To avoid these ads, REGISTER NOW!

ZMotorsports Shop Projects 2.0

NUTTSGT

Super Moderator
Staff member
Joined
Sep 14, 2009
Messages
51,166
Location
Northern Central Ohio
Mike - that was an awesome post. And as you have stated that your mentor was quite modest, as I have read a lot of your responses and details about things you have accomplished, I find that he also passed that quality upon you too.

Great "short" back story. Thanks for sharing - and have a great Thanksgiving!

I couldn't have said it better myself. I believe we should start calling you Modest Mike.

:beer:
 
To avoid these ads, REGISTER NOW!

Scuderia-F1

Well-known member
Joined
Feb 9, 2011
Messages
1,198
Location
Stockholm, Sweden
Thanks John, I appreciate the kind words.

Glad to hear you also detail your lawn & garden equipment. Makes me feel like I'm not all "that" odd.:bounce:

Thanks for following along and taking the time to comment.

You’re far from alone Mike, I even detail my pressure washer. ;-)

Regards,

Anders
 
OP
Z

zmotorsports

ALLIANCE MEMBER
Joined
Oct 20, 2009
Messages
21,477
Location
Northern Utah
I couldn't have said it better myself. I believe we should start calling you Modest Mike.

:beer:

I appreciate that Eric, but trust me I am far from modest no matter how I appear on the forum. My wife and I have been extremely blessed with the ability to work and provide for our family and enjoy the lifestyle that we do, but I am also quite proud of what I have been able to accomplish. So I'm not as modest as you may think, but I appreciate the gesture.:beer:
 
OP
Z

zmotorsports

ALLIANCE MEMBER
Joined
Oct 20, 2009
Messages
21,477
Location
Northern Utah
You’re far from alone Mike, I even detail my pressure washer. ;-)

Regards,

Anders

Thanks Anders. I too detailed my new pressure washer, right after pressure washing and detailing the lawn & garden equipment, pressure washing the house, the shop and the Jeep undercarriage and engine bay.:D

I cleaned it all up, gave her a shot of lube through the pump and put it away for a few months.

I don't look at it that we're ****, we are merely taking proper care of our tools and assets.:)
 

NUTTSGT

Super Moderator
Staff member
Joined
Sep 14, 2009
Messages
51,166
Location
Northern Central Ohio
I appreciate that Eric, but trust me I am far from modest no matter how I appear on the forum. My wife and I have been extremely blessed with the ability to work and provide for our family and enjoy the lifestyle that we do, but I am also quite proud of what I have been able to accomplish. So I'm not as modest as you may think, but I appreciate the gesture.:beer:

Well, I sure the hell aren't going to call you Magic Mike.


:lol_hitti
 
OP
Z

zmotorsports

ALLIANCE MEMBER
Joined
Oct 20, 2009
Messages
21,477
Location
Northern Utah
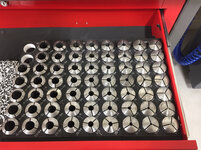
I’ve been keeping my eyes peeled for a good quality set of 5C collets by 1/64th’s. I had a smaller import set by 1/16th's but should have held out for the larger set from the get go.

I found a full set of used Hardinge collets online that are in very good condition. They showed up today and I cleaned them up and put them in the top drawer where they are readily accessible and within easy reach of the lathe.
b3bb5e30364a2b9128d2db1f65f237d6.jpg


Sent from my iPhone using Tapatalk
 

Attachments

  • b3bb5e30364a2b9128d2db1f65f237d6.jpg
    b3bb5e30364a2b9128d2db1f65f237d6.jpg
    869.7 KB · Views: 1
Last edited:
OP
Z

zmotorsports

ALLIANCE MEMBER
Joined
Oct 20, 2009
Messages
21,477
Location
Northern Utah
I was able to start on another little project today that I have had floating around in my head for a long time now. I’m fabricating a fixture to hold axles on while working on them.

I wanted to build something back when I was building street rods, muscle cars and race cars but never found the time. Then I got away from them for a while when we were heavy into duning and snowmobiling but over the past several years of working on Jeeps and off-road vehicles I have been thinking it may have to go back on the “to do” list.

I’m tired of wrestling these axles around on my welding table. My son is getting ready to build the axles for his new Jeep WJ project and a friend asked me to build his axles in his Jeep after the first of the year so now is as good of time as any.

Dug through my metal supply and was able to locate everything I need so no out of pocket expense. The best kind of project.

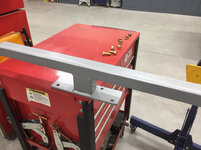
I started with the adapter that will bolt to the engine stand.
9e714c210400c74c8f6500e446eea47f.jpg

137304ac2a038e062d3d873233a5105a.jpg

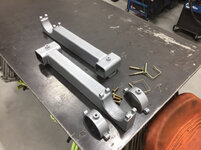
Next I started on the arms that will come out from the stand. I cut recesses into them and filled those with some 4”x .250” wall tube that will support the axle and have the other half of the tube hinge over and pin.
f5ac5a420e27adfe4730e799037543e9.jpg

80373199207f9db6a293d35f20687da1.jpg

a55c422ede07ec32851f3b75c5422266.jpg

8a265a0062075abd08e2138cce049ab2.jpg

Thanks for looking.


Sent from my iPhone using Tapatalk
 

Attachments

  • a55c422ede07ec32851f3b75c5422266.jpg
    a55c422ede07ec32851f3b75c5422266.jpg
    816.8 KB · Views: 2
  • 9e714c210400c74c8f6500e446eea47f.jpg
    9e714c210400c74c8f6500e446eea47f.jpg
    648.1 KB · Views: 2
  • 137304ac2a038e062d3d873233a5105a.jpg
    137304ac2a038e062d3d873233a5105a.jpg
    705.8 KB · Views: 2
  • f5ac5a420e27adfe4730e799037543e9.jpg
    f5ac5a420e27adfe4730e799037543e9.jpg
    755 KB · Views: 2
  • 80373199207f9db6a293d35f20687da1.jpg
    80373199207f9db6a293d35f20687da1.jpg
    800.7 KB · Views: 2
  • 8a265a0062075abd08e2138cce049ab2.jpg
    8a265a0062075abd08e2138cce049ab2.jpg
    766.2 KB · Views: 14
Last edited:

GLTHFJ60

Well-known member
Joined
Oct 31, 2013
Messages
821
Location
Durham, NC
I made something similar that attaches to my welding table. I recommend coming up with a way to secure the housing to the stand, so that the axle can't move around when you're doing things like installing ball joints or differentials. Also, on an engine stand, you'll also be able to rotate an axle upright to make installing axle shafts easier :)

You can see the arms that come out from underneath the housing in this pic. They are 2" square tubing that slides into the 2.5" square rails of my bench:
 

Attachments

  • stand.jpg
    stand.jpg
    142.3 KB · Views: 246
OP
Z

zmotorsports

ALLIANCE MEMBER
Joined
Oct 20, 2009
Messages
21,477
Location
Northern Utah
I made something similar that attaches to my welding table. I recommend coming up with a way to secure the housing to the stand, so that the axle can't move around when you're doing things like installing ball joints or differentials. Also, on an engine stand, you'll also be able to rotate an axle upright to make installing axle shafts easier :)

You can see the arms that come out from underneath the housing in this pic. They are 2" square tubing that slides into the 2.5" square rails of my bench:


Thanks for the picture.

As for my design, it will have a fastening system to lock down on the axle tubes to hold the axle in the saddles. I don't always like the pinion facing straight down which is where gravity naturally takes it so I came up with a way of holding the axle in any orientation needed.

I was going to go out into the shop yesterday and finish up machining the hinge assembly and threaded bungs for the fastening system but with the weather so nice I opted to change out the soffit lighting on the exterior of my house to LED's to match my shop.

I purchased the LED retrofit lights about two weeks ago but I figured it would nicer to do the lighting replacements in 65 degree sunny weather than wait until there's that nasty white stuff on the ground.:sad:

More axle housing build to come but thanks for showing me yours and thanks for checking in on my Projects Thread.
 

Ohmthis

Well-known member
Joined
Jan 20, 2013
Messages
3,021
Location
Outside of Louisville KY
Mike, did the holding tray come with the collets? I'm curious to see how you lock down the axle on the stand. Years ago I made a stand to you t to my floor jack for removing and installing an outdrive on a boat. Someone liked it better than me, I've been meaning to make another one.
 
OP
Z

zmotorsports

ALLIANCE MEMBER
Joined
Oct 20, 2009
Messages
21,477
Location
Northern Utah
Mike, did the holding tray come with the collets? I'm curious to see how you lock down the axle on the stand. Years ago I made a stand to you t to my floor jack for removing and installing an outdrive on a boat. Someone liked it better than me, I've been meaning to make another one.

The collet rack I purchased from a guy on ebay who makes them. They are quite nice and he has several variations available plus will make anything custom that you want. I was going to get the stamped sheet metal style like I have for my smaller set but these were about the same cost and I thought they were nice seeing as how they were labeled with sizes. I haven't used it much in the past few days but so far I like the collet rack and it is easy to remove collets from the rack.

Thanks for following along on my projects thread.

I was hoping to make some progress on the axle stand tonight but the wife informed me that she now wants a wreath holder to place on the mantle over the fireplace so I was informed that just got moved to the top of the to do list.:headscrat
 

Bigblue&Goldie

Well-known member
Joined
Mar 12, 2009
Messages
10,734
Location
AZ
Mike, do you use collets for holding drill bits in lieu of a drill chuck? Also, your axle holder has me thinking about using my engine stand to hold a tubing bender.
 
OP
Z

zmotorsports

ALLIANCE MEMBER
Joined
Oct 20, 2009
Messages
21,477
Location
Northern Utah
I would add a set screw to keep the axle from turning when you’re working on them

That's pretty much what I'm doing. I will have a "C" pivot over the axle in the saddles and in that "C" will be a threaded bung to thread a bolt down to hole the axle. The "C" will be able to easily pivot back out of the way and allow the axle to be removed on placed onto the stand, easy peezy.
 
To avoid these ads, REGISTER NOW!
OP
Z

zmotorsports

ALLIANCE MEMBER
Joined
Oct 20, 2009
Messages
21,477
Location
Northern Utah
Mike, do you use collets for holding drill bits in lieu of a drill chuck? Also, your axle holder has me thinking about using my engine stand to hold a tubing bender.

I don't use collets for my drilling operations. I have a few nice chucks that I use in both the lathe and mill. For those smaller than about 3/8" or so I have a nice keyless chuck for each the lathe and mill but for much larger than that I use my Jacobs ball bearing chucks. I do however, use collets for my end mills in the mill, until I get up around 3/4" or so then I try to use end mill holders just due to the stresses involved, but then it naturally adds length to the setup so again, it depends on the application at the time.

Thanks for following along on my projects thread.
 
OP
Z

zmotorsports

ALLIANCE MEMBER
Joined
Oct 20, 2009
Messages
21,477
Location
Northern Utah
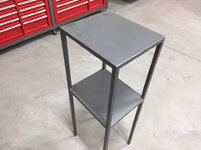
‘‘Tis the season.....For honey-do’s that is. Mrs. Z wanted to hang a wreath over the fireplace but I did not want holes in my mortar or in the rock so I threw together a stand real quick and painted it to blend in with the mantle.

Started with just a piece of 3/16” x 6” square plate for the base then used a piece of 5/8”x .065” tubing and a piece of 3/16” O-1 drill rod bent with a very slight hook.
16e5e8454fe0d3c6f07905df5685348b.jpg

08dc365cf7029ed72104412a66e82022.jpg

4b3353261a16ccde9cbbb1b0046dd291.jpg

Trial run on the bench.
5430c5d66a5df6cc1a565a9dda5cee3f.jpg

Wiped down, painted and in place. Project done. Happy wife, wonderful life.[emoji41]
79ebb8e1c6b06d0453fe75997098eec5.jpg

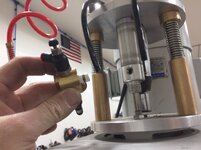
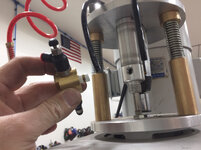
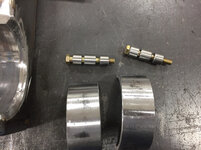
While I was using the mill to drill the hole in the tubing I noticed my power drawbar didn’t sound quite normal. I shot a squirt of air tool oil in it and run it in/out a few times and I had a fitting that broke. I don’t know if it was damaged during the move or the fitting fatigued but luckily I was able to walk over to my drawer organizers m, open the drawer labeled “brass fittings” and was able to find a new 1/8”NPT ******.

Broken ******.
67244a864c9962c7030422080bad82ea.jpg

Broken piece extracted with an easy-out.
0bf75c51eed2018c210144fd9f41b6e2.jpg

Completed.
2ac5d6fbb6e36ef79a82e98ae59b0ae9.jpg

Sounds and functions normally again.


Sent from my iPhone using Tapatalk
 

Attachments

  • 16e5e8454fe0d3c6f07905df5685348b.jpg
    16e5e8454fe0d3c6f07905df5685348b.jpg
    705.6 KB · Views: 13
  • 2ac5d6fbb6e36ef79a82e98ae59b0ae9.jpg
    2ac5d6fbb6e36ef79a82e98ae59b0ae9.jpg
    659.5 KB · Views: 2
  • 0bf75c51eed2018c210144fd9f41b6e2.jpg
    0bf75c51eed2018c210144fd9f41b6e2.jpg
    806.6 KB · Views: 1
  • 79ebb8e1c6b06d0453fe75997098eec5.jpg
    79ebb8e1c6b06d0453fe75997098eec5.jpg
    751.8 KB · Views: 1
  • 5430c5d66a5df6cc1a565a9dda5cee3f.jpg
    5430c5d66a5df6cc1a565a9dda5cee3f.jpg
    761.7 KB · Views: 1
  • 4b3353261a16ccde9cbbb1b0046dd291.jpg
    4b3353261a16ccde9cbbb1b0046dd291.jpg
    698.8 KB · Views: 1
  • 67244a864c9962c7030422080bad82ea.jpg
    67244a864c9962c7030422080bad82ea.jpg
    704.1 KB · Views: 1
  • 08dc365cf7029ed72104412a66e82022.jpg
    08dc365cf7029ed72104412a66e82022.jpg
    785.3 KB · Views: 0

NASTYZEN

Well-known member
Joined
Jun 11, 2010
Messages
2,823
Location
St-Colomban,Que. Canada
Funny yours just rattled loose now Mike. I just installed one on my cnc mill the other day. What a time saver!
Thank you for sending me your plans a while back. There was no time to make one so I bought a Korean one. I still had to mod it to get it to work right though.
Mine sure makes a racket.
 
OP
Z

zmotorsports

ALLIANCE MEMBER
Joined
Oct 20, 2009
Messages
21,477
Location
Northern Utah
Funny yours just rattled loose now Mike. I just installed one on my cnc mill the other day. What a time saver!
Thank you for sending me your plans a while back. There was no time to make one so I bought a Korean one. I still had to mod it to get it to work right though.
Mine sure makes a racket.

Thanks Claude, I still think maybe it got damaged or bumped during the move. I took it off the mill before hauling the mill from my old shop but it could have gotten knocked around a little even though I was trying to be careful. It must have cracked it until it finally let go because it had an odd sound when I used it just prior to the fitting holding the needle valves broke away completely.

Oh well, at least it was a quick and easy fix and I had a spare fitting.

I agree, they are definitely a time saver. I think my son is going to build one for his CNC mill. He has only had it running a short time now and he is already tired of manually unthreading the drawbar.

Thanks for stopping by my projects thread Claude.
 
OP
Z

zmotorsports

ALLIANCE MEMBER
Joined
Oct 20, 2009
Messages
21,477
Location
Northern Utah
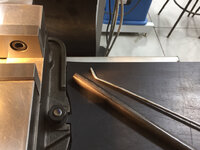
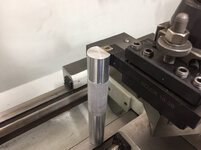
I started machining the hinges for my axle fixture tonight and while I had chips on the lathe I thought I would knock out another little project that I’ve had on my mind for a couple of years now, a lathe tool height gage.


After facing the bottom off I bored a small recess in which I could press and glue a small magnet in.

b5c24c483778bcecd879e5feefe0eafe.jpg


Creeping up on the proper length. I placed a .500” gage pin in the collet and then used a .250” on the top of the gage and machined the necessary amount until I had the exact same reading on both gage pins then I knew the height gage was exactly on the centerline.

ad34e9da5faa475379aabd384450fc3a.jpg


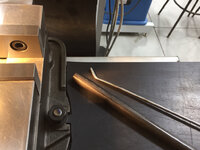
I then clamped it in the mill vise and took some material off to create a flat that could allow the gage to be placed right alongside the lathe tool and set the height.

de077808b5ec5fa795091188d924cebc.jpg


Trial run.

ddae96696e9fd792b91108f11e651eb2.jpg

Lastly I mixed up a small amount of epoxy and glued the magnet into the base.

be00d3b3935e5846e622a6a0e9fc2dd2.jpg


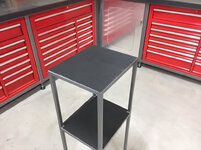
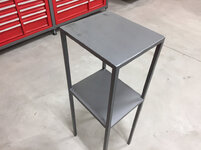
While the epoxy was drying on the tool I decided to add some rubber material to the stand I built a month or so ago for my hydraulic press accessories.

7cc41bb2c291ebb99e342046c1f79bda.jpg


23f0a86f457501711a11a5912db2dca1.jpg


Thanks for looking.


Sent from my iPhone using Tapatalk
 

Attachments

  • 23f0a86f457501711a11a5912db2dca1.jpg
    23f0a86f457501711a11a5912db2dca1.jpg
    774.5 KB · Views: 0
  • 7cc41bb2c291ebb99e342046c1f79bda.jpg
    7cc41bb2c291ebb99e342046c1f79bda.jpg
    657.9 KB · Views: 0
  • be00d3b3935e5846e622a6a0e9fc2dd2.jpg
    be00d3b3935e5846e622a6a0e9fc2dd2.jpg
    744.1 KB · Views: 0
  • ddae96696e9fd792b91108f11e651eb2.jpg
    ddae96696e9fd792b91108f11e651eb2.jpg
    644.4 KB · Views: 1
  • de077808b5ec5fa795091188d924cebc.jpg
    de077808b5ec5fa795091188d924cebc.jpg
    708.7 KB · Views: 1
  • ad34e9da5faa475379aabd384450fc3a.jpg
    ad34e9da5faa475379aabd384450fc3a.jpg
    711.7 KB · Views: 1
  • b5c24c483778bcecd879e5feefe0eafe.jpg
    b5c24c483778bcecd879e5feefe0eafe.jpg
    682.2 KB · Views: 1
Last edited:

heffneil

Well-known member
Joined
Apr 12, 2009
Messages
722
Location
Naples FL
Where did you get the rubber? I need a pad thats like 8 or 9 feet long for my barn door to slide in to. Then I need a way to affix it to the cedar. There is a slight gap and I really want to fill it somehow!
 
OP
Z

zmotorsports

ALLIANCE MEMBER
Joined
Oct 20, 2009
Messages
21,477
Location
Northern Utah
Where did you get the rubber? I need a pad thats like 8 or 9 feet long for my barn door to slide in to. Then I need a way to affix it to the cedar. There is a slight gap and I really want to fill it somehow!

The rubber mats were actually the ones that came with my toolboxes that I incorporated into my work benches. They were the mats that went on top whereas I didn't use them I have them for projects such as this.

I think you can purchase this thin material from McMaster Carr. I know I have purchased some thicker rubber mat material from them in the past. You may want to check them out.

Thanks for stopping by my projects thread. I've enjoyed following along on your shop build, it is turning out fantastic.
 
OP
Z

zmotorsports

ALLIANCE MEMBER
Joined
Oct 20, 2009
Messages
21,477
Location
Northern Utah
you did all that after work ? im guessing you dont watch allot of tv. good for you!!

I still get a little TV watching in but not much. I get home and have a couple hours a night in the shop before I go in to spend some time with the wife after she gets home from work and after dinner. It's never enough time in the shop though.:(

Thanks for stopping by my thread.
 

shortykorte

Well-known member
Joined
Sep 1, 2014
Messages
8,039
Location
Tallahassee, Fl
The trial run picture wasn’t display but now it is. Looks like a very useful tool. I’ll have to show my friend.


Sent from my iPhone using Tapatalk
 

yaidunno

Well-known member
Joined
Feb 10, 2011
Messages
1,336
Location
WI
Nice job on the height gauge. That looks like it would come in handy! I also see your putting the new 5C's to work.
 
OP
Z

zmotorsports

ALLIANCE MEMBER
Joined
Oct 20, 2009
Messages
21,477
Location
Northern Utah
The trial run picture wasn’t display but now it is. Looks like a very useful tool. I’ll have to show my friend.


Sent from my iPhone using Tapatalk

Yeah Shorty, I don't understand what happened there. I looked earlier and just got the black X where the picture was supposed to be. I went in through Tapatalk and deleted the photo and reloaded it and it seemed to fix it. Don't know why it was like that though.

I also noticed a lot of other picture lately have been showing the black box with the "X" and don't understand why.

Thanks for the comments and for checking in on things.
 
OP
Z

zmotorsports

ALLIANCE MEMBER
Joined
Oct 20, 2009
Messages
21,477
Location
Northern Utah
Nice job on the height gauge. That looks like it would come in handy! I also see your putting the new 5C's to work.

Thank you. Yep, I'm trying to get some use out of them. I used my last set a little bit but having a limited set it turned out to be a bit troublesome because as soon as you machined more than about .015"-.020" off, they no longer gripped very well or true in the collet so it was just easier to use the 6-jaw chuck. I am definitely enjoying the collets though.

I'm hoping to be able to give my height gage a good test now that the epoxy should be dry tonight when I arrive home.

Thanks for following along and commenting.
 
OP
Z

zmotorsports

ALLIANCE MEMBER
Joined
Oct 20, 2009
Messages
21,477
Location
Northern Utah
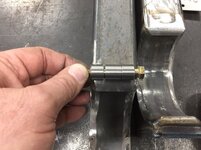
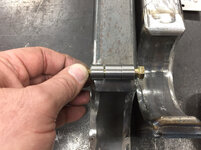
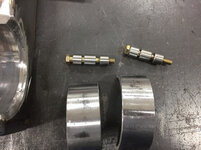
I had about an hour this evening after work so I ran out to the shop and machined the components for the hinges on the axle fixture.
58bccf2f01b2ede4d606811378f99128.jpg

This is roughly where they will be welded.
5a3c3a3be5604bc6c96411383714c8fc.jpg

Next is to machine similar components for the latching end where I will use clevis pins to secure the clasp.

Thanks for looking.


Sent from my iPhone using Tapatalk
 

Attachments

  • 5a3c3a3be5604bc6c96411383714c8fc.jpg
    5a3c3a3be5604bc6c96411383714c8fc.jpg
    772.7 KB · Views: 0
  • 58bccf2f01b2ede4d606811378f99128.jpg
    58bccf2f01b2ede4d606811378f99128.jpg
    819.3 KB · Views: 0
OP
Z

zmotorsports

ALLIANCE MEMBER
Joined
Oct 20, 2009
Messages
21,477
Location
Northern Utah
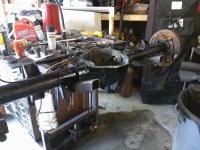
I fixed a cup of coffee and headed out to the shop this morning and hung out with my son today. Very productive day and a perfect way to spend a Saturday.

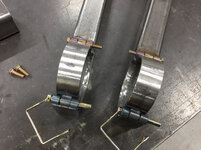
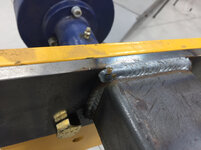
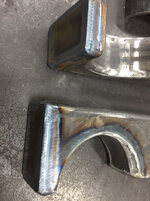
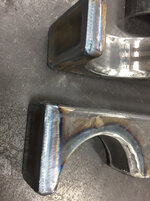
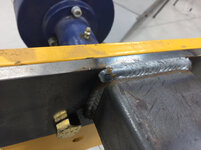
Started by machining the remaining components for the hinges and clasps for the arms of my axle stand.
a8240c1201aac00ed0e045ac9e749db3.jpg

Welded in position.
930cedf54d25e7eae2fdbcccdea35b8c.jpg

58002c6f638b162caa7b90969ac8f6f8.jpg

1369e89c9566ece72e6047fc923073af.jpg

Test fit.
eda8bbf564e6cd735416232d6116cbf2.jpg

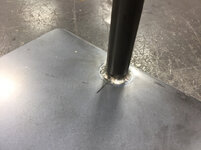
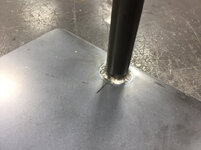
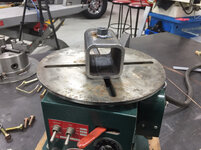
I then machined the threaded bungs for the lock down bolts. Decided to use my weld positioner to weld the bungs in place. This reminds me of another project that I have wanted to build for a couple of years now, a TIG steady rest. The height of this positioner makes is difficult to rest my arms on during the TIG welding process.
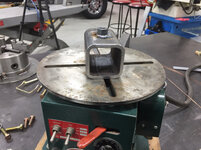
5e4e1cf61d4cc125ebda221a5d62ac1d.jpg

24eaf5d69485104f81ab02b4caacd5dc.jpg

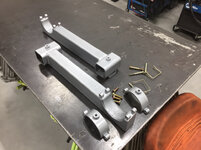
Cut the arms out and welded the square tube.
37346a72aeaf5c34190b88157bc9d798.jpg

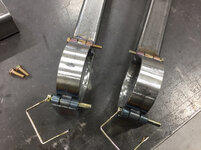
All of the components painted and ready for final assembly.
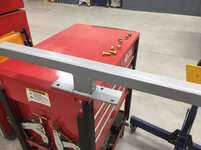
b9ee2f646289eebc6be219b243206d0b.jpg

cfda390293b48c4db4a63e2bf0a597ee.jpg

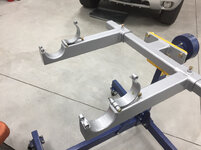
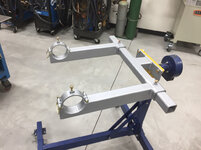
Completed and installed on the engine stand.
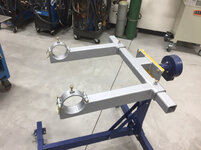
183d00ad7ee533904b9bf9fc0ca9a4fa.jpg

Clamps opened and ready for an axle.
2a5314d0633205b0fab8b18df7e68b2f.jpg

I think I may cut some thin rubber and glue it to the saddles where the axle will sit.

While in the middle of machining my MIL called and asked if I would look at her car. I had her bring the car by and I tested the battery and sure enough the battery is on it’s way south. Glad it happened now before it left her stranded in a snowstorm.

It is so nice to be able have the space that I can pull a car in behind my truck and not feel cramped. Plenty of room to walk around the car and work.
198ce4aecbeec83af593c7b2ac824ee2.jpg


Sent from my iPhone using Tapatalk
 

Attachments

  • 198ce4aecbeec83af593c7b2ac824ee2.jpg
    198ce4aecbeec83af593c7b2ac824ee2.jpg
    720.5 KB · Views: 1
  • a8240c1201aac00ed0e045ac9e749db3.jpg
    a8240c1201aac00ed0e045ac9e749db3.jpg
    796.4 KB · Views: 1
  • 930cedf54d25e7eae2fdbcccdea35b8c.jpg
    930cedf54d25e7eae2fdbcccdea35b8c.jpg
    852.3 KB · Views: 0
  • 58002c6f638b162caa7b90969ac8f6f8.jpg
    58002c6f638b162caa7b90969ac8f6f8.jpg
    676.9 KB · Views: 0
  • 2a5314d0633205b0fab8b18df7e68b2f.jpg
    2a5314d0633205b0fab8b18df7e68b2f.jpg
    649.5 KB · Views: 0
  • 183d00ad7ee533904b9bf9fc0ca9a4fa.jpg
    183d00ad7ee533904b9bf9fc0ca9a4fa.jpg
    689.9 KB · Views: 0
  • cfda390293b48c4db4a63e2bf0a597ee.jpg
    cfda390293b48c4db4a63e2bf0a597ee.jpg
    746.2 KB · Views: 0
  • b9ee2f646289eebc6be219b243206d0b.jpg
    b9ee2f646289eebc6be219b243206d0b.jpg
    725.5 KB · Views: 0
  • 37346a72aeaf5c34190b88157bc9d798.jpg
    37346a72aeaf5c34190b88157bc9d798.jpg
    756.1 KB · Views: 0
  • 24eaf5d69485104f81ab02b4caacd5dc.jpg
    24eaf5d69485104f81ab02b4caacd5dc.jpg
    680.5 KB · Views: 0
  • 5e4e1cf61d4cc125ebda221a5d62ac1d.jpg
    5e4e1cf61d4cc125ebda221a5d62ac1d.jpg
    805 KB · Views: 0
  • eda8bbf564e6cd735416232d6116cbf2.jpg
    eda8bbf564e6cd735416232d6116cbf2.jpg
    818 KB · Views: 0
  • 1369e89c9566ece72e6047fc923073af.jpg
    1369e89c9566ece72e6047fc923073af.jpg
    817.2 KB · Views: 1
Last edited:
OP
Z

zmotorsports

ALLIANCE MEMBER
Joined
Oct 20, 2009
Messages
21,477
Location
Northern Utah
Nice axle stand. I had a C-Channel sawhorse set up for axles, but the pinion always swung down and interfered. This is way nicer.


Thank you. That is precisely why I wanted to incorporate some way of locking the housing into position to keep the pinion from falling victim to gravity.

Thanks for stopping by my projects thread.


Sent from my iPhone using Tapatalk
 
To avoid these ads, REGISTER NOW!
Top Bottom