To avoid these ads, REGISTER NOW!

ZMotorsports Shop Projects 2.0

OP
Z

zmotorsports

ALLIANCE MEMBER
Joined
Oct 20, 2009
Messages
21,495
Location
Northern Utah
Mike without going through 136 pages, did you document the build on your fabrication table? Thanks.

I'm sorry, I don't have my fabrication table documented anywhere. I built that long before I joined the forum in 2009. I did however, just recently add the 5/8" holes for fixturing.

Thank you for checking out my projects. If you have the time I encourage you to check out other projects on this thread as I have done a wide range of projects, both on my own assets as well as for others.

Thank you.
 
To avoid these ads, REGISTER NOW!
OP
Z

zmotorsports

ALLIANCE MEMBER
Joined
Oct 20, 2009
Messages
21,495
Location
Northern Utah
Yesterday on my drive to work I had a small rock hit my brand new windshield in the Jeep. The windshield is just two weeks old and already a rock chip. To say I was PISSED is a huge understatement.

Yesterday after having to deal with a Safety Auditor at work for the past couple of days and arriving home from work, I cleaned and filled the rock chip on my Jeep.

Bridge installed and resin inserted.
crack1.JPG

Windshield repair tool kit has been getting a lot of use lately.
crack2.JPG

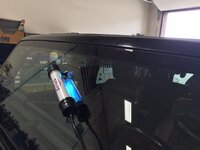
UV light curing the resin.
crack3.JPG


After removing the light and cleaning the area and a final application of "pit polish" the rock chip is not noticeable and hopefully warded off another cracked windshield.
 

TimeWarpF100

Well-known member
Joined
Aug 21, 2010
Messages
6,784
Location
not here
Yesterday on my drive to work I had a small rock hit my brand new windshield in the Jeep. The windshield is just two weeks old and already a rock chip. To say I was PISSED is a huge understatement.

Yesterday after having to deal with a Safety Auditor at work for the past couple of days and arriving home from work, I cleaned and filled the rock chip on my Jeep.

Bridge installed and resin inserted.
crack1.JPG

Windshield repair tool kit has been getting a lot of use lately.
crack2.JPG

UV light curing the resin.
crack3.JPG


After removing the light and cleaning the area and a final application of "pit polish" the rock chip is not noticeable and hopefully warded off another cracked windshield.
Cool stuff! Took me 20 yrs to find a NOS windshield for my '66 Truck. Very first ride a nissan doing 100+ MPH passes me in a gore point covering me with gravel and yep, chipped the windshield. I was not a happy camper and good thing wife was with me. I found a old timer who came and fixed the chip. Since then I found 6 more NOS windshields I keep up in attic.
 

Monza Harry

Well-known member
Joined
Dec 29, 2018
Messages
1,433
Location
Windsor ON
Mike, (or others here) do you know if a window "tint" (clear/UV/other) can be applied to the outside of the glass to protect the glass. Like Randy's truck, my cars' glass is very hard to find (and therefore expensive), it is still made but on some rotating schedule, the timing is a mystery. So protecting it is paramount. Outer protection should at minimum help with "road rash" (fine pitting). Just wondering about possible pitfalls. Thanks for Sharing Harry
 

Mr.zippy

Well-known member
Joined
Apr 27, 2020
Messages
2,221
Location
Wyoming
I swear, it seems like every time I replace a windshield, a chip happens within weeks. Truly pisses me off as well.
 

4 FN 27

ALLIANCE MEMBER
Joined
Oct 19, 2015
Messages
4,635
Location
Minnesnowta
As always Mike...cool!!!

Safety Auditors...just wrapped up spending $30k here at the plant as "recommended" by our new Fire Marshall or he was going to "Red Tag" the doors. The old Fire Marshall thought we were the safest shop he had to inspect....but this guy...guess he needs to prove himself.
 

red94chev

Well-known member
Joined
Jan 29, 2015
Messages
556
Location
Northeastern MD
Mike, (or others here) do you know if a window "tint" (clear/UV/other) can be applied to the outside of the glass to protect the glass. Like Randy's truck, my cars' glass is very hard to find (and therefore expensive), it is still made but on some rotating schedule, the timing is a mystery. So protecting it is paramount. Outer protection should at minimum help with "road rash" (fine pitting). Just wondering about possible pitfalls. Thanks for Sharing Harry
Look into ExoShield windshield protection film.
 

LXCam

ALLIANCE MEMBER
Joined
Apr 23, 2013
Messages
19,215
Location
AZ
Yesterday on my drive to work I had a small rock hit my brand new windshield in the Jeep. The windshield is just two weeks old and already a rock chip. To say I was PISSED is a huge understatement.

Yesterday after having to deal with a Safety Auditor at work for the past couple of days and arriving home from work, I cleaned and filled the rock chip on my Jeep.

Bridge installed and resin inserted.

Windshield repair tool kit has been getting a lot of use lately.

UV light curing the resin.
After removing the light and cleaning the area and a final application of "pit polish" the rock chip is not noticeable and hopefully warded off another cracked windshield.
I’ve been meaning to ask you what kit that is again Mike. I’m now up to 6-7 good ones in the last 6 months and need to deal with it. Thanks.
As always Mike...cool!!!

Safety Auditors...just wrapped up spending $30k here at the plant as "recommended" by our new Fire Marshall or he was going to "Red Tag" the doors. The old Fire Marshall thought we were the safest shop he had to inspect....but this guy...guess he needs to prove himself.
Speaking of safety nazi’s. This past weekend my 5yr old grandson turned into one. I was doing some stuff at my daughters new house and standing on the second to the last rung on a 4ft ladder shen he said papa, you be careful you could fall. I said I’m alright, no worries. He then pointed at the sticker of the stick man falling 🥴
 
OP
Z

zmotorsports

ALLIANCE MEMBER
Joined
Oct 20, 2009
Messages
21,495
Location
Northern Utah
I’ve been meaning to ask you what kit that is again Mike. I’m now up to 6-7 good ones in the last 6 months and need to deal with it. Thanks.

Speaking of safety nazi’s. This past weekend my 5yr old grandson turned into one. I was doing some stuff at my daughters new house and standing on the second to the last rung on a 4ft ladder shen he said papa, you be careful you could fall. I said I’m alright, no worries. He then pointed at the sticker of the stick man falling 🥴

That's awesome Cam. Out of the mouths of babes......

The components and chemicals that I am using for windshield repair I purchased from Delta. It really isn't a "kit" per se as I pieced it together from various recommendations and research.

Thanks for stopping by and checking in on my thread Cam.
 
OP
Z

zmotorsports

ALLIANCE MEMBER
Joined
Oct 20, 2009
Messages
21,495
Location
Northern Utah
Not in my shop or yard but work none the less.

Just as I was about to leave work yesterday I got a phone call asking if I could stop by my wife's grandmother's home and take a look at her sprinkler system.

Upon arriving I determined that the timer was incorrect and she informed me that she panicked and unplugged the timer last week. She is 93 and still living in her home and her husband who passed away four years ago was **** about his yard, vehicles and pretty much everything. I worked on his vehicles over the years and I was honored that she requested that I come and look at her sprinkler system.

After resetting the timer she asked if I would look at a spot in her back yard that didn't appear to be getting watered. I ran through the zones and sure enough, one zone wasn't working. I grabbed my meter and took some voltage readings. I found voltage at the terminal at the timer for the zone in question and also determined voltage was in fact reaching the valve, but not activating it. I disconnected the wires from the valve and found the resistance was very low, not shorted, but quite low. A very quick and easy discovery but then I worried about locating a solenoid.

valve1.jpg

I was worried I would have a difficult time locating a solenoid for the valve as it is about 40 years old.
valve2.JPG

I left thinking I would have to order a new solenoid but decided it was 10 minutes before the local plumbing store closed so it was worth a stop and maybe I'd get lucky. To my surprise they have a universal solenoid that looked very similar so I rolled the dice and purchased it.

I ran home, changed clothes and grabbed my wife before heading back to her Grandmother's place. Upon arriving back at her home I installed it and the zone would now activate but would not shut off when voltage was removed by the timer. I disassembled the valve and found a lot of crud in the valve so the pilot bleed port must not have been able to bleed off the pressure and close the valve.
valve3.jpg

After a good cleaning and reassembly everything seemed to be functioning properly and I was able to put everything back together and call it a day. The worst part was the heat, it was 101 degrees while I was knelt down behind shrubs working on the valve box where there was absolutely no air flow at all.

Glad that job is done but also glad I was able to help her out. I sure miss my wife's Grandpa. He was a great guy and real salt of the earth.

Thanks for looking.
 
Last edited:
OP
Z

zmotorsports

ALLIANCE MEMBER
Joined
Oct 20, 2009
Messages
21,495
Location
Northern Utah
Last night my new Laird BB4505CNS antenna arrived for my GMRS radio that I recently installed in our Jeep Wrangler. I was able to make huge improvements to the SWR over my last antenna with a little fine tuning.

Went from 1.85:1 standing wave ratio.
gmrs1.JPG

Installed the new Laird BB4505CNS antenna.
gmrs2.JPG

Then on the third trip from the Jeep to the workbench I landed on a perfect SWR of 1:1. Mine is sitting pretty with a Standing Wave Ratio (SWR) of 1.08:1.
gmrs3.JPG

I can live with that.

Thanks for looking.
 
Last edited:

Mr.zippy

Well-known member
Joined
Apr 27, 2020
Messages
2,221
Location
Wyoming
Looks good Mike! Now you can put one of those lighted up neon thingies on the end of the antenna..........Sorry, just had to throw that out!
 

Mr.zippy

Well-known member
Joined
Apr 27, 2020
Messages
2,221
Location
Wyoming
I just had to throw that out, as I noticed they were razzing ya on Rattle Snakes thread. As always, you keep it classy Mike! I enjoy your updates and style!
 
OP
Z

zmotorsports

ALLIANCE MEMBER
Joined
Oct 20, 2009
Messages
21,495
Location
Northern Utah
I had to have a new windshield put in the wife's Acura TL on Friday and I noticed it needed the interior detailed badly so when I arrived home from work I parked it in the shop to give her a detail Saturday morning. Our neighbor to the east is selling their home and they had an open house and I didn't want to do any grinding or making noise to upset the action they had going on so I decided to vacuum and wipe the interior of the car down then wipe the paint down.

After their open house was done I continued on with the cart for my tube roller that I started on a couple of weeks ago.

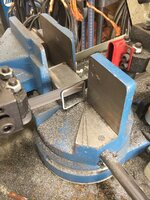
I began by measuring for some feet to add to the handle end. One was a bit long so I trimmed it back. I sure love the way this Baileigh BS210 saw cuts. It is so easy to get thin and precise cuts from it.
cart1.JPG


cart2.JPG


I dug through my spare parts and found some nice rubber feet so I compensated for them in the height of the feet.
cart3.JPG


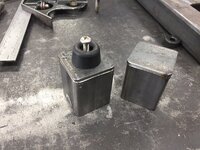
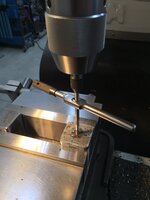
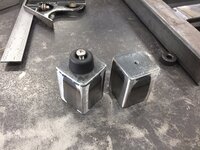
After welding some caps on the feet I drilled and tapped the ends to 10-32 threads.
cart4.JPG


Feet completed and ready to weld onto the frame.
cart5.JPG


Getting things leveled up in preparation to weld the vertical support tube in place.
cart6.JPG


Blended a few welds on the underside of the upper support framework in preparation to accept the vertical post.
cart7.JPG


Verifying my fabrication table is level before moving on to the vertical post.
cart8.jpg


Vertical post being welded to the upper framework that the roller will bolt to.
cart9.jpg


Vertical post dead nuts level after welding.
cart10.JPG


More pics to follow.
 
OP
Z

zmotorsports

ALLIANCE MEMBER
Joined
Oct 20, 2009
Messages
21,495
Location
Northern Utah
Continuing on with the tube roller cart....


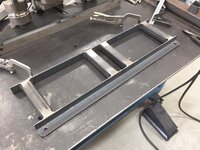
Preparing the upper framework to mate with the base and getting it level.
cart11.JPG


Next I wanted to make a mount for a fold down handle as well as a sleeve for the handle. To the mill and lathe I went.
cart12.JPG

Drilled and reamed a 5/8" hole to receive the machined sleeve.
cart13.JPG

Sleeve fusion welded into place in the handle.
cart14.JPG

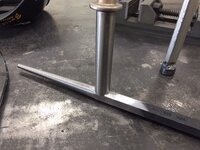
Mount welded to the vertical post and handle test fit.
cart15.JPG


cart16.JPG

Ready to complete the handle and fabricate some posts to hang the dies on the vertical post.
cart17.JPG


That's as far as I've made it so far before cleaning up my fabrication area and machining equipment.

Thanks for looking.
 
To avoid these ads, REGISTER NOW!
OP
Z

zmotorsports

ALLIANCE MEMBER
Joined
Oct 20, 2009
Messages
21,495
Location
Northern Utah
Cart is looking good Mike! I like the fold away handle, it's the details that make something simple that much better.

Thanks Marc. I agree about the details. I'm sure I could have finished this already had I not taken the time to machine parts for the axle and the handle. However, like others, these things would bother me each time I used it if I didn't make it the way I wanted from the beginning. As for the handle and overall design, I really can't take all of the credit as I am somewhat copying lis2323's tube roller cart that he showed a couple of years ago.
 

bigdave_185

Well-known member
Joined
Feb 14, 2021
Messages
443
Location
Utah
Been a min since I have been on. It’s been a great time reading the last few pages of your thread Mike. Really good reading!
Keep up the good fight.
 

TTMotorsports

Well-known member
Joined
Jan 8, 2019
Messages
1,107
Location
Lucerne Valley, CA
Cool stuff! Took me 20 yrs to find a NOS windshield for my '66 Truck. Very first ride a nissan doing 100+ MPH passes me in a gore point covering me with gravel and yep, chipped the windshield. I was not a happy camper and good thing wife was with me. I found a old timer who came and fixed the chip. Since then I found 6 more NOS windshields I keep up in attic.

Phoenix area is notorius for getting chipped windshields. My 06 dodge got one 3 months after moving there. Ex wife got a chip, had it fixed and next day got another one, which cracked the windshield that night so got a new one installed and 1st week got a chip in that one. Seems like the trucks are always dropping stuff on the roads out there.
 
OP
Z

zmotorsports

ALLIANCE MEMBER
Joined
Oct 20, 2009
Messages
21,495
Location
Northern Utah
Been a min since I have been on. It’s been a great time reading the last few pages of your thread Mike. Really good reading!
Keep up the good fight.
Thanks for stopping by my thread and checking on things. Sorry I missed your message last week but the wife and I took off for a few days of R&R.

I hope that the radio wasn't tuned inside of the shop. ;)

Both and didn't make a difference. I've noticed a difference in SWR readings when tuning CB's whether inside a building or not but the GMRS didn't seem to care one way or the other. Got a chance to use it over the past several days and it does seem to work well. No static or interruptions like a CB once you lock in a privacy code.
 
OP
Z

zmotorsports

ALLIANCE MEMBER
Joined
Oct 20, 2009
Messages
21,495
Location
Northern Utah
I have been trying to get caught up on various incomplete shop projects in preparation to do my annual maintenance on the Jeep because the wife and I have 4 week long Jeep/RV gatherings coming up in the next 3 months. I generally check the Jeep over prior to each off road adventure and then do my major annual maintenance in late July/early August before our big Jeep club events begin and carry us through the remainder of the summer and fall months.

Wheeling in Colorado especially really pushes ones vehicles to their limit due to the steep climbs and high altitudes where the air is thinner. This is where I make absolutely certain that the cooling system is up to par, transmission fluid and lines are in good condition, driveshaft joints are removed and thoroughly greased including the double cardan joint that many people seem to forget about and especially the brakes are in perfect condition. Coming down those steep grades from 13k plus feet elevation that you just went up and having thousand plus foot drop-offs on the side of the shelf road is where you really want to trust your brakes and have confidence in your overall vehicle's performance and abilities.

One of the items on this year's maintenance schedule is to rebuild my RCV axle shafts in my front axle. I've rebuilt several RCV shafts lately and after every one I tell myself I'm going to take a few minutes and build me a tool that I think will make rebuilding these joints easier. Last night I finally took the time to build my punch hammer.

Started with a long drift punch that I purchased from my local NAPA as I didn't want to cut up one of my MAC or Proto punches. Total cost on the punch was $7.10 and I had the round stock in my materials drawer. The large diameter is 1.25" 1020 in which I bored to accept the .750" 1045 steel which I also notched with a 3/4" end mill to aid in welding to the punch.

The length of 1045 notched and the coating knocked off of the punch where I will weld using some 1/16" ER80SD-2 welding rod.
punch1.jpg

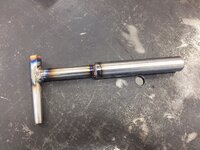
Shaft welded to the punch and allowed to cool naturally.
punch2.jpg


Deciding where to cut the punch to give me the results I want.
punch3.jpg

I then machined a chamfer on one end of the piece of 1.25" 1020 stock and bored the other end to .750" about 1" deep. This allowed me to press the shaft into the handle and then weld them together using .045" of ER80SD-2.
punch4.jpg


punch5.jpg

Completed and ready to use once I get to the point of pulling the Jeep in the shop to begin my annual maintenance.
punch6.jpg

Thanks for looking.
 
OP
Z

zmotorsports

ALLIANCE MEMBER
Joined
Oct 20, 2009
Messages
21,495
Location
Northern Utah
After finishing up my punch/hammer I moved on to a small job that came into my shop. I have some bronze bushings to make for a guy and the C932 material just showed up last night from McMaster Carr.


bush3.JPG

bush2.JPG

bush4.JPG

That's about where I left off last night because the wife rang the dinner bell. :bounce:
 
Last edited:
OP
Z

zmotorsports

ALLIANCE MEMBER
Joined
Oct 20, 2009
Messages
21,495
Location
Northern Utah
So last night I didn't feel like I got anything productive done in the shop and went in to dinner feeling like my time in the shop was wasted as I was chasing my lathe all over the place.

As I was beginning the small production run of bronze bushings for a client the night before I realized that I was not getting the results that I wanted nor had been able to produce earlier with my lathe. I was a couple thousandths off in about 4-5 inches of material which is not acceptable.

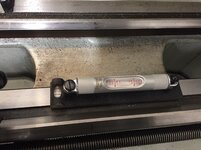
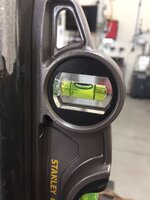
I began by ensuring the lathe was level, which it was not, it was slightly off. Not sure how or why but it was off. I'm assuming from possibly things have settled a bit or the earthquake we had last summer had more effect than I realized. Either way after about 30-minutes of chasing it around the corner of the shop I landed where it was level in both planes.

Near the headstock.
lathe1.jpg

Near the tailstock.
lathe2.JPG

End to end.
lathe3.jpg

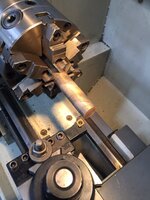
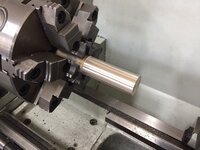
Next I set up a 2.5" diameter piece of thick wall aluminum tubing as my test piece. I began by making multiple light cuts across the length of about 11 inches sticking out from the chuck and measuring each end for variances, then making small adjustments between passes.
lathe4.JPG

Beautiful surface finish.
lathe5.JPG

This is where I landed after a couple hours of work. I can live with .0001" in about 10-11 inch cut.
lathe6.JPG


I chased the headstock around for the better part of two hours last night before I was happy with the results. I initially told myself I wanted to get it within a thousandth of an inch but then I realized I could get better than that and that's when I became obsessed and chasing it more than I probably should have or needed to.

Tonight I just have to realign the tailstock with the headstock since moving the headstock last night and I should be good to go for a while again. I did throw the level on the milling machine while I had it out and noticed it was about a half a bubble off as well so I'll tackle the mill after I get this small production run of bushings completed.

Thanks for looking.
 

rattle_snake

Well-known member
Joined
Jun 25, 2015
Messages
5,244
Location
Chandler, AZ
Can't resist, have to ask...

Why level a lathe? I've been told it has to be, but the machinists I have asked have no logical reason. "It just need to be, how dare you ask why!!"

The chuck, carriage and everything are all fixed in relation to the base, so their relation to earth's core is irrelevant. I can understand shimming the base evenly to not distort the bed due to imperfection in the floor, so head and tail are aligned.
So I assume that the term 'level' indicates no force/twist on the base, aka it is 'flat' like it was machined in manufacturing.
Level in two orthogonal directions indicates a flat plane, hence no twist, so perhaps it's named after the method, which is easy and uses a simple and available tool.

My mill and lathe are on wheels, oh the horror!
 
OP
Z

zmotorsports

ALLIANCE MEMBER
Joined
Oct 20, 2009
Messages
21,495
Location
Northern Utah
Can't resist, have to ask...

Why level a lathe? I've been told it has to be, but the machinists I have asked have no logical reason. "It just need to be, how dare you ask why!!"

The chuck, carriage and everything are all fixed in relation to the base, so their relation to earth's core is irrelevant. I can understand shimming the base evenly to not distort the bed due to imperfection in the floor, so head and tail are aligned.
So I assume that the term 'level' indicates no force/twist on the base, aka it is 'flat' like it was machined in manufacturing.

Level in two orthogonal directions indicates a flat plane, hence no twist, so perhaps it's named after the method, which is easy and uses a simple and available tool.

My mill and lathe are on wheels, oh the horror!

Agree 100% Justin.

I had this exact conversation with a co-worker yesterday morning who was a machinist/R&D mechanic for a company before coming to work for us. We were talking about "HOW" the lathe is out of level is more important than "IF" the lathe is out of level. Meaning bed twisted vs. just out of level at both ends but the same direction. We jokingly commented that the lathe could be upside down as long as the axis was straight down the middle and it would cut perfect.

Upon returning home yesterday and actually throwing the level on it, that is exactly what I found. The lathe was out of level but the same amount and the same direction at both ends (headstock and tailstock) and sloped slightly towards the tailstock. I could have left it alone and just focused on the headstock which was out of spec' and been fine but my OCD got the better of me and I spent at least a half an hour leveling the lathe because I wanted it perfectly level. Then I moved on to aligning the headstock and now just have the tailstock to do. The fact that I have only .0001" in about 10-11 inches of travel by tweaking the headstock is more important and of more benefit than having the lathe level.

As for the milling machine, I prefer to have it level as well because when I'm setting up work it is easy to grab a level and knowing the table is level just makes it easier. Granted a person could zero out the level on the table and use that as the reference but I want to know it's level.

I wish I could say there was a better reason than my OCD but I simply can't at this time. My wife, son and now my daughter-in-law just say I'm "quirky", but I know it's not as an endearing as it sounds.:unsure:
 
Last edited:

gearhead1960

ALLIANCE MEMBER
Joined
Mar 21, 2019
Messages
1,864
Location
Manassas, VA, a small blot in history
I wish I could say there was a better reason than my OCD but I simply can't at this time. My wife, son and now my daughter-in-law just say I'm "quirky", but I know it's not as an endearing as it sounds.:unsure:
Mike,

I don't get the "quirky" label, mine is "****"..... :ROFLMAO: and I'm not changing that for any reason....
 
OP
Z

zmotorsports

ALLIANCE MEMBER
Joined
Oct 20, 2009
Messages
21,495
Location
Northern Utah
Just out of curiosity, what did you have to do to align the headstock?

After determining how much it was off with the test cuts on the 2.5" diameter piece of aluminum, I set up a dial indicator on the loose end of the aluminum test piece (end furthest from the chuck) and zero'd it out. Then I loosened the two bolts under the spindle mount (chuck) and the two bolts behind the motor/belt cover for a total of four fasteners securing the headstock to the bed. Then on the rear of the machine just above the motor there were a couple of socket head cap screws that pushed against the headstock gear box in relation to the bed casting. I watched the dial indicator and tweaked the furthest one away from center until my dial indicator measured approx. half of the total amount I was off. Then locked the four fasteners back down and made another pass across the test piece of aluminum taking off a small amount (approx. .008') and remeasured.

This was a lather, rinse, repeat process many times until I got it where I wanted it. In all honesty the first adjustment got me pretty damn close at about .001" off. However, I thought it was so easy to get to that precision in the first try that I wanted to go deeper and the goal in my head was to get it to half a thousandth (.0005"). This is where I kept going back and forth and chasing tenths plus and minus and also when it became an obsession to get it as low as possible. That last few tenths of a thousandth were a ***** to be honest.

Last night I aligned the tailstock in relation to the headstock and I was able to get it exactly spot on with zero difference between centers on a 14" test bar. I am VERY pleased with how the lathe is now configured but with the time I have spent chasing this thing I could have done the job I started for the client several times over. Looks like I'm working late tonight. :unsure:

Thanks for following along and I hoped I answered your question.
 
Last edited:

LXCam

ALLIANCE MEMBER
Joined
Apr 23, 2013
Messages
19,215
Location
AZ
No ****, I had no idea there might be an adjustment for my head stock. I’m going to have to look on mine now. The last long piece I ran was 30” (3”x2.5”DOM) and on a quickly made live center adapter for my live center wasn’t to bummed I had .005 of taper.

Thanks for the tip Mike
 
OP
Z

zmotorsports

ALLIANCE MEMBER
Joined
Oct 20, 2009
Messages
21,495
Location
Northern Utah
No ****, I had no idea there might be an adjustment for my head stock. I’m going to have to look on mine now. The last long piece I ran was 30” (3”x2.5”DOM) and on a quickly made live center adapter for my live center wasn’t to bummed I had .005 of taper.

Thanks for the tip Mike

You're welcome Cam. I don't know where or how mine came out of adjustment as I haven't crashed my lathe. Talked to my son and he hasn't crashed it. I checked it and had to make a very minor adjustment when I first took delivery of the lathe 7 years ago and then a quick check after setting it up in my new shop 4 years ago from the move. We had an earthquake that shook the hell out of our place last year but I can't see that affecting the headstock, maybe the overall level of the machines yes, as my mill, lathe and drill press were all about half a bubble off level.

Actually my wife says I'm a half bubble off plum so I guess that would mean we all match. :ROFLMAO:

Anyways, glad I got it dialed in and get to work on the actual project that I started on Tuesday night.:rolleyes:
 
To avoid these ads, REGISTER NOW!
Top Bottom