To avoid these ads, REGISTER NOW!

ZMotorsports Shop Projects 2.0

To avoid these ads, REGISTER NOW!
OP
Z

zmotorsports

ALLIANCE MEMBER
Joined
Oct 20, 2009
Messages
21,477
Location
Northern Utah
Continued on with the machining for the blocks last night.

I know this is kind of crazy the amount of time I am spending on these things and waaaaayyyyyy overkill just to cure a squeak/creak. However, I have not used my rotary table a lot over the years and I thought seeing as how I have a lull in side jobs this week that I would try to sharpen my skills a bit and get some practice. Plus making chips is kind of fun. :bounce:

My Phase II rotary table was purchased many years ago at an estate auction and about the only thing I used it for over the years was to machine elongated slots in ignition timing plates for advancements/adjustments on various snowmobiles and ATV's when we were building a lot of 2-stroke engines for powersports equipment. Last year I tore it apart to clean it up as the grease was so hard it did not operate very smooth at all. After a major cleaning and polishing up some bores and shafts this thing works as smooth as silk now. The rotary table turns so easily and advances the table much more fluid than it ever did in the past.


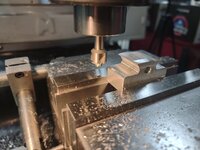
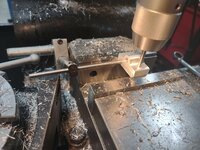
I started by using a 3/8" end mill to create the two radii around the lower block.
d11.jpg

d12.jpg

I then went to the vertical bandsaw and cut the two blocks apart before the next processes.
d13.jpg

This is also overkill for a non-critical part but I wanted to play with my corner rounding end mills and put a radius on each of the two outer corners. More practice.
d14.jpg

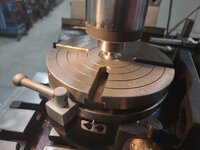
I made this "quick setup tool" for aligning the rotary table several years ago after watching one of Tom Griffin's YouTube videos on Tom's Techniques. I machined a Morse Taper #3 on the big end and used a cut-down shoulder bolt for the shaft. I put it in a collet in the mill quill and then align it with the rotary table so it goes in/out easily and the taper auto-centers the rotary table in relation to the quill centerline. I had to dig through my machining box to find it. I should probably keep it more readily available when I put it away after this project.
d17.jpg

Centering slug in place in the center of the rotary table.
d18.jpg

Centering tool in 1/2" collet then the rotary table centered under it for easy in/out sweep of the quill then bolt/clamp the rotary table down to the mill table and the X and Y axis are zeroed out on the DRO.
d19.jpg

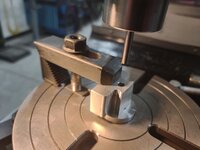
Next I used a .250" gauge pin to center the hole from the block over the center of the rotary table. This ensures the radius will be equal around the pin bore.
d20.jpg

Make certain that the part is in line with either the X or Y axis or you will be moving the radius off the center pin bore at an angle.
d21.jpg

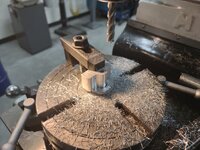
Once the radius is determined, move the table away from the center position the proper distance PLUS half the cutting tool diameter. I also go a bit more so I have material for a final or clean up cut.
d22.jpg


More pics to follow......
 

4 FN 27

ALLIANCE MEMBER
Joined
Oct 19, 2015
Messages
4,635
Location
Minnesnowta
I LOVE your tabletop CAD program Mike, I use the Ritz, Rice Krispies version etc. for mine, low budget, reuse or nutin"! Now about that circle/radius template though, I just bought a new one as my selection didn't go quite large enough for my latest "Lime Felt" cut-outs*. While searching nothing like that popped up or would have bought one like that (really catching my attention) looks real handy! Any hints as to the "catalogue name/description" I figure you've been "attached to it for awhile" as I have been to my drafting supplies [second last template purchase was ~1987 I think]. I did buy my self a set of real nice mechanical pencils about 5 years back. Yes I paid more than that, I am Canadian we pay more for everything: https://www.dickblick.com/products/...zqyzhFfF6m-OQ9_I2cbkSd41A_IElfr0aAhCgEALw_wcB but they are silky smooth.
Harry
* I am planning a thread of some of my projects soon if everything goes smooth here'

Harry, I have had my radius template and arc template for many years now. I haven't seen them anywhere in recent years to even begin to suggest where you could purchase them. We used to have an office/art/draft supply house here in Ogden called Utah-Idaho Office Supply that we would frequent for things like this but I think they've been out of business for many years now.
Gents I wish they would bring back the foundation of drafting principles you mention in your posts. Pencils and templates. It teaches discipline. Kind of like the Karate Kid wax on wax off exercises. In todays CAD world there is very little discipline. We see it everyday with very poor drafting practices. On average we have to fix at least 90% of the prints coming in so the guys on the floor know what to do and what to hold for dimensions.

A lost art.
 
OP
Z

zmotorsports

ALLIANCE MEMBER
Joined
Oct 20, 2009
Messages
21,477
Location
Northern Utah
Continuing on....

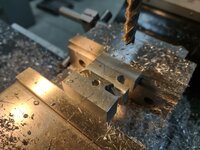
The upper block out of the rotary table and ready to determine dimensions for the mounting fasteners. Originally I was going to drill blind threaded holes in the block and mount using button head screws from the inside of the drawer for a cleaner appearance. However, after an initial measurement I realized the the drawer bottom is actually about .700" above the actual bottom of the front of the drawer so access from the inside of the drawer will not work.

My next thought was to use threadserts which will work perfectly.

d23.jpg

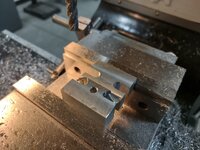
Once I determined the dimensions for the mounting fasteners I moved back to the mill vise. I drilled the holes and then realized I would be taking these in and out a few times so I set up a stop for repeatability. Then used a pin gauge to center the quill and zero out the DRO.
d24.jpg

I measured the thickness and diameter of the head of a 1/4"-20 stainless steel socket head cap screw and countersunk the hole enough to allow full seating of the fastener.
d25.jpg

It sits a few thou lower than the surface.
d26.jpg

With the upper block completed (other than some minor chamfering) I moved on to the lower block to repeat the process.
d30.jpg

One other little detail I added was to recess the back of the blocks enough to clear the thickness of the threadsert, therefore allowing the block to fully seat against the drawer face without standing proud on the threadsert's face.
d31 (1).jpg

d32.jpg

Loosely fastened in place to ensure the bolt pattern was accurate and to mark the lower block.
d33.jpg

Made quite a mess of the mill and my floor last night.
mess.jpg


Thanks for looking.
 
Last edited:
OP
Z

zmotorsports

ALLIANCE MEMBER
Joined
Oct 20, 2009
Messages
21,477
Location
Northern Utah
Gents I wish they would bring back the foundation of drafting principles you mention in your posts. Pencils and templates. It teaches discipline. Kind of like the Karate Kid wax on wax off exercises. In todays CAD world there is very little discipline. We see it everyday with very poor drafting practices. On average we have to fix at least 90% of the prints coming in so the guys on the floor know what to do and what to hold for dimensions.

A lost art.

I have to admit Pat, I enjoyed my drafting class in shop during my middle school years. I was quite good at it and picked it up rather quickly. Some of those skills used all those years ago I still use today. I don't know if any of our youth even knows what a drafting table or drafting arm looks like with everything being computer based these days.
 

Mr.zippy

Well-known member
Joined
Apr 27, 2020
Messages
2,221
Location
Wyoming
Gee whiz Mike........if you ever wanted a career change, I think you could do very well writing technical manuals for just about anything. I know nothing about what you are working with, but your description and pics are extremely helpful to us "non-gifted" peoples!
Thank you for sharing!
 
OP
Z

zmotorsports

ALLIANCE MEMBER
Joined
Oct 20, 2009
Messages
21,477
Location
Northern Utah
Gee whiz Mike........if you ever wanted a career change, I think you could do very well writing technical manuals for just about anything. I know nothing about what you are working with, but your description and pics are extremely helpful to us "non-gifted" peoples!
Thank you for sharing!

Thank you. I appreciate the kind words.

Funny story about technical writing. When my son was in college working towards his ME (Mechanical Engineering) degree he had another teacher discuss a secondary degree in technical writing because of how well he described things in his documents. When he asked what that would look like she replied "well, you know all of those instructions that you get when you purchase something that needs assembly? Those need to be written by people who can describe the process."

His senior project was a performance programming project that focused around his Buell motorcycle as there was not much information available and was a quite silent and guarded community when it came to custom tunes. He got a very high grade on it and was informed that much of that was because of how well he explained every facet of the project. I don't know where he got that from, I didn't think it was me.
 

gearhead1960

ALLIANCE MEMBER
Joined
Mar 21, 2019
Messages
1,864
Location
Manassas, VA, a small blot in history
Mike,
I think the ability to write is one thing, but without the knowledge and understanding you imparted in him, he would never have been able to describe it in writing. Not to take away from his talent or skill, but it started with you. That said, I think anytime you need to do technical writing, the understanding of the concept(s) is the most important thing. If you can't understand the concept, how can you convey that to anyone else properly?
 

bugnut

ALLIANCE MEMBER
Joined
Jul 14, 2012
Messages
4,010
Location
Central Ohio
Mike, wow you letting us down, using guide pins, for setting reference points. Good Lord, what the heck are you doing, this is a precision tool box holder! Evidently the last word indicator is missing in action!:ROFLMAO:
 
OP
Z

zmotorsports

ALLIANCE MEMBER
Joined
Oct 20, 2009
Messages
21,477
Location
Northern Utah
I arrived home yesterday to find a package on my doorstep. I had almost forgot I ordered a Rotopax system for the Jeep.


Now let me preface by saying I HATE the looks of fuel cans or Rotopax containers on Jeeps. The ones around here are mostly on mall crawlers and don't have any idea why people drive around with them hanging all over their Jeeps. Maybe it to make people think they take them off-road.

Anyways, usually we have had absolutely no issues with fuel concerns when off-roading, especially with the LS being even better on fuel than the anemic little V6. However, last year we had two occasions where I was getting nervous wondering when we'd hit pavement and a fuel station. In addition, there are a couple of trails here in Utah out across the west desert heading towards Nevada that my wife and I would like to explore this year. Last fall when the wife and I were in Moab we really wanted to do Lockhart Basin but it is a long trail that heads south out of Moab and when it finally hits pavement it is a long drive back on pavement to Moab. No one else in our group wanted to do it so I'm sure it will be a trail that we will run by ourselves and not knowing the exact distance and terrain I would feel a little better having some extra fuel. Then again in the San Rafael Swell in November there was a trail we were in Reds Canyon. Near the bottom of Reds Canyon there is a secondary road that takes off down through Muddy Creek. It is "usually" passable from what I understand but not always. The wife and I sat at the turn-off for several minutes discussing it with 3/8 of a tank of fuel remaining. I knew that if we stayed on the main road we had about 18 miles of dirt before we hit pavement and aired up and then another 30 miles back to camp in Green River. However, I did not know what Muddy Creek trail would be like and where exactly it would dump us back on to the pavement or even IF the trail would be passable through the ravine that day. I figured it would be as it was later in the year but they had also gotten some heavy rain the week before we were there so it was questionable. Ultimately we stayed on the Reds Canyon loop road and arrived back to camp with just under a quarter of a tank, but I really wanted to see where the Muddy Creek trail went as I understand there are some cool old abandoned mines along that route. My wife and I would really like to explore a couple of these areas more extensively.

That being said, I started thinking about it later last year and looking at what my options were and I was especially keen on something that was NOT permanent and easily installed and removed when not needed, which will be the majority of the time. I stumbled across a guy on the trails between Ouray and Silverton last year and was quite impressed with how simple of an idea it was and especially how easy it was to install and then remove when not needed. It is made by Rock Slide Engineering which is a Utah based company so I was happy to support them. I also had a discount coupon to a vendor that I used recently so for Christmas I ended up ordering a couple of 2-gallon Rotopax containers, two Rotopax mounting brackets and a Rock Slide Engineering spare tire carrier dual mount system. This will allow me to carry 4 extra gallons of fuel on those rare occasions I think I'll need it thus extending my range by about 40-55 miles depending on the type of trail. More than likely to the higher range because when we do these longer trails they are generally not as technical and I am netting at least 14 or so MPG when traveling at speed on scenic dirt roads. The technical trails I get closer to 9.5~ish or so.

I had received the two 2-gallon Rotopax containers and the mounting brackets within a couple days of ordering them in mid-December. However, I received an email stating that the mounting system was on backorder and it would be late February before it shipped. At the time I didn't think anything about it because we had no plans until March/April time frame but I had forgotten all about them until yesterday when I arrived home.

Needless to say, I had to test fit them.

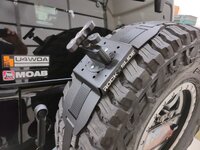
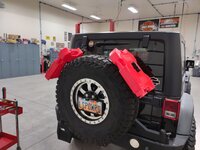
I assembled the mounting brackets to the curved mounting plates. They appear to be well made and have a nice powder coated finish that compliments the rest of the Jeep's fenders and bumpers well. The instructions say to mount them on either side across from one another but I chose to mount them a bit higher on the tire and somewhat angled. My theory is that it will keep the weight more centered over the tire than further out over the widest part of the spare tire.
rs1.jpg

The mounting system is pretty basic, just a 2" wide ratchet strap. It appears to be very stable but first trip with fuel in the containers and a rough road will be the test. The guy I talked with in Colorado last summer said his didn't bounce much at all or really give any indication they were mounted back there but I'm still a bit anxious. I also know my tire carrier is probably built a bit stouter than most aftermarket ones but still, between the 37" spare tire, Hi-Lift jack and now 4-gallons of fuel that is a lot of weight.
rs2.jpg

rs3.jpg

rs4.jpg

rs5.jpg

rs6.jpg

They don't look the greatest but they don't look that bad either. More importantly they will work when they are needed, which thankfully won't be that often.
 
OP
Z

zmotorsports

ALLIANCE MEMBER
Joined
Oct 20, 2009
Messages
21,477
Location
Northern Utah
After playing around the Rotopax system I figured I would get on with what I had planned for the evening, finishing my toolbox retainer blocks.

I set up the lower block on the rotary table using the same "high precision" gauge pin process. Then cut the radius on the block.
b41.jpg

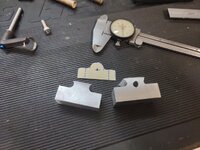
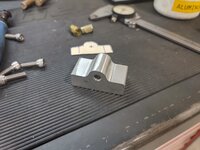
After an initial test fit I noticed that the retaining pin wouldn't completely drop through the lower block enough to allow the detent balls to expand. So rather than cut the lower block down I opted to machine a .100" recess in the top block to allow the quick release pin to sit down just enough that the detent balls would go all the way through the lower block thus locking in place.
b42.jpg

b43.jpg

Retaining pin sunken down slightly into the upper block.
b44.jpg

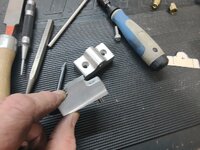
Mocked up on the bench.
b45.jpg

Next I mocked it up on the toolbox to see if my measurements were accurate between the mounting holes for the blocks and the retaining pin bores. It's a snug fit going in but due to using a reamer rather than a .250" drill bit.
b46.jpg

I opened and closed the toolbox multiple times to ensure repeatability and it is consistent. I also removed the small ring at the end of the pin in fear of that being a potential rattle.
b47.jpg

I could have left them raw aluminum but I wanted them to blend in with the toolbox so a trip to the bead blasting cabinet and then some semi-gloss black paint and it was time for final installation.
b48.jpg

b49.jpg

I don't think it is the best looking solution but it works and that's the important thing. I would have liked to not have had to do this at all or at least have been able to make it a bit more invisible but as long as it cures my noise, I'm happy.

Thanks for looking.
 

XJSuperman

Well-known member
Joined
Jan 26, 2018
Messages
3,088
Location
Central Iowa
I haven't held one of those Rotopax just yet, but I see them everywhere. A bit unrealistic for my budget but I am curious how they handle expansion and contraction. Are they much thicker walled than other cans? Does the mounting hole in the middle basically prevent expansion? Do the lids have a venting ability? Its nice they have a simple removable mount.
 
OP
Z

zmotorsports

ALLIANCE MEMBER
Joined
Oct 20, 2009
Messages
21,477
Location
Northern Utah
Seems like a fairly simply and non cumbersome solution Mike.

At the start of this, when I saw the ring, I had a feeling it would disappear for that very reason.

Is there any chance of the handle being able to move back and forth?

Thanks Marc. Yeah, I knew that ring would disappear as soon as I took it out of the package from McMaster Carr but figured I'd wait until being closer to the finished product. I am still on the fence about the handle rotating. Currently it is snug enough that I don't think it will but I am sure over time and jostling around off-road that the bores in the blocks may open by a few thousandths. If/when that happens I may have to glue a rubber pad to the contact area on the back of the box or come up with another alternative. Right now I don't see it moving and even if it does it won't be enough to rattle.

Thanks for following along Marc.
 
OP
Z

zmotorsports

ALLIANCE MEMBER
Joined
Oct 20, 2009
Messages
21,477
Location
Northern Utah
I haven't held one of those Rotopax just yet, but I see them everywhere. A bit unrealistic for my budget but I am curious how they handle expansion and contraction. Are they much thicker walled than other cans? Does the mounting hole in the middle basically prevent expansion? Do the lids have a venting ability? Its nice they have a simple removable mount.

I honestly don't know what the expansion rate is of these containers. The caps are not vented to prevent spillage but they sure appear to be well made. I am only assuming expansion won't be an issue just due to the sheer number of them that I see when off-road but this is my first experience with any of the Rotopax products. I know there are a couple of knock-off's or copies out there but there wasn't that much of a price difference so I opted to stick with the originals for that very reason.
 
To avoid these ads, REGISTER NOW!

lilscorpion

Well-known member
Joined
Mar 15, 2010
Messages
3,600
Location
Colorado
Mike,

I've looked at the Rotopax quite a few times and like that system for exactly the purpose you did. Tanks are unsightly to me when added to a rear bumper as a permanent feature. It kinda even bugs me a bit when I pull up to a light and I see the loaded out "adventure rigs" commuting to work. Do they actually NEED 2 water tanks, 4 gas tanks, a shovel, an axe, a tent, and 2 gear boxes to survive 8 hours of their desk job? Corporate America ain't that rough. Just sayin'

Toolbox latch turned out slick. I need to do something like that as well. I have the RoadRunner tray that slides out in my JK. The drawer does stay somewhat in place because, when latched, it presses just slightly up against the back of the rear seat. That said, it has just the ever so slight amount of play in it and that play allows it to make the faintest click-click when the inertia of the jeep changes in any direction. I've gotten used to it and typically ignore it. Occasionally however, it catches my attention and in those moments it's irritating.
 

Bigblue&Goldie

Well-known member
Joined
Mar 12, 2009
Messages
10,734
Location
AZ
Those Rotopax are quality units. I literally watched a guy roll a CanAm X3 on the beach in Baja right on top of one and it didn't break. He had it mounted like a shark fin, sticking up above the roof line. Crazy.
 

rattle_snake

Well-known member
Joined
Jun 25, 2015
Messages
5,240
Location
Chandler, AZ
Mike,

I've looked at the Rotopax quite a few times and like that system for exactly the purpose you did. Tanks are unsightly to me when added to a rear bumper as a permanent feature. It kinda even bugs me a bit when I pull up to a light and I see the loaded out "adventure rigs" commuting to work. Do they actually NEED 2 water tanks, 4 gas tanks, a shovel, an axe, a tent, and 2 gear boxes to survive 8 hours of their desk job? Corporate America ain't that rough. Just sayin'
There are a lot of fully loaded overlander type trucks driving around in phx area. Mostly Tacomas, brand new everything. pristine shovel, 37 LED lights and so on. More stuff bolted on to the outside than the jeep crowd! RTTs on all kinds of vehicles, may be 3 or 4 at a given stop light. Cannot drive a 4-runner without a roof rack. I get a laugh out of it, but I guess I'm somewhat in the same bucket rolling on 40s to work. I guess as long as these peeps are taking their kids out camping at least once its a win.
 

lilscorpion

Well-known member
Joined
Mar 15, 2010
Messages
3,600
Location
Colorado
There are a lot of fully loaded overlander type trucks driving around in phx area. Mostly Tacomas, brand new everything. pristine shovel, 37 LED lights and so on. More stuff bolted on to the outside than the jeep crowd! RTTs on all kinds of vehicles, may be 3 or 4 at a given stop light. Cannot drive a 4-runner without a roof rack. I get a laugh out of it, but I guess I'm somewhat in the same bucket rolling on 40s to work. I guess as long as these peeps are taking their kids out camping at least once its a win.
Harsh Justin. You just said that because I have 40's, I'm no better than the overlander guys. Thought 40's were a practical upgrade.
 
OP
Z

zmotorsports

ALLIANCE MEMBER
Joined
Oct 20, 2009
Messages
21,477
Location
Northern Utah
Thanks guys. I will have to report back on my impressions of the Rotopax once I get a chance to use them. I don't plan on them spending much time on the Jeep however. Just for those occasional "questionable" distance trails.

I plan on driving the Jeep tomorrow so I hope my noise is gone for good now.
 

Monza Harry

Well-known member
Joined
Dec 29, 2018
Messages
1,433
Location
Windsor ON
Mike for your anti-noise pin, you could put a dimple in the hole [simple ball burr or drill through from the back (can't see it that way either)]for the plunger to let it seat. Now it can't rotate and the locking feature is invisible. As for those cans it's a good thing they are functional because as you stated they ain't purdy! Function over form every time though. Harry
 

PhantomEB

Well-known member
Joined
Feb 6, 2006
Messages
6,847
Location
Medicine Hat, AB, Canuckistan
I have to admit Pat, I enjoyed my drafting class in shop during my middle school years. I was quite good at it and picked it up rather quickly. Some of those skills used all those years ago I still use today. I don't know if any of our youth even knows what a drafting table or drafting arm looks like with everything being computer based these days.
I enjoyed drafting and Architecture In high school so much that when I went for first year school for my Millwright ticket 20 years later…..the blueprinting teacher asked me from my first drawing just what my background was…..arrows and lines were all perfect.
 
OP
Z

zmotorsports

ALLIANCE MEMBER
Joined
Oct 20, 2009
Messages
21,477
Location
Northern Utah
Last night I was supposed to have a small welding job come in the shop but the guy was a no-show. While I was waiting for him (still thinking he was going to show up) I cleaned up my mess from the previous few nights of work. Lots of aluminum shavings and chips from the mill and a few from the lathe. It is actually quite nice to be able to have space or room between the pieces of equipment to get behind and sweep. It makes for quick and relatively easy clean up. Nothing like the last shop where everything was spaced so tightly together that getting in between them was impossible.
shop1.jpg

Mill cleaned off and wiped down. A little brake wash to remove the writing on the mill vise from the Sharpie and it's ready for the next job.
shop2.jpg

Lathe cleaned, wiped down and ways oiled ready for the next job.
shop3.jpg

Bandsaw cleaned and wiped down as well as areas behind the equipment swept out.
shop4.jpg


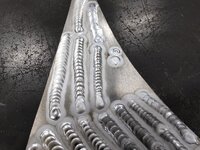
After cleaning up the mess I thought I'd run a few test passes seeing as how I haven't welded any aluminum in quite some time and I had an aluminum welding job walking through the door any minute.

I love welding but would not necessarily want to do it day in and day out which makes it difficult to become consistent.
alum1.jpg

On the test pass to the far left it got away from me being so close to the edge and I didn't taper off the amperage quite enough. I sped up my movements and feed but it wasn't enough to cool and freeze the puddle being that close to the edge.
alum2.jpg

An area I seem to struggle with is my tie-ins. So I made sure to practice on them on about every pass. These last two passes were the best tie-ins all night. This one with the screwdriver pointing was close with the puddle size match but the etching is a dead giveaway.
alum3.jpg

This last one with the screwdriver pointing was the best one so far. The only real evidence was the wider etching around the toes of the weld but the puddle tie-in looks great.
alum4.jpg


Once I realized the welding job was not going to show up I moved on the next small project that bugged me......
 
Last edited:

OutlawDrifter

Well-known member
Joined
Jan 20, 2015
Messages
3,903
Location
KS
I had a no show a couple weekends ago on a facebook marketplace sale...it's very frustrating. Same guy that bought some headers from me the week prior, he just couldn't understand why I wouldn't drive to meet him halfway with the headers. Maybe after "ghosting" me or whatever the kids say these days he'll understand!

Very frustrating, a simple courtesy call goes a long ways!
 

LXCam

ALLIANCE MEMBER
Joined
Apr 23, 2013
Messages
19,209
Location
AZ
No show, no call = no service IMO. Damn shame as he missed a great opportunity to work with the best.

That no communication stuff really gets under my skin so much so I'm going to share a rant.

Tuesday night my counterpart for SoCal let me know his family had an medical emergency and he wouldn't me able to make a mandatory job walk in Blythe on Wednesday morning and his two backups were both out with the vid. So I offered to cover for him being I'm 80 miles closer then he is.

So I'm in town an hour early as being late is completely unacceptable to me. Ten minutes before our scheduled meeting time I get a call from the County PM letting me know he's running about a half hour late. 40 minutes later I call him to see wuz up and it goes straight to VM and I leave a nice message. 15 minutes after that I call again, same deal but I didn't leave a message. Another 20 minutes goes by and this time the phone rings several times, but off the VM hell we go.

So I finally gave up and went into the facility and introduced myself to the commander and LT and we probably BS'd for 15-20 minutes before the PM finally arrived. That damn guy didn't even bother to call me when he got there and was actually surprised I was inside making friends with everyone and came off at me a bit offended I did so.

Problem here is my inner self wanted to just spout off a big FU azzhole but my outter self spouted off, I gave up on you. Hell he wasn't even courteous enough to let the facility know he was running late.
 
Last edited:

duneslider

Well-known member
Joined
Jan 20, 2013
Messages
2,272
Location
Riverton, Utah
Mike,
I think the ability to write is one thing, but without the knowledge and understanding you imparted in him, he would never have been able to describe it in writing. Not to take away from his talent or skill, but it started with you. That said, I think anytime you need to do technical writing, the understanding of the concept(s) is the most important thing. If you can't understand the concept, how can you convey that to anyone else properly?
Not to derail Mr. Z's thread but this is also the problem mentioned above concerning drafting. I learned to draft on a drafting table but now I do it everyday on a computer. I enjoy drawing on paper but not a chance in heck I would choose that over the computer. We have some old school guys in the office that insist on doing paper drawings (they espouse the belief that its a lost art) but the shop brings their drawings to me on a consistent basis to have me fix them on the computer. The paper guys come to me often too and ask me to figure something out on the computer so they can draw it correctly because they can't figure it out on paper, or the math isn't working out and making it to paper correctly.
I also get new guys in the office right out of engineer school who have ever turned a wrench, or worked with their hands. They struggle to understand what and why the shop needs what they need on paper. Doesn't matter if they were taught to use pencil and paper, or a computer they don't grasp the real world experience needed to convey the message on paper. When I am drawing and dimensioning something I am thinking it through the whole way, "if I were building this what information would I need to do it?" When the shop calls with questions I have the answer because I have already built it in my head. Sure, there are times I can't figure it out and I call the shop and ask them how they would do it so I can give them information the way they will do it. I will take a new hire that has spent time working with his hands over a new hire out of engineer school with no practical experience. Its a lot more difficult to teach the practical side in my experience. Most people who have the practical experience can learn the other side fairly quick.
 
OP
Z

zmotorsports

ALLIANCE MEMBER
Joined
Oct 20, 2009
Messages
21,477
Location
Northern Utah
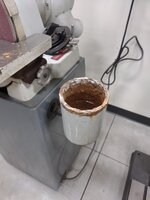
Once I came to the realization that the welding job wasn't going to happen I almost closed up shop and called it a day. However, I keep throwing up a little bit in my mouth each time I quench something in my water pail after using the disc sander.

I quickly made this quenching cup about 20 years ago when I bought my Wilton belt/disc sander. I used a piece of thick walled tubing and a hodge podge of pipe and fittings to make a mount. As the years went by and my welding got somewhat better this bugged the ever living **** out of me but not enough to do anything about it, until last night.

cup1.jpg

It's a bit old and nasty. However, in all honesty, it was pretty nasty the day I made it. I can't believe how far some of my welding and fabrication has come over the length of my career.
cup2.jpg

Rather than use a piece of 1/2" rod that slips inside the mount like previously, I chose to use a piece of 1" OD 4130 chromoly tubing that measured .875" ID and a very nice fit over the mount. This would be more rigid and not as "floppy" yet still allow easy removal to fill the water pail outside on a regular basis.
cup3.jpg

cup4.jpg

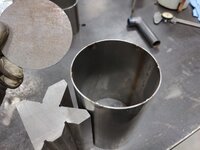
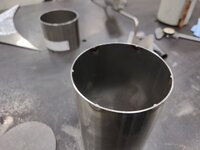
I used a piece of left over 4" exhaust tubing from the Banks kit that I cut off when working on the 2002 Duramax 2500HD last week.
cup5.jpg

I cut the 1" OD 4130 chromoly tubing on a 45-degree angle to create a 90-degree angle when welded then moved over to the vise to hold the small piece while I added a radius.
cup6.jpg

Test fitting to the 4" tubing.
cup7.jpg

The two 45-degree angles welded together to create the 90-degree pivot point.
cup8.jpg

I marked the flat piece of plate by marking the inside of the tubing. This would allow an open corner joint on the bottom. To prevent the plate from falling inside of the tubing and create a shelf to rest on while tacking I added several of these small spot welds to act as a shelf.
cup9.jpg

I then touched them off on the disc sander to flatten them out and not have any standing proud.
cup10.jpg


More pictures to follow.....
 
OP
Z

zmotorsports

ALLIANCE MEMBER
Joined
Oct 20, 2009
Messages
21,477
Location
Northern Utah
Continuing on.....


Placed the plate on top and prepared for welding.
cup11.jpg

Working my way around the circumference of the tubing. I really should have back-purged this weldment.
cup12.jpg

Mocking the pivot handle into position and securing for tack welding.
cup13.jpg

Pivot handle welded in place.
cup14.jpg

cup15.jpg

A couple pictures of the test fit on the belt/disc sander.
cup16.jpg

cup17.jpg

cup18.jpg

Lastly I bead blasted it and painted it using some machinery gray aerosol paint.
cup19.jpg

Thanks for looking.
 
OP
Z

zmotorsports

ALLIANCE MEMBER
Joined
Oct 20, 2009
Messages
21,477
Location
Northern Utah
I had a no show a couple weekends ago on a facebook marketplace sale...it's very frustrating. Same guy that bought some headers from me the week prior, he just couldn't understand why I wouldn't drive to meet him halfway with the headers. Maybe after "ghosting" me or whatever the kids say these days he'll understand!

Very frustrating, a simple courtesy call goes a long ways!

Marc, I HATE having to sell things for this very reason. Maybe that's why I keep things for so long is because I hate dealing with people when selling. 🤬


Clean shop like that would make me happy and talk about dimes!!! 🔥🔥🔥

Thank you Matt, I just can't seem to function in a mess. I wish I could get to the point of all my welds looking like that and being more consistent. I am proud of most of my welds most of the time but they sure aren't up to the Instagram welders that are more of an art.


No show, no call = no service IMO. Damn shame as he missed a great opportunity to work with the best.

That no communication stuff really gets under my skin so much so I'm going to share a rant.

Tuesday night my counterpart for SoCal let me know his family had an medical emergency and he wouldn't me able to make a mandatory job walk in Blythe on Wednesday morning and his two backups were both out with the vid. So I offered to cover for him being I'm 80 miles closer then he is.

So I'm in town an hour early as being late is completely unacceptable to me. Ten minutes before our scheduled meeting time I get a call from the County PM letting me know he's running about a half hour late. 40 minutes later I call him to see wuz up and it goes straight to VM and I leave a nice message. 15 minutes after that I call again, same deal but I didn't leave a message. Another 20 minutes goes by and this time the phone rings several times, but off the VM hell we go.

So I finally gave up and went into the facility and introduced myself to the commander and LT and we probably BS'd for 15-20 minutes before the PM finally arrived. That damn guy didn't even bother to call me when he got there and was actually surprised I was inside making friends with everyone and came off at me a bit offended I did so.

Problem here is my inner self wanted to just spout off a big FU azzhole but my outter self spouted off, I gave up on you. Hell he wasn't even courteous enough to let the facility know he was running late.

Cam, I know what you mean. Some days I spend a good portion of a day waiting on people who have no respect for other people's time.

As for being ghosted for side jobs, this seldom happens, thank God. Every once in a while I have to deal with someone who thinks their time is more valuable than mine and I need to juggle my entire life around to meet their needs as far as dropping off or picking up but they eventually either show up or call. This was a first in quite some time.

When he calls (if he calls) I will definitely be telling him I'm not interested. He can take it elsewhere if he's going to be that inconsiderate.

You're a better person than I am, as I would have given him an ear full. When someone pisses me off my people skills go out the window. I don't let things roll off my back as well as others.
 

lilscorpion

Well-known member
Joined
Mar 15, 2010
Messages
3,600
Location
Colorado
Eek...That new cup now could give the casual passer-by the idea that you hand out refreshments in the shop whereas that old cup made it clear that they should go somewhere else for a drink no matter how thirsty they get.

Joking aside, like the quench cup. I find those little random fab projects very enjoyable.
 
OP
Z

zmotorsports

ALLIANCE MEMBER
Joined
Oct 20, 2009
Messages
21,477
Location
Northern Utah
Thanks guys. Yeah, the old cup was nasty as hell. Been an eyesore for 20 years now. Glad to have finally replaced it with something a little nicer finally.


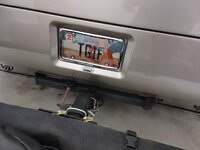
I didn't even go out into the shop over the weekend other than to put the new sticker on the coach as I paid the annual taxes a few weeks ago and the new registration arrived on Friday afternoon in the mail. I cleaned the license plate, installed the new registration sticker and put everything back together. She's good for another year now.
TGIF.jpg


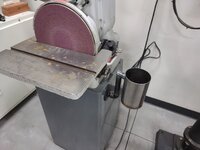
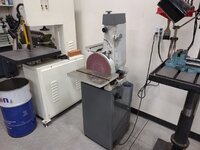
While I was in the shop on Friday I filled the new quench cup with water and installed it on the belt/disc sander. That job is now complete.
disc1.jpg

disc2.jpg

Thanks for looking.
 

TimeWarpF100

Well-known member
Joined
Aug 21, 2010
Messages
6,784
Location
not here
I have to admit Pat, I enjoyed my drafting class in shop during my middle school years. I was quite good at it and picked it up rather quickly. Some of those skills used all those years ago I still use today. I don't know if any of our youth even knows what a drafting table or drafting arm looks like with everything being computer based these days.
It's so long ago since I went to school stuff like that was not invented yet. School was coal fired. No drafting tables but lots of drafts in school if you sat too close to a window in winter.
 

TimeWarpF100

Well-known member
Joined
Aug 21, 2010
Messages
6,784
Location
not here
If you run out of side jobs I have one for ya! I need to add a eccentric on my p/s system on the Raptor Ranger. It's good with a new belt but does not take long for belt to stretch and then make noise. Not enough room to add a tensioner
 
To avoid these ads, REGISTER NOW!
Top Bottom