To avoid these ads, REGISTER NOW!

ZMotorsports Shop Projects 2.0

Monza Harry

Well-known member
Joined
Dec 29, 2018
Messages
1,433
Location
Windsor ON
Mike I am sure I worked on the mould for your engine cover, [wasn't in my group so it (the time) would have been measured in minutes and seconds not even hours] way back in ~08 or one very similar looking! Just another useless FYI to amuse yourself with. Harry
 
To avoid these ads, REGISTER NOW!
OP
Z

zmotorsports

ALLIANCE MEMBER
Joined
Oct 20, 2009
Messages
21,477
Location
Northern Utah
When using a vacuum source to bleed brakes, how do you seal the bleeder threads to prevent sucking air? grease?

Asking for a friend haha.

Justin, I don't worry about the threads sucking a little air as they will as soon as the bleeder is cracked open. The bleeder is no longer seated and therefore the air will get pulled around the clearances in the threads, just the way it is and no way to prevent it. This is somewhat evident by the very small bubbles seen in the clear tubing as the fluid is being extracted from the caliper.

That being said, I do take precautions prior to opening the bleeder and that is basically just a thorough cleaning. Usually it is just a shot with brake wash chased with a blast of compressed air but sometimes it requires a little brushing with a small stainless brush. Once you open the bleeder screw you have to think in terms that the air coming in from around the threads and really isn't going anywhere but turning and going immediately back out the bleeder into the vacuum pump. It's not like the air is being introduced into the system or even into a full caliper of fluid as it will go immediately to the source of the vacuum.

The biggest thing to keep in mind when vacuum bleeding any ABS system is to NOT let the reservoir run dry in the process. This can and will introduce air into the system that is more difficult to extract once it gets to the ABS module. I have also used my brake pressure bleeding system but I prefer the vacuum pump/reservoir as it is so much quicker and less bother, but there are some vehicles that the pressure bleeder works better on, especially when the master cylinder and reservoir are down low as or even lower than the calipers.
 

LXCam

ALLIANCE MEMBER
Joined
Apr 23, 2013
Messages
19,210
Location
AZ
Stupid tidbit of worthless information. When we started tracking the modern hemi stuff and advent of aftermarket high performance brakes hit the scene. There would be stupid arguments about which wheel to start the bleeding procedure. The typical response was the right rear right? Well with the abs module being mounted in the front right corner, that made the left rear the longest runs and inversely the front swapped too.

I’m telling ya Mike, some of them guys lost their minds arguing over it whenever I’d say something.
 
OP
Z

zmotorsports

ALLIANCE MEMBER
Joined
Oct 20, 2009
Messages
21,477
Location
Northern Utah
Stupid tidbit of worthless information. When we started tracking the modern hemi stuff and advent of aftermarket high performance brakes hit the scene. There would be stupid arguments about which wheel to start the bleeding procedure. The typical response was the right rear right? Well with the abs module being mounted in the front right corner, that made the left rear the longest runs and inversely the front swapped too.

I’m telling ya Mike, some of them guys lost their minds arguing over it whenever I’d say something.

Yeah, I hear ya Cam. Although I try to stick with the furthest from the module which can be pretty vehicle specific, but in all honesty, I wonder if it really matters all that much. That was the way I was taught in my auto class nearly 40 years ago now and long before ABS was even a conception but looking at it, if the vacuum is being pulled on an open bleeder, that is the path of least resistance and where the fluid should flow from the reservoir to the open bleeder regardless of if it is furthest or not.

To be honest, the main reason I pull from the furthest is because I'm a tight *** and brake fluid is an expense. I want to pull the longest section first and get that fluid out of the way then the others go much faster and require less volume of fluid as they branch off after the reservoir.

Keep in mind, it's the internet and everyone is an expert and most are fairly close to losing their minds already. :ROFLMAO:
 
OP
Z

zmotorsports

ALLIANCE MEMBER
Joined
Oct 20, 2009
Messages
21,477
Location
Northern Utah
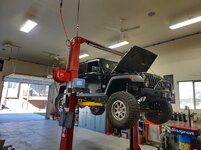
Last night I kicked off the shop time by racking the Jeep and giving it a good once over. Checking suspension, ball joints, steering, brakes as well as all welds at the suspension joints followed lastly by ensuring all paint marks on the fasteners are still in alignment.

Raised slightly above the ground to check for play in the front unit bearings and ball joints.
oct1.jpg

Raised to full height to give the undercarriage a thorough inspection.
oct2.jpg

After checking the Jeep over, I parked it and racked the Camaro to double check everything under it as well. Mainly with the new exhaust system I wanted to double check the torque on the exhaust fasteners. The wife and I have to make a quick trip to Burley, ID tonight for a viewing and I just wanted to ensure nothing had moved in the few hundred miles that the exhaust has been on the car.

Sorry, no pictures of the Camaro on the lift as I forgot.

After parking the Camaro I moved on to my Snapper 21" walk-behind mower that has had an intermittent shut-down issue the last Friday when I mowed the lawn. I suspected the kill wire from the coil to the throttle bracket with the stop switch initially, however after tearing it completely apart and throwing a meter on it I found nothing out of the ordinary. After reassembly I fired it up and it ran perfectly. :headscrat Damn, I hate problems that cure themselves and nothing is detected. Maybe just my moving the wire around in the bracket was enough to re-establish a good connection but I tested very thoroughly before disturbing anything and the issue was detectable a couple times but not consistent. After reassembly I could not get it to act up once. I even went back and double checked the wiring to make certain it didn't chafe anywhere and short out to the engine case or metal bracket somewhere. The ONLY thing I did prior to reassembly is pinch the female spade connector just a little bit that slipped onto the coil module as I felt like it came off the spade too easily.

I had been working on the lawnmower on my motorcycle lift table but as I was lowering the lift table down to off-load the mower I noticed that I had a pretty noticeable air leak coming from the lift table foot actuated air valve. This lift table is nearly 30 years old and I don't recall that I have ever had it apart so I assumed it had a worn O-ring.

Sure enough, the original O-ring has seen better days.
oct3.jpg

I grabbed my O-ring selection and found a suitable replacement.
oct4.jpg

New O-ring installed and the old one alongside the valve plunger.
oct5.jpg

I grabbed the Sil-Glyde and applied some to the O-ring and body of the valve.
oct6.jpg

Reinstalled into the base of the valve.
oct8.jpg

Fully assembled with the washers and E-clip.
oct9.jpg


I cycled it a few times to ensure a proper repair and it is so nice to have a quiet foot actuated air valve again.

Thanks for looking.
 

SilverJimmy

Well-known member
Joined
Apr 14, 2012
Messages
1,692
Location
Prescott/Flagstaff, AZ
Mike, I sold those o-ring tools a lot, but the majority of those sales were to body men. They really liked them for being able to carefully pry apart interior plastic panels without causing any damaging marks. The width and thinness allowed them access to the hidden tabs and didn’t seem to cause any scars.
 
OP
Z

zmotorsports

ALLIANCE MEMBER
Joined
Oct 20, 2009
Messages
21,477
Location
Northern Utah
Mike, I sold those o-ring tools a lot, but the majority of those sales were to body men. They really liked them for being able to carefully pry apart interior plastic panels without causing any damaging marks. The width and thinness allowed them access to the hidden tabs and didn’t seem to cause any scars.

To be honest, the past 30+ years of my career I have used a Snap-on pick set to remove and install O-rings on all flavors of pneumatic and hydraulic components. However, I just recently (within last year) bought the Snap-on set shown in the above picture which are specifically designed for O-rings. I like them a lot, however, I almost had to grab my old tried and true curved pick from my other set for this O-ring as it was so small that the paddle of the tool would barely fit into the groove. I was pretty determined to use my new O-ring tool though. :ROFLMAO:
 

mmsheb

Well-known member
Joined
Mar 30, 2008
Messages
365
Location
Wisconsin
Mike,
It seems like each time I read something from you I learn about another product and/or tool that I need! Today it is Sil-Glyde and an O-ring tool. I have borrowed that tool in the past, but it's time to get my own.
Mike in WI
 
OP
Z

zmotorsports

ALLIANCE MEMBER
Joined
Oct 20, 2009
Messages
21,477
Location
Northern Utah
I've used Sil-Glyde a LOT over the past 34+ years of being an Industrial Maintenance Mechanic. I had never heard of it prior but once I started working in a professional shop and doing more hydraulic and pneumatic repairs it became a staple at both work and at my home shop. Matter of fact, I just recently had to purchase another tube for home because my tube of probably 20 years is nearly empty. Like anti-seize though, a little goes a long ways.
 
OP
Z

zmotorsports

ALLIANCE MEMBER
Joined
Oct 20, 2009
Messages
21,477
Location
Northern Utah
My son bought a slightly used axle shaft for his wife's car so I hurried up and masked it, sanded it down to remove the surface rust and threw a coat of Eastwood's Extreme Chassis Paint on it.
oct1.jpg

oct2.jpg

oct3.jpg


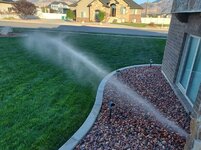
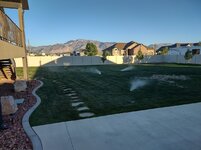
Next was not exactly "in the shop" but I used compressed air from the shop, so I guess that counts. I winterized my sprinkler system and put it to bed for the winter. Hard to believe it is that time of year already.
oct4.jpg

oct5.jpg

oct6.jpg

oct7.jpg


Only item remaining to get the yard ready for winter is to cover the A/C condenser but it hasn't quite cooled off enough here for that yet.

I still have a couple of mows left before I winterize the OPE, even though we're supposed to have a cold snap here this weekend and snow levels dropping to 5k feet.
 
OP
Z

zmotorsports

ALLIANCE MEMBER
Joined
Oct 20, 2009
Messages
21,477
Location
Northern Utah
After blowing the sprinkler system out I commenced a thorough cleaning of the shop along with cutting up the OEM Camaro exhaust system so I could dispose of it.

I then went down the rabbit hole of cleaning the trunk of the Camaro. What started with giving the underside of the deck lid a cleaning with Final Inspection then turned into removing filler panels and doing even more cleaning.

Underside of the deck lid wiped down with Final Inspection.
ss1.jpg

Trunk jamb area wiped down with Final Inspection and the two filler panels removed.
ss2.jpg

The access panels for the tail lights were filthy and in desperate need of a thorough cleaning.
ss3.jpg

Zep Powerhouse to the rescue again.
ss4.jpg

Even the push pins got a treatment. The one I'm holding has been cleaned and the ones in the background have not.
ss5.jpg

Access panels treated with 303 Aerospace Protectant then reinstalled. Lastly the trunk gasket was wiped down with 303.
ss6.jpg

Thanks for looking.
 
OP
Z

zmotorsports

ALLIANCE MEMBER
Joined
Oct 20, 2009
Messages
21,477
Location
Northern Utah
Thanks guys. I'm not saying the products or processes that I use are the only ones, I'm sure there are others who have "their" way to achieve the same results. However, the Zep Powerhouse followed by 303 Aerospace Protectant treatment has been my "go-to" for quite a few years now and it continually delivers repeatable results.

Like the old saying "there's more than one way to skin a cat".
 

Mr.zippy

Well-known member
Joined
Apr 27, 2020
Messages
2,221
Location
Wyoming
Thanks guys. I'm not saying the products or processes that I use are the only ones, I'm sure there are others who have "their" way to achieve the same results. However, the Zep Powerhouse followed by 303 Aerospace Protectant treatment has been my "go-to" for quite a few years now and it continually delivers repeatable results.

Like the old saying "there's more than one way to skin a cat".
Great.....now I have to see if my supply of 303 is still adequate......
 
OP
Z

zmotorsports

ALLIANCE MEMBER
Joined
Oct 20, 2009
Messages
21,477
Location
Northern Utah
The cover for the Camaro arrived this past week and I was able to pick up my license plates and complete the registration process yesterday afternoon. I gave the car a good wipe down with Final Inspection, installed the new license plates and then put the cover on the car to keep the dust off of it. I have had a couple of California Car Covers over the years and I have been quite impressed with the quality of them so that was my go-to when I wanted a cover to keep the car clean while parked in the shop.

The color really pops but it definitely needs some attention paid to the paint now that the car is zeroed out.
ss10.jpg

The cover fits very nicely.
ss11.jpg

ss12.jpg

Jeep parked in the shop to give a wipe down and vacuum as well.
ss13.jpg

View from outside the shop as the sun was beginning to set.
ss14.jpg

My two LS powered toys. I feel so blessed with this shot right here that my two dream vehicles are a reality.
ss15.jpg


Thanks for looking.
 
To avoid these ads, REGISTER NOW!
OP
Z

zmotorsports

ALLIANCE MEMBER
Joined
Oct 20, 2009
Messages
21,477
Location
Northern Utah
Funny story about the cover from California Car Covers. When I was trying to decide on which one to get I called them to inquire based on my situation. I really didn't need one with UV or water protectant because it will not sit outside but I wanted one to keep dust/debris off the paint and had a couple of questions about the various lines of covers and I could not remember which one I had for our last car seeing as how that was nearly 15 years ago.

During my discussion with the person on the phone I asked about ETA as well as options. On their website they stated covers in stock are shipped within 2-3 days and special orders will be closer to 2-3 weeks. I also noticed on their website that they had custom embroidery offered as well. I inquired about how much it would cost to have a Chevy bowtie embroidered on the front of the cover. I was told that would be about a $40 charge and I didn't think I wanted to pay that just for a bowtie and that this was a common cover and they had them in stock. I was told to go online to order because they were offering a 10% discount using a fall promo code but only with on-line orders.

I went online and completed the order form. One of the options available was for an extra $2 charge they would leave the California Car Cover logo off the cover. I opted to have the logo left off and submitted and paid for my order. Within a few hours I got an email stating that the cover would be 2-3 weeks and shipping information would be provided once the cover was shipped. I replied back saying I was just on the phone and was told there were in stock. "Yes, they are but this was a special order because the logo had been asked to leave off." :unsure:
 

Mr. Roboto

Well-known member
Joined
Dec 11, 2012
Messages
2,161
Location
New Hampshire
Mike,

Finally all caught up again on your thread. As always, LOVE all of the photos your share of your wheeling trips. I shall continue to live vicariously through you until I can make it out that way one day.

AND, Congrats on the Camaro!!!! It looks right at home next to the Jeep. You've got the best of both worlds there, that's for sure. Enjoy that ride, it looks incredible for a 10 year old vehicle, the PO took great care of it. It's also wonderful that you got to share that whole experience with your Son, a time you'll both always remember. Looking forward to the updates!
 

signcrafter

Well-known member
Joined
May 9, 2012
Messages
12,531
I told my wife years ago and I still stand by this, that mechanics are probably the dumbest of the dumb. We actually buy tools to do work, then we find ourselves buying more tools to do more work. Then lather, rinse, repeat in this viscous cycle. :unsure: Let that soak in for a minute. :ROFLMAO:
I have always been of the thinking that if I can buy the tools to do the job myself instead of pay someone else then I am ahead because I end up with tools and something fixed instead of paying someone else. Have used this logic since I was a teenager for car and home repairs. Have collected a pretty big tool collection over the years using this logic and also doing work for others. Within the last year I was talking to the wife and got to thinking how much money I have spent on tools and other things and how in the big picture it probably would have been cheaper to just pay someone else to fix things when they break. Wouldnt have all the tools to keep organized and wouldnt have to have a shop just to store them. And the older I get the more valuable my time becomes. When I was younger I had no issue working as many hours as I could. But now with kid events and other stuff going on I try to put them first so work can pile up and always seems like im behind. We work our tails off to acquire our shops full of tools but it's funny how our thinking changes as we get older. But in the end, it's the fact that I have liked to tinker with things since I was a little kid and I dont think I could ever be happy just letting others fix my stuff and not having a shop of some kind.
Yeah, I hear ya Cam. Although I try to stick with the furthest from the module which can be pretty vehicle specific, but in all honesty, I wonder if it really matters all that much. That was the way I was taught in my auto class nearly 40 years ago now and long before ABS was even a conception but looking at it, if the vacuum is being pulled on an open bleeder, that is the path of least resistance and where the fluid should flow from the reservoir to the open bleeder regardless of if it is furthest or not.

To be honest, the main reason I pull from the furthest is because I'm a tight *** and brake fluid is an expense. I want to pull the longest section first and get that fluid out of the way then the others go much faster and require less volume of fluid as they branch off after the reservoir.

Keep in mind, it's the internet and everyone is an expert and most are fairly close to losing their minds already. :ROFLMAO:
I too was taught to start at the right rear. But as you mention some vehicles that isnt always the farthest away. And I have wondered also if it makes a difference. In theory they are all just lines and we are just replacing the fluid in the lines. Just like house plumbing. Open each faucet and draw new fluid into the lines. I really dont think it makes a difference. I've done front caliper replacement and I will do the front lines first just because those are the lines I opened. Then hit the rears. Which ever one you open first is going to be the one to pull all the old fluid from reservoir and put fresh fluid in. Then the other 3 lines are just the lines and done.


Where do you purchase your zep power house from?
 
OP
Z

zmotorsports

ALLIANCE MEMBER
Joined
Oct 20, 2009
Messages
21,477
Location
Northern Utah
Mike,

Finally all caught up again on your thread. As always, LOVE all of the photos your share of your wheeling trips. I shall continue to live vicariously through you until I can make it out that way one day.

AND, Congrats on the Camaro!!!! It looks right at home next to the Jeep. You've got the best of both worlds there, that's for sure. Enjoy that ride, it looks incredible for a 10 year old vehicle, the PO took great care of it. It's also wonderful that you got to share that whole experience with your Son, a time you'll both always remember. Looking forward to the updates!

Mike, love your new toy! I always enjoy following along.

Thanks guys. I appreciate the comments and I appreciate you taking the time to follow along.
 
OP
Z

zmotorsports

ALLIANCE MEMBER
Joined
Oct 20, 2009
Messages
21,477
Location
Northern Utah
Where do you purchase your zep power house from?

I used to buy it directly from our local Zep representative at work but he retired last year and we do not have a replacement at this time. I have not had to buy any since he retired and I still have a few cans so I'm not sure where I will purchase it from next time. I know my local Grainger carries Zep products so maybe that is where I will get it from next time I need it.
 

Mr.zippy

Well-known member
Joined
Apr 27, 2020
Messages
2,221
Location
Wyoming
Just a shout out Mike, I ordered 4 cans from the ebay......and used the product this weekend. I had some trim on the car that had faded badly. The ZEP really cleaned it up excellent. I used it as a prep for the top coat of Solution Finish Black. I wanted to get the trim back to a factory black. The ZEP is a winner! Thanks for the tip!
 
OP
Z

zmotorsports

ALLIANCE MEMBER
Joined
Oct 20, 2009
Messages
21,477
Location
Northern Utah
So the wife and I just returned from another RV/Jeep trip to the San Rafael Swell so the next few posts will be mostly pictures of our adventure last week.

Hope you enjoy the pictures.

We arrived early Saturday afternoon and after getting the coach set up in our site we took off in the Jeep and headed out on some trails that were closer to the town of Green River, UT. I didn't think we would be long and so I didn't air down. What a mistake, rattled my teeth loose in my head and I'm sure it didn't do the Jeep any favors either. I figured it would be a short trail but I should have still aired down and made the ride more comfortable and not rattled things around as much. Lesson learned.

Saturday night a hellacious storm rolled through the area. It started raining just after we returned to the coach from dinner around 6pm and it didn't stop until Sunday morning around 10am. We left our campsite in Green River and headed the 30 miles west to the middle of the Swell thinking that by the time we got there that the rain would quit and being desert, that the ground would **** up the moisture fast and we could continue on with our plans for the day. We aired down as there were some sucker holes poking through the clouds so we thought we would be good to go for the day.

Here we are pulled off the main dirt road airing down. swell1.jpg

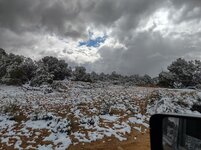
As we headed towards the trail that I had planned on running the clouds starting gathering again and we continued to climb in elevation until we hit snow.
swell2.jpg

As we were beginning our descent down into Eagle Canyon, which runs under the I-70 bridges the trail got awfully "gooey" and slimy. The trail dropping down into Eagle Canyon is a narrow shelf road that is slightly off camber towards the floor of the canyon. As we approached the first descent the Jeep slid sideways about a foot or so and gave me reason for pause. The dirt and silt on the road had turned to a slimy paste with all of the moisture and I really didn't like the idea of possibly putting the Jeep on it's lid 60-100 feet down in the canyon or best case scenario, not be able to get up and out of the other side of the canyon due to poor traction.

At this point we opted to turn around and run a trail that we had done before which was much less prone to falling off a canyon wall.
swell3.jpg

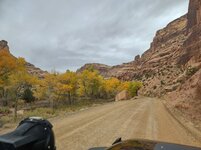
We turned south and dropped in elevation as we headed towards Red's Canyon. This is a MUCH wider canyon and had good road all the way down and quite well groomed for the most part. More like a dirt highway but seeing as how it was more gravel it would also be less muddy and I HATE mud. The views were very spectacular however and we enjoyed this drive very much. The clouds parted for a couple of hours in the early afternoon before gathering again.
swell4.jpg

Here you can see what was quite common all day where the water from the night before had washed sections away and all of that silt and dirt had been washed onto the dirt road and in some places actually washed sections of the road away.
swell5.jpg

Here you can see one area where the road is actually part of the dry river bed at the very bottom of the canyon. Luckily being much wider than Eagle Canyon the water and debris had dissipated and spread out rather than being heavily concentrated in a narrow path. Still, the road was disturbed by all of the water and silt washed across it in many places.
swell6.jpg

On day #2 we opted to try a trail that we had never run before called Copper Globe Canyon or Copper Globe Mine. The weather was complete opposite of day # 1 as there wasn't a cloud in the sky and it was in the mid 50's all day. Not quite warm enough to flip the top back on the Jeep but much warmer than the day before and the ground was much less muddy. Only had a few places over the next few days where there were patches of mud that had to be driven through or around.

Here we are just about 6 miles south of I-70 and just arriving at the Copper Globe Mine.
swell7.jpg

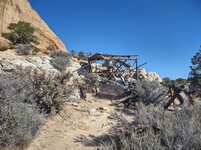
One of the buildings still remaining, somewhat. This mine was active between 1900-1905.
swell8.jpg

Top view of the same structure from the above picture. In the rear was an exhaust flu from the old stove.
swell9.jpg

This was an interesting story. The miners opted to construct a smelter on site to melt the copper as it was being extracted from the mine. In the back ground you can see the large pile of firewood that they had gathered to feed the smelter. Unfortunately, the smelter didn't even make it one cycle as the rocks that they used to construct the smelter actually melted before the copper ore so it was in essence only used one time.
swell10.jpg


More pictures to follow......
 
OP
Z

zmotorsports

ALLIANCE MEMBER
Joined
Oct 20, 2009
Messages
21,477
Location
Northern Utah
Continuing on with our trip to the Swell.

Here is the large pile of firewood near the smelter from the picture above.
swell11.jpg


Below the pile of wood is the actual mine entrance that has pretty much been taken back by mother nature.
swell12.jpg

I believe this was an air ventilation shaft entrance that was perpendicular to the mine entrance above.
swell13.jpg

A plaque just outside of the mine's entrance.
swell14.jpg

Looking back towards the mine in the small alcove of the canyon above.
swell15.jpg

We had heard that were were a few dozen wild horses roaming the area and that if we were lucky we would see them as we were leaving the mine and heading toward a canyon called Cat Canyon. Just as we climbed out of the small canyon where the mine was we spotted several horses on the side of the trail.
swell16.jpg

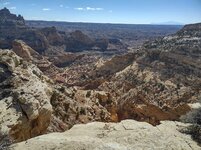
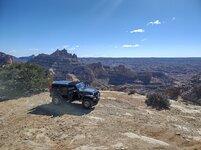
We continued to climb and were looking for a lunch spot. I was watching my tablet and saw that we were parallel with the canyon so we saw a faint dirt 2-track and headed towards the canyon. Sure enough we were rewarded with another spectacular view where we could see for miles and miles. Perfect spot for lunch.
swell17.jpg

swell18.jpg

swell19.jpg

swell20.jpg

More pictures to follow.....
 
OP
Z

zmotorsports

ALLIANCE MEMBER
Joined
Oct 20, 2009
Messages
21,477
Location
Northern Utah
Continuing on.

Last picture from the overlook just outside of Cat Canyon. There was a faint track that ran around the canyon wall so we followed it and ended up putting us right back onto to our original path where we deviated from.
swell21.jpg

On the last day in the San Rafael Swell area we decided to take Black Dragon Canyon or Black Dragon Wash, I've heard it called both. This is one of our favorite trails in the area but is a very narrow canyon where in some places probably less than 20' wide with canyon walls at least a couple hundred feet high, so NOT a canyon you would want to be in during threat of a storm. As we were climbing out of the canyon we came across another washout but this one was rather large and deep.
swell22.jpg

This washout was probably 4' wide by at least 12' or so deep. I cannot even fathom the force of the water that came through there to create that void but at the same time, I am glad we were not there when it came through.
swell23.jpg

As we climb out of Black Dragon Canyon there are some benches named Jackass benches and there is a herd of donkeys that frequent the area. We have been fortunate to see them once before but weren't sure if we would see them during this trip, especially seeing as how we were fortunate enough to see the wild horses the day before. Sure enough we were able to see a few of the wild burros as we were traversing across jackass benches. There was even a young one staying hidden behind momma as we drove past.
swell24.jpg

As the day progressed on the clouds began forming again so we headed up a much wider canyon called Buckhorn Wash in the event it started raining. Driving through the wash we were blessed with some more of mother nature's colors as the trees were changing color in the canyon floor.
swell25.jpg

swell26.jpg

For a lunch spot we were trying to make the Wedge which is also known as the Little Grand Canyon. As we arrived at the lookout we were surprised that we had the entire place to ourselves. This is usually a very popular lookout and seeing as how we hadn't seen more than 2-3 other vehicles for the past several days I thought we would at least see a few at the Wedge overlook, but no one was here.
swell27.jpg

swell28.jpg

The colors in bottom of the canyon were very notable even from several hundred feet above.
swell29.jpg

swell30.jpg

That is all from our 4 day trip to the San Rafael Swell area and chocked up to another successful trip.

As we arrived back to camp that night the skies once again opened up and we were treated with an amazing thunder and lightening storm which we were able to view from the coach. It was quite spectacular to watch the storm move through the area.
 

OutlawDrifter

Well-known member
Joined
Jan 20, 2015
Messages
3,903
Location
KS
Awesome pics Mike!

I must say, however, that's the dirtiest I've ever seen the Jeep :ROFLMAO:

Beautiful country, I'm jealous of the views, glad you guys had fun.
 
OP
Z

zmotorsports

ALLIANCE MEMBER
Joined
Oct 20, 2009
Messages
21,477
Location
Northern Utah
Driving home we encountered rain the entire couple hundred miles. While it did wash off some of the mud from the undercarriage of the Jeep, it made the rest of the Jeep and especially the coach a filthy mess. Thursday was cleaning day.

Jeep pulled in the shop after a pressure wash and chamois job. I commenced the deep cleaning of the interior and the engine bay as well as removed the Sunrider top from the Jeep and installed the OEM Freedom tops for the colder winter months ahead. The good news is that with all of the moisture we had during our trip to the Swell, there was hardly any dust on the trails other than the first afternoon/evening run.

Also noted was that while we were on vacation the temperatures dropped here along the Wasatch front so that meant the shop doors are now closed and the heater is running.:(
clean1.jpg

As I was cleaning the engine bay I noticed that a small section of convoluted wire casing had deteriorated to the point of needing to be replaced. As I removed it the casing just crumbled in my hand.
clean2.jpg

New wire casing installed and the rest of the engine bay cleaned and blown out.
clean3.jpg

Jeep exterior detailed and Freedom tops installed.
clean4b.jpg

Fenders also treated with some 303 Aerospace treatment and tire pressures double checked.
clean5.jpg

Next it was time to move on to detailing the coach after that nasty drive through pouring rain. Out came the pressure washer to wash the undercarriage, generator and engine bay.
clean6.jpg

Then moved on to a good hand washing of the exterior followed by a thorough chamois drying.
clean7.jpg

clean8.jpg

clean9.jpg

clean10.jpg

At this point she was ready to back into her home in the shop. That was a long day of cleaning.
 
OP
Z

zmotorsports

ALLIANCE MEMBER
Joined
Oct 20, 2009
Messages
21,477
Location
Northern Utah
On Friday morning I was going to sit outside on the deck and enjoy my coffee but the temps were just a bit too cold for me. The seasons changed while we were away last week and now we have heavy frost in the mornings and snow in our mountains.
oct1.jpg

oct2.jpg

The wife and I opted to take off for a drive over the weekend so we hopped in the car and set out for the day. As we ended up in southern Idaho we decided to go over the mountain pass seeing as how it was such a beautiful sunny day. At the top of the pass we found some snow from the previous week's storm so it made for some great pictures with the car.
oct3.jpg

oct4.jpg

oct5.jpg

oct6.jpg

Thanks for looking.
 

Blackbyrd

Well-known member
Joined
Nov 28, 2020
Messages
1,175
Location
TN
glad to see im not the only one who goes down the rabbit hole of detailing obscure things hahah

man that color pops in the sun, I had a c6 Vette that was similar in color (ls2 car)
 
OP
Z

zmotorsports

ALLIANCE MEMBER
Joined
Oct 20, 2009
Messages
21,477
Location
Northern Utah
glad to see im not the only one who goes down the rabbit hole of detailing obscure things hahah

man that color pops in the sun, I had a c6 Vette that was similar in color (ls2 car)

Thanks. Yeah I sometimes go overboard when it comes time to clean. :headscrat

I agree about the metallic red on the Camaro, it really pops in the sun and even moreso with the reflection from the snow. Perfect background for a few impromptu photos.

Thanks for following along and for the comments.
 

HotRod68Camaro

Well-known member
Joined
Apr 29, 2008
Messages
201
Location
Central TX
As I was cleaning the engine bay I noticed that a small section of convoluted wire casing had deteriorated to the point of needing to be replaced. As I removed it the casing just crumbled in my hand.
clean2.jpg

New wire casing installed and the rest of the engine bay cleaned and blown out.
clean3.jpg
What type of casing is that? did you have to de-pin the connector to get it covered? I'm having the same issue on my truck right now.
 
OP
Z

zmotorsports

ALLIANCE MEMBER
Joined
Oct 20, 2009
Messages
21,477
Location
Northern Utah
That was some beautiful landscape you encountered on your trip. Thanks for posting those photos Mike. That little Grand Canyon was awesome!

Jay

Thanks for the comments Jay. Yes, the scenery was spectacular last week. Last time we were at the Little Grand Canyon back in April it was a madhouse there were so many people. This time there was absolutely no one, perfect.
 
To avoid these ads, REGISTER NOW!
Top Bottom