To avoid these ads, REGISTER NOW!

ZMotorsports Shop Projects 2.0

To avoid these ads, REGISTER NOW!
OP
Z

zmotorsports

ALLIANCE MEMBER
Joined
Oct 20, 2009
Messages
21,495
Location
Northern Utah
I recently learned there is a whole range of different valve core types and trey have different colored bands to identify the type and what they are best used with. Ie their is some specific to coolant applications, hydraulics, standard air etc.

Valve Cores

Agreed. There is a wide range of applications. Some of the seals don't play well with certain chemicals. So it is a good idea to utilize the correct Schrader valves for your specific application(s).
 

signcrafter

Well-known member
Joined
May 9, 2012
Messages
12,535
I agree Scott, and had my local NAPA still been open at 7pm last night that is where I would have gone. Unfortunately, the NAPA store closes at 6pm here and my wife usually doesn't get home until after that so by the time I racked her car, found out what I needed it was far too late to hit the NAPA store. I was just a bit sticker shocked to see a 2-pack of 168 bulbs be $10.00 at Autozone where most of the bulbs I've been buying are a couple bucks each from NAPA.

WOW! I think I just sounded like my dad right there. :bounce:
Mine closes at 6 also and it ***** sometimes. When we moved 10 years ago I had to start "stocking" a lot of things because we only have napa, oreillys, and a hardware store and next bigger town is 30-40 minute drive depending on what store you're going to. Now have an autozone but still can be tough when you need something small and have to spend half a day to get it. AC valve cores are the number one spot to leak from my experience. I bought a kit with valve cores, orings, and a bunch of other stuff to keep on hand and always replace them when doing any AC work. Small price for insurance when freon went through the roof. I just looked up 168 bulbs at napa and the ones that come on a card behind the counter are 99 cents each.
 

ntsqd

Well-known member
Joined
Jan 22, 2005
Messages
1,002
Location
Lower left coast
I recently learned there is a whole range of different valve core types and trey have different colored bands to identify the type and what they are best used with. Ie their is some specific to coolant applications, hydraulics, standard air etc.

Valve Cores
Thanks for this, D/L'd into my Reference files.

Re: bleeding brakes; the best tool that I've built myself is a pressure bleeder that allows me to push fluid in from the bleed screws. I'm told that this is how all A&P work on aircraft brakes is done (no idea myself). It's not 100% perfect, but it's far better than anything that I've tried or come up with in the past.
 
OP
Z

zmotorsports

ALLIANCE MEMBER
Joined
Oct 20, 2009
Messages
21,495
Location
Northern Utah
Mine closes at 6 also and it ***** sometimes. When we moved 10 years ago I had to start "stocking" a lot of things because we only have napa, oreillys, and a hardware store and next bigger town is 30-40 minute drive depending on what store you're going to. Now have an autozone but still can be tough when you need something small and have to spend half a day to get it. AC valve cores are the number one spot to leak from my experience. I bought a kit with valve cores, orings, and a bunch of other stuff to keep on hand and always replace them when doing any AC work. Small price for insurance when freon went through the roof. I just looked up 168 bulbs at napa and the ones that come on a card behind the counter are 99 cents each.

Scott, that's interesting that you've had so many Schrader valves leak and yet this is my first. Goes to show just how many different ways there are for parts to fail. I have heard of them failing to seal but in all my years, this was my first.

My MAC tools A/C adapter kit came with a few valve cores so when I noticed the leak I remembered that little kit had a few in it and at the time I purchased it I even though to myself I wonder if I'll ever need these? :unsure: I purchased that kit a long, long time ago. Matter of fact it was back in the late 90's when I swapped my 1986 over to R134. I'm glad it wasn't the high side port because it is one of those funky ones that the valve core isn't removable and the entire port must be replaced. Not that it would have been difficult, just that I didn't have one on hand and would have taken me another couple of days to complete the A/C work on the car.
 
OP
Z

zmotorsports

ALLIANCE MEMBER
Joined
Oct 20, 2009
Messages
21,495
Location
Northern Utah
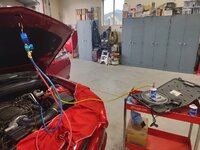
Arrived home from work last night to find my pressure still holding on the Camaro's A/C system. So I bled the nitrogen off and hooked up the vacuum pump and let it pull a vacuum for about an hour. While the vacuum pump was running I turned my attention to the truck to see if I could finish it up and get the painted parts off the mobile shelf.

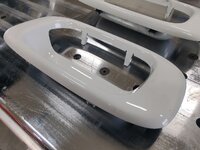
I removed the tailgate handle bezel that had the broken locking ear and you can see the two side by side.
paint71.jpg

The texture on this part always bugged me. It just didn't have the depth either and almost looked a different color on the tailgate.
paint72.jpg

Compared to the freshly painted one that I spent a little more time on priming and sanding to eliminate the texture.
paint73.jpg

This looks so much better. Don't mind the dirty tailgate surrounding the bezel though. :bounce:
paint74.jpg

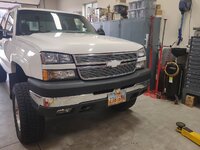
I then went to the front end and removed the cover between the grille and the core support allowing access to the bowtie for replacement. I was on the fence about this mod last night but it's growing on me.
paint75.jpg

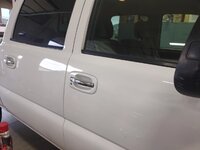
Lastly, I turned my attention to the door handles and replaced the driver's and passenger's front door handles. Now I can unlock and open the door for my queen from the same side. I hated this part when I replaced the OEM door handles. I hated having to run around to the driver's side to unlock the doors, then run around to the passenger's side to open the door. Made me feel a bit befuddled throughout the process. No more of that.
paint76.jpg

By this time the vacuum had been pulled down and valved off and allowed to sit for nearly another hour to ensure holding a vacuum. I felt confident based on the nitrogen being held overnight, but it's still a habit I like to keep. Once it sat for nearly an hour I put the truck back in the attached garage and added the refrigerant to the system.
ac11.jpg

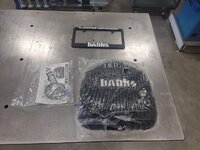
Just as I was about to lock up the shop for the evening, this arrived. My new rear diff. cover for the truck.
banks.jpg


Thanks for looking.
 

ntsqd

Well-known member
Joined
Jan 22, 2005
Messages
1,002
Location
Lower left coast
Having worked in High Vacuum twice over my career I can tell you that its not intuitive, and sealing methods that work for pressure do not always work for vacuum, and vice versa, sealing methods that work for vacuum do not always work for pressure. Its befuddling, vacuum is just pressure in the opposite direction, but it behaves differently. For instance, for deep vacuum tapered pipe threads are almost hopeless. I've only ever seen one thing that will get them to seal vacuum, and it's only good for so far down. The other thing that seems strange is that the higher in vacuum that a system goes, the larger (to a point) the plumbing wants to be.

If a system will hold both pressure and vacuum, you've got a good, well designed and assembled system.
 

Fixr

Well-known member
Joined
Dec 23, 2012
Messages
9,710
Location
SW VA
One other point about service valve leaks. Decades ago when 134 refrigerant was a new thing for cars, a trainer from one of the A/C suppliers told us that the primary seal for the service valve is the cap, not the Schrader valve, which pretty much only exists to hold in the refrigerant while the gauges are being connected and disconnected. So make sure the caps seal well.
 
OP
Z

zmotorsports

ALLIANCE MEMBER
Joined
Oct 20, 2009
Messages
21,495
Location
Northern Utah
One other point about service valve leaks. Decades ago when 134 refrigerant was a new thing for cars, a trainer from one of the A/C suppliers told us that the primary seal for the service valve is the cap, not the Schrader valve, which pretty much only exists to hold in the refrigerant while the gauges are being connected and disconnected. So make sure the caps seal well.

I've heard that as well and one of my pet peeves is when I work on client cars that have these service port caps missing. I'm dumbfounded at the people that don't put them back after working on an A/C system.
 

signcrafter

Well-known member
Joined
May 9, 2012
Messages
12,535
One other point about service valve leaks. Decades ago when 134 refrigerant was a new thing for cars, a trainer from one of the A/C suppliers told us that the primary seal for the service valve is the cap, not the Schrader valve, which pretty much only exists to hold in the refrigerant while the gauges are being connected and disconnected. So make sure the caps seal well.
I always listen for a pressure release when I unscrew the cap for the port. A tell tail sign of a schrader valve leaking.

Mike, sometimes those bigger fittings with the schrader valve built in can be a pan. I always get nervous replacing those because they can seize in there and always worry about twisting the line the fitting is brazed to, even with a backing wrench. Never have twisted one, just seems like it takes a lot of force to bust them loose and I get nervous. Or if it's an aluminum fitting I worry about the threads pulling out. Have had that happen on the fitting on a condenser before. I call it aluminum rust. Plus those fittings are way more expensive then a just replacing a schrader valve.
 

gearhead1960

ALLIANCE MEMBER
Joined
Mar 21, 2019
Messages
1,864
Location
Manassas, VA, a small blot in history
One other point about service valve leaks. Decades ago when 134 refrigerant was a new thing for cars, a trainer from one of the A/C suppliers told us that the primary seal for the service valve is the cap, not the Schrader valve, which pretty much only exists to hold in the refrigerant while the gauges are being connected and disconnected. So make sure the caps seal well.
Believe it or not, this statement also holds true for automobile and truck tires. The cap is supposed to be the seal of last resort. Don't lose them caps....
 
OP
Z

zmotorsports

ALLIANCE MEMBER
Joined
Oct 20, 2009
Messages
21,495
Location
Northern Utah
Believe it or not, this statement also holds true for automobile and truck tires. The cap is supposed to be the seal of last resort. Don't lose them caps....

Mark, funny you mention valve caps on tires. I have a quick story pertaining to just that. We were at a Jeep rally in Moab about 6 or 8 years ago and after airing down I was reinstalling my valve caps and a gentleman asked why I was putting those "damn" things back on we'll just be airing back up in a few hours? This made absolutely no sense to me so I simply explained that we are on a dirt road and we may encounter a water crossing, both of which are an enemy to these small valves. It couldn't have been planned any better, but the same gentleman had a flat tire the next morning. We were waiting on him and his wife during a driver's meeting and someone mentioned that he was changing his tire. I went over to their campsite to see if I could assist so they wouldn't miss the trail run. He was nearly done changing the tire and I asked if I could help. He said he must have picked up a nail or something along the trail the day before. I didn't see anything in the tire after rolling it around and giving it a thorough visual inspection, but we tossed it back on his tire carrier as he said he would stop by town on the way back to camp after the trail run and have it fixed.

Later that day at Happy Hour he mentioned to the group that it is a good idea to put your valve caps back on their tires because he stopped to have his tire fixed on the way back to camp and the tire shop couldn't find anything in his tire, but he did find a leaking valve stem. :unsure: Who'da thunk it? :bounce:

Then a couple years later the wife and I were hosting our annual Ouray, CO trip and after airing down I overheard the same gentleman telling another guy to make sure to put the cap back on after airing down. I kind of had to smile to myself.
 

signcrafter

Well-known member
Joined
May 9, 2012
Messages
12,535
Believe it or not, this statement also holds true for automobile and truck tires. The cap is supposed to be the seal of last resort. Don't lose them caps....
I've never considered the tire valve stem cap an actual sealing component, but maybe it is. I'm sure it helps but most AC port caps have an oring in them to seal. Weather the tire stem cap actually seals or not it's a good thing to put on as Mike pointed out, it keeps **** out of the valve stems so the schrader valve in them can seal good. Next time I'm doing a tire I think I'll leave the core out slightly and screw the cap on and see how well it actually seals just out of curiosity now.
 
OP
Z

zmotorsports

ALLIANCE MEMBER
Joined
Oct 20, 2009
Messages
21,495
Location
Northern Utah
It won't hold up to tire pressure, but there's typically a small rubber seal in the tip to keep dust/debris out. Always put your caps on!!

This was my point to the gentleman with the flat. The dirt won't force the valve open, but guess what? The dirt will be there in a few hours when you air up your tires and you will force it right into the valve where it "can" then impair the sealing.
 
OP
Z

zmotorsports

ALLIANCE MEMBER
Joined
Oct 20, 2009
Messages
21,495
Location
Northern Utah
At least the gentleman with the leaking valve stem learned the lesson, and was actively working to head off other's having his experience.

I've always kept the caps on if only because I didn't want to be pushing dust into the tires when inflating them.

Plus, I think it looks like **** having exposed threads on the valve stems. :bounce:
 

Xti04

Well-known member
Joined
Nov 11, 2016
Messages
2,369
Schrader valves were one of my most common ac repairs in my shop days. Not uncommon to see them leaking. I like the pag oil with dye in it, we didnt have access to nitrogen to pressure test but I do like the idea of it. Dye was nice because it lights up and the residue will stay especially in an evaporator drain tube where it can be seen without pulling a dash apart.
 

signcrafter

Well-known member
Joined
May 9, 2012
Messages
12,535
It won't hold up to tire pressure, but there's typically a small rubber seal in the tip to keep dust/debris out. Always put your caps on!!
I agree with always putting caps back on. I've never noticed a seal in them but I will look for it next time I have one in my hand.
 

NUTTSGT

Super Moderator
Staff member
Joined
Sep 14, 2009
Messages
51,183
Location
Northern Central Ohio
I agree Scott, and had my local NAPA still been open at 7pm last night that is where I would have gone. Unfortunately, the NAPA store closes at 6pm here and my wife usually doesn't get home until after that so by the time I racked her car, found out what I needed it was far too late to hit the NAPA store. I was just a bit sticker shocked to see a 2-pack of 168 bulbs be $10.00 at Autozone where most of the bulbs I've been buying are a couple bucks each from NAPA.

WOW! I think I just sounded like my dad right there. :bounce:
A few years back, I came across an auction on Govdeals for a cardboard flat (soda case) of misc. light bulbs. Bulbs from 5 cell Maglites, emergency lights and regular automotive style bulbs. I bid $2 on it and on the last day, got out bid. A couple of days later, while in seeing the wife at work, Filly (Chief Deputy) swings by her office and asks if I still want the bulbs as the winning bidder failed to pay.

Did I mention this auction was at the Sheriff's Office where the wife works ? He said to just log on and pay and he would bring the bulbs down for the wife to bring home. I think with tax and buyer's premium, about $2.25 in total. Needless to say, I needed one of the bulbs for the tail light in my old F250 and that one bulb paid for the entire package I bid on.


Crazy what bulbs are going for these days.. . Almost makes a man want to drink and drown his sorrows. :spit:
 
To avoid these ads, REGISTER NOW!

gorilla

Well-known member
Joined
Dec 13, 2007
Messages
1,657
Having worked in High Vacuum twice over my career I can tell you that its not intuitive, and sealing methods that work for pressure do not always work for vacuum, and vice versa, sealing methods that work for vacuum do not always work for pressure. Its befuddling, vacuum is just pressure in the opposite direction, but it behaves differently. For instance, for deep vacuum tapered pipe threads are almost hopeless. I've only ever seen one thing that will get them to seal vacuum, and it's only good for so far down. The other thing that seems strange is that the higher in vacuum that a system goes, the larger (to a point) the plumbing wants to be.

If a system will hold both pressure and vacuum, you've got a good, well designed and assembled system.
I worked in the high vacuum world for most of my career, what I remember from the design classes for system design is that the pumping equations resembled probability calculations. Put differently a larger pumping opening is needed for the molecules to find it.
 

ntsqd

Well-known member
Joined
Jan 22, 2005
Messages
1,002
Location
Lower left coast
Pretty much that's how it was explained to me. Weird, huh? Makes sense when you think it thru, but it's still weird and not "normal".
 

LXCam

ALLIANCE MEMBER
Joined
Apr 23, 2013
Messages
19,216
Location
AZ
Having worked in High Vacuum twice over my career I can tell you that its not intuitive, and sealing methods that work for pressure do not always work for vacuum, and vice versa, sealing methods that work for vacuum do not always work for pressure. Its befuddling, vacuum is just pressure in the opposite direction, but it behaves differently. For instance, for deep vacuum tapered pipe threads are almost hopeless. I've only ever seen one thing that will get them to seal vacuum, and it's only good for so far down. The other thing that seems strange is that the higher in vacuum that a system goes, the larger (to a point) the plumbing wants to be.

If a system will hold both pressure and vacuum, you've got a good, well designed and assembled system.

I worked in the high vacuum world for most of my career, what I remember from the design classes for system design is that the pumping equations resembled probability calculations. Put differently a larger pumping opening is needed for the molecules to find it.

All I got from that is you guys ****.. :spit:


However, as a electrical contractor I worked/built/serviced the air gas industry for a couple decades. They used very high negative pressure to bring air down to cryogenic temperatures in order to separate it into various gasses (simply put). The first time someone explained that negative pressure is still pressure is one of those :headscrat moments
 

Snapped-off

Well-known member
Joined
Feb 22, 2012
Messages
4,819
Location
Indiana
All I got from that is you guys ****.. :spit:


However, as a electrical contractor I worked/built/serviced the air gas industry for a couple decades. They used very high negative pressure to bring air down to cryogenic temperatures in order to separate it into various gasses (simply put). The first time someone explained that negative pressure is still pressure is one of those :headscrat moments
Did they explain psia/psig and microns?
 

ntsqd

Well-known member
Joined
Jan 22, 2005
Messages
1,002
Location
Lower left coast
Oh yeah..... the first High Vacuum chamber that I assembled used a cryogenic pump to pull the vacuum down low enough that it would start pulling the sealing o-rings apart, molecule by molecule. Basically it worked by freezing stuff out of the chamber. Molecules would get so cold that they'd drop down into the cryo pump and get stuck on the 'cold head', which used liquid Helium to get down to nearly absolute zero. Moisture in the air was literally separated into hydrogen and oxygen molecules because it got so cold.
Periodically the cold head had to be "regenerated" because all of the 'stuff' stuck to it made it less effective. Regeneration meant allowing it to slowly warm back up to room temperature while a roughing pump held a small vacuum on the cryo pump pulling all of the 'stuff' out of the cryo pump as it warmed up. Then it would get filled with nitrogen and pumped down, repeat three or four times to finish cleaning it out.

So imagine what happened when an "innovative" operator managed to by-pass all of the hardware and software interlocks and put room temperature Nitrogen into the still very, very cold cryo pump? Remember that part about separating water vapor into it's components? They recombined. Explosively.
The blast buckled a 3/4" thick, 27" wide 316 SS plate leaving it with crown about 2" tall. And blew the horrifically expensive cryo pump thru the false floor, thru the building's slab, and buried it so deep that they just left it down there (somewhere) when they repaired the slab. Totaled a machine that cost ~$250k in mid 1980's dollars.
 

Bigblue&Goldie

Well-known member
Joined
Mar 12, 2009
Messages
10,745
Location
AZ
A good friend of mine owns a small HVAC operation; in the last year he's had 2 instances of Schrader valves going bad for mutual friends......both are coincidentally named Jeff.

I really need to learn how to service automotive HVAC systems. My last couple of trucks only went to the shop once while I owned them and that was when high pressure side hoses developed leaks. I imagine the tools would probably pay for themselves pretty quickly. I already have a nitrogen bottle, so I would only need some gauges and a vacuum pump. Granted, I'm tired of chasing coolant leaks on my F150, so maybe I should save my sanity and just let the shop hunt down refrigerant leaks!
 

WoodsTruck

Well-known member
Joined
Jan 12, 2013
Messages
1,028
I had to vacuum dry pine pollen one summer. We funneled it into small long neck glass vials, looked like a ping pong ball with a long tube. Fill about 1/2 full, then connect to a rubber hose on a vacuum machine. S-l-o-w-l-y open the valve so the moisture could boil off. Once it quit boiling for a while we had a double burner torch and we would melt the tube while turning it to seal the glass shut. Freeze for later.
The cute co-ed doing soil samples in the lab didn't hurt either.
 

ScepterToad

Well-known member
Joined
Nov 9, 2023
Messages
346
The only (and coolest) thing I've done with vacuum was an old vapor deposition machine we had at work probably 20 years ago now. Old piece of equipment with a giant glass bell that sat down and then a vacuum was drawn and you vaporize metals to coat things. Also happened to be a cicada year.

We coated a cicada in copper.
 

ntsqd

Well-known member
Joined
Jan 22, 2005
Messages
1,002
Location
Lower left coast
Mike, I'm curious what your thoughts on this are.
A question came up on another forum about GTAW tungsten electrodes and that caused me to look into the new(er) versions available. I've used Reds for ferrous of any type and for DC-Rev on aluminum; green for AC on aluminum. Mostly because that is what I'm used to and what is in the extensive inventory came with the machine that I bought from a former employer. I've known that reds aren't a great idea due to the radioactivity of the Thorium, but until now I've not bothered to look into what to replace them with. Seems like Blue is the electrode to use where I've been using Red.
Do the Blues out perform the old reds, or should I keep using the reds until I grow a second nose? ;)

As an aside, in this State anyway, I can't buy new Reds from the local welding supply shop ("LWS"?). Amazon lists them - no doubt from overseas, and will ship them to me.
 

mike528

Well-known member
Joined
Dec 20, 2014
Messages
503
Location
Shelby county Ohio
Mike, I'm curious what your thoughts on this are.
A question came up on another forum about GTAW tungsten electrodes and that caused me to look into the new(er) versions available. I've used Reds for ferrous of any type and for DC-Rev on aluminum; green for AC on aluminum. Mostly because that is what I'm used to and what is in the extensive inventory came with the machine that I bought from a former employer. I've known that reds aren't a great idea due to the radioactivity of the Thorium, but until now I've not bothered to look into what to replace them with. Seems like Blue is the electrode to use where I've been using Red.
Do the Blues out perform the old reds, or should I keep using the reds until I grow a second nose? ;)

As an aside, in this State anyway, I can't buy new Reds from the local welding supply shop ("LWS"?). Amazon lists them - no doubt from overseas, and will ship them to me.
Check out the ck worldwide LaYZr tungsten if you are looking for an alternative. From my understanding for hobby use thoriated isn't that much of an issue, maybe if you have other health issues already. I'll let someone else chime in that has done more research on that. The LaYZr tungsten is supposed to be able to be ground to a point and used on anything. I've been running it on my dc only welder at home for mild and stainless with great results for the last couple of years.
 
OP
Z

zmotorsports

ALLIANCE MEMBER
Joined
Oct 20, 2009
Messages
21,495
Location
Northern Utah
Mike, I'm curious what your thoughts on this are.
A question came up on another forum about GTAW tungsten electrodes and that caused me to look into the new(er) versions available. I've used Reds for ferrous of any type and for DC-Rev on aluminum; green for AC on aluminum. Mostly because that is what I'm used to and what is in the extensive inventory came with the machine that I bought from a former employer. I've known that reds aren't a great idea due to the radioactivity of the Thorium, but until now I've not bothered to look into what to replace them with. Seems like Blue is the electrode to use where I've been using Red.
Do the Blues out perform the old reds, or should I keep using the reds until I grow a second nose? ;)

As an aside, in this State anyway, I can't buy new Reds from the local welding supply shop ("LWS"?). Amazon lists them - no doubt from overseas, and will ship them to me.

Sorry for not responding Thom, been away for a week or so and just saw your question.

My opinion is to ditch the pure tungsten (Green) and stick with the 2% Thoriated on a transformer machine if you have a surplus of Red, or better yet switch over to 2% Lanthanated. When I began TIG (GTAW) welding I used an older transformer machine to learn on and was told by a guy I "had" to use 2% Thoriated (Red) for ferrous materials and Pure (Green) for non-ferrous materials so that is what I did. I struggled with the Pure and it only hampered my progress on non-ferrous welds. One day I tried the 2% Thoriated on some aluminum and it worked better for me and seemed to be less sporadic on the arc cone and provided better control of the puddle, so I just stuck with it and tossed out all the Pure and never used it again.

Fast forward to when I purchased my inverter machine back in 2006 and I experimented with a few different ones, settling on 2% Ceriated for a short time. At work I still stuck with 2% Thoriated being a transformer machine. However, about 10 years ago I was given some 2% Lanthanated from a vendor to try and I was hooked. I use it on everything now, even on our old transformer Miller Synchrowave machine at work, when I weld at work anyways.
 

ntsqd

Well-known member
Joined
Jan 22, 2005
Messages
1,002
Location
Lower left coast
Thank you, Mike. I figured (hoped) that you were off doing something fun.

Interesting experience with red on AL. I use red when welding really thin or really thick AL with DC-Reverse, but have not tried it with AC. Same as you, I was coached by several different TIG vets to use green on AL. The bias' that we pick up without realizing it.....
I'll pick-up some 2% Lanthanated to try the next time I'm at the welding supplier.

Mine is an '83 vintage SynchroWave 250, but most of my AL welding was done with a former employer's Lincoln 300/300 (that must be now, what nearly 100 years old?). I've debated getting an inverter machine, just hard to justify when there's other tooling that I need (want) more.
 
OP
Z

zmotorsports

ALLIANCE MEMBER
Joined
Oct 20, 2009
Messages
21,495
Location
Northern Utah
Thank you, Mike. I figured (hoped) that you were off doing something fun.

Interesting experience with red on AL. I use red when welding really thin or really thick AL with DC-Reverse, but have not tried it with AC. Same as you, I was coached by several different TIG vets to use green on AL. The bias' that we pick up without realizing it.....
I'll pick-up some 2% Lanthanated to try the next time I'm at the welding supplier.

Mine is an '83 vintage SynchroWave 250, but most of my AL welding was done with a former employer's Lincoln 300/300 (that must be now, what nearly 100 years old?). I've debated getting an inverter machine, just hard to justify when there's other tooling that I need (want) more.

Agreed Thom, the biases we pick up without really even realizing it. :rolleyes: For me I just wanted to learn to TIG and was absorbing everything I could from someone who knew his **** and was freely giving it. On one hand I think it hindered my progress, then on the other once I decided to step outside the norm and try different things, I feel like my progress exploded. Not sure what the correct path was to be honest.

It's kind of the norm for me though being mostly self-taught as I didn't have classroom theory knowledge, so I've had to figure it out by kind of reverse learning. Fixing things or learning how to do something and then going back and applying the theory to it in reverse order. Hell, in some ways maybe that turned out to be a better way of learning. I just referred to it as the school of hard knocks, learning by trial and error. :ROFLMAO:
 

ntsqd

Well-known member
Joined
Jan 22, 2005
Messages
1,002
Location
Lower left coast
I have two friends whom I think are like you. School was definitely NOT their thing, yet both are very smart and very capable guys. Both have educated themselves. The aspect that I find fascinating about them is that both of them are always looking for new things to learn. They do things that they haven't done before in the hope that it will teach them something new. I do that, so it's a quality that I appreciate.

That prompts a discussion about how people learn. According to my Aunt, who went as far as a Master's in Teaching, generally left-brains tend to learn bottom-up, right brains tend to learn top down. I say generally, because there are people, like her, who are cross-wired. Usually a person who is right-handed uses the left side of their brain the most. Left-handers tend to use their right side of the brain the most. Not to imply that right-handers don't use the right side of their brains or that left-handers don't use the left side of their brain, just that nether tends to use the 'off side' half as much as they use the 'on side' half. I've no idea about why being right-handed is connected to more using the left side, and vice versa.

Bottom-up is how most teaching is done because the vast bulk of the population is right-handed, so they are left-brained (mostly). All of those 'blocks' they're taught eventually form some whole picture and they're content with only knowing what they're taught and aren't worried about how it all fits together until taught how it all fits together.

Left-handed (right brained) people just can't learn that way. They need the big picture so that they can fit all of the 'blocks' into their correct places as they are learned. Being left-handed I can tell you just how frustrating it is to be taught by someone who methodically keeps handing me blocks without being willing or able to tell me where to put them.

Then we get to people like my Aunt, who is right-handed, but also right brained. Until she understood this, school was a nightmare for her. Discovery of a book called "Unicorns are Real" really helped her turn the corner and inspired her to go back to school to learn about teaching. I've mentioned the book to several friends who had children that were having a tough time in school. It has helped all of them to some degree, but one turned out to also have a same handed/brained child. I *think* that he was left/left, but it's been a while.

I'm hoping that in typing this that someone reading it gets that "AHA" moment and understands why they've had a tough time with traditional teaching.
 
OP
Z

zmotorsports

ALLIANCE MEMBER
Joined
Oct 20, 2009
Messages
21,495
Location
Northern Utah
I have two friends whom I think are like you. School was definitely NOT their thing, yet both are very smart and very capable guys. Both have educated themselves. The aspect that I find fascinating about them is that both of them are always looking for new things to learn. They do things that they haven't done before in the hope that it will teach them something new. I do that, so it's a quality that I appreciate.

That prompts a discussion about how people learn. According to my Aunt, who went as far as a Master's in Teaching, generally left-brains tend to learn bottom-up, right brains tend to learn top down. I say generally, because there are people, like her, who are cross-wired. Usually a person who is right-handed uses the left side of their brain the most. Left-handers tend to use their right side of the brain the most. Not to imply that right-handers don't use the right side of their brains or that left-handers don't use the left side of their brain, just that nether tends to use the 'off side' half as much as they use the 'on side' half. I've no idea about why being right-handed is connected to more using the left side, and vice versa.

Bottom-up is how most teaching is done because the vast bulk of the population is right-handed, so they are left-brained (mostly). All of those 'blocks' they're taught eventually form some whole picture and they're content with only knowing what they're taught and aren't worried about how it all fits together until taught how it all fits together.

Left-handed (right brained) people just can't learn that way. They need the big picture so that they can fit all of the 'blocks' into their correct places as they are learned. Being left-handed I can tell you just how frustrating it is to be taught by someone who methodically keeps handing me blocks without being willing or able to tell me where to put them.

Then we get to people like my Aunt, who is right-handed, but also right brained. Until she understood this, school was a nightmare for her. Discovery of a book called "Unicorns are Real" really helped her turn the corner and inspired her to go back to school to learn about teaching. I've mentioned the book to several friends who had children that were having a tough time in school. It has helped all of them to some degree, but one turned out to also have a same handed/brained child. I *think* that he was left/left, but it's been a while.

I'm hoping that in typing this that someone reading it gets that "AHA" moment and understands why they've had a tough time with traditional teaching.

That's interesting Thom. Never really thought about it that way, at least not that there was so much study and science behind it. I just figured being left-handed and getting all kinds of **** about it over the years meant I had a learning disability. :ROFLMAO:

I was good in school but didn't really care for it. Upon attending a couple semesters of college, I quickly learned that it was not for me. I'm glad my son went though, but then again, I don't think my wife and I gave him any choice, he was going to college come hell or high water and it wasn't open for discussion. I think it paid off huge for him and I am proud to see where he is at now in life, so much further ahead of his mother and I were at that age.

That being said, I have never been one to learn something by watching someone else or even listening to them without immediately trying it personally. Even reading something, if I don't put it into immediate action the lesson is lost on me. I need to see the big picture of what I am trying to accomplish, then go back and fill in the blanks with all of the details and then the theory usually becomes evident. Kind of bass-ackwards, but it's just how I'm wired I guess.
 
OP
Z

zmotorsports

ALLIANCE MEMBER
Joined
Oct 20, 2009
Messages
21,495
Location
Northern Utah
The wife and I took off for a week of playing in southern Utah. The week prior I had racked the Jeep in preparation for the trip and I spent a little extra time going over and inspecting suspension components to ensure everything was in proper condition. There is a trail down around Kanab called Hog Canyon that is supposed to be quite technical. Basically, it consists of a lot of twists and turns followed quickly by uphill climbs while still making the turns so off-camber and somewhat crossed up. This places enormous stress on all suspension components such as links, bushings and joints due to being fully flexed out on one end and stuffed the opposite.

Two years ago, I had a less than desirable outcome when in Montana and I broke a link right at the bushing housing and I'm afraid to say that is has made me a bit nervous or gun shy ever since. I feel that I repaired it properly even going to the extreme to wrap the bushing housing and tying it back to the link but in the back of my mind it has still made me anxious and even with the multiple off-road trips since, I don't think I have put that kind of stress on the suspension since then. Couple that with the fact that the trail descriptions and videos that I have read about Hog Canyon being one hard turn and climb after another for the first few miles I was a little apprehensive about placing this kind of continuous stress on the components. It's not like some of them where the stress is brief then nothing for a while, this was one after the other, so I was very anxious during preparation. Although I didn't mention that part to the wife, no sense in both of us being stressed. ;)


I hope everyone likes pictures because I have a metric ****-ton of them:

The morning we left home, we didn't get 20-miles south when it started to sprinkle. I generally get extremely pissed off when the coach and Jeep are clean and we hit rain before getting to our destination, but this time I tried not to let it get to me. I don't mind hitting rain on the way home because the rig will get washed before being parked anyways, but I really don't like it dirty when we arrive at our destination. The rain only lasted a few miles and didn't really get anything dirty other than the windshield.

We had a pretty uneventful drive until we were about 20 miles from Kanab on Highway 89 when the driver of this Western Express decided to choose a curve to turn around and stuck his landing gear in the asphalt resulting in the unloading of his drive axles and he was dead in the water. We arrived about the same time as the Highway Patrol but there was nothing to be done until a wrecker arrived. One by one the officers allowed a few vehicles to pass around the rear of the trailer but stopped us prior stating there wasn't enough room for our rig. I walked it and determined we could make it without hitting any trees nor the trailer and although the officer was not pleased with me, he allowed it. He did want me to disconnect the Jeep but I informed him if the coach makes it the Jeep won't have any issues and if I need to back up, I can have the Jeep disconnected in less than a minute so he let me proceed. We made it around easily with room to spare.
kanab1.jpg

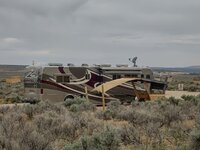
Our campsite for the week. Nice wide and long pull-outs that I was able to pull into without even disconnecting the Jeep.
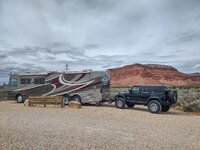
kanab2.jpg

Slides extended, Jeep disconnected and satellite dish deployed. Ready for relaxation.
kanab3.jpg

Although when we arrived it was quite chilly, being only in the 50's we had a nice cover on the curb side to relax under and perfect for viewing sunsets.
kanab4.jpg

kanab5.jpg

I got the fire pit and tank out in preparation for some sitting outside.
kanab6.jpg

The first two nights the fire was a welcomed addition as there was a chill in the air. Completely different story by the end of the week where we had to run the A/C's. :oops:
kanab7.jpg

Sunday with the threat of rain, I really didn't want to get caught off-road in unfamiliar terrain so we took a pavement day and headed into Zion NP. I think most of the western U.S. population had the same idea as I have never seen so many people in Zion NP before. It was a pleasant drive and the masses of people didn't get on my nerves too much. :bounce:
kanab8.jpg

Checkerboard mountain at the east side of Mt. Carmel Tunnel. We had a minimal wait to get through the tunnel which was odd considering the number of people including tour buses. I think going west (east side) we had less than a 5-minute wait. When we emerged from the west side the traffic was backed up three quarters of the way down the switchbacks and I mentioned to the wife that it wasn't going to be fun waiting to go the other direction. Although, after driving around a bit and sightseeing, we headed back up the switchbacks eastbound and drove right through, no wait at all. We both looked at each shocked, but delighted.

kanab9.jpg

My wife read an article about the 5 best places to have pie in southern Utah and we had eaten at a few of them over the years but didn't realize the Thunderbird Restaurant was one of them. This place is located right at the intersection of Highway 89 and state route 9 going into Zion NP at the town called Mt. Carmel. The town I think consisted of the restaurant, a couple of gas stations and a few houses. The term "town" was a bit of a stretch.

We remembered reading years ago when we were there that the family opened the restaurant in the early 30's and it is still family owned and operated. The story behind the "HO-MADE" pies was because space was at a premium for the sign and the owners were trying to control costs, so they shortened "home-made". 😆
kanab10.jpg


Stay tuned for more.....
 
Last edited:
To avoid these ads, REGISTER NOW!
Top Bottom