To avoid these ads, REGISTER NOW!

ZMotorsports Shop Projects 2.0

To avoid these ads, REGISTER NOW!

FranksGarage

New member
Joined
Jun 9, 2021
Messages
3
Congrats 🍾🎉🎊🎈 Mike and Z-Family. Being a Dad is the best job in the world as far as I’m concerned. Have to let me know how the Grandpa job is, but my own father (Grandad around here) says it’s got all the perks.
 
Last edited:

Swanny1953

ALLIANCE MEMBER
Joined
Jul 28, 2010
Messages
1,082
Location
Lucas, TX
Congrats, Mike, on the new family addition. For me, there were two (actually three) things that made me very happy - 1) Watching my wife come into her own in full grandma mode (although, woe be it to him that calls her grandma!!!); 2) Watching my kids finally grasp and understand the concept of unconditional love (I have a running dialog with both girls about loving them more - perhaps now they understand!); and 3) having 4 more young minds to be able to help mold into great kids, adolescents and adults. Having faces light up when you walk through the door and run into your arms doesn't hurt much, either! Enjoy the journey - the oldest of our 4 will be 6 in May, the youngest just turned 1 - they grow up so fast. But if your grandkids are like my daughters (and hopefully, this carries over to our grandkids), they absolutely adored their Bampa!!
Congrats, again - one of the best days in any dad's life!
 

Duker

Well-known member
Joined
Sep 25, 2010
Messages
10,868
Location
Livingston, TX
Thank you very much. Yes, everyone is well. Beyond well actually.


I am happy to announce that @ 12:12am on this morning, March 22, 2023, our grandson Max was born via C-section weighing in at 8 lbs./ 1 oz. and measured 20" in length.

It's been a rough, exhausting and emotional roller coaster ride over the past 30+ hours but everyone is doing fine and all are healthy and happy. My wife and I are beyond proud, happy and blessed to have our new addition to our little family.
Excellent news Mike and glad everyone is doing fine! So… we all know it’s coming… when do you start on the chop and lowered crib and then hot rod go cart project ? 😁
 
OP
Z

zmotorsports

ALLIANCE MEMBER
Joined
Oct 20, 2009
Messages
21,477
Location
Northern Utah
Wonderful news!! Congratulations to you all! It makes me so happy to hear of great families like yours expanding and adding more light to our world, dim as it may seem at times.

Austin, thank you for the kind words. I'm not gonna lie, having a young one brought into this shitshow of a society right now has me worried beyond belief. The ONLY thing that is bringing me peace is watching my son and DIL cherish that little guy and knowing that they are taking their responsibility of raising him right very seriously.

Congrats 🍾🎉🎊🎈 Mike and Z-Family. Being a Dad is the best job in the world as far as I’m concerned. Have to let me know how the Grandpa job is, but my own father (Grandad around here) says it’s got all the perks.

Thank you Frank. I can say so far the first week has been fantastic.

I see that this was your first post here on Garage Journal. For that I am flattered that you chose to chime in and join the conversation here on my thread. Thank you.


Congrats, Mike, on the new family addition. For me, there were two (actually three) things that made me very happy - 1) Watching my wife come into her own in full grandma mode (although, woe be it to him that calls her grandma!!!); 2) Watching my kids finally grasp and understand the concept of unconditional love (I have a running dialog with both girls about loving them more - perhaps now they understand!); and 3) having 4 more young minds to be able to help mold into great kids, adolescents and adults. Having faces light up when you walk through the door and run into your arms doesn't hurt much, either! Enjoy the journey - the oldest of our 4 will be 6 in May, the youngest just turned 1 - they grow up so fast. But if your grandkids are like my daughters (and hopefully, this carries over to our grandkids), they absolutely adored their Bampa!!
Congrats, again - one of the best days in any dad's life!

Gary, thank you very much. My wife has not been the most forthcoming in accepting the title of Grandma but she has fully embraced the role. She has made it very clear to my son and DIL that she is not to be called Grandma. Me on the other hand, at first I was kind of the same way, but now I don't care the least what he calls me as he gets older, just as long as he knows me and I'm in his life he can call me whatever he wants, except Mike.

I have to say though, watching my son be so possessive of the little tyke has been very rewarding. I've been able to get several pictures of him holding and feeding his son and I can witness the bond being made. It is so heartwarming to watch.

During a conversation last week in the hospital before he was born we were talking and I mentioned that he is about to learn what it's like to love someone more than yourself or your wife. Even though your love for your wife may be strong there is something about addressing the needs of a baby that relies on your for everything for the first bit and that bond is stronger than I can describe. It is to be cherished.

I also mentioned that as a parent you never quit worrying. Not when they're 3-days old, 3-months old, 3-years old or even 30-years old, you always worry about them and their well being. I think he is finding that out.

Excellent news Mike and glad everyone is doing fine! So… we all know it’s coming… when do you start on the chop and lowered crib and then hot rod go cart project ? 😁

Thanks Duke. Not sure if you've been following along but a few pages back I started working on a Radio Flyer Wagon project for him so that will have to suffice for a bit before we move to motorized toys. :LOL:
 
OP
Z

zmotorsports

ALLIANCE MEMBER
Joined
Oct 20, 2009
Messages
21,477
Location
Northern Utah
I hope everyone bears with me over the next several posts as they will be picture heavy.

Not sure what lit the fire under my *** but I am now in full-steam ahead mode on my grandson's Radio Flyer Wagon project.

First things first however. As Friday night was the first night I spent in the shop after my grandson's birth I had to address the highest priority item.
max1.jpg

max2.jpg


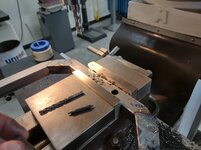
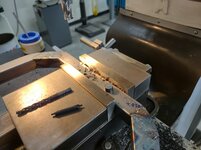
Next was to pick up where I left off on the Radio Flyer project. I started by cranking up the tunes followed by figuring out how to hold the frame horns in the mill vise to allow me to cope them at the correct angle for the front crossmember.

Once I coped the front frame horns I figured I had better drill the holes in the chassis to mount the tub before I grafted the frame horns onto the chassis as it would be less manageable having the frame horns on it.

Here I drilled and used an end mill to size the holes to .625" for the slugs to be pressed in and welded once I thread them.
rf84.jpg

The .625" round stock was a nice fit. I will drill and tap them and cut to length to allow them to press into the holes and weld flush.
rf85.jpg

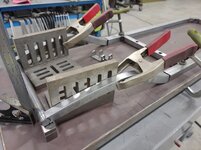
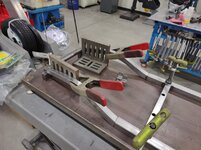
With the body mounting holes drilled I moved on to centering the chassis on the fixture table and then measuring, measuring and more measuring to get the frame horns positioned.
rf86.jpg

More fine tuning of the fitment.
rf87.jpg

Once I got the fitment nearly spot on by moving the large angle plates I focuses on the angle of where the frame horns will marry to the main chassis and started finessing the fitment.
rf88.jpg

Everything clamped down and ready to start tacking into position.
rf89.jpg

In order to have the frame horns solidly grafted to the chassis I opted to use internal fish plates to carry some of the load and not rely solely on **** joints.
rf90.jpg

rf91.jpg

The internal fish plates welded to the frame horns and now the fitment to the main chassis can be done for the last time before welding.

Stay tuned for more pictures to follow......
 
OP
Z

zmotorsports

ALLIANCE MEMBER
Joined
Oct 20, 2009
Messages
21,477
Location
Northern Utah
Continuing on.....

Next was to prep the main chassis to receive the frame horns by drilling holes for the Rosette welds of the internal fish plates as well as adding a small chamfer to the leading edges of the main chassis rails.
rf92.jpg

Deburring the inside of the drilled holes.
rf93.jpg

More measuring to ensure the frame horns are perfectly centered on the chassis table and equally spaced inward at the front pinch.
rf94.jpg

At the joint between the frame horns and the main chassis rails I shifted the frame horns to the inside of the frame and to the top edges. This will allow a small tapered transition from the main frame rails to the frame horns as that is where the narrowing begins. Here I tack welded the frame horns to the chassis rails as well as tack welded the front crossmember to the frame horns where the angled cope joint is.
rf95.jpg

With the right side tack welded it was time to match it at the left side.
rf97.jpg

Frame horns both tack welded and the heavy angle plates removed.
rf98.jpg

Checking the level of the frame and frame horns.
rf101.jpg

As well as the front crossmember. Everything is level, plumb and square.
rf102.jpg

Someone commented on my cordless foot pedal for my TIG welder a few weeks ago so I thought I'd shoot a picture and show how nice it is to have not only long enough ground and power cables for the TIG to reach all the way over to the bike lift but also not to have to drag a foot pedal cable around. Being able to move from the lift table to the fabrication table without moving the TIG welder is a real convenience and time save. At my last shop I had the same layout and it worked great when fabricating sand drag chassis on the bike lift and then smaller fixtures on the fabrication table but in this shop it is even nicer because I have a bit more space between them.
rf96.jpg

Stay tuned for more pictures....
 
OP
Z

zmotorsports

ALLIANCE MEMBER
Joined
Oct 20, 2009
Messages
21,477
Location
Northern Utah
Continuing on.

Clamps removed and ensuring the frame isn't twisted or have any stress induced into it. Still sitting flat on the fixture table and the 1.5" blocks at the nose.
rf103.jpg

Moved over to the fabrication table and clamped into place to start final welding.
rf105.jpg

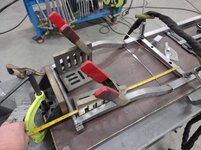
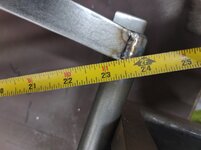
Once the frame horns are welded at the joint and at the front crossmember I ran a tape measure diagonally to ensure the chassis is square. 23-3/8" to the inside edge at the front crossmember in one direction.
rf99.jpg

And the same 23-3/8" in the opposite direction. Dead nuts on.
rf100.jpg

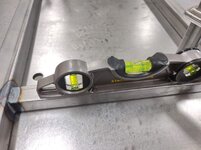
Middle crossmember level.
rf110.jpg

And front crossmember level.
rf111.jpg

Top weld at the juncture between the main chassis rails and the front frame horns.
rf106.jpg

Top weld at the front crossmember.
rf107.jpg

More pictures to follow....
 
OP
Z

zmotorsports

ALLIANCE MEMBER
Joined
Oct 20, 2009
Messages
21,477
Location
Northern Utah
Last set of pictures for this round.

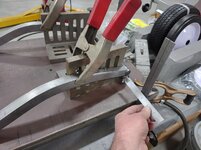
Now with the top and inside of each joint welded it was time to turn the attention to the bottom and outside of the frame rails to work on the narrowing or pinching of the frame rails to meet the frame horns. A slit was made along the bottom of each side and then the chassis could be clamped together to create the transition area.
rf112.jpg

Slits welded back together.
rf113.jpg

Then the outside of the frame could receive the same process to bring the outside rail in to meet the frame horns.
rf114.jpg

Outside edge slit welded up.
rf115.jpg

Looking down the chassis this shows the narrowing in more detail and demonstrates the effects I was after.
rf117.jpg

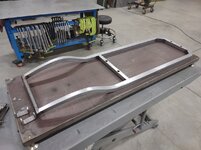
After a little grinding and metal finishing the main frame/chassis is complete.
rf118.jpg

I'm pretty please with how that chassis turned out and should only require a very small amount of filler in a few spots before moving to primer.
rf119.jpg

Tub or body test fit back on the chassis.
rf120.jpg


Thanks for looking.
 

SilverJimmy

Well-known member
Joined
Apr 14, 2012
Messages
1,688
Location
Prescott/Flagstaff, AZ
Max’s first Hot Rod is looking sweet! The wife and I are down in Phoenix at Wild Horse Pass/Firebird Drag Strip. Don’t need to crank the tunes cuz all the Nitro teams are testing after the race and we’re getting Nitro music played for us! Sweetest 10,000 HP tunes you’ll hear!
 

WoodsTruck

Well-known member
Joined
Jan 12, 2013
Messages
1,028
Are you planning on a flag mount somewhere on the chassis?
Looks like a wagon just made for a Fourth of July parade...
 

Jayman17

Well-known member
Joined
Feb 6, 2017
Messages
3,820
Location
Seattle, Wa
Mike, that’s pretty slick how you transitioned the frame horns to the chassis. I appreciate you posting the process, I was wondering how you were going to smooth out the differences between tube sizes. Seems like I learn something new every time I read your thread.
Also learned about fish plates, going to have to remember that method. 👍

Brilliant idea to start the door trim growth chart with the birth length! 😂
 

Transcraft

Active member
Joined
Jun 28, 2014
Messages
27
Congratulations on grandson mine is 8 months old. Nothing like it. Just caught up on your thread lot of great stuff. Ironically 2 of my vehicles are a 2011 Jeep and a 2005 GMC 2500 duramax. Love the detail
 
To avoid these ads, REGISTER NOW!
OP
Z

zmotorsports

ALLIANCE MEMBER
Joined
Oct 20, 2009
Messages
21,477
Location
Northern Utah
Mike, that’s pretty slick how you transitioned the frame horns to the chassis. I appreciate you posting the process, I was wondering how you were going to smooth out the differences between tube sizes. Seems like I learn something new every time I read your thread.
Also learned about fish plates, going to have to remember that method. 👍

Brilliant idea to start the door trim growth chart with the birth length! 😂

Thank you. I had envisioned a smooth transition from the frame rails to the front frame horns but didn't really have a plan in the beginning. I knew I wanted to prevent a more "bulky" transition so making pie cuts to narrow actually worked out quite well. I'm pretty pleased with the way it turned out considering it was an on the fly decision.


Congratulations on grandson mine is 8 months old. Nothing like it. Just caught up on your thread lot of great stuff. Ironically 2 of my vehicles are a 2011 Jeep and a 2005 GMC 2500 duramax. Love the detail

Thank you for taking the time to catch up and for following along. Nice choice on vehicles, but I may be a bit biased. ;)

Congratulations on your new grandson!!
great work on the wagon !! I’m sure all the other pare and grandparents will have wagon envy!!

Don't know about wagon envy as it is quite a bit of work. Hope it's a head turner when they're using it...:bounce:
 
OP
Z

zmotorsports

ALLIANCE MEMBER
Joined
Oct 20, 2009
Messages
21,477
Location
Northern Utah
On another note, a couple of weeks ago I had posted a few pictures of a records book/photo album that I started on our 2013 Camaro. I thought I'd document this vehicle a bit different than others in the past and keep everything in a 3-ring binder along with mods/upgrades, repairs as well as general routine maintenance items. I also printed off all of the purchase documents from when the wife and I purchased the car as the second owner. Over the past couple/few weeks I have been trying to obtain the original build sheet and if possible, a duplicate window sticker to keep with my records. My hopes are to someday hand the car and all documentation down to either my son or grandson and I just figured it may have a bit more sentimental value if I have all of the documentation I could possibly acquire and/or provide.

After too many emails to count bouncing between department and department, person and person at General Motors I was finally able to obtain the documents I desired with the build sheet for my particular VIN#. The only document I was unable to obtain was the window sticker as I am being told that as of mid-year 2021 it is unlawful to duplicate such document. Not sure why but that is what I am being told.

I received an email this morning with the original build sheet along with a breakdown of the VIN# and they even included a nice color copy of the original 2013 Chevrolet Camaro brochure, which will be cool to keep in the binder.
 

LXCam

ALLIANCE MEMBER
Joined
Apr 23, 2013
Messages
19,206
Location
AZ
My wife has never understood my obsession with neatly folding up the window sticker and sticking in the manual folder in the glove box Mike.

"It's a man thing honey.....ya don't need to understand" :)

I certainly admire your dedication to keeping all those records as I'm just not that into it for my daily drivers. The only ride we got in the stable that has a mass of documentation is the kids 69 bird. That one is worth the effort.
 
OP
Z

zmotorsports

ALLIANCE MEMBER
Joined
Oct 20, 2009
Messages
21,477
Location
Northern Utah
My wife has never understood my obsession with neatly folding up the window sticker and sticking in the manual folder in the glove box Mike.

"It's a man thing honey.....ya don't need to understand" :)

I certainly admire your dedication to keeping all those records as I'm just not that into it for my daily drivers. The only ride we got in the stable that has a mass of documentation is the kids 69 bird. That one is worth the effort.

I've never purchased a new vehicle Cam, so I guess I can only assume these elusive window stickers exist. :ROFLMAO: I guess I have also never had the desire or even thought about what it would mean to hand a vehicle down so I haven't seen the benefit. However, the past several months activities, more specifically the past week's, have altered my thinking a bit when it comes to the legacy I want to leave behind.

As for records, I keep pretty decent records for my daily drivers but they are just small notebooks where I track service intervals and repairs as well as keep part numbers for future reference. In all honesty, I probably should have done a better job of documenting my Jeep build. I have it all between a file in my shop and a small pocket notebook in the glovebox but I should have done something much more detailed and broken out by sections such as I am now doing with the Camaro. I don't think the mods to the Camaro will be anywhere near as extensive as the Jeep but I was just thinking it would possible have some sentimental value to either my son or grandson someday along with some photographs of the mods/repairs.
 

4 FN 27

ALLIANCE MEMBER
Joined
Oct 19, 2015
Messages
4,635
Location
Minnesnowta
I've never purchased a new vehicle Cam, so I guess I can only assume these elusive window stickers exist. :ROFLMAO: I guess I have also never had the desire or even thought about what it would mean to hand a vehicle down so I haven't seen the benefit. However, the past several months activities, more specifically the past week's, have altered my thinking a bit when it comes to the legacy I want to leave behind.
Mike you might try this if you want a copy of the build sheet for your Camaro:

"Reach out to [email protected] and provide them your name and vin, and let them know you are looking to get your build sheet for your car (I also told them the year, make, model, and trim just to play it safe...but probably not needed).

Got my build sheet today. I learned this from a corvette forum, and thought I'd give it a shot for the Z/28, and low and behold, it worked
!"

I copied this from CAMARO5.com

When the Z28 was delivered to the dealer I didn't let them PID car. We pushed it right into the trailer and I hauled it back to the shop.

Was able to keep all the items that came with the car. Tags, Labels, Covers, Spring Spacers and most importantly the Window Sticker and 3 copies of the Build Sheet that the car came out of the factory with.

1 of 4 Ashen Grey Metallic Z28's with AC and Stereo Delete.

IMG_3013.JPG
 
OP
Z

zmotorsports

ALLIANCE MEMBER
Joined
Oct 20, 2009
Messages
21,477
Location
Northern Utah
@4 FN 27 Pat, I've already received my build sheet but [email protected] is the email I used. Like you, I also obtained it from the camaro5.com forum a few weeks ago. The woman who responded from that email address is the one who told me that as of mid-2021 they can no longer lawfully provide the window stickers but she referred me to another department (archive dept.) @ General Motors to obtain the build sheet, [email protected]. After a couple more emails I was given another email of a third party company with instructions on how to contact, purchase and obtain the documents I was inquiring about for my specific car by VIN#. That third party company (Allied-Vaughn) is where I ended up obtaining my build sheet as well as the VIN# deciphering documents and the colored 2013 Camaro brochure. They also informed me that a duplicate window sticker is unobtainable, but I at least got the build sheet which is what I really wanted.

Thanks.
 
OP
Z

zmotorsports

ALLIANCE MEMBER
Joined
Oct 20, 2009
Messages
21,477
Location
Northern Utah
Last night it was service mode in the shop.

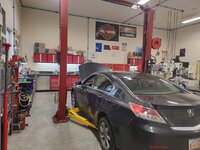
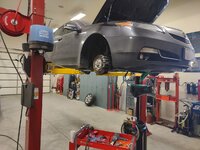
I pulled the wife's daily into the shop to perform a LOF service as well as transmission fluid service, battery test, tire rotation and generally give the car a good once over by putting eyes and hands on things, paying special attention to suspension components, exhaust system, rubber components such as hoses and bushings, brakes and looking for anything out of the norm such as fluid traces/leaks.

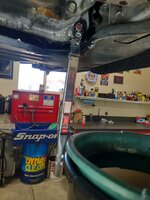
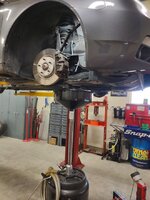
The car racked, tires/wheels removed and wheeled to the new locations and transmission drain plug removed to allow the fluid to drain.
tl1.jpg

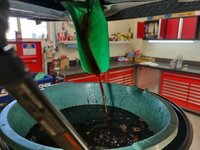
Transmission fluid actually looked quite good as it was draining. Still red and no foul odor indicating overheating. I drain and refill transmission fluid about every third engine oil service as I can only get about half out at a time.
tl2.jpg

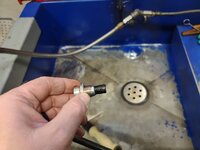
Drain plug had very little debris on the magnet which is a good sign. Some is normal but what you don't want to see is chunks of metal or heavy filings resulting in more of a thick paste.
tl3.jpg

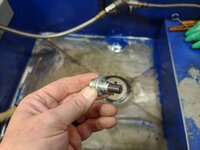
Transmission drain plug cleaned and ready for reinstallation.
tl4.jpg

Transmission drain plug gets torqued to 36 ft/lbs.
tl5.jpg

Next was to drain the engine oil, install a new crush washer on the drain plug and torque the oil pan drain plug to 29 ft/lbs. and then replace the oil filter.
tl6.jpg


More pictures to follow.
 
OP
Z

zmotorsports

ALLIANCE MEMBER
Joined
Oct 20, 2009
Messages
21,477
Location
Northern Utah
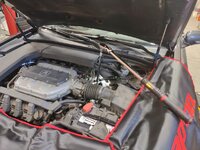
Continuing on with the Acura's LOF service.

After everything under the car is completed the tires/wheels are reinstalled and lugnuts run down by hand with a speeder. Then the car is lightly set down onto the tires to prevent them turning while I torque them to spec. but not the full weight of the car yet.
tl7.jpg

Fender covers are placed on the car and then transmission fill plug is removed. It is helpful on this particular model to move one of the coolant hoses out of the way slightly by removing it from the plastic retainer. This allows easy access to the fill plug that requires a 17mm socket to remove.
tl8.jpg

Removing the transmission fill plug. Be mindful of the washer so that you don't drop it into the black hole.
tl9.jpg

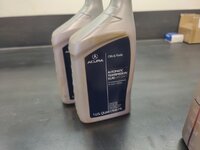
Fresh transmission fluid is at the ready.
tl10.jpg

Once filled, reinstall the fill plug and torque to 33 ft/lbs. Don't forget to replace the coolant hose back into the plastic clip when finished.
tl11.jpg

Lastly, before the test drive I confirmed the tire pressures were accurate.
tl12.jpg

That's it for the car's service. Should be good for a few more months now. Other than it definitely needs a thorough detailing once the weather breaks. Usually this time of year during the spring service I give it a thorough cleaning inside and out as well as the engine bay but we are still in the middle of winter storms this year so it may have to wait a few more weeks before the cleaning.

Thanks for looking.
 

sanddan

Well-known member
Joined
Jul 7, 2005
Messages
708
Location
Oregon
Thanks. As I get more seat time I find myself liking it more and more. I am still happy I went with the Acme seat stem as it is very smooth and convenient to pivot around to the TIG welder without having to have the casters roll in an arc. One thing I can say with 100% certainty is that it is stable as hell. I have found myself putting it through the testing phase by rolling from the fabrication table to the bike lift where the wagon is on the fixture for test fitments and measurements and it continues to please me with how smooth and stable it is. I generally don't wheel around the shop like that but figured if I'm going to test it out I may as well give it the full test.

This has been a strange and odd week so I haven't been in the shop but I am looking forward to getting back out in the shop and getting more seat time and hood time doing more welding and fabrication as I go full steam ahead on the wagon project. :D
Mike, I’ve been looking at the Vyper chairs for awhile now. Due to knee problems I can’t stand very long and it’s been keeping me out of the shop. Especially machining work. I’ve been using a cheap wood stool, $9.99, at the welding table but it’s not tall enough to use at the lathe. For me I would get both heights of Vyper nd use the shorter one at the welding table and the taller one when running the lathe and mill. I think I would be adjusting them fairly often and was going to get the quick adjust until reading your comments. Would you still prefer the acme threaded one if you needed to adjust the height every other time it was used? I would also use it when working on a vehicle on the lift, I’m currently replacing the PTO clutch on my mower and would love to be able to get off my knees doing it. My current stool is right between the height of the 2 Vyper’s so I would have to get both. The price is the only thing holding me back. And congrats on the new grandson.
Dan
 
OP
Z

zmotorsports

ALLIANCE MEMBER
Joined
Oct 20, 2009
Messages
21,477
Location
Northern Utah
Mike, I’ve been looking at the Vyper chairs for awhile now. Due to knee problems I can’t stand very long and it’s been keeping me out of the shop. Especially machining work. I’ve been using a cheap wood stool, $9.99, at the welding table but it’s not tall enough to use at the lathe. For me I would get both heights of Vyper nd use the shorter one at the welding table and the taller one when running the lathe and mill. I think I would be adjusting them fairly often and was going to get the quick adjust until reading your comments. Would you still prefer the acme threaded one if you needed to adjust the height every other time it was used? I would also use it when working on a vehicle on the lift, I’m currently replacing the PTO clutch on my mower and would love to be able to get off my knees doing it. My current stool is right between the height of the 2 Vyper’s so I would have to get both. The price is the only thing holding me back. And congrats on the new grandson.
Dan

Thanks Dan.

I looked at their package deal as they had a promo shaving $200 off compared to buying them individually so if you are looking at both heights I would definitely lean towards their package deal and save a few bucks. I very briefly looked at their package deals but I already have several taller bar stool style chairs and don't like wheels on the taller bar stools so I was set in that department. Plus I was already squeamish about the price for one, let alone two. :LOL:

As for the Acme vs. the quick height adjustment, for my application I am glad that I went with the Acme thread. Over the past couple of weeks I have adjusted it a few times based on what I was working on at the time and it is a relatively quick spin of the seat a few revolutions in each direction so not terrible. I feel the couple weeks that I've had and used the Vyper stool that it has been a good representation of a "normal" workload in the shop so I see this trend of minor adjustments and few and far between to be what to expect going forward.

If you feel that you will be adjusting more frequently or more variation in heights then it may be worth the extra $30 for the convenience of the quick adjustment setup. Also keep in mind that if you want to have the stool in its lowest height that you give up about 4 inches with the quick height adjustment, so it you're trying to get the stool as low as possible the quick height adjustment makes you forego those 4 lowest inches. I think for the Acme thread the seat height will vary from 15" to 24" whereas with the quick height adjustment the lowest setting is about 19". For my welding setup it was more wanting to have the ability to spin around on the stem of the chair than the $30 upcharge for the quick adjustment. Let's face it, once you spend over $500 on a stool what's another thirty, right? :bounce:

Now that I have more seat time and find myself spinning around to touch up my tungsten I am glad I don't have to turn the wheels each time or twist in my seat as the Acme thread stem spins so freely. Again, that is just my personal use and yours may be completely different Dan.

Sorry to hear about your knee problems limiting your shop time Dan. That ***** as I'm sure you're anxious to use those awesome machining tools and be in your shop. Hope you and your wife are still able to get out and use your coach as well.
 
OP
Z

zmotorsports

ALLIANCE MEMBER
Joined
Oct 20, 2009
Messages
21,477
Location
Northern Utah
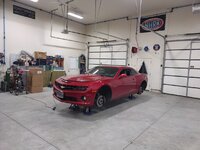
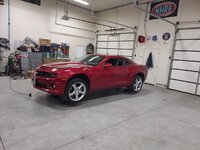
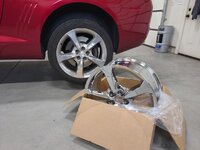
My new wheels arrived for the Camaro yesterday so I put the car on jackstands and removed the tires/wheels in preparation to have the wheels swapped around. If the weather will cooperate this weekend I would like to get them swapped around so I can get the OEM wheels packaged up and sent back. Wouldn't ya know it we have snow again this morning. :rolleyes:

Car cover removed and on jackstands ready to pull tires/wheels.
wheels1.jpg

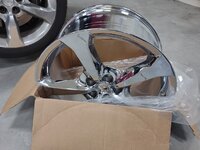
I opened up each box to ensure the wheels were undamaged and get a glance at the awesome chrome work.
wheels2.jpg

Beautiful chrome job and should really pop on the car, especially after I polish the paint out.
wheels3.jpg

Looks a little sad sitting there, like it was left in the hood unsupervised. :ROFLMAO:
wheels4.jpg

Tires/wheels ready to load up and take to the tire shop once the weather clears.
wheels5.jpg

Thanks for looking.
 
OP
Z

zmotorsports

ALLIANCE MEMBER
Joined
Oct 20, 2009
Messages
21,477
Location
Northern Utah
I like them Mike! They sure do “pop” well!

Thanks. I've been going back and forth since we purchased the car last summer on what to do as far as wheels. I wasn't really finding anything I liked aftermarket that made the statement I wanted and I really like the OEM wheel design, just not the painted finish nor the curb rash from the original owner. ;) I found a company that has an exchange program for the exact same OEM wheels but they polish and treat them to a high quality chrome plating and then take your OEM ones back in exchange, even with a little curb rash. With nicer weather right around the corner (I hope) I thought I'd pull the trigger on the wheels and get the car ready to knock down some miles this summer.

:3gears:
 
To avoid these ads, REGISTER NOW!
Top Bottom