To avoid these ads, REGISTER NOW!

ZMotorsports Shop Projects 2.0

OP
Z

zmotorsports

ALLIANCE MEMBER
Joined
Oct 20, 2009
Messages
21,495
Location
Northern Utah
I have a big paved drive area like yours at my place in Northern Wisconsin. We get a lot of snow there.

I use a 42" Manplow and it works great. I push everything to the outer edges and then just make 1 or 2 passes around the perimter edges with the snowblower. Keeps me from having to double or triple blow snow to get it off the pavement. I can clear the drive in a fraction of time this way versus just using the blower only.

With the optional Power-U handle you can really lean into it and push a bunch of snow. Especially if it is cold and light snow.

Manplow

Yeah, pushing one or maybe even two inches of light and dry stuff across 72' of concrete is doable, however, when that 2 inches is wet and heavy or it's 4+ inches there's not way a shovel works, I've tried it. That's when the only course of action is firing up the snowblower. My wife will sometimes come out and help go around the edges to push the furrows back into play but it's still quite a lengthy process having to throw it three times when we much more than a couple of inches.
 
To avoid these ads, REGISTER NOW!
OP
Z

zmotorsports

ALLIANCE MEMBER
Joined
Oct 20, 2009
Messages
21,495
Location
Northern Utah
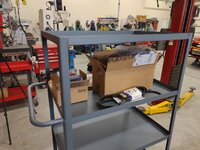
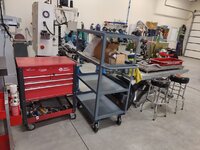
Added another piece of equipment to the shop last night, a Durham 4-shelf roller cart w/3k pound capacity (750-pounds per shelf).
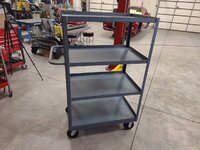
cart1.jpg

For many years now, especially in old shop, I have been frustrated when I have a major repair that I'm working on and I have to scatter parts for the car I'm working on all over the shop amongst the fabrication table, bike lift and especially taking up valuable real estate on the workbenches. Another space eater is when collecting parts for an upcoming project as I will have parts sitting on the same workbenches, lift table and lastly on the fabrication table, then when I have to move parts to use the fabrication table or workbench it gets to me. In the last shop I simply didn't have any other options as I was plumb out of space. However, for the past several years in the new shop I've been contemplating picking up some form of mobile shelving or cart in which to use where I could store parts for long term projects and better yet, when I'm tearing down a car I can wheel it right next to where I'm working and stack the components on the shelving as they're coming off the car, then move the cart out of the way until they are ready to be reinstalled onto the car.

I have kept putting it off over and over again but last month when I was rebuilding the turbo on my Duramax and had parts scattered around the shop my wife came in and make the comment about having parts all over the place. I had mentioned what I had envisioned for a rolling cart or shelf and she just told me to quit messing around and buy one or build one. So I did some research and found one that would suit my needs and ordered it. It took a few weeks but I got the call yesterday from my local Grainger stating it was in so I stopped on my way home and picked it up.

It's nothing special but I have been pleased with the other Durham products that I have in the shop and although my local Graingers was a few bucks more than I could have gotten it online, I was able to actually save some money by having it shipped directly to my local branch there was no freight tacked on so I ended up getting it for less than anywhere I found online and it seem to be a nicely built piece of equipment.


Here are some parts that I have collected for some upcoming work on our coach and I keep moving them around between the bench next to the lathe and the bench under the radio/shelf and the fabrication supply cart. When I have needed to get into the fab. cart to get Roloc's or hole saws I have to move them then put them back. Now that is a thing of the past as I can store such items on the mobile shelf until they're needed.
cart2.jpg

cart3.jpg

Space is still at a premium in the new shop but it will be more easily rolled around out of the way if/when needs be.
cart4.jpg


Thanks for looking.
 
OP
Z

zmotorsports

ALLIANCE MEMBER
Joined
Oct 20, 2009
Messages
21,495
Location
Northern Utah
Mike, I wholeheartedly agree, you should have purchased that cart looooooong ago. Sometimes I wonder if you like little frustrations.

(Just kidding)

:beer:

Gotta get those little jabs in don't ya Dan???? :ROFLMAO:

Although maybe there's some truth to that as it seems I don't do anything on impulse. I have to think **** to death and then mull it over and over and over again in my head before I make a decision. :unsure:
 
OP
Z

zmotorsports

ALLIANCE MEMBER
Joined
Oct 20, 2009
Messages
21,495
Location
Northern Utah
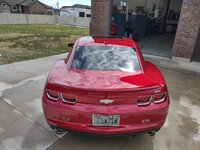
Got another third of the Camaro polished last night. I hope everyone likes pictures as I have a LOT of them to share.

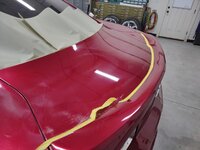
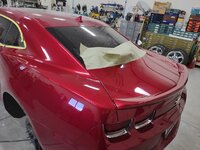
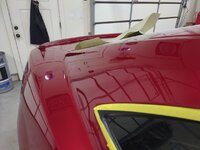
The deck lid had quite a lot of scratches in the clear plus a few on the rear spoiler. Masking helped keep the compound out of the nooks and crannies. The heavy swirl marks show how aggressive I was getting with the compound and polisher. I started out with the Milwaukee cordless polisher thinking not having the cord would be a benefit but I was so disappointed in its performance that I switched right back to the old tried and true Buffmaster.
paint30.jpg

Second step started bringing the depth back and removed the heavy swirl marks.
paint31.jpg

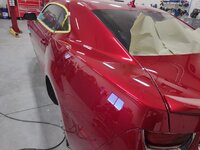
First step on the left rear quarter.
paint32.jpg

Even with the heavy swirl marks the depth is starting to show.
paint33.jpg

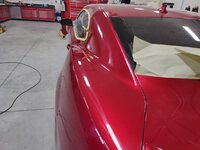
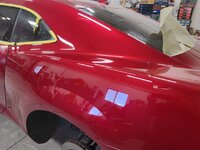
First step of compound and white wool pad on the right rear quarter shows the same. This side was actually a bit worse than the left side as far as deep scratches on the upper horizontal part of the quarter and several deep scratches on the lower sail panel.
paint34.jpg

There were a lot of scratches along this area.
paint35.jpg

Left side step #2 progressing nicely. Swirl marks starting to disappear.
paint36.jpg

Starting the third step now and the deck lid is looking fantastic.
paint37.jpg

I love this GM Crystal Red Tintcoat color found on these GM cars. I've sprayed a lot of candies in my days and this color is about as close as you're going to get without actually shooting a multiple pass candy apple red.
paint38.jpg

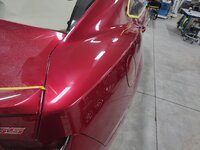
Third pass on the right rear quarter starting to really come alive.
paint39.jpg

More pics to follow....
 
OP
Z

zmotorsports

ALLIANCE MEMBER
Joined
Oct 20, 2009
Messages
21,495
Location
Northern Utah
Third step completed and this shot really shows the depth and clarity of the paint. This was one of the worse areas of the car as far as scratches.
paint41.jpg

Left rear third step completed as well.
paint42.jpg

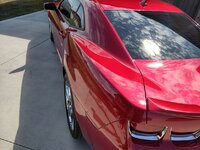
Sail panel and quarter on driver's side.
paint43.jpg

Even the blue sky and clouds out the window are clearly visible.
paint44.jpg

Once the rear third of the car was completed I thought I'd throw the tires/wheels on so I could set it down off the jackstands. Here's a few teaser shots with the tires/wheels.
paint45.jpg

paint46.jpg

paint47.jpg


Sorry for all the pictures but I am pretty pleased at how she's turning out.

All that is remaining is the roof and the top of the doors from the body line upwards. Then it can be backed out and a thorough wash/detail job and it's ready for the road.

With the beautiful weather that we are supposed to have this Easter weekend I hope to be able to get it done Saturday and put some miles on her.

Thanks for looking.
 

Graham08

Well-known member
Joined
Dec 10, 2007
Messages
713
Location
Iron Station, NC
We use those carts quite a bit at work. They're super handy for keeping all the parts that go with a car together and mobile as it moves through the shop. Nice add to your shop!
 

SilverJimmy

Well-known member
Joined
Apr 14, 2012
Messages
1,696
Location
Prescott/Flagstaff, AZ
So you show us that real cool cart yet you don’t give us a model number?! How are we supposed to “Be like Mike” and make sure we get the good stuff? Cart looks very nice, I like that it’s a welded together cart and won’t rattle apart. I can really see it’s value in a shop.

Quick question on your mill. I just got mine finally powered up and am contemplating making some chips soon. My mill is placed similar to yours, facing my lathe, out away from any walls. I’m just wondering if or how you control chips being thrown all over your shop. My mill is within 8’ of my tool box and I’d hate to have chips getting into the drawers. Am I over thinking this, or should I consider placing screens around the mill when I’m running it? Thanks again for your input and also your help in spending my cash!
 
OP
Z

zmotorsports

ALLIANCE MEMBER
Joined
Oct 20, 2009
Messages
21,495
Location
Northern Utah
We use those carts quite a bit at work. They're super handy for keeping all the parts that go with a car together and mobile as it moves through the shop. Nice add to your shop!

Thanks Graham. I waffled over this for a bit and my intended use is exactly what you described so I'm glad to hear it works well for that.


Mike - That is looking incredible! You do great work and should be extremely pleased with the results.
Thanks for sharing. Never too many pictures.
Mike

Thanks Mike. I appreciate the comments and thanks for continuing to follow along on my thread.

Those chrome wheels look so damn good, I think they are perfect for that car! Love it!

Thanks Zip, I agree. I think it has the perfect ratio of paint to brightwork. Just enough to add that kustom or hot rod look yet not so much to make it look gaudy. Thanks for the comments.
 
OP
Z

zmotorsports

ALLIANCE MEMBER
Joined
Oct 20, 2009
Messages
21,495
Location
Northern Utah
So you show us that real cool cart yet you don’t give us a model number?! How are we supposed to “Be like Mike” and make sure we get the good stuff? Cart looks very nice, I like that it’s a welded together cart and won’t rattle apart. I can really see it’s value in a shop.

Quick question on your mill. I just got mine finally powered up and am contemplating making some chips soon. My mill is placed similar to yours, facing my lathe, out away from any walls. I’m just wondering if or how you control chips being thrown all over your shop. My mill is within 8’ of my tool box and I’d hate to have chips getting into the drawers. Am I over thinking this, or should I consider placing screens around the mill when I’m running it? Thanks again for your input and also your help in spending my cash!


Sorry Sterling. The cart is made by Durham and the model # is RSC-2436-4-3K-95. I purchased the 4-shelf, 3k pound version that measures 36"x24" made of 14-gauge welded steel. They make a couple different versions as well, such as 5 or 3 shelf, as well as 48"x24" and various weight capacities. I figured my needs to fit the 4-shelf as the distance between the shelves was 14.75" and hold 750 pounds per shelf which should be perfect for my needs. I also like that fact that it is welded together vs. bolted but that point is probably negligible.

As for the overall quality of the Durham, I am pleased with it. The casters seem nice quality and the cart doesn't rock like the legs are unequal length so it is very solid feeling. I looked at others that were either more expensive and several that were less expensive and feel this was a nice quality for the money. I have other Durham components in the shop and have been just as pleased with them over the years so I felt comfortable with this cart for the money.

As for my milling machine, I don't have an issue with chips and mine is actually closer than 8' from my toolbox, probably closer to 5' but I'd have measure as I don't think I've ever thrown a tape measure at it. I haven't gotten any chips in my toolbox but they will accumulate around the bottom near the closer side. I also don't have too big of a problem with it throwing chips and in those few rare times when I'm running at higher speeds and slinging chips, usually with aluminum, I will take a piece of cardboard and hold it up on the side while machining but that has been very infrequent. My workbench is just across from the mill and I haven't gotten any chips on the workbench surface either. Just thinking about it I wonder if it has to do with using a thicker sulfur based cutting oil that aids in keeping the chips knocked down. Not sure if that plays a factor in it or not just throwing that out there.
 

Monza Harry

Well-known member
Joined
Dec 29, 2018
Messages
1,433
Location
Windsor ON
At the last place I worked they had the 3 shelf [18" X 36" X 36" tall IIRC] and I can confirm Durham builds a quality product for sure. Ours ended up with a 1/4" rubber mat on top great for some secondary op's. As for projectile chips, turn the handle faster for more distance! LOL! Harry
 
OP
Z

zmotorsports

ALLIANCE MEMBER
Joined
Oct 20, 2009
Messages
21,495
Location
Northern Utah
Wow, beautiful results on your paint correction Mike!

Thank you. I appreciate that.

Now I'm trying to decide if I should install the OEM GM rock guards on the front and rear to help protect the paint from any more rock chips. I'm not a fan of rock guards on sports cars but the factory GM ones look pretty nice and if I'm going to add any I would rather add OEM ones to keep the paint looking good for as long as possible, especially where I plan on racking up the miles on this car vs. a street rod that gets driven around town from car show to car show. I would like to keep the rock chips at bay and can tolerate the rock guards for paint preservation.
 

OutlawDrifter

Well-known member
Joined
Jan 20, 2015
Messages
3,905
Location
KS
Mike, my Z28 had GM white splash guards (with a black Z28 emblem) on the back when I bought it. They both broke in the severe cold after being loaded on a trailer. If I could stomache the $300 to replace them (they are NLA, and can only be found NOS), I would, but the price keeps me from doing it.
 
OP
Z

zmotorsports

ALLIANCE MEMBER
Joined
Oct 20, 2009
Messages
21,495
Location
Northern Utah
Mike, my Z28 had GM white splash guards (with a black Z28 emblem) on the back when I bought it. They both broke in the severe cold after being loaded on a trailer. If I could stomache the $300 to replace them (they are NLA, and can only be found NOS), I would, but the price keeps me from doing it.


Thanks for the comment Marc. I actually just pulled the trigger. I found a set of OEM GM ones last night while searching and the price was quite a bit less than my local dealership wanted so I snagged them I will have to paint them but I may know someone who can do that. ;)

I was really torn because I don't particularly care for the looks, I guess they're ok, but I don't want any more rock chips than its already got. The girl has wide hips and the lower louvers just below the body line in front of the rear tires on the rear quarters both have some small rock chips so I want to keep them from getting worse and I do plan on piling the miles up over the years.

Thanks again for letting me know I'm not alone in my thoughts.:unsure:
 
OP
Z

zmotorsports

ALLIANCE MEMBER
Joined
Oct 20, 2009
Messages
21,495
Location
Northern Utah
Well, so much for the rock guard idea on our Camaro. I received an email earlier today stating that the OEM rock guards that they said they had in stock are not in stock after all and in fact, they've been discontinued from GM. I cannot even purchase plain ones that need to be painted so my only option is aftermarket and I haven't seen any that I like. Well ****.... 🤬
 

Finallygotit

ALLIANCE MEMBER
Joined
Jul 6, 2013
Messages
4,103
Location
Tucson, AZ
Well, so much for the rock guard idea on our Camaro. I received an email earlier today stating that the OEM rock guards that they said they had in stock are not in stock after all and in fact, they've been discontinued from GM. I cannot even purchase plain ones that need to be painted so my only option is aftermarket and I haven't seen any that I like. Well ****.... 🤬
How about a tour of a local bone yard to peruse their inventory?

Just a thought..............

:beer:
 
To avoid these ads, REGISTER NOW!
OP
Z

zmotorsports

ALLIANCE MEMBER
Joined
Oct 20, 2009
Messages
21,495
Location
Northern Utah
I see a 3D printer in your future. You could print rock guards. lol.

How about a tour of a local bone yard to peruse their inventory?

Just a thought..............

:beer:

Possibly ebay? I’ve found some oem parts for 30 years old vehicles on the bay?

Thanks guys. I'll keep my eyes open and be ready when/if I find something. As for 3D printer, don't see myself with one now as it's not an interest to me, maybe someday however, just not now.
 
OP
Z

zmotorsports

ALLIANCE MEMBER
Joined
Oct 20, 2009
Messages
21,495
Location
Northern Utah
So another photo dump coming.

Saturday was a busy day but a good one. It was the first day of the year that was nice enough to work with the shop doors open and oh what a beautiful day, and even weekend, it was. Opened the doors, cranked up the tunes and went to work polishing the last remaining third of the Camaro. Then pulled it outside and gave it a thorough wash and detail job making sure to get in each of the jambs, under the trunk lid, around gaskets and then under the hood and engine bay. The wife and I then took off for a short drive Saturday evening and a longer drive yesterday after brunch with my FIL and our kids and grandson. All in all a wonderful Easter weekend and I hope everyone else was able to enjoy theirs as well.

No on to the pictures.


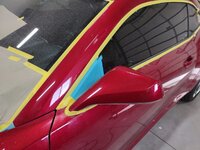
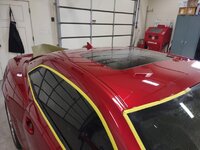
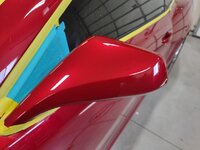
A-pillar, mirror and upper door compounded with step #1.
camaro50.jpg

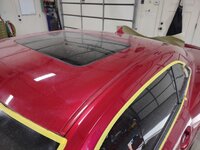
Roof and C-pillar (sail panel) compounded.
camaro51.jpg

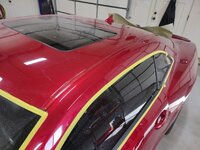
Moving on to step #2 (Finnese-It) removing the heavy swirl marks from the first step and really bringing on the shine and depth.
camaro52.jpg

More of step #2.
camaro53.jpg

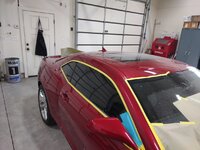
Last area for step #2.
camaro54.jpg

Color really popping after step #3 is being completed with the blue foam pad and Perfect-It polishing compound.
camaro58.jpg

More step #3.
camaro60.jpg

The last of the third step and wiping with microfiber towel.
camaro62.jpg

The depth and clarity of this color is amazing.
camaro63.jpg

Then the deionized water tank, washing bucket, lambs wool wash pad and air dryer is at the ready.
camaro66.jpg

Stay tuned for more....
 
OP
Z

zmotorsports

ALLIANCE MEMBER
Joined
Oct 20, 2009
Messages
21,495
Location
Northern Utah
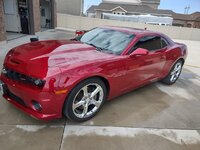
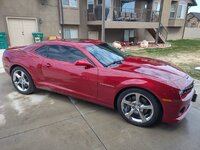
Last of the pictures after washing/detailing.

camaro77.jpg

camaro78.jpg

camaro79.jpg

camaro80.jpg


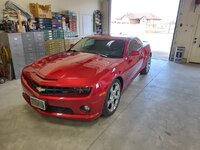
And here it is parked back in the shop after a couple hundred mile drive yesterday.
camaro81.jpg


Looking forward to putting some miles on her over the summer and years to come. Overall I am very pleased with how she turned out.

That was a long week of work resulting in about 18-20 hours of polishing and detailing but I think it was well worth it after seeing the results. I'm also really happy I chose to go with the chromed OEM wheels as I think they add the perfect balance or ratio between chrome and paint.

Thanks for looking.
 
OP
Z

zmotorsports

ALLIANCE MEMBER
Joined
Oct 20, 2009
Messages
21,495
Location
Northern Utah
In post #8332 I show the compounds, pads and tools that I used for my 3-step paint correction process.

I also have a video coming that will be posted to my YouTube channel. I started editing it Saturday night but didn't get it completed. I should be able to get it posted within the next day or so but it goes into great detail of the tools, supplies and procedures that I used to bring my paint jobs to that show quality shine.
 
OP
Z

zmotorsports

ALLIANCE MEMBER
Joined
Oct 20, 2009
Messages
21,495
Location
Northern Utah
The zmotorsports we know would never show off all that brown grass! 😉


Unfortunately the grass has been covered with snow up until Friday of last week. This winter hasn't seemed to want to end. I usually have my lawn mowed at least once or twice by the first of April but I don't dare drive anything on it yet for fear of creating deep ruts in the yard. I have a section I need to cut out and replace with sod as soon as I can get on the lawn, had some grubs last summer that I want to remove all evidence of.
 

Monza Harry

Well-known member
Joined
Dec 29, 2018
Messages
1,433
Location
Windsor ON
Ok Mike, how about some wagon updates that Heartbreaker is going to be finished medical school before you finish dotting on your toy! Just bustin' your β@!!$ Mike. So are you going to share the bigger picture? I'm envisioning spoke skinnies (Ansen/Halibrand?) up front with motorcycle fenders. You have shown us the "meats" for out back, so are moon disc's hubcaps in the picture for out back with some 1/2 fenders? Just the vibe I'm getting long distance here. Harry
 
OP
Z

zmotorsports

ALLIANCE MEMBER
Joined
Oct 20, 2009
Messages
21,495
Location
Northern Utah
Beautiful car Mike. She couldn’t of looked that good in the show room.

jhn9840
John

Thank you John. I think it looks every bit as good as it must have on the showroom floor. I know I am pleased to have it in our stable now. Mechanically she's sound being all zero'd out and now cosmetically it's zero'd out as well. Time for miles on the highway. ;)
 
OP
Z

zmotorsports

ALLIANCE MEMBER
Joined
Oct 20, 2009
Messages
21,495
Location
Northern Utah
Ok Mike, how about some wagon updates that Heartbreaker is going to be finished medical school before you finish dotting on your toy! Just bustin' your β@!!$ Mike. So are you going to share the bigger picture? I'm envisioning spoke skinnies (Ansen/Halibrand?) up front with motorcycle fenders. You have shown us the "meats" for out back, so are moon disc's hubcaps in the picture for out back with some 1/2 fenders? Just the vibe I'm getting long distance here. Harry

I went to town on the chassis for the wagon the week my grandson was born but unfortunately it hasn't gotten any attention the last week plus as I've been busy on other things. I have a few side jobs coming in and some work on the coach to do then I'll get back on it. I'd like to have it done well before the West Haven Car Show which is in July so the kids can drag him around in it. I'm also thinking about maybe putting our Camaro in the show but the wife doesn't think there's anything special about it and it would be stupid to put it in the local show. Not sure where I sit now on the subject. :unsure:

As for tires/wheels on the wagon. I will be using the stock Radio Flyer fronts with a spacer that I machined for them to spin on and for the rear I got a pair of flat surfaced wheels from my local Tractor Supply that I think will fit the image I'm going for. Nothing flashy but just that retro 32' roadster style rear tire.
 
To avoid these ads, REGISTER NOW!
Top Bottom