To avoid these ads, REGISTER NOW!

ZMotorsports Shop Projects 2.0

OP
Z

zmotorsports

ALLIANCE MEMBER
Joined
Oct 20, 2009
Messages
21,440
Location
Northern Utah
On the way home from work last night I stopped by the local brewery and filled my CO2 tank as it was nearly depleted last October during our last trip to the San Rafael Swell. Then last night I was also supposed to have a guy bring by his wife's car for me to look at but he didn't show up. He text me much later but it was too late to have him bring it by. By then I had already dug into a couple of other small personal projects for the evening.

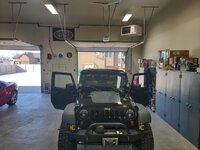
With the nice weather we've had for the past few days and with our RV'ing season about to kick off I thought I'd remove the Freedom Tops from the Jeep and install my Bestop Sunrider flip back top as well as some new Warn grab handles as I had one of the Mastercraft handles break over the winter.

Sunrider and Warn grab handles being installed.
sunrider.jpg

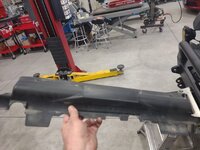
While the Jeep was in the shop I checked fluids and decided to install the new radiator cover/valance that I had gotten from Robbie @ Motech. I had trimmed the OEM plastic one but he has been making these sheet metal ones and powder coating them for his LS swaps and I thought they looked nice so when I contacted him about getting a spare CAN module as well as power distribution board to keep on hand he said he would send me a radiator valance as well as one of their newly designed battery trays where it turns the battery similar to the 2012+ JK's. I didn't have time to install the battery tray but I did get the radiator valance installed after a little "tweaking".

The OEM radiator valance removed.
jeep1.jpg

I didn't care for the abrupt edge at the rear of the new valance so I marked off a line @ .625" and broke about a 30-degree down angle into the rear of the valance. Also drilled a couple of small holes to secure it down to the core support as well as a few holes for tie wraps.
jeep2.jpg

That fits much, much better and doesn't have that harsh or sharp edge in which the upper radiator hose will rest against.
jeep3.jpg

Completed and ready for a cleaning and LOF service this next weekend as well as an air filter cleaning.
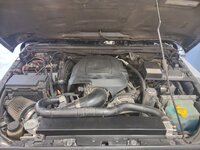
jeep4.jpg

The Jeep done for the night and a shot with the other sibling in the shop.
jeep5.jpg


After completing the Jeep I went out to walk around the yard and discovered not only the buds were finally beginning to be visible on the trees but also the leaves from the neighbor's trees had created a very dense layer across the back fence line which I was afraid would choke out the lawn now that the weather is starting to become like spring.

I grabbed the rake and began raking up the leaves from the neighbor's trees so that our lawn could breathe. Unfortunately, I didn't get a picture of the before where everything was matted down. I only thought about it about an hour later when I had put most of the leaves in the garbage can and was on the home stretch.
lawn1.jpg

lawn2.jpglawn3.jpg


Thanks for looking.
 
To avoid these ads, REGISTER NOW!
OP
Z

zmotorsports

ALLIANCE MEMBER
Joined
Oct 20, 2009
Messages
21,440
Location
Northern Utah
Last night I thought I'd trim, edge and mow the lawns for the first time of the season. Most is still quite short and just coming out of dormancy but along the house and shop the grass is over 6 inches long.

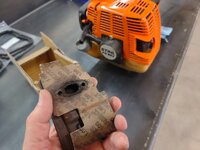
I had forgotten that I purchased a new muffler/spark arrestor for the newly acquired Stihl FS85 line trimmer that I picked up last year. After replacing some damaged components I noticed it was slow to rev and lacked power so I assumed the muffler was plugged and picked a new one up over the winter months. I had forgotten about it but remembered yesterday and installed it.

stihl1.jpg

stihl2.jpg

After firing it up and a few tweaks of the carburetor is purrs like a kitten.

It felt good to be mowing the lawn again, even if it is in pretty shoddy condition after the harsh winter.
 

JJC

Well-known member
Joined
Aug 31, 2006
Messages
169
Location
Buffalo Ny
On the way home from work last night I stopped by the local brewery and filled my CO2 tank as it was nearly depleted last October during our last trip to the San Rafael Swell. Then last night I was also supposed to have a guy bring by his wife's car for me to look at but he didn't show up. He text me much later but it was too late to have him bring it by. By then I had already dug into a couple of other small personal projects for the evening.

With the nice weather we've had for the past few days and with our RV'ing season about to kick off I thought I'd remove the Freedom Tops from the Jeep and install my Bestop Sunrider flip back top as well as some new Warn grab handles as I had one of the Mastercraft handles break over the winter.

Sunrider and Warn grab handles being installed.
sunrider.jpg

While the Jeep was in the shop I checked fluids and decided to install the new radiator cover/valance that I had gotten from Robbie @ Motech. I had trimmed the OEM plastic one but he has been making these sheet metal ones and powder coating them for his LS swaps and I thought they looked nice so when I contacted him about getting a spare CAN module as well as power distribution board to keep on hand he said he would send me a radiator valance as well as one of their newly designed battery trays where it turns the battery similar to the 2012+ JK's. I didn't have time to install the battery tray but I did get the radiator valance installed after a little "tweaking".

The OEM radiator valance removed.
jeep1.jpg

I didn't care for the abrupt edge at the rear of the new valance so I marked off a line @ .625" and broke about a 30-degree down angle into the rear of the valance. Also drilled a couple of small holes to secure it down to the core support as well as a few holes for tie wraps.
jeep2.jpg

That fits much, much better and doesn't have that harsh or sharp edge in which the upper radiator hose will rest against.
jeep3.jpg

Completed and ready for a cleaning and LOF service this next weekend as well as an air filter cleaning.
jeep4.jpg

The Jeep done for the night and a shot with the other sibling in the shop.
jeep5.jpg


After completing the Jeep I went out to walk around the yard and discovered not only the buds were finally beginning to be visible on the trees but also the leaves from the neighbor's trees had created a very dense layer across the back fence line which I was afraid would choke out the lawn now that the weather is starting to become like spring.

I grabbed the rake and began raking up the leaves from the neighbor's trees so that our lawn could breathe. Unfortunately, I didn't get a picture of the before where everything was matted down. I only thought about it about an hour later when I had put most of the leaves in the garbage can and was on the home stretch.
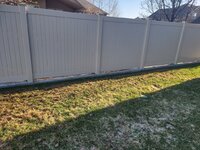
lawn1.jpg

lawn2.jpglawn3.jpg


Thanks for looking.
Do you know what cause the lighter patches in the Grass I get the same thing
 
OP
Z

zmotorsports

ALLIANCE MEMBER
Joined
Oct 20, 2009
Messages
21,440
Location
Northern Utah
Nice weekend Mike! How did that shiny Camero run?

Thank you. Yes, last weekend was nice as was this past one. The weather was a bit chilly on Saturday only getting into low 50's but barely nice enough to open up the shop doors and work for most of the day on Saturday.

Yesterday the wife and I took off and put some miles on the Camaro after breakfast as it was pushing 70-degrees and a beautiful sunny Sunday.

Do you know what cause the lighter patches in the Grass I get the same thing

Much of the ones in the pictures above were just due to the grass coming out of winter slumber and the dormant grass not greening up yet. It's funny what only a few days of 60~ish plus degree days does for the greening of grass.

The large spot just off the shop apron is actually where I had grubs last summer and I am looking to replace it with some sod as soon as I can find some. I've been watching the local for sale ads for the past week but nothing so far. I think I'll be able to find some remnants from people who are either putting sod down at their new home or there are quite a few removing grass and going with the zero-scape effect. Either way we've only had about a week or so of what I would call spring like weather so I think I should be able to find a couple hundred square feet of sod here shortly to replace the damaged sod.
 
OP
Z

zmotorsports

ALLIANCE MEMBER
Joined
Oct 20, 2009
Messages
21,440
Location
Northern Utah
Saturday I was able to get some preventive maintenance done on the Jeep and prep for our first outing coming up soon.

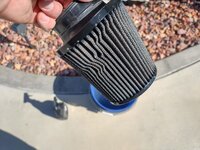
Started with the air filter so it could dry while I worked on the rest of the Jeep. Sprayed the K&N filter cleaner onto the air filter and let is soak for a few minutes. The air cleaner wasn't terrible but ready to be cleaned. I also reach inside the air intake duct to feel for any grit and/or dust that determine the health of the air filter, the air filter's service interval and overall to ensure the air filter is performing its duties. I generally don't like there open air filters and much prefer an OEM filter style intake but with the LS swap it really doesn't allow much room for any kind of filter box so this is about the only option so I am somewhat **** about ensuring it is cleaned properly and not allowing anything into the engine.
jeep1.jpg

After the cleaner is allowed to soak for a few minutes I insert it into a bucket of clean water and agitate it to flood the dirt and contaminants out of the filter media.
jeep2.jpg

Then the excess water is shaken off and set in the sun to dry for a while at which time I turn my attention to the other items on the Jeep and walk away from the filter for an hour or so. I prefer not to use compressed air to dry these as it takes life away from them so air drying in the sun works best.
jeep3.jpg

Suspension checked, fastener paint checked, brakes checked and everything greased while it is on the lift as well as tire rotation.
jeep4.jpg

The front end suffered some surface rust from this past winter's harsh road coatings so I lightly sanded the track bar, tie rod and hydraulic cylinder then checked the torque on the fasteners, hit the front end components with some black epoxy paint and repainted the fasteners with marking paint pen.
jeep5.jpg

Lastly the Volant air filter is hit with a light coat of oil and allowed to soak in before reinstalling it onto the air duct.
jeep6.jpg

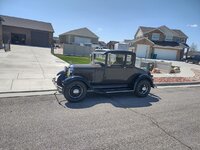
As I was finishing up my Jeep, my cousin and his wife were out for a drive and they stopped by when they saw the shop door open to visit. They had just come from a Model A club run and thought they'd do a drive by and see if I was home.
sat1.jpg

sat2.jpg

After the Jeep was completed, wheels torqued back on and fluids added it was getting late in the day so the wife and I decided to go grab some Mexican food take-out as neither of us felt like cooking or going out to dinner. As we were driving to pick up our dinner I happened to glance down just as the odometer rolled over 150k miles.
jeep7.jpg


It's hard to believe I've but nearly 150k miles on the ole' girl already and she now has 57,500 on the GM powertrain already. Just seems like yesterday that I did the LS swap but it has already been about 4-1/2 years now with the new powertrain.


Thanks for looking.
 

OutlawDrifter

Well-known member
Joined
Jan 20, 2015
Messages
3,886
Location
KS
It's amazing how the time flies by Mike! I was thinking the same thing myself as I was servicing the cars this weekend. Mine don't get the miles that yours does, but the Z28 has been LS swapped for over a decade now, and the '49 has been running on its 6.0L for 5.5yrs.
 

WoodsTruck

Well-known member
Joined
Jan 12, 2013
Messages
1,025
Glad to hear you are having luck with the K&N open filter. I tried that on one of my woods trucks and started getting contaminants in the throttle body. Returned to OEM and problem solved.
 

signcrafter

Well-known member
Joined
May 9, 2012
Messages
12,454
Mike, was working on a 2002 olds intrigue with the 3.5L that needed coolant crossover pipe gaskets. They were nice enough to put the exhaust crossover pipe 1/2" away from the coolant crossover so no room to get bolts out. What a fun job that was, calls for 7 hours of labor. Got it back together and went to vacuum test it and it was leaking down a little. Put pressure tester on and couldn't find any leaks but was leaking down slowly. Then I remembered reading a post by you about a similar situation and how you usually just pinch off the overflow hose, which I do the same. Pulled the hose off and put a plug in it and it held good vacuum. The hose was connected good to the tank so my only thought is the hose was old and leaked out some air before my clamp. But that's just a guess. Just thought I would post quick to say thanks for sharing your run in with a similar issue.
 

Monza Harry

Well-known member
Joined
Dec 29, 2018
Messages
1,433
Location
Windsor ON
Hey Mike glad to see things going nicely. A few thoughts I'd like to share. The grand babies wagon, I like how it turned out, but I think the only thing missing is the "keg" front fuel tank, all polished up to look like spun aluminum. I know more work but, that would send that period look so far into the stratosphere it would be without rival! (JMH[ish]O) Your cousins "A" looks nice the model A is suc.h a well proportioned vehicle that even us Bowtie and Pentastar fans appreciate them, Iconic for sure! Harry
 

Graham08

Well-known member
Joined
Dec 10, 2007
Messages
713
Location
Iron Station, NC
Hey Mike glad to see things going nicely. A few thoughts I'd like to share. The grand babies wagon, I like how it turned out, but I think the only thing missing is the "keg" front fuel tank, all polished up to look like spun aluminum. I know more work but, that would send that period look so far into the stratosphere it would be without rival! (JMH[ish]O) Your cousins "A" looks nice the model A is suc.h a well proportioned vehicle that even us Bowtie and Pentastar fans appreciate them, Iconic for sure! Harry

Moon sells a miniature tank for radiator overflow, cast aluminum mounts and all:


Betcha you could get one made without the extra bungs on it...
 
OP
Z

zmotorsports

ALLIANCE MEMBER
Joined
Oct 20, 2009
Messages
21,440
Location
Northern Utah
Thanks for the comments guys. Not sure what kind of real estate that will be available on the front once the steering goes in but time will tell. I have had a hell of a time finding some lights that look like the large Ford Queen Bee headlights but I think I found some that will work and appear to be near proper ratio. The lights won't be functional as I won't be putting a battery on this thing but thought the chrome Queen Bee headlights would also match the theme that we're going for and found some motorcycle turn signals that will fit the bill perfectly.

Work on the wagon has been suspended as I have some side jobs I've been working on and just got back from a few days of R&R but I'll get back on it here shortly.

Thanks
 
OP
Z

zmotorsports

ALLIANCE MEMBER
Joined
Oct 20, 2009
Messages
21,440
Location
Northern Utah
As mentioned above, the wife and I took a few days off last week to go get some R&R. We haven't had any vacation time off since October and thought now with our grandson being here and all is well with him that we'd take off for a few days and hit the San Rafael Swell and do some exploring.


Arrived at Green River, UT on Wednesday early afternoon. Skies were clear and blue but quite chilly with high's only in the 40's for the day.
swell1.jpg

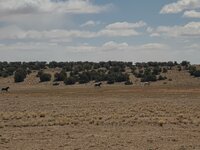
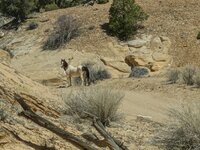
Thursday we took off and headed down from Swasey's Cabin into Eagle Canyon then out Rod's Valley and towards Red's Canyon. As we got close to dropping down into Red's Canyon, we turned off towards McKay's Flat to see if we could see the herd of wild horses again. In the 4 or 5 times we've been down to the Swell we've only seen the herd one other time, but we got some good views of several horses this trip. We saw about a dozen way off in the distance and then as we came over a small knoll there were three of them running alongside the Jeep about 100 yards off the road. We slowed to get some pictures and they didn't seem to be too bothered by us.
swell2.jpg

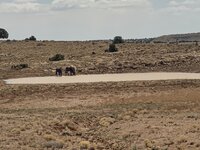
Several more stopped at a drinking hole near the main dirt road.
swell3.jpg

As we were leaving Red's Canyon on Thursday we headed towards Temple Mountain which would drop us out just north of Goblin Valley. We came around a curve and saw about 6 dual sport motorcycles stopped on the side of the road and a guy waving us down. They had a sprocket failure so I was able to dig out some mechanics wire and make a temporary means of holding the sprocket onto the countershaft as they lost the washer and snap ring. They were able to get back on the road and headed towards Green River where they were planning on spending the night. As we were talking it turned out that they were from Layton, UT so not far from where I live. Small world.


On Friday we headed quite a bit further west and ran Copper Globe Canyon which has a mine about 4 or 5 miles into the trail. We didn't see another soul the entire day after we left the airdown spot where there were several side by sides unloading for the trail. Never did see any of them on the trail.

Here we are stopped at Copper Globe Mine with the rock wall in the background.
swell4.jpg

My wife found these beautiful bright blue rocks all around the mine entrance. Not sure what they are but we walked the entire mine site and these blue rocks were nowhere else other than around the mine entrance.
swell5.jpg

We took a detour out towards the canyon and found an awesome spot for lunch. It was a little warmer on Friday so we got the lawn chairs out and enjoyed the view while we ate our lunch.
swell6.jpg

As we were heading further west and were coming out of what is called Cat Canyon we had heard there were another herd of wild horses in the area. This guy startled us as we rounded a corner in the wash/canyon. He stayed just ahead of us throughout the remainder of the canyon and when we exited he headed towards a smaller herd of about 6 or 8 horses where they watched us drive past. Seeing the wild horses on two days were definitely the high points of the trip as they look so majestic out in the wild.
swell7.jpg

swell8.jpg

On Saturday it was quite overcast and I was more apprehensive to drop down into any deep and narrow slot canyons. There was one that we enjoy so we made a quick pass through it and as we were climbing up and out of Black Dragon Canyon there were a group of 26 side by sides that passed us and headed down into the canyon. By this time it was clouding up pretty heavily and I don't think I would have gone down in there but maybe I'm a bit more cautious.

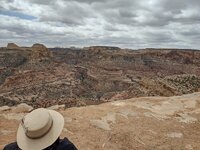
We took the main dirt road heading north through the Swell and headed towards the Wedge where we found ourselves nearly alone other than a few vehicles. We got the lawn chairs out again and enjoyed the view for lunch.
swell9.jpg

Our lunch view.
swell10.jpg


All in all it was a bit more chilly of a spring trip than we've taken in the past but a good few days off just the same.

Thanks for looking.
 
OP
Z

zmotorsports

ALLIANCE MEMBER
Joined
Oct 20, 2009
Messages
21,440
Location
Northern Utah
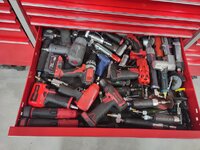
While we were gone my new Snap-on PT338 stubby 3/8" impact arrived. I had my son grabbing our mail and packages so I was pleased to open this package upon our arrival home yesterday. I've wanted one of these for several years now but couldn't bring myself to pay full price which was about $550 bucks. I found one new in box for about half that so I bought it.

so1.jpg

Fits right in with the other pneumatic tools in the drawer.
so2.jpg

Coach and Jeep parked in front of our home upon our arrival yesterday while I disconnected the Jeep, then backed the coach into the back yard. Lawn looked green when we pulled into the drive but it definitely needs mowing as we had some rain while we were away and the guy came and fertilized the lawn last week, both of which really greened up the yard.
home1.jpg

After unloading the Jeep and coach and parking the coach back in the shop I went about mowing the lawn.
home2.jpg

Other than the spot where the grubs were last summer the yard is looking pretty good for as early as it is yet. Now I need to find a couple hundred square feet of sod to replace the damaged area and let it grow in.
home3.jpg


Thanks for looking.
 

4 FN 27

ALLIANCE MEMBER
Joined
Oct 19, 2015
Messages
4,635
Location
Minnesnowta
Other than the spot where the grubs were last summer the yard is looking pretty good for as early as it is yet. Now I need to find a couple hundred square feet of sod to replace the damaged area and let it grow in.
Can you rake it and seed it Mike?

I am still telling the Snow to get off my Lawn!!! Have a few piles left down by the shop.

Grounds are a little too soft and wet yet to head out and start cleaning up the storm damage from a few weeks ago. Maybe tomorrow or Wednesday. Thursday we are back to more rain and no mention of Snow.
 
OP
Z

zmotorsports

ALLIANCE MEMBER
Joined
Oct 20, 2009
Messages
21,440
Location
Northern Utah
Can you rake it and seed it Mike?

I am still telling the Snow to get off my Lawn!!! Have a few piles left down by the shop.

Grounds are a little too soft and wet yet to head out and start cleaning up the storm damage from a few weeks ago. Maybe tomorrow or Wednesday. Thursday we are back to more rain and no mention of Snow.

I could Pat, but I'm not a patient person and just want instant lawn filled in. I'm also told that now that the grubs have been killed the grass will eventually fill back in on it's own but it will take some time, like possible another season or two. However, I must refer you back to my initial assessment that I am not a patient person.... :bounce:
 
To avoid these ads, REGISTER NOW!

Monza Harry

Well-known member
Joined
Dec 29, 2018
Messages
1,433
Location
Windsor ON
Mike for quick fill lawn freeze your seed (a couple of days should do it) spread the seed and then water it with warm water. This will mimic winter into a warm spring rain. The grass will be showing in three days as compared to the typical 7-10 days [Sorry this is from my location not sure how that would translate to Utah or Minnisota] but I know how well this speeds things up. Just something to consider for our impatient #$$es. Some peatmoss [watch your PH balance though] will keep it warmer (dark colour] and moist. Harry
 
OP
Z

zmotorsports

ALLIANCE MEMBER
Joined
Oct 20, 2009
Messages
21,440
Location
Northern Utah
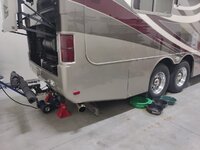
After work yesterday I got the coach up on jackstands and drain buckets at the ready for a transmission service.
coach1.jpg

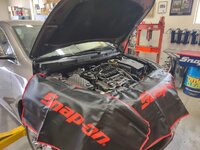
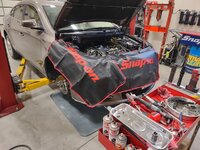
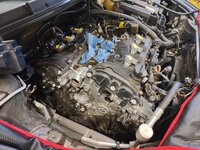
Before I got the fluid dumped the next job rolled through the shop door so I started on it. 2010 Buick LaCrosse with a 3.0 liter high feature GM engine.
buick1.jpg

buick2.jpg


Looks like a busy week ahead of me.
 

OutlawDrifter

Well-known member
Joined
Jan 20, 2015
Messages
3,886
Location
KS
Mike is it a 3.0L or a 3.6L? We had the 3.6L in our Saturn sister vehicle(Outlook), they are prone to timing chain issues for sure! Other than that it was a great rig until my kids outgrew it.

Edit, just dawned on me this is a LaCrosse not an Enclave...duh!
 
OP
Z

zmotorsports

ALLIANCE MEMBER
Joined
Oct 20, 2009
Messages
21,440
Location
Northern Utah
Mike is it a 3.0L or a 3.6L? We had the 3.6L in our Saturn sister vehicle(Outlook), they are prone to timing chain issues for sure! Other than that it was a great rig until my kids outgrew it.

Edit, just dawned on me this is a LaCrosse not an Enclave...duh!

Marc, yes it is a 3.0 liter. I did some work on it for the gentleman last year and noticed the front timing cover was just starting to weep a little but nothing serious. I explained that these high feature engines are actually a good family of engines but in the 120k-150k can develop timing chain issues, especially if routine oil services are neglected so he should plan on eventually looking to have the timing chains, guides and tensioners replaced preferably as preventive vs. after a chain jumps time and has a piston smack a valve or if starts to get camshaft correlation codes (P0016, P0017, P0018 or P0019) meaning the chains are severely stretched. He and his wife do a pretty good job of keeping the car maintained/serviced so he was less concerned about a catastrophic failure but the oil leak has started to get worse, to the point it is now dripping on his garage floor so he brought it back to me to confirm the source of the leak.

He had me look at it a few weeks ago and with now having 129k on the clock I suggested he go ahead with the timing service as well as cooling system work and then he should be good for many more miles as the rest of the car is pretty solid and in excellent condition. He and his wife weighed discussed the options of doing the work on this car vs. selling and finding something else. He called me last week and said they decided to keep the car and have the work performed so I began sourcing the needed parts for the job.
 

OutlawDrifter

Well-known member
Joined
Jan 20, 2015
Messages
3,886
Location
KS
Marc, yes it is a 3.0 liter. I did some work on it for the gentleman last year and noticed the front timing cover was just starting to weep a little but nothing serious. I explained that these high feature engines are actually a good family of engines but in the 120k-150k can develop timing chain issues, especially if routine oil services are neglected so he should plan on eventually looking to have the timing chains, guides and tensioners replaced preferably as preventive vs. after a chain jumps time and has a piston smack a valve or if starts to get camshaft correlation codes (P0016, P0017, P0018 or P0019) meaning the chains are severely stretched. He and his wife do a pretty good job of keeping the car maintained/serviced so he was less concerned about a catastrophic failure but the oil leak has started to get worse, to the point it is now dripping on his garage floor so he brought it back to me to confirm the source of the leak.

He had me look at it a few weeks ago and with now having 129k on the clock I suggested he go ahead with the timing service as well as cooling system work and then he should be good for many more miles as the rest of the car is pretty solid and in excellent condition. He and his wife weighed discussed the options of doing the work on this car vs. selling and finding something else. He called me last week and said they decided to keep the car and have the work performed so I began sourcing the needed parts for the job.

Definitely better to do it before it has problems! Based on newer car prices, this service job will save them thousands for sure.
 
OP
Z

zmotorsports

ALLIANCE MEMBER
Joined
Oct 20, 2009
Messages
21,440
Location
Northern Utah
Definitely better to do it before it has problems! Based on newer car prices, this service job will save them thousands for sure.

Agreed. I explained worse case scenario if it is let go long enough to have a catastrophic failure vs. fixing now. Then I even gave them an in between example of stretching bad enough for camshaft correlation issues and let them decide. It was really no skin off my nose either way but I just felt it my obligation to at least load them with the facts and kept my opinions to myself. They are nearing retirement and just purchased a retirement property and decided they didn't want another expense of either a catastrophic failure or a new/newer car.

I was actually pleasantly surprised with their thoroughness of their thought process because that has not been the train of thought that I have been seeing lately. Plus, I have not been impressed with anything in the new market these past few years. Most of it is junk in my opinion and DEFINITELY not worth what they are getting out of them. Personally I think many people in our society have become ignorant and stupid with their finances and money so this was a refreshing conversation.
 

csp

Well-known member
Joined
Mar 23, 2010
Messages
5,720
Location
Franktown, CO
My lawn was plagued with junebug grubs and I didn't know it. I thought it was underwatered by my poorly designed sprinkler system. We discovered the grubs digging trenches to add a new sprinkler zone, which we did add despite the grub situation. The lawn came back in just a few months at an altitude 2k feet higher than Ogden.
 
OP
Z

zmotorsports

ALLIANCE MEMBER
Joined
Oct 20, 2009
Messages
21,440
Location
Northern Utah
My lawn was plagued with junebug grubs and I didn't know it. I thought it was underwatered by my poorly designed sprinkler system. We discovered the grubs digging trenches to add a new sprinkler zone, which we did add despite the grub situation. The lawn came back in just a few months at an altitude 2k feet higher than Ogden.

Thanks. We had some rain yesterday and I noticed that the main area where the grubs were is still pretty much dead, however, the edges of where the good grass is seems to want to start filling in. Either way I think I may have found some sod but won't be able to grab it until next week so mid-week I may cut around the edges of the good grass to square up some of the area in preparation for some new sod. I want to start having Bar-b-ques and can't bring myself to do so with a big dead spot of grass in the middle of the yard.
 
OP
Z

zmotorsports

ALLIANCE MEMBER
Joined
Oct 20, 2009
Messages
21,440
Location
Northern Utah
Made a little progress on the Buick LaCrosse last night.

buick3.jpg

The 4-shelf cart sure came in handy. It is working out just as I had hoped. Parked it adjacent to where I'm working and as parts come off the car they go onto the cart. New parts are on the top shelf awaiting installation, I have a few parts on the lowermost shelf for my Camaro and coach which leaves the other shelves for current project and still have room left. I think this is going to work excellent for my purpose.
buick4.jpg

Almost ready to open the engine up.
buick5.jpg


Thanks for looking.
 
OP
Z

zmotorsports

ALLIANCE MEMBER
Joined
Oct 20, 2009
Messages
21,440
Location
Northern Utah
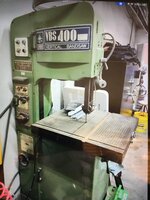
Dan, yes, that's a nice looking vertical bandsaw. Looks identical to my Birmingham, which is also a Taiwanese vertical bandsaw. The only drawback is the 3ph but easy enough to overcome.
 

Gwrench

Member
Joined
Jan 19, 2015
Messages
9
Location
Indiana
Hello Mike, I hope you are doing well. I follow you on this platform as well as your Youtube channel and enjpy your content very much. I hate to bother you with off topic questions but it seems whenever I am in the market for a tool I look through your 2 shop tour videos to see what brand you have and try to get the same. I'm looking to buy an adjustable (non-dedicated) cam bearing installation tool for my Dad's 1944 Allis Chalmers WC engine I am trying to get back together. I didn't see a mention of what brand of tool you have in your arsenal so I thought I'd ask your opinion. Thank you very much in advance for any comments or suggestions you may have. I really appreciate it Mike.
Best regards, Rick
 
OP
Z

zmotorsports

ALLIANCE MEMBER
Joined
Oct 20, 2009
Messages
21,440
Location
Northern Utah
Hello Mike, I hope you are doing well. I follow you on this platform as well as your Youtube channel and enjpy your content very much. I hate to bother you with off topic questions but it seems whenever I am in the market for a tool I look through your 2 shop tour videos to see what brand you have and try to get the same. I'm looking to buy an adjustable (non-dedicated) cam bearing installation tool for my Dad's 1944 Allis Chalmers WC engine I am trying to get back together. I didn't see a mention of what brand of tool you have in your arsenal so I thought I'd ask your opinion. Thank you very much in advance for any comments or suggestions you may have. I really appreciate it Mike.
Best regards, Rick

Rick, thank you very much for continuing to follow along and support both my YouTube channel as well as my projects thread here. It is much appreciated.

As for cam bearing installation tool, I have a couple of them. My newer one is more specific to the GM LS engine family but the one I think you are referring to in my video is a much older Lisle adjustable type installation tool. I've had it for pushing 30 years now and it has done a lot of cam bearings over that time and still works great. I just used it a couple of months ago in fact on a 3.8 liter Chrysler (Jeep) V6 engine.

The rubber bands have held up exceptionally well in that time, the expandable mandrels also are still in excellent condition and adjust very easily and fluidly. I also have not had to replace any components in the kit in all these years, however the somewhat cheap blow-molded plastic case in which it resides had the plastic hinges fail early on which kind of bugged me. Granted the tool is what does the work and not the case but it still bothered me that it failed so early. Other than that I would have no problem recommending it as a good reliable and solid built installation tool.
 
OP
Z

zmotorsports

ALLIANCE MEMBER
Joined
Oct 20, 2009
Messages
21,440
Location
Northern Utah
Last night was a busy night in the shop. I had a young man whom I work with ask if I would assist him in tuning out the AFM in his 2007 Suburban that he recently had a lifter failure in. The AFM lifters are known to fail in the GM engines and although his lasted many miles pushing 200k the failure resulted in also taking out the camshaft. He had approached me about performing the repairs a couple of months ago and although I was willing to do so, I convinced him to tackle the job himself. I think he felt like maybe it was a bit beyond his abilities but after several conversations with him and explaining what he needed to do, what parts to use and printing out several pages for him from my FSM I think I was able to arm him with enough information and confidence to perform the repair. He had asked a few more questions during the repair but I think he did a great job and if nothing more, proved to himself he could do it. I would have been more than happy to do the work but I think the time he spent working through it was more valuable than merely getting his vehicle running.

He finished the repair last week and it was running poorly so he called me while I was on vacation and I explained what I thought the issue was and why we needed to tune out the AFM in order to restore it to proper running condition. He came by my shop last night and we performed the quick process of disabling the AFM and he was a happy camper again.

The other added benefit was he had never been to my home shop and to be honest, I don't think he even realized how much I wrench as he only knows me from work and he has only been with us about 6 or so years so I think it was good for him to see a different side of me from what he sees at work. In all honesty I think he was quite shocked when he came over. He asked if he could look through my toolbox in which I told him to have at it and afterwards I took him around my shop and I gave him the nickel tour. He kept saying he hoped to have a shop at home someday and I tried to explain that what he was seeing was not a quick or easy process and it takes time and dedication, but if I can do it anyone can do it. I really appreciate this young man and can see a lot of myself in him from my younger days and I actually have high hopes for him and his future but I don't want him to become frustrated early on in his career. As we all know acquiring tools and equipment, let alone a shop to store them in and work out of, takes a serious amount of time and dedication and is not something to be had in a year or even a few short years, unless one has more money than they know what to do with which I don't think many of us fit that bill.

As we walked around the shop he was saying over and over again how he hoped to have a shop full of tools at home someday, I explained that hope is not a plan. A plan is as simple as writing it down somewhere and breaking it up into short term goals and as you accomplish those short term goals they will get him to his long term goals and dreams. I explained that accomplishing short term goals can be beneficial as they keep us from getting lost or frustrated by long term failures and by being able to check off smaller accomplishments makes us feel as though we are progressing and moving towards our end goals. I also tried to warn him of getting caught in the trap of buying tools and equipment on credit and many things can be sourced through pawn shops or the used market yet still have incredible value as a reliable and durable tool and that none of my tools have ever been purchased on time and all were paid for by working and saving, not instant gratification by borrowing for them and that he should avoid that debt monkey at all costs. I know a few years ago he got into a spending spree on the Snap-on truck and I hated seeing him, as well as a few other mechanics, get wrapped up in that weekly tool truck payment that can feel like an anchor. I want to think the couple hours spent with him last night was beneficial but time will tell.

Just prior to his arrival I was able to get the rocker covers removed from the Buick engine. Like the others I've disassembled, the front rocker cover and cam area look much cleaner than the rear. I know this engine has been well maintained but all of these engines seem to have more carbon buildup at the rear head (Bank 1) which I assume is from airflow through the engine bay and maybe to some extend the breathing abilities of the engine itself as the crankcase ventilation appears to be slightly biased left to right head.
buick6.jpg

Here you can also see the darker more carbon riddled right head vs. the left head and camshafts. The good news is that none of the phasers are bad and the timing chains actually look to be in really good condition although I can see the chains starting to climb the sprockets of the phasers and when I put a wrench on the camshaft flats I could see the amount of chain stretch so I feel this repair is just in time.
buick7.jpg

Alternator backed away from the block and the bolt that goes into the front timing cover removed.
buick8.jpg

I found another useful place for my modified small headed Snap-on flex-head ratchet as well. Having the 3/8" arbor in a 1/4" size ratchet head allowed me to get into the power steering pulley and remove both fasteners securing the power steering pump to the engine block.
buick9.jpg

Perfect tool for the job in which I had barely enough room to back the fastener out and then reach in with a magnet to extract the loose fastener. Then a small heel bar was used to gently push the P/S pump rearward away from the timing cover thus exposing the last two lower fasteners for removal.
buick10.jpg

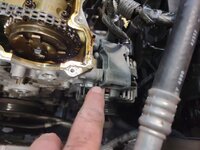
Next item to remove was the water pump. The water pump does not necessarily need to be removed from the timing cover as it can stay affixed to the timing cover in the event that the water pump is not being replaced. That would actually save another gasket cleaning surface but seeing as how we will be replacing the water pump at this time I opted to remove it while the cover was still solidly mounted to the front of the engine.
buick11.jpg

That is where I left off for the night and allowed the remainder of the coolant to drain from the block. Next will be to remove the harmonic balance then the timing cover to gain access to the timing chain, tensioners, idlers and guides for replacement.

Thanks for looking.
 

OutlawDrifter

Well-known member
Joined
Jan 20, 2015
Messages
3,886
Location
KS
He kept saying he hoped to have a shop at home someday and I tried to explain that what he was seeing was not a quick or easy process and it takes time and dedication, but if I can do it anyone can do it. I really appreciate this young man and can see a lot of myself in him from my younger days and I actually have high hopes for him and his future but I don't want him to become frustrated early on in his career. As we all know acquiring tools and equipment, let alone a shop to store them in and work out of, takes a serious amount of time and dedication and is not something to be had in a year or even a few short years, unless one has more money than they know what to do with which I don't think many of us fit that bill.

As we walked around the shop he was saying over and over again how he hoped to have a shop full of tools at home someday, I explained that hope is not a plan. A plan is as simple as writing it down somewhere and breaking it up into short term goals and as you accomplish those short term goals they will get him to his long term goals and dreams. I explained that accomplishing short term goals can be beneficial as they keep us from getting lost or frustrated by long term failures and by being able to check off smaller accomplishments makes us feel as though we are progressing and moving towards our end goals. I also tried to warn him of getting caught in the trap of buying tools and equipment on credit and many things can be sourced through pawn shops or the used market yet still have incredible value as a reliable and durable tool and that none of my tools have ever been purchased on time and all were paid for by working and saving, not instant gratification by borrowing for them and that he should avoid that debt monkey at all costs. I know a few years ago he got into a spending spree on the Snap-on truck and I hated seeing him, as well as a few other mechanics, get wrapped up in that weekly tool truck payment that can feel like an anchor. I want to think the couple hours spent with him last night was beneficial but time will tell.

Mike I've had this conversation with a few "young" guys as well. Most of them in their early to mid 20s. At that point in your life its hard to have the patience when you see someone else with the things you want. I remember those days. I also remember all the weekends and evening I picked up side work or fixed, cleaned, and flipped vehicles to make fun money. Or the days I spent hustling on the road as a territory manager(I still don't make the same money I did back then after 7 years!), but that was a trade off for time with my family. The dollars were no longer worth it.
 

Mr. Roboto

Well-known member
Joined
Dec 11, 2012
Messages
2,161
Location
New Hampshire
Mike! Sorry I have been MIA in here. I've just been finding time to update my own thread here and there, but am finally getting caught up with those I follow.

1st, congrats on the birth of your grandson!!!! My best to you and your family. My parents keep telling us how enjoyable it is having grandchildren, and how different the experience is vs. when they had their own kids (my sister and I, obviously haha). Enjoy the experiences with him, and he's going to love the wagon! He'll be out there in the shop with you in no time.

The Camaro is looking fantastic. There is so much depth to that color, especially now that you've had your way with it, and the chrome wheels really compliment it so well. You're really going to enjoy your first full summer with it!

Also, it was nice to hear your perspective when you were talking to your coworker who was visiting for the AFM delete. You've been at this for much longer than I have, but I too have been building my own shop, tool collection, knowledge base, and skill set for the last 11 years since buying this house and building my shop up. I am pretty introverted and don't talk about my projects/shop much with many (which is why I love posting on GJ, it gives me an easy outlet to share on).... but many people have the same reaction if they ever walk into my garage. It kind of irks me when people say "You're so lucky to have this space and all of these tools" when in reality, luck has nothing to do with it. I've worked damn hard and invested a lot of time and effort to get build it all out the way I want it! Anyways, I digress... haha

Finally, that parts storage rack is a great idea. I too end up with parts scattered all over my workbenches, tool tray, and eventually the floor. It would be nice to have something like that, that not only keeps everything contained and organized, but also is mobile! I just had 4 doors worth of window glass, window regulators, weather stripping, door handles, lock actuators, door shims, and trim scattered about my garage as I installed the freshly painted XJ door shells, and re populated them with all of their "guts" ..... a task that took me much longer than anticipated.

Keep up the great work as always!
 

signcrafter

Well-known member
Joined
May 9, 2012
Messages
12,454
Mike, I've done a few of the 3.6Ls and it's always fun working in that tight space. Especially putting the timing cover back on without smearing the sealant. I'm guessing you already have them but I bought a set of timing tools off amazon. Can do it without them but it's nice to throw them on and be 100 percent sure of everything in time. They were pretty cheap but worked good.
 
OP
Z

zmotorsports

ALLIANCE MEMBER
Joined
Oct 20, 2009
Messages
21,440
Location
Northern Utah
Mike! Sorry I have been MIA in here. I've just been finding time to update my own thread here and there, but am finally getting caught up with those I follow.

1st, congrats on the birth of your grandson!!!! My best to you and your family. My parents keep telling us how enjoyable it is having grandchildren, and how different the experience is vs. when they had their own kids (my sister and I, obviously haha). Enjoy the experiences with him, and he's going to love the wagon! He'll be out there in the shop with you in no time.

The Camaro is looking fantastic. There is so much depth to that color, especially now that you've had your way with it, and the chrome wheels really compliment it so well. You're really going to enjoy your first full summer with it!

Also, it was nice to hear your perspective when you were talking to your coworker who was visiting for the AFM delete. You've been at this for much longer than I have, but I too have been building my own shop, tool collection, knowledge base, and skill set for the last 11 years since buying this house and building my shop up. I am pretty introverted and don't talk about my projects/shop much with many (which is why I love posting on GJ, it gives me an easy outlet to share on).... but many people have the same reaction if they ever walk into my garage. It kind of irks me when people say "You're so lucky to have this space and all of these tools" when in reality, luck has nothing to do with it. I've worked damn hard and invested a lot of time and effort to get build it all out the way I want it! Anyways, I digress... haha

Finally, that parts storage rack is a great idea. I too end up with parts scattered all over my workbenches, tool tray, and eventually the floor. It would be nice to have something like that, that not only keeps everything contained and organized, but also is mobile! I just had 4 doors worth of window glass, window regulators, weather stripping, door handles, lock actuators, door shims, and trim scattered about my garage as I installed the freshly painted XJ door shells, and re populated them with all of their "guts" ..... a task that took me much longer than anticipated.

Keep up the great work as always!

@Mr. Roboto, thanks for taking the time to catch up. It's hard to believe our grandson is already a month old and growing like a weed.

As for the rack/cart, having parts from future and current project cluttering up the workbenches was driving me nucking futs. Through this project having everything on the cart really solidified my thought process and reasoning for the multi-shelf cart. I love it so far.


Mike, I've done a few of the 3.6Ls and it's always fun working in that tight space. Especially putting the timing cover back on without smearing the sealant. I'm guessing you already have them but I bought a set of timing tools off amazon. Can do it without them but it's nice to throw them on and be 100 percent sure of everything in time. They were pretty cheap but worked good.

Scott, yes, repositioning the cover back down into the tight space between the block and uniframe/chassis rail is tight to say the least. I can see where dropping the engine would be beneficial for ease of space but doesn't make much sense from a time perspective if only doing the timing chains. If a person had more work to do on the engine or trans I think would be worth the extra time to lower the engine cradle assembly. Those timing gauges/tools are worth the small investment if for nothing more than peace of mind knowing everything is in proper time. I have had mine for quite some time now and can't remember how much they were but they couldn't have been more than about $20 or so.

Maybe I missed it Mike, but did you choose OEM parts for that job or a good aftermarket mfg like Cloyes?

I use a mixture of OEM and aftermarket parts, not only on this job but most jobs depending on what I am doing. For this job I used Melling timing components, Fel-Pro gaskets and OEM water pump and radiator hoses.
 

Gwrench

Member
Joined
Jan 19, 2015
Messages
9
Location
Indiana
Rick, thank you very much for continuing to follow along and support both my YouTube channel as well as my projects thread here. It is much appreciated.

As for cam bearing installation tool, I have a couple of them. My newer one is more specific to the GM LS engine family but the one I think you are referring to in my video is a much older Lisle adjustable type installation tool. I've had it for pushing 30 years now and it has done a lot of cam bearings over that time and still works great. I just used it a couple of months ago in fact on a 3.8 liter Chrysler (Jeep) V6 engine.

The rubber bands have held up exceptionally well in that time, the expandable mandrels also are still in excellent condition and adjust very easily and fluidly. I also have not had to replace any components in the kit in all these years, however the somewhat cheap blow-molded plastic case in which it resides had the plastic hinges fail early on which kind of bugged me. Granted the tool is what does the work and not the case but it still bothered me that it failed so early. Other than that I would have no problem recommending it as a good reliable and solid built installation tool.

Thank you Mike... much obliged!
Rick
 
To avoid these ads, REGISTER NOW!
Top Bottom