To avoid these ads, REGISTER NOW!

ZMotorsports Shop Projects 2.0

Just Fishing

Well-known member
Joined
Dec 21, 2020
Messages
57
Location
Utah
Before pulling away I mentioned how I didn't think they were setting a good example for their kids and that they are part of the problem and not the solution but I'm sure it fell on deaf ears.


No deed goes unpunished there.
I was at a boat ramp on strawberry reservoir where I saw an old man sitting there in his very small boat.
Parked right along side where the boats come in with a clear "Don't park boat here" type of sign.
Sign has an image of boats hitting boats showing "don't park here stupid" :lol:

On the other side of that has the area that's protected from the boats being loaded and unloaded, and that's where you're supposed to park your boat for lunch & bathroom breaks.

I got told to F off, middle fingers etc.
Then a few minutes later the guys boat nearly got crushed with him in it by the usual antics as someone tried to load up their boat.

Later in the parking lot I got bullied more for my attempt to help, and the ******* decided to flash his bow at me to show me how tough he is. :ROFLMAO: (I pack)

Before that I tried to help someone with their boat, pretty much "Doing it wrong" type of a help.
Middle fingers, fk off, and they decided to vandalize my trailer after we were on the water.

I can tell you stories about a certain neighbor that pretty much behaves with the same mentality, and he is about 70 years old!!!
Never learned after all those years.

I now try and avoid it, and if I feel the need I let the rangers/law enforcement deal with it as I quietly exit.
 
Last edited:
To avoid these ads, REGISTER NOW!

Just Fishing

Well-known member
Joined
Dec 21, 2020
Messages
57
Location
Utah
Agreed. That's just the way much of society thinks today. Evidently, I made a victim of them by even implying they were doing something wrong and rather than correct that behavior, it was easier to justify it by lashing out at us.

Totally different than when I was growing up. If I did something wrong and even thought about being disrespectful towards someone else for such a thing my dad would have put foot to ***, my ***.

I think you nailed it on the head and explained much better than I could have. :beer:

I try to live by the rule "Treat others how I expect to be treated".

John Wayne Quote came to mind when typing that.
“I won’t be wronged. I won’t be insulted. I won’t be laid a hand on. I don’t do these things to other people and I require the same from them.”
 

Bob Heine

ALLIANCE MEMBER
Joined
Oct 24, 2009
Messages
10,708
Location
Boca Raton, Florida
Mike, the same thing happened to boating. We bought our first boat in 1971 and learned the rules of the road, took a couple of boating courses and were respectful of others. When jet skis came out in 1973 I thought they were a fun addition to the sport. Didn't take long for the "Those are your rules!" crowd to show up.

Florida allows 14-year olds to operate a boat or personal watercraft (PWC) after taking an online class. The specs on a $6,000 jet ski sound like a junior dragster but without seat belts, helmet or roll cage:

Specs & Features​

  • Price: Starts at $5,999.
  • Engine: Rotax 900 ACE
  • Top Speed: The Spark 60 has a top speed of 42 mph.
  • Acceleration: 0 to 30 mph in 3.6 seconds.
  • Capacity: 2 passengers.
Not a big deal if your mistake only puts you in the water but when another boat, rock jetty or seawall is involved you could pay with your life.
 
OP
Z

zmotorsports

ALLIANCE MEMBER
Joined
Oct 20, 2009
Messages
21,471
Location
Northern Utah
No deed goes unpunished there.
I was at a boat ramp on strawberry reservoir where I saw an old man sitting there in his very small boat.
Parked right along side where the boats come in with a clear "Don't park boat here" type of sign.
Sign has an image of boats hitting boats showing "don't park here stupid" :lol:

On the other side of that has the area that's protected from the boats being loaded and unloaded, and that's where you're supposed to park your boat for lunch & bathroom breaks.

I got told to F off, middle fingers etc.
Then a few minutes later the guys boat nearly got crushed with him in it by the usual antics as someone tried to load up their boat.

Later in the parking lot I got bullied more for my attempt to help, and the ******* decided to flash his bow at me to show me how tough he is. :ROFLMAO: (I pack)

Before that I tried to help someone with their boat, pretty much "Doing it wrong" type of a help.
Middle fingers, fk off, and they decided to vandalize my trailer after we were on the water.

I can tell you stories about a certain neighbor that pretty much behaves with the same mentality, and he is about 70 years old!!!
Never learned after all those years.

I now try and avoid it, and if I feel the need I let the rangers/law enforcement deal with it as I quietly exit.

Yeah, I should probably learn to just keep my damn mouth shut Chris. However, I want to still be able to go off-road when we retire and these morons are ruining that possibility with every stupid act they perform so for that I feel somewhat obligated to at least try and aid or help them to learn the proper way to care for our trail systems as we are all supposed to be good stewards over our natural resources.
 
OP
Z

zmotorsports

ALLIANCE MEMBER
Joined
Oct 20, 2009
Messages
21,471
Location
Northern Utah
Mike, that rolling step stool looks extremely handy…...I must say, you have had an impact on my wallet a time or ten…..just want to tell you thanks?

Yeah, been there more than I care to admit myself. This forum is fantastic with a lot of knowledge, however, it also comes at a cost ($$$$). :ROFLMAO:


Mike, the same thing happened to boating. We bought our first boat in 1971 and learned the rules of the road, took a couple of boating courses and were respectful of others. When jet skis came out in 1973 I thought they were a fun addition to the sport. Didn't take long for the "Those are your rules!" crowd to show up.

Florida allows 14-year olds to operate a boat or personal watercraft (PWC) after taking an online class. The specs on a $6,000 jet ski sound like a junior dragster but without seat belts, helmet or roll cage:

Specs & Features​

  • Price: Starts at $5,999.
  • Engine: Rotax 900 ACE
  • Top Speed: The Spark 60 has a top speed of 42 mph.
  • Acceleration: 0 to 30 mph in 3.6 seconds.
  • Capacity: 2 passengers.
Not a big deal if your mistake only puts you in the water but when another boat, rock jetty or seawall is involved you could pay with your life.

That's a good point Bob, I'm sure those in the boating industry can very much relate to where I'm coming from. Good analogy Bob. Thank you.
 

Just Fishing

Well-known member
Joined
Dec 21, 2020
Messages
57
Location
Utah
Yeah, I should probably learn to just keep my damn mouth shut Chris. However, I want to still be able to go off-road when we retire and these morons are ruining that possibility with every stupid act they perform so for that I feel somewhat obligated to at least try and aid or help them to learn the proper way to care for our trail systems as we are all supposed to be good stewards over our natural resources.

yeah, it sounds like my problem.
I speak my mind, and when someone acts like a fool I call them out on it. :ROFLMAO:

My neighbor is the one that really got me to start re-thinking my choices in regard to standing up to people.
I can describe the family with two words: Crazy & narcissistic.

Victim card if I speak up, and they use children to go around and spread rumors.
Form of gaslighting as I have learned...
Reminds me of a certain political party right now... :LOL:

It takes A special kind of person to use their grandchildren like that.


Yup, it's something new for me
Over 10 years of it, and I'm just now starting to pay attention and figure it out. :poop:


I tell ya, these people are probably exactly the same type of people you ran into.
Same with the ones I ran into at strawberry all those years ago.

That crazy family is all over around here, I wouldn't doubt if you ran into one or two in your life.

Anyways, stay safe!
(I need you man! ;))
 

rharman

Well-known member
Joined
Apr 22, 2012
Messages
8,908
Location
SoCal
Looks like a nice stool. I also used a step ladder or drywall bench and always had them slip out while leaning over the engine bay of trucks. ZKdiesel turned me onto this little giant step ladder that works really good also. The steps are wide and handle folds down out of the way. I put off buying it for a long time because while I have no problems buying tools to do the job correctly when it comes to things like this and tool boxes and that kind of stuff I think of it as more of a personal comfort and go back and forth on weather or not to fork out the money for it. But after I do get them I'm always happy I did and think what a dummy I was for not just pulling the trigger right away. This links to grainger but they a lot cheaper other places. Think I got mine from Sam's club online.

I've had one of those for years! It's rock solid. I really appreciate the handle for stability on the top step.
 
OP
Z

zmotorsports

ALLIANCE MEMBER
Joined
Oct 20, 2009
Messages
21,471
Location
Northern Utah
So, I have a couple of thoughts about if you own an RV long enough. One thought is you will eventually fix everything on the RV, the other not so good thought is there may be items that you end up fixing twice. Last night's repair on our 2003 Monaco Dynasty was the latter. 🤬

When we bought our 2003 Monaco Dynasty in Feb. 2007 it was only 4 years old and shortly after purchasing it we developed the infamous galley slide sink drain leak. I had done a lot of research on this prior to purchasing our coach which was one of the reasons I actually didn't want a galley slide. We were actually only looking for a living room slide and a bedroom slide model as my thinking was too many moving parts and a sink drain hose that was known for having issues. These issues are not specific to Monaco products as other manufacturers such as Newmar, Tiffin, Country Coach and a host of others all use a very similar design for the galley sink drain hose. When this coach was found it had everything on our needs and wants list and the wife really liked the opposing slides which added a lot of living space so I figured I'd just have to accept the fact that the galley could potentially have issues. Sure enough, only a few months after purchasing the coach the slide drain hose broke. I guess I should be pleased at least knowing that the original drain hose only lasted 4-years and my initial repair lasted almost exactly 16 years now (July 2007).

The flexible drain hose is of the PVC variety and sold under the description of "spa hose" and readily available at local hardware stores so acquiring the necessary parts was not a big deal. The repair itself however, was a huge PITA due to the location. I am not a small guy and there is absolutely no room to work under the galley cupboards. To make matters even worse, much of the work had to be done one-handed due to not being able to get both hands back in there at the same time.

Also, we were fortunate that it didn't make a bigger mess and we discovered it before our next trip. We didn't use the sink last week as we ate most of our meals out and only had coffee and toast in the mornings so very few dishes or cups to wash and therefore minimal leakage out of the break in the drain hose. Actually, it didn't leak out from under the slide until the drive home and the wife noticed a small water trail across the tile floor when we arrived home. Further investigation after washing and parking the coach revealed the failed drain hose. Looks like it was right at the glued PVC adapter fitting. I remember the original one seemed to be too short causing the hose to pull down at an angle at the fitting when the slide was extended so I added a couple of inches of length when I repaired it back in 2007 so the hose was still somewhat in line with the adapter at full extension. That must have helped somewhat to make it last 16 years.

It leaked at the fitting again but this time I opted to go a step further and add a piece of angle iron to give me a little more space to add a few extra zip-ties to act as a strain relief. Maybe this one will last longer than 16 years. :unsure:

Here you can see the split at the glued connection after running some water in the sink to test and find the actual leak.
drain1.jpg

After cutting the remaining flexible hose from the fitting I was able to remove the adapter using slip-joint pliers.
drain2.jpg

The lower fitting's integrity was still good enough that I was able to turn the flexible hose and it threaded the lower adapter out of the black PVC pipe.
drain3.jpg

The cleanup began by using absorbent pads to wipe up the water. I then removed the lower guide or track and cleaned that as well as the surface under it. I let it dry overnight and then sprayed with a bleach mixture to kill off any potential issues before they started.
drain4.jpg

Yesterday I stopped and picked up the necessary supplies for the job. I was fortunate that I was able to find threaded adapters that had a deeper socket for the flexible tubing to fit into. The OEM adapters as well as the ones I used last time had a 3/4" deep socket for the tubing to be glued into whereas the ones I found yesterday have a 1-1/4" deep socket. This will allow more surface area for the glue and should provide a longer lasting repair, in theory.
drain5.jpg

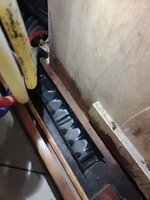
Everything wiped up and sprayed again with bleach before reinstalling the guide or track for the flexible hose. Fortunately no damage was done to the substrate and nothing had to be done structurally, only clean up and the bleach mixture to treat the area.
drain6.jpg

In addition to the new adapters having a deeper socket, they also have a hex which aided in installation as I could use a large axle socket to thread the adapter into the black PVC "T" after applying some thread sealant/paste.
drain7.jpg

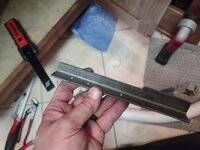
Upon more thinking about this over the past couple of days, I also thought I'd add a small section of angle iron which would extend out a couple of inches past the small "trolley" that moves with the slide. I thought this would give me another option to add more zip-ties and add to the strain relief.
drain8.jpg

The flexible hose glued into place and the angle iron screwed to the trolley.
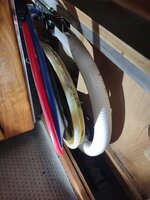
drain9.jpg

The added zip-ties for strain relief in place to hold the flexible drain line. The zip-ties got slightly longer as they moved away from the glued connection but are still holding the drain line adding support. Secured to the drain line were well of the pex hoses for the water supply and glycol lines in addition to the two wire looms.
drain10.jpg

Job completed and hopefully should last a long time, fingers crossed, although I hate using "hope" as a plan.:(
 
OP
Z

zmotorsports

ALLIANCE MEMBER
Joined
Oct 20, 2009
Messages
21,471
Location
Northern Utah
After crawling out from under the galley sink and working the kink out of my back I thought I'd try out my new step stool and replace the air filter on my truck.

Initial impression is the step is very, very stable. I should have bought one of these years ago.
truck1.jpg

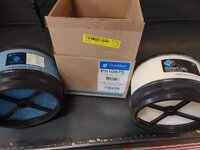
I was pleased to find the NAPA Gold air filter a Donaldson, which was the same one I purchased last time from my local GM dealer being an AC Delco part #.
truck2.jpg


Thanks for looking.
 

Just Fishing

Well-known member
Joined
Dec 21, 2020
Messages
57
Location
Utah
Nice stool!
I bought one of these about a year or two ago, after learning this was a thing.
https://www.jegs.com/i/JEGS/555/81166/10002/-1?_br_psugg_q=topside+creeper

It's pretty cheaply made for the most part, but it works great.
I modified mine a bit with extra height selection holes, and some extra padding to protect my grille and bumper.
and a little piece of leather to soften the top of the ladder where it transitions to the pad since it was a little too sharp for my liking.
I'm sure someone makes a better more "stout" version, but it works pretty well for my limited use.

I my first impression of using it was "where has this been my whole life!" :pimpflash
 
OP
Z

zmotorsports

ALLIANCE MEMBER
Joined
Oct 20, 2009
Messages
21,471
Location
Northern Utah
Nice stool!
I bought one of these about a year or two ago, after learning this was a thing.
https://www.jegs.com/i/JEGS/555/81166/10002/-1?_br_psugg_q=topside+creeper

It's pretty cheaply made for the most part, but it works great.
I modified mine a bit with extra height selection holes, and some extra padding to protect my grille and bumper.
and a little piece of leather to soften the top of the ladder where it transitions to the pad since it was a little too sharp for my liking.
I'm sure someone makes a better more "stout" version, but it works pretty well for my limited use.

I my first impression of using it was "where has this been my whole life!" :pimpflash

Funny you mention the mods. My wife bought me one of those Topside Creepers about 15 years or so ago when I was working on those damn things that go in the water. I too added some additional holes and some pipe insulation to the leading edges to protect bumpers and grilles on trucks.
 
OP
Z

zmotorsports

ALLIANCE MEMBER
Joined
Oct 20, 2009
Messages
21,471
Location
Northern Utah
I had another unique tool issue a few weeks ago.

I've had my Snap-on wire crimpers for about 10+ years now and one thing I have liked about them is they haven't loosened up over time and use. My Cornwell ones that are of similar design that I carry in the Jeep slowly loosened over time, not to the point of being sloppy or flopping around at the pivot but just to the point where they almost fall open when using. Not the end of the world as they still work perfectly and I'm certain I am just overly critical about my tools.

A couple of weeks ago when I was replacing the bulb sockets in our coach's taillights I was using my Snap-on crimpers and after about a dozen or so crimps I noted on one crimp that I had to exert a bit more force to open them up after a crimp. I thought to myself that was odd but then on the next crimp they locked up so tightly that I had to use both hands to pull the crimpers back open and it required a lot of force. At that point I also noted that the center pin had turned creating a sharp edge. I looked closely to see if I had something jammed between the arms but it was clear.

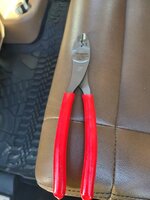
Here you can see how the center pin turned based on the lettering. I brought them to my Snap-on dealer for exchange and he was mystified by why this happened and said in all his years he had not seen that one before. He then made some snide remark about why it's always me who has the anomolies but it went in one ear and out the other. :headscrat
wirecrimpers.jpg


He didn't have a pair on his truck in red at the time so he ordered me a new pair of crimpers. He text me last week to tell me he received them but the wife and I were out of town so I grabbed them from him this morning. Same part # and same handle but one thing I noticed right off the bat was the center pin is smaller on these new crimpers.
wirecrimpers1.jpg


Now to get these broken in. :cool:
 

SilverJimmy

Well-known member
Joined
Apr 14, 2012
Messages
1,685
Location
Prescott/Flagstaff, AZ
If he hasn’t seen that before he’s obviously a rookie! Lol! Mike, as a suggestion to make your pliers silky smooth, you might try some of the Snap-On ULube airtool spray lubricant. It works great also as a lubricant for the wobble impact sockets. YMMV
 
Last edited:

OutlawDrifter

Well-known member
Joined
Jan 20, 2015
Messages
3,898
Location
KS
Mike, apparently you went all "hulk" on them ;) ...you can't turn the connectors into diamonds no matter how hard you squeeze, haha.

My BIL is famous for shearing the pin on pliers, goes through a set a month. I guess my wife's grandfather was the same way.
 
OP
Z

zmotorsports

ALLIANCE MEMBER
Joined
Oct 20, 2009
Messages
21,471
Location
Northern Utah
If he hasn’t seen that before he’s obviously a rookie! Lol! Mike, as a suggestion to make your pliers silky smooth, you might try some of the Snap-On ULube airtool spray lubricant. It works great also as a lubricant for the wobble impact sockets. YMMV

Thanks for the tip Sterling. I generally give my pliers a shot of Tri-Flow on occasion, but I'll have to try a few drops of the air tool oil and see if there's any difference.

Mike, apparently you went all "hulk" on them ;) ...you can't turn the connectors into diamonds no matter how hard you squeeze, haha.

My BIL is famous for shearing the pin on pliers, goes through a set a month. I guess my wife's grandfather was the same way.

I don't think I went all hulk on them Marc. In fact, my grip isn't what it used to be these days so I'm not quite sure what happened. This is the first set of pliers I've ever experienced this scenario with, Snap-on or any other brand for that matter and I don't feel that I abuse my tools by any stretch. I'll chalk it up to a fluke at this point. :unsure:
 

PugetDude

ALLIANCE MEMBER
Joined
Mar 13, 2013
Messages
22,477
Location
Superstition Mountains, AZ
I had another unique tool issue a few weeks ago.

I've had my Snap-on wire crimpers for about 10+ years now and one thing I have liked about them is they haven't loosened up over time and use. My Cornwell ones that are of similar design that I carry in the Jeep slowly loosened over time, not to the point of being sloppy or flopping around at the pivot but just to the point where they almost fall open when using. Not the end of the world as they still work perfectly and I'm certain I am just overly critical about my tools.

A couple of weeks ago when I was replacing the bulb sockets in our coach's taillights I was using my Snap-on crimpers and after about a dozen or so crimps I noted on one crimp that I had to exert a bit more force to open them up after a crimp. I thought to myself that was odd but then on the next crimp they locked up so tightly that I had to use both hands to pull the crimpers back open and it required a lot of force. At that point I also noted that the center pin had turned creating a sharp edge. I looked closely to see if I had something jammed between the arms but it was clear.

Here you can see how the center pin turned based on the lettering. I brought them to my Snap-on dealer for exchange and he was mystified by why this happened and said in all his years he had not seen that one before. He then made some snide remark about why it's always me who has the anomolies but it went in one ear and out the other. :headscrat
wirecrimpers.jpg


He didn't have a pair on his truck in red at the time so he ordered me a new pair of crimpers. He text me last week to tell me he received them but the wife and I were out of town so I grabbed them from him this morning. Same part # and same handle but one thing I noticed right off the bat was the center pin is smaller on these new crimpers.
wirecrimpers1.jpg


Now to get these broken in. :cool:

Looks like they also removed the graphics from the center pin to make pin rotation harder to diagnose..,
 
OP
Z

zmotorsports

ALLIANCE MEMBER
Joined
Oct 20, 2009
Messages
21,471
Location
Northern Utah
I had a busy but awesome weekend and I hope everyone else had a great Father's Day weekend.

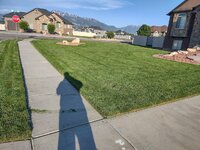
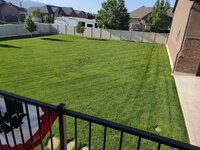
Started Friday night by edging, trimming and mowing my lawn. Five weeks now since I dug up a couple hundred square feet of the back lawn where I had the grubs last summer and replaced it with sod and it is looking very nice for only 5 weeks in.

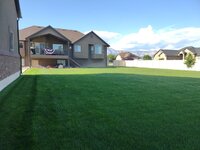
Back lawn before mowing, with one lap around the outer perimeter after trimming the edges.
yard1.jpg

Shot from the back corner of the shop after one lap. It was quite long and was just mowed on Monday evening but still well over an inch and a half came off.
yard2.jpgyard3.jpg

Half the back lawn mowed.
yard4.jpg

Front lawn after edging, trimming and mowing.
yard5.jpg

Side lawn is even looking great this year.
yard6.jpg

After mowing was complete. The new sod is barely detectable from this angle.
yard7.jpg

Another shot of the back yard, this one from the back corner of the house.
yard8.jpg

Back lawn complete.
yard9.jpg

Shot from the deck while having coffee on Saturday morning.
yard10.jpg


Thanks for looking.
 
OP
Z

zmotorsports

ALLIANCE MEMBER
Joined
Oct 20, 2009
Messages
21,471
Location
Northern Utah
Saturday morning after my coffee, I went out to the shop to finish up a small project that I started on a couple of weeks ago. I was hoping to have these done for our anniversary but didn't quite make it before we left on vacation.

I had a couple hours of work yet so I put the finishing touches on these matching bolt action pens that I made for my wife and I Saturday morning.
pens1.jpg


I then shifted gears and got back on my grandson's Little Red Wagon project. I was hoping to have this done for our city's annual car show but it's next weekend and I'm not going to make it. I think he might be a little small for it yet anyways but I still would have liked to have had it done to drag around the car show.

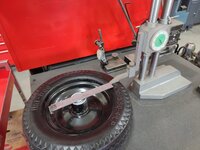
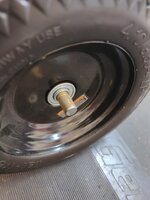
I went to work on the rear axle so I had to determine overall width that I wanted. Measured the center hub protrusion from the inside of the tire to get a reference point.
rf121.jpg

Jotting down notes with my new pen.
rf122.jpg

Transferring those dimensions over to the actual parts after prepping the pieces.
rf123.jpg

Next I machined a couple of caps for the rear axle center piece.
rf124.jpg

One cap pressed into place and wiped with acetone prior to welding.
rf125.jpg

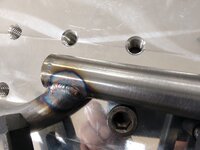
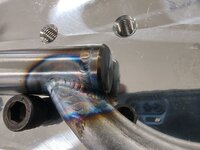
One cap welded in place.
rf126.jpg

Prior to welding the next end cap I popped a small .065" hole in the tube to allow venting. This will be directly under the outer stub shaft which will cover the hole.
rf127.jpg

After the stub shaft lengths were determined, they got trimmed to length using the bandsaw.
rf128.jpg

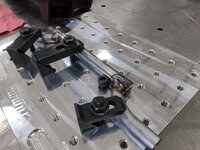
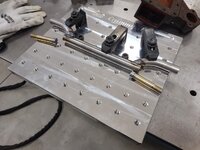
With the stub shafts deburred and prepped everything was clamped to the fixture plate to prevent any shifting of parts.
rf129.jpg


More to follow.....
 
To avoid these ads, REGISTER NOW!
OP
Z

zmotorsports

ALLIANCE MEMBER
Joined
Oct 20, 2009
Messages
21,471
Location
Northern Utah
Continuing on with the rear axle.

I stood the fixture plate up on end, zero'd out the digital level and made sure each stub shaft was dead nuts on. Don't want this wagon to develop irregular tire wear or handling characteristics at high speeds. :cool:
rf130.jpg

Other side was confirmed in the same manner.
rf131.jpg

After placing multiple tacks, one side was fully welded and allowed to cool slightly before flipping over and repeating the process on the other side.
rf132.jpg

rf133.jpg

rf134.jpg

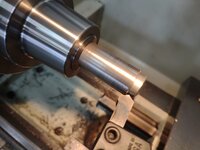
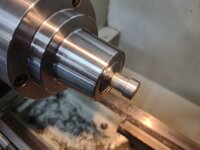
While one side was cooling I moved back over to the lathe to machine the axle shafts which will get pressed into the intemediate stub shafts.
rf135.jpg

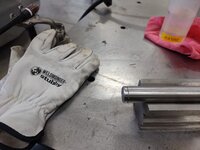
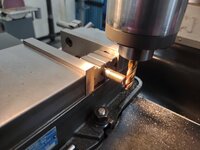
Then after the overall axle length was measured, they were clamped in the mill and trimmed to length. I ended up removing .800" from the end so that after a thin spacer is installed there would only be about 1-2 threads protruding out past the nut.
rf136.jpg

Full shoulder engagement and a small spacer will need to be machined.
rf137.jpg

One cut to length and one to go.
rf138.jpg

Both trimmed to length and the heads machined down for a slight press fit.
rf139.jpg

Stay tuned for more.....
 
OP
Z

zmotorsports

ALLIANCE MEMBER
Joined
Oct 20, 2009
Messages
21,471
Location
Northern Utah
Continuing on with the wagon's rear axle.

Ready to press the outer axle shafts into the center assembly for welding.
rf140.jpg

Pressed in with just about .125" protruding for a nice weld profile to be added.
rf141.jpg

One side completed.
rf142.jpg

Rear axle assembly completed and ready to test fit after cooling.
rf143.jpg

Mocked in place to determine the mounting tab placement.
rf144.jpg

Mounting tab location determined. Next they will get welded in place and while I have the chassis on the fab table I may as well machine the body tub mounting bungs and weld them in at the same time. I will then machine some rear axle mounting flanges that can be welded into the rear axle and the ride height will be set.
rf145.jpg

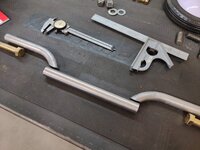
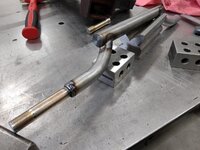
Before closing up shop for the night I started laying out the front axle placement and determining the angle to be bend into the axle tube. I can then machine the kingpin axle tubes and laying out the knuckles for a few degrees of inclination angle which will be figured in.
rf147.jpg

Once the rear axle is solidly mounted I can bend the front axle and determine rake but here is an overview of what it will look like going forward.
rf148.jpg


Thanks for looking.
 
OP
Z

zmotorsports

ALLIANCE MEMBER
Joined
Oct 20, 2009
Messages
21,471
Location
Northern Utah
Yesterday for Father's Day I wanted to have the kids over and grill burgers for dinner.

My son and DIL made me an AWESOME wall mounted box for the shop. It has a Camaro stenciled on it as well as the perimeter of the box is lined with an LED strip that has a remote for changing colors.
fd1.jpg


And this made my Father's Day even more special..... seeing this happy little guy grinning and laughing at his daddy.:love:

fd2.jpg

I couldn't be any more proud. My wife and I have been so very blessed with a fantastic son and daughter-in-law and now an amazingly happy and fun grandson.
 

LXCam

ALLIANCE MEMBER
Joined
Apr 23, 2013
Messages
19,204
Location
AZ
And this made my Father's Day even more special..... seeing this happy little guy grinning and laughing at his daddy.:love:

fd2.jpg

I couldn't be any more proud. My wife and I have been so very blessed with a fantastic son and daughter-in-law and now an amazingly happy and fun grandson.
Isn't that the best Mike. I've always been proud of our kids but seeing the kind of parent our daughter has turned out to be is very special in deed. Yesterday she put together a video collage with pic's of me and all the GB's that made my day.
 

Duker

Well-known member
Joined
Sep 25, 2010
Messages
10,866
Location
Livingston, TX
Continuing on with the wagon's rear axle.

Ready to press the outer axle shafts into the center assembly for welding.
rf140.jpg

Pressed in with just about .125" protruding for a nice weld profile to be added.
rf141.jpg

One side completed.
rf142.jpg

Rear axle assembly completed and ready to test fit after cooling.
rf143.jpg

Mocked in place to determine the mounting tab placement.
rf144.jpg

Mounting tab location determined. Next they will get welded in place and while I have the chassis on the fab table I may as well machine the body tub mounting bungs and weld them in at the same time. I will then machine some rear axle mounting flanges that can be welded into the rear axle and the ride height will be set.
rf145.jpg

Before closing up shop for the night I started laying out the front axle placement and determining the angle to be bend into the axle tube. I can then machine the kingpin axle tubes and laying out the knuckles for a few degrees of inclination angle which will be figured in.
rf147.jpg

Once the rear axle is solidly mounted I can bend the front axle and determine rake but here is an overview of what it will look like going forward.
rf148.jpg


Thanks for looking.
I don’t know Mike…. As fast as that wagon is beginning to look you might need bigger meats on the back end to keep it hooked up! 😁
 
OP
Z

zmotorsports

ALLIANCE MEMBER
Joined
Oct 20, 2009
Messages
21,471
Location
Northern Utah
Isn't that the best Mike. I've always been proud of our kids but seeing the kind of parent our daughter has turned out to be is very special in deed. Yesterday she put together a video collage with pic's of me and all the GB's that made my day.


Agreed Cam. It's the best.


I don’t know Mike…. As fast as that wagon is beginning to look you might need bigger meats on the back end to keep it hooked up! 😁

Good point Duke. I'll put a governor on it for the time being, don't want the little tyke getting hurt with his first ride. :ROFLMAO:
 

Mr.zippy

Well-known member
Joined
Apr 27, 2020
Messages
2,221
Location
Wyoming
I have to say, it has been an incredible transformation seeing the hard work and sweat Mike made on that property since they purchased it! Well Don Sir! Very well indeed. 👍
 
OP
Z

zmotorsports

ALLIANCE MEMBER
Joined
Oct 20, 2009
Messages
21,471
Location
Northern Utah
I have to say, it has been an incredible transformation seeing the hard work and sweat Mike made on that property since they purchased it! Well Don Sir! Very well indeed. 👍

Thank you. Yeah, it's not the same property that we purchased 6-1/2 years ago, not even close even if we were take the shop out of the picture. It's definitely been a ****-ton of work but I finally feel like it is nicer than the yard we left back in 2016 at our old place.
 
OP
Z

zmotorsports

ALLIANCE MEMBER
Joined
Oct 20, 2009
Messages
21,471
Location
Northern Utah
Mike, you going to give metal spinning a try and make some “Mike” discs for high speed running out West of you?

I doubt it Sterling. I may machine some covers for the axle nuts but haven't thought that far ahead yet. Right now I am just trying to get my feet under me and get caught up on some projects.
 
OP
Z

zmotorsports

ALLIANCE MEMBER
Joined
Oct 20, 2009
Messages
21,471
Location
Northern Utah
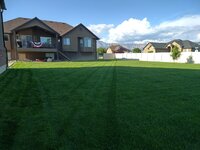
After work last night I mowed the lawns and finished just as the rain started.

lawn1.jpg

lawn2.jpg

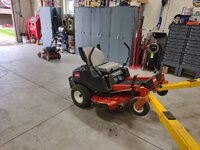
While mowing I could hear some intermittent noises coming from under the deck and figured it was time to clean it. Seems a bit premature this year but we have had a bit wetter spring so I'm sure it is needing a good cleaning. Rather than pull the deck out I opted to try lifting the front end with the lift which actually gives me pretty good access. While I'm at it I may as well clean the 21" Snapper walk-behind and get them both done.
mower.jpg

Some days I wonder if being so **** about things is really worth it. I feel like I can't get ahead these days and all I'm doing is chasing my tail between the yard, house and our own fleet of vehicles, let alone trying to get any of the long list of paying jobs into the shop. Any little noise or suspicious feel I investigate and many times they turn out to be nothing, but it still bugs me until I take a look.

I see other mechanics that I've watched over many years now and I've noticed they all seem to let things slip as they have aged. Vehicles they once were so **** about are now lucky if they ever get washed, let alone any little issues corrected. I actually feel like I'm going the opposite direction and becoming more **** and meticulous about our **** as I age and it seems to be paralyzing me to the point I don't feel like I'm gaining ground. :unsure:

There are days I wish I could just turn the key, crank up the stereo and be ignorant to many things mechanical but I find myself listening to any little noise, noticing any little idiosyncrasy while driving and can't seem to get those thoughts of how many parts all have to work together and any number of them can fail. My cousin has a beautiful 36' Country Coach Intrigue that just sits in his shop because he is so nervous to drive it for fear of being stranded and I don't ever want to get to that point where I shut down but it seems it's getting harder and harder to keep up.

While mowing the lawn and hearing the grass chunks bounce around intermittently under the deck it was driving me nuts to the point I almost stopped in the middle of the front yard. I pushed through thinking I wanted to get the lawn done before the rain started and then I'd get it in the shop and take a look. When I finally did I was surprised that the underside of the deck wasn't worse than it was. I made it worse in my head by worrying about it.
 
OP
Z

zmotorsports

ALLIANCE MEMBER
Joined
Oct 20, 2009
Messages
21,471
Location
Northern Utah
Case in point....


During a couple of steep mountain passes and hard pulls on our last RV trip I noted my fuel pressure was about a pound lower than normal on these pulls. Still nothing to be concerned about, or at least a normal person to worry about. However, it started getting me thinking that we now have just over 10k miles on the coach since I installed the FASS fuel pump system in our coach and although I felt like I always did a good job of maintaining our fuel system, keeping clean filters on it and using good fueling procedures, I knew that with all of the polishing that the FASS system was doing to the fuel in the coach that maybe the filters are becoming plugged. The entire contents of the fuel tank gets cleaned at least once every hour being a 150-gallon tank and I have the 165 GPH pump installed so I figured the filters had to be getting plugged. I didn't say anything to my wife so I just stared at the fuel pressure gauge at every grade and worried if anything was getting past the filtration and to the injection pump.


Last night I opted to hurry and change the three filters and cut them open for inspection. Turns out it was probably a waste of time and filters but I feel better at least. :headscrat


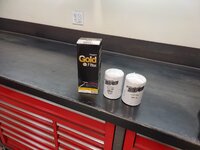
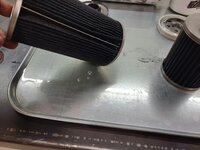
New Napa Gold filter is the last filter before the CAPS injection pump on the engine. The FASS filters are the first line of defense and actually, most people stop there and only have the two filters from the FASS manifold. I opted to keep a third filter when I did my install as extra peace of mind.
filters1.jpg

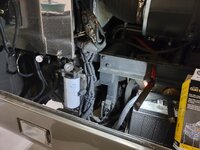
The primary and secondary filters are located on the FASS manifold up front and were changed just prior to the tertiary filter in the engine bay which is now ready for replacement.
filters2.jpg

All three filters ready to be dissected.
filters3.jpg

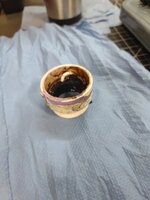
These little axle drain buckets work well for fitting into tight spaces and are good for catching more than just gear oil.;)
filters4.jpg

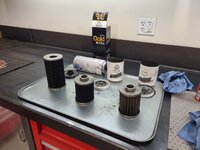
All three filters cut apart and laid out for inspection. Again, a normal person would probably just replace the filters and be done but I can't leave well enough alone and have to know how bad they are as far as debris.
filters5.jpg

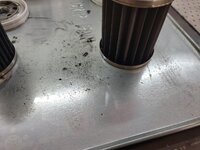
Turns out they weren't that bad after all. The primary filter had a little bit of debris but nothing extreme by any stretch.
filters6.jpg

The secondary filter had very, very little debris.
filters7.jpg

And the tertiary and final filter had absolutely nothing, clear as water.
filters8.jpg

I could have gone many more miles on those filters, so it also proved to me that my tank was actually not very dirty in the first place, even with the first 128k miles on the coach without any fuel polishing.

That turned out to be a waste of time and filters ($$$) just to settle my nerves and curiosity.
 
Last edited:

LXCam

ALLIANCE MEMBER
Joined
Apr 23, 2013
Messages
19,204
Location
AZ
That certainly *****. How is that system pressure regulated mike? Also why do I have a vague recollection of you having the ability of monitoring pressure before and after the filters or was that a conversation we had.
 
To avoid these ads, REGISTER NOW!
Top Bottom