To avoid these ads, REGISTER NOW!

ZMotorsports Shop Projects 2.0

OP
Z

zmotorsports

ALLIANCE MEMBER
Joined
Oct 20, 2009
Messages
21,477
Location
Northern Utah
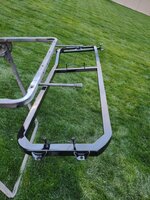
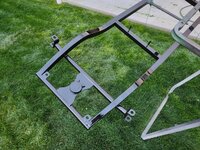
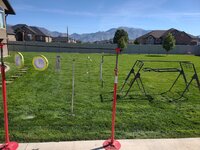
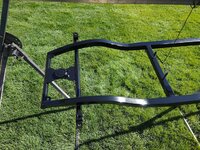
Sorry to disappoint ya fellas, but any overspray will disappear after the next mow (last night). And yeah, I love that little guy enough to paint over my grass. I won't let the kids walk on it, but I'll spray over it. :ROFLMAO: What's worse is got a little matted down when I was walking around the paint stand. That took a bit longer to let the grass stand back up. 🤬
 
To avoid these ads, REGISTER NOW!
OP
Z

zmotorsports

ALLIANCE MEMBER
Joined
Oct 20, 2009
Messages
21,477
Location
Northern Utah
Finished up the glazing of a few low spots last night, I hope that should be all at least.

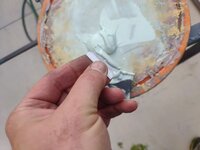
Here's a little trick if you only have a pinhole or some small imperfection that you want to fill without leaving much thickness or buildup to have to sand down, use a razor blade as the applicator. Works excellent for those small spots.
rf361.jpg

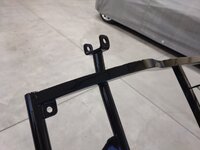
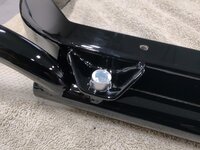
Had a very small "dimple" right where the front crossmember end cap was welded on that needed to be filled and the razor blade worked perfectly to apply a very small controlled amount which was easily removed afterwards with a few swipes of some 180-grit paper.
rf362.jpg

A couple of other areas that needed just a skim coat more glaze.
rf363.jpg

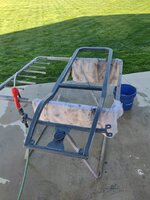
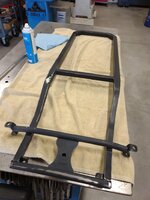
After curing the glaze was sanded down. Then the chassis was blown off with compressed air, wiped with Wax & Grease Remover, then hung to be sprayed with another few coats of SPI's Epoxy Primer.
rf364.jpg

Hung and wiped with a tack cloth.
rf365.jpg

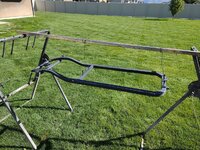
A light coat was first applied as a "tack coat" then a medium wet coat followed by a couple more medium wet coats with about 10 minutes or so between coats. I was trying to hurry just a bit as the clouds were really thickening after mowing the lawn and I was worried I wouldn't make it.
rf366.jpg

After several coats of epoxy primer were applied and ready to have the wife help me haul it back into the shop.
rf367.jpg

rf368.jpg

rf369.jpg


Overall I am quite pleased with how the primer laid down and I should just be able to wet sand it with 400-grit and go to sealer and paint.
Thanks for looking.
 
OP
Z

zmotorsports

ALLIANCE MEMBER
Joined
Oct 20, 2009
Messages
21,477
Location
Northern Utah
Oh man!!

No other words required

Thanks Dave.

Mike I may have missed this, what color(s) are you planning to paint? I almost poked you about painting over the grass. Great work!

Thank you. I figured I would get some **** about painting outside on my grass but it's better than getting that **** all over my shop but thought I'd roll the dice and post the pictures anyways. :bounce:

The chassis and components will just be black.
 

bugnut

ALLIANCE MEMBER
Joined
Jul 14, 2012
Messages
4,010
Location
Central Ohio
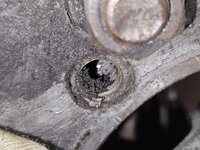
Mike I need a little input. I recall you mentioning helicoils in post #8736. I also recall you had worked on sand rails and Pauter blocks. I have run into an issue with a mexican 1600cc vw case. Somewhere in its previous life someone installed keyserts in the case for the head studs. These are a 10mm stud in this case and the keyserts were not staked when installed. I also had one keysert come out with the stud and 1 stud with keysert assembly is now stuck and I cannot loosen it. I have dissuaded myself from trying further as don't care to damage things further.
So here's my question. Any idea if the keysert will stand up to holding in the oil when the case is under pressure? Also might a case saver be used instead of the keysert without leaking? I really don't want to expend anymore energy on this till I can make sure I am not going to end up with a constantly leaking case. I'm planning to dig deeper into drill sizes and methods to determine if the casesavers will work.

Any enlightenment appreciated.
 

Attachments

  • 20231010_113655.jpg
    20231010_113655.jpg
    989.3 KB · Views: 41
  • 20231010_113639.jpg
    20231010_113639.jpg
    986.3 KB · Views: 41
  • 20231010_113511.jpg
    20231010_113511.jpg
    820.6 KB · Views: 39
  • 20231010_113647.jpg
    20231010_113647.jpg
    1.1 MB · Views: 39
  • 20231010_113651.jpg
    20231010_113651.jpg
    862.6 KB · Views: 41
OP
Z

zmotorsports

ALLIANCE MEMBER
Joined
Oct 20, 2009
Messages
21,477
Location
Northern Utah
Mike I need a little input. I recall you mentioning helicoils in post #8736. I also recall you had worked on sand rails and Pauter blocks. I have run into an issue with a mexican 1600cc vw case. Somewhere in its previous life someone installed keyserts in the case for the head studs. These are a 10mm stud in this case and the keyserts were not staked when installed. I also had one keysert come out with the stud and 1 stud with keysert assembly is now stuck and I cannot loosen it. I have dissuaded myself from trying further as don't care to damage things further.
So here's my question. Any idea if the keysert will stand up to holding in the oil when the case is under pressure? Also might a case saver be used instead of the keysert without leaking? I really don't want to expend anymore energy on this till I can make sure I am not going to end up with a constantly leaking case. I'm planning to dig deeper into drill sizes and methods to determine if the casesavers will work.

Any enlightenment appreciated.

Joel, the "case savers" were supposed to be oil resilient when it comes to leaking. I never did experience an issue with leaks from case savers on any of the VW cases I had used, especially from Pauter Machine. I did however, have a couple of engine cases that clients brought me to remove damaged case savers and I'm not gonna lie, they were a PITA to remove. Most of the time I could dig at the stakes and work them side to side with a small chisel to loosen and once they were removed, I would weld a nut onto the top of the steel insert and extract the case saver but it took quite a bit of finessing to do so. I had a couple I remember that didn't go as planned and I had to end up setting up in the mill and using an end mill, cut down just enough to remove the steel sleeve, bore slightly oversized, then machine an aluminum slug that got pressed in, welded, machined flat then lastly drilled and tapped. The first one made me extremely anxious and I wasn't even sure I could successfully do the repair but it turned out good and only had to go that deep into an extraction another time or two.

Not sure if that helps or answers you question or not.
 

WoodsTruck

Well-known member
Joined
Jan 12, 2013
Messages
1,028
When I ran VW, I was always under the impression that those were stronger than the actual threaded hole in the magnesium.
As luck would have it, I lost a bar stud on my chainsaw today out in the brush. I'll see if it is repairable tomorrow.
 
OP
Z

zmotorsports

ALLIANCE MEMBER
Joined
Oct 20, 2009
Messages
21,477
Location
Northern Utah
When I ran VW, I was always under the impression that those were stronger than the actual threaded hole in the magnesium.
As luck would have it, I lost a bar stud on my chainsaw today out in the brush. I'll see if it is repairable tomorrow.

In general the case savers, Keenserts or Helicoils are stronger than the parent threads in the aluminum and magnesium cases but they still have their limits as far as what they'll hold and how often they can be reused. We used a lot of them back in the day of building VW's as well as motorcycle and ATV engines and had excellent results. However, in several cases they either failed or had issues and had to be replaced which was less than an exciting job to do. 🤬
 
To avoid these ads, REGISTER NOW!
OP
Z

zmotorsports

ALLIANCE MEMBER
Joined
Oct 20, 2009
Messages
21,477
Location
Northern Utah
Stay tuned for several posts being very picture heavy. Hope everyone is ok with pictures. :ROFLMAO:

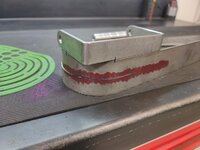
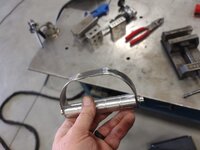
Looks like the peanut gallery won out. Saturday morning I opened up the shop and began work by modifying the handle to change from the 90-degree handle bracket to a radius style. Started by working on a couple of bends to see what looked good. I could have made a completely new handle but figured I would just modify the original. Time wise it was probably sixes as to which was quicker, but either way it's done now.
rf371.jpg

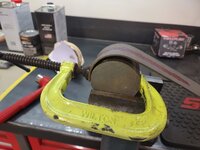
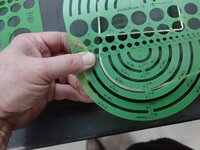
Settled on a radius that looked good and duplicated it.
rf372.jpg

Mocked up and marked the points of tangency.
rf373.jpg

After cutting the radius bends I test fitted. Not quite as much room but ample for my large hands so it should work.
rf374.jpg

Cuts were made, edged chamfered and setup for tacking.
rf375.jpg

Tacked together and test fit the grip.
rf376.jpg

Final welds done and blended then metal finished on the outside...
rf377.jpg

and metal finished on the inside.
rf378.jpg

Set up on the fabrication table with both ends leveled so they are in the same plane.
rf379.jpg

Handle completed and ready for final sanding.
rf380.jpg


Stay tuned for more....
 
OP
Z

zmotorsports

ALLIANCE MEMBER
Joined
Oct 20, 2009
Messages
21,477
Location
Northern Utah
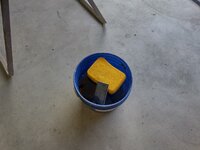
Next out came the water and sponge for wet sanding.

A couple of drops of Dawn dishwashing soap in the water works well for lubrication and keeping the paper from clogging up so quickly.
rf381.jpg

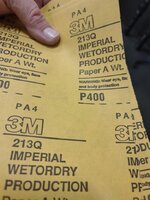
I only had a couple sheets of 3M 400-grit sandpaper so I had to stop by the local paint & body supply shop a few days earlier.
rf382.jpg

rf383.jpg

I generally don't waiver from 3M products but I'm not gonna lie, there has been a huge price gap lately so I opted to give a less expensive brand a try on the counterman's suggestion.
rf384.jpg

rf385.jpg

For a good side by side comparison I used each brand on each side of the chassis. I really couldn't tell much difference in them other than I felt the import brand didn't clog as easily. That may have been in my head though or it could be that the SPI Epoxy Primer sands much better than the PPG brand of epoxy primer.
rf386.jpg

Chassis wet sanded and wiped down.
rf387.jpg

All of the nooks and crannies were blown out as well.
rf388.jpg

rf389.jpg

rf390.jpg

Pretty pleased with how everything sanded and came out.

Stay tuned....there's more...
 
OP
Z

zmotorsports

ALLIANCE MEMBER
Joined
Oct 20, 2009
Messages
21,477
Location
Northern Utah
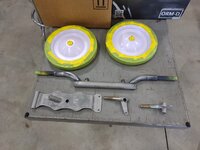
Before closing up the shop Saturday night I thought I'd get the wheels masked.

Here's a little trick to masking without taking any more time than necessary.

Use wide tape when possible, then fill in with the 3/4" wide tape. Start in one spot and work in a direction. Doesn't matter clockwise or counterclockwise but the key it to overlay in a sequence.
rf391.jpg

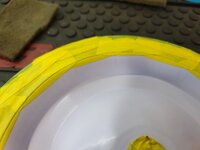
I just used my fingernail to press the tape down into the recess between the steel wheel and the rubber tire. Next take a sharp razor blade and run around the recess using it as a guide.
rf392.jpg

Here you can see the cut line.
rf393.jpg

Next, pick a starting point and peel in the same direction and it should come off all in one if you overlapped correctly.
rf394.jpg

Masked and ready to go in relatively quick order.
rf395.jpg

Everything masked and wet sanded, ready for sealer and paint.
rf396.jpg

rf397.jpg


That was where I closed up the shop and called it a day.

Yesterday after the wife and I returned from breakfast it was such a nice day with no breeze blowing so I headed back out to the shop to seal and pain the parts.

Everything hung and wiped down one last time with Wax & Grease remover as well as tacked using a tack cloth.
rf398.jpg

rf399.jpg


Stay tuned for more..
 
OP
Z

zmotorsports

ALLIANCE MEMBER
Joined
Oct 20, 2009
Messages
21,477
Location
Northern Utah
I had mixed up the SPI Epoxy Primer and added just a bit of slow reducer to aid in laying down flat for the sealer coat.

Here is the sealer coat applied.
rf401.jpg

Sealer coat applied to the chassis.
rf402.jpg

The sealer was given about an hour and a half while I sat on the deck with the wife enjoying a nice lazy Sunday afternoon.

Then I mixed up some PPG DBC9700 black and sprayed a couple coats of color on the parts....
rf403.jpg

rf404.jpg

and the chassis....
rf405.jpg

The paint dries relatively quick so by the time I cleaned the gun and mixed up the SPI Univeral Clear it was ready to spray the final clear using a couple of wet coats.
rf406.jpg

rf407.jpg

The wife helped me carry the chassis and parts into the shop.
rf408.jpg

rf409.jpg

rf410.jpg


After hanging everything in the shop I cleaned out the guns, cleaned up the bench, coiled up hoses and put all of the paint supplies away and got the shop back to normal again.

Overall, I am pretty pleased with how the job turned out and it should be ready to final assembly after I machine a few fasteners and polish a couple of items.

Thanks for looking.
 
OP
Z

zmotorsports

ALLIANCE MEMBER
Joined
Oct 20, 2009
Messages
21,477
Location
Northern Utah
Pure F'n Awesome.

I really like how you slit the flat bar strip so you could bend both radius parts as one, that's wisdom! The paint work is great and I'm glad you were able to kick back and enjoy your Sunday with your wife in between coats.

Mike, nice trick on getting the curve of the handle uniform. I probably would have tried to make it one curve, but I definitely see a benefit to how you it. Paint looks great too! I’m excited to see it completed.

Thanks guys. I tried to think ahead and make one bend and duplicate the radius and this was the best I could think of to save time.
 
OP
Z

zmotorsports

ALLIANCE MEMBER
Joined
Oct 20, 2009
Messages
21,477
Location
Northern Utah
I didn't get much time on the wagon last night as I had a few other tasks in the shop to do but I was able to unmask everything and get a good start on final assembly.

rf411.jpg

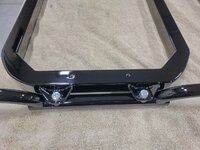
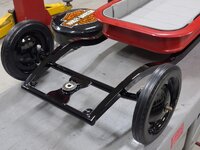
I'm quite pleased with the depth of the paint on the chassis. All of the work paid off, although this project took on quite a bit of project creep.
rf412.jpg

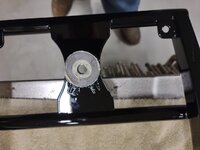
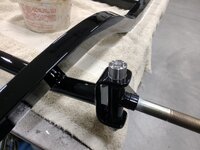
Even the smaller parts have nice deep appearing paint work and the welds are smooth and barely visible.
rf413.jpg

Next was to add another finishing touch of mine, knocking the knurls off of the stainless steel socket head capscrews. I did this same technique on all of the snowmobiles, sand quads and sandrails I built over the years before the fasteners went off to chrome. I don't particularly like the visible knurls on fasteners for show jobs.
rf414.jpg

Those look so much better than the knurls.
rf415.jpg

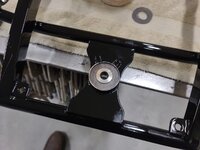
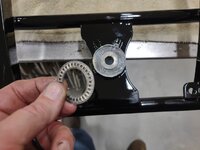
Next I thought I'd grease and assemble the Torrington bearing assembly for the steering pivot plate.
rf416.jpg

rf417.jpg

rf418.jpg

rf419.jpg


Stay tuned for more pictures.....
 
OP
Z

zmotorsports

ALLIANCE MEMBER
Joined
Oct 20, 2009
Messages
21,477
Location
Northern Utah
Continuing on.

Assembled the steering knuckles after pressing the Delrin bushings in and lubing the pivot points.
rf421.jpg

Bolted the rear axle in place.
rf422.jpg

rf423.jpg

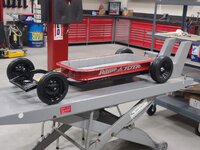
Installed the tires/wheels onto the chassis to get it to ride height.
rf424.jpg

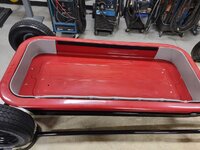
Removed the interior's lower panel and bolted the body to the chassis.
rf425.jpg

I like how the body rests on top of the chassis rails giving it that Roadster appearance.
rf426.jpg

Interior reassembled and moved to the lift table as that was all the time I had for the night.
rf427.jpg

rf428.jpg

rf429.jpg

rf430.jpg


Thanks for looking.
 
OP
Z

zmotorsports

ALLIANCE MEMBER
Joined
Oct 20, 2009
Messages
21,477
Location
Northern Utah
Super sharp.

I envision a wall standoff bracket to hang this wagon up when not in use.

Thank you. Yes, been toying with some type of wall mounting apparatus for when he gets too big for it and it is no longer in use. In talking with my son last night, we agreed it can be stored in the shop when not being used as it will more than likely be spring before my grandson can use it. I don't think I'll sell this one as I kick myself for selling my son's 25+ years ago. I didn't have the room to store it but I think I'll make room to store this one.

The wife came out to the shop last night when she got home and was kind of surprised at how it has turned out. She said "I thought you were just going to quickly fabricate a frame and some steering, not build a show piece?" I explained to her what scope creep or project creep was and showed her exhibit A. :ROFLMAO:
 
To avoid these ads, REGISTER NOW!
Top Bottom