To avoid these ads, REGISTER NOW!

ZMotorsports Shop Projects 2.0

To avoid these ads, REGISTER NOW!
OP
Z

zmotorsports

ALLIANCE MEMBER
Joined
Oct 20, 2009
Messages
21,439
Location
Northern Utah
Looks comfy Mike. I bet theres a trick to getting those inside your rig.

Yes Paco, there's definitely a little body English that has to take place getting it through the door. Hopefully by leaving the armrests off it will be a bit easier going in than coming out.
 
OP
Z

zmotorsports

ALLIANCE MEMBER
Joined
Oct 20, 2009
Messages
21,439
Location
Northern Utah
Finally able to work in my shop this week and completed a couple small tasks in between helping my son work on the cooling system of his WJ.

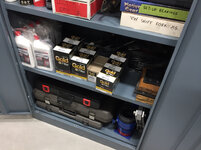
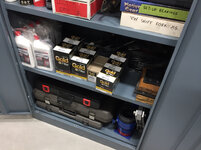
Starting off my local NAPA had their annual filter sale so I stocked up for the year.
7668ccf9957d9a210c3311b5f0eb35c3.jpg

Made room in one of the cabinets for them.
acd939038ec0538a2e90d99f8d452dba.jpg

d20d4fab8ecff3cd9fb7ef661ba06dc4.jpg
 

Attachments

  • 7668ccf9957d9a210c3311b5f0eb35c3.jpg
    7668ccf9957d9a210c3311b5f0eb35c3.jpg
    845.5 KB · Views: 0
  • d20d4fab8ecff3cd9fb7ef661ba06dc4.jpg
    d20d4fab8ecff3cd9fb7ef661ba06dc4.jpg
    778.3 KB · Views: 0
  • acd939038ec0538a2e90d99f8d452dba.jpg
    acd939038ec0538a2e90d99f8d452dba.jpg
    759.4 KB · Views: 0
OP
Z

zmotorsports

ALLIANCE MEMBER
Joined
Oct 20, 2009
Messages
21,439
Location
Northern Utah
Before getting dirty for the day I had my son assist me on getting the curbside couch into the coach. Once inside I installed the armrests, put it in place and bolted it to the floor then installed the drawer and called it done.
257c2eaa6cd1b48054ae8a41ca583f2d.jpg

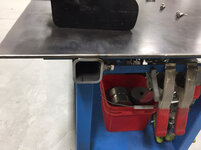
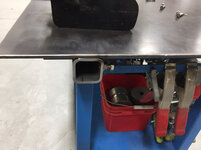
When I was fabbing up my work benches a couple of months ago and incorporated 2” receivers into the benches, I also added one under my welding/fabrication table. I welded it under the side opposite where I do 95% of my welding. My thinking was that I would use it to mount my small metal brake but wanted it out of the way of where I do most of my welding.
831c4589f82e083591fa0a4e7887d2fa.jpg

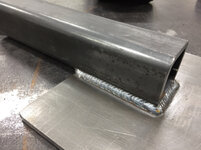
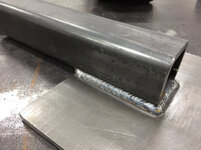
I then cut a piece of 1/4” plate to 6”x8” in which to bolt my small brake to. I also cut a 8” Long piece of 2”x1/4” wall hitch tubing.
3041ae15d76ea38f05c4b9de9a4af9af.jpg

Welded together.
e62534cf6731e09c821c903a1db55611.jpg

8e687fc9edc975a7b77285e85ef5a3ab.jpg

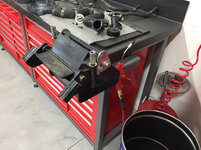
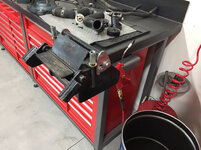
Painted and then bolted the brake to the adapter and test fit.
01eedb947a3e23fe0d3217239a3172b7.jpg

I also tested it one of the other receivers so I can use it at any one of the three locations.
8f5c4ab6b12f07fcebe2f54b24a0a8b2.jpg

I needed to make a small holder for my new chamfering bits. I had a small piece of UHMW that was perfect.
552b7c6c419638b3817a98b565aca07f.jpg

Drilled and test fit.
41d7677da70f07af992de9464ec4ff6e.jpg

In their new home on the shelf above the lathe between my screw jacks and spot drills.
3321f234038ad77de478b7fd7a133fff.jpg
 

Attachments

  • 552b7c6c419638b3817a98b565aca07f.jpg
    552b7c6c419638b3817a98b565aca07f.jpg
    688.6 KB · Views: 0
  • 41d7677da70f07af992de9464ec4ff6e.jpg
    41d7677da70f07af992de9464ec4ff6e.jpg
    736.7 KB · Views: 0
  • 01eedb947a3e23fe0d3217239a3172b7.jpg
    01eedb947a3e23fe0d3217239a3172b7.jpg
    694 KB · Views: 0
  • 3041ae15d76ea38f05c4b9de9a4af9af.jpg
    3041ae15d76ea38f05c4b9de9a4af9af.jpg
    715.6 KB · Views: 0
  • 8e687fc9edc975a7b77285e85ef5a3ab.jpg
    8e687fc9edc975a7b77285e85ef5a3ab.jpg
    718.5 KB · Views: 0
  • e62534cf6731e09c821c903a1db55611.jpg
    e62534cf6731e09c821c903a1db55611.jpg
    748.3 KB · Views: 1
  • 257c2eaa6cd1b48054ae8a41ca583f2d.jpg
    257c2eaa6cd1b48054ae8a41ca583f2d.jpg
    702.9 KB · Views: 1
  • 831c4589f82e083591fa0a4e7887d2fa.jpg
    831c4589f82e083591fa0a4e7887d2fa.jpg
    690.6 KB · Views: 1
  • 3321f234038ad77de478b7fd7a133fff.jpg
    3321f234038ad77de478b7fd7a133fff.jpg
    672.4 KB · Views: 2
  • 8f5c4ab6b12f07fcebe2f54b24a0a8b2.jpg
    8f5c4ab6b12f07fcebe2f54b24a0a8b2.jpg
    785.5 KB · Views: 4
Last edited:

Mike.ASC

Well-known member
Joined
Apr 21, 2010
Messages
880
Location
East coast
Greetings Mike, Is that small metal brake a piece you fabricated yourself or did you buy it from somewhere?
 

nbruno

Well-known member
Joined
Feb 12, 2014
Messages
213
Mike,
Your level of organization is second to none. I am so completely impressed and jealous. I'm hoping that when my wife and I relocate in the spring I am able to get my shop organized somewhere close to that of yours.

Happy holidays

Sent from my SM-G930V using Tapatalk
 

Bob Heine

ALLIANCE MEMBER
Joined
Oct 24, 2009
Messages
10,707
Location
Boca Raton, Florida
Mike, I have to stop looking at the photos without reading the text. I jumped to the conclusion you were going to bend that 1/4-inch plate in that little brake. Another nice project to make your shop more efficient.
 
OP
Z

zmotorsports

ALLIANCE MEMBER
Joined
Oct 20, 2009
Messages
21,439
Location
Northern Utah
Greetings Mike, Is that small metal brake a piece you fabricated yourself or did you buy it from somewhere?


Mike, I picked this up at a yard sale about 15+ years ago. I’m not sure who it’s made by as there are no labels or markings on it. For small brackets it works great and I have used it a lot over the years.

At my last shop I had it permanently mounted to one if my workbenches but in my new shop I decided I didn’t want things permanently mounted to benches so the receivers will work perfect.

At my last shop I also had a fixture permanently mounted next to it on my workbench that was very similar to the one made by OTC for transmission work but I had fabricated it myself with adapters for all of the big 3’s transmissions as well as fixtures for snowmobile engines and 2-stroke ATV/motorcycle engines (which I used to build a lot of). I am going to also fabricate a 2” receiver adapter so I can continue to use them.
 
OP
Z

zmotorsports

ALLIANCE MEMBER
Joined
Oct 20, 2009
Messages
21,439
Location
Northern Utah
Mike,
Your level of organization is second to none. I am so completely impressed and jealous. I'm hoping that when my wife and I relocate in the spring I am able to get my shop organized somewhere close to that of yours.

Happy holidays

Sent from my SM-G930V using Tapatalk


Thank you very much for the compliments, I am flattered. At my last shop due to being so tight for room I routinely performed 5S events to keep things organized. I see myself doing the same here as time goes on. I’ve taken my time setting the new shop up because as I get more shop time I am fine tuning my placement of things based on work flow and improving efficiency.

Good luck on the relocation and getting a shop set up.

Thanks for stopping by my projects thread.
 
Last edited:
OP
Z

zmotorsports

ALLIANCE MEMBER
Joined
Oct 20, 2009
Messages
21,439
Location
Northern Utah
Mike, I have to stop looking at the photos without reading the text. I jumped to the conclusion you were going to bend that 1/4-inch plate in that little brake. Another nice project to make your shop more efficient.


Thanks Bob. I completely agree that it is getting fine tuned and feels more efficient every day.

Thanks for following along.
 

Mike.ASC

Well-known member
Joined
Apr 21, 2010
Messages
880
Location
East coast
Mike, I picked this up at a yard sale about 15+ years ago. I’m not sure who it’s made by as there are no labels or markings on it. For small brackets it works great and I have used it a lot over the years.

At my last shop I had it permanently mounted to one if my workbenches but in my new shop I decided I didn’t want things permanently mounted to benches so the receivers will work perfect.

At my last shop I also had a fixture permanently mounted next to it on my workbench that was very similar to the one made by OTC for transmission work but I had fabricated it myself with adapters for all of the big 3’s transmissions as well as fixtures for snowmobile engines and 2-stroke ATV/motorcycle engines (which I used to build a lot of). I am going to also fabricate a 2” receiver adapter so I can continue to use them.

Thanks for the reply. I can definitely see that being quite handy and may have to fab up something very similar for myself.
 
OP
Z

zmotorsports

ALLIANCE MEMBER
Joined
Oct 20, 2009
Messages
21,439
Location
Northern Utah
Thanks for the reply. I can definitely see that being quite handy and may have to fab up something very similar for myself.


Agreed. Between that and my Swag HD finger brake I can bend quite a variety of small brackets and tabs.

One of these days I would like to add a 48” finger brake for sheet metal but I will have to do a lot more sheet metal work before I’m willing to commit that much floor space to a piece of equipment.

Thanks for following along on my thread.
 
OP
Z

zmotorsports

ALLIANCE MEMBER
Joined
Oct 20, 2009
Messages
21,439
Location
Northern Utah
I want to wish everyone a very safe, prosperous and Happy New Year as we head into 2018.

I hope everyone has the opportunities to get out in their shops and fulfill their dreams this year. Whether it be repairing, fabricating, machining or merely creating memories with family and friends.
 

Ch3No2

Well-known member
Joined
Nov 27, 2009
Messages
356
Mike, very nice mig beads....mind if I ask what machine you are using?
Thanks in advance
 
OP
Z

zmotorsports

ALLIANCE MEMBER
Joined
Oct 20, 2009
Messages
21,439
Location
Northern Utah
Mike, very nice mig beads....mind if I ask what machine you are using?

Thanks in advance


Thank you for the comments. And I’ve followed along on your shop build Nitro and very much like your shop and setup.

As for the machine, nothing special but I tend to bleed blue, Miller blue that is. The MIG machine that I currently use is a Miller MM251.

Thanks for stopping by my projects thread.
 

Ch3No2

Well-known member
Joined
Nov 27, 2009
Messages
356
Mike, I have always bled Miller Blue,,,my Dad bought me a Dial Arc HF for my 18th Bday and I still have it to this day. I already had a Miller 35...best machine made...plug it in the #4 tap and go.
I currently have a MM250 and it seems pretty sensitive but I will admit I am probably on the hot and fast side since it is 3" square tube 1/8" wall....seems better there than to slowly stich back and forth on a lower setting.
Thanks for the response
Dan
 
To avoid these ads, REGISTER NOW!

wrenchn

Well-known member
Joined
May 20, 2012
Messages
59
Location
Chicago
Thanks. It’s actually ultra leather and feels very soft and supple. [emoji108] My wife nailed it on the color she picked out.

Mike,

I have been following your projects since you started building your new garage, Amazing attention to detail and it shows. I like that color on the couch do you happen to know what that color is called?
 
Joined
Jun 20, 2012
Messages
24
ZMotorsport, What size welding table is yours, length, width, and table thickness. Could you post some pics. Looking to build one myself and the few pics of yours ive seen looks like something im wanting.
 
OP
Z

zmotorsports

ALLIANCE MEMBER
Joined
Oct 20, 2009
Messages
21,439
Location
Northern Utah
Mike, I have always bled Miller Blue,,,my Dad bought me a Dial Arc HF for my 18th Bday and I still have it to this day. I already had a Miller 35...best machine made...plug it in the #4 tap and go.
I currently have a MM250 and it seems pretty sensitive but I will admit I am probably on the hot and fast side since it is 3" square tube 1/8" wall....seems better there than to slowly stich back and forth on a lower setting.
Thanks for the response
Dan

Dan, those old DialArc's were bulletproof and just flat worked. Had one at work for many years until we bought the MM251 about 14 years ago. I liked it so much that I bought mine for home after using the one at work for approx. a year. Buddy of mine purchased the MM252 about two years ago and it is pretty much the exact same machine as my MM251 only with a different display panel, welds pretty much the same and settings seem to be very close to mine if not exact.

At work I always welded on the hot and fast side but that's more the industrial side than the motorsports side. About 10 or so years ago (maybe longer now, you know how time gets away from us) I started having more clients ask for and request the stack of dimes look in MIG so I figured if I was going to continue making money welding and fabricating I had better learn how to do it.:D It is definitely something that takes time and practice to learn to manipulate the gun at slightly slower and lower settings while not sacrificing penetration but has definitely been beneficial to learn.

Thanks again for following along and commenting Dan, I appreciate it.
 
OP
Z

zmotorsports

ALLIANCE MEMBER
Joined
Oct 20, 2009
Messages
21,439
Location
Northern Utah
Mike,

I have been following your projects since you started building your new garage, Amazing attention to detail and it shows. I like that color on the couch do you happen to know what that color is called?

Thank you very much for following along on both my shop/RV build as well as my projects thread. I appreciate that.

The material is Ultra Leather and I believe the color is called "sand". When I showed my wife the sample book she didn't even hesitate and pointed right to it and said "that's the one I want." So far I think it is looking good, only one more couch to go then I can wrap up the interior project on the coach.
 
OP
Z

zmotorsports

ALLIANCE MEMBER
Joined
Oct 20, 2009
Messages
21,439
Location
Northern Utah
ZMotorsport, What size welding table is yours, length, width, and table thickness. Could you post some pics. Looking to build one myself and the few pics of yours ive seen looks like something im wanting.

The table measures 32"x 60" with 1/2" top. The frame is fabricated from 2"x.187" square tubing and has supports under the table top so it is dead level and no drooping in the middle. I used locking casters on it and when locked in place is very solid mainly due to the weight, it is quite heavy. I hung the one long side over the edge of the frame about 8" for two reasons, one so when I sit to weld I can be under that lip and secondly for clamping, I can reach around that one edge a little further for adding clamps. I can't remember the exact height, I think it is 34" from the floor but I will double check as I don't want to give you false information. I also added the bars on two of the sides for hanging my clamps so they don't interfere with my sitting position.

I will take some additional pictures of it tonight when I get home and post them up for you.

Thanks for your interest and for following along.
 

wrenchn

Well-known member
Joined
May 20, 2012
Messages
59
Location
Chicago
Thanks for letting me know the color. I am going to save that in my notes for later reference. I like to keep notes that way when a project comes up, I can go back. I don't do enough big projects to use a whiteboard yet.
 
OP
Z

zmotorsports

ALLIANCE MEMBER
Joined
Oct 20, 2009
Messages
21,439
Location
Northern Utah
Thanks for letting me know the color. I am going to save that in my notes for later reference. I like to keep notes that way when a project comes up, I can go back. I don't do enough big projects to use a whiteboard yet.

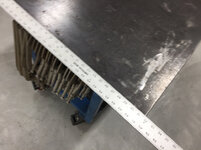
You're welcome. The Ultra Leather material is so much softer and smoother than the original leather that we removed.
 
OP
Z

zmotorsports

ALLIANCE MEMBER
Joined
Oct 20, 2009
Messages
21,439
Location
Northern Utah
Here are some pictures of my welding/fabrication table along with measurements.

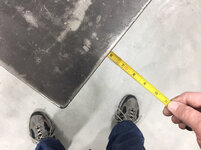
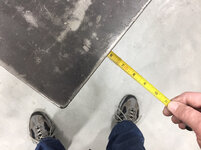
From the floor to the work surface it measures 32”.
3eda0f564913826f180d9b677f9d9c5b.jpg

It measures 32” wide.
f4f68dac136d3d20213cad63ce0a54ff.jpg

And 60” long.
f5490302147acc9f9bf138230d2c4377.jpg

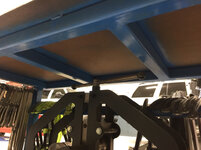
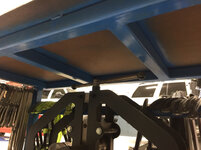
The top is slightly offset which allows me to sit comfortably under the edge.
bdf1d0249a7c848ddacbcc850b80d7cc.jpg

The top has 6” of overhang.
01435fcb718bd7743991782fabcbf9b3.jpg

Originally both front and back were open but shortly after completing it I purchased quite a few additional C-clamps at a yard sale and I needed a place to hang them. I added a piece of tubing to the one side. I bolted the rectangular tubing on to avoid messing up the Miller blue paint job.
1d81b37fb16b87a5e7c3f9b10cbd9ce3.jpg

On the end I had welded a piece of round tube to hang vise grip clamps on during the original build.
007ad373a433b5e7ba6b615a84e539a2.jpg

The entire framework was constructed of 2”x .187” wall square tube, also spanning under the 1/2” top for a flat surface that won’t droop it sag. So far still flat after more than 15 years.
3b218573e7460b414e9084bcdd4c7221.jpg

I added a piece of receiver tubing a couple of months ago while I was constructing my workbenches so I can use my various adapters on any of the benches.
64cb3134e43d055417f17e8c579322d9.jpg

I hope that is helpful.
 

Attachments

  • 3eda0f564913826f180d9b677f9d9c5b.jpg
    3eda0f564913826f180d9b677f9d9c5b.jpg
    756.3 KB · Views: 4
  • f4f68dac136d3d20213cad63ce0a54ff.jpg
    f4f68dac136d3d20213cad63ce0a54ff.jpg
    648.6 KB · Views: 3
  • f5490302147acc9f9bf138230d2c4377.jpg
    f5490302147acc9f9bf138230d2c4377.jpg
    801.3 KB · Views: 3
  • bdf1d0249a7c848ddacbcc850b80d7cc.jpg
    bdf1d0249a7c848ddacbcc850b80d7cc.jpg
    705.9 KB · Views: 4
  • 01435fcb718bd7743991782fabcbf9b3.jpg
    01435fcb718bd7743991782fabcbf9b3.jpg
    709 KB · Views: 4
  • 64cb3134e43d055417f17e8c579322d9.jpg
    64cb3134e43d055417f17e8c579322d9.jpg
    707.1 KB · Views: 4
  • 3b218573e7460b414e9084bcdd4c7221.jpg
    3b218573e7460b414e9084bcdd4c7221.jpg
    728.4 KB · Views: 2
  • 007ad373a433b5e7ba6b615a84e539a2.jpg
    007ad373a433b5e7ba6b615a84e539a2.jpg
    750.7 KB · Views: 3
  • 1d81b37fb16b87a5e7c3f9b10cbd9ce3.jpg
    1d81b37fb16b87a5e7c3f9b10cbd9ce3.jpg
    117.1 KB · Views: 3
Last edited:
OP
Z

zmotorsports

ALLIANCE MEMBER
Joined
Oct 20, 2009
Messages
21,439
Location
Northern Utah
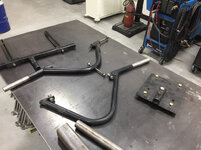
Checked another small item off the list tonight. About 18 or so years ago I had fabricated some adapters to hold transmissions during disassembly/assembly that attached to a base plate that I had also fabricated and bolted to my workbench. The transmission fixture is very similar the OTC one that used to be commercially available which allows positioning the transmission in various positions depending upon whether I was working on the valve body or removing/inserting sun gears, shells, gears, bands etc into the body. I also had fabricated an adapter in which had two adjustable arms that I used to bolt snowmobile and ATV engines to back when I was building a lot of them.
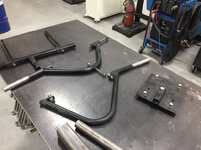
Here are the couple of trans. adapters along with the power sports engine adapter and base plate.
8de6596551ec8cfd57b888b936c48002.jpg

In my new shop I don’t want to permanently bolt things to the top of my workbenches (other than my Wilton vise) so I decided to fabricate an adapter that I can use at any one of the work bench receiver tubes, three total.

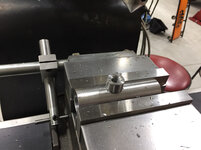
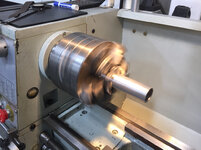
Started by machining a small piece of tubing that I bored out to 1.075” ID.
d269cb8e6c90e675159b30b00100d943.jpg

Then I machined a small bung tapped to 1/2”-13.
62d57ff8978047aa449e1f42f75a2fe3.jpg

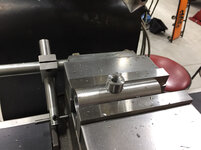
Milled a small flat to accept the .875” OD bung.
0fae0846db70f45f2d292b729777b4ce.jpg

Drilled 1/2” hole.
347d2c3793dc78f7ceb7a5ceb492980e.jpg

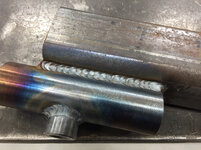
Ready to weld the bung onto the tube.
ab2783076360f25d765afcd3d825d135.jpg

Welded the round tube to a piece of 2” square hitch tubing.
09fc9e56abf6bd16d620138b5b67679b.jpg

71659a07525131cab3dbd45f4e477311.jpg

Painted then a trial run.
17e7afd7b822551a8d8f0be4d8e14757.jpg

I also fabricated a small hanger to hang all of the components on the wall in the storage bay.
3c02af3064e397eedb99ac0b60f93e25.jpg

Thanks for looking.
 

Attachments

  • 09fc9e56abf6bd16d620138b5b67679b.jpg
    09fc9e56abf6bd16d620138b5b67679b.jpg
    836.5 KB · Views: 3
  • 347d2c3793dc78f7ceb7a5ceb492980e.jpg
    347d2c3793dc78f7ceb7a5ceb492980e.jpg
    658.2 KB · Views: 2
  • 71659a07525131cab3dbd45f4e477311.jpg
    71659a07525131cab3dbd45f4e477311.jpg
    862.1 KB · Views: 2
  • 17e7afd7b822551a8d8f0be4d8e14757.jpg
    17e7afd7b822551a8d8f0be4d8e14757.jpg
    854.6 KB · Views: 2
  • ab2783076360f25d765afcd3d825d135.jpg
    ab2783076360f25d765afcd3d825d135.jpg
    638.6 KB · Views: 1
  • 3c02af3064e397eedb99ac0b60f93e25.jpg
    3c02af3064e397eedb99ac0b60f93e25.jpg
    826.1 KB · Views: 1
  • 0fae0846db70f45f2d292b729777b4ce.jpg
    0fae0846db70f45f2d292b729777b4ce.jpg
    647.9 KB · Views: 1
  • 62d57ff8978047aa449e1f42f75a2fe3.jpg
    62d57ff8978047aa449e1f42f75a2fe3.jpg
    702.8 KB · Views: 1
  • d269cb8e6c90e675159b30b00100d943.jpg
    d269cb8e6c90e675159b30b00100d943.jpg
    762.5 KB · Views: 1
  • 8de6596551ec8cfd57b888b936c48002.jpg
    8de6596551ec8cfd57b888b936c48002.jpg
    758.3 KB · Views: 0
Last edited:

Nlped

Well-known member
Joined
Feb 24, 2014
Messages
151
Location
Hayden AL
Finished reading this one today too. Great detail, beautiful inner-shop & fantastic tools & organizational implements.


Sent from my iPhone using Tapatalk
 
OP
Z

zmotorsports

ALLIANCE MEMBER
Joined
Oct 20, 2009
Messages
21,439
Location
Northern Utah
Finished reading this one today too. Great detail, beautiful inner-shop & fantastic tools & organizational implements.


Sent from my iPhone using Tapatalk


I just commented to my wife on Tuesday night when she came out to the shop after work that I finally feel like everything is in its place and I can walk to a cabinet or drawer and grab exactly what I need, whether it be a tool, brake wash, sealant or a piece of metal from my metal storage cabinets. I was machining a small threaded bung and was able to walk right to the drawer that contains my small drops of round bar stock then walked right back to the lathe, it was awesome.


Thank you for taking the time to read through it and comment. I appreciate that.
 
OP
Z

zmotorsports

ALLIANCE MEMBER
Joined
Oct 20, 2009
Messages
21,439
Location
Northern Utah
My favorite part. Everyone wants to build 36 inch high tables. Build something 18" tall and you need a step stool to weld the top.

I completely agree. I've welded on some friends benches that have been in the 38-40 inch range and have had to grab a step stool if anything of any size is being welded exactly as you described.

I built this welding table back when I was fabricating snowmobile and ATV sand drag chassis and as you say, once you have a 18"-24" chassis clamped down I can either sit and weld the bottom rails or stand and weld the upper without having to be on a step stool.

It would be a bit low for general purpose work but for fabrication where I am either sitting and welding or standing and welding on something taller it seems to be the perfect height.

Thanks for checking in and commenting.
 
OP
Z

zmotorsports

ALLIANCE MEMBER
Joined
Oct 20, 2009
Messages
21,439
Location
Northern Utah
My order from McMaster Carr arrived today. I ordered some parts for another Jeep bumper that I need to build, this one for a friend, so while was ordering I also ordered a few handles for the receivers in my benches and the transmission fixture I just fabricated.
cbbc2911c8365e07a6c8d3d983895d08.jpg

b1286a102c85bf2e763864f006b49ac5.jpg

I then commenced another project that I have wanted to build for two years now, ever since I purchased my M-K Products weld positioner, an arm support for TIG welding that I can locate on my bench then adjust height and angle for support during the welding process.

The plate scribed and ready to drill some speed holes. [emoji1]
62c588178bf5be2e6f3abf2f203022c1.jpg

Clamped in the drill press drilling speed holes.
cb39d4ed6f7783e915d718963c388fcf.jpg

Gussets will also have speed holes.
9c5665cd923008c5f463af1105b632db.jpg

Machining three 3/8”-16 threaded bungs for locking handles.
0e124c532f3806b5d06c43fe3a1ffdba.jpg

The base is ready to weld together then I can commence fabricating the movable/adjustable section.
b66a5961836a38c2892c163313ac1efb.jpg

Stay tuned..... the remaining components should reveal the what the final product will be soon.
 

Attachments

  • b66a5961836a38c2892c163313ac1efb.jpg
    b66a5961836a38c2892c163313ac1efb.jpg
    698.5 KB · Views: 0
  • 0e124c532f3806b5d06c43fe3a1ffdba.jpg
    0e124c532f3806b5d06c43fe3a1ffdba.jpg
    769.3 KB · Views: 0
  • cb39d4ed6f7783e915d718963c388fcf.jpg
    cb39d4ed6f7783e915d718963c388fcf.jpg
    831.3 KB · Views: 0
  • 62c588178bf5be2e6f3abf2f203022c1.jpg
    62c588178bf5be2e6f3abf2f203022c1.jpg
    905 KB · Views: 0
  • b1286a102c85bf2e763864f006b49ac5.jpg
    b1286a102c85bf2e763864f006b49ac5.jpg
    827.7 KB · Views: 0
  • cbbc2911c8365e07a6c8d3d983895d08.jpg
    cbbc2911c8365e07a6c8d3d983895d08.jpg
    709.3 KB · Views: 0
  • 9c5665cd923008c5f463af1105b632db.jpg
    9c5665cd923008c5f463af1105b632db.jpg
    812.8 KB · Views: 0
Last edited:
To avoid these ads, REGISTER NOW!
Top Bottom