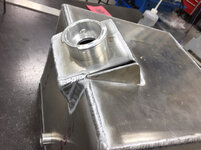
To avoid these ads, REGISTER NOW!

ZMotorsports Shop Projects 2.0

fnieto

Well-known member
Joined
Aug 27, 2013
Messages
1,401
Location
Tucson,Arizona
Well said Mike,

Ok, I checked out you shop tour video, nice digs for sure brother. What's most impressive to me is your eclectic collection of tools. Man, I thought I was a tool junkie, it would take me years to come close to your collection. You use them and thats whats important. I have been building my own specialty tools for a while now and find it satisfying when they turn out nicer than what can be purchased.
Nice job man!
Paco
 
To avoid these ads, REGISTER NOW!
OP
Z

zmotorsports

ALLIANCE MEMBER
Joined
Oct 20, 2009
Messages
21,464
Location
Northern Utah
Well said Mike,

Ok, I checked out you shop tour video, nice digs for sure brother. What's most impressive to me is your eclectic collection of tools. Man, I thought I was a tool junkie, it would take me years to come close to your collection. You use them and thats whats important. I have been building my own specialty tools for a while now and find it satisfying when they turn out nicer than what can be purchased.
Nice job man!
Paco

Thanks Paco, I appreciate the feedback.

Thanks for taking the time to view my Shop Tour video.
 
OP
Z

zmotorsports

ALLIANCE MEMBER
Joined
Oct 20, 2009
Messages
21,464
Location
Northern Utah
Started another project tonight.

I have decided to fabricate a new surge tank for our Monaco Dynasty coach. The plastic surge tanks on the late 90’s through mid-2000’s are plastic and have quite a high failure rate. I feel mine is living on borrowed time being 15 years old and has 116k on clock.

Although Monaco Coach has been bought and sold a few times now since around 2009, they continue to have pretty good support for their coaches. They are now owned by REV Specialty Vehicles, who also owns Fleetwood and American Coach in addition to the Monaco line.

There actually is a replacement surge tank available through Monaco as well as a company called Veurinks that is an RV dealership in Michigan that supports the Monaco line in addition to many others. This new surge tank is a nylon tank vs. the original plastic and has been reported to be a very nice bolt in reproduction of the original.

Not able to leave well enough alone nor have something like everyone else I opted to fabricate one from some aluminum that I had left over from previous projects. Another thing that I don’t like about the original surge tank is the long rod style low coolant level sensor. This is no longer available and is the rubber grommet style and I would prefer to have a NPT style threaded level sensor.

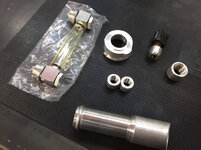
I purchased an aluminum radiator filler neck, a 5” long sight glass and did some research to locate a 1/4” NPT thread in style of coolant level sensor and pigtail to graph into my wiring harness.

Original surge tank bolted in coach.
9f0edfe5c4f5897a2eeab3b921eb5033.jpg

Surge tank removed.
e36e8ae3171539a433e6e092063101f6.jpg

Surge tank on the fab table ready to measure.
8a0fbd4f10faf751467848e94386c0bb.jpg

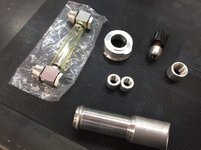
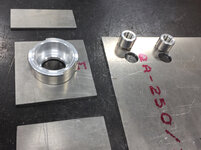
Purchased aluminum filler neck, 5” sight glass with threaded bungs & banjo fittings and a piece of 1” diameter 6061 in which to machine a few 1/4” NPT bungs for the sensor and bypass hose connections. I also would like to add another feature that the original tank did not have, a drain plug. I will use the aluminum stock to machine a 1/2” NPT bung for a drain plug.
e8e971b52e2a36b72cb96dfef9aeb8e1.jpg

The aluminum cut to the proper height and in my press brake.
3ce7ad38afb97d290767233590f73389.jpg

Bent and ready to trim the one leg to match and then cut the back.
594d0138728adbc5f2a63ed50e30431d.jpg

f3e7e3bfb004eb111d7858442d472577.jpg

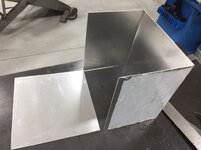
Trimmed and back cut, deburred and ready to tack weld.
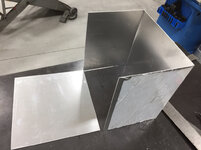
6e11dad139a0c88d28161b2bbe23e1d9.jpg

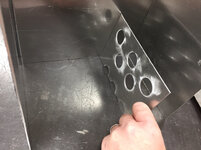
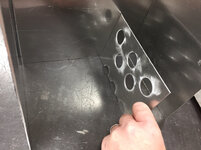
Probably unnecessary but I decided to make a pair of baffles to weld inside the tank as well.
1046d17c6f45454533d8b95319c29bf4.jpg

a747ab101904ed8a77679af480b1dd0f.jpg

7e0c49fccbef57a3f9e41baafe5dcc09.jpg

That’s it for tonight.

Thanks for looking.
 

Attachments

  • 9f0edfe5c4f5897a2eeab3b921eb5033.jpg
    9f0edfe5c4f5897a2eeab3b921eb5033.jpg
    633.7 KB · Views: 0
  • 7e0c49fccbef57a3f9e41baafe5dcc09.jpg
    7e0c49fccbef57a3f9e41baafe5dcc09.jpg
    750.2 KB · Views: 0
  • a747ab101904ed8a77679af480b1dd0f.jpg
    a747ab101904ed8a77679af480b1dd0f.jpg
    717.6 KB · Views: 0
  • 6e11dad139a0c88d28161b2bbe23e1d9.jpg
    6e11dad139a0c88d28161b2bbe23e1d9.jpg
    659.5 KB · Views: 0
  • f3e7e3bfb004eb111d7858442d472577.jpg
    f3e7e3bfb004eb111d7858442d472577.jpg
    681 KB · Views: 0
  • 594d0138728adbc5f2a63ed50e30431d.jpg
    594d0138728adbc5f2a63ed50e30431d.jpg
    683.2 KB · Views: 0
  • 3ce7ad38afb97d290767233590f73389.jpg
    3ce7ad38afb97d290767233590f73389.jpg
    741.3 KB · Views: 1
  • e8e971b52e2a36b72cb96dfef9aeb8e1.jpg
    e8e971b52e2a36b72cb96dfef9aeb8e1.jpg
    788.4 KB · Views: 1
  • 8a0fbd4f10faf751467848e94386c0bb.jpg
    8a0fbd4f10faf751467848e94386c0bb.jpg
    735.9 KB · Views: 1
  • e36e8ae3171539a433e6e092063101f6.jpg
    e36e8ae3171539a433e6e092063101f6.jpg
    787.6 KB · Views: 0
  • 1046d17c6f45454533d8b95319c29bf4.jpg
    1046d17c6f45454533d8b95319c29bf4.jpg
    719.3 KB · Views: 1
Last edited:

customh

Well-known member
Joined
Feb 18, 2013
Messages
562
Location
East Bethel, MN
This thread can easily serve as inspiration to the idea of bootstrapping and just taking projects on, learning as you go. Tanks scare me- pressure or not. Given the time, some thought, and some practice anything is possible though!
 
OP
Z

zmotorsports

ALLIANCE MEMBER
Joined
Oct 20, 2009
Messages
21,464
Location
Northern Utah
This thread can easily serve as inspiration to the idea of bootstrapping and just taking projects on, learning as you go. Tanks scare me- pressure or not. Given the time, some thought, and some practice anything is possible though!

Thanks, but don't let tanks scare you. I haven't built a ton of tanks nor had any special training on fabricating them but have just seen what others have done, read up on materials and lastly used good ole' common sense and jumped in on my first one. Just take a systematic approach to the fabrication process and build as needed. Let your tank be driven by design (what is the tanks actual purpose), fitment (sized for the appropriate location), integrity (keep the welds and components appropriate for long life) and lastly focus on cosmetics (making it look nice). Also, keep in mind that EVERYONE who fabricates tanks and shows pictures of their works of art had to build their first tank at some point in time, and I am sure they didn't have the same knowledge they had by their second tank or even their hundredth tank. It is all a learning curve and a person should be learning and improving with each and every one, just keep that in mind and don't let them (or anything for that matter) scare you in your attempt.

I try to plan my bends and welds out prior to beginning which also helps. For example, I was worried about being able to bend both corners in my small brake so I did a test bend on a long piece of narrow scrap. I thought worse case I could make one bend on two identical panels and weld them together, it would still be two vertically welded corner joints so technically no more welding but it was the placement that I was trying to focus on. I guess I'm a symmetrical guy and wanted both front corners to be bends rather than one bent corner and one welded corner when viewing from the rear of the coach. The tank would have functioned fine either way but it would have bugged me and I wanted the aesthetics to be correct. This way both vertical corner welds will actually be at the rear of the tank with the back piece welded on and not one on the rear and the other on the opposing front corner.

Thanks for following along on my projects and I hope they are as informative as well as entertaining.
 

sanddan

Well-known member
Joined
Jul 7, 2005
Messages
708
Location
Oregon
Cool project Mike. If it's not too late, try to center one of the baffles over the makeup line port in the bottom. That will prevent the "toilet bowl effect" from pulling air down into the line when the tank water level is low. I learned that when designing my first surge tank for a Detroit Series 60 installation. Might not be a big deal since I'm sure you check the fluid level regularly but would prevent air pockets from ever getting into the cooling system if it ever did get low.
 
OP
Z

zmotorsports

ALLIANCE MEMBER
Joined
Oct 20, 2009
Messages
21,464
Location
Northern Utah
Cool project Mike. If it's not too late, try to center one of the baffles over the makeup line port in the bottom. That will prevent the "toilet bowl effect" from pulling air down into the line when the tank water level is low. I learned that when designing my first surge tank for a Detroit Series 60 installation. Might not be a big deal since I'm sure you check the fluid level regularly but would prevent air pockets from ever getting into the cooling system if it ever did get low.

Thanks Dan. I hadn't thought about that so thanks for the tip. I keep a close eye on my coolant level so doubtful it should ever get that low. The 1.250" makeup port will be dead center and towards the back of the bottom of the tank. The sight glass bottom fitting will be in the 3" range off the bottom of the tank. I was thinking of spacing the baffles in from the sides to have the tank divided evenly into thirds. The tank is 11" wide so somewhere around 3.625 inches or so in from each side for baffle placement which would leave the center in the 3.5"-3.75" range in width.
 

macgyver

Well-known member
Joined
Feb 13, 2008
Messages
45
Location
Big Bear Lake
Mike, that sight glass is cool. Where did you find that? my Sig has a metal tank already with a dime size sight glass in it. With the red Chevron long life coolant it is impossible to see. I may add one of these to my tank!!
 
OP
Z

zmotorsports

ALLIANCE MEMBER
Joined
Oct 20, 2009
Messages
21,464
Location
Northern Utah
Mike, that sight glass is cool. Where did you find that? my Sig has a metal tank already with a dime size sight glass in it. With the red Chevron long life coolant it is impossible to see. I may add one of these to my tank!!

Quinn, I purchased it on eBay from a vendor called Coyote. They have several versions available by length, I chose the 5" long version. I waffled on doing a 1/2" NPT sight glass for lower and one for upper but I really prefer the sight tube vs. a single sight glass.
 

bmxdad

Well-known member
Joined
Feb 18, 2014
Messages
2,539
Location
Puyallup, WA
Started another project tonight.


The aluminum cut to the proper height and in my press brake.
3ce7ad38afb97d290767233590f73389.jpg

Mike ... is that an attachment to the press? I mean, did you buy it or make it? I have Dake B10 10 ton bench press, and would love to do some sheet metal work?

As always ... just in awe of your shop. Something to shoot for!!
 
OP
Z

zmotorsports

ALLIANCE MEMBER
Joined
Oct 20, 2009
Messages
21,464
Location
Northern Utah
Mike ... is that an attachment to the press? I mean, did you buy it or make it? I have Dake B10 10 ton bench press, and would love to do some sheet metal work?

As always ... just in awe of your shop. Something to shoot for!!

Thanks for the comments.

As for the press brake, that one is the SWAG Off-Road Heavy Duty Finger Brake that I purchased in kit form and assembled/welded it myself. I have had it for a few years now and it works great for things like this. I only recently took it apart and painted it as it was just bare steel before. I would love to have a floor model 48" pan brake but just can't justify giving up the real estate for one the few times a year I need a brake. This one with the fingers is nice for making various size boxes with. I would definitely recommend the SWAG press brake if you have a hydraulic press in which to power it.
 
Last edited:
OP
Z

zmotorsports

ALLIANCE MEMBER
Joined
Oct 20, 2009
Messages
21,464
Location
Northern Utah
Due to getting out of work late tonight I didn’t get much done on my surge tank.

Cut the top & bottom pieces.
6d0036aabb6ef6f3e0a06cd3ebdf534c.jpg

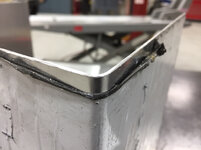
One thing worth mentioning is that when you bend up a piece of sheet you get a little raised nub at the corner. Take a file and knock these small nubs down flat and even with the edges.
bde4b15c63f735aca4a2cf8722e96222.jpg

Nub filed flat.
bb25aa49e11956a4544f078cfd24e943.jpg

I get to use my recently fabricated TIG arm rest.
3dabb25c031605eab2929a0c03ff2af4.jpg

Keep the fitment tight and the tacks small. I'll actually knock these down just a bit with a file before final welding.
51ff1f0f3002878f537ad9cef4fc5608.jpg

By all means not my best welds but they’ll have to do. I haven’t welded aluminum for well over a year so I guess I need some more practice.
1bb927ff6d9ebce9b04523741344fc2e.jpg

Thanks for looking.
 

Attachments

  • 3dabb25c031605eab2929a0c03ff2af4.jpg
    3dabb25c031605eab2929a0c03ff2af4.jpg
    773.9 KB · Views: 1
  • 1bb927ff6d9ebce9b04523741344fc2e.jpg
    1bb927ff6d9ebce9b04523741344fc2e.jpg
    605.2 KB · Views: 0
  • 51ff1f0f3002878f537ad9cef4fc5608.jpg
    51ff1f0f3002878f537ad9cef4fc5608.jpg
    636.7 KB · Views: 0
  • bb25aa49e11956a4544f078cfd24e943.jpg
    bb25aa49e11956a4544f078cfd24e943.jpg
    642.3 KB · Views: 0
  • bde4b15c63f735aca4a2cf8722e96222.jpg
    bde4b15c63f735aca4a2cf8722e96222.jpg
    630.9 KB · Views: 0
  • 6d0036aabb6ef6f3e0a06cd3ebdf534c.jpg
    6d0036aabb6ef6f3e0a06cd3ebdf534c.jpg
    709.5 KB · Views: 0
Last edited:

Ohmthis

Well-known member
Joined
Jan 20, 2013
Messages
3,021
Location
Outside of Louisville KY
Great job on the tank! A couple of questions though. Are you going to use some sort of vibration damper on the mounting tabs? I would think the welds to the tab and tank could crack with the vibration. How wide is the press brake? The welds look fine, they will hold up for a long time. what filler did you use? Thanks for the insight on your projects.
 

fnieto

Well-known member
Joined
Aug 27, 2013
Messages
1,401
Location
Tucson,Arizona
Looking good Mike.
The support TIG arm looks like a big help. have you consider a tight fitting hole for the filler neck and weld it from the bottom (inside) prior to assembling the tank. Might take less heat reducing possible distortion. The treaded bungs could also have a shoulder turned to fit semi flush on the inside for the same fast weld. T joints seem to require more heat vs flat for me at least. I did a set of funny car headers this way as it was tight and difficult to weld from the outside between ports. They held up for several years. Just a thought...
 
OP
Z

zmotorsports

ALLIANCE MEMBER
Joined
Oct 20, 2009
Messages
21,464
Location
Northern Utah
Great job on the tank! A couple of questions though. Are you going to use some sort of vibration damper on the mounting tabs? I would think the welds to the tab and tank could crack with the vibration. How wide is the press brake? The welds look fine, they will hold up for a long time. what filler did you use? Thanks for the insight on your projects.

Thanks for the comments.

No isolation mounts in the plans but I will install rubber washers between the steel framework and the tank. Also the tabs will be a bit larger than the tabs on the plastic tank and cover a bit more area. I've rigid mounted a lot of tanks from go-karts, snowmobiles and sand sandrails in the past with no real issues due to fatigue cracking. The key is to have enough surface area when welding the tabs on. I've seen more issues when people merely weld a tab onto a corner than covering a few square inches and extending past a panel.

I can't remember the exact width of the SWAG press brake, I think it will accept somewhere around 20-22 inch wide material an the brake itself if just over 24" wide. It barely fits between the vertical supports of my 20-ton Nugier hydraulic press.

Thanks for stopping by and checking out the project.
 
OP
Z

zmotorsports

ALLIANCE MEMBER
Joined
Oct 20, 2009
Messages
21,464
Location
Northern Utah
Looking good Mike.
The support TIG arm looks like a big help. have you consider a tight fitting hole for the filler neck and weld it from the bottom (inside) prior to assembling the tank. Might take less heat reducing possible distortion. The treaded bungs could also have a shoulder turned to fit semi flush on the inside for the same fast weld. T joints seem to require more heat vs flat for me at least. I did a set of funny car headers this way as it was tight and difficult to weld from the outside between ports. They held up for several years. Just a thought...

Thanks Paco, I thought about welding from the backside but haven't made up my mind yet. I will have to fabricate a sub-section to weld the filler neck on to then weld that to the tank in order to get my angle and standoff of the fill neck so I may still do that, haven't decided.

As for the bungs I usually machine a small step on them to assist in alignment with the holes but I will weld them from the outside on this tank. I think I am going to splurge and have the tank polished and I think the polished welds on the bungs look kind of cool, although the bungs will barely be visible due to their locations.:dunno: Polishing it is overkill for a motorhome, but I am also tossing around the idea of installing some mirror polished stainless steel on my two large electrical panels in the engine bay as well as the plastic covers are looking a bit old. Figured I may as well give the engine bay a slight Prevost coach look.:bounce:

Always appreciate your insights and feedback Paco, thank you very much.
 
OP
Z

zmotorsports

ALLIANCE MEMBER
Joined
Oct 20, 2009
Messages
21,464
Location
Northern Utah
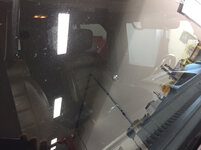
Driving home from work this afternoon a roll back truck went past me and flipped up a pretty good size rock and smacked the windshield of my Jeep right in the middle of the passenger’s side field of vision. Lucky I have my windshield repair kit and just pulled it into the shop and hurried and repaired it.

It had already started to spider a bit by the time I got home.
52797e2b8e7a77a37243b222f29829cd.jpg

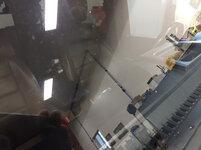
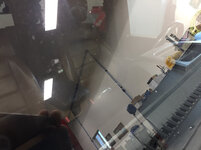
Opened up my tool box and got everything ready for the repair so items are within easy reach.
1cd5d165e960a014290798b6cf5cde8f.jpg

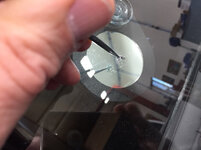
I used a pick to try and get as much out of the center pit as possible.
7e1edfb9e621f2bfb64bbbaa83bb1de4.jpg

Next installed the bridge and forced the resin into the chip.
513f09c615153a428a51e1e979de74b7.jpg

The guy who used to repair my windshields told me that by using a little heat on the inside helps the resin flow out a little easier on ones that have started to spread so I tried it by passing a lighter around the backside and you could actually see the resin flow out into the hairline cracks, not completely eliminating them but it sure helped.

I thought I took a picture of the UV light on it curing the repair but I guess I forgot do you’ll have to settle for a completed shot.
fc68f54a20c6db6350fa83186ad6fdd2.jpg

Lastly while sweeping up and getting ready to close up the shop for the evening I just had to get a shot of the mountain out my shop window with the sun going down and lighting up the mountain.
c719032ea0558c48545e6b8e30836e4c.jpg

Thanks for looking.
 

Attachments

  • c719032ea0558c48545e6b8e30836e4c.jpg
    c719032ea0558c48545e6b8e30836e4c.jpg
    685.5 KB · Views: 0
  • fc68f54a20c6db6350fa83186ad6fdd2.jpg
    fc68f54a20c6db6350fa83186ad6fdd2.jpg
    619.7 KB · Views: 0
  • 513f09c615153a428a51e1e979de74b7.jpg
    513f09c615153a428a51e1e979de74b7.jpg
    84 KB · Views: 0
  • 7e1edfb9e621f2bfb64bbbaa83bb1de4.jpg
    7e1edfb9e621f2bfb64bbbaa83bb1de4.jpg
    687 KB · Views: 0
  • 1cd5d165e960a014290798b6cf5cde8f.jpg
    1cd5d165e960a014290798b6cf5cde8f.jpg
    871.6 KB · Views: 0
  • 52797e2b8e7a77a37243b222f29829cd.jpg
    52797e2b8e7a77a37243b222f29829cd.jpg
    641.8 KB · Views: 0

nbruno

Well-known member
Joined
Feb 12, 2014
Messages
213
Mike, I see you have the American windshield kit? How do you like it? Is it worth the price?

Sent from my SM-G930V using Tapatalk
 
OP
Z

zmotorsports

ALLIANCE MEMBER
Joined
Oct 20, 2009
Messages
21,464
Location
Northern Utah
Mike, I see you have the American windshield kit? How do you like it? Is it worth the price?

Sent from my SM-G930V using Tapatalk


It’s not bad for the price. The biggest disappointment was the battery powered UV light that came in the kit. I purchased a 110VAC UV light from Delta that I am much happier with.

Obviously there are nicer, better equipped kits out there but they are at least double the cost. This does what I need it to do for personal use.

Thanks for stopping by my projects thread.
 
OP
Z

zmotorsports

ALLIANCE MEMBER
Joined
Oct 20, 2009
Messages
21,464
Location
Northern Utah
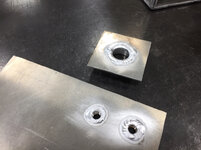
I had a little time this afternoon to work on the surge tank.

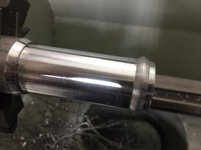
Started by machining the bungs needed for the tank.
db5a55d0aab6036165082f27f64308bc.jpg

6cda5f31d402d4dc85057d1799765ac0.jpg

I ground a HSS tool to put a radius on the end of the bungs.
a7818d2ef6455ca03244713584528311.jpg

Machined a step then parted off.
7845a21471a89cce08cd5bfab4cf18d5.jpg

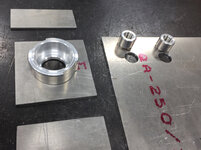
Three 1/4” NPT bungs for fittings and a 1/2” NPT bung for a drain plug on the bottom of the tank completed.
440e499a1cc35525ab454c9ef24bdcd1.jpg

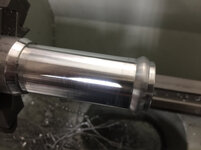
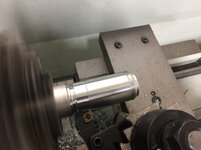
I also machined a step into the filler neck.
bfdbb89e4bf321547be3e7c90c4f833e.jpg

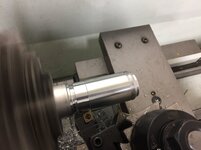
I chucked up a piece of 1.5” diameter tube in which to machine the make up fitting for the bottom of the tank.
2361eb076461e05ff63195732d353675.jpg

75eb2820eb5552fe402f5ca6503fc247.jpg

I ground a concave shape into another HSS tool blank.
a6138846c2beb9c90505dc81657801fc.jpg

Machining the diameter to fit the 1.250” make up hose that will connect.
0b2de372dd19b06d2add9b13c3b6bb2b.jpg

Ready to cut once I determine exact length and angle.
b6b5e862b84e42884a448b43b414d601.jpg

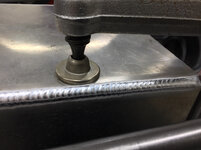
Some more welding on the tank.
65820fd6428a14ff212596ea2b3e6b35.jpg

2f89d4da0989ab0e4849005f98e2ebe9.jpg

Ready to start locating bungs and sight glass components.
09da83b04457cec0bd293e0165bcbd9f.jpg

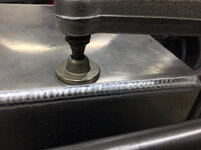
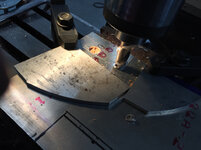
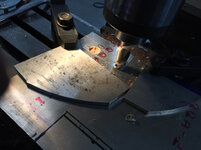
Tank clamped to mill table to drill holes for bungs.
6296541147a8257e48b316085c60377e.jpg

e7f63bc15c89d5a8fc9bdea9e0295733.jpg

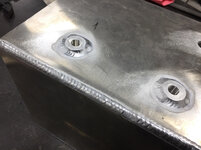
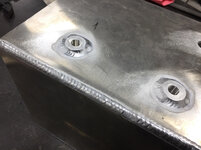
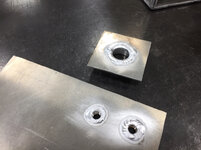
Sight glass and coolant level sensor bungs welded in place.
6004cf6c2e7b2a5027513ca4496b4645.jpg

58304b3aa75cb08508487e1b92967491.jpg

643eeba6458a58a65a0e7d088a91977a.jpg

0df5efead57013f9582b72c34799308c.jpg

Thanks for looking.
 

Attachments

  • 2f89d4da0989ab0e4849005f98e2ebe9.jpg
    2f89d4da0989ab0e4849005f98e2ebe9.jpg
    767.8 KB · Views: 0
  • 09da83b04457cec0bd293e0165bcbd9f.jpg
    09da83b04457cec0bd293e0165bcbd9f.jpg
    857.9 KB · Views: 0
  • 6296541147a8257e48b316085c60377e.jpg
    6296541147a8257e48b316085c60377e.jpg
    734.9 KB · Views: 0
  • 58304b3aa75cb08508487e1b92967491.jpg
    58304b3aa75cb08508487e1b92967491.jpg
    823.9 KB · Views: 0
  • 643eeba6458a58a65a0e7d088a91977a.jpg
    643eeba6458a58a65a0e7d088a91977a.jpg
    734 KB · Views: 0
  • e7f63bc15c89d5a8fc9bdea9e0295733.jpg
    e7f63bc15c89d5a8fc9bdea9e0295733.jpg
    698.6 KB · Views: 0
  • 6004cf6c2e7b2a5027513ca4496b4645.jpg
    6004cf6c2e7b2a5027513ca4496b4645.jpg
    715.6 KB · Views: 0
  • 0df5efead57013f9582b72c34799308c.jpg
    0df5efead57013f9582b72c34799308c.jpg
    776.2 KB · Views: 0
  • 65820fd6428a14ff212596ea2b3e6b35.jpg
    65820fd6428a14ff212596ea2b3e6b35.jpg
    652.1 KB · Views: 0
  • b6b5e862b84e42884a448b43b414d601.jpg
    b6b5e862b84e42884a448b43b414d601.jpg
    593.5 KB · Views: 0
  • 0b2de372dd19b06d2add9b13c3b6bb2b.jpg
    0b2de372dd19b06d2add9b13c3b6bb2b.jpg
    632.9 KB · Views: 0
  • a6138846c2beb9c90505dc81657801fc.jpg
    a6138846c2beb9c90505dc81657801fc.jpg
    628 KB · Views: 0
  • 75eb2820eb5552fe402f5ca6503fc247.jpg
    75eb2820eb5552fe402f5ca6503fc247.jpg
    660.9 KB · Views: 0
  • 2361eb076461e05ff63195732d353675.jpg
    2361eb076461e05ff63195732d353675.jpg
    738.6 KB · Views: 0
  • bfdbb89e4bf321547be3e7c90c4f833e.jpg
    bfdbb89e4bf321547be3e7c90c4f833e.jpg
    639.5 KB · Views: 0
  • 440e499a1cc35525ab454c9ef24bdcd1.jpg
    440e499a1cc35525ab454c9ef24bdcd1.jpg
    805.6 KB · Views: 0
  • 7845a21471a89cce08cd5bfab4cf18d5.jpg
    7845a21471a89cce08cd5bfab4cf18d5.jpg
    663.7 KB · Views: 0
  • a7818d2ef6455ca03244713584528311.jpg
    a7818d2ef6455ca03244713584528311.jpg
    641 KB · Views: 0
  • 6cda5f31d402d4dc85057d1799765ac0.jpg
    6cda5f31d402d4dc85057d1799765ac0.jpg
    664.2 KB · Views: 0
  • db5a55d0aab6036165082f27f64308bc.jpg
    db5a55d0aab6036165082f27f64308bc.jpg
    708.2 KB · Views: 0
Last edited:
To avoid these ads, REGISTER NOW!

12husky

Well-known member
Joined
Feb 23, 2014
Messages
91
Do you have any problems with the threads after welding the bungs in?


Sent from my iPhone using Tapatalk
 

NUTTSGT

Super Moderator
Staff member
Joined
Sep 14, 2009
Messages
51,129
Location
Northern Central Ohio
Bungs welded in after the tank is welded to prevent the alum sheets from distorting under the welding heat for the bungs ? Granted I realize you are TIG welding.
 
OP
Z

zmotorsports

ALLIANCE MEMBER
Joined
Oct 20, 2009
Messages
21,464
Location
Northern Utah
Do you have any problems with the threads after welding the bungs in?


Sent from my iPhone using Tapatalk


I haven’t had any issues, but you do have to pay attention to keep the weld from wicking up over the top on the shorter bungs. If you did I guess you could merely run a tap in and clean them up as needed.

Thanks for stopping by my projects thread.
 
OP
Z

zmotorsports

ALLIANCE MEMBER
Joined
Oct 20, 2009
Messages
21,464
Location
Northern Utah
Bungs welded in after the tank is welded to prevent the alum sheets from distorting under the welding heat for the bungs ? Granted I realize you are TIG welding.


They could be welded either before or after Eric. I will more than likely weld the couple of 1/4” bungs in the top before welding the top to the tank for ease. The biggest reason I had most of the box done before welding the bungs for the sight glass and coolant level sensor was that I wanted to set the box in place and double check clearances as I am changing location of the level sensor and adding the sight glass compared to the OEM tank and didn’t want issues with where I chose to put them.

Thanks for following along Eric.
 

LXCam

ALLIANCE MEMBER
Joined
Apr 23, 2013
Messages
19,203
Location
AZ
And yet another super impressive project from the shop of Mike, very nice!! When you build tanks do you also pressure test them before installing them?
 

NUTTSGT

Super Moderator
Staff member
Joined
Sep 14, 2009
Messages
51,129
Location
Northern Central Ohio
They could be welded either before or after Eric. I will more than likely weld the couple of 1/4” bungs in the top before welding the top to the tank for ease. The biggest reason I had most of the box done before welding the bungs for the sight glass and coolant level sensor was that I wanted to set the box in place and double check clearances as I am changing location of the level sensor and adding the sight glass compared to the OEM tank and didn’t want issues with where I chose to put them.

Thanks for following along Eric.

Ahh, that makes sense Mike. I didn't think about that. Sometimes while following with builds on the 'net, it's hard to think about the steps it takes to build or set something up.
 
OP
Z

zmotorsports

ALLIANCE MEMBER
Joined
Oct 20, 2009
Messages
21,464
Location
Northern Utah
And yet another super impressive project from the shop of Mike, very nice!! When you build tanks do you also pressure test them before installing them?


Thanks Cam. Yes, I actually do both, pull a vacuum as well as pressurize. I will do that just before drilling the hole for the make up line on the bottom as that will be the hardest to seal.

Thanks for stopping by my projects thread and commenting Cam.
 

cweidert03

Well-known member
Joined
Oct 19, 2015
Messages
417
Location
New Castle, IN
Is there anything that you don’t do yourself?? Besides paint a coach and upholstery?? Nicely done on the window.


Sent from my iPhone using Tapatalk
 
OP
Z

zmotorsports

ALLIANCE MEMBER
Joined
Oct 20, 2009
Messages
21,464
Location
Northern Utah
Is there anything that you don’t do yourself?? Besides paint a coach and upholstery?? Nicely done on the window.


Sent from my iPhone using Tapatalk

Upholstery is the only thing I don't do. Tried it once many, many years ago and I decided I would hire that out. Painting our vehicles, toys, race cars, street rods motorcycles, etc. is something I have always done myself but due to the size and time frame on our current coach, I decided to hire it out. I did, however, paint our first two motorhomes. The first one being a 30' gasser that took me about a month to do both front and rear caps and below the beltline. The second coach, our 38' Beaver, took me nearly 4 months as I painted it in sections at my parent's farm. I painted each side separate and then front and rear caps at the same time. THAT was a project and a half though. I decided to hire this one out due to time. My first one took me over a month and my second one nearly 4 months so I think I made a smart choice having this one painted. :lol:

Thanks for the kind words and for following along.
 
OP
Z

zmotorsports

ALLIANCE MEMBER
Joined
Oct 20, 2009
Messages
21,464
Location
Northern Utah
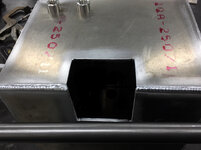
I was able to get most of the surge tank completed today. All that is left to do on it tomorrow is cut out the four mounting tabs and weld them on.

Top clamped to the mill table and milled the holes for the two 1/4” NPT bungs.
c8799654efb061f16d3d02f026e7ed9d.jpg

4b20e722586fa07a513210e7e1d4aad3.jpg

Also bored the 1.5” diameter hole for the filler neck.
921250c92cdfac9fb653c5ccc68a3ff6.jpg

Welded on the back side.
2d1b996a40ca7ccf16c49496db534245.jpg

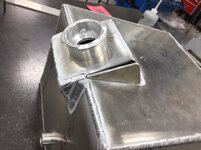
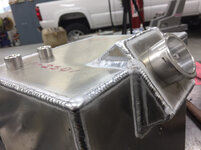
Top welded on after sectioning for the filler neck box which will be angled for easier filling and better access than the OEM.
c2372c8b6a61ebe1869e0511cf029072.jpg

12649d3fd5cb882004ce3878a67bfec5.jpg

1b576d5caa87e1e69f872656be895fd2.jpg

Building out the angled filler neck box.
a75871ca69b108b202e60daabfd29135.jpg

Make up hose spigot and the 1/2” NPT drain plug bung welded.
09966c5ceded97f788b89ab36cb1a39e.jpg

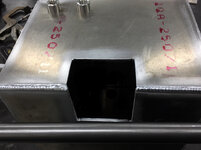
Box mostly completed.
08d5dc40253dadd9f330d986c9e79c85.jpg

54f9ed7981a07be89ca39ee20aab7230.jpg

521608a4fdd3bde07caada53358aa32d.jpg

All that is remaining is to cut out the four mounting tabs and weld them in place.

Thanks for looking.
 

Attachments

  • 54f9ed7981a07be89ca39ee20aab7230.jpg
    54f9ed7981a07be89ca39ee20aab7230.jpg
    804.4 KB · Views: 0
  • 921250c92cdfac9fb653c5ccc68a3ff6.jpg
    921250c92cdfac9fb653c5ccc68a3ff6.jpg
    760 KB · Views: 0
  • 2d1b996a40ca7ccf16c49496db534245.jpg
    2d1b996a40ca7ccf16c49496db534245.jpg
    730.2 KB · Views: 0
  • c2372c8b6a61ebe1869e0511cf029072.jpg
    c2372c8b6a61ebe1869e0511cf029072.jpg
    632.6 KB · Views: 0
  • 12649d3fd5cb882004ce3878a67bfec5.jpg
    12649d3fd5cb882004ce3878a67bfec5.jpg
    575.5 KB · Views: 0
  • 1b576d5caa87e1e69f872656be895fd2.jpg
    1b576d5caa87e1e69f872656be895fd2.jpg
    658.2 KB · Views: 0
  • c8799654efb061f16d3d02f026e7ed9d.jpg
    c8799654efb061f16d3d02f026e7ed9d.jpg
    698 KB · Views: 0
  • 4b20e722586fa07a513210e7e1d4aad3.jpg
    4b20e722586fa07a513210e7e1d4aad3.jpg
    687.1 KB · Views: 0
  • a75871ca69b108b202e60daabfd29135.jpg
    a75871ca69b108b202e60daabfd29135.jpg
    733.8 KB · Views: 0
  • 521608a4fdd3bde07caada53358aa32d.jpg
    521608a4fdd3bde07caada53358aa32d.jpg
    776.8 KB · Views: 0
  • 08d5dc40253dadd9f330d986c9e79c85.jpg
    08d5dc40253dadd9f330d986c9e79c85.jpg
    677.3 KB · Views: 0
  • 09966c5ceded97f788b89ab36cb1a39e.jpg
    09966c5ceded97f788b89ab36cb1a39e.jpg
    106.9 KB · Views: 1
Last edited:
To avoid these ads, REGISTER NOW!
Top Bottom