To avoid these ads, REGISTER NOW!

ZMotorsports Shop Projects 2.0

C_F

ALLIANCE MEMBER
Joined
Jan 21, 2005
Messages
9,675
Location
Utah...SNOW BLOWS!
Man, that Mastercool flaring tool is great, it's even hydraulic! I haven't heard of that tool before. These days I only have an occasion to flare some tubing maybe once or twice a year...if I did it even a dozen times a year, I would definitely "need" to buy one of those. :lol: That's pretty neat.

Oh, and excellent bends on your hard lines! :thumbup:
 
To avoid these ads, REGISTER NOW!

lilscorpion

Well-known member
Joined
Mar 15, 2010
Messages
3,600
Location
Colorado
C_F said:
These days I only have an occasion to flare some tubing maybe once or twice a year...if I did it even a dozen times a year, I would definitely "need" to buy one of those. :lol: That's pretty neat.


I’ve always wanted one but flare lines even less than you (once every 5 years at best). I’ll leave it on my “when I’m outta tools to buy list”
 
OP
Z

zmotorsports

ALLIANCE MEMBER
Joined
Oct 20, 2009
Messages
21,477
Location
Northern Utah
Man, that Mastercool flaring tool is great, it's even hydraulic! I haven't heard of that tool before. These days I only have an occasion to flare some tubing maybe once or twice a year...if I did it even a dozen times a year, I would definitely "need" to buy one of those. :lol: That's pretty neat.

Oh, and excellent bends on your hard lines! :thumbup:

I’ve always wanted one but flare lines even less than you (once every 5 years at best). I’ll leave it on my “when I’m outta tools to buy list”

Thanks guys. I bought the Rigid benders as well as upgraded from my Blue Point flaring kit and my Imperial Eastman to the Mastercool about ten years ago when I was doing a lot of street rods, muscle cars and very heavy into sand rails. They've proven invaluable although I only get them out of the drawer a half dozen times a year lately. But when I do I smile every time I use them as they both work great and were excellent investments. I used my Blue Point flaring kit for nearly 20 years prior to the Mastercool and it did a fine job but the Mastercool just does it so much faster and effortlessly if your doing a lot of lines at a time it really shines. I can also do the fuel line crimps and bought the adapters to do 37-degree flares, which is what we used on the sand rails and race cars on many of the components.

Thanks for checking in guys and commenting.
 
Last edited:
OP
Z

zmotorsports

ALLIANCE MEMBER
Joined
Oct 20, 2009
Messages
21,477
Location
Northern Utah
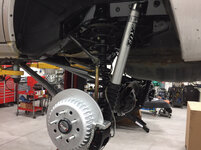
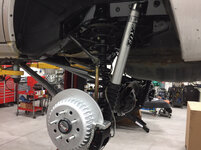
I think we about have the rear axle finished up after tonight’s work.

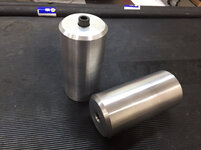
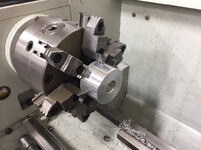
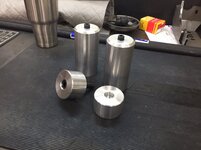
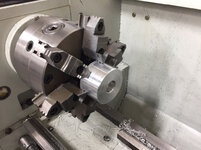
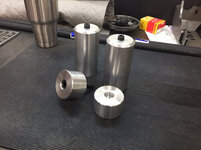
I machined the front bump stops.
e145aeb3a2f79e28eebeb404e9901bcf.jpg

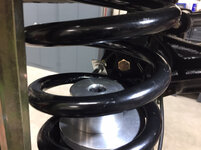
Then while I already had a messy lathe I machined the rear bump stops.
0c2cb72f46ba9287dbbd349df1ad6779.jpg

d544a864ba300a4f9cad5b129e5df9ed.jpg

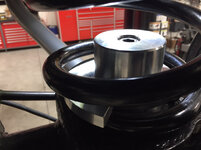
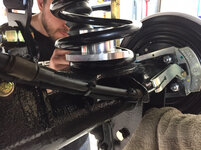
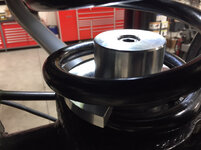
Rear bump stops installed on top of the spring retainers.
03d59c1a08394619e81bce9d65d2ad07.jpg

99886e2a90a2c8df96cdeaa3912edc71.jpg

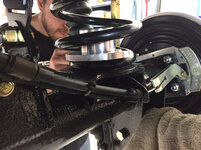
We then tackled connecting the emergency brakes and used the OEM brackets to secure them to the rear axle truss.

Next up was to cut the OEM wiring harness to the rear ABS sensors and solder on the new wires and connector. I ran the wires through some abrasive protection sheathing with some heat shrink at each end before plugging in the new JK ABS sensors.
601b6b4371baea02ce4e141a7c687a68.jpg

60ded95bdfb8ea9c885fef1f0cdf8074.jpg

Next ran them alongside the e-brake cables and secured them up and out of the way so they won’t snag on anything when off-road.
c0da4ec28f92e9ba726d773f891c744d.jpg

275a73612e4b230d49e423bd75abd1e0.jpg

Rear end neatly buttoned up.
a9c0f1ec503e71cd84dd3bc3709b66d9.jpg

Tomorrow night we will run new hose for the rear axle breather and move on to the front axle.

Thanks for looking.
 

Attachments

  • 0c2cb72f46ba9287dbbd349df1ad6779.jpg
    0c2cb72f46ba9287dbbd349df1ad6779.jpg
    688.4 KB · Views: 0
  • a9c0f1ec503e71cd84dd3bc3709b66d9.jpg
    a9c0f1ec503e71cd84dd3bc3709b66d9.jpg
    730.4 KB · Views: 0
  • 275a73612e4b230d49e423bd75abd1e0.jpg
    275a73612e4b230d49e423bd75abd1e0.jpg
    706.8 KB · Views: 0
  • c0da4ec28f92e9ba726d773f891c744d.jpg
    c0da4ec28f92e9ba726d773f891c744d.jpg
    762.9 KB · Views: 0
  • 60ded95bdfb8ea9c885fef1f0cdf8074.jpg
    60ded95bdfb8ea9c885fef1f0cdf8074.jpg
    676.5 KB · Views: 0
  • 03d59c1a08394619e81bce9d65d2ad07.jpg
    03d59c1a08394619e81bce9d65d2ad07.jpg
    626.5 KB · Views: 0
  • d544a864ba300a4f9cad5b129e5df9ed.jpg
    d544a864ba300a4f9cad5b129e5df9ed.jpg
    741.6 KB · Views: 0
  • 601b6b4371baea02ce4e141a7c687a68.jpg
    601b6b4371baea02ce4e141a7c687a68.jpg
    616.8 KB · Views: 0
  • e145aeb3a2f79e28eebeb404e9901bcf.jpg
    e145aeb3a2f79e28eebeb404e9901bcf.jpg
    707 KB · Views: 0
  • 99886e2a90a2c8df96cdeaa3912edc71.jpg
    99886e2a90a2c8df96cdeaa3912edc71.jpg
    621 KB · Views: 0
Last edited:
OP
Z

zmotorsports

ALLIANCE MEMBER
Joined
Oct 20, 2009
Messages
21,477
Location
Northern Utah
I'll double down on what Dan said. Your son is one very lucky man to have you as a dad Mike. :thumbup:

Thanks Cam. I hope he feels that way but sometimes I wonder as I may be a bit hard on him at times. Luckily in spite of me, he has turned out to be a fantastic young man.

I appreciate the comments Cam.
 

LXCam

ALLIANCE MEMBER
Joined
Apr 23, 2013
Messages
19,204
Location
AZ
Thanks Cam. I hope he feels that way but sometimes I wonder as I may be a bit hard on him at times. Luckily in spite of me, he has turned out to be a fantastic young man.

I appreciate the comments Cam.


Aaa, don't give it a second thought bud. That's just a lifetime of hard earned experience coming outta ya. He may not always appreciate or understand the delivery now but he will in time. :beer:
 
OP
Z

zmotorsports

ALLIANCE MEMBER
Joined
Oct 20, 2009
Messages
21,477
Location
Northern Utah
Aaa, don't give it a second thought bud. That's just a lifetime of hard earned experience coming outta ya. He may not always appreciate or understand the delivery now but he will in time. :beer:

I hope so. I hope he looks back and has fond memories growing up rather than the times I got on him about something.

Funny how we think about things as we age. I would love to have my dad chew me out for something just one more time, just to be able to spend some time with him as he's been gone for quite a few years now.
 

LXCam

ALLIANCE MEMBER
Joined
Apr 23, 2013
Messages
19,204
Location
AZ
I hope so. I hope he looks back and has fond memories growing up rather than the times I got on him about something.

Funny how we think about things as we age. I would love to have my dad chew me out for something just one more time, just to be able to spend some time with him as he's been gone for quite a few years now.


He will bud, no doubt about it. We've discussed this before in this very thread but my old man was a hard nosed sumbitch. At times he'd chew my *** up one side and down the other for various reasons but it was always for the right reason. He was also the type that would let me swing a sledgehammer busting up a slab, or a pick, or shovel, or, or, orrr for a dozen hours then at the end of the day say "next time do it like this and it'll be much easier"


Like you, I miss that man.

I've consciously tried to teach my son differently but am not always successful at it. Seems like the old mans tactics spew right out of my mouth many times. But ya know what he still keeps coming back for more....******* :p
 
Last edited:

rmack898

Well-known member
Joined
Jan 23, 2007
Messages
3,212
Location
Honu Grove NE Florida
But ya know what he still keeps coming back for more....******* :p

Cam,
After we are gone, our kids will be having a similar discussion about us.

Contrary to what current thinking is today, sometimes the lesson is more important than the way it was taught. My dad taught me some great life lessons in a tough way that if it were not for his tough delivery, I might not have learned the lesson he was trying to teach. I am grateful for having him teach me, as will our kids for having taught them.
 
OP
Z

zmotorsports

ALLIANCE MEMBER
Joined
Oct 20, 2009
Messages
21,477
Location
Northern Utah
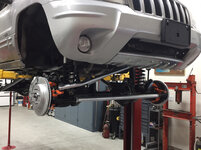
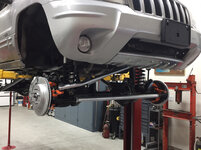
We got it set down on its tires/wheels tonight to check ride height before working on buttoning up the front suspension. The Jeep is actually not resting on the arms for the 2-post lift, the arms are relaxed by about 3" but didn't collapse them because the Jeep will be going right back up in the air again.

I think it sits perfect and while we were at it we adjusted the track bar for proper placement.
041db7df2734a0a7fc5734b0d900edda.jpg

f80b5e054563a996e57eb92513702b3a.jpg

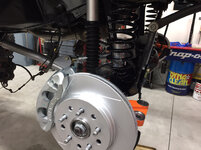
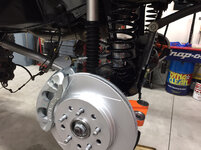
Started putting brakes together before calling it a night.
2d885ebc9eabcc36ac6ae18749b1cf3e.jpg
 

Attachments

  • 2d885ebc9eabcc36ac6ae18749b1cf3e.jpg
    2d885ebc9eabcc36ac6ae18749b1cf3e.jpg
    710.3 KB · Views: 0
  • 041db7df2734a0a7fc5734b0d900edda.jpg
    041db7df2734a0a7fc5734b0d900edda.jpg
    684.2 KB · Views: 0
  • f80b5e054563a996e57eb92513702b3a.jpg
    f80b5e054563a996e57eb92513702b3a.jpg
    686.3 KB · Views: 0
Last edited:

Ohmthis

Well-known member
Joined
Jan 20, 2013
Messages
3,021
Location
Outside of Louisville KY
Mike, the Jeep is looking very nice. I know you and your son are proud of the work you’ve accomplished! I pray my son and I can work on a project together like this. As several of you guys have spoken about, my late stepfather was a hard *** too. I got more what were you thinking than ata-boys. It took me awhile to understand he was trying to teach me something. Once I realized what he was doing, things were much better. When he was dying he expressed how proud he was of us and wished he was a little easier on us. I told him I was the man I was because of him! With my son, I’ll get on him, but explain my reasoning and I always make sure to tell him I love him and that we are all learning. I know this is a garage forum, but the bonds and relationships built while working is truly an awesome thing.
 
OP
Z

zmotorsports

ALLIANCE MEMBER
Joined
Oct 20, 2009
Messages
21,477
Location
Northern Utah
Mike, the Jeep is looking very nice. I know you and your son are proud of the work you’ve accomplished! I pray my son and I can work on a project together like this. As several of you guys have spoken about, my late stepfather was a hard *** too. I got more what were you thinking than ata-boys. It took me awhile to understand he was trying to teach me something. Once I realized what he was doing, things were much better. When he was dying he expressed how proud he was of us and wished he was a little easier on us. I told him I was the man I was because of him! With my son, I’ll get on him, but explain my reasoning and I always make sure to tell him I love him and that we are all learning. I know this is a garage forum, but the bonds and relationships built while working is truly an awesome thing.

Thanks for sharing and I couldn't agree more. Some great people on this garage forum and great stories.

Thanks for checking in and commenting.
 
OP
Z

zmotorsports

ALLIANCE MEMBER
Joined
Oct 20, 2009
Messages
21,477
Location
Northern Utah
Got the front brake lines ran and connected tonight along with the ABS sensor wires and new plug connectors soldered in place.
a41045bf6ff259279cedef36dae40fff.jpg

0e3cd54987f65f5e945cc30de7b0b0d5.jpg

Next we moved on to installing the heavy duty tie rod and drag link.
fe76efbca1fd406a6aa2ea79e6fb9a96.jpg

Lastly we pulled the transfer case back out before closing up the shop as I noticed a drip on the floor when I got out in the shop tonight. I hate doing jobs twice and I cannot figure out why the transmission output seal started leaking. It appears to have seeped a little around the OD. I’ll pick up a new seal in the morning and apply a little sealant around the outside of it prior to installation.
 

Attachments

  • fe76efbca1fd406a6aa2ea79e6fb9a96.jpg
    fe76efbca1fd406a6aa2ea79e6fb9a96.jpg
    709.8 KB · Views: 1
  • 0e3cd54987f65f5e945cc30de7b0b0d5.jpg
    0e3cd54987f65f5e945cc30de7b0b0d5.jpg
    741.2 KB · Views: 0
  • a41045bf6ff259279cedef36dae40fff.jpg
    a41045bf6ff259279cedef36dae40fff.jpg
    718.7 KB · Views: 0

LXCam

ALLIANCE MEMBER
Joined
Apr 23, 2013
Messages
19,204
Location
AZ
Cam,
After we are gone, our kids will be having a similar discussion about us.

Hell Mack, he tells them now and the last time I checked I still had a pulse :pimpflash


As always everything looks top drawer. Damn shame about that seal, I hate when stuff like that happens. You take great care to make certain everything is money, no effort or expense spared and some stupid $5 part bites you in the ***.
 
OP
Z

zmotorsports

ALLIANCE MEMBER
Joined
Oct 20, 2009
Messages
21,477
Location
Northern Utah
As always everything looks top drawer. Damn shame about that seal, I hate when stuff like that happens. You take great care to make certain everything is money, no effort or expense spared and some stupid $5 part bites you in the ***.


Thanks Cam. Yeah, I agreed, more work for a defective part. At least I didn’t have exhaust or driveshaft installed yet so it was a quick job. But still I hate doing things twice.
 
OP
Z

zmotorsports

ALLIANCE MEMBER
Joined
Oct 20, 2009
Messages
21,477
Location
Northern Utah
What a long *** day today, but a good one.

We started in the shop early this morning and took a quick break around 8~ish when NAPA opened so we could pick up another seal. They were good about it and warranted the seal so nothing out of pocket except a couple quarts of ATF and about an hour of time.

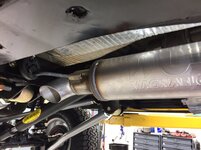
Once we got the transfer case back in we moved on to the exhaust. Due to the triangulated rear suspension we really can’t run the exhaust over the rear axle so we dumped it out just ahead of the rear suspension links. This is not my favorite way of having the exhaust exit but it turned out well with a little custom fabricating.

I picked up a 10” long piece of 2.5” tubing that was expanded on one end for a slip fit and after mocking up we determined where it needed to be cut and then welded the tube into the Magnaflow muffler. I also picked up a 30-degree bend that we could bologna cut.
5befb057975a5d0284d6dd6ab5026062.jpg

c5e852a1229c076beca1760e362c9de7.jpg

While I was at NAPA picking up the exhaust tubing I also scrounged through their exhaust isolators and found one that I thought would work and made a mount for it.
9bba8aba266fd5a8bb252e5d1fc4f09b.jpg

3c347373c48b87062017b9b7115af938.jpg

28398b73e7c9ed89075b79e13403a7a7.jpg

We then mocked it up one last time to determine location of mounting rod for engagement into the isolator. It was then welded in place and time for final assembly.
64887c42a28136788569747729f1533b.jpg

4a6212794c2173780de9cfa016c6dbc6.jpg

Final installation. We put just enough preload into the isolator to pull it taught and called it good, then installed a stainless steel band clamp at the front just behind the cats.
7f26ba7ebf41996973aae76140fb4800.jpg

035e9855d3e868f05d9340972846c2f0.jpg

Last item before road test was to bleed the brakes. Then we installed tires and wheels and backed it away from the lift under its own power for the first time in four months.
a291dccf0102ab406e339605c0623ac2.jpg

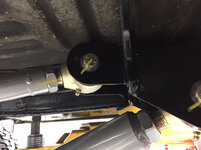
While it was sitting on the shop floor we went through and bounced the suspension a bit listening for any interferences then tightened all of the suspension fasteners.
e7863234300dec48dc2961ac71b2379d.jpg

Prior to backing it out if the shop we set the toe and adjusted the drag link to center the steering wheel.

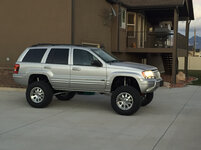
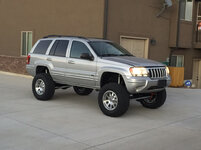
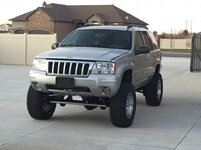
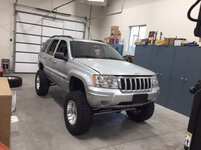
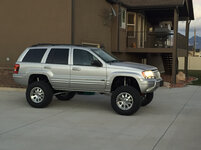
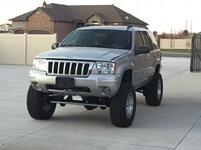
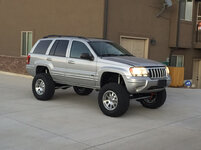
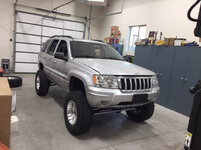
Pictures outside the shop after returning from the first road test.
425c2ee76c9d429c6915d7150ee85f36.jpg

eca440796946deebfd6ffbbc333cde44.jpg

2ed87f423801de5a9f2c730ee6258f78.jpg

a676202202a202d33fcd6d74b89fa55e.jpg

We completed the road test and tweaked the toe just a bit before closing up the shop.

Tonight was our local Jeep club's Christmas party and my son wanted so badly to drive it to the party and show it off tonight. We were so confident in the build after a quick visual I decided to let him drive it and it performed great. My son’s girlfriend came over and we closed up the shop at 5:00 pm, ran in the house to get cleaned up and made it to the Christmas party at 6:00 on the nose.

We have a few tweaks to do tomorrow and install the front driveshaft then it’s ready to put some miles on it and break in the gears.

Thanks for looking.
 

Attachments

  • 7f26ba7ebf41996973aae76140fb4800.jpg
    7f26ba7ebf41996973aae76140fb4800.jpg
    115.8 KB · Views: 0
  • 4a6212794c2173780de9cfa016c6dbc6.jpg
    4a6212794c2173780de9cfa016c6dbc6.jpg
    686.3 KB · Views: 0
  • 64887c42a28136788569747729f1533b.jpg
    64887c42a28136788569747729f1533b.jpg
    724.8 KB · Views: 0
  • 035e9855d3e868f05d9340972846c2f0.jpg
    035e9855d3e868f05d9340972846c2f0.jpg
    738.9 KB · Views: 0
  • a291dccf0102ab406e339605c0623ac2.jpg
    a291dccf0102ab406e339605c0623ac2.jpg
    656.6 KB · Views: 0
  • e7863234300dec48dc2961ac71b2379d.jpg
    e7863234300dec48dc2961ac71b2379d.jpg
    639.5 KB · Views: 0
  • eca440796946deebfd6ffbbc333cde44.jpg
    eca440796946deebfd6ffbbc333cde44.jpg
    657 KB · Views: 0
  • a676202202a202d33fcd6d74b89fa55e.jpg
    a676202202a202d33fcd6d74b89fa55e.jpg
    627.4 KB · Views: 0
  • 2ed87f423801de5a9f2c730ee6258f78.jpg
    2ed87f423801de5a9f2c730ee6258f78.jpg
    654.1 KB · Views: 0
  • 425c2ee76c9d429c6915d7150ee85f36.jpg
    425c2ee76c9d429c6915d7150ee85f36.jpg
    666 KB · Views: 0
  • 28398b73e7c9ed89075b79e13403a7a7.jpg
    28398b73e7c9ed89075b79e13403a7a7.jpg
    658.8 KB · Views: 0
  • 3c347373c48b87062017b9b7115af938.jpg
    3c347373c48b87062017b9b7115af938.jpg
    679 KB · Views: 0
  • 9bba8aba266fd5a8bb252e5d1fc4f09b.jpg
    9bba8aba266fd5a8bb252e5d1fc4f09b.jpg
    800.8 KB · Views: 0
  • 5befb057975a5d0284d6dd6ab5026062.jpg
    5befb057975a5d0284d6dd6ab5026062.jpg
    731.7 KB · Views: 0
  • c5e852a1229c076beca1760e362c9de7.jpg
    c5e852a1229c076beca1760e362c9de7.jpg
    681.8 KB · Views: 0
Last edited:
To avoid these ads, REGISTER NOW!

LXCam

ALLIANCE MEMBER
Joined
Apr 23, 2013
Messages
19,204
Location
AZ
She's a driver!! Kickass Mike, you and the boy have done a fantastic job my friend. She looks great and I bet once the alignment is dialed in will be a very smooth ride. With that said now...


What's in the box :lol_hitti


Haha. Since you've been into this scene for so long I have no doubt you have "the guy". But how do you handle alignments for a project like this. Another words do you need to babysit the procedure? Personally when I do some crazy all encompassing build that requires multiple adjustments and everything be spot on, I have a guy. But that means an all day adventure to make it happen. I also insist on helping which he is fine with, he just charges me double lol. In the grand scheme of things a small price to pay but still a bit of a PITA.
 
Last edited:
OP
Z

zmotorsports

ALLIANCE MEMBER
Joined
Oct 20, 2009
Messages
21,477
Location
Northern Utah
She's a driver!! Kickass Mike, you and the boy have done a fantastic job my friend. She looks great and I bet once the alignment is dialed in will be a very smooth ride. With that said now...


What's in the box :lol_hitti


Haha. Since you've been into this scene for so long I have no doubt you have "the guy". But how do you handle alignments for a project like this. Another words do you need to babysit the procedure? Personally when I do some crazy all encompassing build that requires multiple adjustments and everything be spot on, I have a guy. But that means an all day adventure to make it happen. I also insist on helping which he is fine with, he just charges me double lol. In the grand scheme of things a small price to pay but still a bit of a PITA.


Thanks Cam, you’ll just have to wait a little bit longer to find out what’s in the box.

As for the alignment, I don’t have a guy, I am the guy. Sorry, I just don’t trust anyone else.

No fancy computer equipment just old school alignment. This is one of the reasons I was so adamant about my shop floor being so dead nuts level and flat.
I’ve been doing them myself for about the past ten or twelve years now after fighting with one guy who was supposed to be “the man” on alignments and another shop that was just horrible and my little red shop truck handled like **** after leaving their shop. That’s when I said enough is enough and bought a couple of simple tools and learned how to do them myself. My slammed 1991 Chevy short bed was my test vehicle and it took me a bit but I got that thing dialed in and even played with different caster and camber settings to see the effects.

Both my son’s 2002 Duramax and my 2006 Duramax tested me a bit but they track great, ride great, wear tires beautifully and best of all no one else had to touch them.

When we set my son’s Jeep on the ground yesterday afternoon and took it out for its first road test I think my son was impressed. Not to be boastful but I was pretty proud to put it on the ground, fire it up, back it out if the shop and drive it around a mile test loop and then my son drove it to our club's party. It handled fair but I knew we were off just a bit but close. Not bad for building an entire suspension system from scratch, put it on the road and have it drive decent.

Today we went out to the shop and took some fine measurements to find that the rear axle was perfectly centered under the Jeep with no thrust and the front axle only needed to be pulled back on the driver’s side about an eighth of an inch. Toe was off by 1/16” and we added about one more degree of caster for around 4-degrees total. She handles like a dream after those minor adjustments today and half a dozen test drives between each tweak.

Thanks for inquiring and commenting Cam, sorry to have to make you wait a bit longer on the box.
 
Last edited:

LXCam

ALLIANCE MEMBER
Joined
Apr 23, 2013
Messages
19,204
Location
AZ
Most excellent Mike. I can get'm pretty decent with a set of parallel bars I made, a tape measure and my digital angle finder. But what I can't nail is the thrust angle. One of these days I'm going to get what I need to do it all at home. Like you any of the local yahoos are just that, pretty damn disappointing.

So is it 100% now?
 
OP
Z

zmotorsports

ALLIANCE MEMBER
Joined
Oct 20, 2009
Messages
21,477
Location
Northern Utah
Nice job Mike!! Well done and time for an adult beverage to celebrate.


:beer:


Thanks Dan. I’m not one to partake any longer but I appreciate the thought. It’s been a long two days and even Friday evening but very rewarding as well. I’ve loved working so close with my son the past couple of days as we’ve gotten close to completing phase one of his build.
 
OP
Z

zmotorsports

ALLIANCE MEMBER
Joined
Oct 20, 2009
Messages
21,477
Location
Northern Utah
I'll double this, great work. It looks perfect and ready for action. You guy's need some off road time to fully check it out.


Thanks. I agree that it now needs some off road testing. Our local Jeep club had a run today and even though it was a mild run I told my done we should hold off until we get it properly dialed in and I think he is glad we did after the tweaking and how much better it’s handling today vs. yesterday.

I would also like him to get the gears broke in before putting additional stress and heat from off roaming. There will be plenty of time for that I hope in the next year.
 
OP
Z

zmotorsports

ALLIANCE MEMBER
Joined
Oct 20, 2009
Messages
21,477
Location
Northern Utah
Most excellent Mike. I can get'm pretty decent with a set of parallel bars I made, a tape measure and my digital angle finder. But what I can't nail is the thrust angle. One of these days I'm going to get what I need to do it all at home. Like you any of the local yahoos are just that, pretty damn disappointing.

So is it 100% now?


I would say it is 99.9% as of right now. Just want to bounce it down the road a bit for a day if so then double check the settings but as far as settings go I think it’s there.

He drove it to his girlfriend’s tonight and text me later to tell me how happy he was and how awesome it drove and handled. That made my day to see how happy he is with it.
 
OP
Z

zmotorsports

ALLIANCE MEMBER
Joined
Oct 20, 2009
Messages
21,477
Location
Northern Utah
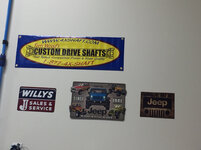
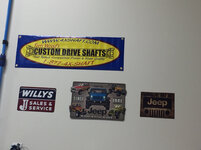
So this morning I went out to the shop and very first thing was to put up my Tom Woods driveshaft banner that I keep moving around the shop. I’ve been a dealer for Tom for the past ten so years and dealt with him when he was at Six States Distributors in Ogden before he opened his own driveshaft shop. I think his driveshafts are second to none and I’m honored to fly his banner in my shop.
4fd4dd739772d46fc9a66969e3118960.jpg

88a91bbadf2ae5faa1974a151968f14f.jpg

After getting the suspension dialed in on my son’s WJ the last thing we do is to paint the fasteners as it helps to notice when or if something moves.
3b683c40f4d4ad8ab4c69872fccbbb92.jpg

2586bff1c5ca8a4034b42b89175a086d.jpg

Thanks for looking.
 

Attachments

  • 3b683c40f4d4ad8ab4c69872fccbbb92.jpg
    3b683c40f4d4ad8ab4c69872fccbbb92.jpg
    690.2 KB · Views: 0
  • 88a91bbadf2ae5faa1974a151968f14f.jpg
    88a91bbadf2ae5faa1974a151968f14f.jpg
    664.2 KB · Views: 0
  • 4fd4dd739772d46fc9a66969e3118960.jpg
    4fd4dd739772d46fc9a66969e3118960.jpg
    653.7 KB · Views: 0
  • 2586bff1c5ca8a4034b42b89175a086d.jpg
    2586bff1c5ca8a4034b42b89175a086d.jpg
    681.2 KB · Views: 0
Last edited:

jalbrecht55

Active member
Joined
Jun 5, 2011
Messages
41
Location
Silverdale, WA
Mike, any chance you could show us what tools and methods you use when you do alignments?

How's your son like the magnaflow muffler? Looks pretty roudy (loud), which can be a great thing except when it's not.. any drone issues on the highway?
 

Bears Fan

Well-known member
Joined
Jan 26, 2012
Messages
3,443
Location
Indiana
Mike, awesome job on the Jeep! I'm with everyone else, the stance is perfect! Great looking Jeep!
 
Last edited:
OP
Z

zmotorsports

ALLIANCE MEMBER
Joined
Oct 20, 2009
Messages
21,477
Location
Northern Utah
Mike, any chance you could show us what tools and methods you use when you do alignments?

How's your son like the magnaflow muffler? Looks pretty roudy (loud), which can be a great thing except when it's not.. any drone issues on the highway?

Nothing fancy, just good ole' tape measure to check axle in relation to the body, to make certain it is squarely sitting under it as well as side to side. Then I use either my Longacre or Remco gauges for the caster and camber adjustments. They both work similar but mount differently to the front end. The Longacre mounts to the inner wheel lip and the Remco mounts to the spindle or axle nut via a magnet, I prefer the Remco gauge. For toe I merely use alignment plates on either side of the tires and measure front and rear. I also have a piece of square tubing with sliding end and a piece of 3/8" drill rod that I slide unit it just touches the outside of the tire and check front to rear but I feel I can get just as close if not closer with the plates and tape measures front and rear at the same time.

Honestly alignments scare a lot of people but they are pretty straightforward. Sometimes it takes a bit to get them where I want but very doable with a little time and patience. I've done quite a few over the years of my own as well as clients and I think I can get them every bit as close as a dedicated alignment shop, the biggest difference is I can't provide a printout that seems to give people the warm and fuzzies.

As far as the Magnaflow muffler he loves it. I have to admit, I was very concerned when he showed me what he wanted to run. I thought it was going to be way to loud and annoying for my taste but it actually sounds very nice. Maybe just a tad loud for me as I'm getting older and don't necessarily need volume in an exhaust system but not annoying at all and no drone. With the windows down you can definitely hear it but with the windows up and no stereo playing the exhaust just has a nice deep throaty sound.
 
Last edited:
OP
Z

zmotorsports

ALLIANCE MEMBER
Joined
Oct 20, 2009
Messages
21,477
Location
Northern Utah
Turned out fantastic!! Clearly I missed something, what are the other phases?

Thanks Matt, I appreciate that.

Technically we should call this Phase 1.1 or even Phase 2 as the original part was done last year after he purchased it. He originally went through and got all of the fluids replaced in the engine and flushed cooling system along with fixed a leaking water pump. He also did a full tune up and filter replacement, basically just getting the maintenance on the engine performed and getting it driveable until he could move on to the suspension part.

The next phase will be building front and rear bumpers along with tire carrier on the rear and rock rails. He wants to have them powder coated the same silver as the suspension links which match the body very close. He will probably start the bumpers and rock rails after the first of the year as he wants to get some miles on it for the time being but wants it pretty much completed by around March~ish time frame so it is ready for the Jeeping season.

Thanks again and thanks for following along on the build.
 
To avoid these ads, REGISTER NOW!
Top Bottom