
You are using an out of date browser. It may not display this or other websites correctly.
You should upgrade or use an alternative browser.
You should upgrade or use an alternative browser.
ZMotorsports Shop Projects 2.0
- Thread starter zmotorsports
- Start date
Ohmthis
Well-known member
Happy belated Birthday Mike, I put in too many hours this peak season and just enjoyed the family and holidays. The Jeep looks just as I had envisioned when I read several pages back that you had started it.
OP
zmotorsports
ALLIANCE MEMBER
Happy belated Birthday Mike, I put in too many hours this peak season and just enjoyed the family and holidays. The Jeep looks just as I had envisioned when I read several pages back that you had started it.
Thank you. I appreciate the comments and for following along. Hope you had a great holiday season despite the long hours.

OP
zmotorsports
ALLIANCE MEMBER
Today I was able to pretty much wrap up the chassis. If all I wanted to do was throw the engine in, drop the body and get it running I think I could have accomplished that by now. Unfortunately it’s all of the little details that take so much more time. The downside to rushing an engine swap (or anything for that matter) is that the little details such as dealing with clearances, chafing potentials and heat issues that will be the difference between a vehicle that will run trouble free for many miles and years or one that will very problematic.
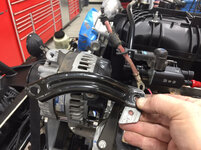
I wanted to be able to use the small stabilization bracket on top if the alternator so it took a little tweaking and a small standoff then some bead blasting and paint and it looks OEM.
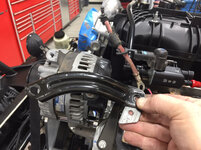
I also rewrapped the alternator wire with split loom and used an Adel clamp for strain relief.


I routed the alternator cable under the throttle body but high enough to keep it up off of the steam tube that runs across from head to head.

Next I addressed the transmission cooler lines. I wanted to secure them to the engine and keep from fatigue cracking.

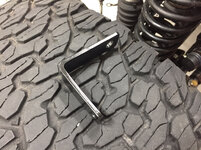
Bent up a small bracket out of 1” strap. Bead blasted and painted.
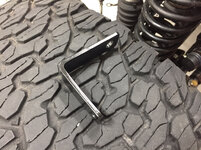
Installed using the OEM tab on the lines.

I then replaced the oil passage block off plate with a boss equipped to thread my analog oil pressure sensor into for my oil pressure gauge on my A-pillar.

While I was at it I wrapped the sending unit wire with abrasion resistant wrap.

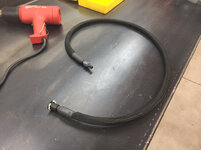
EVAP line with abrasion resistant wrap ready to install.
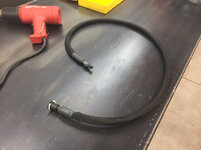
Installed the EVAP line and fuel line (also wrapped for abrasion protection) and ran them down the back of the engine and transmission. I also wrapped the area around where the exhaust will be routed with heat reflective material.
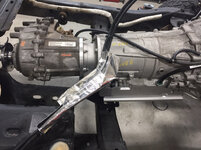
I installed the OEM GM wire harness onto the engine and down the back to the transmission.

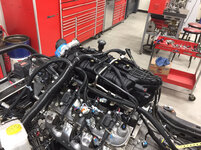


Adel clamp to add strain relief to the main wire harness.

I didn’t tie the wiring and fuel too tight as on a 4WD vehicle you want them to be able to float a little and not pull so tight as they will tug at connections or lines/wiring.
Ground distribution is critical to a modern engine so make sure to ground to a threaded boss and use star washers against the block or head as they dig in and provide the proper ground.

After the engine harness was installed I moved rearward and replaced the fuel pump as well as removed the fill tube in order to replace it with the new revised fill tube with a flap valve to prevent spit back.

You can tell if yours is equipped with the new check valve by the large mid-section.
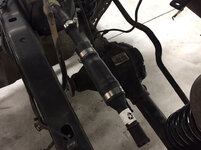
Lastly I relocated the EVAP canister. Removed it from the factory location and moved it above the rear axle and incorporated the GM closed loop feedback system EVAP vent valve and fuel tank pressure sensor into it.

At this point the chassis is pretty much complete and I’m ready to move to the body where I am going to consolidate some wiring, replace my radiator, fan, A/C condenser and install new heater hoses before dropping the body.
Thanks for looking.
I wanted to be able to use the small stabilization bracket on top if the alternator so it took a little tweaking and a small standoff then some bead blasting and paint and it looks OEM.
I also rewrapped the alternator wire with split loom and used an Adel clamp for strain relief.
I routed the alternator cable under the throttle body but high enough to keep it up off of the steam tube that runs across from head to head.
Next I addressed the transmission cooler lines. I wanted to secure them to the engine and keep from fatigue cracking.
Bent up a small bracket out of 1” strap. Bead blasted and painted.
Installed using the OEM tab on the lines.
I then replaced the oil passage block off plate with a boss equipped to thread my analog oil pressure sensor into for my oil pressure gauge on my A-pillar.
While I was at it I wrapped the sending unit wire with abrasion resistant wrap.
EVAP line with abrasion resistant wrap ready to install.
Installed the EVAP line and fuel line (also wrapped for abrasion protection) and ran them down the back of the engine and transmission. I also wrapped the area around where the exhaust will be routed with heat reflective material.
I installed the OEM GM wire harness onto the engine and down the back to the transmission.
Adel clamp to add strain relief to the main wire harness.
I didn’t tie the wiring and fuel too tight as on a 4WD vehicle you want them to be able to float a little and not pull so tight as they will tug at connections or lines/wiring.
Ground distribution is critical to a modern engine so make sure to ground to a threaded boss and use star washers against the block or head as they dig in and provide the proper ground.
After the engine harness was installed I moved rearward and replaced the fuel pump as well as removed the fill tube in order to replace it with the new revised fill tube with a flap valve to prevent spit back.
You can tell if yours is equipped with the new check valve by the large mid-section.
Lastly I relocated the EVAP canister. Removed it from the factory location and moved it above the rear axle and incorporated the GM closed loop feedback system EVAP vent valve and fuel tank pressure sensor into it.
At this point the chassis is pretty much complete and I’m ready to move to the body where I am going to consolidate some wiring, replace my radiator, fan, A/C condenser and install new heater hoses before dropping the body.
Thanks for looking.
Attachments
-
 630227c11906d4befa84d45384f03eed.jpg781.9 KB · Views: 1
 -
 6459e3857d043d1300e25600cb79fcdd.jpg659.4 KB · Views: 0
 -
 7d38a0040d0fcdfd3ea7f13fa6e3a6b7.jpg695.5 KB · Views: 0
 -
 e8a250ab8efea46574f868d14beefd9a.jpg682.3 KB · Views: 0
 -
 9ceb4881f29e65430a68a5a5a963c1aa.jpg829.1 KB · Views: 0
 -
 254d2fa61bbc34639a29d41c9a1222d4.jpg924.6 KB · Views: 0
 -
 d6083f5eb4afeda0b1fbe701093159a6.jpg866.7 KB · Views: 0
 -
 223745b5a65b34d6aaa6a09bfb94ab02.jpg876.4 KB · Views: 0
 -
 588dfd5ea6a729727b98e8fed33059b0.jpg773.2 KB · Views: 0
 -
 f7c25f109995f8b15c65f01610f7c53c.jpg676.1 KB · Views: 0
 -
 9d004fb8ddb105ccdca91c26280705c2.jpg661.2 KB · Views: 0
 -
 cef2173518f2d35d1a4c06f70f99cb0f.jpg682.2 KB · Views: 0
 -
 ba28c7232b660e5386d4a583dea0ce34.jpg665.9 KB · Views: 0
 -
 663836121837ff50a661cfdee661a2ee.jpg802.4 KB · Views: 0
 -
 79719211af9b6d3cf288d9956c391c8b.jpg661.1 KB · Views: 0
 -
 8633a437472cc10a550807a738dec732.jpg796.5 KB · Views: 0
 -
 3f2bc48decc5d31152afed096b4ea268.jpg732.6 KB · Views: 0
 -
 0a46df8ea3158bf943716a6a1573373b.jpg748.4 KB · Views: 0
 -
 e1303270891911bf698fc049e8e5e9cf.jpg904.7 KB · Views: 0
 -
 9252b52aefe605928e0b5ec30dd013fe.jpg745.6 KB · Views: 0
Last edited:
Finallygotit
ALLIANCE MEMBER
Well done Mike and fantastic attention to detail. 
Oh so true!Ground distribution is critical to a modern engine so make sure to ground to a threaded boss and use star washers against the block or head as they dig in and provide the proper ground.
OP
zmotorsports
ALLIANCE MEMBER
Well done Mike and fantastic attention to detail.
Oh so true!
Thank you Dan, I appreciate the comments.
Sent from my iPhone using Garage Journal
jeepinerdeep
Well-known member
Everything looks slick as always Mike.
There isn't nearly enough rust on this stuff to be considered a Jeep project lol.
lol.
I tried to make sure I read back 8 or 10 pages to see if you mentioned this but did not find it. Did you do any sort of Pro/Con list comparing a LS vs Hemi or did you know for sure you just wanted the economy/reliability of the proven GM combos?
I am NOT asking about a brand loyalty comparison, just HOW you decided.
I am going to sell my TJ and build something else. I just have no idea what yet, and a 2dr Hemi swap in a JK from around 08-10 is certainly on the list of options. I am a diesel guy by trade so GM vs Mopar gasser are all the same to me- I'd certainly consider the GM as it makes no difference to me.
There isn't nearly enough rust on this stuff to be considered a Jeep project
lol.I tried to make sure I read back 8 or 10 pages to see if you mentioned this but did not find it. Did you do any sort of Pro/Con list comparing a LS vs Hemi or did you know for sure you just wanted the economy/reliability of the proven GM combos?
I am NOT asking about a brand loyalty comparison, just HOW you decided.
I am going to sell my TJ and build something else. I just have no idea what yet, and a 2dr Hemi swap in a JK from around 08-10 is certainly on the list of options. I am a diesel guy by trade so GM vs Mopar gasser are all the same to me- I'd certainly consider the GM as it makes no difference to me.
WoodsTruck
Well-known member
- Joined
- Jan 12, 2013
- Messages
- 1,028
I'll be curious to know how much longer you think this conversion would take if the body was still on. Or is it even possible.
OP
zmotorsports
ALLIANCE MEMBER
Everything looks slick as always Mike.
There isn't nearly enough rust on this stuff to be considered a Jeep project
I tried to make sure I read back 8 or 10 pages to see if you mentioned this but did not find it. Did you do any sort of Pro/Con list comparing a LS vs Hemi or did you know for sure you just wanted the economy/reliability of the proven GM combos?
I am NOT asking about a brand loyalty comparison, just HOW you decided.
I am going to sell my TJ and build something else. I just have no idea what yet, and a 2dr Hemi swap in a JK from around 08-10 is certainly on the list of options. I am a diesel guy by trade so GM vs Mopar gasser are all the same to me- I'd certainly consider the GM as it makes no difference to me.
I know I gave a lengthy explanation about the Hemi vs. LS when I started as this comment came up several times.
Firstly, I am NOT a fan of the Hemi in the JK/JKU. They are heavy (150+ more pounds) and tall which messes with center of gravity. They also are so physically large that they really don't fit into the engine bay worth the **** and require relocating the steering shaft as well as either hammering in or cutting and welding in recesses into the firewall. Most hammer them in but I believe AEV cuts a section of the firewall and welds a new panel in. Lastly I'm not a fan of the Chrysler WA580 transmission whereas the GM 6L80 is really the hidden gem of this whole swap. The LS/6L80 is only about 40 pounds more than the 3.8 and most of that is due to the transmission which is mid-Jeep and low so it doesn't adversely affect the center of gravity. I don't think there is a Hemi that we have wheeled with that the owner didn't comment about his constant battle with overheating as well. The Hemi is a good engine in a muscle car but I don't want the hot rod muscle car feel for a daily driver. Trust me I've build street rods, muscle cars and race cars as well and they have their place but I want a sleeper that is mild and docile for daily driving or cross country driving and yet when I jump on the skinny pedal I want it to come to life, which is where I feel the LS falls.
Lastly, I'm a GM guy so this just makes more sense. A Hemi would definitely be an easier swap in terms of emissions and EPA but again, I don't think that is the proper way to deal with the tune. I'm not a fan of hacking and patching a tune into an operating system and I believe in keeping the tune pure so all of the monitoring, Mode 6 data and safety parameters are in tact. I want my hot protection mode, oil aeration, etc to be functioning just at the OEM intended.
Hope all of that makes sense. I know the Hemi's have a huge following and there are more of them in Jeeps that LS's but their just not for me in my Jeep.
Thanks for checking out my build.
OP
zmotorsports
ALLIANCE MEMBER
I'll be curious to know how much longer you think this conversion would take if the body was still on. Or is it even possible.
It could be done with the bolt in engine mounts by removing the intake and the core support but I feel time wyse it's about a toss up and I also feel a little more attention to detail could be paid to chassis wiring and such by lifting the body.
I'm sure there are some that would argue the other way but I just prefererred to take the couple of hours and lift the body vs. removing core support and fighting the body being in the way. If a person had a lot of interferences such as rock rails that were welded to the chassis or other items that had to be cut off and removed a body on would possibly make more sense.
OP
zmotorsports
ALLIANCE MEMBER
Details, details, details. They always seem to eat up 90% of the time you didn't account for. But they are always worth the effort. Looking great Mike!
Thanks Cam. If anyone understands the little details of a projects it's you.
jeepinerdeep
Well-known member
Hope all of that makes sense. I know the Hemi's have a huge following and there are more of them in Jeeps that LS's but their just not for me in my Jeep.
Thanks for checking out my build.
Thanks for that Mike, as per usual I learned 3 or 4 things I hadn't considered in that explanation!
NASTYZEN
Well-known member
This to me is amazing Mike. I can fabricate and machine, but all this electrical and vacuum that, with bypass there stuff is daunting stuff for the mere mortal. Not to mention the axle work you do.
Pretty cool. You can do all three!
Pretty cool. You can do all three!
OP
zmotorsports
ALLIANCE MEMBER
Thanks for that Mike, as per usual I learned 3 or 4 things I hadn't considered in that explanation!
You’re welcome. Remember these are just my opinions so take them for what they’re worth.
OP
zmotorsports
ALLIANCE MEMBER
This to me is amazing Mike. I can fabricate and machine, but all this electrical and vacuum that, with bypass there stuff is daunting stuff for the mere mortal. Not to mention the axle work you do.
Pretty cool. You can do all three!
Thanks Claude. I’m flattered, especially coming from you. Your work is so inspiring in itself.
I appreciate you stopping by to check out what I’m working on.
OP
zmotorsports
ALLIANCE MEMBER
I almost forgot a few pictures from yesterday on the chassis.
Here is my EVAP canister after relocation. I could have left it where it was but by relocating it the void left really clears up some valuable space where I want to place my common chamber muffler. Plus it will be very protected above the rear axle.
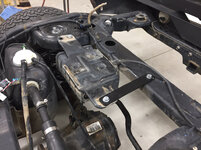
Completed closed loop feedback EVAP system with GM’s fuel tank pressure sensor and vent valve. Also inside the Chrysler ESIM (EVAP System Integrity Monitor) there is a shuttle valve that you want to pin in place to keep it from moving and allow the GM system to function unobstructed.
Also in the picture you can see the new fill tube. There was a TSB out a couple years ago with the addition of the new fill tube which has a check valve to prevent spit back which the early JK’s are known for.

Here is where I crossed the chassis wiring loom over to the driver’s side. I also installed some OEM style loom retainers as the driveshaft resides just below and you want the wiring to stay put.

Here I tie wrapped the chassis loom up to the front where it will plug into the factory GM engine harness.

Here is the driver’s side downstream O2 sensor connector. Remember the upstream one is located on the engine harness.

At this point the chassis is now ready to accept the body. Next up is to prep the body then marry the two back up.
Here is my EVAP canister after relocation. I could have left it where it was but by relocating it the void left really clears up some valuable space where I want to place my common chamber muffler. Plus it will be very protected above the rear axle.
Completed closed loop feedback EVAP system with GM’s fuel tank pressure sensor and vent valve. Also inside the Chrysler ESIM (EVAP System Integrity Monitor) there is a shuttle valve that you want to pin in place to keep it from moving and allow the GM system to function unobstructed.
Also in the picture you can see the new fill tube. There was a TSB out a couple years ago with the addition of the new fill tube which has a check valve to prevent spit back which the early JK’s are known for.
Here is where I crossed the chassis wiring loom over to the driver’s side. I also installed some OEM style loom retainers as the driveshaft resides just below and you want the wiring to stay put.
Here I tie wrapped the chassis loom up to the front where it will plug into the factory GM engine harness.
Here is the driver’s side downstream O2 sensor connector. Remember the upstream one is located on the engine harness.
At this point the chassis is now ready to accept the body. Next up is to prep the body then marry the two back up.
Attachments


Last edited:
OP
zmotorsports
ALLIANCE MEMBER
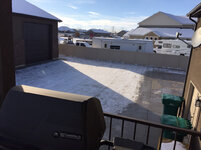
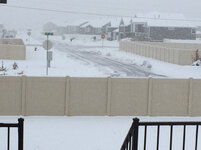
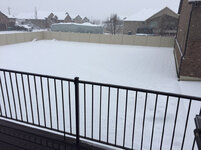
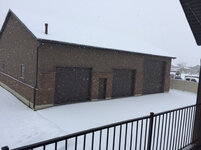
Unfortunately I didn’t get any shop time today. We woke up to this. Three plus inches of white **** and still falling.
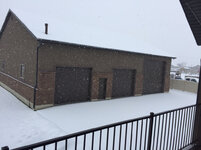

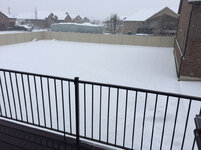

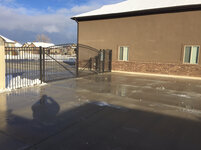
It quit snowing around noon and this is what it looked like after 3+ hours of snow removal.

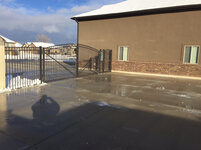
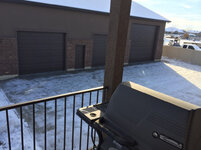
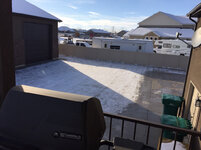

At least the sun came out and helped melt some of it, except where the drive is shaded. The only downside of a north facing home and shop.
It quit snowing around noon and this is what it looked like after 3+ hours of snow removal.
At least the sun came out and helped melt some of it, except where the drive is shaded. The only downside of a north facing home and shop.
Attachments
-
 e71ca3ed9ed6178ab38e5f3254c41862.jpg803.7 KB · Views: 0
 -
 e86ed245c5eb44c07dc62ec52ca1d259.jpg716.7 KB · Views: 0
 -
 4e42e94ec804dcd6ab391306302caba2.jpg706.5 KB · Views: 0
 -
 eeafe2aa0a7abd6961756e6c9d9027ef.jpg713.4 KB · Views: 0
 -
 8835934af05a4d38964ba0e987dfc88e.jpg674.1 KB · Views: 1
 -
 a00f9e6ab67ace9b835b0534eb0157c7.jpg608 KB · Views: 1
 -
 67236303bf2a73ae3c5187239a259f52.jpg692.7 KB · Views: 1
 -
 273c35cc823a1d40c7c6912aa7d8218c.jpg634.2 KB · Views: 0
 -
 126208f81f8d781de68046db0b0ffa56.jpg704.6 KB · Views: 0
Last edited:
OP
zmotorsports
ALLIANCE MEMBER
And I've been sniveling about it being in the low 40's here. Pretty sure I'd die if I had to go out in the white stuff and actually work.
Yeah, I’m starting to think I made a mistake with all of my concrete. Holy **** that was a lot of work Cam, even with the snowblower.
My lovely wife even came out to help me which made me feel guilty but she was sure a sport about it.
Finallygotit
ALLIANCE MEMBER
Maybe put a plow on the Jeep when your done with the conversion. 
danielbuck
Well-known member
- Joined
- Apr 15, 2014
- Messages
- 933

Love that view of the mountains!
Attachments

Love that view of the mountains!
Seriously. That's one hell of a backyard!!
C2tuck
Well-known member
Yeah, I’m starting to think I made a mistake with all of my concrete. Holy **** that was a lot of work Cam, even with the snowblower.
My lovely wife even came out to help me which made me feel guilty but she was sure a sport about it.
Should have put radiant heating in the driveway...
I don’t know how y’all do it. I’m with Cam...if it gets below 50 it’s chilly.
Sent from my iPhone using Tapatalk
JustinS
Well-known member
Yeah, I’m starting to think I made a mistake with all of my concrete. Holy **** that was a lot of work Cam, even with the snowblower.
My lovely wife even came out to help me which made me feel guilty but she was sure a sport about it.
Time to put a blade on something.
OP
zmotorsports
ALLIANCE MEMBER
Maybe put a plow on the Jeep when your done with the conversion.
Ha, ha, ha Dan. I don't think that gonna happen.

OP
zmotorsports
ALLIANCE MEMBER
Love that view of the mountains!
Me too. The view from our deck is my favorite. I don't think we could have found a more perfect home for us. I even told my wife last night when I came in from taking the picture that I am ready for spring so I can sit on my deck, relax and enjoy the view and she agreed.
OP
zmotorsports
ALLIANCE MEMBER
Seriously. That's one hell of a backyard!!
Thanks. We love the yard and especially the view. The nice thing about our view of the mountains to the east is that it will never get blocked by a house or structure because it is the only entrance/egress for the neighborhood. That view should always stay the same.
OP
zmotorsports
ALLIANCE MEMBER
Should have put radiant heating in the driveway...
I don’t know how y’all do it. I’m with Cam...if it gets below 50 it’s chilly.
Sent from my iPhone using Tapatalk
Actually my contractor suggested that seeing as how it was a north facing property but just couldn't swing it and really didn't want the worry or maintenance to be honest. It flat ***** moving snow but in reality it is usually less than about a dozen times a year that we have to move snow, the other 350+ days out of the year I love having a north facing home and shop.
OP
zmotorsports
ALLIANCE MEMBER
Time to put a blade on something.
We had a blade on a Polaris ATV at our last place and it worked ok. It moved the snow quickly but once it piled up it was harder and harder with each storm to push up and over or to move the pile, that is why I switched to a snowblower a couple of years before we moved.
Yesterday when I came into the house pissed because I didn't get anything done in the shop that I wanted to because of moving snow, the wife mentioned getting either another ATV or a small tractor to push the snow around. It was nice to hear her mentioned that but to be honest, I really don't want another piece of equipment around the place that I have to both store as well as maintain. I will just have to come to grips that I have a ****-ton of concrete that I need to clean when it snows. Actually, if I didn't have a bunch of things in the shop that I was anxiously trying to get completed, my Jeep in particular, I probably wouldn't be quite so upset about having to clear snow.
To try and make the loss of your shop day yesterday a little easier to swallow...at least it wasn’t 12+” of snow .
Jeep is coming along fantastically. And, per your recommendation, I finished up my RapidAir install in my home shop. That wasn’t nearly as bad as I was expecting and to have 5 drops throughout the shop plus air for the blaster & machinery is phenomenal.
Keep plugging along.
Sent from my iPhone using Tapatalk
. Jeep is coming along fantastically. And, per your recommendation, I finished up my RapidAir install in my home shop. That wasn’t nearly as bad as I was expecting and to have 5 drops throughout the shop plus air for the blaster & machinery is phenomenal.
Keep plugging along.
Sent from my iPhone using Tapatalk
Last edited:
OP
zmotorsports
ALLIANCE MEMBER
To try and make the loss of your shop day yesterday a little easier to swallow...at least it wasn’t 12+” of snow
Jeep is coming along fantastically. And, per your recommendation, I finished up my RapidAir install in my home shop. That wasn’t nearly as bad as I was expecting and to have 5 drops throughout the shop plus air for the blaster & machinery is phenomenal.
Keep plugging along.
Sent from my iPhone using Tapatalk
Thanks. You're right, it could have been more than the 3 inches of wet heavy snow.
Glad you like your RapidAir system. I like how easy it was to install and how trouble free it has been for the past year and a half now. I highly recommend it although they aren't cheap.
Thanks for following along.
bustedcrawler
Well-known member
Thanks. You're right, it could have been more than the 3 inches of wet heavy snow.
Glad you like your RapidAir system. I like how easy it was to install and how trouble free it has been for the past year and a half now. I highly recommend it although they aren't cheap.
Thanks for following along.
I've got a small concrete apron and then gravel on the driveway, so not very easy to shove snow off of gravel. Still trying to figure out something better than letting the sun melt it off.
Waiting on my RapidAir to show up. Seeing your shop and all the others here got me looking at them. Got to see my dad's set-up over Christmas and that sealed the deal.
Jeep is coming along nicely.
OP
zmotorsports
ALLIANCE MEMBER
I've got a small concrete apron and then gravel on the driveway, so not very easy to shove snow off of gravel. Still trying to figure out something better than letting the sun melt it off.
Waiting on my RapidAir to show up. Seeing your shop and all the others here got me looking at them. Got to see my dad's set-up over Christmas and that sealed the deal.
Jeep is coming along nicely.
Thanks. I think you’ll really be pleased with the air system.
Sent from my iPhone using Garage Journal
OP
zmotorsports
ALLIANCE MEMBER
Here ya go Mike, I'm sure these are cheap.
That’s sweet as hell Cam, but yeah. I bet it’s not cheap. Definitely can’t justify that fir the 6-8 times a year I’d use it. [emoji15]
OP
zmotorsports
ALLIANCE MEMBER
I cleared another inch of heavy, wet snow when I got home then was able to get a little work done on the Jeep body, more specifically, the engine bay.
I removed the OEM radiator and automatic A/C condenser but left my stacked plate transmission cooler in place.


Actually the package was pretty clean for having over 90k miles on it and being flat-towed behind our coach for probably another 30k~ish miles over the past 7 years. Very little debris trapped in the A/C condenser and that was between my condenser and trans cooler. It may be worth removing the grille and unbolting the cooler to clean once every other year or so just as a preventative measure.

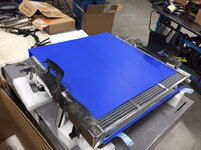
New heavy duty dual pass radiator at the ready. Time to swap over the rubber side flaps and lower valance from the OEM setup. Many don’t run these but I think they aid in getting the airflow where it’s supposed to be.

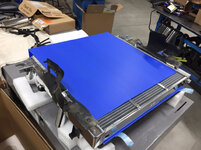
New radiator and manual transmission A/C condenser installed and fastened in place.


I’m using a 19” PWM outrunner fan from a 2016 SS Camaro.


Next I installed some new heater hoses as these will be difficult to access with the truck/SUV engine’s intake manifold. The LS3 still allows easy access but the truck/SUV intake is just a couple inches taller.

Lastly I tackled the wiring along the cowl. I have added a few wires for accessories over the years and I have also removed one or two so I cleaned up the wiring a bit and rather than have three or four split looms, I opted to get everything ready to place in one split loom. It will reside along with the OEM one that runs along the back of the firewall/cowl area.


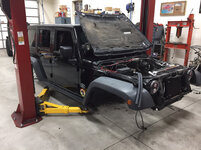
One last picture of my low-rider for the evening.
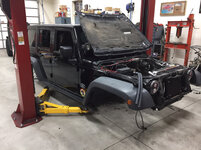
I also had a fellow Jeep club member come by the shop tonight to purchase my NP241OR RockTrac transfer case. That was the last item from my Jeep that I was selling so everything from the original drivetrain that I’m not using is out if my shop.
I think I have another hour or maybe two and the body is ready to drop onto the chassis.
Thanks for looking.
I removed the OEM radiator and automatic A/C condenser but left my stacked plate transmission cooler in place.
Actually the package was pretty clean for having over 90k miles on it and being flat-towed behind our coach for probably another 30k~ish miles over the past 7 years. Very little debris trapped in the A/C condenser and that was between my condenser and trans cooler. It may be worth removing the grille and unbolting the cooler to clean once every other year or so just as a preventative measure.
New heavy duty dual pass radiator at the ready. Time to swap over the rubber side flaps and lower valance from the OEM setup. Many don’t run these but I think they aid in getting the airflow where it’s supposed to be.
New radiator and manual transmission A/C condenser installed and fastened in place.
I’m using a 19” PWM outrunner fan from a 2016 SS Camaro.
Next I installed some new heater hoses as these will be difficult to access with the truck/SUV engine’s intake manifold. The LS3 still allows easy access but the truck/SUV intake is just a couple inches taller.
Lastly I tackled the wiring along the cowl. I have added a few wires for accessories over the years and I have also removed one or two so I cleaned up the wiring a bit and rather than have three or four split looms, I opted to get everything ready to place in one split loom. It will reside along with the OEM one that runs along the back of the firewall/cowl area.
One last picture of my low-rider for the evening.
I also had a fellow Jeep club member come by the shop tonight to purchase my NP241OR RockTrac transfer case. That was the last item from my Jeep that I was selling so everything from the original drivetrain that I’m not using is out if my shop.
I think I have another hour or maybe two and the body is ready to drop onto the chassis.
Thanks for looking.
Attachments
-
 719e12da351481bbe80f412659a3151c.jpg749.1 KB · Views: 0
 -
 00d343696ec04fa35368e4c6448731c0.jpg689.7 KB · Views: 0
 -
 1fb0e817c6d20d68a1d384ea221b834e.jpg749.7 KB · Views: 0
 -
 7ec2b3e5d23af8e02bfc6eaecbe22d62.jpg807.8 KB · Views: 0
 -
 87a5a5fbaf8929ce1597ca68114a1142.jpg734.7 KB · Views: 0
 -
 261a4424e831cc026abbba36f994d236.jpg819.9 KB · Views: 0
 -
 84f9e6e5ee42b634ddb5eaa9fd08b0bf.jpg793.4 KB · Views: 0
 -
 2b0654b69f13de8c0c572c78fe8fde9d.jpg720 KB · Views: 0
 -
 2f68c491a0697fa1d288f329efe91ae5.jpg756.5 KB · Views: 0
 -
 2b3ba448a48f0c4572f40e0ab3808514.jpg653.3 KB · Views: 0
 -
 de5dd383340fbfa9efc26e145e0009a3.jpg755.9 KB · Views: 0
 -
 83ef26531f52f30df928b90b9dafde41.jpg727.6 KB · Views: 0
 -
 9c3237bb56b876dba6c778fcbd0948be.jpg716.6 KB · Views: 0
Last edited:
WoodsTruck
Well-known member
- Joined
- Jan 12, 2013
- Messages
- 1,028
Not sure you would need it, but on my work trucks, I installed a piece of fiberglass window screen (screen door stuff) in front of the radiators when new. Mounting it so it is slightly floppy allows dead bugs and grass seed to dry and fall off instead of plugging the radiator cavities.
OP
zmotorsports
ALLIANCE MEMBER
Not sure you would need it, but on my work trucks, I installed a piece of fiberglass window screen (screen door stuff) in front of the radiators when new. Mounting it so it is slightly floppy allows dead bugs and grass seed to dry and fall off instead of plugging the radiator cavities.
Thanks but I usually keep the front end pretty clean and I don't like obstructing any airflow and even the fine screen mess will create restriction. On your work trucks it may not be an issue because of the extra cooling capacity but I don't want to lose any cooling with this small grille area. My feeling is the Jeep grille has 7 openings, keep them open and unobstructed.
I also see guys with these huge KC Daylighters or worse, a WARN Powerplant strapped to the front bumper right up in front of the grille openings blocking all kinds of airflow. I simply don't understand that.

OP
zmotorsports
ALLIANCE MEMBER
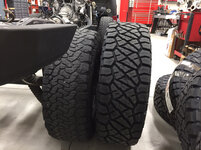
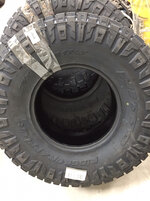
A little more progress was made, but first, look what finally arrived today. I ordered these on a Black Friday sale and they were back ordered until now.
37x12.50x17 Nitto Ridge Grapplers. They will be mounted on my new Raceline Avenger 17x9 wheels.

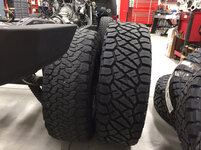

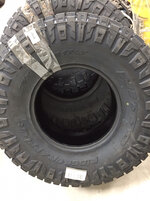
After drooling over my babies new shoes for a few minutes, I prepped the body to be mated back with the chassis. I used a couple of plumb bobs, one on the passenger’s front and another on the driver’s rear to determine placement of the chassis under the body.
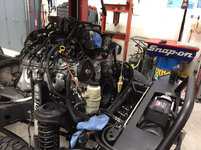
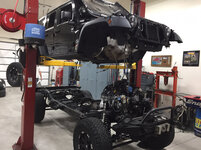
Getting closer.
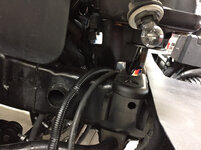
TOUCHDOWN!!! The body has landed on the chassis and it’s a beautiful fit. The two areas I was most concerned with were the heater hoses between the firewall and the intake manifold. You can see there is adequate clearance.

The second area of concern was the A/C lines coming through the firewall from the evaporator and there is a good couple of inches of clearance there.
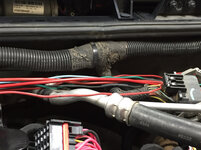
Look at that **** beast in there. A lot of wiring left but it’s getting closer.

A few shots of the underside of the engine and you can see the clearances.


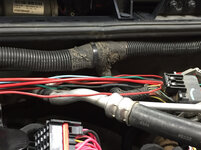
EVAP clearance is fantastic and all hoses and fill tube connected.

I bolted the body down and measured for driveshafts once I set it down to ride height so I can call and order them tomorrow.
Thanks for looking.
37x12.50x17 Nitto Ridge Grapplers. They will be mounted on my new Raceline Avenger 17x9 wheels.
After drooling over my babies new shoes for a few minutes, I prepped the body to be mated back with the chassis. I used a couple of plumb bobs, one on the passenger’s front and another on the driver’s rear to determine placement of the chassis under the body.
Getting closer.
TOUCHDOWN!!! The body has landed on the chassis and it’s a beautiful fit. The two areas I was most concerned with were the heater hoses between the firewall and the intake manifold. You can see there is adequate clearance.
The second area of concern was the A/C lines coming through the firewall from the evaporator and there is a good couple of inches of clearance there.
Look at that **** beast in there. A lot of wiring left but it’s getting closer.
A few shots of the underside of the engine and you can see the clearances.
EVAP clearance is fantastic and all hoses and fill tube connected.
I bolted the body down and measured for driveshafts once I set it down to ride height so I can call and order them tomorrow.
Thanks for looking.
Attachments
-
 67fd8c5ece79fc9daf6edc0056baed86.jpg827.2 KB · Views: 0
 -
 feeb15db09139c2f2e41ae82523dc3b1.jpg753.2 KB · Views: 0
 -
 904772632ec6f44cae877add72b5b645.jpg691.3 KB · Views: 0
 -
 fe21be1583dd02842e4aaa4e91f936f2.jpg778.4 KB · Views: 0
 -
 8194ef1940b31f322b5ede40eb7a1952.jpg727.6 KB · Views: 0
 -
 54a02700dc03af027f26676d41b57628.jpg731.9 KB · Views: 0
 -
 9d21fa71384e955b27a5722eea3823f7.jpg726 KB · Views: 0
 -
 938b192d6a3c06485287dd03a3395dcf.jpg767.3 KB · Views: 0
 -
 dfabae300a9b630c2343587409f41cae.jpg725.4 KB · Views: 0
 -
 124e5c464bb196d0b2f03d71f7d53001.jpg702.2 KB · Views: 0
 -
 6da96afec452a201d7d3ae974c7d4850.jpg887.7 KB · Views: 0
 -
 bf1c1caef35474746aa6cf738f7dad3e.jpg750.1 KB · Views: 0
 -
 287cd68f214472937ca4d9c82a7e9e7a.jpg762.3 KB · Views: 0
 -
 f4d657e06fb7bec3d8067d7c212e0deb.jpg777.3 KB · Views: 1
Last edited: