To avoid these ads, REGISTER NOW!

ZMotorsports Shop Projects 2.0

OP
Z

zmotorsports

ALLIANCE MEMBER
Joined
Oct 20, 2009
Messages
21,477
Location
Northern Utah
Awesome sign.


Shorty Korte
Always remember quality in QST

Sent from my iPhone using Garage Journal

Hi Mike,

As always I enjoy reading what you are up to. Those cut down pole jacks are a great idea! I'll have to copy it if I ever get a lift installed :lol_hitti

The pictures of Montana State prison bring back memories, it's one of the few places we actually stopped and toured while on vacation when I was a kid.

Thanks for the well thought out explanation for your jeep's cooling system. I totally agree that it is important to have a goal for a project (be it a vehicle or something else) and stick with it. Now I just need to actually follow through with that sentiment lol...

Thanks guys. I appreciate you taking the time to follow along and comment.
 
To avoid these ads, REGISTER NOW!
OP
Z

zmotorsports

ALLIANCE MEMBER
Joined
Oct 20, 2009
Messages
21,477
Location
Northern Utah
Knocked another item off of my white board this morning. I fabricated my grease gun holder that I have kept putting off.

I have had my grease guns in a drawer under my workbench placed on absorbent pads for the past two years and after greasing my Jeep suspension the other night and dripping oil all over my shop floor I decided to bump it to the top of the priority list. This heat we’ve been having has been separating the lubricant from the carrier and when I pick the guns up to use all of the oil runs out the bottom of the plunger. By having them hang it won’t prevent the oil from dripping but should at least eliminate the pooling and a gush of oil pouring out when I pick them up to use.

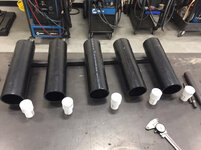
I started with some 3” ABS tubing cut into 12” increments and played with spacing.
93ab47074756bc757eedfddd70f60bab.jpg

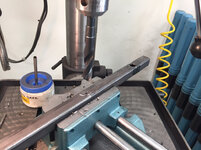
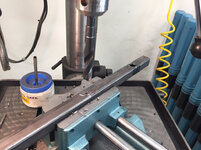
After correct spacing was determined I cut the 1” square tubing to the necessary length and then drilled the holes for mounting the tubes as well as mounting the complete rack to the wall. By using the tube it also creates just enough spacing away from the wall to allow access to remove the bottom caps for cleaning when needed.
8cb3e3b10e942f9b0d8a2068f23e70cd.jpg

I then cut some 1” PVC into 2” lengths which will form the cup to secure the coupler at the end of the hose. I deburred and cleaned up the ends on the lathe.
758def24a9a3de0f0364fffccbabe593.jpg

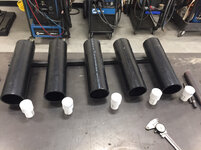
Tubing all cut and prepped.
a03b2805ad0dd7992d91c5ebdde5dad3.jpg

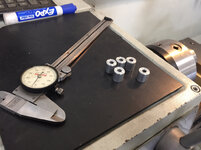
Coupler receivers and mounting tube painted and drying while I machine the .5” spacers.
ee3181c6e5aef5e12fdc32953dcbb1cb.jpg

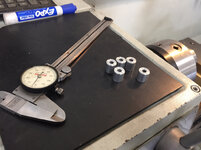
Spacers machined and ready for assembly.
082daf1c5d525bee257e451c05d453c4.jpg

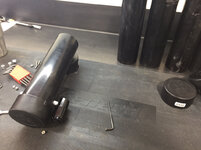
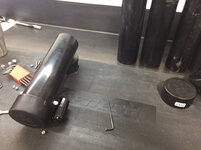
First one assembled.
1f1a487747c0dd0a6b7717151cf1696c.jpg

All five assembled and ready to mate to the mounting tube.
263208880880fe24ca3ccab893a78366.jpg

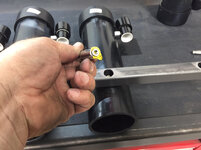
Securing using 10-32 nylock nuts.
58f8fd5c6c0964a651be8a23fe3e688d.jpg

Using the masking tape trick to keep from dropping the nuts into the square tube while assembling.
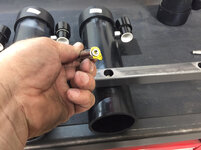
7c46e00948643026c19b078eb5cc2568.jpg

The assembly ready for installation onto the wall.
e1017aa1d9eff41038e425cd037420f5.jpg

3334a376e53797ab3957bce6b993a9c3.jpg

Loaded with the grease guns for years of use and easy access.
ce0bd50baa152af088754e672939caa7.jpg

Gained back one of my large drawers under my workbench.
8a4f4b78c496bba1faed2db12656abfd.jpg

Thanks for looking.
 

Attachments

  • 93ab47074756bc757eedfddd70f60bab.jpg
    93ab47074756bc757eedfddd70f60bab.jpg
    711.2 KB · Views: 2
  • 8a4f4b78c496bba1faed2db12656abfd.jpg
    8a4f4b78c496bba1faed2db12656abfd.jpg
    775.4 KB · Views: 3
  • ce0bd50baa152af088754e672939caa7.jpg
    ce0bd50baa152af088754e672939caa7.jpg
    673.2 KB · Views: 3
  • 3334a376e53797ab3957bce6b993a9c3.jpg
    3334a376e53797ab3957bce6b993a9c3.jpg
    554.2 KB · Views: 4
  • e1017aa1d9eff41038e425cd037420f5.jpg
    e1017aa1d9eff41038e425cd037420f5.jpg
    88.4 KB · Views: 3
  • 7c46e00948643026c19b078eb5cc2568.jpg
    7c46e00948643026c19b078eb5cc2568.jpg
    680.8 KB · Views: 3
  • 58f8fd5c6c0964a651be8a23fe3e688d.jpg
    58f8fd5c6c0964a651be8a23fe3e688d.jpg
    691 KB · Views: 3
  • 263208880880fe24ca3ccab893a78366.jpg
    263208880880fe24ca3ccab893a78366.jpg
    665.6 KB · Views: 4
  • 1f1a487747c0dd0a6b7717151cf1696c.jpg
    1f1a487747c0dd0a6b7717151cf1696c.jpg
    721.5 KB · Views: 5
  • 082daf1c5d525bee257e451c05d453c4.jpg
    082daf1c5d525bee257e451c05d453c4.jpg
    682.7 KB · Views: 4
  • ee3181c6e5aef5e12fdc32953dcbb1cb.jpg
    ee3181c6e5aef5e12fdc32953dcbb1cb.jpg
    1.2 MB · Views: 3
  • a03b2805ad0dd7992d91c5ebdde5dad3.jpg
    a03b2805ad0dd7992d91c5ebdde5dad3.jpg
    710.1 KB · Views: 3
  • 758def24a9a3de0f0364fffccbabe593.jpg
    758def24a9a3de0f0364fffccbabe593.jpg
    682.9 KB · Views: 2
  • 8cb3e3b10e942f9b0d8a2068f23e70cd.jpg
    8cb3e3b10e942f9b0d8a2068f23e70cd.jpg
    754.9 KB · Views: 3
Last edited:

LXCam

ALLIANCE MEMBER
Joined
Apr 23, 2013
Messages
19,205
Location
AZ
Well mike for the first time ever I’m disappointed in something you built. I can’t believe that you didn’t do a stainless or aluminum back splash just in case there was a spot of grease on a hose that could leave a stain on the wall.


Whatta slacker ;)


Lol, as always it’s looks great bud.
 

larry4406

Well-known member
Joined
Jan 27, 2006
Messages
19,593
Location
Northern Virginia
Well mike for the first time ever I’m disappointed in something you built. I can’t believe that you didn’t do a stainless or aluminum back splash just in case there was a spot of grease on a hose that could leave a stain on the wall.


Whatta slacker ;)


Lol, as always it’s looks great bud.

That’s funny right there! But I can see the value of the back splash.
 
OP
Z

zmotorsports

ALLIANCE MEMBER
Joined
Oct 20, 2009
Messages
21,477
Location
Northern Utah
I’m sorry Cam. I didn’t think a backsplash was needed as I wipe the grease off the coupler before storing.

I’m sorry I let ya down bud. I’ll have to try harder on the next project to reacquire your respect. [emoji12]
 

4 FN 27

ALLIANCE MEMBER
Joined
Oct 19, 2015
Messages
4,635
Location
Minnesnowta
Well mike for the first time ever I’m disappointed in something you built. I can’t believe that you didn’t do a stainless or aluminum back splash just in case there was a spot of grease on a hose that could leave a stain on the wall.

Was thinking the same thing...but I hear you Mike on wiping them down prior to putting them away.

Where there is a Grease Gun there is a Rag or a Matt...or a Puddle.
 
OP
Z

zmotorsports

ALLIANCE MEMBER
Joined
Oct 20, 2009
Messages
21,477
Location
Northern Utah
I here ya Pat. At my last shop I had my guns hanging on a piece of tubing protruding out perpendicular from the wall and an absorbent pad on the floor for the drippings. I just wanted something a little nicer now and a little more aesthetically pleasing than an oil soaked pad on the floor.
 

shortykorte

Well-known member
Joined
Sep 1, 2014
Messages
8,039
Location
Tallahassee, Fl
Very nice Mike. Definitely better than laying in a drawer. Is each gun loaded with a different grease or is the loaded for a year use due to all being the same grease?
I too like the back splash idea even if it’s for looks. How about this, laminate a picture of a monkey and place behind. Then the rack is your grease monkey. lol.


Shorty Korte
Always remember quality in QST

Sent from my iPhone using Garage Journal
 

Boosted1

Well-known member
Joined
Nov 25, 2007
Messages
1,681
Location
Georgetown, KY
Once again I am looking at one of your projects thinking you could sell those if you were to make a batch.
I have same problem you fixed with grease guns.
 
OP
Z

zmotorsports

ALLIANCE MEMBER
Joined
Oct 20, 2009
Messages
21,477
Location
Northern Utah
Thanks for all of the comments guys. I appreciate the feedback and all of you following along.

As far as different greases, each gun has a different grease.

My Proto (favorite gun) is my most used EP2 grease which is Phillips Multiplex grease. Then my I have two Lincoln guns each containing Valvoline Ford moly-enriched grease for ball-joints/tie rods with a standard coupler and the other with a needle point for flush zerks and my RCV shafts. Lastly is another Lincoln with Red & Tacky that I use for motorcycles steering necks.
 
Last edited:

lilscorpion

Well-known member
Joined
Mar 15, 2010
Messages
3,600
Location
Colorado
Thanks for all of the comments guys. I appreciate the feedback and all of you following along.

As far as different greases, each fun has a different grease.

My Proto (favorite gun) is my most used EP2 grease which is Phillips Multiplex grease. Then my I have two Lincoln guns each containing Valvoline Ford moly-enriched grease for ball-joints/tie rods with a standard coupler and the other with a needle point for flush zerks and my RCV shafts. Lastly is another Lincoln with Red & Tacky that I use for motorcycles steering necks.


Cool project and dang that’s a lot of grease types. I think I have 1. Maybe I need to look into what types I actually should be using instead of assuming grease is grease.
 
OP
Z

zmotorsports

ALLIANCE MEMBER
Joined
Oct 20, 2009
Messages
21,477
Location
Northern Utah
Cool project and dang that’s a lot of grease types. I think I have 1. Maybe I need to look into what types I actually should be using instead of assuming grease is grease.

Thanks Matt. Coming from the industrial maintenance field I learned that not all grease is the same so it has carried over into my personal life as well.:lol_hitti
 

matt_i

Well-known member
Joined
Mar 14, 2008
Messages
10,752
Location
SE Michigan
Great design on the gun holders! You'd laugh at me, its a super-sized Ziplock bag with some rags inside, I take mine along with the boat trailer to purge water from the submerged hubs and that was the fastest way I could get it to "travel cleanly".

I'm trying to standardize on Mobil "multipurpose" XHP222 (blue) and the moly-laden XHP222+ (black).

I have given some thought to EP grease but have to make sure it doesn't get into any bronze...I've seen the results of that mistake firsthand...
 
OP
Z

zmotorsports

ALLIANCE MEMBER
Joined
Oct 20, 2009
Messages
21,477
Location
Northern Utah
Great design on the gun holders! You'd laugh at me, its a super-sized Ziplock bag with some rags inside, I take mine along with the boat trailer to purge water from the submerged hubs and that was the fastest way I could get it to "travel cleanly".

I'm trying to standardize on Mobil "multipurpose" XHP222 (blue) and the moly-laden XHP222+ (black).

I have given some thought to EP grease but have to make sure it doesn't get into any bronze...I've seen the results of that mistake firsthand...

Thanks.

The Phillips Multiplex #2 was something we started using because of it's lubricating properties and it's resistance to water washout when our janitorial personnel would wash down equipment. At the time I was working on several boats for friends so I decided to give it a try on boat trailer wheel bearings and immediately saw a benefit by not having to disassemble and repack as often. I have pretty much used it for all of my general chassis grease and even have the 5-gallon bucket with my Alemite bearing packer attachment. It can be used in ball joints as well but I opt to use one with a bit of molybdenum in it for a bit more extreme wear of metal on metal surfaces that ball joints and tie rod ends encounter.

Thanks for stopping by and following along on my thread.
 
OP
Z

zmotorsports

ALLIANCE MEMBER
Joined
Oct 20, 2009
Messages
21,477
Location
Northern Utah
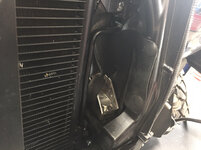
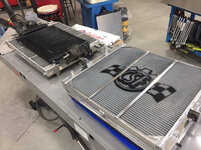
The aluminum radiator in my Jeep developed a small leak a few months ago and I have been waiting for a replacement under warranty. It showed up a few weeks ago but with the triple digit heat we’ve been having it has started to worry me so I thought I would get it replaced before we start hitting several Jeep rallies we will be attending over the next few months.

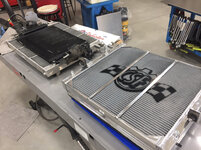
I stopped by my buddies shop Monday afternoon and evacuated my A/C system and pulled the radiator.

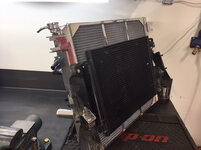
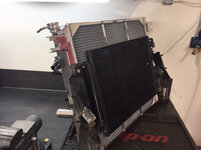
Last night I swapped the Camaro SS electric fan and the A/C condenser over to the new radiator.
f1f760c375c5809e6c2844ac1a4d3d26.jpg

8c068428d90204301b3a5af127c7f0d6.jpg

Assembly ready for installation.
24aefe1abefff67105fd9a46d885083c.jpg

988ca1c6a287fb083dea5964c431a181.jpg

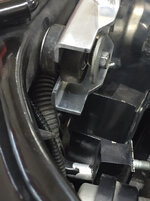
These JK’s are hard on aluminum radiators for two reasons, first there are so many electronics that they have issues with electrolysis so I added a ground strap directly from the chassis to the radiator shell. Secondly the Jeeps flex and have a tendency to crack aluminum radiators so to aid in allowing a little ability to move without cracking while flexing I added some springs under the rubber isolators. These seem to retain the radiator well yet still allow some movement.
ef74cc35b814fdbc7769933b237dfc46.jpg

52939e3c7a78bcd31ae08482f7ab093c.jpg

Another issue I have seen on the JK’s is that people have a tendency to remove the rubber side flaps and lower radiator valances when they are installing aftermarket components such as transmission coolers, aux. lights and winches. These rubber flaps aid in cooling by keeping the airflow directed through the radiator core rather than around it under it so make sure you keep yours in place.

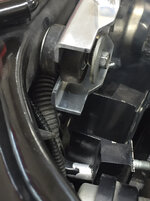
Here you can see on the passenger’s side I merely cut a slit to allow the braided transmission lines to run through it but the flap is still in place and fastened to the core support.
1ffabbb48dbb610d97839e796aa59e05.jpg

Driver’s side in place.
26ca6a5500bea025974e10c3dda20bdc.jpg

Upper radiator hose installed along with 1/4” line to the surge tank using tie-wraps to help conceal the surge tank hose. Another tip for keeping things clean and tidy is to loosely install the tie-wrap then rotate it so the lock is under the hose and out of site before tightening and using flush cuts to snip the tail. This does two things, the flush cut cutters eliminate that nasty sharp cut edge so you don’t get scratched by it and by not seeing the lock it provides a much cleaner overall appearance.

Ready to pull a vacuum on the cooling system and check for leaks and fill.
6f76ab4d66a661e8bb76f8a7b82ed7e6.jpg

Double checking things after the test drive.
742775b59c00c97680191b33f0161a1b.jpg

Now to recharge my A/C system.
 

Attachments

  • 742775b59c00c97680191b33f0161a1b.jpg
    742775b59c00c97680191b33f0161a1b.jpg
    803.1 KB · Views: 3
  • 6f76ab4d66a661e8bb76f8a7b82ed7e6.jpg
    6f76ab4d66a661e8bb76f8a7b82ed7e6.jpg
    796.5 KB · Views: 3
  • 26ca6a5500bea025974e10c3dda20bdc.jpg
    26ca6a5500bea025974e10c3dda20bdc.jpg
    710.3 KB · Views: 1
  • 1ffabbb48dbb610d97839e796aa59e05.jpg
    1ffabbb48dbb610d97839e796aa59e05.jpg
    756.4 KB · Views: 2
  • f1f760c375c5809e6c2844ac1a4d3d26.jpg
    f1f760c375c5809e6c2844ac1a4d3d26.jpg
    745.7 KB · Views: 2
  • 52939e3c7a78bcd31ae08482f7ab093c.jpg
    52939e3c7a78bcd31ae08482f7ab093c.jpg
    820.6 KB · Views: 1
  • ef74cc35b814fdbc7769933b237dfc46.jpg
    ef74cc35b814fdbc7769933b237dfc46.jpg
    640.9 KB · Views: 0
  • 988ca1c6a287fb083dea5964c431a181.jpg
    988ca1c6a287fb083dea5964c431a181.jpg
    638.3 KB · Views: 0
  • 24aefe1abefff67105fd9a46d885083c.jpg
    24aefe1abefff67105fd9a46d885083c.jpg
    649.3 KB · Views: 0
  • 8c068428d90204301b3a5af127c7f0d6.jpg
    8c068428d90204301b3a5af127c7f0d6.jpg
    877.1 KB · Views: 0
Last edited:
To avoid these ads, REGISTER NOW!

Monza Harry

Well-known member
Joined
Dec 29, 2018
Messages
1,433
Location
Windsor ON
Well Mike nice job on the grease gun rack, But :lol_hitti you could use some Two Faced Tape and a precut piece of Aluminum Diamond Palate for a back splash, easy, pretty, and functional. That is if you are looking for back seat fabricators to help you out! And then to raise your game and silence the peanut gallery [Yes I resemble that remark] you could learn to, and apply some, pin-stripping and calligraphy to mark which gun goes where. And I wholeheartedly agree that air flow control is #1 & #2 on the list for your rad re-install. Keep them coming! Harry
 
OP
Z

zmotorsports

ALLIANCE MEMBER
Joined
Oct 20, 2009
Messages
21,477
Location
Northern Utah
I racked my Jeep Thursday night to check things out and noticed I had some play in my ball joints so I tossed in some new ones between Thursday and Friday evenings.

On Saturday morning while it was still on the lift I decided to install my new driving lights. My Hella Black Magic 6” driving lights have worked well for the past 8 years I’ve had them but being halogen with a glass lense I finally had one take a rock and break during a recent off-road trip.

I opted to go the LED route this time and bought a pair if KC Pro 6 Gravity lights. I also ordered some amber covers as it will help in dust during off-road driving as well as that nasty inversion **** we have to drive in here in northern Utah during January and into February months.

73ed421c646e37363b1a54da89d20ab1.jpg


Sent from my iPhone using Garage Journal
 

Attachments

  • 73ed421c646e37363b1a54da89d20ab1.jpg
    73ed421c646e37363b1a54da89d20ab1.jpg
    699.4 KB · Views: 0
OP
Z

zmotorsports

ALLIANCE MEMBER
Joined
Oct 20, 2009
Messages
21,477
Location
Northern Utah
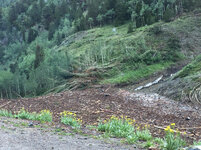
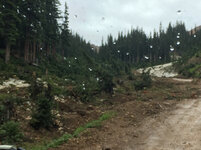
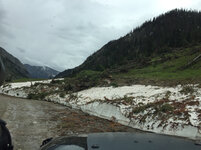
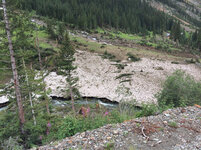
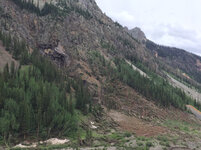
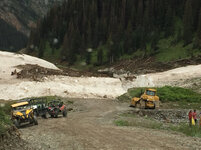
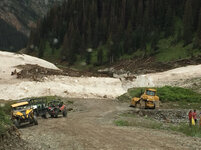
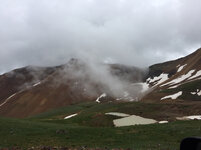
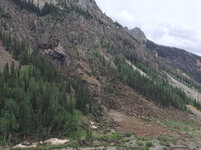
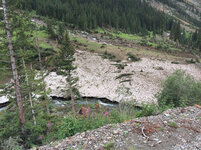
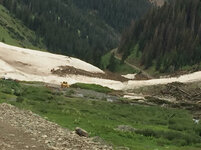
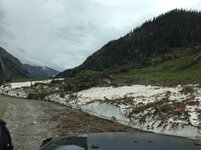
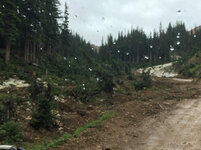
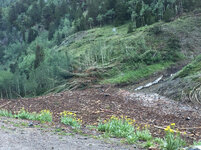
My wife and I just returned from our annual Ouray, CO wheeling trip. This was our twelfth year in the area and by far the most interesting. The amount of damage and carnage from many, many avalanches was staggering. We’ve seen an occasional slide or avalanche area here and there but we counted about 17 this trip and that was just from one heavy snowfall season. Upon talking with a local who works at a historical museum in the area he said this was the highest snowfall on record since the 1880’s and by what we witnessed I have no reason to argue the point.

Many of the trails in the area were similar to years past with a few sections here and there that had larger rocks exposed and a culvert exposed that required some careful tire placement but overall a great trip. Two trails that I like to run were not open, Black Bear Pass and Poughkeepsie Gulch. I talked to a Forest Service ranger one day and was informed they were working to get Black Bear Pass open within a week or so but had no plans to work on Poughkeepsie this year as they didn’t have the resources to work on both this season.

For the last four years my wife and I had hosted a small gathering in the area(12-15 couples/RV’s/Jeeps) but this year we weren’t 100% sure we would be able to make it with our son’s home purchase and wedding so we didn’t organize anything. We were able to get away and it turned out to just be the two of us although we met a few people in the campground that had asked if they could tag along with us after discovering that we were familiar with the area.

Now for the pictures.

Our campsite for the week.
d883f4531f16ed83ccbd5b1fc1aedb24.jpg

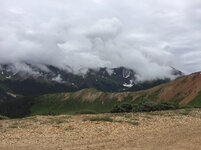
Day one it was raining and upon driving over Corkscrew Gulch, Hurricane Pass and California Gulch the damage was very evident.
a90ae16c44579cdc6a3d471a17a7415b.jpg

c2f5f3a89f05ab812eed5e875aefd08f.jpg

6e89189842b106dfc86d78de1c368145.jpg

970192dde8c3e9938f43a48b0b40a4c1.jpg

36e644a20fb7789e428eb80918c1f7b4.jpg

99ca3beadd7334a86f59f610372a08ba.jpg

cbf6395790a763f4798441c1673567ec.jpg

b7183ce9a1a47aa28f5918074b6ad5ce.jpg

6b91e20f3daada33e749740da7621bca.jpg

dc81ba746897c24d80224acb6ab054e9.jpg

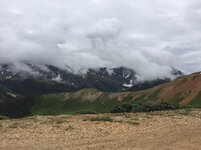
However, the natural beauty of the area was still very obvious. Lake Como at the top of the Poughkeepsie Gulch trail.
622c3a7e969b7c7bed0e709647f335ec.jpg

8ab0175b79154c69d71ef1b25f39e41f.jpg

ae3cba5d9510c561fd73e5dd46e97223.jpg

2ce978843d16b4978a0cefe0821d4382.jpg

3c28de0dd74615fb774ff30cc4cd9bfd.jpg

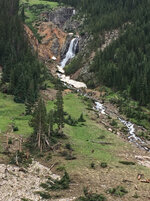
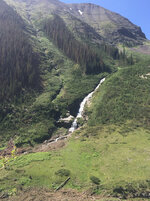
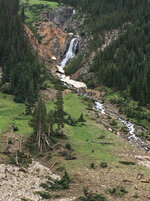
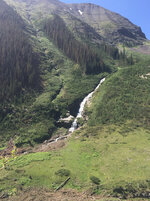
And with the heavy snowfall last winter the sheer amount and size of the waterfalls were probably a once in a lifetime experience. We have never seen so many waterfall in this area. Around nearly every turn we would comment about seeing “another” waterfall.
23760d160f2a38f78b4e43affc689a0b.jpg

e831c4454a65d7ab4969ffe3f7e64200.jpg

47019aebf3d323a0630d40a8fad67f29.jpg

Thanks for looking.
 

Attachments

  • dc81ba746897c24d80224acb6ab054e9.jpg
    dc81ba746897c24d80224acb6ab054e9.jpg
    774.7 KB · Views: 0
  • 622c3a7e969b7c7bed0e709647f335ec.jpg
    622c3a7e969b7c7bed0e709647f335ec.jpg
    844.1 KB · Views: 0
  • 8ab0175b79154c69d71ef1b25f39e41f.jpg
    8ab0175b79154c69d71ef1b25f39e41f.jpg
    719.6 KB · Views: 0
  • ae3cba5d9510c561fd73e5dd46e97223.jpg
    ae3cba5d9510c561fd73e5dd46e97223.jpg
    609 KB · Views: 0
  • 6b91e20f3daada33e749740da7621bca.jpg
    6b91e20f3daada33e749740da7621bca.jpg
    899 KB · Views: 0
  • 2ce978843d16b4978a0cefe0821d4382.jpg
    2ce978843d16b4978a0cefe0821d4382.jpg
    907 KB · Views: 0
  • e831c4454a65d7ab4969ffe3f7e64200.jpg
    e831c4454a65d7ab4969ffe3f7e64200.jpg
    908.1 KB · Views: 0
  • 23760d160f2a38f78b4e43affc689a0b.jpg
    23760d160f2a38f78b4e43affc689a0b.jpg
    959.5 KB · Views: 0
  • 47019aebf3d323a0630d40a8fad67f29.jpg
    47019aebf3d323a0630d40a8fad67f29.jpg
    1,014.6 KB · Views: 0
  • 3c28de0dd74615fb774ff30cc4cd9bfd.jpg
    3c28de0dd74615fb774ff30cc4cd9bfd.jpg
    890.3 KB · Views: 0
  • b7183ce9a1a47aa28f5918074b6ad5ce.jpg
    b7183ce9a1a47aa28f5918074b6ad5ce.jpg
    1.2 MB · Views: 0
  • cbf6395790a763f4798441c1673567ec.jpg
    cbf6395790a763f4798441c1673567ec.jpg
    993 KB · Views: 0
  • 99ca3beadd7334a86f59f610372a08ba.jpg
    99ca3beadd7334a86f59f610372a08ba.jpg
    655.4 KB · Views: 0
  • 36e644a20fb7789e428eb80918c1f7b4.jpg
    36e644a20fb7789e428eb80918c1f7b4.jpg
    770.6 KB · Views: 0
  • 970192dde8c3e9938f43a48b0b40a4c1.jpg
    970192dde8c3e9938f43a48b0b40a4c1.jpg
    710.9 KB · Views: 0
  • 6e89189842b106dfc86d78de1c368145.jpg
    6e89189842b106dfc86d78de1c368145.jpg
    1.1 MB · Views: 0
  • c2f5f3a89f05ab812eed5e875aefd08f.jpg
    c2f5f3a89f05ab812eed5e875aefd08f.jpg
    1.1 MB · Views: 0
  • a90ae16c44579cdc6a3d471a17a7415b.jpg
    a90ae16c44579cdc6a3d471a17a7415b.jpg
    756.1 KB · Views: 0
  • d883f4531f16ed83ccbd5b1fc1aedb24.jpg
    d883f4531f16ed83ccbd5b1fc1aedb24.jpg
    879.6 KB · Views: 11
Last edited:
OP
Z

zmotorsports

ALLIANCE MEMBER
Joined
Oct 20, 2009
Messages
21,477
Location
Northern Utah
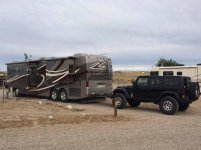
Picture of us traveling to Ouray, stopping for the night in Green River, UT.
IMG_6287.jpg

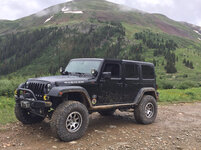
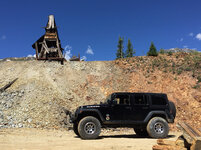
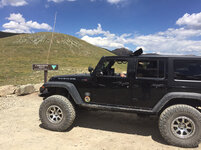
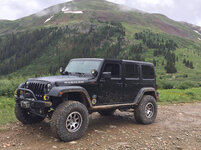
I almost forgot to include some gratuitous pictures of our Jeep in her element.
48b11e6cee0eab5e8ab325a8ff71c084.jpg

c041a61b17d6687cf1d2b84fc9ef7a49.jpg

d358baed32e696371e117d503233036f.jpg

a8ebbd634ece7a95337af0ce7fdb0112.jpg

e4dd49bb185f8866c77555d2f7e0538a.jpg

67b62c8b6071871f1537c00042a78bc9.jpg

7e95f20162057b2eb38ee910094f17a4.jpg

10470a126451c4dd2e3f0588f9a8eccf.jpg

658937f3dc55f907c37034fd9cb8bbe9.jpg

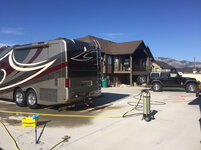
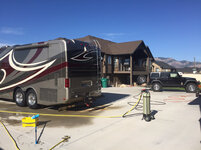
Then after returning home yesterday proceeded to wash and detail both the Jeep and the coach in preparation for the next RV/Jeep adventure.
9e989e60509984b63af79183fbb76522.jpg

6e22848640e1797a24f7ca14e951e723.jpg

c3011f3c59efca74f29aa41f0fc37a16.jpg

Thanks for looking.

And for anyone interested, the new powertrain really performed fantastic and the 37’s really flattened out the trails this year. Especially seeing as how the rocks were a bit larger this year as all of the water had washed out much of the dirt and left just the large rocks exposed. The Jeep handled them in stride and I couldn’t be more pleased with the way everything performed.
 

Attachments

  • IMG_6287.jpg
    IMG_6287.jpg
    148.8 KB · Views: 33
  • 9e989e60509984b63af79183fbb76522.jpg
    9e989e60509984b63af79183fbb76522.jpg
    716.7 KB · Views: 2
  • 48b11e6cee0eab5e8ab325a8ff71c084.jpg
    48b11e6cee0eab5e8ab325a8ff71c084.jpg
    891.2 KB · Views: 1
  • c041a61b17d6687cf1d2b84fc9ef7a49.jpg
    c041a61b17d6687cf1d2b84fc9ef7a49.jpg
    965.6 KB · Views: 0
  • d358baed32e696371e117d503233036f.jpg
    d358baed32e696371e117d503233036f.jpg
    953.6 KB · Views: 0
  • a8ebbd634ece7a95337af0ce7fdb0112.jpg
    a8ebbd634ece7a95337af0ce7fdb0112.jpg
    907 KB · Views: 0
  • e4dd49bb185f8866c77555d2f7e0538a.jpg
    e4dd49bb185f8866c77555d2f7e0538a.jpg
    733.7 KB · Views: 0
  • 67b62c8b6071871f1537c00042a78bc9.jpg
    67b62c8b6071871f1537c00042a78bc9.jpg
    817.3 KB · Views: 0
  • 7e95f20162057b2eb38ee910094f17a4.jpg
    7e95f20162057b2eb38ee910094f17a4.jpg
    920.5 KB · Views: 0
  • 10470a126451c4dd2e3f0588f9a8eccf.jpg
    10470a126451c4dd2e3f0588f9a8eccf.jpg
    710.2 KB · Views: 0
  • 658937f3dc55f907c37034fd9cb8bbe9.jpg
    658937f3dc55f907c37034fd9cb8bbe9.jpg
    830.7 KB · Views: 0
  • 6e22848640e1797a24f7ca14e951e723.jpg
    6e22848640e1797a24f7ca14e951e723.jpg
    719.8 KB · Views: 0
  • c3011f3c59efca74f29aa41f0fc37a16.jpg
    c3011f3c59efca74f29aa41f0fc37a16.jpg
    694.6 KB · Views: 2
Last edited:

Bigblue&Goldie

Well-known member
Joined
Mar 12, 2009
Messages
10,734
Location
AZ
Badass, I'm glad the Jeep performed! That area is my favorite place to four wheel. You can't beat the scenery or weather this time of year. We went there like 4 years in a row, but it's been a while now.
 
OP
Z

zmotorsports

ALLIANCE MEMBER
Joined
Oct 20, 2009
Messages
21,477
Location
Northern Utah
Badass, I'm glad the Jeep performed! That area is my favorite place to four wheel. You can't beat the scenery or weather this time of year. We went there like 4 years in a row, but it's been a while now.

Thanks. Agreed, the scenery is spectacular which is why we go back year after year. This has been one of the very few places that when we were packing up to leave and getting the coach to travel mode that the wife said she can't wait until we can walk back down to the campground office and say we would like to stay for another week or more.

I too can't wait until we can do that.:)
 

Bigblue&Goldie

Well-known member
Joined
Mar 12, 2009
Messages
10,734
Location
AZ
I've never stayed there. We've stayed at the city park in Telluride and the State Park just out of town. We've also stayed at the little park on the lake in Durango. The new rig won't fit in any of those places, so we'll have to look into the KOA.
 
To avoid these ads, REGISTER NOW!
Top Bottom