To avoid these ads, REGISTER NOW!

ZMotorsports Shop Projects 2.0

Pressingonward

Well-known member
Joined
Mar 9, 2016
Messages
522
Location
SW WA
Very nice work. Your welds are beautiful and the design is top notch.

I will second your comments about a vertical bandsaw, they are very handy to have around! For anyone who doesn't have the funds or space for one - a jigsaw with a good blade will handle most jobs that a bandsaw will, just at a slower pace. You'd probably go through several blades to do a full bumper like Mike, but it could be done if that's all you had to work with lol
 
To avoid these ads, REGISTER NOW!
OP
Z

zmotorsports

ALLIANCE MEMBER
Joined
Oct 20, 2009
Messages
21,495
Location
Northern Utah
Very nice work. Your welds are beautiful and the design is top notch.

I will second your comments about a vertical bandsaw, they are very handy to have around! For anyone who doesn't have the funds or space for one - a jigsaw with a good blade will handle most jobs that a bandsaw will, just at a slower pace. You'd probably go through several blades to do a full bumper like Mike, but it could be done if that's all you had to work with lol

Thank you for following along and the comments.

The welds on the wings were so-so as I knew they would be blended at the seams but I appreciate the feedback.
 

rattle_snake

Well-known member
Joined
Jun 25, 2015
Messages
5,245
Location
Chandler, AZ
Bumper turned out great. I like that it's one-of-a-kind in a time when jeep bumpers are a commodity product. I also like that it doesn't have light holes, looks cleaner. Can focus on lines instead.
 
OP
Z

zmotorsports

ALLIANCE MEMBER
Joined
Oct 20, 2009
Messages
21,495
Location
Northern Utah
Nailed it! Looks super clean!

Bumper turned out great. I like that it's one-of-a-kind in a time when jeep bumpers are a commodity product. I also like that it doesn't have light holes, looks cleaner. Can focus on lines instead.

Thanks guys.

Justin, thank you for the comment about the lights. My son had a 14" WARN LED light bar that he won and he really wanted to incorporate that into the bumper but I tried to convince him that it would either block airflow across the cooling stack and/or just not look right with the lines of the WJ. He was reluctant but finally agreed to sell it and purchase some round LED lights instead. I think they look much nicer and give it a clean look.

Not to mention that I am just not a "light bar" kind of guy. Something about them just doesn't sit well with me.

I appreciate you guys following along as well as the comments.
 

shortykorte

Well-known member
Joined
Sep 1, 2014
Messages
8,039
Location
Tallahassee, Fl
Painted body color, front bumper will look like the original which means great design and work.


Shorty Korte
Always remember quality in QST

Sent from my iPhone using Garage Journal
 
OP
Z

zmotorsports

ALLIANCE MEMBER
Joined
Oct 20, 2009
Messages
21,495
Location
Northern Utah
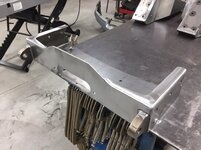
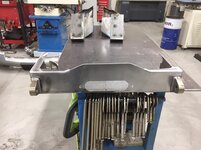
Last night I broke everything down, blended the last piece (center section) and prepped everything to take to the powder coater.

35742b2edd13d47e87792709f33fbca8.jpg

9380484e92e35c95fd28261f37868f32.jpg

55880f0cba13b05a52b0e816c2d2f8df.jpg

Thanks for looking.
 

Attachments

  • 9380484e92e35c95fd28261f37868f32.jpg
    9380484e92e35c95fd28261f37868f32.jpg
    94 KB · Views: 1
  • 35742b2edd13d47e87792709f33fbca8.jpg
    35742b2edd13d47e87792709f33fbca8.jpg
    93.1 KB · Views: 1
  • 55880f0cba13b05a52b0e816c2d2f8df.jpg
    55880f0cba13b05a52b0e816c2d2f8df.jpg
    77.8 KB · Views: 1
Last edited:
OP
Z

zmotorsports

ALLIANCE MEMBER
Joined
Oct 20, 2009
Messages
21,495
Location
Northern Utah
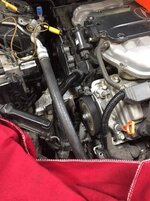
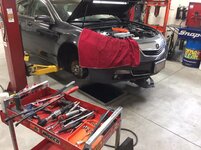
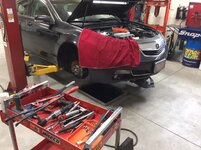
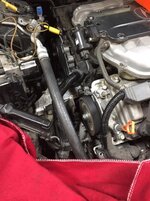
Today was preventive maintenance or scheduled maintenance day on the wife’s Acura TL.

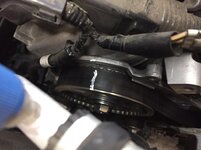
Timing belt, water pump, idlers, hydraulic tensioner, serpentine belt and tensioner pulley all were replaced.

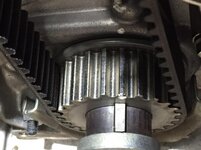
Removed lower cover to expose the harmonic balancer.
922ec3a4088819dd0b06bb67ee2af06e.jpg

0a30a742e4ca005f436130dba970c0de.jpg

The official Honda/Acura tool will work to hold the crankshaft for removal.
b1f2cf5263fbe5d5cf28bcc41d8ce470.jpg

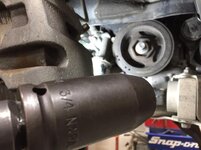
Or you can use a socket with more mass and an impact gun. A standard impact socket generally won’t work due to not enough mass. I used a 3/4” drive 3/4” deep impact and it zipped right out.
ce688ba9632ed5eed7c3e3b648cc2531.jpg

Next remove the 7 shoulder bolts holding the lower cover on as well as the serpentine belt tensioner assembly.
ea3676b8eab9028e2296670d3de72997.jpg

Remove the front and rear upper belt covers.
b4853f3ffd8a08e9c712939a104e2d7d.jpg

Turn the engine over until all of the timing marks align.
5a263d25ed3ae55b4632863b62b185e9.jpg

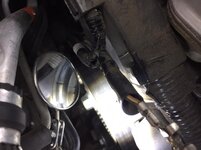
You may have to use a mirror to verify the rear cam marks as they are hard to see from above.
bce50411aba7cf7c7679bbce2b2af5c1.jpg

Using some marking paint sometimes helps.
60f0a029bcd5b9f2a06551b91ab3cd43.jpg

3686eb56424558e29622ba951528a6b3.jpg

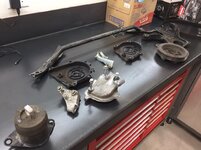
The motor mount must be removed prior to removing the belt, tensioner and idlers.
f4bbde5337176835447e8913243a528d.jpg

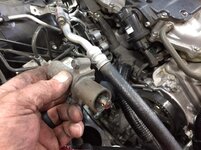
Hydraulic tensioner removed.
2007abefd5fe5a7c9ef97e7c0019c522.jpg

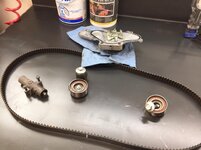
Parts removed.
0de7448bf4c0fb870f45c8f86f7a7558.jpg

ba0e204fbabeb1759d16849a83f8503c.jpg

Water pump removed and ready to start reassembly.
11631a924c16ca5c87c1f03edbf2cbae.jpg

New belt going back into place.
56a7e9a439476fdd56cf07890b43f01e.jpg

1fe6a0b4d3c427660138914084036e11.jpg

d8bf74e53726f423f5086091b4f4f953.jpg

After pulling the pin on the hydraulic tensioner turn the crank over a couple of revolutions to verify the marks.

At this point I like to start the engine and let it run briefly to determine if everything is ok.
2e01248046f2f9f8301dece3e2e4b9fb.jpg

Everything reassembled and ready to install the engine covers, tires/wheels and clean up the shop.
e5e446ef48661ac78c70cb3bf4f2aa79.jpg

Old parts boxed up for disposal.
928b4b87b3e442d69ce3ebd1a024350b.jpg

Here is the Aisin Kit part number if anyone needs it for the Honda/Acura “J” Engine.
499a01b8eccef6cc8f66a36cbedc3439.jpg

Thanks for looking.
 

Attachments

  • 928b4b87b3e442d69ce3ebd1a024350b.jpg
    928b4b87b3e442d69ce3ebd1a024350b.jpg
    82 KB · Views: 0
  • e5e446ef48661ac78c70cb3bf4f2aa79.jpg
    e5e446ef48661ac78c70cb3bf4f2aa79.jpg
    110.3 KB · Views: 0
  • 499a01b8eccef6cc8f66a36cbedc3439.jpg
    499a01b8eccef6cc8f66a36cbedc3439.jpg
    75.8 KB · Views: 0
  • 2e01248046f2f9f8301dece3e2e4b9fb.jpg
    2e01248046f2f9f8301dece3e2e4b9fb.jpg
    116.1 KB · Views: 0
  • d8bf74e53726f423f5086091b4f4f953.jpg
    d8bf74e53726f423f5086091b4f4f953.jpg
    75.6 KB · Views: 0
  • 1fe6a0b4d3c427660138914084036e11.jpg
    1fe6a0b4d3c427660138914084036e11.jpg
    64.8 KB · Views: 0
  • b4853f3ffd8a08e9c712939a104e2d7d.jpg
    b4853f3ffd8a08e9c712939a104e2d7d.jpg
    111.9 KB · Views: 0
  • ea3676b8eab9028e2296670d3de72997.jpg
    ea3676b8eab9028e2296670d3de72997.jpg
    101.1 KB · Views: 0
  • ce688ba9632ed5eed7c3e3b648cc2531.jpg
    ce688ba9632ed5eed7c3e3b648cc2531.jpg
    76.2 KB · Views: 0
  • b1f2cf5263fbe5d5cf28bcc41d8ce470.jpg
    b1f2cf5263fbe5d5cf28bcc41d8ce470.jpg
    97.2 KB · Views: 0
  • 0a30a742e4ca005f436130dba970c0de.jpg
    0a30a742e4ca005f436130dba970c0de.jpg
    84.2 KB · Views: 0
  • 922ec3a4088819dd0b06bb67ee2af06e.jpg
    922ec3a4088819dd0b06bb67ee2af06e.jpg
    74.1 KB · Views: 0
  • 5a263d25ed3ae55b4632863b62b185e9.jpg
    5a263d25ed3ae55b4632863b62b185e9.jpg
    105 KB · Views: 0
  • bce50411aba7cf7c7679bbce2b2af5c1.jpg
    bce50411aba7cf7c7679bbce2b2af5c1.jpg
    71.2 KB · Views: 0
  • 56a7e9a439476fdd56cf07890b43f01e.jpg
    56a7e9a439476fdd56cf07890b43f01e.jpg
    76.7 KB · Views: 0
  • 11631a924c16ca5c87c1f03edbf2cbae.jpg
    11631a924c16ca5c87c1f03edbf2cbae.jpg
    107.2 KB · Views: 0
  • ba0e204fbabeb1759d16849a83f8503c.jpg
    ba0e204fbabeb1759d16849a83f8503c.jpg
    89.6 KB · Views: 0
  • 0de7448bf4c0fb870f45c8f86f7a7558.jpg
    0de7448bf4c0fb870f45c8f86f7a7558.jpg
    74.9 KB · Views: 0
  • 2007abefd5fe5a7c9ef97e7c0019c522.jpg
    2007abefd5fe5a7c9ef97e7c0019c522.jpg
    104.5 KB · Views: 0
  • f4bbde5337176835447e8913243a528d.jpg
    f4bbde5337176835447e8913243a528d.jpg
    111.9 KB · Views: 0
  • 3686eb56424558e29622ba951528a6b3.jpg
    3686eb56424558e29622ba951528a6b3.jpg
    67.4 KB · Views: 0
  • 60f0a029bcd5b9f2a06551b91ab3cd43.jpg
    60f0a029bcd5b9f2a06551b91ab3cd43.jpg
    90.5 KB · Views: 0
Last edited:

shortykorte

Well-known member
Joined
Sep 1, 2014
Messages
8,039
Location
Tallahassee, Fl
Does the parts come in a single kit? If so that makes it nice. Curious about how many miles the car has.
Another job well done.


Shorty Korte
Always remember quality in QST

Sent from my iPhone using Garage Journal
 
OP
Z

zmotorsports

ALLIANCE MEMBER
Joined
Oct 20, 2009
Messages
21,495
Location
Northern Utah
Does the parts come in a single kit? If so that makes it nice. Curious about how many miles the car has.
Another job well done.


Shorty Korte
Always remember quality in QST

Sent from my iPhone using Garage Journal

Thanks Shorty.

The parts can actually be purchased in multiple ways. They can be purchased individually or NAPA has a kit that comes with the belt, idler and tensioner pulley but the hydraulic tensioner and the water pump must be purchased separately. The NAPA kit is make by Gates with the NAPA label and has a lifetime warranty on the parts which is appealing but normal wear doesn't fall under that criteria.

The Aisin kit which my local NAPA had in their warehouse has everything included in the kit and was a few bucks more than the Gates parts when added up but marginal. The Aisin is OEM for the Honda/Acura and only carried a 1-year warranty but I chose to go with the Aisin as it was OEM and not as concerned with the warranty on these.

Honda recommends replacement at 100k miles on these and most of the Honda/Acura gurus testify to that 100k mile service but say it can go as long as 120k but don't recommend anything over that being an interference engine. I've been busy trying to get my son's bumper built so I let it go a bit further than I like but when I opened it up everything still looked great inside with 105k on the odometer. Once I got the bumper off to the powder coater I just didn't feel comfortable letting it go any longer so for peace of mind I fit it in over the weekend.

I also purchased new struts for the car but didn't get to them so I'll have to fit it in next Saturday morning for strut replacement.

Thanks for following along Shorty.
 

fnieto

Well-known member
Joined
Aug 27, 2013
Messages
1,401
Location
Tucson,Arizona
Great work Mike, thanks for detailing the process.

I need to get the my wife Lexus in the shop for the same. Her car turned 70K recently but it's a 2006 so I'm more concerned with time over milage. I plan on replacing the same components. It's a little tight being a V-8 and facing forward. Those interference engines don't do well when the timing belt lets loose.

Thanks for posting!
 

Bighead38

Well-known member
Joined
Nov 11, 2012
Messages
5,612
Location
Rockland County NY
Agreed. When I built my son's go-kart I did a lot of homework and made sure to have the proper Ackermann angle, kingpin inclination angle as well as caster/camber and it was a joy to drive and handled like it was on rails.

Ha ha. I'll definitely have to find some pictures of it in our scrapbook and post it. It was pretty sleek, low and fast for just an overhead B&S engine.

We want proof!
 
OP
Z

zmotorsports

ALLIANCE MEMBER
Joined
Oct 20, 2009
Messages
21,495
Location
Northern Utah
Great work Mike, thanks for detailing the process.

I need to get the my wife Lexus in the shop for the same. Her car turned 70K recently but it's a 2006 so I'm more concerned with time over milage. I plan on replacing the same components. It's a little tight being a V-8 and facing forward. Those interference engines don't do well when the timing belt lets loose.

Thanks for posting!

Thanks Paco. This one was just the little 3.5 liter J engine mounted transversely but it was close quarters between the front of the block and the right strut tower. My hands ended up getting more cut up than they've been in quite a while.

Being an interference engine was my biggest concern as I don't have the time nor want to spend the money if the worst happened. Better to be proactive vs. reactive on these engines.
 
OP
Z

zmotorsports

ALLIANCE MEMBER
Joined
Oct 20, 2009
Messages
21,495
Location
Northern Utah
Cool. Sounds like you put a lot of work into it. How did you set up the front end?

There was no suspension but I fabricated the entire chassis including the spindles and spindle mounts. They had the correct inclination angle as well as Ackermann angle and handled very well. It was also very low to the ground and stable.
 
To avoid these ads, REGISTER NOW!
OP
Z

zmotorsports

ALLIANCE MEMBER
Joined
Oct 20, 2009
Messages
21,495
Location
Northern Utah
did your year Acura hide a stupid plastic push rivet under the shield. i

Are you talking up under the strut tower? If so, yes, there was a plastic push pin placed vertically under the tower that I had to use a pick tool to pull the center down far enough to grab with the pin release tool then it came right out.
 
OP
Z

zmotorsports

ALLIANCE MEMBER
Joined
Oct 20, 2009
Messages
21,495
Location
Northern Utah
How many hours do you think that Acura job took?

The job took me about 5-1/4 hours start to finish.

I was a little slow getting going Saturday morning as I had a few cups of coffee with the wife before heading out to the shop. I opened the shop @ 9:30am, racked the car and got right to work. I was ready for it's road test by 2:30-2:45pm. After road test I cleaned up and put tools away and locked the shop up and headed back inside right @ 3:30pm.

Not a bad job, just time consuming. I'm not sure what the book calls for on that job as I have heard some say 4-hours and others say if doing water pump and belt it is 5.5 hours. I know I wasn't working very fast as I was just enjoying the day, listening to the radio and keeping a steady pace. I had some issues with the shoulder bolts lining up on the rear timing gear cover that I fought with for about 15-20 minutes before walking away for a few minutes to get a drink, then returned and it fell right back into position.
 

Finallygotit

ALLIANCE MEMBER
Joined
Jul 6, 2013
Messages
4,103
Location
Tucson, AZ
.....I had some issues with the shoulder bolts lining up on the rear timing gear cover that I fought with for about 15-20 minutes before walking away for a few minutes to get a drink, then returned and it fell right back into position.


Funny how that is sometimes. Nice work as always Mike! :thumbup:


:beer:
 

aka Larry

Well-known member
Joined
May 2, 2012
Messages
8,103
Location
Eastern, NC
The job took me about 5-1/4 hours start to finish.

I was a little slow getting going Saturday morning as I had a few cups of coffee with the wife before heading out to the shop. I opened the shop @ 9:30am, racked the car and got right to work. I was ready for it's road test by 2:30-2:45pm. After road test I cleaned up and put tools away and locked the shop up and headed back inside right @ 3:30pm.

Not a bad job, just time consuming. I'm not sure what the book calls for on that job as I have heard some say 4-hours and others say if doing water pump and belt it is 5.5 hours. I know I wasn't working very fast as I was just enjoying the day, listening to the radio and keeping a steady pace. I had some issues with the shoulder bolts lining up on the rear timing gear cover that I fought with for about 15-20 minutes before walking away for a few minutes to get a drink, then returned and it fell right back into position.

I guess all J-series engines are not created equal. I helped a friend replace the t-belt, water pump, and tensioner on his J30 a couple of years ago. It wasn't particularly difficult, but somewhat aggravating. In our case removing and installing what seemed like a hundred 10mm bolts that held the 3-piece dust covers in place was a pain. The biggest pain, was the tensioner, which was not a hydraulic one like yours. Reason being, we hadn't done one like this before because we had previously mostly worked on the Honda B-series engines. The instructions actually said to remove one of the hold-down bolts for the battery, grind it to a point, and screw it in, to hold the tensioner pulley in place for the t-belt. We scratched our heads for a bit because that REALLY didn't seem to make sense, but we did as instructed, and it worked out just fine. It took us all day, but we didn't rush, and stopped for lunch.
 
OP
Z

zmotorsports

ALLIANCE MEMBER
Joined
Oct 20, 2009
Messages
21,495
Location
Northern Utah
I guess all J-series engines are not created equal. I helped a friend replace the t-belt, water pump, and tensioner on his J30 a couple of years ago. It wasn't particularly difficult, but somewhat aggravating. In our case removing and installing what seemed like a hundred 10mm bolts that held the 3-piece dust covers in place was a pain. The biggest pain, was the tensioner, which was not a hydraulic one like yours. Reason being, we hadn't done one like this before because we had previously mostly worked on the Honda B-series engines. The instructions actually said to remove one of the hold-down bolts for the battery, grind it to a point, and screw it in, to hold the tensioner pulley in place for the t-belt. We scratched our heads for a bit because that REALLY didn't seem to make sense, but we did as instructed, and it worked out just fine. It took us all day, but we didn't rush, and stopped for lunch.

I too thought that all J-series were the same. I've only worked on a few but the timing belt replacements have all pretty much been the same between the Acura and Honda's.

I also noticed that the instructions did mention to use one of the battery hold down bolts to grind to a point for the tensioner release the same as you described. While I've done it in the past, I have found it really isn't necessary. I know some mechanics who merely use a pair of diagonal cutters and cut the old timing belt but I can't bring myself to do that. I merely unbolt the tensioner and let the slack push it out of the way, then removed the tensioner pulley and then the belt. That seems much quicker than grinding a taper to a battery hold down bolt. Just removing a battery hold-down bold, grinding a taper and inserting it in the tensioner to release is probably a 15-20 minute detour that isn't necessary although it does work.
 

aka Larry

Well-known member
Joined
May 2, 2012
Messages
8,103
Location
Eastern, NC
I merely unbolt the tensioner and let the slack push it out of the way, then removed the tensioner pulley and then the belt. That seems much quicker than grinding a taper to a battery hold down bolt. Just removing a battery hold-down bold, grinding a taper and inserting it in the tensioner to release is probably a 15-20 minute detour that isn't necessary although it does work.

Since I don't have near the experience level as you, had never done it on a J-series, I didn't want to screw up his DD, so I followed the directions.
 
OP
Z

zmotorsports

ALLIANCE MEMBER
Joined
Oct 20, 2009
Messages
21,495
Location
Northern Utah
I received a call from the powder coater today so I picked up the bumper parts for my son’s WJ after work.
0f5d588d65e344996b54ae96e0dd024a.jpg

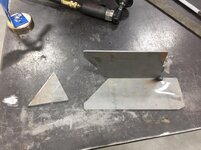
We then started to build a small skid or guard for the windshield washer bottle on the driver’s side.
e0349083bdb613ca138bffc8f0422213.jpg

bcff26e7befeee6a22e351252a3aa75c.jpg

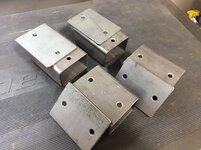
We then commenced the fabrication of the sliders by building the mounting points.
e79b0ec42a313cfcfb1b11613850a740.jpg

a69ab57c4e57397982b8c1bb8fd3b390.jpg

d600afc38fb86b0ce62d9632fa5abeb3.jpg

Thanks for looking.
 

Attachments

  • 0f5d588d65e344996b54ae96e0dd024a.jpg
    0f5d588d65e344996b54ae96e0dd024a.jpg
    93 KB · Views: 0
  • e0349083bdb613ca138bffc8f0422213.jpg
    e0349083bdb613ca138bffc8f0422213.jpg
    109.6 KB · Views: 0
  • bcff26e7befeee6a22e351252a3aa75c.jpg
    bcff26e7befeee6a22e351252a3aa75c.jpg
    114.4 KB · Views: 0
  • e79b0ec42a313cfcfb1b11613850a740.jpg
    e79b0ec42a313cfcfb1b11613850a740.jpg
    120.3 KB · Views: 0
  • a69ab57c4e57397982b8c1bb8fd3b390.jpg
    a69ab57c4e57397982b8c1bb8fd3b390.jpg
    81.7 KB · Views: 0
  • d600afc38fb86b0ce62d9632fa5abeb3.jpg
    d600afc38fb86b0ce62d9632fa5abeb3.jpg
    103.8 KB · Views: 2
Last edited:
OP
Z

zmotorsports

ALLIANCE MEMBER
Joined
Oct 20, 2009
Messages
21,495
Location
Northern Utah
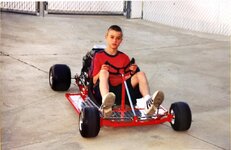
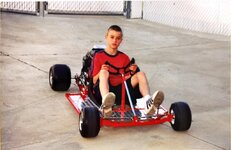
There has been some interest in a go-kart that my son and I built about 20 years ago for my son and I finally found some pictures of it over the weekend.

I don’t have any during the build process but here is the finished product.

It was constructed from 1” square tubing. I built everything on the chassis including the steering, rear axle, pedals and linkages. I used a new Briggs & Stratton engine with a CVT clutch system and go-kart slicks. I finished it off with chrome, polished aluminum tread plate and red left over from one of my shop truck projects.

Here is my son sporting his ride.
ac906be5ff5bb9b33acfe7455e564882.jpg

f38fe279a5b1c9ba6832e9942a0bf229.jpg

Lastly I’d like to pose a question. As my wife and I were digging/sorting through pictures last night I ran across quite a few pictures of previous projects and wondered if anyone would like to see them even though they are far from current projects and probably not up to the quality of my current work. Most of these are 15-25 year old projects.

If interested let me know and I can try to upload some pictures. I must warn you though, there are a LOT of them.
 

Attachments

  • f38fe279a5b1c9ba6832e9942a0bf229.jpg
    f38fe279a5b1c9ba6832e9942a0bf229.jpg
    110.1 KB · Views: 2
  • ac906be5ff5bb9b33acfe7455e564882.jpg
    ac906be5ff5bb9b33acfe7455e564882.jpg
    78.1 KB · Views: 2
Last edited:
OP
Z

zmotorsports

ALLIANCE MEMBER
Joined
Oct 20, 2009
Messages
21,495
Location
Northern Utah
That’s a sweet looking go kart. Do you still have it? Personally I’d like to see anything you want to post up. Thanks for sharing your work.

jhn9840
John

Thanks John.

No we don't still have his go-kart. We sold it when he outgrew it in Jr. High, but he put a lot of miles on it cruising around the old neighborhood.
 

Bighead38

Well-known member
Joined
Nov 11, 2012
Messages
5,612
Location
Rockland County NY
Awesome. I would have put a million miles on that thing. Hell I put a million miles on mine and they weren’t as cool or fast like that one. We had a racetrack connecting my yard and the neighbors when it snowed. I would be out there everyday. I got pulled over on my neighborhood one day when we had a snow day. A car was stopped on the side of the road so I passed them. Turned out to be an undercover cop who pulled me over. He was so pissed and made me push it home lecturing me the whole time about how my parents were gonna kill me bla bla bla. Finally got home with the cop and my old man just laughed at him. Said the kid is having fun on a snow day and knows how to drive what’s the problem?

Yeah old projects are welcome imo.
 
To avoid these ads, REGISTER NOW!
Top Bottom