To avoid these ads, REGISTER NOW!

ZMotorsports Shop Projects 2.0

OP
Z

zmotorsports

ALLIANCE MEMBER
Joined
Oct 20, 2009
Messages
21,441
Location
Northern Utah
Huh, I figured it would only be a size change of the burner nozzles, to go from propane to NG. I didn't take into consideration a change in regulator too.

Funny story, if you don't mind. :) One winter back around '88 or so, when my EX & I were just starting out, we got behind in payments with Mountain fuel co. and they shut us off! I couldn't come up with the money to pay them to turn the gas back on, but I could afford to fill up a tall (I think 20 gallon) propane tank I had. :D So I filled that up, and hooked up to our furnace. That was back when the propane tanks had a smaller valve fitting than they do today.
It worked great! After about 60 days of us not paying our bill & not begging them for forgiveness to turn the gas back on in freezing temps, they figured something was up & threatened to take us to court. By then, I had enough to pay our bill off, so OKAY, here's your money! :lol:
Actually, I was kinda glad, I had to fill that tank up every week, and it was getting old. But the rebel in me sure had fun for a while. :thumbup:

Yeah, I don't know exactly the size difference of the orifices but if memory serves LP (Liquid Petroleum) has over twice the amount of BTU's than NG (Natural Gas).
 
To avoid these ads, REGISTER NOW!

Graham08

Well-known member
Joined
Dec 10, 2007
Messages
713
Location
Iron Station, NC
Yeah, I don't know exactly the size difference of the orifices but if memory serves LP (Liquid Petroleum) has over twice the amount of BTU's than NG (Natural Gas).

Yep, that's correct. Funny story...my dad was a dealer for Holland Grill back in the late 90's-early 2000's. He sold a grill for propane that the factory had accidentally installed a natural gas orifice in. It got returned and had clearly gotten REALLY hot...all the powdercoating was burned off. Fortunately nobody got hurt and no property was damaged other than the grill, which Holland took care of without any trouble.
 
OP
Z

zmotorsports

ALLIANCE MEMBER
Joined
Oct 20, 2009
Messages
21,441
Location
Northern Utah
Yep, that's correct. Funny story...my dad was a dealer for Holland Grill back in the late 90's-early 2000's. He sold a grill for propane that the factory had accidentally installed a natural gas orifice in. It got returned and had clearly gotten REALLY hot...all the powdercoating was burned off. Fortunately nobody got hurt and no property was damaged other than the grill, which Holland took care of without any trouble.

I'll bet it got hot. I've not heard of Holland Grill before.
 
OP
Z

zmotorsports

ALLIANCE MEMBER
Joined
Oct 20, 2009
Messages
21,441
Location
Northern Utah
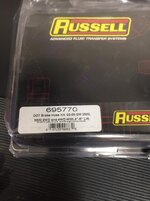
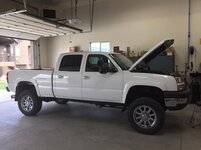
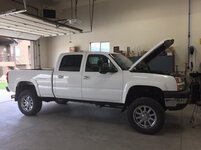
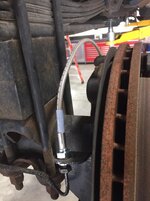
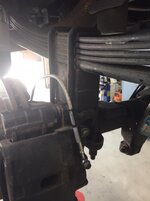
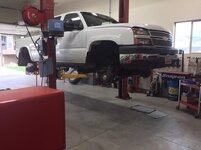
It’s time for a LOF service on the 2006 2500HD Duramax. I racked it, removed the tires & wheels for a rotation and it’s also time for brake fluid service. I flushed it just before we moved so it’s a little overdo. I also opted to replace my brake lines seeing as how the truck is 14 years old now so I purchased some stainless steel flex lines to replace the rubber hoses. Thanks to Paco (fnieto) for the link that saved me a few bucks.

f4a78c39f3519c51ae3491f12a17dd54.jpg

293a0a64b0b698d295186ad2ac10f66d.jpg

b656f1a6261c7a7b9cc3efc3f9a234f2.jpg

5c58e7f27c3c7a540f856e81bb57c1c3.jpg

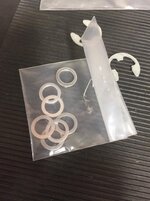
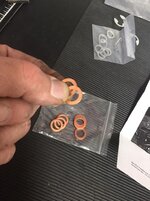
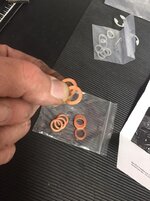
The kit come with aluminum crush washers but I’m not a fan of them so I planned on using copper instead. I’ve purchased copper in bulk and I’m getting low do I need to resupply.
2c5104c5f01e5338e4c561161f10b92e.jpg

5c556344b390fec38088105a3ed5ee93.jpg

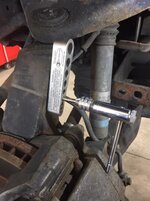
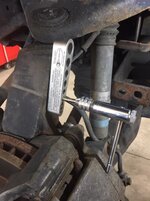
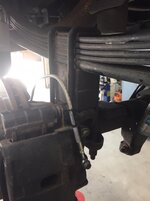
Drilled and deburred a hole in the knuckle for an Adel clamp to secure the new brake line.
bbafa1ff271b5eef788bc8d5e708fb41.jpg

9c36a3eea469960aed19675e3f434cf9.jpg

aed3487dc45c6e112cd0d7ae508b04c2.jpg

62371d6db8d122b1605b258c0b883c13.jpg

More to come. I really need to schedule some time to repaint my chassis.
 

Attachments

  • 62371d6db8d122b1605b258c0b883c13.jpg
    62371d6db8d122b1605b258c0b883c13.jpg
    91.2 KB · Views: 0
  • f4a78c39f3519c51ae3491f12a17dd54.jpg
    f4a78c39f3519c51ae3491f12a17dd54.jpg
    67.7 KB · Views: 0
  • aed3487dc45c6e112cd0d7ae508b04c2.jpg
    aed3487dc45c6e112cd0d7ae508b04c2.jpg
    86.3 KB · Views: 0
  • 9c36a3eea469960aed19675e3f434cf9.jpg
    9c36a3eea469960aed19675e3f434cf9.jpg
    94.1 KB · Views: 0
  • 293a0a64b0b698d295186ad2ac10f66d.jpg
    293a0a64b0b698d295186ad2ac10f66d.jpg
    76.3 KB · Views: 0
  • b656f1a6261c7a7b9cc3efc3f9a234f2.jpg
    b656f1a6261c7a7b9cc3efc3f9a234f2.jpg
    79.6 KB · Views: 0
  • 5c58e7f27c3c7a540f856e81bb57c1c3.jpg
    5c58e7f27c3c7a540f856e81bb57c1c3.jpg
    110.6 KB · Views: 0
  • 2c5104c5f01e5338e4c561161f10b92e.jpg
    2c5104c5f01e5338e4c561161f10b92e.jpg
    85.3 KB · Views: 0
  • 5c556344b390fec38088105a3ed5ee93.jpg
    5c556344b390fec38088105a3ed5ee93.jpg
    101.7 KB · Views: 0
  • bbafa1ff271b5eef788bc8d5e708fb41.jpg
    bbafa1ff271b5eef788bc8d5e708fb41.jpg
    86 KB · Views: 0
Last edited:

lilscorpion

Well-known member
Joined
Mar 15, 2010
Messages
3,600
Location
Colorado
You vehicles get maintenance I didn’t even know existed. They probably get newer during the time you own them...


Sent from my iPhone using Tapatalk Pro
 

Duker

Well-known member
Joined
Sep 25, 2010
Messages
10,861
Location
Livingston, TX
You vehicles get maintenance I didn’t even know existed. They probably get newer during the time you own them...


Sent from my iPhone using Tapatalk Pro


Seriously.... Mike probably has a state exemption to roll back the speedometer!


Sent from my iPhone using Tapatalk Pro
 
OP
Z

zmotorsports

ALLIANCE MEMBER
Joined
Oct 20, 2009
Messages
21,441
Location
Northern Utah
You vehicles get maintenance I didn’t even know existed. They probably get newer during the time you own them...


Sent from my iPhone using Tapatalk Pro

Seriously.... Mike probably has a state exemption to roll back the speedometer!


Sent from my iPhone using Tapatalk Pro

Thanks guys. I try to keep up on the maintenance and I'm sure in some aspects I overmaintain them but it sets my mind at ease knowing at any time I could hop in any of our vehicles and drive cross country if the need arose. I guess that's one thing that I really developed over my 30+ year career as an industrial maintenance mechanic and that is the importance of preventive maintenance.

What's funny is you guys seem to see the maintenance but when I try to sell something I get beat up on pricing because of the age, even after showing all service records and upgrades.:headscrat

I appreciate you guys following along and for the kind words.
 

steves_001

Well-known member
Joined
May 30, 2011
Messages
527
Location
Southern MN / Northern MN
Nice brake lines. I had to look up what the tap guide was, had not seen that before. Really a nice setup you have there in the shop. SO clean as well, a pleasure to work in and around I'm sure.
 
OP
Z

zmotorsports

ALLIANCE MEMBER
Joined
Oct 20, 2009
Messages
21,441
Location
Northern Utah
Nice brake lines. I had to look up what the tap guide was, had not seen that before. Really a nice setup you have there in the shop. SO clean as well, a pleasure to work in and around I'm sure.

Thank you for the comments.

Yes, I love working in my shop, especially now that I have everything set up and organized the way I want it. It is nice to have space to work and get around equipment to clean. My last shop was getting so tight I had to go outside to change my mind.:lol_hitti

Thank you for stopping by and checking out my various projects.
 

Bob Heine

ALLIANCE MEMBER
Joined
Oct 24, 2009
Messages
10,708
Location
Boca Raton, Florida
Mike, you are a constant source of valuable information. I have almost pulled the trigger on a set of those Big Gator guides. It wasn't hard to justify $23 for one but I made the mistake of searching for "Big Gator Tool V Guide set" and the six guide set for drills and taps was only $80. Oh dear, another tiny little rabbit hole.

I'm with you on the braided lines. Two used cars I've owned had dragging calipers and in both cases it was internal disintegration of the rubber brake line blocking u a caliper passage.

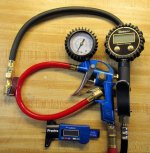
I also broke down and bought a tire tread depth gauge so I wouldn't be surprised by a tire worn down past the indicators. I was going to buy the dial gauge but hesitated. I remembered I used a dial-gauge tire inflator to fill the tires on the Cadillac. The gauge read 36psi but the tire monitor on the instrument cluster said they were all at 32psi. I bought a digital depth gauge as well as a tire inflator with a digital gauge. Sure enough, the dial gauge is off by 4psi and on closer examination, it looks like the needle is not sitting on zero. I was reluctant to spend $27 on a tire gauge but that's chump change compared to the replacement cost of a 285/35-19 tire. I was surprised how small a shot of air it took to bump the pressure up four pounds.
attachment.php
 

Attachments

  • Tire Gauges.jpg
    Tire Gauges.jpg
    111.2 KB · Views: 949
OP
Z

zmotorsports

ALLIANCE MEMBER
Joined
Oct 20, 2009
Messages
21,441
Location
Northern Utah
Thanks for the comments Bob. I'm glad to have been able to inspire others when it comes to maintenance and/or repairs.

I've actually tracked my tire tread wear for years now and find it interesting. I can compare miles to wear and even anticipate wear from flat-towing the Jeep behind the coach. I can also get a very good feel for various tires and their longevity based on compound and tread design.
 

Gwrench

Member
Joined
Jan 19, 2015
Messages
9
Location
Indiana
Hi Mike,
Just wondering how those new tires on your Duramax are doing? I know you said in the past you haven't put many miles on them to be able to give an opinion, but perhaps you have run them enough to give a thumbs up or thumbs down. I value your opinion and am considering them for my Chevy based on your feedback.
Thanks and stay safe!
Rick
 
OP
Z

zmotorsports

ALLIANCE MEMBER
Joined
Oct 20, 2009
Messages
21,441
Location
Northern Utah
Hi Mike,

Just wondering how those new tires on your Duramax are doing? I know you said in the past you haven't put many miles on them to be able to give an opinion, but perhaps you have run them enough to give a thumbs up or thumbs down. I value your opinion and am considering them for my Chevy based on your feedback.

Thanks and stay safe!

Rick


Rick, I still don’t have many miles on them (~5k) but so far I like them.

They ride nice and are quiet. Our road leading into our subdivision has been under construction as they’ve been replacing water line, adding curb & gutter and have widened it substantially. It’s been roadbase for the past month or so and I’ve noticed these pick up rock less than my old KO’s but they still pick up and fling about 1/2” diameter rocks easily.

Overall I am very happy with them with the small amount of miles I have on them thus far.


Sent from my iPhone using Garage Journal
 
Last edited:
OP
Z

zmotorsports

ALLIANCE MEMBER
Joined
Oct 20, 2009
Messages
21,441
Location
Northern Utah
I completed the installation of the rear stainless steel brake lines today as well as serviced the engine, greased the chassis and replaced the fuel filter.

8cd4f67d213a94c7ad07c9808d8d0257.jpg

2ba7b4e7e9f5b0c665cd39ded9c6fc90.jpg

Tires & wheels torqued on, brakes bled, chassis greased, fuel filter replaced and road test completed. Pulled back in to double check for leaks and give her a wipe down.
3b5f6fe2a67b18cf76946cf4e0bcdcf5.jpg

3a61f423b5448d462f41c0ae828003ba.jpg

Thanks for looking.
 

Attachments

  • 3b5f6fe2a67b18cf76946cf4e0bcdcf5.jpg
    3b5f6fe2a67b18cf76946cf4e0bcdcf5.jpg
    68.1 KB · Views: 0
  • 8cd4f67d213a94c7ad07c9808d8d0257.jpg
    8cd4f67d213a94c7ad07c9808d8d0257.jpg
    86.6 KB · Views: 0
  • 2ba7b4e7e9f5b0c665cd39ded9c6fc90.jpg
    2ba7b4e7e9f5b0c665cd39ded9c6fc90.jpg
    57.7 KB · Views: 0
  • 3a61f423b5448d462f41c0ae828003ba.jpg
    3a61f423b5448d462f41c0ae828003ba.jpg
    93.1 KB · Views: 0

OutlawDrifter

Well-known member
Joined
Jan 20, 2015
Messages
3,889
Location
KS
There's just something about a white GM pickup/SUV! Nice rig Mike!

Routine maintenance is one of the things that brings me stress relief...same with washing & vacuuming my DD. One of the many reasons I bought the K2500 Suburban. The F150 I was driving gave you every possible readout, I got lazy with checking tire pressure and even the oil...why bother when it's all on the dash?
 
OP
Z

zmotorsports

ALLIANCE MEMBER
Joined
Oct 20, 2009
Messages
21,441
Location
Northern Utah
There's just something about a white GM pickup/SUV! Nice rig Mike!

Routine maintenance is one of the things that brings me stress relief...same with washing & vacuuming my DD. One of the many reasons I bought the K2500 Suburban. The F150 I was driving gave you every possible readout, I got lazy with checking tire pressure and even the oil...why bother when it's all on the dash?

Thanks Marc.

Yeah, I enjoy routine maintenance myself. The vehicles just seem happier afterwards.:bounce:

Thanks for stopping by and checking out the projects.
 
To avoid these ads, REGISTER NOW!
OP
Z

zmotorsports

ALLIANCE MEMBER
Joined
Oct 20, 2009
Messages
21,441
Location
Northern Utah
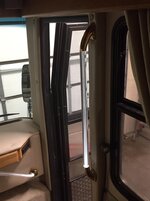
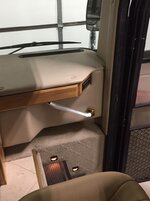
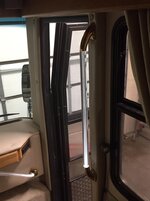
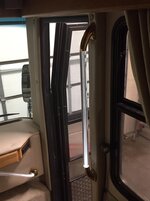
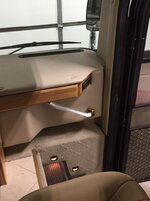
I took a few minutes tonight and replaced the burnt lights in my grab handles on the coach. I replaced them with some LED bulbs that I found relatively inexpensive on eBay.

The exterior grab handle works great as I replaced the bulb a few years ago when I had the coach painted.
d411740cf0df3c2f932438f63e9ddf93.jpg

The two interior grab handles were the ones needing replacement. The vertical on above the co-pilot’s seat quit working altogether.
306ec584788d38174c9ea6541a8520a5.jpg

The lower stairwell was intermittent.
8daefa7600d0e002dd6dfaf40246c5f3.jpg

Both interior bulbs replaced and reassembled.
00b689dcc7ebdca3b8df135bbd21df66.jpg

e680f4ed208cfacb79cf7fe4e5776786.jpg

709119d19b892fd427ea2270cf7c457f.jpg

15c4a0f4edfd043a7d612e47120f3fc9.jpg
 

Attachments

  • 15c4a0f4edfd043a7d612e47120f3fc9.jpg
    15c4a0f4edfd043a7d612e47120f3fc9.jpg
    65.9 KB · Views: 0
  • 709119d19b892fd427ea2270cf7c457f.jpg
    709119d19b892fd427ea2270cf7c457f.jpg
    70.5 KB · Views: 0
  • e680f4ed208cfacb79cf7fe4e5776786.jpg
    e680f4ed208cfacb79cf7fe4e5776786.jpg
    61 KB · Views: 0
  • 00b689dcc7ebdca3b8df135bbd21df66.jpg
    00b689dcc7ebdca3b8df135bbd21df66.jpg
    65.9 KB · Views: 0
  • 8daefa7600d0e002dd6dfaf40246c5f3.jpg
    8daefa7600d0e002dd6dfaf40246c5f3.jpg
    75.2 KB · Views: 0
  • 306ec584788d38174c9ea6541a8520a5.jpg
    306ec584788d38174c9ea6541a8520a5.jpg
    71.9 KB · Views: 0
  • d411740cf0df3c2f932438f63e9ddf93.jpg
    d411740cf0df3c2f932438f63e9ddf93.jpg
    55.4 KB · Views: 0
Last edited:
OP
Z

zmotorsports

ALLIANCE MEMBER
Joined
Oct 20, 2009
Messages
21,441
Location
Northern Utah
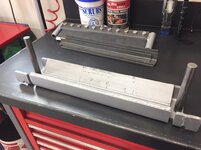
Tonight I modified my SWAG HD finger brake.

94bd3e8dfb396eff91751f77c27b9f82.jpg

851624ca68540c4cb508a6af9cca78ff.jpg

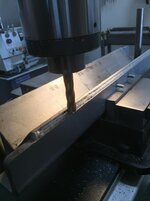
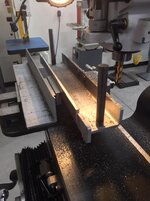
I cut the welds to remove the angle iron to make room for the 4-way press die that I purchased a while ago.
d9a7f6933fca7334c37d516b6b189988.jpg

c433c3996ff7884e53c658e1aea8e51b.jpg

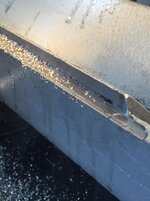
A couple of passes freed the angle iron from the base.
474d8f89595e8dbe6aa8ad84dc87f4cb.jpg

ce2823d6daea144c7a13b3c1dcff6cc5.jpg

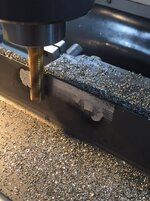
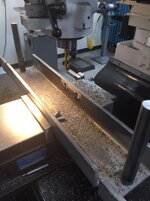
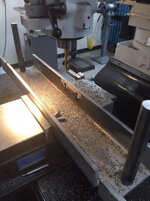
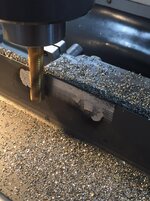
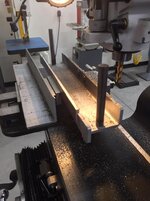
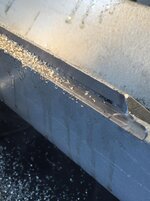
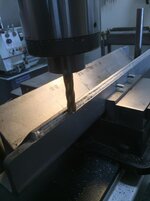
While clamped in the mill vise I machined the welds and the heads off of the carriage bolts from the base.
74afd91e7cd239c918e6437a04100eb9.jpg

fd2779db90fdb46e023f9f6171c068c1.jpg

532da5739f240161a5c36dc7d26255bc.jpg
 

Attachments

  • 532da5739f240161a5c36dc7d26255bc.jpg
    532da5739f240161a5c36dc7d26255bc.jpg
    86.8 KB · Views: 0
  • fd2779db90fdb46e023f9f6171c068c1.jpg
    fd2779db90fdb46e023f9f6171c068c1.jpg
    97.3 KB · Views: 0
  • 74afd91e7cd239c918e6437a04100eb9.jpg
    74afd91e7cd239c918e6437a04100eb9.jpg
    147.5 KB · Views: 0
  • ce2823d6daea144c7a13b3c1dcff6cc5.jpg
    ce2823d6daea144c7a13b3c1dcff6cc5.jpg
    99.1 KB · Views: 0
  • 474d8f89595e8dbe6aa8ad84dc87f4cb.jpg
    474d8f89595e8dbe6aa8ad84dc87f4cb.jpg
    78.7 KB · Views: 0
  • c433c3996ff7884e53c658e1aea8e51b.jpg
    c433c3996ff7884e53c658e1aea8e51b.jpg
    90.8 KB · Views: 0
  • d9a7f6933fca7334c37d516b6b189988.jpg
    d9a7f6933fca7334c37d516b6b189988.jpg
    64.6 KB · Views: 0
  • 851624ca68540c4cb508a6af9cca78ff.jpg
    851624ca68540c4cb508a6af9cca78ff.jpg
    51.8 KB · Views: 0
  • 94bd3e8dfb396eff91751f77c27b9f82.jpg
    94bd3e8dfb396eff91751f77c27b9f82.jpg
    83.8 KB · Views: 0
Last edited:

4 FN 27

ALLIANCE MEMBER
Joined
Oct 19, 2015
Messages
4,635
Location
Minnesnowta
Mike wouldn’t you need different spacers front to back depending on which V opening you are using on the 4 Way?

I need to see and end view of the 4 way???

Looks to me like you should center the 4 way using the upper punch then shim, clamp...some how retain the 4 way. This help a lot to hold close tolerance work.

I have never used a 4 way...thus I may need some education.
 

gorilla

Well-known member
Joined
Dec 13, 2007
Messages
1,655
Mike wouldn’t you need different spacers front to back depending on which V opening you are using on the 4 Way?

I need to see and end view of the 4 way???

Looks to me like you should center the 4 way using the upper punch then shim, clamp...some how retain the 4 way. This help a lot to hold close tolerance work.

I have never used a 4 way...thus I may need some education.

We used 4 way dies for 99% of our work and centered them up exactly as you said. This was on a real press brake that had screws that held the fixture for the die in place. I think that you may want to add some screws on the side of the die holder and some thinner spacer blocks so you can adjust the punch and die more accurately.
 
OP
Z

zmotorsports

ALLIANCE MEMBER
Joined
Oct 20, 2009
Messages
21,441
Location
Northern Utah
Mike wouldn’t you need different spacers front to back depending on which V opening you are using on the 4 Way?

I need to see and end view of the 4 way???

Looks to me like you should center the 4 way using the upper punch then shim, clamp...some how retain the 4 way. This help a lot to hold close tolerance work.

I have never used a 4 way...thus I may need some education.

We used 4 way dies for 99% of our work and centered them up exactly as you said. This was on a real press brake that had screws that held the fixture for the die in place. I think that you may want to add some screws on the side of the die holder and some thinner spacer blocks so you can adjust the punch and die more accurately.

Thanks guys.

That is exactly what I am planning on doing. Originally I was going to cut some 3/4" pieces for the centered die and then a couple of 3/8" and 1-1/8" pieces depending on how I orientate the die. However, before closing up shop I found a couple pieces of 1.5"x .250" strap that I will run the length of the dies then drill and tap some 3/8"-16 socket head cap screws to shift the die front to back as needed which will use less material, add less weight and be more precise.

Thanks for the comments guys and for following along.
 

Monza Harry

Well-known member
Joined
Dec 29, 2018
Messages
1,433
Location
Windsor ON
Hmm, well that is a slick upgrade to the brake. Now I have to upgrade mine...
:cool:
I have to agree! I have to buy mine first though there is always a problem with the plan isn't there?

Mike I would consider making the vee's centered in the block and then the spacing should be good regardless of orientation. You have a good looking mill and demonstrated the skills to use it just tilt the head and mill those vee's in the center if they aren't already. Harry
 
OP
Z

zmotorsports

ALLIANCE MEMBER
Joined
Oct 20, 2009
Messages
21,441
Location
Northern Utah
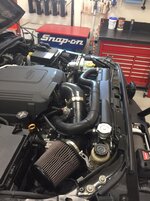
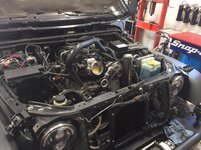
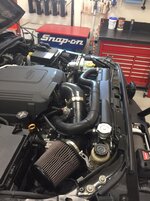
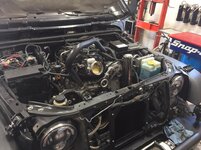
Last night I replaced the radiator in the Jeep due to a leak as well as replaced my high pressure A/C line that also developed a leak over the winter.

Leaking radiator removed. A/C condenser and Camaro SS fan removed.
c8e8171ca05094343a7a05959c7b84bd.jpg

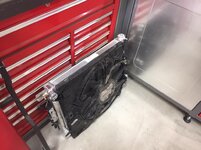
New radiator with the cooling stack components assembled and ready to install.
b3bf17bee59ac57b72958ee00885244b.jpg

0f6750423f0e1f75ecd433eece316261.jpg

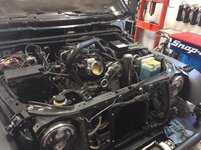
Engine bay wiped down and ready to accept cooling stack.
7179831a10e1717db0a226ef02593a73.jpg


Installed. Vacuum pulled on cooling system and refilled.
d930342ed4caeb70d32bf89a78ebda7a.jpg

Next I’ll have to charge my A/C system as it’s supposed to be mid-90’s by end of the week.
 

Attachments

  • d930342ed4caeb70d32bf89a78ebda7a.jpg
    d930342ed4caeb70d32bf89a78ebda7a.jpg
    111.5 KB · Views: 0
  • 7179831a10e1717db0a226ef02593a73.jpg
    7179831a10e1717db0a226ef02593a73.jpg
    115.4 KB · Views: 0
  • 0f6750423f0e1f75ecd433eece316261.jpg
    0f6750423f0e1f75ecd433eece316261.jpg
    86 KB · Views: 0
  • b3bf17bee59ac57b72958ee00885244b.jpg
    b3bf17bee59ac57b72958ee00885244b.jpg
    89.8 KB · Views: 0
  • c8e8171ca05094343a7a05959c7b84bd.jpg
    c8e8171ca05094343a7a05959c7b84bd.jpg
    149.4 KB · Views: 0
Last edited:
OP
Z

zmotorsports

ALLIANCE MEMBER
Joined
Oct 20, 2009
Messages
21,441
Location
Northern Utah
Diagnosis on leaking radiator?

Seems a bit premature.

Very premature Marc. This is my second one that has failed in 20k miles (16 months).
The company has warranted both but it's getting old quick.

They keep telling me it's due to the electrical loads in the modern vehicles causing electrolysis to the seams but I'm not buying it because they're not in the Jeep long enough for that to take place. Both have leaked at the core to tank seam. They then tell me it's because the Jeep flexes so much but this last one failed and I haven't even been off-road since October so I don't believe that either. I even mounted this one using springs on the mounting points so the cooling stack isn't rigid in the Jeep and can allow for some movement.

This one is supposed to be the end all be all and new design so we'll see.
 

OutlawDrifter

Well-known member
Joined
Jan 20, 2015
Messages
3,889
Location
KS
Very premature Marc. This is my second one that has failed in 20k miles (16 months).

The company has warranted both but it's getting old quick.
They keep telling me it's due to the electrical loads in the modern vehicles causing electrolysis to the seams but I'm not buying it because they're not in the Jeep long enough for that to take place. Both have leaked at the core to tank seam. They then tell me it's because the Jeep flexes so much but this last one failed and I haven't even been off-road since October so I don't believe that either. I even mounted this one using springs on the mounting points so the cooling stack isn't rigid in the Jeep and can allow for some movement.

This one is supposed to be the end all be all and new design so we'll see.

100% agree that's not acceptable.

I don't buy that either. The factory radiator in my Z28 has been in there since 1991, and has lived through a TPI 350 and now 8+ years with an LS.

Sounds to me like they need a better QC program!!! Tell them we'd be happy to freelance "for a fee!" :beer::lol_hitti


P.S. I love how clean and stock looking the engine bay is in that Jeep!
 

gorilla

Well-known member
Joined
Dec 13, 2007
Messages
1,655
How do you pull a vacuum on the cooling stack? I guess what I mean is what kind of pump?
 

JTH

Well-known member
Joined
May 4, 2012
Messages
167
Location
MO Ozarks
You can check for voltage in the coolant with a DMM. If I recall correctly 0.4 volts was the start of problems. Ford had many problems with it in years past. Would eat through freeze plugs in the block. The coolant gets nasty when it’s happening and with your maintenance habits would see it. Always enjoy what your up to.
 
OP
Z

zmotorsports

ALLIANCE MEMBER
Joined
Oct 20, 2009
Messages
21,441
Location
Northern Utah
100% agree that's not acceptable.

I don't buy that either. The factory radiator in my Z28 has been in there since 1991, and has lived through a TPI 350 and now 8+ years with an LS.

Sounds to me like they need a better QC program!!! Tell them we'd be happy to freelance "for a fee!" :beer::lol_hitti


P.S. I love how clean and stock looking the engine bay is in that Jeep!

Thanks Marc. That was my end goal with the LS swap was to have everything appear OEM.

Everyone bad mouths the OEM plastic radiators but to be honest the aluminum core radiators with the crimped on plastic tanks actually hold up very well, especially in a Jeep. I think the gasket and crimped on tanks allow for some movement where the aluminum radiators are so much more rigid. That's why I tried mounting the radiator last time using springs on the mounting points to allow for some movement. I wish one of these companies would manufacture a drop in JK radiator that is 2" wide aluminum core with plastic tanks similar to the OEM's 1" core but so far none are accepting the challenge.
 
OP
Z

zmotorsports

ALLIANCE MEMBER
Joined
Oct 20, 2009
Messages
21,441
Location
Northern Utah
How do you pull a vacuum on the cooling stack? I guess what I mean is what kind of pump?

I use an AirLift cooling system evacuation and fill system. I bought it about 20 years ago for doing ATV's and snowmobiles but it works so well on all cooling systems that is about all I use now. I like it because I can pull a cooling system into a vacuum, shut the valve off and let it sit for about 10 minutes or so while I do something else and confirm the cooling system is tight and free of leaks before ever filling the system. Filling the system is clean and easy buy sucking the coolant into the system until it is out of a vacuum then you know there are no air pockets in the system.
 
OP
Z

zmotorsports

ALLIANCE MEMBER
Joined
Oct 20, 2009
Messages
21,441
Location
Northern Utah
You can check for voltage in the coolant with a DMM. If I recall correctly 0.4 volts was the start of problems. Ford had many problems with it in years past. Would eat through freeze plugs in the block. The coolant gets nasty when it’s happening and with your maintenance habits would see it. Always enjoy what your up to.

Agreed. If you check back through my posts last year when I replaced the first radiator I believe I demonstrated how to check the cooling system for transient voltages as they will cause electrolysis issues in the cooling system.

Thanks for stopping by and checking in on my projects.
 
Last edited:

jeepinerdeep

Well-known member
Joined
Dec 28, 2013
Messages
2,099
Location
South Central PA
Mike,

When I bought my JK, it had a broken radiator. Many hours of interweb research and talking to my buddies at the hot rod shop led me to C&R. As soon as take it out of the box it'd obvious how stout it is compared to everything else I looked at. Might be something to keep in mind if you have to change course.
 

C_F

ALLIANCE MEMBER
Joined
Jan 21, 2005
Messages
9,675
Location
Utah...SNOW BLOWS!
I use an AirLift cooling system evacuation and fill system. I bought it about 20 years ago for doing ATV's and snowmobiles but it works so well on all cooling systems that is about all I use now. I like it because I can pull a cooling system into a vacuum, shut the valve off and let it sit for about 10 minutes or so while I do something else and confirm the cooling system is tight and free of leaks before ever filling the system. Filling the system is clean and easy buy sucking the coolant into the system until it is out of a vacuum then you know there are no air pockets in the system.

Man, I would love to see that evacuation system in action. My current cooling system (radiator swap or whatever) EVAC involves buckets & funnels. :D And maybe the occasional extra hose-to-bleeder thing, to burp out air pockets.
But maybe once again Mike has posted something beyond my current up-to-today repertoire, and I would (as always) be glad to learn yet again from the master. :)
 

C_F

ALLIANCE MEMBER
Joined
Jan 21, 2005
Messages
9,675
Location
Utah...SNOW BLOWS!
Oh, sorry, I got sidelined with the coolant EVAC stuff...what about rubber isolated radiator mounts? Maybe you have already been there, so never mind?
 

awdblazer

Well-known member
Joined
Oct 17, 2011
Messages
1,100
Location
winnipeg, manitoba, canada
Last night I replaced the radiator in the Jeep due to a leak as well as replaced my high pressure A/C line that also developed a leak over the winter.

Leaking radiator removed. A/C condenser and Camaro SS fan removed.
c8e8171ca05094343a7a05959c7b84bd.jpg

New radiator with the cooling stack components assembled and ready to install.
b3bf17bee59ac57b72958ee00885244b.jpg

0f6750423f0e1f75ecd433eece316261.jpg

Engine bay wiped down and ready to accept cooling stack.
7179831a10e1717db0a226ef02593a73.jpg


Installed. Vacuum pulled on cooling system and refilled.
d930342ed4caeb70d32bf89a78ebda7a.jpg

Next I’ll have to charge my A/C system as it’s supposed to be mid-90’s by end of the week.

hey mike, on your last picture, you have a bunch of zip ties on your upper radiator hose, is that holding your steam line up? where does it go? thanks
 

Attachments

  • d930342ed4caeb70d32bf89a78ebda7a.jpg
    d930342ed4caeb70d32bf89a78ebda7a.jpg
    108 KB · Views: 1
  • 7179831a10e1717db0a226ef02593a73.jpg
    7179831a10e1717db0a226ef02593a73.jpg
    111.1 KB · Views: 1
  • 0f6750423f0e1f75ecd433eece316261.jpg
    0f6750423f0e1f75ecd433eece316261.jpg
    86 KB · Views: 0
  • b3bf17bee59ac57b72958ee00885244b.jpg
    b3bf17bee59ac57b72958ee00885244b.jpg
    86.2 KB · Views: 0
  • c8e8171ca05094343a7a05959c7b84bd.jpg
    c8e8171ca05094343a7a05959c7b84bd.jpg
    141.3 KB · Views: 0
To avoid these ads, REGISTER NOW!
Top Bottom