To avoid these ads, REGISTER NOW!

ZMotorsports Shop Projects 2.0

OP
Z

zmotorsports

ALLIANCE MEMBER
Joined
Oct 20, 2009
Messages
21,477
Location
Northern Utah
Best thing to do nowadays is live within your means and pad your bank account. That’s exactly my game plan. Figure in 3 months I will have all three credit cards paid off as well the car. This year I want to also pay property tax in full when it comes due in June. This will free upwards of 1000 per month.


Good to hear you’re on the right track.

I can attest to you that not being saddled by debt is a great feeling.
 
To avoid these ads, REGISTER NOW!

Bob Heine

ALLIANCE MEMBER
Joined
Oct 24, 2009
Messages
10,709
Location
Boca Raton, Florida
Good to hear you’re on the right track.

I can attest to you that not being saddled by debt is a great feeling.
Mike, I've had the same experience. Once the house was paid off we didn't need as much monthly income and over time that turned into assets that pay me back. My retirement income, 25 years in, is higher than my best year working and the investments continue to grow. Sadly my children live in a different universe.
 
OP
Z

zmotorsports

ALLIANCE MEMBER
Joined
Oct 20, 2009
Messages
21,477
Location
Northern Utah
Mike, I've had the same experience. Once the house was paid off we didn't need as much monthly income and over time that turned into assets that pay me back. My retirement income, 25 years in, is higher than my best year working and the investments continue to grow. Sadly my children live in a different universe.


Thanks Bob. That’s all we owe on currently is the house. We had our previous home paid off for 11 years before buying our new home which caused us to go back to having a mortgage. It’s manageable but we’re paying extra plus contributing to our investments in preparation for retirement. I want to go into retirement without the mortgage because we have some expensive hobbies that we want to be able to continue enjoying through retirement.

Glad to hear you have been able to enjoy retirement as long as you have. I love hearing success stories like that. It gives the rest of us inspiration.
 
OP
Z

zmotorsports

ALLIANCE MEMBER
Joined
Oct 20, 2009
Messages
21,477
Location
Northern Utah
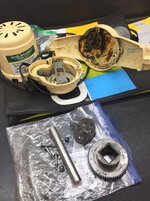
I’ve had a project sitting on my workbench for way too long. A gentleman my wife works with had asked if I could take a look at an ice cream making machine for him. That was a couple of months ago but I haven’t had time to look at it until this weekend.

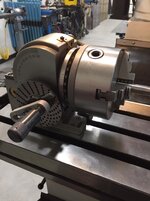
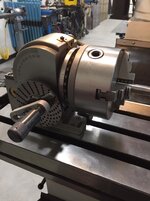
It did allow me to finally purchase a dividing head that I’ve wanted for a while. I’m sure I won’t make enough off of this job to pay for it but it’s a start.

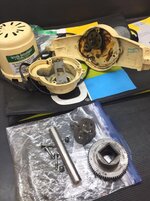
This is an old White Mountain ice cream maker. I haven’t seen one of these in nearly 40 years so I eagerly took this project on although I have never cut gears before so I was a little nervous.
08772e98e91023a2835c53446cc95375.jpg

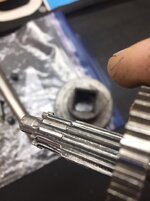
A few teeth on this gear will need repairing.
803208c2de0dd8550a5dd6b78959b525.jpg

This gear is completely trashed.
7d7a938f53b726cc7fe145e75207adb2.jpg

Step one was to turn down to the correct OD plus the step which runs in the housing.
72628807119eb17f1591f0a1ad1bdce2.jpg

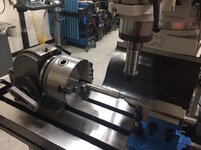
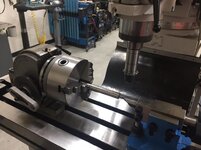
Then the setup moved to the milling machine using the new BS-0 dividing head.
4196f50191f3b856cbf263956593d46a.jpg

Calculation made for the correct plate.
83e1f821b2ff95b4e01978d10bc13b35.jpg

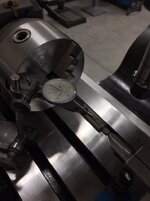
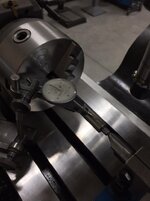
Zeroing in on the top of the shaft.
63286b5b77f4972916e7dad928191afb.jpg

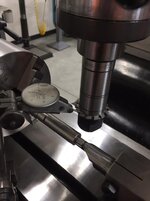
Zeroing in on the top of the cutter.
a10fa8125efeca1683b505ec311c7e1a.jpg

Zero the Z-axis on the DRO.
0242e130917517238ce98291c638ce84.jpg

Raised the knee half of the shaft diameter less half the cutter thickness and locked the knee.
1c807db143545a954b9d99b294b74381.jpg

75af807fc9840c606909fb37a784223d.jpg

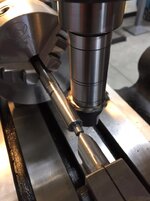
Calculated the depth of cut and making the first pass.
b3f94abd41de8d1317656fdd510bf417.jpg

Last pass completed.
04904563524d814cd34daa2cedb3d7e5.jpg

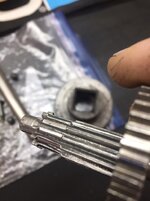
Cleaned and inspected. SUCCESS!!
d06c0a04ce52825f8beab55c026b3aa6.jpg

Turned the outer end down to .500” for the gear to slide on.
3e86be5dd51821f07dda9db7005477ca.jpg

Stay tuned for more work to complete this project. For the first time cutting a gear I am very pleased with the results.
 

Attachments

  • 0242e130917517238ce98291c638ce84.jpg
    0242e130917517238ce98291c638ce84.jpg
    80.8 KB · Views: 0
  • a10fa8125efeca1683b505ec311c7e1a.jpg
    a10fa8125efeca1683b505ec311c7e1a.jpg
    62.2 KB · Views: 0
  • 63286b5b77f4972916e7dad928191afb.jpg
    63286b5b77f4972916e7dad928191afb.jpg
    58.6 KB · Views: 0
  • 83e1f821b2ff95b4e01978d10bc13b35.jpg
    83e1f821b2ff95b4e01978d10bc13b35.jpg
    81.1 KB · Views: 0
  • 4196f50191f3b856cbf263956593d46a.jpg
    4196f50191f3b856cbf263956593d46a.jpg
    81.3 KB · Views: 0
  • 72628807119eb17f1591f0a1ad1bdce2.jpg
    72628807119eb17f1591f0a1ad1bdce2.jpg
    60.9 KB · Views: 0
  • 7d7a938f53b726cc7fe145e75207adb2.jpg
    7d7a938f53b726cc7fe145e75207adb2.jpg
    65 KB · Views: 0
  • 803208c2de0dd8550a5dd6b78959b525.jpg
    803208c2de0dd8550a5dd6b78959b525.jpg
    81 KB · Views: 0
  • 1c807db143545a954b9d99b294b74381.jpg
    1c807db143545a954b9d99b294b74381.jpg
    86.7 KB · Views: 0
  • 75af807fc9840c606909fb37a784223d.jpg
    75af807fc9840c606909fb37a784223d.jpg
    70.2 KB · Views: 0
  • 3e86be5dd51821f07dda9db7005477ca.jpg
    3e86be5dd51821f07dda9db7005477ca.jpg
    61.9 KB · Views: 0
  • d06c0a04ce52825f8beab55c026b3aa6.jpg
    d06c0a04ce52825f8beab55c026b3aa6.jpg
    127.3 KB · Views: 0
  • 04904563524d814cd34daa2cedb3d7e5.jpg
    04904563524d814cd34daa2cedb3d7e5.jpg
    92 KB · Views: 0
  • b3f94abd41de8d1317656fdd510bf417.jpg
    b3f94abd41de8d1317656fdd510bf417.jpg
    64.6 KB · Views: 0
  • 08772e98e91023a2835c53446cc95375.jpg
    08772e98e91023a2835c53446cc95375.jpg
    119.9 KB · Views: 0
Last edited:

loganb

ALLIANCE MEMBER
Joined
Dec 29, 2011
Messages
5,636
Location
Omaha, NE
Excellent work.

Hard to beat home made ice cream on a warm summer day. We would it a couple times a year growing up and always did hand crank with White Mountain mixers. One year we got the power unit for it off a flea market and it made the process much easier!

Sent from The Garage Journal mobile app
 

LXCam

ALLIANCE MEMBER
Joined
Apr 23, 2013
Messages
19,205
Location
AZ
Holy smokes Mike, nice job my friend. That’s gonna be one very expensive ice cream maker when your done or will it become a labor of luv? Kinda reminds me of several one off brackets and AN fittings I’ve had to make in the past. Someone will eventually ask how much that’d cost to make another which get the “ya don’t wanna know” answer.
 
OP
Z

zmotorsports

ALLIANCE MEMBER
Joined
Oct 20, 2009
Messages
21,477
Location
Northern Utah
Nice job Mike! Any info on the arbor and cutting tool used?

Yeah I am going to have to second that... both on the nice job and the tools you used!


Sent from my iPhone using Tapatalk Pro

Thanks guys.

The tooling was purchased from Travers. I bought the R8 shank with the keyed cutter end and after calculating which diametral pitch I needed I also ordered the two DP24 cutters from Travers.

The BS-0 dividing head is a nice Taiwanese unit that I purchased from Matt @ Precision Mathews.
 
OP
Z

zmotorsports

ALLIANCE MEMBER
Joined
Oct 20, 2009
Messages
21,477
Location
Northern Utah
Great work. I would think that’s a pricey repair and takes quite while to complete.

Excellent work.

Hard to beat home made ice cream on a warm summer day. We would it a couple times a year growing up and always did hand crank with White Mountain mixers. One year we got the power unit for it off a flea market and it made the process much easier!

Sent from The Garage Journal mobile app

Holy smokes Mike, nice job my friend. That’s gonna be one very expensive ice cream maker when your done or will it become a labor of luv? Kinda reminds me of several one off brackets and AN fittings I’ve had to make in the past. Someone will eventually ask how much that’d cost to make another which get the “ya don’t wanna know” answer.

Very Cool Mike!!!

Next time I need an Input Shaft...

Great job Mike!

Impressive work Mike. That ice cream will certainly taste better with Mike's gears in it....

Thanks guys. Definitely not going to make enough to cover the tools and tooling I had to buy but it will be a start and I now have a dividing head that I've wanted for some time.

This was definitely a learning experience for me as I relied heavily on my Machinist's Handbook for the formulas and charts necessary. My scratch pad looks terrible with all of the mathing that was going on.:lol_hitti
 
OP
Z

zmotorsports

ALLIANCE MEMBER
Joined
Oct 20, 2009
Messages
21,477
Location
Northern Utah
Keeps the brain sharp, right?! :beer::willy_nil

Ain't that the truth Marc. I kept calculating and re-calculating to make sure I didn't make a mistake. I finally thought "well, I may as well start cutting and if I made a mistake, I'll have to start over with a new blank." But it turned out great and was a fun learning experience. I actually do really like the learning process just as much as the making money aspect.:lol_hitti
 

casmurbax

Well-known member
Joined
Sep 25, 2012
Messages
2,761
Location
Wilton, NY
When you first bought that tool I was like WTH is that, I had to go look it up, definitely not one that said to me "buy me now" like some of your other tools you show.

Quite interesting to see how it gets set up and what it allows you to do. Pretty neat.
 
OP
Z

zmotorsports

ALLIANCE MEMBER
Joined
Oct 20, 2009
Messages
21,477
Location
Northern Utah
When you first bought that tool I was like WTH is that, I had to go look it up, definitely not one that said to me "buy me now" like some of your other tools you show.

Quite interesting to see how it gets set up and what it allows you to do. Pretty neat.

Yeah, the dividing head is pretty task specific but they work better than a rotary table for cutting splines and/or gears.
 
To avoid these ads, REGISTER NOW!
OP
Z

zmotorsports

ALLIANCE MEMBER
Joined
Oct 20, 2009
Messages
21,477
Location
Northern Utah
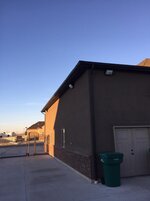
Last night with the help of a friend we added some exterior lighting to the west side of the house garage to help with lighting of the dead zone on the west side of my house garage leading back to the shop.

b50be3f2d6d19b940d334ed840e55610.jpg

4ac4eda8fd36753d14a67ff158cc9c8d.jpg

9da70d1dc23c35b3682efaa4dfe402c7.jpg

126a0c4457c50e3a6e2be9cc364b54b0.jpg

There are more pictures over on my shop build thread but this will give you an idea of what we accomplished last night.:D
 

Attachments

  • 126a0c4457c50e3a6e2be9cc364b54b0.jpg
    126a0c4457c50e3a6e2be9cc364b54b0.jpg
    44.1 KB · Views: 0
  • 9da70d1dc23c35b3682efaa4dfe402c7.jpg
    9da70d1dc23c35b3682efaa4dfe402c7.jpg
    60.2 KB · Views: 0
  • 4ac4eda8fd36753d14a67ff158cc9c8d.jpg
    4ac4eda8fd36753d14a67ff158cc9c8d.jpg
    39.5 KB · Views: 0
  • b50be3f2d6d19b940d334ed840e55610.jpg
    b50be3f2d6d19b940d334ed840e55610.jpg
    56 KB · Views: 0
Last edited:

rmack898

Well-known member
Joined
Jan 23, 2007
Messages
3,212
Location
Honu Grove NE Florida
Mike, you should frame the scratch pad page with all your calculations on it and hang it by the mill.
Years down the road from now and you're making gears for something and doing the calculations in your head, you'll have a good memory of the first gear you cut.
 
OP
Z

zmotorsports

ALLIANCE MEMBER
Joined
Oct 20, 2009
Messages
21,477
Location
Northern Utah
Mike, you should frame the scratch pad page with all your calculations on it and hang it by the mill.
Years down the road from now and you're making gears for something and doing the calculations in your head, you'll have a good memory of the first gear you cut.

Good idea Mac. For the time being I stuffed it into my Machinist's Handbook along with several other pages of calculations. The Machinist's Handbook was paramount in obtaining all of my calculations, but I'm sure most everyone already knows that.
 

38Chevy454

Well-known member
Joined
Dec 26, 2006
Messages
4,038
Location
Cincinnati, OH
Neat project making the new gears. Are you planning anything for anti-wear coating or lubricant on the gears? What base material is the gear shaft?

Sent from dumb operator on a smart phone
 
OP
Z

zmotorsports

ALLIANCE MEMBER
Joined
Oct 20, 2009
Messages
21,477
Location
Northern Utah
Neat project making the new gears. Are you planning anything for anti-wear coating or lubricant on the gears? What base material is the gear shaft?

Sent from dumb operator on a smart phone

Thanks Terry. I'm not planning on anything other than using grease like what was packed in the cavity from the OEM. I just used some mild steel to machine the splined shaft, similar to what the original one was.
 
OP
Z

zmotorsports

ALLIANCE MEMBER
Joined
Oct 20, 2009
Messages
21,477
Location
Northern Utah
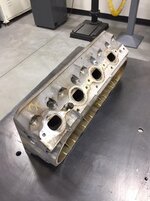
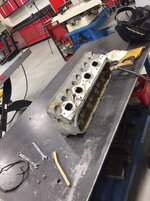
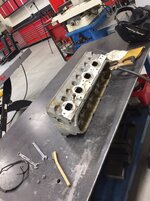
I had a guy that I did some work for about ten years ago contact me via one of my YouTube videos over the weekend. He also joined garagejournal recently and asked if I would be willing to do a small job for him.

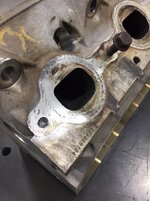
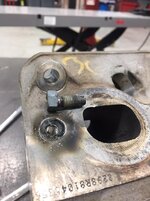
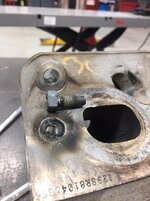
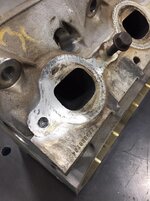
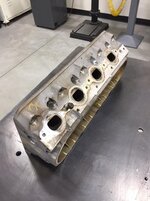
He had an LS cylinder head with a broken exhaust manifold bolt that also had half of a easy-out broke off in it and asked if I could remove them.

935bbf79d6d5215ea688eac9a296ca79.jpg

Here you can see the fastener is broken well below the surface with the broken screw extractor even slightly below the fastener.
e6453f1e9ee9c67fa6c2689b21ab62fd.jpg

50ab1336c1cb8197c584fabea1dd7442.jpg

Here I use the TIG welder to bathe or immerse the end of the fastener with the arc. This will aid in annealing the hardened extractor as well as heat things up uniformly. Once I put some heat into the part I will establish a very small molten puddle using a small tungsten (1/16") and then slowly add some 309 filler rod to build up the center so it is slightly above the surface.
39a00b3af034550ffed881b867cd27c8.jpg

Once the bead profile is slightly above flush I will set a nut in place and fuse the weld profile to the nut. I keep some various sizes of nuts at the ready that have had the coating removed by means of muriatic acid for this purpose.
02134115168bd5819dcf4b05f38c5bf7.jpg

After the weld is no long glowing red or in the "plastic" state I apply some force and see if it will break loose. Most of time they come right out.
6f98bedeb4c1f6d107c2f775fb41424b.jpg

Broken fastener with broken extractor removed.
1c9c97b9189e7ee9c05e82490e916938.jpg

Next I run a tap or thread chaser through to clean up the threads.
ba454c919183143b2c8272bc480e80d3.jpg

Job completed.
e0ab5f120e63d5f7f9832baed147cec3.jpg

c6e1ffa8d6bec54935587d3ace830b96.jpg

Another successful bolt extraction.
 

Attachments

  • c6e1ffa8d6bec54935587d3ace830b96.jpg
    c6e1ffa8d6bec54935587d3ace830b96.jpg
    103.2 KB · Views: 0
  • e0ab5f120e63d5f7f9832baed147cec3.jpg
    e0ab5f120e63d5f7f9832baed147cec3.jpg
    92.4 KB · Views: 0
  • ba454c919183143b2c8272bc480e80d3.jpg
    ba454c919183143b2c8272bc480e80d3.jpg
    98.4 KB · Views: 0
  • 1c9c97b9189e7ee9c05e82490e916938.jpg
    1c9c97b9189e7ee9c05e82490e916938.jpg
    91.2 KB · Views: 0
  • 02134115168bd5819dcf4b05f38c5bf7.jpg
    02134115168bd5819dcf4b05f38c5bf7.jpg
    86.9 KB · Views: 0
  • 39a00b3af034550ffed881b867cd27c8.jpg
    39a00b3af034550ffed881b867cd27c8.jpg
    86.7 KB · Views: 0
  • 50ab1336c1cb8197c584fabea1dd7442.jpg
    50ab1336c1cb8197c584fabea1dd7442.jpg
    108.8 KB · Views: 0
  • e6453f1e9ee9c67fa6c2689b21ab62fd.jpg
    e6453f1e9ee9c67fa6c2689b21ab62fd.jpg
    113.4 KB · Views: 0
  • 935bbf79d6d5215ea688eac9a296ca79.jpg
    935bbf79d6d5215ea688eac9a296ca79.jpg
    84.9 KB · Views: 0
  • 6f98bedeb4c1f6d107c2f775fb41424b.jpg
    6f98bedeb4c1f6d107c2f775fb41424b.jpg
    83.9 KB · Views: 0
Last edited:

Jeff Ivers

Well-known member
Joined
Apr 9, 2010
Messages
2,567
Location
Oklahoma
Very nice job on the head repair!

Am I correctly interpreting the steps as:
1-cleaned the debris out of the hole with wire brush and perhaps blown air
2-put bead of weld on top of broken bolt
3-centered nut over hole and welded nut to remains in hole
4- removed nut and damaged bolt with wrench
5- chased the threads with a tap

If so, what prevents the weld from sticking to the head?
 
OP
Z

zmotorsports

ALLIANCE MEMBER
Joined
Oct 20, 2009
Messages
21,477
Location
Northern Utah
Very nice job on the head repair!

Am I correctly interpreting the steps as:
1-cleaned the debris out of the hole with wire brush and perhaps blown air
2-put bead of weld on top of broken bolt
3-centered nut over hole and welded nut to remains in hole
4- removed nut and damaged bolt with wrench
5- chased the threads with a tap

If so, what prevents the weld from sticking to the head?

Yes that is pretty much what I did, below is a more detailed account. I think I should have done a better job of documenting the process.

1- cleaned with wire brush and compressed air. The bolt and extractor were well below the surface.

2- use the TIG welder to "bathe" or immerse the end of the fastener and extractor with the arc before adding material. This somewhat anneals the hardened extractor as well as heats things up evenly. I've found if you just jump right in with the arc and start applying filler the fastener actually swells in the hole making removal more difficult rather than easier.

3- after putting some heat into the fastener I focus the arc at the center and just start to get it molten and apply a dab of 309 filler rod. This is where having a foot controller is necessary as at this stage you are increasing and decreasing the amperage in order to build up the profile. Apply some current and melt in some filler, then back off a little to allow it to solidify but keep the arc established. Increase the current and dab again. Lather, rinse, repeat until the bead profile is above the surface.

4- place a nut over the profile and fuse the built up bead to the inside of the nut. I also use nuts with the coating removed at this stage to prevent not only the popping from the zinc coated nut but also to eliminate the possibility of introducing contaminants into the weld which will weaken the already questionable integrity of the small cross sectional area in which will be twisting upon removal. I generally keep a few nuts of various sizes in which I have removed the coating using muriatic acid.

5-once the nut is welded onto the fastener and no longer molten or in "plastic" state, I put a wrench on it and slowly apply force. Most of the time they come right out. On occasion it may require a second attempt but seldom.

6- chase the threads and task completed.

As for what keeps from welding it all together, in this case the head was aluminum but when performing this task on cast iron heads and/or exhaust manifolds you have to be very careful not to fuse the fastener into the part. The key is to use a small tungsten, I usually use 1/16", keep it very pointed and focus the arc on the center of the broken fastener to avoid the internal threads.

I hope that helps and thanks for the comments and for checking out my projects.
 

PhantomEB

Well-known member
Joined
Feb 6, 2006
Messages
6,821
Location
Medicine Hat, AB, Canuckistan
Extra lighting is always a bonus. Now my GF loves the Christmas lights along the bottom 1/4 of our fence for the dogs....she ain’t said no to rope lighting on a timer for the rest of the year.
 
To avoid these ads, REGISTER NOW!
Top Bottom