To avoid these ads, REGISTER NOW!

Portable Band Saw Stand

To avoid these ads, REGISTER NOW!

dnschmidt

Well-known member
Joined
Oct 3, 2014
Messages
7,294
Location
Phoenix, AZ
The hated "Den of Tools" did a review of it and it does look very interesting particularly in the vertical position. One complaint I have is that it doesn't have a clamp in the horizontal position just a stop. I'd have to come up with a way of adding some De-Sta-Co clamps to the unit.
 

Poolshark314

Well-known member
Joined
Jul 5, 2021
Messages
658
Location
MD
The hated "Den of Tools" did a review of it and it does look very interesting particularly in the vertical position. One complaint I have is that it doesn't have a clamp in the horizontal position just a stop. I'd have to come up with a way of adding some De-Sta-Co clamps to the unit.

This clamp fits the stand
 

1320

Well-known member
Joined
Jan 3, 2018
Messages
903
Location
Arizona
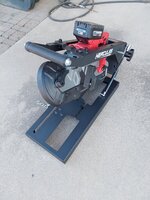
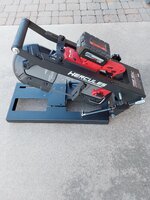
20231018_163539.jpg 20231018_163546(0).jpg

I picked up one of these in early September when they finally had one in stock at Harbor Freight. I have a cordless Milwaukee Fuel M18 bandsaw.

20231018_165012.jpg

I want to like the thing, but it just seems too rinky dink. I think I have the saw centered in it and tightened down correctly, but it seems to not make very straight cuts, like the blade moves around too much during the cut.

20231018_165029.jpg

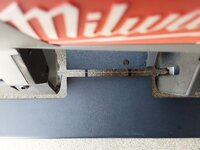
On my stand, each side of the flat surface that the blade passes through is not on the same plane - there is some twist to it. I couldn't photograph it correctly, but if I put a straight edge spanning the gap, against the fence, there is daylight under it on the non fence side. The gap is the smallest against the fence, but increases in size moving away from the fence.

I have waited and waited for any local harbor freight store to get any back in stock to swap this one out for another to no avail - if they get any in, they're instantly gone. I've talked to a few store managers about this and asked about exchanging mine for a display model, and they were willing to do it, but when I've checked two different display models, they were both even more out of plane than mine.

Also, in the mean time, the price went up 20%, which is probably appropriate, considering they can't keep them in stock.

Anyone else had this problem? Or am I probably doing something wrong or just expecting too much?
 

Poolshark314

Well-known member
Joined
Jul 5, 2021
Messages
658
Location
MD
20231018_163539.jpg 20231018_163546(0).jpg

I picked up one of these in early September when they finally had one in stock at Harbor Freight. I have a cordless Milwaukee Fuel M18 bandsaw.

20231018_165012.jpg

I want to like the thing, but it just seems too rinky dink. I think I have the saw centered in it and tightened down correctly, but it seems to not make very straight cuts, like the blade moves around too much during the cut.

20231018_165029.jpg

On my stand, each side of the flat surface that the blade passes through is not on the same plane - there is some twist to it. I couldn't photograph it correctly, but if I put a straight edge spanning the gap, against the fence, there is daylight under it on the non fence side. The gap is the smallest against the fence, but increases in size moving away from the fence.

I have waited and waited for any local harbor freight store to get any back in stock to swap this one out for another to no avail - if they get any in, they're instantly gone. I've talked to a few store managers about this and asked about exchanging mine for a display model, and they were willing to do it, but when I've checked two different display models, they were both even more out of plane than mine.

Also, in the mean time, the price went up 20%, which is probably appropriate, considering they can't keep them in stock.

Anyone else had this problem? Or am I probably doing something wrong or just expecting too much?
Yeah funny how they are advertising that they "Cut" prices, but the stand is now $20 more...
1697723694366.png

I'm not crazy about the switch rig because the Milwaukee still has the safety switch before you can pull the trigger.
 

XJSuperman

Well-known member
Joined
Jan 26, 2018
Messages
3,088
Location
Central Iowa
I have one and hate it. I use a Bauer saw in it. Harbor Freight actually emailed me to confirm my review and the engineer questioned my setup. I sent back pics and an explanation simple enough for a kindergartner and never received a reply.
I'd advise against it. In theory it should be amazing, in practice, I was less than enthused. There are further comments in the Pass/Fail thread.
 

olytdi

Well-known member
Joined
Dec 3, 2011
Messages
2,202
Location
Olympia, Washington
I just picked up one and paired it with the new Hercules 11 amp band saw. I really like the low speed and the light on the Hercules saw. Mine cuts straight and I have no complaints whatsoever with its performance in the stand.

I took a bit of time making sure both halves of the stand were square/plumb/parallel prior to mounting the saw. Saw mounted well and was pretty much in proper alignment right off once mounted. I had zero problems with the lever switch -- worked right the first attempt at mounting it.

Mine stand has a good, firm feel in both the chop saw position and in the vertical position. Everything feels solid -- no slop anywhere. Solid kit.

Now figuring out a better way to secure it to the work bench beside using clamps yet retaining ease of removal though it is surprisingly stable un-clamped. Also mounting a separate and more accessible switch.

A good buy in my opinion -- especially on sale.
 

sparky 1971

Well-known member
Joined
Oct 9, 2018
Messages
8,028
Location
Central Iowa
Now figuring out a better way to secure it to the work bench beside using clamps yet retaining ease of removal though it is surprisingly stable un-clamped. Also mounting a separate and more accessible switch.

A good buy in my opinion -- especially on sale.
I use one of these for mine, just keep the switch locked on.


olytdi

Well-known member
Joined
Dec 3, 2011
Messages
2,202
Location
Olympia, Washington
I use one of these for mine, just keep the switch locked on.

Yeah, just discussing that:


I think I've decided to go with a hard switch.
 

driftpin

Well-known member
Joined
Dec 22, 2016
Messages
11,325
Location
Miami-Dade/Broward Co. Florida
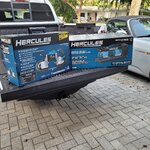
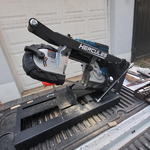
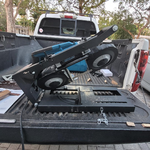
I just got the stand and the Hercules 11 amp portable bandsaw.

20231201_162003.jpg

Today I took 'em out and hooked 'em up. It took some fussing to get them cutting well. I stopped trying to 'eyeball' the blade in the slot so that it appeared so the same space on one side of the blade, front to back existed, and just made cuts with some 1 x 2's until I was satisfied with the shape of the cuts. I did it only for the horizontal position, I have not done the vertical table mounting yet.

I used several positions for the crossways switch lever, starting at the third from the rear hole (closest to the power cord) for the crossways lever pivot screw. That worked, but the switch lever would hang-up a bit when trying to 'off' the switch. I tried the next-to-last pivot point for the crosswise lever, but ended up locating the crosswise switch lever in the rearmost pivot hole. That would allow the switch to cleanly snap 'off' and to not hang-up, though the two other positions I tried and abandoned, would shut-off the motor.

I like the 6-speed motor switch, but I haven't tried using it on anything but #1 (slowest speed). Maybe tomorrow.

1701564615700.png

1701564647331.png

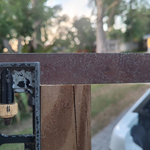
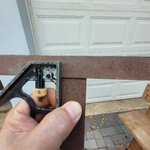
Here's a shot using a square to show the adjustment results I got from using the portable bandsaw stand in the horizontal (chopsaw) position.

1701564731800.png

One issue I had, out of the box, before I did any frame adjusting (the three big machine screws/nuts for holding the two frame stand pieces together) was having the blade cut a not perpendicular to the long dimension of my wood stock, shape. Think of trying to cut a 2 x 4 with a manual saw, like a Disston handsaw, and not holding it perfectly perpendicular to the 2 x 4. You end up with an angled cut, and not a 'square' cut. That was what I found, and I made adjustments to both the removed front handle and the bracket which replaced it (moving the entire bandsaw forward and backward), and the allen head machine screws which fastened the top frame of the jig stand to the bracket attached to the saw where the saw handle was (moving the front of the bandsaw to the left or the right).

I played with the ~two inch solid rubber biscuits/machine screws which position the rear saw handle left and right, and the allen head machine screws which fasten the top frame of the jig stand to the bracket attached to the front of the saw, replacing the forward handle. When I finally got the saw band cutting perpendicular, if you eyeballed the saw band in the lower frame's space where the blade passes through the saw table, the position of the saw band appeared to be gapped incorrectly. That would be the left gap appeared to be narrower at the rear of the saw table, where the saw band sits, compared to the left gap at the front of the saw table. However, that gave me the cut I show with the square.

I ran out of time today to check the vertical cut function, maybe tomorrow. Right now, I'm watching the Big 10 championship football game. And maybe doing some brief posts.

Sunday a.m. post:
I set up the vertical function on the stand which went pretty quickly. I used my 2x4 stand I had left over from parting out a Delta DP 220. It looks like it is going to be a perfect match for the use of the stand. I had to fuss a bit with the fastening of the cutting table surface to the saw. I may be doing something wrong because the directions say to separate the guide bar and its plate after removing the guide bar from the saw with the two Allen screws; then it says to replace the plate. The screws do not seem to be long enough to allow the plate to be fastened underneath the vertical table cutting surface. What I ended up doing was eliminating the guide bar plate on the saw and just bolted the cutting table surface directly to the saw frame. That caused a bit of an interference with one of the dust covers for the drive wheel. I ended up removing that plastic dust cover. Then I bolted the vertical table cutting surface to the saw, centering the blade and moving the table as far out as the screws would allow.

I tried cutting a piece of bed frame which as anyone who has worked with it knows is notoriously hard to drill. Using the 24 tooth per inch bandsaw blade it went through the material quickly. The material is an angle iron 1 in by 1 in by 1/8 in. I took my time and it seemed to cut fairly easily with the new blade. I used my trusty 50 plus year old square to show what the results were on the cut. I am no expert woodworker or welder or Steel fabricator, but I was able to make a pretty decent cut on the angle iron. I didn't use any kind of brace or fence and just did it freehand but I think for the type of work that I am going to be using this stand for, and whatever configuration, either horizontal chop or vertical cuts, if I take my time I think this will prove to be perfectly adequate and will probably make a better cut than using a side grinder with a cutting wheel.

20231203_124051.jpg

Below is the first horizontal chopsaw configuration cut, with dreaded bedframe metal material (1" X 1" X 1/8"). Material tougher than a $3 steak.

20231203_121553.jpg


The freehand cut (below):
Vertical positioning of the saw stand.
20231203_124037.jpg

So-far, I think this will work for my modest fabrication needs. I have some ideas about making it configure to what I want/need, ways to improve accuracy in use, storage of the saw and its pieces and tools, speed of conversion from horizontal chopsaw to vertical bandsaw, and any other ideas which pan-out once I try 'em. Stay tuned, same Bat-Time, same Bat-Channel.
 
Last edited:

larry4406

Well-known member
Joined
Jan 27, 2006
Messages
19,636
Location
Northern Virginia
I just got the stand and the Hercules 11 amp portable bandsaw.

View attachment 2003384

Today I took 'em out and hooked 'em up. It took some fussing to get them cutting well. I stopped trying to 'eyeball' the blade in the slot so that it appeared so the same space on one side of the blade, front to back existed, and just made cuts with some 1 x 2's until I was satisfied with the shape of the cuts. I did it only for the horizontal position, I have not done the vertical table mounting yet.

I used several positions for the crossways switch lever, starting at the third from the rear hole (closest to the power cord) for the crossways lever pivot screw. That worked, but the switch lever would hang-up a bit when trying to 'off' the switch. I tried the next-to-last pivot point for the crosswise lever, but ended up locating the crosswise switch lever in the rearmost pivot hole. That would allow the switch to cleanly snap 'off' and to not hang-up, though the two other positions I tried and abandoned, would shut-off the motor.

I like the 6-speed motor switch, but I haven't tried using it on anything but #1 (slowest speed). Maybe tomorrow.

1701564615700.png

1701564647331.png

Here's a shot using a square to show the adjustment results I got from using the portable bandsaw stand in the horizontal (chopsaw) position.

1701564731800.png

One issue I had, out of the box, before I did any frame adjusting (the three big machine screws/nuts for holding the two frame stand pieces together) was having the blade cut a not perpendicular to the long dimension of my wood stock, shape. Think of trying to cut a 2 x 4 with a manual saw, like a Disston handsaw, and not holding it perfectly perpendicular to the 2 x 4. You end up with an angled cut, and not a 'square' cut. That was what I found, and I made adjustments to both the removed front handle and the bracket which replaced it (moving the entire bandsaw forward and backward), and the allen head machine screws which fastened the top frame of the jig stand to the bracket attached to the saw where the saw handle was (moving the front of the bandsaw to the left or the right).

I played with the ~two inch solid rubber biscuits/machine screws which position the rear saw handle left and right, and the allen head machine screws which fasten the top frame of the jig stand to the bracket attached to the front of the saw, replacing the forward handle. When I finally got the saw band cutting perpendicular, if you eyeballed the saw band in the lower frame's space where the blade passes through the saw table, the position of the saw band appeared to be gapped incorrectly. That would be the left gap appeared to be narrower at the rear of the saw table, where the saw band sits, compared to the left gap at the front of the saw table. However, that gave me the cut I show with the square.

I ran out of time today to check the vertical cut function, maybe tomorrow. Right now, I'm watching the Big 10 championship football game. And maybe doing some brief posts.
Thanks for the info!

Keep us posted on your likes and dislikes as you use it. After I get thru a couple projects I think I am going to buy this same set along with the optional clamp.
 

boom_bap

Well-known member
Joined
Feb 29, 2020
Messages
614
Location
Idaho
I have a Dealt DCM120 or whatever the model is. The blade in my saw isn't in the same plane as the handle so it was impossible to get it to square up in the stand. Its an awesome idea. Also I was getting a lot of chatter in the stand, while cutting, whether that was from a dull blade I'm not sure. I wasn't overly impressed after messing with the adjustments for hours and hours took it back.
 

driftpin

Well-known member
Joined
Dec 22, 2016
Messages
11,325
Location
Miami-Dade/Broward Co. Florida
One dislike from trying it, the degrees marks are not useful unless you are looking for an indication of, "that's pretty-close to what I want to cut!" I might use a protractor to set-up some common angles, and cut a piece of 1 x 4 for each degree angle, so I can quickly, easily set the saw to that particular angle. My thought is to have the blade stationary just-above the table, and then set the degree indicator piece of 1 x 4 against the blade, and then the other side will be the location for the fence, and lock it in.

Yes, you could use the protractor to make some marks on the table with a sharpie or a scribe to scratch it in, but then if you remove the saw, or some other issue (maybe changing the blade?) you might find it difficult to exactly replace the bandsaw to match the ink marks/scribes.

I suppose that someone with CAD (cardboard-aided design) could make a saddle to accept the exact in-place location of the bandsaw rear handle, and another to repeat the front mounting accurately and then you wouldn't worry about removing/replacement of the saw from the stand.

I do not need to remove the saw to use out of the jig stand, as I have a Rockwell porta band saw to use for those cuts.
 
Last edited:

driftpin

Well-known member
Joined
Dec 22, 2016
Messages
11,325
Location
Miami-Dade/Broward Co. Florida
I ran-out of GJ 'Edit' privileges today, so I have to post another entry.

WARNING!
The description below is what I did to correct an incomplete tool parts inventory. Do Not do this tool modification on your own. Return the tool to the point of purchase and get a refund, if you find your saw is missing parts. Caveat emptor!

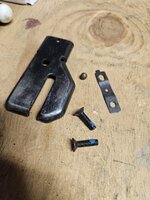
I went to the local ACE Hardware and bought two allen flat-head machine screws, 6mm X 1.0 X 25mm to use for fastening the vertical band saw work table in-place. They only had 30mm, so I used my Dremel tool to remove 4 or 5mm. The OEM screws they supply aren't long-enough to secure the vertical band saw work table, I found. They supply you 20mm (listed as 6mm X 20mm on the owner's manual exploded diagram), and I looked in all the envelopes they give you for Bauer, Hercules (both are HFT brands), Milwaukee, and DeWalt portable bandsaws. No machine screws in all those polyethylene envelopes work to properly-secure the vertical work table to the saw body. So, I bought my own or pulled 'em out of my 'traveling work pack-out toolboxes.' Or, on true GJ fashion chuck-up a proper steel alloy 10mm stock, and turn it down for the correct angle to taper the head for installation, then thread it using your Snap-On metric tap and die set. Use the Bridgeport to make an allen head recess, and 'Bob's yer uncle.'

I used the smaller bracket piece below the guide plate (see the lower illustration) which I removed by pushing a button on the guide plate, to line-up the holes in the guide plate so you can see the allen screw heads which hold the guide plate to the saw body. Remove those screws, and the guide plate and a much-smaller steel rectangular bracket will come-off attached to the guide plate. Depress the button, and separate the guide plate and the smaller rectangular bracket below it.

20231204_110742.jpg

Replace the smaller rectangular steel bracket onto the saw, where it was, and then place the vertical bandsaw work table above it, so the holes line-up with the tapped holes in the saw body which will be used to fasten the work table to the vertically-positioned bandsaw.
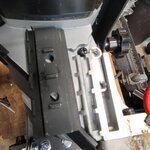
20231204_115520.jpg
This picture above shows the small bracket to be turned over and mounted to the saw frame after the vertical workbench surface (the work table) is placed on top of it. The two Allen screws will hold the workbench (the work table) surface, the small rectangular bracket and the body of the saw fastened together. Ensure that the band saw blade does not rub on the work stand bench surface

This is where I will need the fasteners I bought: allen flat-head machine screws, 6mm X 1.0 X 25mm. Those will be long-enough to reach the narrow captive steel bar's two threaded holes. The narrow captive steel bar with its two threaded holes, seen in the above picture, slides back and forth in a recess in the saw's aluminum body. The work table will rest on-top of the small steel bracket (which was beneath the guide plate which I removed and did-not replace) and now I will use the 6mm X 25mm allen flat-head tapered screws to secure the work table to the saw. It would be a lot easier to show the process if the *+_*^$#! owner's manual was online, w/its exploded diagram. But it isn't, so here's a description of what I had to do, to attach the vertical band saw work table to the saw. It's inexcusable that they don't provide enough of the proper fasteners to assemble the saw properly. It sounds like a CPSC issue, and I warn you, to approach this knowing that their parts (or lack of parts) do not allow safe and proper assembly.
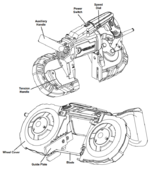
1701654260160.png
Note the guide plate (above) is showing two holes with fasteners in the holes. The small rectangular plate below or underneath the guide plate (see the red background picture, the right side bracket) will be replaced on the saw, and the vertical band saw work table will go on-top of the small rectangular plate and the two 6mm x 25mm screws (which I had to buy separately) are what hold the work table to the saw. The open cut in the work table will face the saw body. The band saw blade will be spaced so the blade is positioned between the sides of the work table slot, so the blade does not rub against the work table.

The owner's manual I got has an exploded picture of the saw pieces, and an inventory of what's supplied. It also provides instructions to mount different manufacturers' portable band saws into the stand, and how to make adjustments to switch between horizontal band saw operation, and vertical band saw operation.

In an earlier post, I said I had to remove the plastic dust cover for the 'driven' band saw wheel, when I tried to mount the vertical band saw work table. Why? Because without the tool coming with proper assembly hardware, mounting the vertical band saw table to the band saw body resulted in an interference between the bandsaw body and the work table. I had to eliminate the small rectangular plate beneath the guide plate to mount the work table to the band saw when it was set-up vertically. That caused the interference between the work table and the plastic dust cover over the driven wheel. Removing the plastic dust cover allowed the vertical position work table to be fastened in-place with the supplied hardware. However, I had to remove the driven wheel dust cover to fit the table. Once I bought the proper length 6mm X 25mm machine screws, I was able to replace the small rectangular plate beneath the work table using the new screws I bought. That gave me sufficient clearance to re-mount the driven wheel plastic dust cover.

Here's a simple wood bench to hold the stand either way, horizontally or vertically. For the vertical position I fastened it with 1/2" X 3" machine screws through the two factory holes in the base using wing nuts. No tools needed with wing nuts.

20231204_121045.jpg

I'm going to drill holes in the bench to hold by friction-fit, the allen wrenches the saw and stand require.

Well, that's it. Too-bad the online manual does not provide an exploded diagram and an index of supplied parts. It would make the problem I encountered, and how I solved it, much easier to describe. A picture and 1,000 words, you know.
 
Last edited:
OP
D

D45

Well-known member
Joined
Mar 21, 2014
Messages
4,836
Location
NW INDIANA
I'm still thinking about looking at options

I would like a metal band saw but don't want to footprint

I saw this one recently


Just for reference I want the mount for my Milwaukee 2629-20 M18 cordless band saw
 

sparky 1971

Well-known member
Joined
Oct 9, 2018
Messages
8,028
Location
Central Iowa
I finally was able to use my stand in chop saw mode on a job. I cut about 25 pieces of 1-5/8" unistrut, 10 pieces of 13/16" and five sticks of 2" EMT. To the eye they are perfect, definitely 99% better than my feeble attempts at free hand. On another note, I set up my deep cut Milwaukee 120 volt saw in the stand. I decided to just leave the saw in it and that gave me a reason to buy the M18 deep cut to go along with my M18 compact and two M12 sub compacts.
 
OP
D

D45

Well-known member
Joined
Mar 21, 2014
Messages
4,836
Location
NW INDIANA

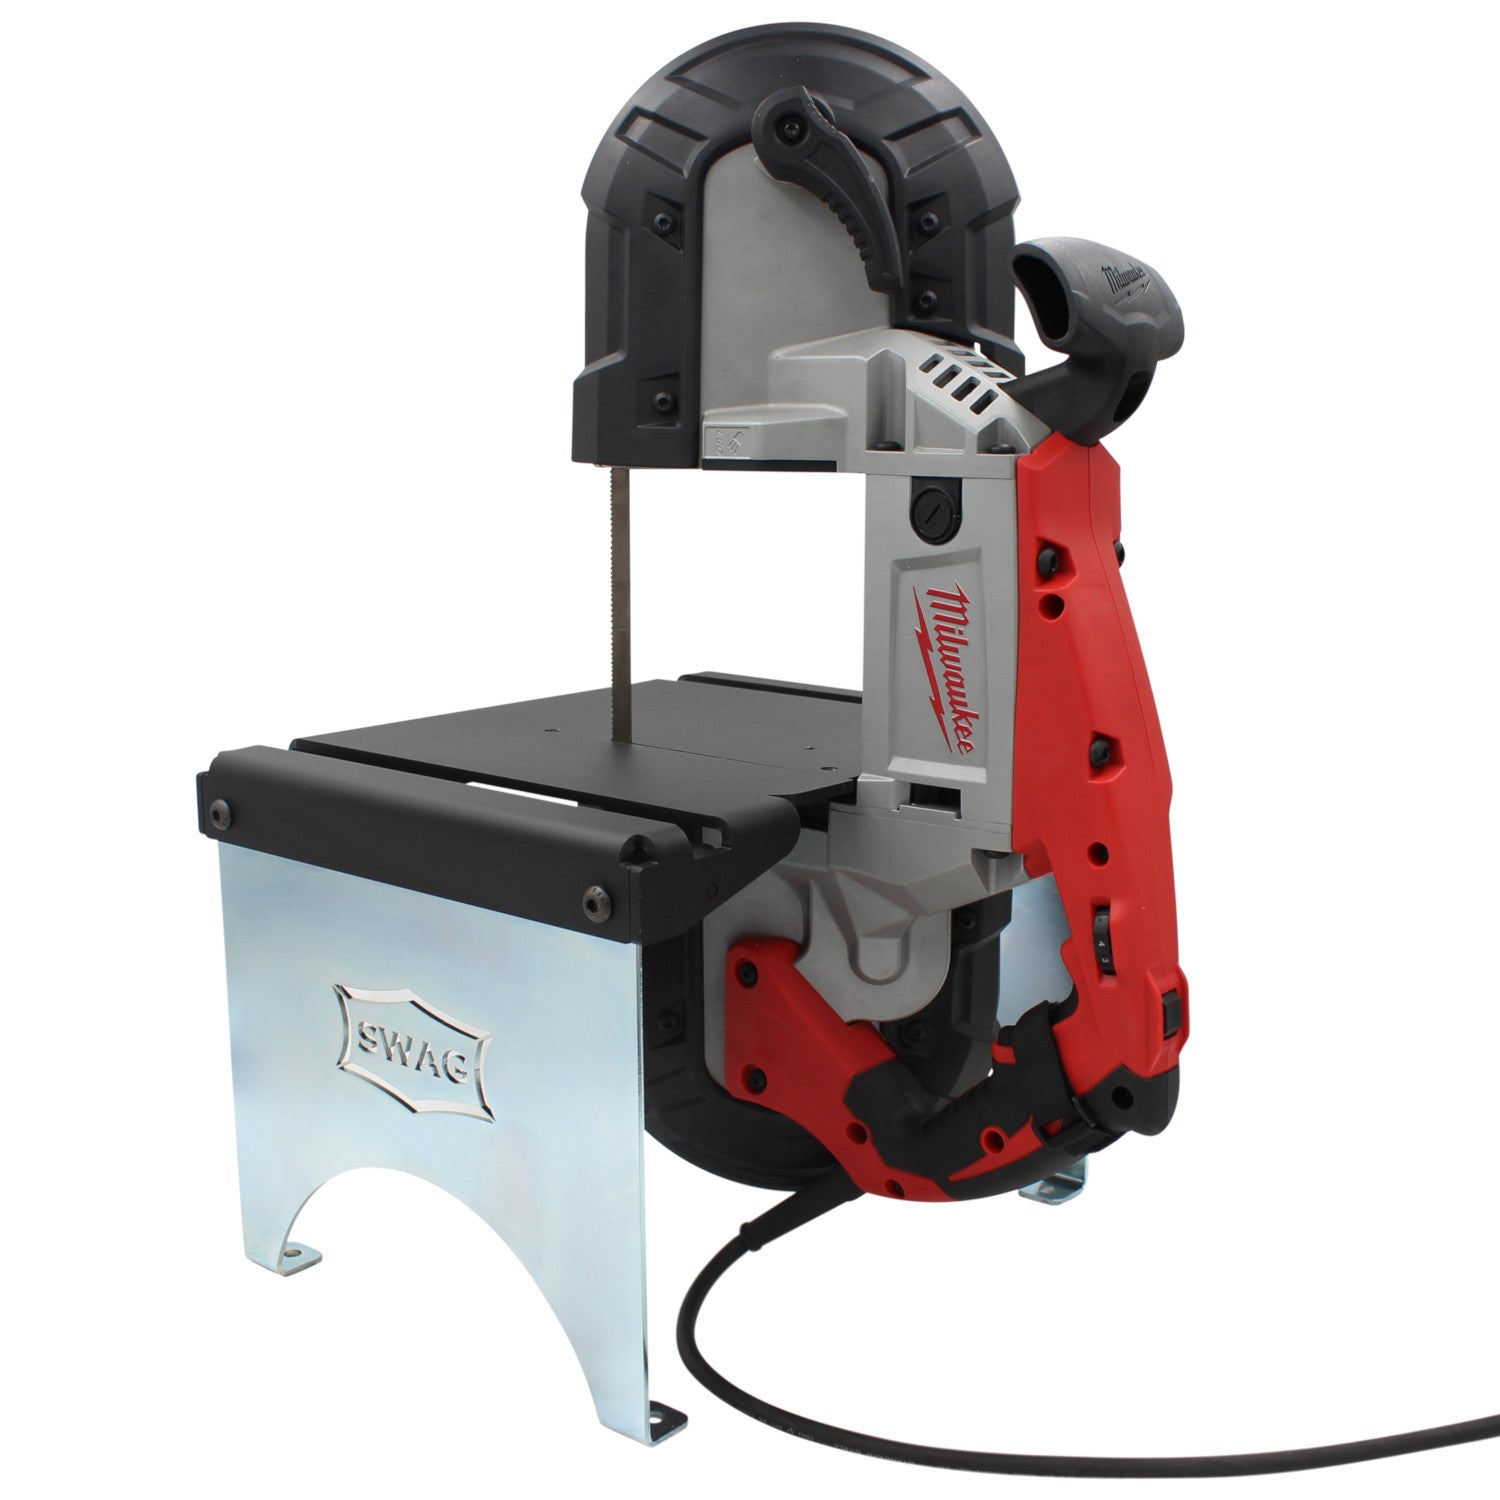
Swag Offroad also makes a portaband saw mount
 
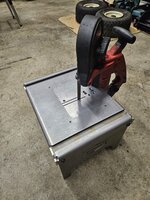
To avoid these ads, REGISTER NOW!
OP
D

D45

Well-known member
Joined
Mar 21, 2014
Messages
4,836
Location
NW INDIANA
I like the Swag table alot.......I'll probably order it this weekend

After watching videos on YouTube, it seems like a compact alternative with a much smaller footprint on the bench

I really would rather have a fix solid saw mount stand like the Swag over the pivoting mount like the Hercules

I do want a miter gauge but I'm also not wanting to spend $70 on the V27 miter gauge that Swag sells

I'll look for a nice used one on ebay
 
OP
D

D45

Well-known member
Joined
Mar 21, 2014
Messages
4,836
Location
NW INDIANA
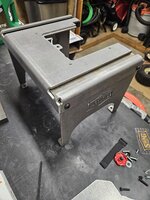
Swag table:

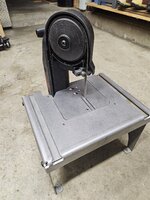
The table dimensions are 9.75" tall, 11" deep, and 13.5" wide, and with the saw installed, the overall dimensions are approximately 22" tall, 18" deep, and 13.5" wide.
 

GeoBruin

Well-known member
Joined
May 5, 2018
Messages
3,753
Swag table:

The table dimensions are 9.75" tall, 11" deep, and 13.5" wide, and with the saw installed, the overall dimensions are approximately 22" tall, 18" deep, and 13.5" wide.
If you haven't bought a miter gauge already, please consider that the blade is not necessarily parallel to the stand when installed, and most portabands do not have a provision to adjust blade angle. I had an incra miter gauge for my table saw I was excited to use because the slot was the same width as the SWAG table slot, but it was so far from parallel, it was a pain to use. I eventually stopped trying and just got really good at free hand cutting a scribed line.
 
OP
D

D45

Well-known member
Joined
Mar 21, 2014
Messages
4,836
Location
NW INDIANA
I ordered the Swag table

I'll post up some pics when it arrives

I will have my 2620 saw and 5.0 battery as a dedicated setup
 
OP
D

D45

Well-known member
Joined
Mar 21, 2014
Messages
4,836
Location
NW INDIANA
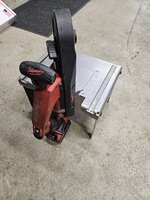
I chose to use a portable band saw and stand over a large traditional floor mounted stand for two main reasons:

I have a spare cordless M18 band saw to use and have permanently mounted and ready to use all the time

I didn't want the footprint of a "floor" band saw
 
OP
D

D45

Well-known member
Joined
Mar 21, 2014
Messages
4,836
Location
NW INDIANA
I'll probably get a miter gauge at some point

I need to figure out how to mount the stand somewhat permanently on my steel fab table

The stand does have tabs on the legs, for adjustable leveling feet.......but I feel that it would be more stable if it was mounted on my table with atleast two bolts
 

DrFeelGood

Well-known member
Joined
Mar 25, 2023
Messages
67
Location
Clackamas, OR
Mine worked straight out of the box when paired to my Dewalt DWM120. It took a little bit to mount but it is solid and cuts true. The switch trigger needs to be flipped over with the Dewalt and it sometimes will not go full power, (variable speed trigger) but that is an easy fix and 90% of full has been just fine so far. I did have to drop the saws native work stop down (to contact the table) to prevent from lowering the saw too far when chopping and cutting the saw frame. Maybe that step is in the instructions.
I am very happy with it to this point and would recommend it.
 
Last edited:
  • Like
Reactions: D45
OP
D

D45

Well-known member
Joined
Mar 21, 2014
Messages
4,836
Location
NW INDIANA
Found these two blades on marketplace for dirt cheap

Here's also my saw.......smaller compact version but it will work great for my needs. Was a garage sale find for $30

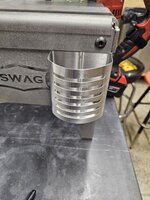
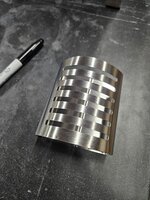
I ordered two magnetic pen/marker holders on Amazon to attach to the side of the table
 

Attachments

  • 20240124_070929.jpg
    20240124_070929.jpg
    680.8 KB · Views: 32
  • 20240124_070920.jpg
    20240124_070920.jpg
    508.2 KB · Views: 26
  • 20240124_070841.jpg
    20240124_070841.jpg
    1.9 MB · Views: 32
  • 20240124_070834.jpg
    20240124_070834.jpg
    1.4 MB · Views: 41
OP
D

D45

Well-known member
Joined
Mar 21, 2014
Messages
4,836
Location
NW INDIANA
Very happy with the fit and stability of this setup

I didn't need nor want a floor standalone up bandsaw, mainly because of the room

This fit my needs perfectly. I was initially concerned it would be too tall when I ordered it, but it's literally perfect
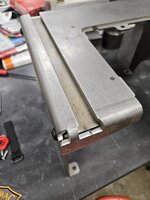
I hope I installed everything correctly

The battery was close to sitting or resting on the bench but there's enough room

I installed an 18 TPI blade

Time to look for old older, used miter gauge

I ordered a magnetic, marker basket to hang on the side for pencils and Sharpies

Minimal parts to remove and save somewhere
 

Attachments

  • 20240130_192632.jpg
    20240130_192632.jpg
    1.2 MB · Views: 29
  • 20240130_192601.jpg
    20240130_192601.jpg
    1.3 MB · Views: 23
  • 20240130_192524.jpg
    20240130_192524.jpg
    1.3 MB · Views: 23
  • 20240130_192522.jpg
    20240130_192522.jpg
    1.4 MB · Views: 24
  • 20240130_192515.jpg
    20240130_192515.jpg
    1.2 MB · Views: 23
  • 20240130_192457.jpg
    20240130_192457.jpg
    1.4 MB · Views: 23
  • 20240130_192445.jpg
    20240130_192445.jpg
    1.3 MB · Views: 25
  • 20240130_192657.jpg
    20240130_192657.jpg
    1.4 MB · Views: 24
  • 20240130_200108.jpg
    20240130_200108.jpg
    963.7 KB · Views: 31
OP
D

D45

Well-known member
Joined
Mar 21, 2014
Messages
4,836
Location
NW INDIANA
More pics

I wasn't expecting miter gauge slots on both sides of the tables. It's a nice feature
 

Attachments

  • 20240130_200400.jpg
    20240130_200400.jpg
    909.7 KB · Views: 33
  • 20240130_200342.jpg
    20240130_200342.jpg
    994.3 KB · Views: 27
  • 20240130_200335.jpg
    20240130_200335.jpg
    961.1 KB · Views: 27
  • 20240130_200125.jpg
    20240130_200125.jpg
    1 MB · Views: 24
  • 20240130_193405.jpg
    20240130_193405.jpg
    726.3 KB · Views: 25
  • 20240130_193402.jpg
    20240130_193402.jpg
    793.5 KB · Views: 25
  • 20240130_193357.jpg
    20240130_193357.jpg
    877.1 KB · Views: 29
OP
D

D45

Well-known member
Joined
Mar 21, 2014
Messages
4,836
Location
NW INDIANA
Mounted up
 

Attachments

  • 20240130_200125.jpg
    20240130_200125.jpg
    1 MB · Views: 30
  • 20240130_200152.jpg
    20240130_200152.jpg
    1.2 MB · Views: 31
  • 20240130_200201.jpg
    20240130_200201.jpg
    1.2 MB · Views: 30
  • 20240130_200213.jpg
    20240130_200213.jpg
    949.4 KB · Views: 25
  • 20240130_200147.jpg
    20240130_200147.jpg
    1.1 MB · Views: 26
  • 20240130_200150.jpg
    20240130_200150.jpg
    1.1 MB · Views: 39
OP
D

D45

Well-known member
Joined
Mar 21, 2014
Messages
4,836
Location
NW INDIANA
I've been using this alot and love it

Amazed how cool to touch the saw blade is after use and how good the cuts are

One recent issue......the band saw blade has been jumping off the upper and lower rollers on the saw, when cutting thick steel (1/4"+)

Could the upper and lower rubber rollers be worn? Are these rollers considered a wear item and should be replaced now and then? The saw was bought used.......

2629-20 M18
 

GeoBruin

Well-known member
Joined
May 5, 2018
Messages
3,753
The response may vary somewhat depending on which saw you're using but generally the little axles that the roller bearings ride on can get bent if you get a piece of metal wedge between the blade and the guide. I have had pretty good luck with just smacking the little axle straight again. That said, this will eventually cause them to deform so I did end up ordering a spare set of the roller guide assembly that I keep on hand.
 
OP
D

D45

Well-known member
Joined
Mar 21, 2014
Messages
4,836
Location
NW INDIANA
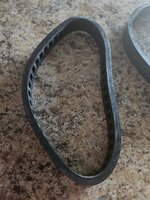
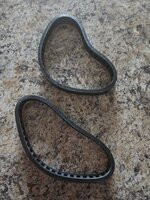
I just ordered a pair, after I inspected the current ones and discovered they are pretty dry rotted
 

isb cornbinder

Well-known member
Joined
Nov 3, 2010
Messages
7,073
Location
Pacific South West, BC, Canada

Who has one?

Any solid GJ reviews?
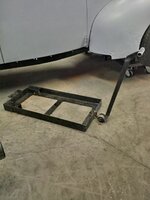
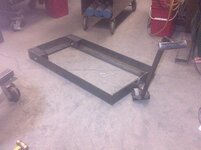
I make my own machine transport stands. One handle works with every mobile stand. These pictures are a sample of what I made.
I try to stay away from one-size-fits-all because it says I gave up.
 

Attachments

  • STERLING MOBILE BASE 3.jpg
    STERLING MOBILE BASE 3.jpg
    89.4 KB · Views: 24
  • mobile base MACHINE MOVER.jpg
    mobile base MACHINE MOVER.jpg
    50 KB · Views: 29
  • ROLLING AXLE STANDS.jpg
    ROLLING AXLE STANDS.jpg
    72 KB · Views: 25
  • MOBILE BASE SOLUTION.jpg
    MOBILE BASE SOLUTION.jpg
    104.5 KB · Views: 23
  • mobile base WF&J Barnes drill.jpg
    mobile base WF&J Barnes drill.jpg
    35.1 KB · Views: 20
  • Mobile Base handle.jpg
    Mobile Base handle.jpg
    50.8 KB · Views: 21
  • Hoefer mobile base.jpg
    Hoefer mobile base.jpg
    80.1 KB · Views: 19
  • STERLING MOBILE BASE 1.jpg
    STERLING MOBILE BASE 1.jpg
    53.5 KB · Views: 19
  • INGERSOL T30 80 WITH MOBILE BASE.jpg
    INGERSOL T30 80 WITH MOBILE BASE.jpg
    63.6 KB · Views: 25

DGersic

Well-known member
Joined
Mar 12, 2017
Messages
6,386
Location
DeKalb, IL
I've been using this alot and love it

Amazed how cool to touch the saw blade is after use and how good the cuts are

One recent issue......the band saw blade has been jumping off the upper and lower rollers on the saw, when cutting thick steel (1/4"+)

Could the upper and lower rubber rollers be worn? Are these rollers considered a wear item and should be replaced now and then? The saw was bought used.......

2629-20 M18

Yes, the rubber tyres are a wear item.
 
OP
D

D45

Well-known member
Joined
Mar 21, 2014
Messages
4,836
Location
NW INDIANA
Time to get these installed
 

Attachments

  • 1000013036.jpg
    1000013036.jpg
    1.1 MB · Views: 16
  • 1000013035.jpg
    1000013035.jpg
    1.3 MB · Views: 15
To avoid these ads, REGISTER NOW!
Top Bottom