
You are using an out of date browser. It may not display this or other websites correctly.
You should upgrade or use an alternative browser.
You should upgrade or use an alternative browser.
ZMotorsports Shop Projects 2.0
- Thread starter zmotorsports
- Start date
OP
zmotorsports
ALLIANCE MEMBER
I know it doesn't fit your mowing program Mike, but I wonder what it would have looked like with the side discharge blockoff removed.
We'll never know Marc.

OP
zmotorsports
ALLIANCE MEMBER
Beautiful Lawn!!!!
Thank you. It's definitely a labor of love and even determination for that matter due to what we started with from the original owners. I was hell bent on bringing that front yard back from death's doorstep and was so upset at the back yard that I completely tore it up and started over while the shop was being built.
That being said, even I am a bit surprised with the way it looks now after only being in this place 6 years now. I figured it would take longer to bring that front yard back than it did, especially with our water restrictions over the past few years.
I appreciate you following along and for the comments.
Chateau Slate 66
Well-known member
Your valve stem replacement reminded me of a funny memory watching a coworker attempt his first valve stem replacement. I watched him struggle for a bit trying to replace it from the OUTSIDE of the rim before I gave him a hand. You don't know until you know, right?
OP
zmotorsports
ALLIANCE MEMBER
Your valve stem replacement reminded me of a funny memory watching a coworker attempt his first valve stem replacement. I watched him struggle for a bit trying to replace it from the OUTSIDE of the rim before I gave him a hand. You don't know until you know, right?
Yeah, pushing that in from the outside would be a trick and something to watch for sure.
OP
zmotorsports
ALLIANCE MEMBER
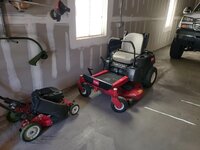
Got home from work later than normal last night so while I waited for the next job to roll into the shop I finished reinstalling the mulching baffles in the Toro Timecutter mower and parked it back in the house garage. I also received a text asking about a quick welding job so I had that on its way as well.
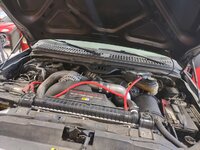
The next job rolled in and after doing some investigation along with the owner we determined that the driver's side valve cover and fastener grommets were leaking. They were leaking down onto the exhaust manifold so I'll get to work on that once the thing cools off. Also he noted that the oil looked like it was bubbling around the exhaust manifold when he crawled under it a few days ago and wondered if the oil could be coming from the exhaust. I told him it was more likely the manifold either had a broken fastener or a loose fastener and he had an exhaust leak forcing its way through the thin layer of oil from the valve cover leak. Sure enough I grabbed a socket and ratchet and the back couple of exhaust manifold bolts were loose. After looking up online to get the torque specs, I ran the torque wrench around all of the exhaust manifold bolts that I could reach from the bottom and torqued them to 28 ft/lbs. I'll hit the upper ones once I have access from the topside. I wondered about the glow plug O-rings on the wire loom being the source of the leak as I hear that is quite common, but the oil definitely seems to be originating above the glow plug harness and at the valve cover seam. Some just above the valve cover lip and quite a bit just below which tells me the gasket is probably leaking as well as the rubber grommets on the fasteners securing the valve covers. Passengers side valve cover seems dry. Evidently the guy he bought the truck from just had the head gaskets done and studs installed before being sold. The owner was suspicious but I did confirm that the engine has studs on the heads. Overall it's a pretty clean truck for a 2007 with 180k on the clock. The typical wear on the driver's side seat bolster and a little spot of rust on the driver's door but other than that not in bad condition.

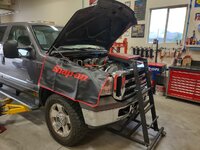
Fender covers in place and Topside creeper in position to begin work once the engine cools.
I forgot to snap pictures of the welding job that came in but will post those up when I get time to work on it.
Thanks for looking.
The next job rolled in and after doing some investigation along with the owner we determined that the driver's side valve cover and fastener grommets were leaking. They were leaking down onto the exhaust manifold so I'll get to work on that once the thing cools off. Also he noted that the oil looked like it was bubbling around the exhaust manifold when he crawled under it a few days ago and wondered if the oil could be coming from the exhaust. I told him it was more likely the manifold either had a broken fastener or a loose fastener and he had an exhaust leak forcing its way through the thin layer of oil from the valve cover leak. Sure enough I grabbed a socket and ratchet and the back couple of exhaust manifold bolts were loose. After looking up online to get the torque specs, I ran the torque wrench around all of the exhaust manifold bolts that I could reach from the bottom and torqued them to 28 ft/lbs. I'll hit the upper ones once I have access from the topside. I wondered about the glow plug O-rings on the wire loom being the source of the leak as I hear that is quite common, but the oil definitely seems to be originating above the glow plug harness and at the valve cover seam. Some just above the valve cover lip and quite a bit just below which tells me the gasket is probably leaking as well as the rubber grommets on the fasteners securing the valve covers. Passengers side valve cover seems dry. Evidently the guy he bought the truck from just had the head gaskets done and studs installed before being sold. The owner was suspicious but I did confirm that the engine has studs on the heads. Overall it's a pretty clean truck for a 2007 with 180k on the clock. The typical wear on the driver's side seat bolster and a little spot of rust on the driver's door but other than that not in bad condition.
Fender covers in place and Topside creeper in position to begin work once the engine cools.
I forgot to snap pictures of the welding job that came in but will post those up when I get time to work on it.
Thanks for looking.
WoodsTruck
Well-known member
- Joined
- Jan 12, 2013
- Messages
- 1,025
Mike,
Again, love the description of details.
Question: Does your Toro rider have any provisions to suspend it fully? Seems like you could use your 2-post lift to suspend your mower for undercarriage work.
Again, love the description of details.
Question: Does your Toro rider have any provisions to suspend it fully? Seems like you could use your 2-post lift to suspend your mower for undercarriage work.
OP
zmotorsports
ALLIANCE MEMBER
Mike,
Again, love the description of details.
Question: Does your Toro rider have any provisions to suspend it fully? Seems like you could use your 2-post lift to suspend your mower for undercarriage work.
Thank you.
I looked closely at potential lifting points while I was under there and although the MX series of the Toro Timecutter (vs. the SS series) is supposed to have heavier gauge steel frame I don't see anywhere I would feel comfortable grabbing it as far as chassis goes. I used one arm from the lift to raise the front end only just to change the blades and remove/install the baffles this past week, but I generally don't swap blades around during a normal mowing season. I will check balance and touch up the edges of the blades if needed when I pull the deck to clean which is usually only 2-3 times a season and then at the end of the season as part of my fall preventive maintenance plan. I've also seen others make a fixture in which grabs the tires and allows lifting that I may copy but can't decide yet.
However, I don't know that undercarriage work is all that common other than deck cleaning so I hate to have a large fixture that I would need to store if I really wouldn't use or justify. I tried to clean the deck from underneath by raising the front end this time just to see if it would be easier than removing the deck. Removing the deck on the Toro Timecutter is a pretty easy process and I can usually have the deck out from under the mower chassis in about 2-minutes but the resinstallation is a bit more of a process. Mainly due to the fact that the right side lift linkage has to be in a very specific position in relation to the angle of the deck or it keeps slipping off the pins. It's not terrible but takes me about 8-10 minutes to reinstall the deck after cleaning. Cleaning the deck is so much easier and I can be much more thorough with the deck out and standing on edge so I don't think I'll mess with trying to clean the deck under the mower again.
Sorry for the long response, it's just funny you asked about raising it with the 2-post lift as I had been tossing that around for a while now and still can't decide if I want to take the time and space to build and store a fixture for lifting it as I don't see that being a process I'd use very often.
WoodsTruck
Well-known member
- Joined
- Jan 12, 2013
- Messages
- 1,025
What about using something like a tire tie down net for the rear tires but use it to lift instead?
Then a simple strap in to the front cross bar just inside the wheel swivel mount.
This would not require a lot of room for storage and yet allow you to "hang" the mower up off the ground as high as you like.
Then a simple strap in to the front cross bar just inside the wheel swivel mount.
This would not require a lot of room for storage and yet allow you to "hang" the mower up off the ground as high as you like.
OP
zmotorsports
ALLIANCE MEMBER
What about using something like a tire tie down net for the rear tires but use it to lift instead?
Then a simple strap in to the front cross bar just inside the wheel swivel mount.
This would not require a lot of room for storage and yet allow you to "hang" the mower up off the ground as high as you like.
While that would work it would negate much of the height the mower would reach at full extension of the lift and not be high enough to stand under and therefore nullify the reason to use the lift. I guess one could roll around under it with a stool, but I don't see using it much, at least not at this point.
I had thought more about a fixture that would take the place of the adjustable pedestal in each arm that the tires would sit in/on and provide a more solid lifting point and keep the benefit of having full lift height but again, just not sure I'd use it much as I don't see the need to work under it that often so until I see a need I really don't know that I can justify the time messing with it at this point. If I ever get to a point where I don't have anything else to do maybe I will put a bit more thought into it and come up with something.
OP
zmotorsports
ALLIANCE MEMBER
Ripped into the 6.0 Powerstroke last night.
Removed air filter, intake duct work and degas bottle after draining about a gallon or so of coolant.

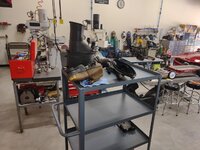
Using my mobile parts shelf again. This thing is proving invaluable.
Removed the FICM. Be extra carefull with these little locking tabs on each connector as they look extremely brittle after 16 years and 180k miles.

FICM removed. All of the connectors came apart without any drama.

With the FICM brackets removed and the wire looms bungee'd out of the way the valve cover can now be removed.

Valve cover removed.

I noticed the back two lower bolts were loose when I removed them. This appeared to be where the leak was concentrated so I'm glad I found something. More to come on this scenario in next post.
Removed air filter, intake duct work and degas bottle after draining about a gallon or so of coolant.
Using my mobile parts shelf again. This thing is proving invaluable.
Removed the FICM. Be extra carefull with these little locking tabs on each connector as they look extremely brittle after 16 years and 180k miles.
FICM removed. All of the connectors came apart without any drama.
With the FICM brackets removed and the wire looms bungee'd out of the way the valve cover can now be removed.
Valve cover removed.
I noticed the back two lower bolts were loose when I removed them. This appeared to be where the leak was concentrated so I'm glad I found something. More to come on this scenario in next post.
OP
zmotorsports
ALLIANCE MEMBER
Continuing on with cleaning of the parts in preparation for reassembly.
I used a rag soaked with brake wash to clean the upper ridge of the rocker box to accept the new gasket. Also sprayed down the glow plug wiring harness that had some oil on it. I have heard that these leak out around the sealing o-ring on the glow plug but this one appeared to be leaking from the valve cover and down onto the glow plug harness vs. the harness itself leaking.

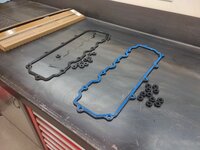
Old and new gaskets. I originally thought that maybe the grommets for the fasteners were hard and that is why they were leaking as there was some oil above the lip of the valve cover indicating it was a fastener grommet leaking as well as the gasket itself but they were still quite pliable.
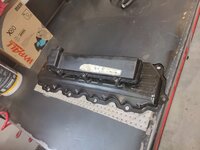
Valve cover cleaned and ready to be reinstalled.
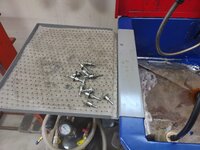
All of the grommets removed and fasteners washed and blown dry.
New gasket with grommets installed on fasteners ready to install.

Upon further cleaning that is when I discovered that the back two lower bolts weren't merely loose, they were stripped from the previous mechanic. Now reassembly is delayed so I can install a couple of Helicoils.

Thanks for looking.
I used a rag soaked with brake wash to clean the upper ridge of the rocker box to accept the new gasket. Also sprayed down the glow plug wiring harness that had some oil on it. I have heard that these leak out around the sealing o-ring on the glow plug but this one appeared to be leaking from the valve cover and down onto the glow plug harness vs. the harness itself leaking.
Old and new gaskets. I originally thought that maybe the grommets for the fasteners were hard and that is why they were leaking as there was some oil above the lip of the valve cover indicating it was a fastener grommet leaking as well as the gasket itself but they were still quite pliable.
Valve cover cleaned and ready to be reinstalled.
All of the grommets removed and fasteners washed and blown dry.
New gasket with grommets installed on fasteners ready to install.
Upon further cleaning that is when I discovered that the back two lower bolts weren't merely loose, they were stripped from the previous mechanic. Now reassembly is delayed so I can install a couple of Helicoils.
Thanks for looking.
OP
zmotorsports
ALLIANCE MEMBER
Mike, That looks like a tough area to get a tap into? The back two bolts?
Exactly. Yes, back two lower bolts. I think that's why I called it quits last night as I wasn't in the mood to tackle drilling and tapping late at night. I'll start fresh this afternoon with a clearer head and hope it goes well. Absolutely no space to work on these things with the engine so far back under the cowl and recessed in.
Do you ever make a drill jig for jobs like that? Pick up the hole pattern from the cover, use a reasonably thick hunk of scrap so that the drill and tap are kept square to the head. I've done this many times for areas that you can't reach or see.
OP
zmotorsports
ALLIANCE MEMBER
Do you ever make a drill jig for jobs like that? Pick up the hole pattern from the cover, use a reasonably thick hunk of scrap so that the drill and tap are kept square to the head. I've done this many times for areas that you can't reach or see.
Yes. For many jobs that must be exact I routinely make up a quick fixturing jig. I must admit I've done it more so over the past 9 years having a DRO on my milling machine as I can very accurately drill the holes once pattern is measured and determined.
That being said, I won't make fixturing jig on this job seeing as how the hole is already so pronounced and definitive, but I will use one of my drill guides to ensure the drill bit goes in perpendicular to the mounting surface, although that is going to be tight.
I also just picked up a standalone Helicoil tap from my local NAPA as I will have to cut the length down some and use my 90-degree pneumatic drill as space is so tight between the rocker box and firewall. I will also more than likely have to modify a bolt to use as an insert tool as I doubt I'll be able to get the Helicoil installation tool back there. The hole second forward shouldn't be an issue, but that rearmost hole has me a bit nervous.
signcrafter
Well-known member
- Joined
- May 9, 2012
- Messages
- 12,496
Mike, what's your opinion on helicoils vs timeserts? I've heard of helicoils failing so try to use timeserts when I need to do a thread repair. I just did a ford 5.4 blown out plug repair that had been fixed once years ago with a helicoil and that didn't hold. Just curious if they get a bad rap from user error or something else since I know you do your homework and wouldn't be using them if they were an issue.
Scuderia-F1
Well-known member
Great pics of the Powerstroke project. I’d personally have opted for Timeserts over Helicoil myself. You should look into them for future projects. Makes a much more high quality job.
Looking forward to see the progress of this project.
Looking forward to see the progress of this project.
OP
zmotorsports
ALLIANCE MEMBER
Mike, what's your opinion on helicoils vs timeserts? I've heard of helicoils failing so try to use timeserts when I need to do a thread repair. I just did a ford 5.4 blown out plug repair that had been fixed once years ago with a helicoil and that didn't hold. Just curious if they get a bad rap from user error or something else since I know you do your homework and wouldn't be using them if they were an issue.
Great pics of the Powerstroke project. I’d personally have opted for Timeserts over Helicoil myself. You should look into them for future projects. Makes a much more high quality job.
Looking forward to see the progress of this project.
Scott/Anders, I very much appreciate you guys following along and asking questions as this exchange turns into more of a discussion vs. me just posting pictures of work. That way I feel we all learn, me especially.
I can't remember who asked a similar question a couple of years ago, I think it was graham08 but not sure.
Anyways, I have used a variety of Helicoils, Keenserts and Timeserts in my 35+ years of wrenching now. I have had great success and some failures with all three as well. At work back in the 90's we had a vendor come in and demonstrate Keenserts and my boss at the time was sold on them and ordered a full set with all of the required tools and a metric ****-ton of inserts in a variety of sizes. That was pretty much all I used at work for quite a few years but then started using Helicoils at my home shop, mainly because they were less expensive as it was hard to charge a client for a one-off repair for a $100+ Timesert kit vs. a $40 Helicoil kit. However, after using the Helicoils for a while and having a high success rate, I ended up ordering several of the larger Helicoil master sets that included taps, insert tools and inserts for a range of fasteners and have just purchased additional inserts as needed over the years of use. Even to this day I have had very few Helicoil failures and those that did fail were after heavily repeated uses. I have actually had more Keensert failures than Helicoil failures to be honest.
For several years I looked at it as Helicoils were my first stage repair and the solid insert (Keensert or Timesert) were what I went to as a second stage repair. What I mean by that is the Helicoil was at least as strong as the OEM fasteners and the parent material so I looked at it that if the parent material did what it was designed/engineered to do for a while then the Helicoil would do a better job. I also liked that the Helicoil removed less of the parent material and as you know on many of the motorcylce cases, there is not much material left around even a factory drilled and tapped hole, so I didn't want to go any larger than absolutely necessary. In some of those applications there would be no way to remove enough material for a solid insert to be used without rendering the case useless. Also, I would look at some applications whereas the hole was so damaged and so enlarged that I didn't feel a Helicoil would have enough parent material to grab so I would use a Timesert or Keensert as the only possible repair.
When I was building 2-stroke race engines I used a lot of Helicoils. At some times in some applications where I knew they were prone to failing I would drill and install a Helicoil as a preventive measure knowing that even though the threads were fine while it was in my shop, the threads would fail rather soon when pushing more cylinder pressure when trying to double the horsepower output, so it was a preventive measure.
During all this was when I got into building VW engines where I started purchasing hi-po VW cases from Pauter Machine that had the machine work already done. They bragged in their literature and even on the phone that they installed Timeserts in the common failure points around the cases for better clamping force. I figured hell, if a well known machine shop was using them they must be better than Helicoils so I purchased a couple of the more common sizes to have on hand in the shop. For the applications I used them in they worked fairly well but I avoided their use in situations where I felt the parent material would be weakened too much by the size of the solid insert. I did like the Timesert a bit more than the Keensert to be honest. My thinking was, and I am not sure how accurate this is as I'm just a mechanic and not an engineer, that the Timersert would be stronger than the Keensert solely due to the threaded engagement being a stronger mechanical bond and more surface area vs. the staked sides of the Keensert. The failures I had from the Keenserts were mostly due to the stakes failing and allowing the insert to bang around and damage the threads and then fail whereas I felt the Timesert maintained a more constant and solid bond with the parent material. Not very scientific however, just an observation from various failures. Also keep in mind these were on things like gearboxes, electric motor mounts, hydraulic ram mounting and other industrial pieces of equipment that see much more adverse conditions than anything automotive would encounter.
So after many years of Helicoils being my first stage repair I have had exponentially more successes than I have failures with them. Then a couple of years ago I stumbled across Rob Wendland's YouTube channel. Rob Wendland is Terry McMillen's crew chief and has extensive knowledge in racing and has some cool videos of various projects that come through his shop. One of his videos in particular caught my attention a couple/few years ago and that was specific to Helicoils vs. Timeserts. I can't remember but it was titled something like Helicoil for the win or something to that affect. Anyway in the video he did side by side comparisons using a new insert for each test and creeping up in torque value until the inserts would fail. The Helicoil held much longer than the Timeserts. If memory serves the Timeserts were failing around the 60 ft/lbs. with 3/8"-16 fasteners whereas the Helicoil blew past that. He then started using the same Helicoil insert for multiple tests and kept going up past 90 ft/lbs. What drove this test was he was having some failures and set out to do some side by side testing using controlled parameters and even made some alterations near the end of his testing to the process used to install the Timeserts.
In all of his early tests the Helicoils held up substantially better than the Timeserts. The Timeserts were failing much sooner than the Helicoils when installing in exact materials and under the same circumstances. Near the end of his testing he was pushing the 3/8-16 inserts well beyong their normal operating range of around 38-42 ft/lbs. He was pushing them to over 100 ft/lbs. and the Helicoils were holding, he actually had a bolt yield at just over 100 ft/lbs. yet the Helicoil insert was still holding fine after about 10 uses and the Timesert failed around 80 ft/lbs. (if memory serves).
Then the last test he did he decided to drop the drill bit size required by the Timesert by approx. .020". He stated the undersize drill bit did create a bit more drag on the lip cutting tool for the Timesert insert and the tap but after forcing his way through the increased friction of the installation and then going through the thread forming procedure with the last tool that the Timesert finally surpassed the Helicoil and failed around 123 ft/lbs where the standard Helicoil actually failed around 105 ft/lbs.
So after all that work and modifying the installation process the Timesert finally surpassed the Helicoil but at nearly 3 times the torque that you would normally tighten a 3/8" fastener to and in which one would be stepping to a larger size fastener when it came to those torque values.
Sorry for the long answer to what quite possibly was a quick question, but I've put a lot of thought into these thread repair inserts over the years and although not as extensive testing and proving as Rob did, I came to the conclusion that the Helicoil in most applications will provide more than adequate holding strength. That being said, I have seen failures due to sloppy installations so for that the failure really can't be blamed on the insert. Most of the Helicoil failures I have seen were from previous repairs where I feel the installer either did not sink that first coil of the Helicoil below the surface far enough or break the tang off in the bottom of the hole. I like to go at least a full thread and two if possible below the surface to ensure the fastener won't grab that first coil and pull it up out of the hole and to be sure to break the tang off so it doesn't try to drive the insert down further into the hole or "stretch out" the Helicoil insert in the threaded bore.
Short answer, I generally use Helicoil inserts these days as I feel they provide much more strength than the original material.
OP
zmotorsports
ALLIANCE MEMBER
Shoot Mike, you could probably jam a toothpick in the stripped holes and get that screw to bite…..works on stripped door hinge screws 🫣
I hadn't thought of that. I'll have to buy a box of toothpicks to have on hand for future repairs.
I bought a set of the gator blades for my lowly Toro push mower and have the same clumping issues, I'm going back to the normal blades when they go bad. What a waste of time/money thinking they would be the ticket.
That was my same conclusion. I ordered a set of OEM Toro mulching blades that arrived last night. I still have a lot of life left in my originals but I'll have a repalcement set on hand when the time comes. For my application and mower I feel like the Gator blades were a waste of money.
OP
zmotorsports
ALLIANCE MEMBER
It was a long night but I was able to finish up the 6.0 Powerstroke last night.
The driver's side valve cover replacement really isn't all that long of a repair, I think the book calls for something like 1.9 hours, but it sure went to **** in a hurry between the stripped threads and some wiring issues from previous work.
After arriving home and opening up the shop I went right to work on the thread repair. Stuffed a rag down between the oil rail and the rocker box to keep shavings out as well as some masking tape to direct whatever shavings did fall went to the floor.

I grabbed my drill block and greased up the drill bit to catch the shavings and drilled the holes out.

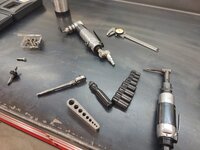
Tools that came into play last night. My stubby 90-degree aircraft pneumatic drill was a life saver. Then my tap sockets and stubby swivel head ratchet.
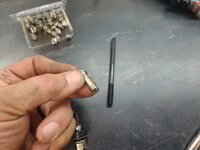
The Helicoil insert installation tool was too long to get a straight shot at the hole so I took a 6mm x 1.0 bolt and notched the end to catch the small tang on the Helicoil insert. Then threaded the insert into the holes, broke the tang off with a short punch and cleaned up the surface to accept the new gasket.
The torque on these fasteners is only 71-75 in/lbs. so they can easily be overtorqued. That is no excuse for not repairing them properly once stripped but after reading quite a few threads on various Powerstroke or diesel forums I see most don't feel the need to use a torque wrench and state to just "snug them down tight". Last I looked that was not a specific torque value. I will say, my small 1/4" drive inch pound torque wrench sure comes in handy for repairs such as this where space is very limited.
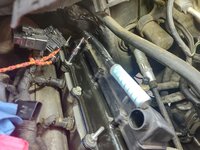
FICM brackets reinstalled.

FICM back in place.
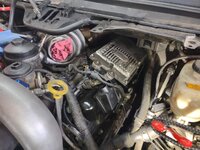
Wiring reconnected and intake duct reinstalled.
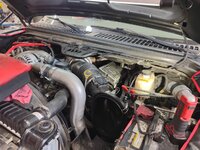
The air filter was quite dirty so after sending the owner pictures he asked me to replace it while I was putting it back together.

Job completed and idling before the test drive.
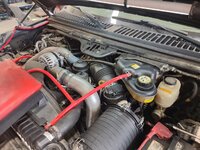
Test drive went well and another job completed.
Thanks for looking.
The driver's side valve cover replacement really isn't all that long of a repair, I think the book calls for something like 1.9 hours, but it sure went to **** in a hurry between the stripped threads and some wiring issues from previous work.
After arriving home and opening up the shop I went right to work on the thread repair. Stuffed a rag down between the oil rail and the rocker box to keep shavings out as well as some masking tape to direct whatever shavings did fall went to the floor.
I grabbed my drill block and greased up the drill bit to catch the shavings and drilled the holes out.
Tools that came into play last night. My stubby 90-degree aircraft pneumatic drill was a life saver. Then my tap sockets and stubby swivel head ratchet.
The Helicoil insert installation tool was too long to get a straight shot at the hole so I took a 6mm x 1.0 bolt and notched the end to catch the small tang on the Helicoil insert. Then threaded the insert into the holes, broke the tang off with a short punch and cleaned up the surface to accept the new gasket.
The torque on these fasteners is only 71-75 in/lbs. so they can easily be overtorqued. That is no excuse for not repairing them properly once stripped but after reading quite a few threads on various Powerstroke or diesel forums I see most don't feel the need to use a torque wrench and state to just "snug them down tight". Last I looked that was not a specific torque value.
I will say, my small 1/4" drive inch pound torque wrench sure comes in handy for repairs such as this where space is very limited.FICM brackets reinstalled.
FICM back in place.
Wiring reconnected and intake duct reinstalled.
The air filter was quite dirty so after sending the owner pictures he asked me to replace it while I was putting it back together.
Job completed and idling before the test drive.
Test drive went well and another job completed.
Thanks for looking.
OP
zmotorsports
ALLIANCE MEMBER
OK, so that was bugging me when I quoted Rob Wendland's Helicoil vs. Timesert testing so I had to go back and find those couple of videos to ensure I wasn't misquoting or repeating erroneous information.
Here are the first couple of videos (shorts) that caught my attention a few years ago and led me to his channel.
First one titled Helicoil is winning. WTF?
Second one titled Helicoil taking the win.
Here is the final video he did on the series where he made the Timesert better where it outperformed the Helicoil, finally.
Here are the first couple of videos (shorts) that caught my attention a few years ago and led me to his channel.
First one titled Helicoil is winning. WTF?
Second one titled Helicoil taking the win.
Here is the final video he did on the series where he made the Timesert better where it outperformed the Helicoil, finally.
signcrafter
Well-known member
- Joined
- May 9, 2012
- Messages
- 12,496
Appreciate the detailed reply Mike!Scott/Anders, I very much appreciate you guys following along and asking questions as this exchange turns into more of a discussion vs. me just posting pictures of work. That way I feel we all learn, me especially.
I can't remember who asked a similar question a couple of years ago, I think it was graham08 but not sure.
Anyways, I have used a variety of Helicoils, Keenserts and Timeserts in my 35+ years of wrenching now. I have had great success and some failures with all three as well. At work back in the 90's we had a vendor come in and demonstrate Keenserts and my boss at the time was sold on them and ordered a full set with all of the required tools and a metric ****-ton of inserts in a variety of sizes. That was pretty much all I used at work for quite a few years but then started using Helicoils at my home shop, mainly because they were less expensive as it was hard to charge a client for a one-off repair for a $100+ Timesert kit vs. a $40 Helicoil kit. However, after using the Helicoils for a while and having a high success rate, I ended up ordering several of the larger Helicoil master sets that included taps, insert tools and inserts for a range of fasteners and have just purchased additional inserts as needed over the years of use. Even to this day I have had very few Helicoil failures and those that did fail were after heavily repeated uses. I have actually had more Keensert failures than Helicoil failures to be honest.
For several years I looked at it as Helicoils were my first stage repair and the solid insert (Keensert or Timesert) were what I went to as a second stage repair. What I mean by that is the Helicoil was at least as strong as the OEM fasteners and the parent material so I looked at it that if the parent material did what it was designed/engineered to do for a while then the Helicoil would do a better job. I also liked that the Helicoil removed less of the parent material and as you know on many of the motorcylce cases, there is not much material left around even a factory drilled and tapped hole, so I didn't want to go any larger than absolutely necessary. In some of those applications there would be no way to remove enough material for a solid insert to be used without rendering the case useless. Also, I would look at some applications whereas the hole was so damaged and so enlarged that I didn't feel a Helicoil would have enough parent material to grab so I would use a Timesert or Keensert as the only possible repair.
When I was building 2-stroke race engines I used a lot of Helicoils. At some times in some applications where I knew they were prone to failing I would drill and install a Helicoil as a preventive measure knowing that even though the threads were fine while it was in my shop, the threads would fail rather soon when pushing more cylinder pressure when trying to double the horsepower output, so it was a preventive measure.
During all this was when I got into building VW engines where I started purchasing hi-po VW cases from Pauter Machine that had the machine work already done. They bragged in their literature and even on the phone that they installed Timeserts in the common failure points around the cases for better clamping force. I figured hell, if a well known machine shop was using them they must be better than Helicoils so I purchased a couple of the more common sizes to have on hand in the shop. For the applications I used them in they worked fairly well but I avoided their use in situations where I felt the parent material would be weakened too much by the size of the solid insert. I did like the Timesert a bit more than the Keensert to be honest. My thinking was, and I am not sure how accurate this is as I'm just a mechanic and not an engineer, that the Timersert would be stronger than the Keensert solely due to the threaded engagement being a stronger mechanical bond and more surface area vs. the staked sides of the Keensert. The failures I had from the Keenserts were mostly due to the stakes failing and allowing the insert to bang around and damage the threads and then fail whereas I felt the Timesert maintained a more constant and solid bond with the parent material. Not very scientific however, just an observation from various failures. Also keep in mind these were on things like gearboxes, electric motor mounts, hydraulic ram mounting and other industrial pieces of equipment that see much more adverse conditions than anything automotive would encounter.
So after many years of Helicoils being my first stage repair I have had exponentially more successes than I have failures with them. Then a couple of years ago I stumbled across Rob Wendland's YouTube channel. Rob Wendland is Terry McMillen's crew chief and has extensive knowledge in racing and has some cool videos of various projects that come through his shop. One of his videos in particular caught my attention a couple/few years ago and that was specific to Helicoils vs. Timeserts. I can't remember but it was titled something like Helicoil for the win or something to that affect. Anyway in the video he did side by side comparisons using a new insert for each test and creeping up in torque value until the inserts would fail. The Helicoil held much longer than the Timeserts. If memory serves the Timeserts were failing around the 60 ft/lbs. with 3/8"-16 fasteners whereas the Helicoil blew past that. He then started using the same Helicoil insert for multiple tests and kept going up past 90 ft/lbs. What drove this test was he was having some failures and set out to do some side by side testing using controlled parameters and even made some alterations near the end of his testing to the process used to install the Timeserts.
In all of his early tests the Helicoils held up substantially better than the Timeserts. The Timeserts were failing much sooner than the Helicoils when installing in exact materials and under the same circumstances. Near the end of his testing he was pushing the 3/8-16 inserts well beyong their normal operating range of around 38-42 ft/lbs. He was pushing them to over 100 ft/lbs. and the Helicoils were holding, he actually had a bolt yield at just over 100 ft/lbs. yet the Helicoil insert was still holding fine after about 10 uses and the Timesert failed around 80 ft/lbs. (if memory serves).
Then the last test he did he decided to drop the drill bit size required by the Timesert by approx. .020". He stated the undersize drill bit did create a bit more drag on the lip cutting tool for the Timesert insert and the tap but after forcing his way through the increased friction of the installation and then going through the thread forming procedure with the last tool that the Timesert finally surpassed the Helicoil and failed around 123 ft/lbs where the standard Helicoil actually failed around 105 ft/lbs.
So after all that work and modifying the installation process the Timesert finally surpassed the Helicoil but at nearly 3 times the torque that you would normally tighten a 3/8" fastener to and in which one would be stepping to a larger size fastener when it came to those torque values.
Sorry for the long answer to what quite possibly was a quick question, but I've put a lot of thought into these thread repair inserts over the years and although not as extensive testing and proving as Rob did, I came to the conclusion that the Helicoil in most applications will provide more than adequate holding strength. That being said, I have seen failures due to sloppy installations so for that the failure really can't be blamed on the insert. Most of the Helicoil failures I have seen were from previous repairs where I feel the installer either did not sink that first coil of the Helicoil below the surface far enough or break the tang off in the bottom of the hole. I like to go at least a full thread and two if possible below the surface to ensure the fastener won't grab that first coil and pull it up out of the hole and to be sure to break the tang off so it doesn't try to drive the insert down further into the hole or "stretch out" the Helicoil insert in the threaded bore.
Short answer, I generally use Helicoil inserts these days as I feel they provide much more strength than the original material.
I figured you had your reasons and I knew you wouldn't be using them if they were that bad. I also always wondered if it was user error that lead to all the failures I had read about. Glad to hear from a trusted source that they are good. I've had to put jobs on hold to order a timesert kit before because the only thing napa has is helicoil kits. And from reading bad things about them I didn't want to take a chance. Usually when needing an insert we already have the OH **** drawer open and don't want to take chances on a repair that may or may not work.
Looks like I should put a helicoil kit or two on my list of needs. I had just been buying timesert kits as needed because they are so much more expensive but since helicoils are cheaper they would be nice to have around so when I need them I won't need to order a kit and wait.
OP
zmotorsports
ALLIANCE MEMBER
Appreciate the detailed reply Mike!
I figured you had your reasons and I knew you wouldn't be using them if they were that bad. I also always wondered if it was user error that lead to all the failures I had read about. Glad to hear from a trusted source that they are good. I've had to put jobs on hold to order a timesert kit before because the only thing napa has is helicoil kits. And from reading bad things about them I didn't want to take a chance. Usually when needing an insert we already have the OH **** drawer open and don't want to take chances on a repair that may or may not work.
Looks like I should put a helicoil kit or two on my list of needs. I had just been buying timesert kits as needed because they are so much more expensive but since helicoils are cheaper they would be nice to have around so when I need them I won't need to order a kit and wait.
While cost is a big factor, I just don't think the Timeserts are 2-3 times as good as Helicoil compared to 2-3 times the cost. In fact, I don't necessarily think they are better based on my experience. I'm not saying the Timeserts or Keenserts are bad at at all so please don't think I'm knocking them, I just don't think they do the intended job of thread repair any better than the Helicoils do.
And after watching Rob's videos and how detailed he went about the testing and proving process I am even more convinced that any of them will do the job and that the solid inserts are not any better than the Helicoils. It could be something as simple as one buys the more expensive product, it works and therefore feels it must be better because that is what they chose. If I'm being honest, I'd have to admit there are times I feel I may fall into that trap as well.
Graham08
Well-known member
I favor Keenserts, but it's only because they install with standard taps and a driver for the tangs. Nothing wrong with a properly installed Helicoil. Nice work on the repair!
Was the drill for this a standard size, or did you have to come up with an oddball 1/4"-28 threaded drill to run in your aircraft right angle drill?
Was the drill for this a standard size, or did you have to come up with an oddball 1/4"-28 threaded drill to run in your aircraft right angle drill?
OP
zmotorsports
ALLIANCE MEMBER
I favor Keenserts, but it's only because they install with standard taps and a driver for the tangs. Nothing wrong with a properly installed Helicoil. Nice work on the repair!
Was the drill for this a standard size, or did you have to come up with an oddball 1/4"-28 threaded drill to run in your aircraft right angle drill?
Thanks Graham. Yes, the 6mm x 1.0 Helicoil required a standard 1/4" drill bit which I had for my aircraft drill.
Scuderia-F1
Well-known member
Great post with lots of valid points, plus a new YouTube channel for me to investigate.Scott/Anders, I very much appreciate you guys following along and asking questions as this exchange turns into more of a discussion vs. me just posting pictures of work. That way I feel we all learn, me especially.
I can't remember who asked a similar question a couple of years ago, I think it was graham08 but not sure.
Anyways, I have used a variety of Helicoils, Keenserts and Timeserts in my 35+ years of wrenching now. I have had great success and some failures with all three as well. At work back in the 90's we had a vendor come in and demonstrate Keenserts and my boss at the time was sold on them and ordered a full set with all of the required tools and a metric ****-ton of inserts in a variety of sizes. That was pretty much all I used at work for quite a few years but then started using Helicoils at my home shop, mainly because they were less expensive as it was hard to charge a client for a one-off repair for a $100+ Timesert kit vs. a $40 Helicoil kit. However, after using the Helicoils for a while and having a high success rate, I ended up ordering several of the larger Helicoil master sets that included taps, insert tools and inserts for a range of fasteners and have just purchased additional inserts as needed over the years of use. Even to this day I have had very few Helicoil failures and those that did fail were after heavily repeated uses. I have actually had more Keensert failures than Helicoil failures to be honest.
For several years I looked at it as Helicoils were my first stage repair and the solid insert (Keensert or Timesert) were what I went to as a second stage repair. What I mean by that is the Helicoil was at least as strong as the OEM fasteners and the parent material so I looked at it that if the parent material did what it was designed/engineered to do for a while then the Helicoil would do a better job. I also liked that the Helicoil removed less of the parent material and as you know on many of the motorcylce cases, there is not much material left around even a factory drilled and tapped hole, so I didn't want to go any larger than absolutely necessary. In some of those applications there would be no way to remove enough material for a solid insert to be used without rendering the case useless. Also, I would look at some applications whereas the hole was so damaged and so enlarged that I didn't feel a Helicoil would have enough parent material to grab so I would use a Timesert or Keensert as the only possible repair.
When I was building 2-stroke race engines I used a lot of Helicoils. At some times in some applications where I knew they were prone to failing I would drill and install a Helicoil as a preventive measure knowing that even though the threads were fine while it was in my shop, the threads would fail rather soon when pushing more cylinder pressure when trying to double the horsepower output, so it was a preventive measure.
During all this was when I got into building VW engines where I started purchasing hi-po VW cases from Pauter Machine that had the machine work already done. They bragged in their literature and even on the phone that they installed Timeserts in the common failure points around the cases for better clamping force. I figured hell, if a well known machine shop was using them they must be better than Helicoils so I purchased a couple of the more common sizes to have on hand in the shop. For the applications I used them in they worked fairly well but I avoided their use in situations where I felt the parent material would be weakened too much by the size of the solid insert. I did like the Timesert a bit more than the Keensert to be honest. My thinking was, and I am not sure how accurate this is as I'm just a mechanic and not an engineer, that the Timersert would be stronger than the Keensert solely due to the threaded engagement being a stronger mechanical bond and more surface area vs. the staked sides of the Keensert. The failures I had from the Keenserts were mostly due to the stakes failing and allowing the insert to bang around and damage the threads and then fail whereas I felt the Timesert maintained a more constant and solid bond with the parent material. Not very scientific however, just an observation from various failures. Also keep in mind these were on things like gearboxes, electric motor mounts, hydraulic ram mounting and other industrial pieces of equipment that see much more adverse conditions than anything automotive would encounter.
So after many years of Helicoils being my first stage repair I have had exponentially more successes than I have failures with them. Then a couple of years ago I stumbled across Rob Wendland's YouTube channel. Rob Wendland is Terry McMillen's crew chief and has extensive knowledge in racing and has some cool videos of various projects that come through his shop. One of his videos in particular caught my attention a couple/few years ago and that was specific to Helicoils vs. Timeserts. I can't remember but it was titled something like Helicoil for the win or something to that affect. Anyway in the video he did side by side comparisons using a new insert for each test and creeping up in torque value until the inserts would fail. The Helicoil held much longer than the Timeserts. If memory serves the Timeserts were failing around the 60 ft/lbs. with 3/8"-16 fasteners whereas the Helicoil blew past that. He then started using the same Helicoil insert for multiple tests and kept going up past 90 ft/lbs. What drove this test was he was having some failures and set out to do some side by side testing using controlled parameters and even made some alterations near the end of his testing to the process used to install the Timeserts.
In all of his early tests the Helicoils held up substantially better than the Timeserts. The Timeserts were failing much sooner than the Helicoils when installing in exact materials and under the same circumstances. Near the end of his testing he was pushing the 3/8-16 inserts well beyong their normal operating range of around 38-42 ft/lbs. He was pushing them to over 100 ft/lbs. and the Helicoils were holding, he actually had a bolt yield at just over 100 ft/lbs. yet the Helicoil insert was still holding fine after about 10 uses and the Timesert failed around 80 ft/lbs. (if memory serves).
Then the last test he did he decided to drop the drill bit size required by the Timesert by approx. .020". He stated the undersize drill bit did create a bit more drag on the lip cutting tool for the Timesert insert and the tap but after forcing his way through the increased friction of the installation and then going through the thread forming procedure with the last tool that the Timesert finally surpassed the Helicoil and failed around 123 ft/lbs where the standard Helicoil actually failed around 105 ft/lbs.
So after all that work and modifying the installation process the Timesert finally surpassed the Helicoil but at nearly 3 times the torque that you would normally tighten a 3/8" fastener to and in which one would be stepping to a larger size fastener when it came to those torque values.
Sorry for the long answer to what quite possibly was a quick question, but I've put a lot of thought into these thread repair inserts over the years and although not as extensive testing and proving as Rob did, I came to the conclusion that the Helicoil in most applications will provide more than adequate holding strength. That being said, I have seen failures due to sloppy installations so for that the failure really can't be blamed on the insert. Most of the Helicoil failures I have seen were from previous repairs where I feel the installer either did not sink that first coil of the Helicoil below the surface far enough or break the tang off in the bottom of the hole. I like to go at least a full thread and two if possible below the surface to ensure the fastener won't grab that first coil and pull it up out of the hole and to be sure to break the tang off so it doesn't try to drive the insert down further into the hole or "stretch out" the Helicoil insert in the threaded bore.
Short answer, I generally use Helicoil inserts these days as I feel they provide much more strength than the original material.

OP
zmotorsports
ALLIANCE MEMBER
great job as usual , how u like that air filter box design ? lol
Is that not a complete clusterf**k of a design???? Getting that cartridge in/out is an exercise in futility.
OP
zmotorsports
ALLIANCE MEMBER
Great post with lots of valid points, plus a new YouTube channel for me to investigate.
Thanks Anders. Again, not saying I'm right or wrong, but more the conversation around it is beneficial. I was impressed with Rob's testing and how methodical he went about it so when I stumbled across it a few years back I was very much intrigued.
I would like to know your thoughts after viewing please.
Scuderia-F1
Well-known member
I get that wasn’t your intention Mike. But I sure value your opinion(s) very highly. I have only had great experiences with HeliCoil myself, I’m also very happy with TimeSert. Thanks to your referral to the crewchief on YouTube I now also know how to improve the TimeSert usage.Thanks Anders. Again, not saying I'm right or wrong, but more the conversation around it is beneficial. I was impressed with Rob's testing and how methodical he went about it so when I stumbled across it a few years back I was very much intrigued.
I would like to know your thoughts after viewing please.
A rather great channel by the way, just like yours. By the way I was apparently already subscribed to Rob’s channel. I’m kind of a hoarder when it comes to high quality shop related YouTube channels, literature and whatever. I see it as essential as high quality tools.

I’ll never know enough and I’ll never stop to try learning and improving. The longer I live the more I learn how little I really know. That’s why I’m so passionate about my work, the constant strive for improvement no matter how small it is.
Last edited:
OP
zmotorsports
ALLIANCE MEMBER
I get that wasn’t your intention Mike. But I sure value your opinion(s) very highly. I have only had great experiences with HeliCoil myself, I’m also very happy with TimeSert. Thanks to your referral to the crewchief on YouTube I now also know how to improve the TimeSert usage.
A rather great channel by the way, just like yours. By the way I was apparently already subscribed to Rob’s channel. I’m kind of a hoarder when it comes to high quality shop related YouTube channels, literature and whatever. I see it as essential as high quality tools.
I’ll never know enough and I’ll never stop to try learning and improving. The longer I live the more I learn how little I really know. That’s why I’m so passionate about my work, the constant strive for improvement no matter how small it is.
Looks like we both are similar in our thinking Anders. The older I get and the little more I learn the more I realize there is so much more I don't know and thirst for that knowledge.
Thank you for continuing to follow along both here and my YouTube channel. I greatly appreciate it.
OP
zmotorsports
ALLIANCE MEMBER
I hope everyone had a safe and happy 4th of July holiday weekend.
The wife and I took a couple of days off to relax and were able to stretch it into a four-day weekend after a hectic past few weeks.
After the owner picked up his 6.0 Powerstroke on Friday evening I commenced my Friday night lawn mowing duties of edging, trimming and mowing.
Saturday morning the wife had some errands to do so I went out to the shop to try and get a side job completed as well as a couple of smaller personal tasks completed that have been on my to do list for a while.
I started off with a small welding side job of machining and welding a bung in a Jeep oil pan for a temperature sending unit.
The location was selected when the owner dropped it off a few nights ago. He also left the sending unit with me.
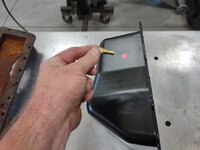
The .625" hold was drilled and area sanded with 80-grit on a DA sander.

A piece of .750" O1 drill rod was selected and a small step machined to .625".

Ready to test fit.

That should work.
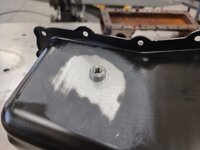
Bung TIG welded in place.


After cooling a little E-coat was sprayed on to match the rest of the oil pan.

Next I moved over to the Camaro for a small task. These Fifth Gen Camaro's didn't come with a spare tire, they rather were provided a foamed center piece that resides over the battery that houses a can of Fix-A-Flat and a small air compressor. This doesn't give me the warm & fuzzies while traveling so I had ordered a spare tire kit from Modern Spare. In addition, GM did offer at one time an optional spare tire accessory kit that came with a different mounting stud and a plastic cover that fully covered the OEM battery. Unfortunately this kit is discontinued and no longer available through GM. I have been watching closely through eBay and a couple other sources to find one and a couple of weeks ago I saw one pop up on eBay from a wrecking yard in PA. I contacted them to ensure it was not damaged or broken and after giving assurance I purchased it. It arrived a couple of weeks ago but I didn't have time to remove the spare tire from the car and install the cover, plus I wanted to wrap both the jack and the handle assemblies from Modern Spare to ensure they don't rattle in the tire well.
The plastic battery cover was quite dirty so it got a full treatment of cleaning with Zep Powerhouse and a some 303 Protectant before being installed. Other than a few minor scratches it was in perfect condition.

Cover in place, towels wrapped around jack and handle, spare tire reinstalled and ready to put the cover on, then carpet and rubber trunk mat.

I can travel with comfort now knowing I at least have a spare tire in the event of a flat tire.
The wife and I took a couple of days off to relax and were able to stretch it into a four-day weekend after a hectic past few weeks.
After the owner picked up his 6.0 Powerstroke on Friday evening I commenced my Friday night lawn mowing duties of edging, trimming and mowing.
Saturday morning the wife had some errands to do so I went out to the shop to try and get a side job completed as well as a couple of smaller personal tasks completed that have been on my to do list for a while.
I started off with a small welding side job of machining and welding a bung in a Jeep oil pan for a temperature sending unit.
The location was selected when the owner dropped it off a few nights ago. He also left the sending unit with me.
The .625" hold was drilled and area sanded with 80-grit on a DA sander.
A piece of .750" O1 drill rod was selected and a small step machined to .625".
Ready to test fit.
That should work.
Bung TIG welded in place.
After cooling a little E-coat was sprayed on to match the rest of the oil pan.
Next I moved over to the Camaro for a small task. These Fifth Gen Camaro's didn't come with a spare tire, they rather were provided a foamed center piece that resides over the battery that houses a can of Fix-A-Flat and a small air compressor. This doesn't give me the warm & fuzzies while traveling so I had ordered a spare tire kit from Modern Spare. In addition, GM did offer at one time an optional spare tire accessory kit that came with a different mounting stud and a plastic cover that fully covered the OEM battery. Unfortunately this kit is discontinued and no longer available through GM. I have been watching closely through eBay and a couple other sources to find one and a couple of weeks ago I saw one pop up on eBay from a wrecking yard in PA. I contacted them to ensure it was not damaged or broken and after giving assurance I purchased it. It arrived a couple of weeks ago but I didn't have time to remove the spare tire from the car and install the cover, plus I wanted to wrap both the jack and the handle assemblies from Modern Spare to ensure they don't rattle in the tire well.
The plastic battery cover was quite dirty so it got a full treatment of cleaning with Zep Powerhouse and a some 303 Protectant before being installed. Other than a few minor scratches it was in perfect condition.
Cover in place, towels wrapped around jack and handle, spare tire reinstalled and ready to put the cover on, then carpet and rubber trunk mat.
I can travel with comfort now knowing I at least have a spare tire in the event of a flat tire.
OP
zmotorsports
ALLIANCE MEMBER
After finishing up the spare tire and battery cover in the Camaro I moved to get the hooks off my workbench that I purchased back in January to build a replacement coat hanger for the attached garage, just outside on the landing of the back door of the house. The original owner just screwed some hooks into the wall and missed studs for starters, plus the hooks were cheap and several of them had broken so this prompted me to purchase some hooks this past winter to fabricate a better coat rack.
I am working with a guy to possibly finish my attached garage in the next several months so I figured I would organize a few items prior to finishing the garage out.
Hooks that I purchased from the local hardware store about six months ago and a piece of 1/8" x 2" strap that I had lying around.

After determining spacing along with stud spacing I clamped it in the mill vise and went to town drilling holes.

The hooks had a small dimple on the backside just below the hole by about .395" so I followed along and drilled some dimpled holes to utilize them for keeping the hooks properly orientated. Probably not required but I figured the dimples were there so why not....
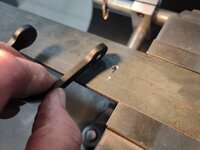
Tapping the four holes to 10-32 threads.

I sprayed the flat strap with Rustoleum's Hammered gray paint that I have used around much of the shop and house garage accessories.


After paint dried, I mounted the hooks and knocked off the protruding screw threads from the backside before mounting on the wall on the back landing.
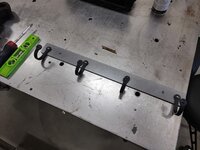
Another quick little project completed and off the to do list.
I am working with a guy to possibly finish my attached garage in the next several months so I figured I would organize a few items prior to finishing the garage out.
Hooks that I purchased from the local hardware store about six months ago and a piece of 1/8" x 2" strap that I had lying around.
After determining spacing along with stud spacing I clamped it in the mill vise and went to town drilling holes.
The hooks had a small dimple on the backside just below the hole by about .395" so I followed along and drilled some dimpled holes to utilize them for keeping the hooks properly orientated. Probably not required but I figured the dimples were there so why not....
Tapping the four holes to 10-32 threads.
I sprayed the flat strap with Rustoleum's Hammered gray paint that I have used around much of the shop and house garage accessories.
After paint dried, I mounted the hooks and knocked off the protruding screw threads from the backside before mounting on the wall on the back landing.
Another quick little project completed and off the to do list.
OP
zmotorsports
ALLIANCE MEMBER
I had washed the wife's Acura TL earlier Saturday morning so it was clean when she ran her errands as it had gotten rained on earlier in the week so I then set out to wash the bugs off the Camaro from the previous weekend's drive and rain drops. I generally don't like leaving bugs on the paint that long but had a busy week and the car ended up getting pushed off.
Camaro backed out of the shop and washing commenced.

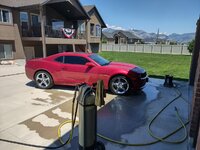
I never tire of the color of this car, how it pops in the sun.


After pulling it back into the shop and before closing up the shop for the evening I popped the hood and gave it a good wipe down as well.

Later that evening we threw some meatage on the grill and had nice dinner. Steak and chicken seasoned and ready to throw on a hot grille.

Just as we were grilling the skies darkened and the air changed, you could smell the rain coming.

Mmmmmm.

We no sooner finished eating dinner, I covered the grill back up and the skies opened up for about a half hour or so. Not a big storm and we could have done without the wind but the rain was welcomed.

We sat out on the deck and enjoyed the summer rainstorm as it rolled through.
Camaro backed out of the shop and washing commenced.
I never tire of the color of this car, how it pops in the sun.
After pulling it back into the shop and before closing up the shop for the evening I popped the hood and gave it a good wipe down as well.
Later that evening we threw some meatage on the grill and had nice dinner. Steak and chicken seasoned and ready to throw on a hot grille.
Just as we were grilling the skies darkened and the air changed, you could smell the rain coming.
Mmmmmm.
We no sooner finished eating dinner, I covered the grill back up and the skies opened up for about a half hour or so. Not a big storm and we could have done without the wind but the rain was welcomed.
We sat out on the deck and enjoyed the summer rainstorm as it rolled through.
OP
zmotorsports
ALLIANCE MEMBER
The next morning I wanted to clean the attached garage as it was next on my to do list so I moved the Jeep, the wife's Acura and the Duramax out of the attached garage and while I was moving vehicles I thought I'd stage a picture of our fleet in the back yard. I opened the RV bay door and pulled the Camaro out of the shop to join in on the pictures.

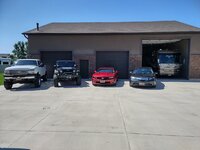


Thanks for looking.
Thanks for looking.
OutlawDrifter
Well-known member
Always fun to take a "fleet" pic!
Looking good Mike!
Looking good Mike!