
You are using an out of date browser. It may not display this or other websites correctly.
You should upgrade or use an alternative browser.
You should upgrade or use an alternative browser.
ZMotorsports Shop Projects 2.0
- Thread starter zmotorsports
- Start date
OP
zmotorsports
ALLIANCE MEMBER
Wagon looks amazing, really like the trick of machining the knurls off the socket heads, very cool!
Thank you. I started machining the knurls off of socket head capscrews about 25 years or so ago and love the look of them. These particular ones were easy because they were stainless steel and just machining and hitting with a little polish netted great results. On the sandrails, sleds and quads I would start with standard socket head capscrews, knock the knurls off then send out for chrome plating with the other parts and they really popped against painted surfaces to net that last little detail.
I'm filing that idea away in my head for possible future use. Thanks!Thanks guys. I tried to think ahead and make one bend and duplicate the radius and this was the best I could think of to save time.
larry4406
Well-known member
Excellent Mike!
Now get a metal “Vin Tag” made by @mattblast with your grandsons name, date, and built by you!
Now get a metal “Vin Tag” made by @mattblast with your grandsons name, date, and built by you!
OP
zmotorsports
ALLIANCE MEMBER
Excellent Mike!
Now get a metal “Vin Tag” made by @mattblast with your grandsons name, date, and built by you!
I didn't realize that was a thing. I just checked out some of his tags after a quick search. Very impressive. I will have to reach out to him and see if he'd be willing to make one for me.
Thank you.
4 FN 27
ALLIANCE MEMBER
Mike when I see a nice looking ride I always say "I'd be seen driving that." In this case "I would be seen being pulled in that."
I am 6 foot 0 inches and 165 lb...can I have a ride?
I am 6 foot 0 inches and 165 lb...can I have a ride?
Bob Heine
ALLIANCE MEMBER
Mike, I usually wait until a project is finished before I make suggestions. This time, I'd like to chime in on the trailer design. Because you have experience with heavy duty air suspension, why not build an airbag car trailer. Being able to drop the frame on the ground eliminates the whole ramp storage issue, makes loading lowered or wrecked vehicles simpler and with your skills you could improve on the best designs out there. As a side benefit, you could tow the Camaro behind the motorhome if you are headed to places that don't involve off-road travel. Fabplans (https://fabplans.com) sells their plans for $65, providing the overall design to get you started that you could modify.
EDIT: I just tested that link and it appears I overpowered the Fabplans site. Or it really is under construction.


EDIT: I just tested that link and it appears I overpowered the Fabplans site. Or it really is under construction.
bigdave_185
Well-known member
I hate to say it, the metal work and tig welds look killer. And I love the look of raw. That black frame sure does PoP!
Speaking of wall mounts for keep sakes, Iv been toying the idea of a 2x2 square tube wall hook set to hang the banshee Up on a wall. Lol can’t blow it up if it’s hung up
Speaking of wall mounts for keep sakes, Iv been toying the idea of a 2x2 square tube wall hook set to hang the banshee Up on a wall. Lol
can’t blow it up if it’s hung upbugnut
ALLIANCE MEMBER
Mike, the wagon is looking great!
Boosted1
Well-known member
The wagon is pure art. Also interesting that you have the patience to stop mid assembly and not rush to completion. I think many would want to see it done and rush a little if needed. The fact you didn't is just another indicator as to why your work always turns out so nice.
welder4956
Well-known member
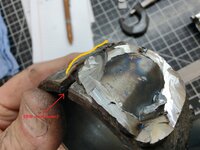
Love reading about your projects and happenings. Great thread!Still not quite sure why this one failed at the HAZ after 9-years of use. I really wish I could point to the reason and make absolutely sure it doesn't happen again.
I'm sure you know that DOM tube is not seamless and has an electric resistance weld seam down the length. The weld is not apparent after cold drawing the tube, so it is possible that the weld seam in the bushing housing was lined up with the weld to the control arm and the crack initiated due to a poor weld in the DOM tube and the stresses in the control arm. I think your machined 1045 bushing housing plus reinforcing strap is a great fix and should prevent this from happening again.
Last edited:
jbmatth
Well-known member
That is information I didn't know, I'd always assumed (I know bit mistake) that DOM was actually seamless, definitely good to know.
JB
JB
You’re not the only one, so did I.That is information I didn't know, I'd always assumed (I know bit mistake) that DOM was actually seamless, definitely good to know.
JB
WoodsTruck
Well-known member
- Joined
- Jan 12, 2013
- Messages
- 1,028
Is there any good way to identify where this seam is located before putting the welder to it?
jbmatth
Well-known member
Just an idea, I've never tried it on DOM, but metal grinding dust and a magnet may help find it. This is called magnetic particle testing, it is used in the inspection world for finding cracks but can detect subsurface as well, unsure if it would work but may be worth a try.Is there any good way to identify where this seam is located before putting the welder to it?
JB
welder4956
Well-known member
The only reliable way that I know is to polish the end, acid etch with nital, then look for the change in grain size. You could see a line on the inside visually, but hard to tell if the line is a weld or scoring from the drawing process. Magnetic particle testing won't show anything unless there is a defect. Eddy current testing would find the seam, but who has eddy current equipment in their garage?Is there any good way to identify where this seam is located before putting the welder to it?
WoodsTruck
Well-known member
- Joined
- Jan 12, 2013
- Messages
- 1,028
Thanks. I just thought if a fab guy had a stick of DOM and could identify and pre-mark the length of tube before fabbing things up this potential issue could be minimized. Although, this is the first documented failure that I'm aware of.The only reliable way that I know is to polish the end, acid etch with nital, then look for the change in grain size. You could see a line on the inside visually, but hard to tell if the line is a weld or scoring from the drawing process. Magnetic particle testing won't show anything unless there is a defect. Eddy current testing would find the seam, but who has eddy current equipment in their garage?
welder4956
Well-known member
Before I retired we examined quite a few ERW boiler tubes that failed due to incomplete weld fusion defects in the weld seam. Mostly an issue in furnace waterwalls and economizer sections. It got so bad that we banned the use of seam welded tubing in our boilers.Thanks. I just thought if a fab guy had a stick of DOM and could identify and pre-mark the length of tube before fabbing things up this potential issue could be minimized. Although, this is the first documented failure that I'm aware of.
jbmatth
Well-known member
Very good point on mag particle only showing defects and likely there won't be any big enough to really tell since it is ERW.The only reliable way that I know is to polish the end, acid etch with nital, then look for the change in grain size. You could see a line on the inside visually, but hard to tell if the line is a weld or scoring from the drawing process. Magnetic particle testing won't show anything unless there is a defect. Eddy current testing would find the seam, but who has eddy current equipment in their garage?
JB
LeonardY
Well-known member
All I can say is "WOW"
Monza Harry
Well-known member
I was sure that [at least some (but really I thought all)] DOM was seamless. So you peaked my curiosity and I looked on everybody's favorite argument starter/ended Google, and found this: https://liwantube.com/drawn-over-mandrel-tube/.
I forgot to take a pic of a piece I have at work ~about 7.5" OD with a 3" hole. I can't see a 2" +/- wall being bent that tight on to this điameter tube. Edit later for pic. Harry
I forgot to take a pic of a piece I have at work ~about 7.5" OD with a 3" hole. I can't see a 2" +/- wall being bent that tight on to this điameter tube. Edit later for pic. Harry
welder4956
Well-known member
If it is hydraulic tube or used for internal pressure service, it probably is cold drawn seamless (CDS). DOM tube is typically seam welded and for structural applications, not intended for pressure retaining service.I was sure that [at least some (but really I thought all)] DOM was seamless. So you peaked my curiosity and I looked on everybody's favorite argument starter/ended Google, and found this: https://liwantube.com/drawn-over-mandrel-tube/.
I forgot to take a pic of a piece I have at work ~about 7.5" OD with a 3" hole. I can't see a 2" +/- wall being bent that tight on to this điameter tube. Edit later for pic. Harry
Last edited:
Monza Harry
Well-known member
I was just saying that I too as the other that confessed to thinking that "DOM" meant seamless, I knew (now thought I knew that sometimes) that DOM was (now appearantly only sometimes) always, seamless but wasn't aware that that didn't mean "all" was seamless . Sorry for the awkward sentence structure, I may try editing in some order later. HarryIf it is hydraulic tube or used for internal pressure service, it probably is cold drawn seamless (CDS). DOM tube is typically seam welded and for structural applications, not intended for pressure retaining service.
OP
zmotorsports
ALLIANCE MEMBER
Mike when I see a nice looking ride I always say "I'd be seen driving that." In this case "I would be seen being pulled in that."
I am 6 foot 0 inches and 165 lb...can I have a ride?
Thanks Pat. Funny you mention that. My son and I both use that phrase, "I'd be seen driving that" if we see something we like.
We also have a thing about texting each other pictures of food quite often. Not sure why, it's just something fun that we do with each other. I text him some pictures of some food the wife and I had last week on vacation and he replied, "I'd eat the hell out of that". I had to laugh to myself.
Mike, I usually wait until a project is finished before I make suggestions. This time, I'd like to chime in on the trailer design. Because you have experience with heavy duty air suspension, why not build an airbag car trailer. Being able to drop the frame on the ground eliminates the whole ramp storage issue, makes loading lowered or wrecked vehicles simpler and with your skills you could improve on the best designs out there. As a side benefit, you could tow the Camaro behind the motorhome if you are headed to places that don't involve off-road travel. Fabplans (https://fabplans.com) sells their plans for $65, providing the overall design to get you started that you could modify.
EDIT: I just tested that link and it appears I overpowered the Fabplans site. Or it really is under construction.
Thanks Bob. I looked very heavily at that design as I had seen one in person several years ago. While intriguing and definitely have the "cool" factor, I think it's a bit much for my needs at the time. I would like to keep the trailer build simple and most importantly, inexpensive. Well, as inexpensive as I can anyways.

OP
zmotorsports
ALLIANCE MEMBER
I hate to say it, the metal work and tig welds look killer. And I love the look of raw. That black frame sure does PoP!
Speaking of wall mounts for keep sakes, Iv been toying the idea of a 2x2 square tube wall hook set to hang the banshee Up on a wall. Lol
Mike, the wagon is looking great!
The wagon is pure art. Also interesting that you have the patience to stop mid assembly and not rush to completion. I think many would want to see it done and rush a little if needed. The fact you didn't is just another indicator as to why your work always turns out so nice.
Thanks guys, much appreciated.
OP
zmotorsports
ALLIANCE MEMBER
Love reading about your projects and happenings. Great thread!
I'm sure you know that DOM tube is not seamless and has an electric resistance weld seam down the length. The weld is not apparent after cold drawing the tube, so it is possible that the weld seam in the bushing housing was lined up with the weld to the control arm and the crack initiated due to a poor weld in the DOM tube and the stresses in the control arm. I think your machined 1045 bushing housing plus reinforcing strap is a great fix and should prevent this from happening again.
You bring up a good and valid point. Yes, I knew all DOM tubing starts out as EWS (Electric Welded Seam) steel tubing and then drawn over the mandrel (DOM) for final sizing and molecular strength. However, I didn't think for a moment that the weld seam could still be the weak area. That's the whole point of using DOM vs. standard EWS tubing. Even square tubing starts out as EWS round tubing then pulled through a form squaring off the corners and turning it into square tubing but the seam is still very evident.
When I was building sandrails I used DOM tubing when the client didn't want to spend the extra money on 4130 chromoly and used it solely because of its added strength and durability over standard EWS tubing. I never for a moment though that it could still have a failure point IF the welded seam had a defect in it. That brings up a good point as I don't think anyone thinks to go through the time and effort to locate the seam in DOM tubing and orientate it in such a manner as that's the whole reason we spend a few dollars more using DOM tubing.
Thank you for bringing that up as it gives me something to ponder.
As a side note, we spent last week off-roading and the first day I went through great lengths to get the Jeep suspension all crossed up and crawled around under it looking for any binding or interference issues and saw none.
Granted with the suspension all crossed up and at full stuff on one side and full strapped extension on the other, then the exact opposite at the other axle, it is evident that even without any interferences or binding that there are still some severe forces at work and easy to see why OEM brackets and tabs get ripped off quite frequently.
I know I don't like using "hope" as a plan but after spending so much time crawling around under the Jeep last week on various obstacles and seeing (and feeling) how fluidly it moves through various obstacles I think I can chalk this failure up to a fluke and "hope" that it doesn't happen again.
OP
zmotorsports
ALLIANCE MEMBER
The next several posts will be picture heavy from last week's trip.
The wife and I spent most of last week in the San Rafael Swell in central Utah doing some Jeeping and exploring some areas that we haven't explored in the past. The more we explore in the Swell, the more I realize we haven't even scratched the surface of the miles of trails in that area.
Jeep hooked up to the coach and ready to hit the road.

We arrived mid-afternoon and immediately unhooked the Jeep and took off exploring. I had read about the Utah Launch Complex weeks before and the wife and I set out to find it. The Utah Launch Complex was a missile testing site in central Utah that was built in 1961 and went fully active in 1962 and remained active until mid 70's (1973 or 1975 I find both dates of when it was officially shut down). Then in 1986 it was dismantled and what you see in the next few pictures are how it remainds today. It is fully fenced off however, the gates were open so we went inside the area to explore.
The buildings are in complete ruin but it was interesting to envision what they were like in the mid 60's when they were fully operational.

This was an interesting structure. The building itself was on rails and appears it could move back and forth along the tracks and concrete slab. My thinking was that they build the rockets/missiles inside this structure which had a huge overhead trolly style of crane and then was able to move towards the concrete pad at the end of the track which was the launch pad.

Here is the door at the other end of the structure along with the rails visible in the concrete.

At the far right of the picture you can see the concrete pad above ground. This was actually the launch pad and had steel structures bolt together that held the missile for launch.

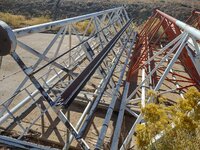
These are the metal structures in which I envisioned bolting together to create the missile holding apparatus for launching.
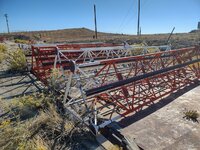
The "rack" seen in the picture appears to guide something along the rails parallel to it.
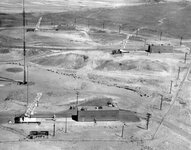
Here are several pictures I found of what it looked like when fully operations from the mid 1960's.
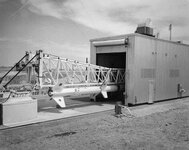
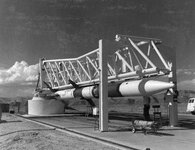
More pictures to follow.
The wife and I spent most of last week in the San Rafael Swell in central Utah doing some Jeeping and exploring some areas that we haven't explored in the past. The more we explore in the Swell, the more I realize we haven't even scratched the surface of the miles of trails in that area.
Jeep hooked up to the coach and ready to hit the road.
We arrived mid-afternoon and immediately unhooked the Jeep and took off exploring. I had read about the Utah Launch Complex weeks before and the wife and I set out to find it. The Utah Launch Complex was a missile testing site in central Utah that was built in 1961 and went fully active in 1962 and remained active until mid 70's (1973 or 1975 I find both dates of when it was officially shut down). Then in 1986 it was dismantled and what you see in the next few pictures are how it remainds today. It is fully fenced off however, the gates were open so we went inside the area to explore.
The buildings are in complete ruin but it was interesting to envision what they were like in the mid 60's when they were fully operational.
This was an interesting structure. The building itself was on rails and appears it could move back and forth along the tracks and concrete slab. My thinking was that they build the rockets/missiles inside this structure which had a huge overhead trolly style of crane and then was able to move towards the concrete pad at the end of the track which was the launch pad.
Here is the door at the other end of the structure along with the rails visible in the concrete.
At the far right of the picture you can see the concrete pad above ground. This was actually the launch pad and had steel structures bolt together that held the missile for launch.
These are the metal structures in which I envisioned bolting together to create the missile holding apparatus for launching.
The "rack" seen in the picture appears to guide something along the rails parallel to it.
Here are several pictures I found of what it looked like when fully operations from the mid 1960's.
More pictures to follow.
OP
zmotorsports
ALLIANCE MEMBER
Upon returning to town, we decided to grab some dinner and the Weinermobile had parked next to us. Evidently, they were hungry as well.


Our campsite for the week.
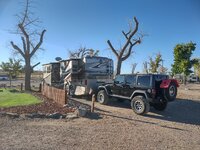
We had absolutely beautiful weather the entire trip.

The next day we ran Copper Globe Canyon and dropped into Devil's Canyon.
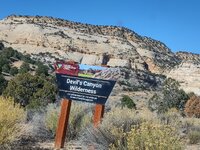
Our lunch spot for the day. Hard to beat these views.

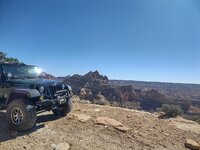
We had the trail completely to ourselves. We did see a flash of something off in the distance a couple of times which I thought was a windshield from another vehicle or something but upon getting over to the other wall of the canyon we found several of these large boulders which appeared to have a lot of glass-like material in them. I think that is what we were seeing reflecting in the distance because we never saw another soul in all 38 off-road miles that day.

Upon climbing up and out of CAT Canyon, we saw another road turn off to the south in which I didn't notice last trip. We decided to take it for a while and see where it led. We found these interesting rocks that looked like volcanic boulders dropped into the desert. We joked that they looked like dinosaur eggs.

As we drove a bit further we found a fairly new bridge crossing the Muddy Creek. We pulled off and I did some playing with my tablet using GAIA and found that the trail we were on actually led down into Cathedral Valley around Torrey, UT and intersected Capitol Reef National Park. I think the wife and I may make this another side trip in a future visit to the area as it was getting late in the day and didn't think we could make it the 20+ miles and back before dark. We definitely have a game plan to explore this trail in more depth during the next trip however.

More pictures to come.
Our campsite for the week.
We had absolutely beautiful weather the entire trip.
The next day we ran Copper Globe Canyon and dropped into Devil's Canyon.
Our lunch spot for the day. Hard to beat these views.
We had the trail completely to ourselves. We did see a flash of something off in the distance a couple of times which I thought was a windshield from another vehicle or something but upon getting over to the other wall of the canyon we found several of these large boulders which appeared to have a lot of glass-like material in them. I think that is what we were seeing reflecting in the distance because we never saw another soul in all 38 off-road miles that day.
Upon climbing up and out of CAT Canyon, we saw another road turn off to the south in which I didn't notice last trip. We decided to take it for a while and see where it led. We found these interesting rocks that looked like volcanic boulders dropped into the desert. We joked that they looked like dinosaur eggs.
As we drove a bit further we found a fairly new bridge crossing the Muddy Creek. We pulled off and I did some playing with my tablet using GAIA and found that the trail we were on actually led down into Cathedral Valley around Torrey, UT and intersected Capitol Reef National Park. I think the wife and I may make this another side trip in a future visit to the area as it was getting late in the day and didn't think we could make it the 20+ miles and back before dark. We definitely have a game plan to explore this trail in more depth during the next trip however.
More pictures to come.
OP
zmotorsports
ALLIANCE MEMBER
The next day we took off into an area we had not explored at all before as I had read about some pictographs on someone's hiking blog a while back. I plugged the GPS coordinates of the pictorgraphs into GAIA and then worked backwards trying to link the closest trails to the pictorgraph's location.
The day started off Highway 6 about 15 miles north of I-70 at the Green River Cutoff trail. This is a direct road across the northern most part of the Swell and takes you to the Wedge, which is known as the "Little Grand Canyon". We have been to the Wedge a couple of times accessing it via a couple different trails but never from this direction. The goal of the day was to find the pictorgraphs, then head to the Wedge for lunch and then leave to the north of the Wedge and take a new to us trail down the east side of the Swell and return to I-70 about 40 miles west of Green River. This would be a long day so we left earlier than usual.
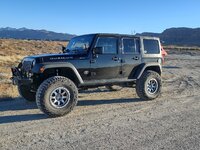
Here we are just pulled off Highway 6 to air down.
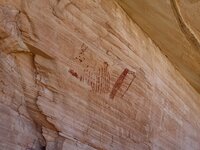
We eventually found the pictographs but it was a long search. Two of the trails in which I had previous marked using GAIA had been closed off using boulders and fencing so we had to locate alternative routes to the pictorgraphs. We ended up accessing them via very, very faint two-tracks that look like they haven't been used in quite some time.
The wife was getting anxious as we were about 25 miles off the main trail and I was basically trying to feel my way around a canyon by any trail we could find. The wife was ready to turn around and head back to the main trail and continue our plans for lunch but I was hell bent on finding the pictographs as it was a mission now.
We did finally locate them but it wasn't an easy route to access. I can see why they were on a hiking blog and not an off-road blog.


We then tried to pick an easier route back to the main trail but kept getting ridge locked and having to turn and backtrack. We eventually picked out way back to the Green River Cutoff trail and blasted down the road to the Wedge. Although we were slightly behind schedule we made good time and had a nice lunch spot. The Wedge Recreation area was actually quite busy as we saw the first other people in a couple of days of being on the trails.
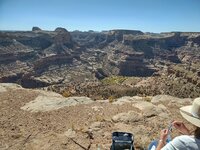
Our lunch spot overlooking the Wedge.
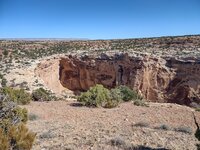
After leaving the Wedge we realized that we didn't have time to go the route I had originally mapped out, so we decided to head back by way of Buckhorn Wash Road. After realizing that Buckhorn Wash was a freakin' highway with all of the traffic and it being so dusty because they hadn't seen any rain in several weeks, I wanted to get off the main trail and find something more "remote" to have to ourselves. After playing with the GAIA app on my tablet I found a trail that somewhat paralleled Buckhorn Wash but on the other side of the ridge down in a wash. As we went through a gated area in the wash we came across this old uranium mine that still had some components remaining.

We returned to town just about dusk and decided on dinner. We try to spread the love between a couple of our favorite places to eat. I was craving a steak and the wife wanted her teriyaki chicken.

This was from the night before's dinner from our other favorite place to eat where I ordered their pork chops. I seem to get these each trip as I have not found pork chops this delicious anywhere else.

More pictures to follow..
The day started off Highway 6 about 15 miles north of I-70 at the Green River Cutoff trail. This is a direct road across the northern most part of the Swell and takes you to the Wedge, which is known as the "Little Grand Canyon". We have been to the Wedge a couple of times accessing it via a couple different trails but never from this direction. The goal of the day was to find the pictorgraphs, then head to the Wedge for lunch and then leave to the north of the Wedge and take a new to us trail down the east side of the Swell and return to I-70 about 40 miles west of Green River. This would be a long day so we left earlier than usual.
Here we are just pulled off Highway 6 to air down.
We eventually found the pictographs but it was a long search. Two of the trails in which I had previous marked using GAIA had been closed off using boulders and fencing so we had to locate alternative routes to the pictorgraphs. We ended up accessing them via very, very faint two-tracks that look like they haven't been used in quite some time.
The wife was getting anxious as we were about 25 miles off the main trail and I was basically trying to feel my way around a canyon by any trail we could find. The wife was ready to turn around and head back to the main trail and continue our plans for lunch but I was hell bent on finding the pictographs as it was a mission now.
We did finally locate them but it wasn't an easy route to access. I can see why they were on a hiking blog and not an off-road blog.
We then tried to pick an easier route back to the main trail but kept getting ridge locked and having to turn and backtrack. We eventually picked out way back to the Green River Cutoff trail and blasted down the road to the Wedge. Although we were slightly behind schedule we made good time and had a nice lunch spot. The Wedge Recreation area was actually quite busy as we saw the first other people in a couple of days of being on the trails.
Our lunch spot overlooking the Wedge.
After leaving the Wedge we realized that we didn't have time to go the route I had originally mapped out, so we decided to head back by way of Buckhorn Wash Road. After realizing that Buckhorn Wash was a freakin' highway with all of the traffic and it being so dusty because they hadn't seen any rain in several weeks, I wanted to get off the main trail and find something more "remote" to have to ourselves. After playing with the GAIA app on my tablet I found a trail that somewhat paralleled Buckhorn Wash but on the other side of the ridge down in a wash. As we went through a gated area in the wash we came across this old uranium mine that still had some components remaining.
We returned to town just about dusk and decided on dinner. We try to spread the love between a couple of our favorite places to eat. I was craving a steak and the wife wanted her teriyaki chicken.
This was from the night before's dinner from our other favorite place to eat where I ordered their pork chops. I seem to get these each trip as I have not found pork chops this delicious anywhere else.
More pictures to follow..
Last edited:
OP
zmotorsports
ALLIANCE MEMBER
By the last day of the trip I had regained the confidence in my Jeep's suspension after finding areas to flex it out and ensure there were no binding or interferences. I HATED that feeling that I couldn't trust my Jeep after the last trip's suspension failure. It took me a bit to get that level of confidence back and begin to trust her again. I think the wife fully understood my trepidation the first few days of the trip but even by now she was feeling good about our chariot again.
The trail we ran on the last day was called Behind the Reef. I got the trail from a friend we met at our Spearfish, SD gathering about 5 years ago who had a Jeep website. He gave me access to his trails and I downloaded this one in the hopes I would be in the area to run it someday. Unfortunately, Steve, the member of our club passed away about 3 years ago. He and his wife were such nice people and although we had only wheeled with them a few times, it felt like we had known them for decades. They had been retired for nearly 20 years and spent their time traveling around documenting various off-road trails in hopes of writing an off-road book.
This is one of his trails. He had it rated as a 3.0 when he last ran it in 2013. However, after running it now I would put it as a solid 3.5 rating now. Erosion and those damn side by sides have dug it out quite a bit and there are only 2 places that make give it the 3.5 rating and other than those two areas it is a solid 2.5. The canyon as we dropped down in off of Temple Mountain Wash was breathtaking.
Here is Temple Mountain Wash heading west toward the turn down into the canyon.
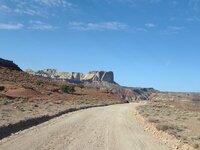
Dropping down into the canyon and along the canyon bottom the road was quite good, just a little rocky in a few areas.

Unfortunately, I didn't take any pictures of the two obstacles giving it the 3.5 rating. The first was just at the bottom of the canyon as you began the climb upwards. The initial obstacle was a deep off-camber ravine that then had a series of boulders to climb. When we first approached it I could tell the wife was anxious which made me a bit anxious. I stopped the Jeep and walked ahead to scout it out. The wife mentioned that if we turned around it would still be worth the drive down into the canyon.
I got back in the Jeep and questioned out loud "why the hell is everyone going so high up on the side hill and then approach the boulders off-camber"? I thought that makes no sense as you're already leaning so much downhill and then trying to climb the rocks tipping even further downhill. Also, the upper area just before the rocks was all dug out from people losing traction and spinning their tires. Damn weekend warriors on their side by sides who think straight ahead and gun it is a good plan.
After sitting in the driver's seat for a moment I realized that if I approached it from the bottom hugging the cliff's edge I could drive straight up it and keep the hood level. This did however, place the Jeep right on the edge with no margin for error but to me seemed like a much more plausible path keeping the Jeep pointing straight up the obstacle as I'm not a fan of off-camber if I can help it.
The obstacle was a non issue and the Jeep crawled straight up it without even slipping a tire. The flex was so fluid and smooth as the axles articulated through he rocks and the hood stayed level the entire time. Upon reaching the top of the boulders I had to make a hard turn to the driver's side but that was a quite easy climb. The mind-screw came from being on the cliff's edge and being alone on the trail which I didn't like either and neither did the wife. I still can't believe I forgot to get a picture of the obstacle as it looked worse that it was.
After making the climb out of the canyon this was our view from the canyon wall.
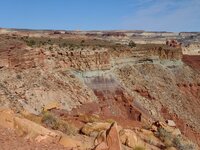
Here is looking back down the trail and into the canyon. You can see the road at the bottom of the trail down in the canyon floor as it was a short and steep climb up out of the canyon. After the initial obstacle it was just large rocks here and there but nothing bad at all. I will admit however, I did fear a little that the obstacle at the bottom of the canyon wouldn't be the worst one and we would find more higher up and the narrow shelf road wouldn't allow us to turn around but that wasn't the case as we easily made the rest of the climb out of the canyon without issue.

There were several of these outcroppings of rocks and one in particular called "the squeeze" that had two large boulders just a Jeep's width from the outcroppings. I had to pull my passenger's mirror in and my hardtop was about 3 inches off the outcropping as my driver's rear tire just kissed the boulder as I worked it around the turn letting the tire climb the rock a bit leaning my hardtop towards the overhead rock, then working the steering wheel a bit to get the rear tire to "slip" down off the rock and level the Jeep out, then inch forward again slightly climbing and repeating the rear tire slipping to level the Jeep. That process took about 3 repeats to get around the squeeze. I don't think much taller or longer of a vehicle would make it around that as the boulder you had to manuever around was almost the size of our Jeep to begin with.
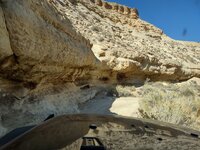
This was another little climb just after the "squeeze". It looked worse that it was also and the Jeep didn't even slip a tire. We had to climb the front end up and then immediately turn hard driver and hug the wall with the right front fender while the rear tires climbed the rocks. Got slighlty off-camber at the hard driver's turn but not bad. The wife didn't even get out for this one so she must have been getting her confidence back in the Jeep as well.

Another view down into the canyon.
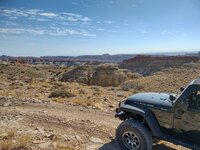
The last climb up towards McKay Flats and then into Red's Canyon. This was a narrow rock garden climb but not bad. The rocks were loose but not big.

Our lunch spot on top looking down into Red's Canyon.
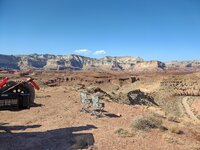
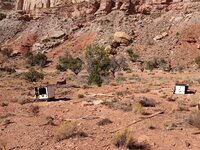
We explored another turn off into a wash that we had not taken before and found another mine back into a slot canyon. We saw the remnants of a structure with some stoves remaining.
That was the last day of the trip. All in all I think we covered about 250-miles of off-road trails in the three days we were in the area.
Thanks for looking.
The trail we ran on the last day was called Behind the Reef. I got the trail from a friend we met at our Spearfish, SD gathering about 5 years ago who had a Jeep website. He gave me access to his trails and I downloaded this one in the hopes I would be in the area to run it someday. Unfortunately, Steve, the member of our club passed away about 3 years ago. He and his wife were such nice people and although we had only wheeled with them a few times, it felt like we had known them for decades. They had been retired for nearly 20 years and spent their time traveling around documenting various off-road trails in hopes of writing an off-road book.
This is one of his trails. He had it rated as a 3.0 when he last ran it in 2013. However, after running it now I would put it as a solid 3.5 rating now. Erosion and those damn side by sides have dug it out quite a bit and there are only 2 places that make give it the 3.5 rating and other than those two areas it is a solid 2.5. The canyon as we dropped down in off of Temple Mountain Wash was breathtaking.
Here is Temple Mountain Wash heading west toward the turn down into the canyon.
Dropping down into the canyon and along the canyon bottom the road was quite good, just a little rocky in a few areas.
Unfortunately, I didn't take any pictures of the two obstacles giving it the 3.5 rating. The first was just at the bottom of the canyon as you began the climb upwards. The initial obstacle was a deep off-camber ravine that then had a series of boulders to climb. When we first approached it I could tell the wife was anxious which made me a bit anxious. I stopped the Jeep and walked ahead to scout it out. The wife mentioned that if we turned around it would still be worth the drive down into the canyon.
I got back in the Jeep and questioned out loud "why the hell is everyone going so high up on the side hill and then approach the boulders off-camber"? I thought that makes no sense as you're already leaning so much downhill and then trying to climb the rocks tipping even further downhill. Also, the upper area just before the rocks was all dug out from people losing traction and spinning their tires. Damn weekend warriors on their side by sides who think straight ahead and gun it is a good plan.
After sitting in the driver's seat for a moment I realized that if I approached it from the bottom hugging the cliff's edge I could drive straight up it and keep the hood level. This did however, place the Jeep right on the edge with no margin for error but to me seemed like a much more plausible path keeping the Jeep pointing straight up the obstacle as I'm not a fan of off-camber if I can help it.
The obstacle was a non issue and the Jeep crawled straight up it without even slipping a tire. The flex was so fluid and smooth as the axles articulated through he rocks and the hood stayed level the entire time. Upon reaching the top of the boulders I had to make a hard turn to the driver's side but that was a quite easy climb. The mind-screw came from being on the cliff's edge and being alone on the trail which I didn't like either and neither did the wife. I still can't believe I forgot to get a picture of the obstacle as it looked worse that it was.
After making the climb out of the canyon this was our view from the canyon wall.
Here is looking back down the trail and into the canyon. You can see the road at the bottom of the trail down in the canyon floor as it was a short and steep climb up out of the canyon. After the initial obstacle it was just large rocks here and there but nothing bad at all. I will admit however, I did fear a little that the obstacle at the bottom of the canyon wouldn't be the worst one and we would find more higher up and the narrow shelf road wouldn't allow us to turn around but that wasn't the case as we easily made the rest of the climb out of the canyon without issue.
There were several of these outcroppings of rocks and one in particular called "the squeeze" that had two large boulders just a Jeep's width from the outcroppings. I had to pull my passenger's mirror in and my hardtop was about 3 inches off the outcropping as my driver's rear tire just kissed the boulder as I worked it around the turn letting the tire climb the rock a bit leaning my hardtop towards the overhead rock, then working the steering wheel a bit to get the rear tire to "slip" down off the rock and level the Jeep out, then inch forward again slightly climbing and repeating the rear tire slipping to level the Jeep. That process took about 3 repeats to get around the squeeze. I don't think much taller or longer of a vehicle would make it around that as the boulder you had to manuever around was almost the size of our Jeep to begin with.
This was another little climb just after the "squeeze". It looked worse that it was also and the Jeep didn't even slip a tire. We had to climb the front end up and then immediately turn hard driver and hug the wall with the right front fender while the rear tires climbed the rocks. Got slighlty off-camber at the hard driver's turn but not bad. The wife didn't even get out for this one so she must have been getting her confidence back in the Jeep as well.
Another view down into the canyon.
The last climb up towards McKay Flats and then into Red's Canyon. This was a narrow rock garden climb but not bad. The rocks were loose but not big.
Our lunch spot on top looking down into Red's Canyon.
We explored another turn off into a wash that we had not taken before and found another mine back into a slot canyon. We saw the remnants of a structure with some stoves remaining.
That was the last day of the trip. All in all I think we covered about 250-miles of off-road trails in the three days we were in the area.
Thanks for looking.
OP
zmotorsports
ALLIANCE MEMBER
Upon returning home the coach had a "spa day" with about a 6-hour detail job before parking her back in the shop.
While I was getting the washing stuff ready and the ladder to wash the roof the wife finished cleaning the interior, although we gave her a good cleaning the last night of the trip so it didn't need much inside other than just a quick wipe down.
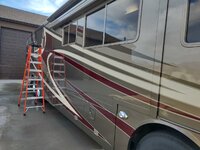
The wife was NOT happy about me getting on the roof as I jacked my shoulder up a couple of weeks ago but I explained I hadn't washed the roof yet this year and I usually do it twice a year, once mid-year and once just as I'm putting her away for the winter. I needed to get up there and do the roof. Ladder leaning up against towels to protect the paint.

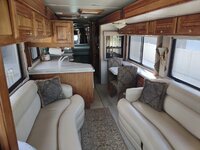
Interior pics. Still looks pretty good for a 22-year old coach in a couple of months. The wife gave the woodwork a wipe down with Murphy's Oil Soap which she does once a year as well. Although now keeping her indoors I don't feel it needs it quite as much as when we were at our old place and she was parked outside. Being able to park the coach indoors is a game changer on keeping one of these things lasting for decades.

My wife's pillow that she got several years ago on one of our road trips. I think it says it all as RV'ing is such a huge part of our life and something we look forward to with each trip.

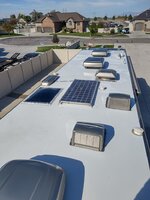
Then the roof washing commenced. Although the roof hadn't been washed since this time last year it was dirty but not terrible. This is the before of the front section.

Here is the after of the same front section.

Entire roof completed and just climbing down.
Then the rest of the coach was washed.

And I even gave it a hand chamois job over every inch of painted surface.

A few more pictures of the coach's spa day to follow.
While I was getting the washing stuff ready and the ladder to wash the roof the wife finished cleaning the interior, although we gave her a good cleaning the last night of the trip so it didn't need much inside other than just a quick wipe down.
The wife was NOT happy about me getting on the roof as I jacked my shoulder up a couple of weeks ago but I explained I hadn't washed the roof yet this year and I usually do it twice a year, once mid-year and once just as I'm putting her away for the winter. I needed to get up there and do the roof. Ladder leaning up against towels to protect the paint.
Interior pics. Still looks pretty good for a 22-year old coach in a couple of months. The wife gave the woodwork a wipe down with Murphy's Oil Soap which she does once a year as well. Although now keeping her indoors I don't feel it needs it quite as much as when we were at our old place and she was parked outside. Being able to park the coach indoors is a game changer on keeping one of these things lasting for decades.
My wife's pillow that she got several years ago on one of our road trips. I think it says it all as RV'ing is such a huge part of our life and something we look forward to with each trip.
Then the roof washing commenced. Although the roof hadn't been washed since this time last year it was dirty but not terrible. This is the before of the front section.
Here is the after of the same front section.
Entire roof completed and just climbing down.
Then the rest of the coach was washed.
And I even gave it a hand chamois job over every inch of painted surface.
A few more pictures of the coach's spa day to follow.
OP
zmotorsports
ALLIANCE MEMBER
Final pictures of the coach's detailed cleaning. All wiped down and ready to put the washing supplies away and park her in her parking spot.


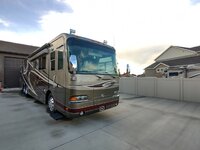

Tucked away in her parking spot.

Thanks for looking.
Tucked away in her parking spot.
Thanks for looking.
OutlawDrifter
Well-known member
Looks like another great trip Mike!
I wonder if those round boulders (dinosaur eggs) are from glacier movement or years of flooding?
I wonder if those round boulders (dinosaur eggs) are from glacier movement or years of flooding?
Swanny1953
ALLIANCE MEMBER
Mike, thanks again for sharing. Some really beautiful scenery. So glad the Jeep was up for the obstacles!! Good stuff!
So are you done RV'n for the year now Mike, kinda sounded that way. Once again thanks for sharing all that, I luv it!.Final pictures of the coach's detailed cleaning. All wiped down and ready to put the washing supplies away and park her in her parking spot.
Tucked away in her parking spot.
Thanks for looking.
I do have a easy question, how wide did you go with the RV garage?
OP
zmotorsports
ALLIANCE MEMBER
Looks like another great trip Mike!
I wonder if those round boulders (dinosaur eggs) are from glacier movement or years of flooding?
That makes more sense than my petrified dinosaur egg theory Marc.

I Really enjoy your pictures. The country(scenery) out there is just amazing. Plus, it is something that seems your wife enjoys as much as you. Another Win!!! Thanks for sharing your vacations in pictures!!!
Thank you. I'm glad someone enjoys the plethora of vacation pictures that I post as well as the technical posts of shop projects.
Yes, the wife seems to enjoy our outings just as much as I do. During an earlier trip this year we had this exact discussion as I was curious if she actually enjoyed off-roading or just does it because it is something I enjoy. She mentioned how much she loves exploring new areas and all of the places we've been able to visit and see where most people will never take the time to go.
We've been blessed to have been able to enjoy a wide range of hobbies as a family, from sleds, sand quads, sandrails, race cars and street rods and all have been fun and all have involved an RV in some form from transporting to keeping us out of the elements. However, as we've changed our family activities over the past 12+ years now since selling all of the powersports toys, getting off-road in the Jeep has been something we have truly enjoyed as a couple and even traveling in the coach has taken on an entire newly refreshed vigor in the way we choose to travel and see this great country that we live in. There is no other way we would rather travel than to see the country through the windshield of the coach. We also prefer to get off the interstates as much as possible and take the backroads through small town America.
We have met so many wonderful people and been to so many interesting and beautiful places that it has become more of a lifestyle than just a hobby. Toss in the off-roading and it's a complete travel package that we love and enjoy.
OP
zmotorsports
ALLIANCE MEMBER
Mike, thanks again for sharing. Some really beautiful scenery. So glad the Jeep was up for the obstacles!! Good stuff!
Thanks Gary. Yeah, I'm glad the Jeep was up to the task as well. For some reason I was quite nervous until after I had gotten some miles and obstacles under my belt this trip. That suspension failure really messed with my noggin' for some reason.
So are you done RV'n for the year now Mike, kinda sounded that way. Once again thanks for sharing all that, I luv it!.
I do have a easy question, how wide did you go with the RV garage?
Cam, yes, the 2023 travel season has come to a close for the wife and I. Going into the holiday season we don't have much time to use from work as it our company's busiest time of year and many blackout dates for vacations. Can't wait until retirement so we can join our friends as this is the FMCA 4-Wheelers club's busiest time of year for Jeep gatherings and rallies and we have never been able to attend any of them between November and March.
The RV bay is 20' wide. Gives me plenty of room to open slides, work on the coach and still not encroach into the stored equipment along the wall that is shared with the shop. If you were just using it for storage I think 16' would be adequate although we have some friends who have one 14' wide and they say it works fine for them, just seems a bit tight for me though.