To avoid these ads, REGISTER NOW!

Above 1200 Sq/FT The Action Sports Garage

Wokspaces above 1200 squarefeet.
To avoid these ads, REGISTER NOW!

manbike26

Well-known member
Joined
Sep 23, 2015
Messages
224
Location
Boise ID USA
On another note, When we got back from ski touring. I find my ******* neighbor cut my tree down, that was clearly on my side of the property line. Not happy!

That's a mega bummer.

I am a firm believer: "stupid needs to hurt"

Maybe seek compensation with a mediator? Some neighborhood associations have contacts for that. If that fails, small claims court.

It's total horseshit that you have to invest any time in this at all...but a quality society can't exist without enforced personal + property rights and a judicial system. You're fighting the good fight. Keep us posted.
 

SilverJimmy

Well-known member
Joined
Apr 14, 2012
Messages
1,643
Location
Prescott/Flagstaff, AZ
You have to call him out, make him responsible, make him understand that society does have boundaries, and your property line is one of those. Next time he might decide he doesn’t like the color of your house and when you come back from some extended photo assignment he will have painted your house fuchsia, cuz he could!
 
OP
G

Grant Gunderson

Well-known member
Joined
May 17, 2013
Messages
2,330
Location
Bellingham, WA
Looks like a small claims court action. A mature tree that size would cost $$$$ to replace! Must be why I live in the sticks, I can’t see most of my neighbors houses, let alone the assholes!
Totally. That tree provided valuable privacy for my backyard during the summer. This guy is well known in the neighborhood for being a bit of a *****. I guess there is always one. Makes me miss my last place where I had lots of property.
Looks like he’s keeping the wood too? Grand Theft Firewood!!!
That maple had good lumber in it!
That's a mega bummer.

I am a firm believer: "stupid needs to hurt"

Maybe seek compensation with a mediator? Some neighborhood associations have contacts for that. If that fails, small claims court.

It's total horseshit that you have to invest any time in this at all...but a quality society can't exist without enforced personal + property rights and a judicial system. You're fighting the good fight. Keep us posted.
I agree 100%. I like to be neighborly and let small stuff slide but this is just way beyond that. I can’t believe his nerve to cut down a fully mature tree on someone else’s property without making any attempt to ask first. Luckily I have security footage catching him in the act.

I reported him to the city as we are in the watershed and tree removal requires a permit that’s almost impossible to get. They have a hefty fine as well. I’m also talking to my attorney about next steps. Only good thing about my on going divorce is I have one on retainer.
 
OP
G

Grant Gunderson

Well-known member
Joined
May 17, 2013
Messages
2,330
Location
Bellingham, WA
You have to call him out, make him responsible, make him understand that society does have boundaries, and your property line is one of those. Next time he might decide he doesn’t like the color of your house and when you come back from some extended photo assignment he will have painted your house fuchsia, cuz he could!
He stated he wants to take the one down in my front yard too. So I need to make sure he learns an expensive lesson. When I asked him why he didn’t ask me first his response is that he knew I’d say no. It’s like dealing with a small child.
 

Xti04

Well-known member
Joined
Nov 11, 2016
Messages
2,342
Man what a winner. My neighbor asked if she could cut branches overhanging onto her property. I think she might have learned after I made her move a fence.
 
OP
G

Grant Gunderson

Well-known member
Joined
May 17, 2013
Messages
2,330
Location
Bellingham, WA
Man what a winner. My neighbor asked if she could cut branches overhanging onto her property. I think she might have learned after I made her move a fence.
Evidently he didn't learn when my ex-wife told him to stop cutting on hit when he trimmed all of the branches that extended on his side of the property line. It's one of the few things she and I actually agreed on!
 
OP
G

Grant Gunderson

Well-known member
Joined
May 17, 2013
Messages
2,330
Location
Bellingham, WA
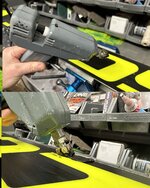
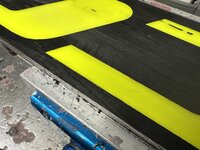
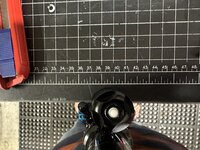
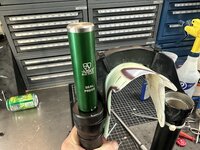
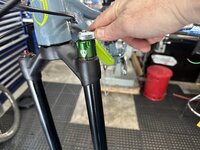
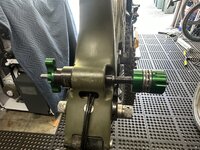
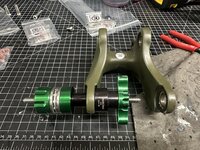
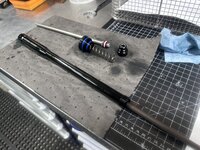
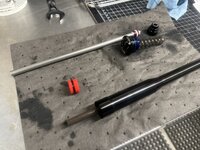
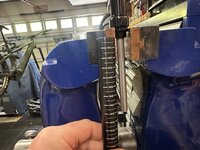
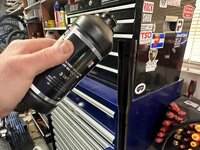
My gear room can be a bit like a modern museum of skiing. Every time I clear it out I seem to come across some real gems. Take for example this early prototype of the Avalanche bag. It was made by the Wari Avalanche Research institute. This was more of a proof of concept than anything as it’s got a few fatal design flaws one of which being a hip pack! However take a look at the quality of the machining that went in to it. This one is going to have to stay in the gear archive!
IMG_1043.jpeg
IMG_1041.jpeg
IMG_1044.jpeg
IMG_1045.jpeg
 

DeeDubz

Well-known member
Joined
Nov 20, 2019
Messages
1,448
Location
Socal
That ***** you have an a hole neighbor, is he a young buck? I would never think about walking on someone else's property and cutting down a tree.
 
OP
G

Grant Gunderson

Well-known member
Joined
May 17, 2013
Messages
2,330
Location
Bellingham, WA
That ***** you have an a hole neighbor, is he a young buck? I would never think about walking on someone else's property and cutting down a tree.
He’s in his mid to late 50. Classic grumpy middle age dude that thinks the world should revolve around him. I pursued my options and he’s about to find out just how expensive of a mistake it was, but that’s the only way to ensure he doesn’t cut my other tree
 
OP
G

Grant Gunderson

Well-known member
Joined
May 17, 2013
Messages
2,330
Location
Bellingham, WA
After a slow start to the season here in the PNW Baker is slatted to open on Wed! Until we get a bit more coverage I’m starting the season out on the rock boards. This year I decided it was time for Stian to learn how to properly repair and prep skis. Unlike Ski magazine and others who think burning Ptex sticks is the proper way to fix a base gouge I am teaching Stian the proper way.
IMG_1075.jpeg

First cut out any loose Ptex with a sharp knife.
IMG_1079.jpeg
Then use a brass roto-brush to clean out as much wax as possible.
IMG_1076.jpeg
Follow with a liberal soaking of base cleaner.
IMG_1104.JPG
I have a Ptex gun I like to use. It’s essentially an industrial hot glue gun.
IMG_1103.JPG

If you don’t have a Ptex gun a $5 garage sale soldering iron works really well. The idea is to heat the ski base where you need to make the repair and then melt the new Ptex stick into it. Lots of heat and moving slow is the key to get it to bond. If you burn the Ptex to drip it in, you are essentially destroying the new base material and it will never bond well to the base.
IMG_1078.jpeg
IMG_1096.jpeg
I then follow with this Wintersteiger base scraper. If you done have one of these a sharp cabinet scraper works too.
IMG_1097.jpeg
Remove the excess Ptex, then prep the base with a good hot wax, scrape and brush.
IMG_0846.jpeg
IMG_0877.jpeg
 
OP
G

Grant Gunderson

Well-known member
Joined
May 17, 2013
Messages
2,330
Location
Bellingham, WA
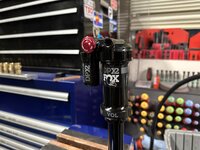
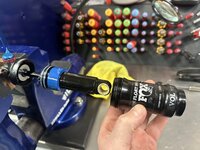
My body came over with his Fox DPX2 shock and asked if I could take a look at it. It was fully stuck down.
IMG_0724.jpeg
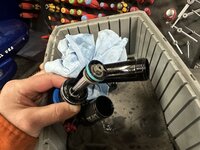
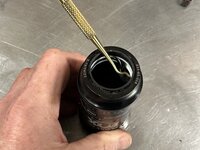
Like most Fox shocks, these use a rubber needle valve thats hidden bellow a plastic plug. There is one on the piggy back that is used to charge the IFP, there is also one on the leg of the shock to relieve pressure incase one is stuck down ( air on wrong side of the main piston).
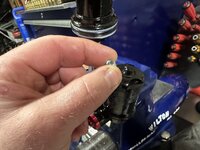
A dental pick works great to get the plug out.
IMG_0729.jpeg
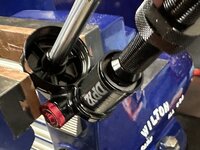
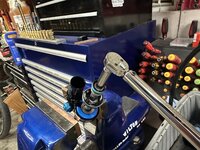
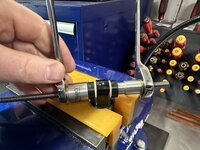
With the plug out, you have access to what is essentially a set screw that has been center drilled to allow a needle to pass through. This valve works a lot like the one on a basket ball or soccer ball, inert needle pump it up and pull needle out. However due to the high PSI's involved, the set screw adds compression onto the rubber valve to create a more robust seal. So to service these, you essentially need a 4mm hex key that a needle can pass through the center of. I'm going to make a tool to do this.
IMG_0728.jpeg
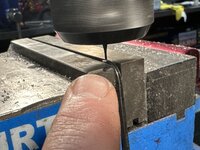
I used a carbide end mill to shorten the length of the short end of a 4mm hex key.
IMG_0731.jpeg
I could have bought a stubby hex key, but this is what I had on hand.
IMG_0732.jpeg
I then selected a 1.5mm 4 flute carbide end mill.
IMG_0734.jpeg
The hex key gets chucked in the mill vise.
IMG_0738.jpeg
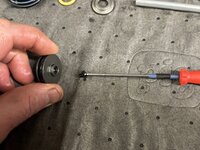
I then machine a slot into it for the needle. Notice how damn small this is!
IMG_0739.jpeg
IMG_0741.jpeg
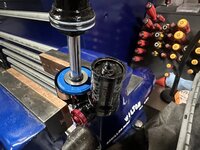
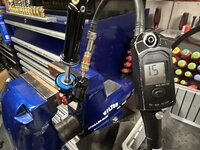
So here are the tools for presurizing / depressing the shock. 4mm slotted hex key, and a needle valve adapter onto a digital shock pump. The needle is just a standard Leur lock needle.
IMG_0750.jpeg
Here you can see the valve port we are dealign with.
 
Last edited:
OP
G

Grant Gunderson

Well-known member
Joined
May 17, 2013
Messages
2,330
Location
Bellingham, WA
I begin by removing the main air valve for the shock and then the pressure from the Piggyback / IFP
IMG_0752.jpeg
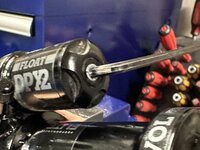
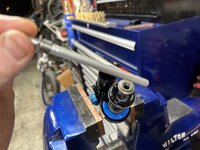
I loosen plug a ¼ turn with the hex key
IMG_0754.jpeg
Insert the needle then deflate.
IMG_0746.jpeg
I then repeat on the leg of the shock.... lots of pressure in there. Thats the problem!
IMG_0756.jpeg
I then loosen the air can with a strap wrench and remove it.
IMG_0762.jpeg
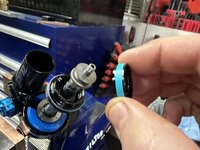
I then used a pick to remove the rubber pucks for the pressure valves. These get replaced with new ones out of the seal kit.
IMG_0766.jpeg
I then unthread the back cover for the piggy back.
IMG_0768.jpeg
A plastic o-ring tool removes the retaining ring.
IMG_0770.jpeg
I thread some 8mm all thread into the IFP and use that to pull it out.
IMG_0771.jpeg
IMG_0775.jpeg
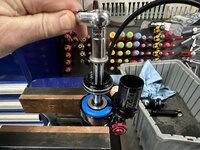
I then clamp the eyelet for the shock into my soft jaws, then use a 22mm low-torque wrench to loosen the seal head.
 
OP
G

Grant Gunderson

Well-known member
Joined
May 17, 2013
Messages
2,330
Location
Bellingham, WA
IMG_0779.jpeg
The lower leg then pulls off and I dump the oil out.
IMG_0781.jpeg
I then use a 9mm socket to remove the nut that holds the inner seal head / valve stack on.
IMG_0782.jpeg
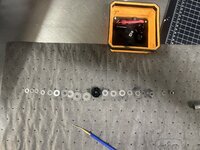
Here is the valve stack all laid out. Thats a lot of shims in it! Lots of pedal support in there. The inner Seal head (black circle) and its seal is the issue causing the shock to stick down. Usually you just replace the seal on these, but Fox includes a whole new seal head in the service kit.... sure sign they know the original had issues.
IMG_0785.jpeg
A 11mm socket removes the main shaft
IMG_0787.jpeg
IMG_0788.jpeg
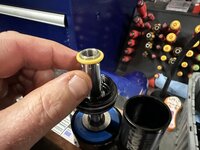
This o-ring is the top out bumper. It comes off next
IMG_0789.jpeg
I can then remove the main seal head.
IMG_0790.jpeg
bottom out bumper
IMG_0791.jpeg
shim comes off next
IMG_0792.jpeg
then the preload spacer
 
Last edited:
OP
G

Grant Gunderson

Well-known member
Joined
May 17, 2013
Messages
2,330
Location
Bellingham, WA
IMG_0793.jpeg
This black ring is a travel limiter.
IMG_0794.jpeg
You can see residue from a failing o-ring in the piggy back
IMG_0796.jpeg
I use a Fox IFP setting tool to remove the IFP. Needle nose pliers work too.
IMG_0798.jpeg
IFP out.
IMG_0800.jpeg
I remove the bleed screw from the IFP
IMG_0803.jpeg
The inner bore of the main shaft is far from smooth.... not the best mfg, but this is a Covid era shock.
IMG_0807.jpeg
I give everything a really good cleaning. Then replace all of the seals and lube them with Slickoleum.
IMG_0812.jpeg
The number one thing to remember when doing suspension service is to only use Brass and Plastic O-ring tools, as you do not want to scratch any of the sealing surfaces!
IMG_0813.jpeg
IMG_0815.jpeg
Main seal head back on, and the top out bumper.
 
OP
G

Grant Gunderson

Well-known member
Joined
May 17, 2013
Messages
2,330
Location
Bellingham, WA
IMG_0817.jpeg
The base for the valve stack goes on next

IMG_0818.jpegThe inner piston shaft goes in next
IMG_0819.jpeg
and gets torqued to spec
IMG_0823.jpeg
The rebound valve stack goes on next. Its essentially a one way valve, then the inner seal head
IMG_0825.jpeg
followed by the compression valve stack
IMG_0826.jpeg
and it gets torqued on
IMG_0914.jpeg
Time to fill with 5wt oil and bleed. this is my set up.
IMG_0915.jpeg
The IFP needs to be set at exactly 1.5" //I confirm I have the IFP setting tool set correctly with my calipers
IMG_0916.jpeg
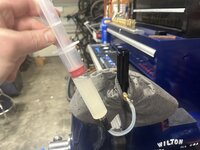
Bleeding really isn't much different than bleeding brakes. I feel a syringe halfway with oil and attach it to the lower shock leg
IMG_0918.jpeg
The lower leg gets filled with oil till it over flows
 
OP
G

Grant Gunderson

Well-known member
Joined
May 17, 2013
Messages
2,330
Location
Bellingham, WA
IMG_0919.jpeg
I then insert the inner seal head into the lower leg
IMG_0921.jpeg
and then use a Crowfoot wrench to torque the main seal head back on
IMG_0925.jpeg
I then invert the shock and use the syringe to push oil into the piggy back
IMG_0930.jpeg
The lower leg then gets cycled to push any remaining air out into the piggy back
IMG_0933.jpeg
IMG_0937.jpeg
I then press the IFP in using the IFP setting tool
IMG_0938.jpeg
and then insert the bleed screw and dump the extra oil
IMG_0942.jpeg
The rubber puck for the leg valve goes in next and its set screw gets tightened down to lock it in place.
IMG_0944.jpeg
The IFP back plate goes in next
IMG_0945.jpeg
then its retaining ring
 
To avoid these ads, REGISTER NOW!
OP
G

Grant Gunderson

Well-known member
Joined
May 17, 2013
Messages
2,330
Location
Bellingham, WA
IMG_0948.jpeg
The rear cap screws on, and then the rubber puck for the valve goes in next
IMG_0949.jpeg
The set screw loosely gets installed
IMG_0951.jpeg
I then insert the needle
IMG_0953.jpeg
and inflate to 150PSI I then tighten the set screw fully before pulling the needle out to ensure a good seal
IMG_0958.jpeg
I add a bit of float fluid to the air can as a lubricant
IMG_0960.jpeg
and seal the air can up
IMG_0962.jpeg
I then insert the shraeder valve and pressurize the air can
IMG_0964.jpeg
These white plastic balls then go into the set screw to prevent tampering
IMG_0967.jpeg
They get tapped in using a starter punch. Shock is done.
 

Johanfpa

Well-known member
Joined
Dec 27, 2016
Messages
241
Location
Aberdeen Scotland
Just finished reading your whole thread, you are clearly very skilful in everything you do, in your job and in your hobbies. Small (relative to some other shops on here) but nicely set up garage with one of the best tool collections I have seen on this forum. Also very clearly laid out tools to ensure a good work flow.
From friends experiences it seems that sometimes in divorce proceedings the child(ren) are used as weapons and that is very sad to see for everybody involved especially said child(ren). Hope time will smooth the waters a bit and you both can work together to do what is best for your son. Good to see you are spending time with him and pass on your love & vast knowledge about bikes & skis.
Hope your neighbour gets what he deserved for illegally cutting down your tree!
 

shibertus

Well-known member
Joined
Nov 13, 2018
Messages
278
Grant, could you share your setup and any lessons learned about painting with a small compressor and 2 part paints? I saw some of your other posts about paint guns and hoping to find out what you landed on. Looks like you have been getting some fantastic results on the vise and lathe. Thanks!
 
OP
G

Grant Gunderson

Well-known member
Joined
May 17, 2013
Messages
2,330
Location
Bellingham, WA
Ski season aka work season for me finally drew to a close last weekend.
IMG_2765.jpeg
It was an absolute **** season, so glad its finally over.
IMG_2684.jpeg
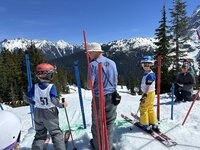
I ended my son is his first ski race. He was nervous at first, but afterwards was really hooked on it.
IMG_1688.jpeg
We both got second in our respective categories. First ski race Iv'e done in 30 years, so stoked I can still hang. Probably would have gotten first had a I actually waxed my skis! Stian's first race didnt count as the timing system wasn't working, so he had to do a redo at the end when it was way warmer. Had his first run count in the morning on cold snow, I'm sure he would have won. Anyways time to get back to working on bikes!
IMG_2517.jpeg
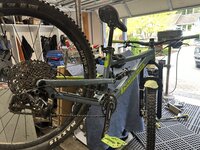
Ive had an eye out on a kids 24" FS frame for him for a while. Was just about to order a new one one for him, when my buddy messaged me that he had a Norco for sale for $500 and to come pick it up. Great deal, but my friend isn't know for bike maintenance, so I knew I had some work ahead of me.
IMG_2522.jpeg
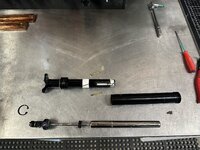
The dropper was bit sticky. This is a cartridge system on the kids specific post. So there isn't much to do, and unfortunately, you cant change the air pressure to make it easier for them to lower, so all we can do here is clean and lube.
I removed the snapring on the bottom.
IMG_2523.jpeg
I have a full set of dedicated dated snapring pliers for all sorts of different kind of rings. I really like my Wiha set, as its got these special notched tips, so the rings dont fly across the garage.
IMG_2526.jpeg
Post gets clamped into the vise soft jaws and the bottom gets held with a 15mm wrench.
IMG_2527.jpeg
With the seat removed a 3mm hex undos the piston shaft.
IMG_2530.jpeg
Pretty damn simple compared to a Reverb!
IMG_2531.jpeg
With the post done. Next up is the shock service. This fork has a DZG9 compression stack tune on it. Meaning that from the factory Fox set it up specially for super light riders IE kids with a very flight shim stack on the compression valve.
 
Last edited:
OP
G

Grant Gunderson

Well-known member
Joined
May 17, 2013
Messages
2,330
Location
Bellingham, WA
IMG_2538.jpeg
I used my Abbey DU bushing tool to push the DU bushing out of the eyelit
IMG_2539.jpeg
IMG_2540.jpeg
Not much wear other than the DU bushing its self. This will get greased and a new DU bushing pressed back in.
IMG_2541.jpeg
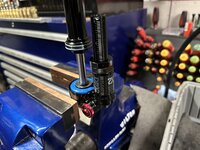
I released the aire pressure, then -clamped the shock in my soft jaws, and then unscrewed the air can by hand.
IMG_2543.jpeg
This is the same air can found on most float shocks. Inorder to get a reasonable PSI setting for such light riders and not have it bottom out all the time, a very large volume spacer is needed. This causes the shock to ramp up very quickly at low PSI.
IMG_2544.jpeg
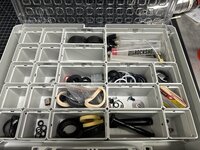
I try to keep a lot of the air can service seals on hand, as they are so common.
IMG_2547.jpeg
The air cans are dead simple to service. All you need is a brass pick to pull the old seals out.
IMG_2552.jpeg
Here is all of the air sleave seals and the volume spacer laid out.
IMG_2556.jpeg
It all gets a good cleaning with Suspension clean.
IMG_2557.jpeg
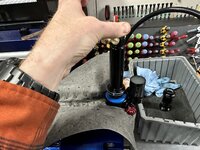
Next, I hand cycle the shock in the vise. Here I am listening for any sounds of cavitation. If it needs a damper rebuild, you will hear the air mixed in with the oil. It sounded perfect. So no need to open up the damper.
 
OP
G

Grant Gunderson

Well-known member
Joined
May 17, 2013
Messages
2,330
Location
Bellingham, WA
IMG_2558.jpeg
All of the seals and the main shaft get lubed with Slickoleum.
IMG_2563.jpeg
I then add a small amount of float fluid to the air can. You can now used the Fox Gold oil for this instead, but I have a ton of float fluid still to use up. Amount doesn't need to be very precise, this is just to lube it. Then screw the air can back on hand tight and its done.

This bike desperately needs the pivot bearings replaced, but first I need to pull the cranks / chainring to access all of them.
IMG_2571.jpeg
Unlike most Sram cranks, you cant remove them with just a 8m hex. Here you have to pull the dust caps with the 8mm.
IMG_2572.jpeg
Then thread in a crank extractor.
IMG_2575.jpeg
and tighten it to pull the cans off of the splined BB. This needs to be done on both sides.
IMG_2613.jpeg
Someone cross threaded the RH side of the BB. I couldn't get it to budge even with my ½" impact. WTF!
IMG_2614.jpeg
Luckily I could get the LH side off. There was zero anti-seize on the threads of the BB cup. So the other side may have just seized its self on. I was able to get a bit creative with my modified Abbey bearing press and my set of Park Bearing drifts to press the BB bearings out from the LH side and then press new ones back in after I cleaned the BB spindle in the ultrasonic.
IMG_2576.jpeg
With the BB done and the LH crank back on, I could then remove all of the pivot hardware. I cleaned all of the hardware in my ultrasonic.
IMG_2582.jpeg
The main link on the kids bike is so narrow my Park Bearing drift wouldn't fit in it.
IMG_2583.jpeg
The Bridgeport made quick work of trimming it down... I really need to get the Monarch 10EE finished up and powered!
 
OP
G

Grant Gunderson

Well-known member
Joined
May 17, 2013
Messages
2,330
Location
Bellingham, WA
IMG_2579.jpeg
Modifying the Abbey bearing press to take an 8mm acme thread, was one of the best things I've done in the shop. This allows me to use it with the Park Bearing drifts. This tool combination works so damn well and allows me to quickly press any bike bearing in / out with zero fuss and 100% perfect alignment each time.
IMG_2594.jpeg
IMG_2593.jpeg
IMG_2589.jpeg
I had one really stubborn bearing, and placing the setup in the vise with a 6mm head, allowed me to get it out.
IMG_2592.jpeg
I have switched over exclusively to Ted-Gel or MareLube for all of my antisize needs on bikes. All of the pivots get a good coating before the new bearings are pressed back in.
IMG_2601.jpeg
The rear break hose was looking pretty bad, so I needed to replace it. It's nice having full set up break tools.
IMG_2603.jpegThe flare nut wrench removes the compression fittings from the caliper and the levers.
 

rbkool

Active member
Joined
Jul 9, 2015
Messages
33
Location
Calgary, Alberta
great stuff. Love to see your posts and how you deal with obstacles along the way (story of my life - quick bike repair turns into multi-hour ordeal due to lack of previous maintenance/stripped threads, etc etc etc!)
 
OP
G

Grant Gunderson

Well-known member
Joined
May 17, 2013
Messages
2,330
Location
Bellingham, WA
IMG_2605.jpeg
This little Jagwire hose cutter has served me well over the years.
IMG_2604.jpeg
I try to keep compression fittings for Shimano, Sram and MAgura on hand. They are all different!
IMG_2606.jpeg
But they all work the same as any compression fitting. Nut goes on hose first, then the olive, and finally the nippled gets pressed in
IMG_2607.jpeg
The Jagwire hose press does a great job. You can switch the needle around for Sram / Shimano Magura.
IMG_2608.jpeg
It's then essential the compression nuts get torqued properly as you need. the olive to deform enough to create a good seal.
IMG_2609.jpeg
Having a full set of crowfeet has proven to be a good investment over the years. I finished the breaks by bleeding them.
 
OP
G

Grant Gunderson

Well-known member
Joined
May 17, 2013
Messages
2,330
Location
Bellingham, WA
Finally I need to service the Manitou fork. I F'n hate these. Everything about them is *** backwards, yet its the defect standard for kids bikes.
IMG_2617.jpeg
They require a very thin wall 8mm socket to service. My snapon sockets are way too thick. My older USA craftsman actually have way thinner walls than the Snapon, so I've kept them around for specific uses such as this or pedals. However even those were too thick, so I checked the socket in the mill, and used a file to thin the tip of it. Once again, I need to get the Monarch 10EE up and running!
IMG_2618.jpeg
Now thats thin wall socket!
IMG_2621.jpeg
And here is why. On a normal fork, Fox, Rockshocks you unscrew the nuts on the fork bottom. With Manitou the shafts are reverse threaded and when you loosen them, they retract up into the fork legs. F'n Stupid design. No wounded they never competed with the big boys after the 90's.
IMG_2622.jpeg
With the lowers off, I could then remove the dust wipers with my Pedro's DH tire lever. This is by far the best way for doing this.
IMG_2624.jpeg
The Manitou, AKA Manipoo uses Fox32 dust wipers. Which is good because the Manitou ones are almost impossible to find in stock.
IMG_2625.jpeg
My Abbey seal press makes quick work of pressing the dust wipers in.
IMG_2626.jpeg
I used my Abbey suspension sockets to remove the top caps for both sides.
IMG_2632.jpeg
Then the plastic nuts holding each shaft in get removed.
IMG_2633.jpeg
Both shafts need a good cleaning. The air shaft on the right, then gets a good coating of slickoleum and reinstalled after I clean the uppers.
IMG_2635.jpeg
A delrin rod and a rag does a good job of pushing the **** out, before I flush with suspension clean.
 
OP
G

Grant Gunderson

Well-known member
Joined
May 17, 2013
Messages
2,330
Location
Bellingham, WA
IMG_2637.jpeg
The damper on all of the Manipoo's are essentially Identical. On his 20" bike, I pulled all but one of the compression shims out, and switched the oil out to 2.5wt so that he could actually compress the fork. Now that he ways quite bit more, I'm going to first try to leave the compression shim stack alone and just change the fork oil to 2.5wt. On the manitous, there isn't any bleeding done, but the oil height is critical. You insert the rebound side into the lower section of the upper tube. You then fill the leg with oil, and then use an extraction tube to **** the oil out until it's at the correct volume. This motorcycle tool, works perfectly as you can set the depth on it.
IMG_2638.jpeg
The damper then gets pushed in, cycle the fork a few times and. screw the caps back on.
IMG_2498.jpeg
The standover on the bike, is honestly 2" too high for him right now, but once he's on it, he rides so well. It's like a kids 29er and its made a big difference in his riding over the 20" bike on trails, and he's actually way faster on it and able to climb better too.
IMG_2642.jpeg
The kid is very stoked on his new ride! I am too!
IMG_2512.jpeg
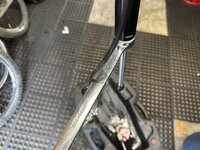
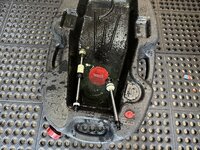
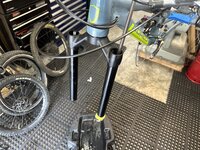
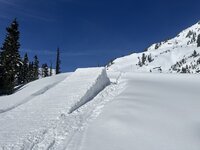
I got a call form Head ski that they had a few olympians headed my way and they wanted to shoot some jumps. We built a massive jump. That lip is close to 8 feet tall. Spent a full day building it, with the plan to hit it the next morning.
IMG_2513.jpeg
Showed up this next am to a massively thick breakable crust on the snow, so the jump was a no go. I'm officially done with ski season now. More shop time to come.
 
OP
G

Grant Gunderson

Well-known member
Joined
May 17, 2013
Messages
2,330
Location
Bellingham, WA
great stuff. Love to see your posts and how you deal with obstacles along the way (story of my life - quick bike repair turns into multi-hour ordeal due to lack of previous maintenance/stripped threads, etc etc etc!)
Thanks! The more I work on different projects, bikes, etc the more I learn, so when I do face an obstacle I now feel like I have lots of tools in the mental tool box for handling them and there is still more to learn, thats why this site is so great.
 
OP
G

Grant Gunderson

Well-known member
Joined
May 17, 2013
Messages
2,330
Location
Bellingham, WA
With all of my bikes, my sons. my lady friends and her daughters, the amount of maintenance to keep track of is a bit mind boggling. I've been using this app called ProBike Garage to at least track the maintain on my personal bikes. Its really cool as you can track the milage, time, etc using Strava for each bike, and every component, then set reminders based upon time, riding time, or mileage for when maintain needs to happen. You can even track parts as you move them from one bike to the next, etc. It's not so great for the kids bikes, as they dont even know what Strava is, and my lady friend is dead set against using it. I think sometimes she is still in the training mindset from being the former World Champion and not wanting people to know what her training is etc, even tho she's been retired from competing for years.
IMG_2888.PNG
The Ebike has over 2200 miles on the odometer, so a bit more than what Strava shows, but hey, sometimes you got to make sure certain trails still say secret. With that many miles on the E-bike and all of them being hard tech the suspension hardware and bearings are beat.
IMG_2705.jpeg
The modified Abbey press and Park bearing drifts make quick work of pressing out all of the old bearings.
IMG_2707.jpeg
And pressing all of the new ones in.
IMG_2709.jpeg
They were done!
IMG_2711.jpeg
The new rear wheel I added last fall has a few hundred miles on it already, so I gave the cassette driver a fresh lube. With 2200 miles the drive train, it was well over due to be replaced. Usually I replace them at 1K to 1200miles. Being its an E-bike I run a full steal drive train, so they will last a bit longer and they are dirt cheap, so in this case I wanted to see just how far I could push it.
IMG_2715.jpeg
A new NX cassette gets torqued to 40NM with the Abbey crombie socket. I purposely am running NX here instead of XX1 as I do on my trail bike as the E-bike just wears out drive trains and I dont care bout the weight penalty in this application.
IMG_2727.jpeg
A chain ring bolt wrench is used to remove the 34th front chain ring fro meh E-bike motor spider.
IMG_2728.jpeg
You can assess chainring wear by looking at how much is left of the web in the valley of each tooth. Notice it's all but gone on the ring o the left. I actually replaced the front ring once already, as the bike came standard with an Aluminum X-synch and all I can find at the time was another one of those. I finally got my hands on some Steel replacements.
IMG_2731.jpeg
Ive seen quite a few chainrings on e-bikes get folded over on friends bikes due to loose chainring bolts. So after torquing them, I apply Torque seal to each to server as a visual indicator. Yellow on the back,
IMG_2732.jpeg
and Black Viz-Torque on the front
 
OP
G

Grant Gunderson

Well-known member
Joined
May 17, 2013
Messages
2,330
Location
Bellingham, WA
IMG_2733.jpeg
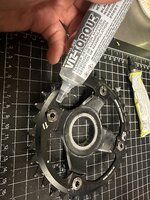
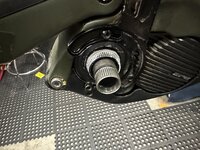
The splines on the motor's drive shaft get a coating of Tef-Gel
IMG_2734.jpeg
I then torque the locking ring down using an Abbey Shimano Steps BB socket. This is way better than the Park BB tool for this, as you dont need any adapters or crow feet.

IMG_2741.jpeg
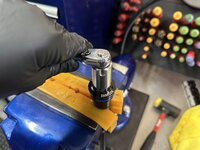
The Zeb Fork needs the oil changed in the damper. I clamp the shaft in the vise using my shaft clamps, then use a low-torque wrench to loosen the seal head.
IMG_2738.jpeg
My interchangeable dovetailed soft jaws, sure are nice when I am constantly switching between soft jaws and various shaft clamps.
IMG_2740.jpeg
The low torque wrenches are really nice for suspension service. They are in-between thickness of a cone wrench and a standard wrench, and they are smooth across the flats so they wont damage Aluminum suspension hardware.
IMG_2743.jpeg
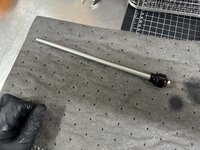
The rebound shaft for the damper is out. No need to service the rebound valve assembly yet. it's still working great. I just clean it all with suspension clean.
IMG_2744.jpeg
I then remove the top cap of the damper. At some point I'll make some brass shaft clamps to fit these, as its they only size I dont have, but I need to find a boring head for the Bridgeport first. The Abbey Crombie socket is perfect for this.
IMG_2745.jpeg
Here is the damper torn down, I then used a delrin rod to push the IFP out.
IMG_2746.jpeg
IT all gets washed down with Suspension clean. The RED IFP gets a new O-ring installed.
IMG_2748.jpeg
I then give everything a fresh coat of slickoleum and clamp the seal head in my copper soft jaws. and then reinsert the rebound shaft into the main tube and then torque the tube down hand tight.
 
OP
G

Grant Gunderson

Well-known member
Joined
May 17, 2013
Messages
2,330
Location
Bellingham, WA
IMG_2749.jpeg
The shaft gets extended to around 80mm
IMG_2750.jpeg
I then fill the tube with 3wt oil
IMG_2751.jpeg
The greased IFP gets inserted with the side that has the spring capture resses facing up
IMG_2752.jpeg
I then torque the compression head assembly on. Since I am holding the seal head with the vise this process toqruews both at the same time. The Web jams a semi open bath design, so all you have to do to bleed it, is to cycle the rebound shaft a few times and it will purge via the vent holes in the tube just bellow the compression head assembly. This is also why you should change the oil when you do the lowers as with a lot of riding it doesn't always get refilled using the one way seal in the bottom of the seal head.

IMG_2759.jpeg
This is my suspension tool drawer. This fork wasn't the smoothest, so I am going to use my fork burnishing tool to see if I can improve the feel.
IMG_2761.jpeg
The burnishing tool gets inserted into the lowers without the dust wipers in place. Using a twisting motion you burnish the upper and lower bushings on each side until the tool moves easily in and out. Next ti was time to put the dust wipers back in and reinstall the lowers. Thats when I found a crack in the foot stud of the Vorspung spring. So thats gotta wait until a new part arrives. Glad I caught it, vs having it fail on a ride!
 

Clemson13

Well-known member
Joined
May 30, 2015
Messages
425
So with all your ski setup templates etc. would you recommend mounting your own bindings or having a shop do it? Its not something I anticipate having to do that often?

I just got another 2 pairs of skis, 90mm & 112 underfoot that need bindings mounted.

I see you use inserts.... i really like that concept but wonder if they are something a shop is going to charge me an arm and a leg for.
 
Last edited:
To avoid these ads, REGISTER NOW!
Top Bottom