To avoid these ads, REGISTER NOW!

Between 485 & 705 SQ/FT Mid-Century Moto Mecca Makeover

Workspaces between 485 and 705 squarefeet.
OP
S

sakurama

Well-known member
Joined
Oct 10, 2010
Messages
1,458
Location
Portland - the cool one.
Yeah, I feel like Bob has enough amazing material for a book. It's funny because when we moved to Colorado we had a Texaco station of that era - "You can trust your car to the man who wears the star!" That certainly wouldn't fly today!


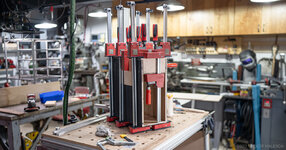
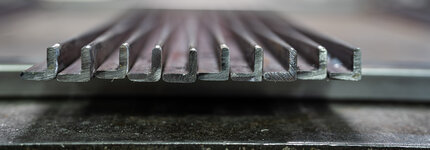
Shelves. Suspending the gear inside the frame and leaving space for airflow.
i-wxKJScQ-X2.jpg

1/8" wall 1/2" angle iron. I generally hate working with hot rolled steel anymore. Feels so... dirty. The saw still had the stop set from the fore/aft bars so I just went for it. After measuring three times and test fitting one cut of course.
i-vz5jRZJ-X2.jpg

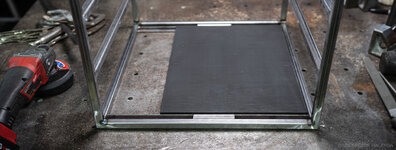
I was trying to center up the bracket and got lucky that it was exactly 5/8" spacing from side to side so I just tossed in the two off cuts I used to size the front openings - I wasn't trying to be perfect here but close. The amps will be able to move slightly to center up and the feet should have a few mm either way. I've tried to give spacing to everything so that there's enough gap to absorb any errors... while trying to prevent any errors.
i-FCCJzLG-X2.jpg

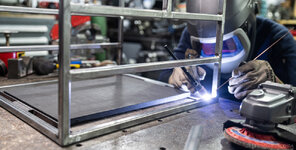
I tacked in the tops and because the first shelf was on the table it was already flush.
i-QQ4Sd3q-X2.jpg

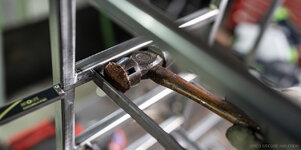
It worked out to 38.7mm for the first shelf and so I used that measurement as I went up the rack and of course test fit each shelf to be sure it was snug and could slide front to back. The actual MDF shelf was my square.

i-BCFb2Bn-X2.jpg

That's one of my garage sale clamps from earlier this summer - a whole box of them for $5 or $10.
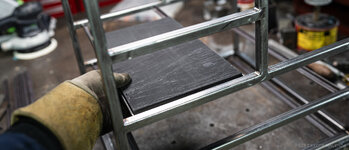
i-pWNw4f4-X2.jpg

The shelves are ever so slightly higher than the main frame but I think that's the veneer thickness - so maybe 1-1.5mm which isn't a big deal.
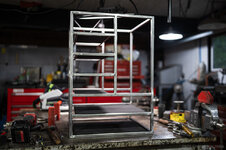
i-qSKbSkZ-X2.jpg
i-5dPqsLD-X2.jpg

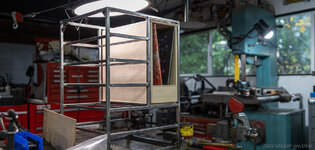
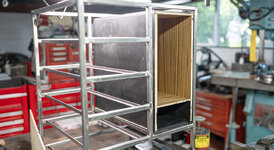
So the shelf brackets are all welded in now. You can see how the shelves don't extend to the back and that space is for the copious amount of interconnects involved in an active system. Honestly with most hifi's actually. At this point I realize I have not yet pulled an amp or pre to test fit - it would be heart breaking to have made some dumb error so I'm really hoping that all my measuring and remeasuring and triple measuring is correct...

Typing that sentence makes me realize I need to pull a HiCap and test fit it.

Now.

Hang tight...

i-vhP8gsQ-X2.jpg

Phew!

Some of the amps feet have been squished from being stacked so I've ordered two different durometer replacement feet from McMaster and will test fit and shim or skim them so that I get consistent height on all the boxes.
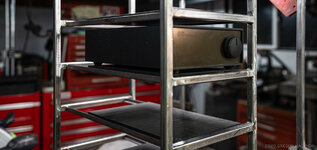
i-4NW43TN-X2.jpg

But this is a huge relief - it fits!
i-7ZTJfWr-X2.jpg

I love the way there's all this space for interconnects - it's something that has bothered me about hifi gear forever. Once the outer panels are in place all wiring will be contained within the frame. It makes me wonder if I should do a simple mesh frame for the back but that part will always be against a wall. No need.

Seeing that amp in there makes it feel real all of a sudden - this is exciting! I'm so glad I picked this project.

Next: outside panel fitting.

Gregor
 
To avoid these ads, REGISTER NOW!

Grant Gunderson

Well-known member
Joined
May 17, 2013
Messages
2,328
Location
Bellingham, WA
i-wmxzvnc-X2.jpg

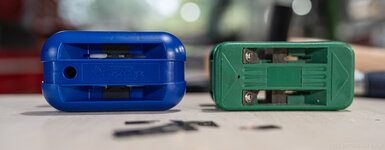
As far as I can tell there's only two trimmers. The green one I got 10 or more years ago from Woodcraft and looking online it's available from multiple sources in different colors. It has four blades - or six actually - two for trimming the excess and two for beveling the edge. It's worked... okay. Considering the age I wanted to change the blades and found a set in a drawer - but they were the wrong type.

i-rv588W2-X2.jpg

This is why I wanted to change the blade. When I went to the store to get the correct blade I realized that the extra's I already had were for the Fastcap trimmer (the blue one) so I bought that too so I could see which worked better.

i-b8Ksk2S-X2.jpg

Maybe it's my edge banding - adhesive backed birch - but the answer was neither. The Fastcap has only two blades so it doesn't attempt to bevel the corners. It's marginally better than the green one. I tried the router table and it got gummed up by the adhesive so there's no good solution.
I've conclude that all of those edge trimmers ****. I have the Fastcap one and at some point I found some carbide replacement blades for it that worked marginally better, especially if it I kept it clean with Acetone, but it still wasn't very good. I've found a small router with the smallest 45* chamfer bit works the best. Festool even makes a router specifically for this. I have a tiny rigid that I got from my dad. It's my only non-festool router, so the trim bit lives on it and its dedicated to that task.
 

Bakafish

Well-known member
Joined
Feb 7, 2017
Messages
477
Location
Tokyo
I've conclude that all of those edge trimmers ****. I have the Fastcap one and at some point I found some carbide replacement blades for it that worked marginally better, especially if it I kept it clean with Acetone, but it still wasn't very good. I've found a small router with the smallest 45* chamfer bit works the best. Festool even makes a router specifically for this. I have a tiny rigid that I got from my dad. It's my only non-festool router, so the trim bit lives on it and its dedicated to that task.
I don't know if you can get them over there but the ceramic bladed STAR-M cutters are the best I've ever used. They just peel off a perfect edge like a dream (used them today!) They are small and double sided to fit into small corners and they have different chamfer sizes too.
 
Last edited:

Grant Gunderson

Well-known member
Joined
May 17, 2013
Messages
2,328
Location
Bellingham, WA
I don't know if you can get them over there but the ceramic bladed STAR-M cutters are the best I've ever used. They just peel off a perfect edge like a dream (used them today!) They are small and double sided to fit into small corners and they have different chamfer sizes too.
I might have to pick one of those up when I'm over there again this January for work.
 

LeonardY

Well-known member
Joined
Apr 16, 2011
Messages
5,077
Location
Southern California
If you went to art school you know the RotoTrim. A staple of every art room and graphic design studio. They were expensive back in the day $3-400 and no one ever sold one so the only option was to buy new. I've owned this for almost 30 years? It cuts paper and veneer as well now as it did then. Nadia uses it all time. I love perfect tools.
I love my RotoTrim. I lucked out back 40 years ago. My girlfriend worked in an art store. They were upgrading the RotoTrim for a guillotine style. The store owner sold me the RotoTrim for I think $20 and threw in a new cutting wheel. I've never had to replace the wheel.
I cut styrene all the time. Didn't think of cutting veneer with it. Great idea.
 

LeonardY

Well-known member
Joined
Apr 16, 2011
Messages
5,077
Location
Southern California
I don't know if you can get them over there but the ceramic bladed STAR-M cutters are the best I've ever used. They just peel off a perfect edge like a dream (used them today!) They are small and double sided to fit into small corners and they have different chamfer sizes too.
The star cutter looks like what I used to use by Dexter.
1701710730757.jpeg
I still use this for bevels and scoring plastic. But now I want a Star-M cutter.
@Bakafish Curse you... :ROFLMAO:
 

Bob Heine

ALLIANCE MEMBER
Joined
Oct 24, 2009
Messages
10,707
Location
Boca Raton, Florida
Gregor, I "renovated" our galley kitchen in the late '70s. Covered the doors, drawer fronts and counters with Formica and had pretty good success. I glued the edge banding on first and then trimmed both edges flush with a straight router bit. Used a file to make sure it was perfectly flush with the surface (a quick sand would have worked as well but the file can be more easily cleaned of glue residue). Then I glued down the surfaces piece so the contact cement coated the edge of the edge banding and over the 20+ years we stayed in that house, never had an edge come off.
 
Last edited:
OP
S

sakurama

Well-known member
Joined
Oct 10, 2010
Messages
1,458
Location
Portland - the cool one.
I don't know if you can get them over there but the ceramic bladed STAR-M cutters are the best I've ever used. They just peel off a perfect edge like a dream (used them today!) They are small and double sided to fit into small corners and they have different chamfer sizes too.

Yes, you *******, you can get them on Amazon (of course) and I'll have it by Wednesday. I'll hold off edging the outer panels until then. I also found a strange rotary trimmer to try. And I do have the Festool OF700 which is what I generally use but it's a whole deal to take out and set up. But in the name of finding the best edging tool... we will try them all Wednesday.


Corner brackets.

i-j8ZzLv7-X2.jpg

I bought some 1/8 steel bar that is 1" wide and then set up a stop in the cold saw and cut a bunch of brackets. I tried just clamping them as a stack to drill them and of course that didn't work (variation in size so the vise didn't hold) so I had to weld them all together.

i-TFv8JdK-X2.jpg

And then drill them and then grind them. I went with a 7mm drill bit so that it was a little oversize for the 1/4-20 threaded inserts so I have some wiggle room. The feet were going to be 8mm and I hate mixing formats... maybe I'll change them. Not sure.

i-fNC5c2h-X2.jpg

I ground off the welds and beveled the edges.

i-qVzK4jB-X2.jpg

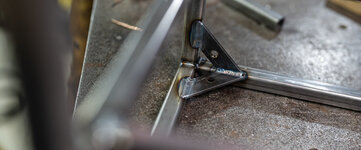
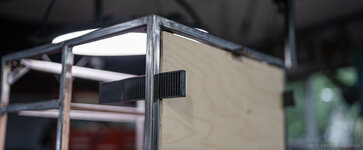
In order to make sure the panels stay flush with the frame I slapped some edge banding onto a scrap of the 1/2" MDF and then rested the bracket on that and tacked that in. This ensures that the stack is correct and the panels will be flush and even.

i-FCVdZvw-X2.jpg

Then I'd remove it (I might have forgotten once or twice) and weld in the inside edges so that the outside had no bead... which, now that I think about, is probably not really a worry given the gap.

i-LLLZqfw-X2.jpg
i-pHC5VdK-X2.jpg

Considering where my welds were when I started this project I'm please with my welds now. Back in the groove! I have better control of heat and my beads are consistent. I should have started this project in the middle.

i-cT8jvtT-X2.jpg

Next up I test fit the panel and used door jam shims (so glad I kept those extras!) to get the spacing as close to even as I could. I'll get that even and then mark centers on the holes and drill for the inserts.

i-M2GCrcQ-X2.jpg

Overall it's pretty even. One edge is slightly less square - either the stand or the panel. Less than 1mm on the long edge so not bad. Once the frame is painted black the gap should help absorb any errors. Next is the threaded inserts and get the panels set. I might need to make them directional as I didn't try to flip the panel to see if that would cancel any errors.

I'm pretty pleased so far. This is fun and I'm happy to be back in the shop.

Gregor
 

Bakafish

Well-known member
Joined
Feb 7, 2017
Messages
477
Location
Tokyo
Yes, you *******, you can get them on Amazon (of course) and I'll have it by Wednesday. I'll hold off edging the outer panels until then. I also found a strange rotary trimmer to try. And I do have the Festool OF700 which is what I generally use but it's a whole deal to take out and set up. But in the name of finding the best edging tool... we will try them all Wednesday.
The pressure is on! 😅 I hope they work as well for you, I started to worry that Japanese edge banding is pretty weak sauce. The Amazon price looks quite reasonable at least, what chamfer size did you get?
 
OP
S

sakurama

Well-known member
Joined
Oct 10, 2010
Messages
1,458
Location
Portland - the cool one.
The pressure is on! 😅 I hope they work as well for you, I started to worry that Japanese edge banding is pretty weak sauce. The Amazon price looks quite reasonable at least, what chamfer size did you get?

I think I went with the .6mm one which seemed most reasonable and shipped quickest. If the edge banding is 1-1.5mm then that should be a generous bevel.

G
 

Graham08

Well-known member
Joined
Dec 10, 2007
Messages
713
Location
Iron Station, NC
I've really enjoyed this thread...thank you @sakurama for documenting and sharing so much!

A tip that might help in the future with gang drilling that might save you some welding: put a couple short pieces of aluminum welding rod between the moving jaw of your vise and your stack of parts. The aluminum will compress enough to make up the small differences in part width to hold everything securely. I forget where I saw this one, but I have used it several times and it works well.
 
OP
S

sakurama

Well-known member
Joined
Oct 10, 2010
Messages
1,458
Location
Portland - the cool one.
I've really enjoyed this thread...thank you @sakurama for documenting and sharing so much!

A tip that might help in the future with gang drilling that might save you some welding: put a couple short pieces of aluminum welding rod between the moving jaw of your vise and your stack of parts. The aluminum will compress enough to make up the small differences in part width to hold everything securely. I forget where I saw this one, but I have used it several times and it works well.

Holy cow… you’re totally right and i forgot that trick. Damn it. Not enough time in the shop. Thanks for the reminder.
 
OP
S

sakurama

Well-known member
Joined
Oct 10, 2010
Messages
1,458
Location
Portland - the cool one.
So I thought I'd be able to do this in a week or so and we're clearly into the "so" part of it. But it's put me in a much better mood so that's good. This was my week with the kids and so my shop time was limited and I lost two days mounting fenders to my gravel bike...

So we left off preparing to mount the panels.


Threaded inserts...

I'm asking you to remind me to never use MDF again. If I start a project that in any way uses MDF stage an intervention. For the shelves, which have no mechanical aspect other than transferring force into the steel, it's fine. That's what the turntable shelf did too. And acoustically MDF was great for the turntable. For these outside panels... not so much.

i-JXqZp69-X2.jpg

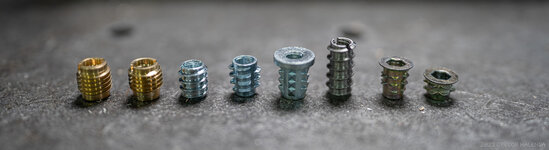
I have a collection of these threaded inserts and don't really like any of them. Because the panels are 1/2" I'm limited. The far right is the only one that is the correct length but I could grind or machine the others. I tested several and in MDF none worked. They all either pulled out or chewed the material.

i-GpTTd9W-X2.jpg

Before I gave up I drilled a couple 1" holes and glued in some softwood dowels to see if I could make that work. It didn't fare any better but I tried the inserts into some baltic birch scraps and of course that held.

i-8pL6Nrp-X2.jpg

I had a half sheet of 1/2" baltic birch in the cottage and planned to use it for the box inside the stand but decided to go ahead and use it for the panels. It's got a bit of a warp in it from being in the cottage but not bad. Hopefully the mechanical attachment will hold it and it will relax over time.

i-94jcHPF-X2.jpg
i-QDxmJxt-X2.jpg

I cut the panels 1mm wider this time and I'm using the shims to gauge the size - I'm looking for about 50-60mm of shim equally exposed around the panel.

i-8KpWpwM-X2.jpg

And I found that two panels were about 1mm short so I used some spare walnut edge band to essentially shim the panel. And I have some interesting news on the edge banding front - that's coming up.

i-zK3pMQC-X2.jpg

Each panel is marked for orientation and position. There is a 1mm error in the stand from top to bottom so I may try to sand that panel before I finish it.

i-wLrPSpj-X2.jpg

These are transfer punches. They're a set of incrementally sized rods with small points that can perfectly mark the center of any hole. It's key to making sure things stay aligned. We're trying really hard to minimize error stacking.

i-qHVdDCb-X2.jpg

And since I've decided to use the low profile shouldered inserts I used a small Forstner bit to drill a flat bottomed hole in the marked panel. Before installing them I got new black stain and stained the backs.

And that's where progress stopped. Nadia had a sleepover last night and asked if I could clean up so the house didn't look like a wood shop.

Fair.

In order to get to the finishing stage I need to build out the box for the records and I never really resolved that so I need to get drawing and solve that part of the puzzle.

Gregor
 
Last edited:

Bakafish

Well-known member
Joined
Feb 7, 2017
Messages
477
Location
Tokyo
And I have some interesting news on the edge banding front - that's coming up.
The tenterhooks that have been suspending me have become tender...

These are transfer punches.
[Austrian doing a bad Australian accent] That's not a transfer punch, that's a transfer punch.

Transfer1.jpegTransfer2.jpeg

In all seriousness, there is nothing worse than a misaligned hole. Nothing I said! Transfer punches are a great solution, but the transfer is only as accurate as the punch's fit to the bore. It may surprise you, but the clearance holes for a screw vary quite a bit depending on their purpose, or many other factors. What that means is an M6 clearance bore could be anything from 5.98-6.6mm, and so a fixed set of transfer punches may not 'fit' as good as one would hope.

These self centering expanding transfer punches solve that problem. They have a replaceable hardened punch that runs through the center, you just need a tiny mark, you repunch it with an optical center punch after.

I'm asking you to remind me to never use MDF again.

Materials are not innately bad, people choose to make them bad. But not-bad people can make them good, and some good MDF comes from Germany. It's not cheap, and if that's your only reason for using MDF (and you are ignoring its beneficial properties of uniform density, damping characteristics and I'll say it, appearance) then this is the wrong material. But it certainly can be used to make some nice stuff.

MDF MFT.jpeg

It's softer than Baltic Birch, and creates more dust, but I found it just as easy to use in every way. I had no complaints at all, other than it being a lot heavier than I expected (this table is much more of a tank than the lightweight work surface I was aiming for.) And it comes in some great colors that are consistent through the entire board. Why stain when you can Stan?

Anyway, pick up a sheet if you see it and hopefully it will be (previous review pending):
[better than my last recommendation]​
[as good as my last recommendation]​
 

zanyad

ALLIANCE MEMBER
Joined
Apr 26, 2018
Messages
2,817
Location
NE Ohio
The tenterhooks that have been suspending me have become tender...


[Austrian doing a bad Australian accent] That's not a transfer punch, that's a transfer punch.

Transfer1.jpegTransfer2.jpeg

In all seriousness, there is nothing worse than a misaligned hole. Nothing I said! Transfer punches are a great solution, but the transfer is only as accurate as the punch's fit to the bore. It may surprise you, but the clearance holes for a screw vary quite a bit depending on their purpose, or many other factors. What that means is an M6 clearance bore could be anything from 5.98-6.6mm, and so a fixed set of transfer punches may not 'fit' as good as one would hope.

These self centering expanding transfer punches solve that problem. They have a replaceable hardened punch that runs through the center, you just need a tiny mark, you repunch it with an optical center punch after.
Oh, that's nifty!
US site, with links to two sellers: https://www.rennsteig.us/products/hardware-tools/punches/272-adjustable-expanding-transfer-punches
Amazon: https://www.amazon.com/dp/B001MRSMT6?tag=atomicindus08-20
 

Grant Gunderson

Well-known member
Joined
May 17, 2013
Messages
2,328
Location
Bellingham, WA
I’ve almost bought that set a few times. However in the end I decided having a full inch / metric set is better. Less wear on the tips. Plus having dedicated sizes is a feature I’ve grown to love as it’s a great way to check the drill bit size needed.
IMG_1065.jpeg
I’ve found there the kind of tool you don’t realize you really need till you have them. Then once you have a set you use them all the damn time. Just remember they are only for marking the location. I always follow up with one of my Starrett punches.
 

Bakafish

Well-known member
Joined
Feb 7, 2017
Messages
477
Location
Tokyo
I’ve almost bought that set a few times. However in the end I decided having a full inch / metric set is better. Less wear on the tips. Plus having dedicated sizes is a feature I’ve grown to love as it’s a great way to check the drill bit size needed.
IMG_1065.jpeg
I’ve found there the kind of tool you don’t realize you really need till you have them. Then once you have a set you use them all the damn time. Just remember they are only for marking the location. I always follow up with one of my Starrett punches.
That's a nice looking set, a lot of the ones I've seen just use nominal sizes which don't even fit a clearance hole properly. The more sizes the better.

The other wonderful tool is a transfer screw which allows you to transfer mark an existing threaded hole pattern to another surface. I've not found native versions of either transfer tools here in Japan, so either they are unknown or have a name I wasn't able to derive. Would really like a metric set of those transfer screws though.
 
To avoid these ads, REGISTER NOW!

Clemson13

Well-known member
Joined
May 30, 2015
Messages
425
I’ve almost bought that set a few times. However in the end I decided having a full inch / metric set is better. Less wear on the tips. Plus having dedicated sizes is a feature I’ve grown to love as it’s a great way to check the drill bit size needed.
IMG_1065.jpeg
I’ve found there the kind of tool you don’t realize you really need till you have them. Then once you have a set you use them all the damn time. Just remember they are only for marking the location. I always follow up with one of my Starrett punches.
What brands did you go with? Since its you, im assuming not amazon specials...
 

Grant Gunderson

Well-known member
Joined
May 17, 2013
Messages
2,328
Location
Bellingham, WA
What brands did you go with? Since its you, im assuming not amazon specials...
I got mine at Grizzly as the show room is just down the street and I got a deal on an open box set. They gave held up surprisingly well. McMaster sells a nice usa made set, but I couldn’t justify the massive price difference.
 

zeug

Well-known member
Joined
Nov 29, 2009
Messages
191
Location
Colorado Springs
The tenterhooks that have been suspending me have become tender...


[Austrian doing a bad Australian accent] That's not a transfer punch, that's a transfer punch.

Transfer1.jpegTransfer2.jpeg
Oh, I think you got me. I've been wanting transfer punches, but didn't like having to store them on top of a horizontal surface. These would tuck nicely in a drawer. The set is good for 6-16mm and I see there are a few other sizes to go larger. Amazon.de is €99 for the set.

Screenshot 2023-12-11 at 8.51.09 AM.png
 
OP
S

sakurama

Well-known member
Joined
Oct 10, 2010
Messages
1,458
Location
Portland - the cool one.
[Austrian doing a bad Australian accent] That's not a transfer punch, that's a transfer punch.

Transfer1.jpegTransfer2.jpeg

In all seriousness, there is nothing worse than a misaligned hole. Nothing I said! Transfer punches are a great solution, but the transfer is only as accurate as the punch's fit to the bore. It may surprise you, but the clearance holes for a screw vary quite a bit depending on their purpose, or many other factors. What that means is an M6 clearance bore could be anything from 5.98-6.6mm, and so a fixed set of transfer punches may not 'fit' as good as one would hope.

These self centering expanding transfer punches solve that problem. They have a replaceable hardened punch that runs through the center, you just need a tiny mark, you repunch it with an optical center punch after.

Anyway, pick up a sheet if you see it and hopefully it will be (previous review pending):

Those are just beautiful. But super expensive. I have a full metric set like Grant and while it will drive the true OCD's up a wall I'll generally use them for the rare standard holes. 1/2 size metrics are pretty small and the transfer punches aren't for ultra precision work - for that I'm using the DRO on the mill.

That said I went oversize on the holes for the panels so that I could center them up with shims and then tighten the screws down. My thought being that if I didn't allow for a small amount of movement I'd get warping over time/seasons if the panels were held completely rigid in steel. Maybe not?

Still, those punches are saved. I'll put a watch on them and see if the price ever drops or look on ebay.

found there the kind of tool you don’t realize you really need till you have them. Then once you have a set you use them all the damn time. Just remember they are only for marking the location. I always follow up with one of my Starrett punches.

This for sure. Once you have them they become useful for all sorts of things - aligning multiple panels or stacks of material, poking things out of holes. The set I have is probably not a McMaster so not crazy expensive but as infrequently as they're used they've held up great.


____________________________________________________​


I'm working on the stand still. At this point I'm trying to finish before Christmas. I have an intermission project though. The group I ride with is right in the middle of MTB and Roadies. Namely they're not jerks but they are big on etiquette especially as it relates to group rides. That doesn't exist for mountain bikes.

The last few weeks have been discussions of light etiquette and fenders. I've been guilty of both. Evidently you're a heathen if you set your lights to blink in a group ride setting. This is the bicycle version of cap locks...

Fenders. Yeah, I get that. My bike didn't have them but I'm at the back anyway, at least until last week.

i-k358N3K-X2.jpg
i-9BPRCsb-X2.jpg
i-gVkxM4G-X2.jpg

So if my bike looked like this in the rainy PNW then riding behind me was a problem. Also I replaced my old tires that were cut with wider ones.

i-fRTC2vL-X2.jpg

I made a delrin stand off for the only mount behind the seat post. My goal is to keep the fenders following the tire line equally. The bike doesn't have two important mounts: a seat stay mount and a fork crown mount. Both help with rigidity and so I needed to make solutions.

i-sGWTp2M-X2.jpg

I was planning to use delrin all the way around as it's super easy to machine but I wanted to add cork adhesive to protect the frame and that didn't stick. I had a chunk of 1/2" aluminum bar so I went with that.

i-szD9j7S-X2.jpg

The stays are just 1/8" stainless rod so I bought some welding rod but tried to use the existing parts but just bent and cut them.

i-6CDrNZr-X2.jpg
i-W7K6ccR-X2.jpg

Fenders that fit large sized 29" tires are rare so the only pair I found have this dumb curve/angle profile which isn't really dumb but difficult to match. What I need to do is take a photo of the fender straight on and then isolate the profile, print a photo at 100% and then cut it out and use that. On the back I tried a curved profile with tape and the front I tried to match the angle unsuccessfully. I may revisit the front.

i-fhmdnFL-X2.jpg

I've tightened up the back a bit but the first ride was solid - no rattles, no rubbing. I am ready for the next rain ride and my lights ARE SET TO NOT BLINK.

Back in the shop today. Hopefully will make some good progress.

Gregor
 
Last edited:

kppolich

Well-known member
Joined
Apr 7, 2020
Messages
348
Location
Eastern Iowa
Another possible faux pas is:
When photographing a bicycle, try and align the drive side crank arm to be at the 3 o'clock position

Agree with fenders in a group being nice to have to protect others from debris and keep yourself a little more clean.
Agree with Blinky's being fine when riding alone or if you are going to be at the back of a group, but if you are not in the back of the group for whatever reason, those Blinky's are horrible for vision within the group dynamic. Stick with solid beam or if your rear light allows, pulse.
 

wasfast

Well-known member
Joined
Apr 10, 2014
Messages
874
Location
San Diego CA
If you really want the fenders to function, add flaps on both the front and rear, extending nearly to the ground. The front flap makes a big difference in keeping your feet and front of your legs dry. The back is commonly called the "buddy flap" and often required for group rides there.
Not the best photo at all but you can see the white flat for the front of the bike on the right, mine:) This is just across the river in east Vancouver.
 

Attachments

  • IMG_1697.JPG
    IMG_1697.JPG
    58.4 KB · Views: 177
OP
S

sakurama

Well-known member
Joined
Oct 10, 2010
Messages
1,458
Location
Portland - the cool one.
I know the 3 o'clock crank rule but, you know, it's my day off. I also didn't clock the tire logos to the valve stems and then clock the tires. I don't want to seem like I'm phoning it in but... I'm learning to set limits on my tweaky-ness.

Same goes for the flaps for now. But I might revisit that.

Today was a big day on the OMTM group ride. For the first time in 3 months it was, for me, an actual group ride - I didn't get dropped and managed to stay mid pack in the climb. I love seeing progress.

Speaking of...


________________________________________________​


There are two things I need to do to finish this project: the outside panels and the interior box. I'm getting nervous with the veneer in the house (kids kicking it, cats sitting on it) and wanted to get those panels done.

i-jHkKwLk-X2.jpg

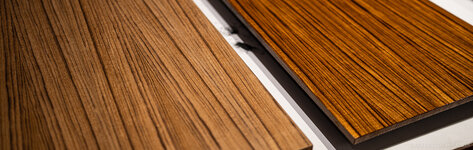
I've never used sheets of veneer that are peel and stick but it was a nice treat - no mess. It was 3M adhesive so I'm pretty confident.

i-R94jDdg-X2.jpg

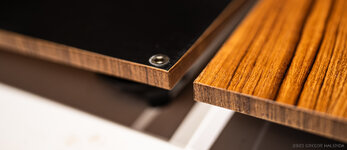
The edges are mostly hidden and so I thought I'd get away with using some other type of edge band: sapelle, walnut, anything that was a close color match. I couldn't find any and was running low on veneer so I bought another quarter sheet and cut some strips. I don't know why I insist on end grain but I cut some because I had it.

Hopefully this level of tweak makes up for the cranks - I only have so much tweak to give so I'm using it here.

i-j8cQR3F-X2.jpg

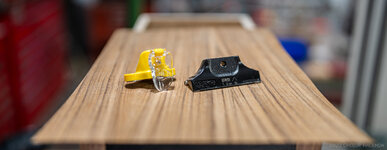
So I bought the Star-M ceramic trimmer that Bakafish recommended and while searching for that came across this little Edge Supply yellow one. It was expensive at $60 but...

i-sW9Shvz.jpg

After the talk about how great the Roto-Trim was I thought this was worth a try. The reviews seemed positive and this sort of cutter would actually cut and not sheer so should, theoretically, cut irrespective of grain orientation - the thing that was messing up my other efforts.

i-LSpMJKB.jpg

The M-Star has a 1mm bevel and that was probably too much. The veneer is slightly less thick and so on the back side the cutter just touched the black stained birch. Also, it worked great on edge banding that was linear but less great on the end grain which is sort of a strange thing to do anyway so no fault there.

Definitely better than the FastCap option. If I were to buy it again I might do the non bevel version as I like to knock the edges down with a sanding block.

i-nkk49FZ.jpg

This weird little cutter did phenomenal with the grain and and fine on the end grain. It made flawless 90 degree cuts and there was no tear out at all - just a neat and tidy cut. It's not easy to hold, it would be better if it was a bit larger and you could do more than pinch it between two fingers but it's really good. I hate to say it's worth $60 because it's physically cheap and toy like. The idea is great but the execution is pretty weak. But the cuts are the best option short of a router.

i-fhrDZXM.jpg

Neither was great at the end grain so I switched to the Fastcap which doesn't bevel like the green one and because you're squeezing this cutter with your whole hand it could more aggressively cut the end grain veneer.

i-29Gxcnz-X2.jpg

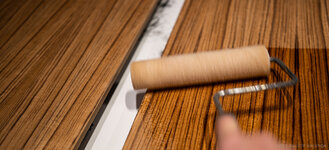
I wanted to get at least one coat of poly on them so that they were protected. I've got stain out and there always seems to be some that hasn't dried on a glove or on the foam board. The poly is insurance. It still needs to be sanded and given a second coat but one locks it in.

i-kT9fTrq-X2.jpg

And it also reminds me why I chose teak. Dang that looks nice.

i-vwVZJnD-X2.jpg

This has turned into a way larger and more complicated project than I anticipated. I'm sure that the only person surprised by this is me.

The next part of the project is the part that makes it interesting and unique - a place to hold the records. In my original sketches I wasn't sure what this would look like. When I started building I wasn't sure what it would look like. I figured I'd deal with it when I got there...

Well, I'm there. That's next.

Gregor
 
Last edited:

burger

Well-known member
Joined
Jun 6, 2005
Messages
997
Location
Erf
Hello Gregor,

Excellent post!

Questions:

1. Are you using water or oil based?

2. How do you feel about brush vs. roller? To load the question, I am a brush guy who is slowly converting to roller.

3. What nap?

4. Cats and kids? You should work in a garage. Silly.


Keep on,
Ed
 

Bakafish

Well-known member
Joined
Feb 7, 2017
Messages
477
Location
Tokyo
Definitely better than the FastCap option. If I were to buy it again I might do the non bevel version as I like to knock the edges down with a sanding block.
Yeah, I was worried when you told me which one you got, the bevel versions are really for plastic edge bands where you want that chamfered look. I use the square edge one most as I've been doing Melamine which uses very thin banding.
 
OP
S

sakurama

Well-known member
Joined
Oct 10, 2010
Messages
1,458
Location
Portland - the cool one.
Hello Gregor,

Excellent post!

Questions:

1. Are you using water or oil based?

2. How do you feel about brush vs. roller? To load the question, I am a brush guy who is slowly converting to roller.

3. What nap?

4. Cats and kids? You should work in a garage. Silly.


Keep on,
Ed

1. Varathane Oil based poly in satin. I did a bunch of tests and this was the one I liked most when I started the house project.

2. Roller and foam pads. I almost never use brushes. Mostly because I'm doing larger surfaces like cabinets and panels but also I like that it's quicker and flats out evenly.

3. 1/4" nap - the larger nap holds too much poly and then, when you go over edges, it will load and drip. That's still a problem on the short nap so when I roll a panel I'll also use a disposable foam brush to quickly run around the outside.

4. Yeah, this project has taken all the room. The welding table has the stand and I've already moved one motorcycle outside so I can use the Festool table for cutting and banding. That leaves the dining table as the only space left.

G
 
OP
S

sakurama

Well-known member
Joined
Oct 10, 2010
Messages
1,458
Location
Portland - the cool one.
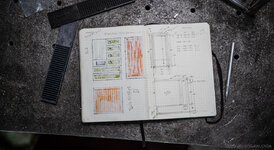
The box seemed like it would be just a box. My first sketches included a steel frame like the amps for the turntable power supply but that's a different brand, size, look etc and so I decided I didn't want to interrupt the clean look. I should hide that.

i-TXMSbsV-X2.jpg

So I turned a page and started to sketch in earnest. This time really measuring everything and I soon discovered that I didn't have much room. Especially if I was going to use 1/2" baltic birch. I think initially I was thinking of the MDF but my experience with the panels reminded me that baltic birch is my happy place.

i-TsCsFpr-X2.jpg

I bought a quarter sheet and started to rip the basic shapes...

i-P3QK6Qh-X2.jpg

And found that things weren't lining up.

i-W5WnvkL-X2.jpg

I've had this Woodpecker giant square for a long time but only just realized that the edge fits into the Festool table tightly. It's not designed to do that but it does make squaring it up easier. It's a drawback of the design that you need to double check square if you break it apart or change the set up.

i-8DbCJ2H-X2.jpg

So the basic box. There's barely room with the 1/2" material but it should work. I need to divide it for records on the top and room for the power supply below but hidden.

i-6SFPRj3-X2.jpg

I have probably 3 or 4 different ways to cut a dado: two attachments to the router, the router table and I suppose the saw with a depth stop. The router bit I had was barely undersized to the 1/4" ply I had and tests showed that it was a tight fit if I ran the router through both directions using this edge guide.

i-Krw2GSc-X2.jpg

I was thinking of using through tenons with the Domino but 1/2" ply needed the smaller size which are too short. It's a good thing because I haven't used the Domino in a long time and it was a learning curve. Let's just say that there may be some strange domino placements that I'm glad you can't see.

i-vwSwkRL-X2.jpg

The other problem is that while I have a fence for 1/2" ply the Domino is really made for metric and my birch isn't. Also the small size can't be centered via the fence. It was a hot mess of trial and error.

i-BWG2BMr-X2.jpg

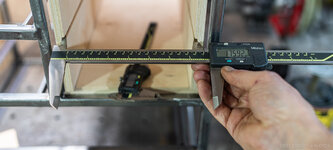
I sometimes forget I own these giant 300mm calipers which are so nice when I remember.

i-Z3vBqT4-X2.jpg

The box is now Domino'd together. I'm leaving the same 6mm gap but the opening isn't perfectly square. I'm really sort of making this up as I go. I cut the base back so I'd have a reveal or gap. I had to use the 1/4" for the divider because I'd run out of room - I'm only going to have 3mm for the power supply.

i-RFhMfwG-X2.jpg

This is a bit of mess but it works.

i-rWgKKbm-X2.jpg

I tested the fit with an old Jean Michel Jarre record and then realized that my new vinyl might be larger so I grabbed Deerhunter, José Gonzales and Glass Animals - gatefolds. It's tight at 315mm especially with the extra sleeves so they won't flip/flop back and forth which is a little disappointing as that's a satisfying sound and feeling but that's how the numbers worked. I might have been able to use 1/4" for the base and gain back 6mm but... I didn't.

i-sXthxDJ-X2.jpg

With the parts cut I decide that I while I was originally going to make it black (so it faded into the front and didn't disrupt the glow of the logos) now I'm going to hide the power supply by boxing it so I have a bit more real estate to work with. Course correction! I want to veneer it and make the whole thing more like furniture. Bring the teak into the front side.

Before I do that I need to stain as much of the parts as I can so I'm not going to accidentally stain the veneer.

i-qn9nLnh-X2.jpg

I'm down to strips of veneer but I decide I should have enough to do the interior if I splice two together. Veneer has seams and so I use the Roto-Trim to cut very accurate sheets for the interior and I try to make the pieces sequential and get the grain to match up.

See, this is the energy I saved up by not clocking the cranks. I can put needless energy into grain matching the interior of a box that will be filled with records and never seen.

i-h2B27f6-X2.jpg

I did the interior in two strips but it came together perfectly. Test fitting of all the parts above and...

i-9gkzNhD-X2.jpg

...finally glue up. Because of my Domino re-entry foibles there's some small errors. I've come to understand that perfection is near impossible but fixing mistakes is where it's at.

i-7ZT4SGc-X2.jpg

Hence the wood filler in spots.

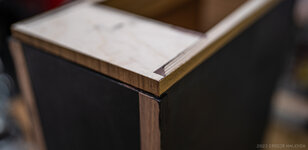
Once glued up I test fit the box in the frame. It was a tiny bit low and a small amount out of square so I used strips of walnut veneer and got it reasonably squared. It looks like intentional slides. Yeah, intentional. That's the ticket.

i-w8mBPk8-X2.jpg

The back of the record box was something I considered trying to dado in or somehow be fancy with and finally decided that getting it done simply was where it's at. The back dropped in and rested on the veneer edges. Glued and nailed.

i-z3H6GMb.jpg

Since I've decided to make this more "furniture" I cut 1/2" strips of veneer to "edge" the box so it would look like the outer panels.

i-WjSFCkt.jpg

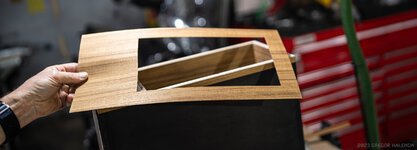
Buying that extra veneer allowed me to hold back a single piece that could be a face to the box. I cut it oversize and put it on without much of an idea of how I was going to trim it.

i-M9XLjGh.jpg

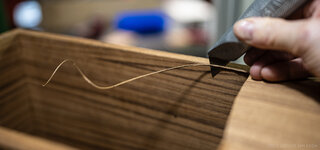
I couldn't use any tool inside so I was just careful with a fresh blade and trimmed up the edges by hand.

i-N77sWTD.jpg

And hopefully this will look good with the sides. This has turned into such a massive amount of work and I'm plowing forward with only cursory test fits. But I'm into the home stretch.

I'm very pleased with the decision to veneer it. I had some LED's and I was thinking of running a strip inside but in the end the records fit so tightly I don't think there's a way to make it work. Also, I've needlessly complicated this enough. I always have Ben in the back of my mind - just finish it.

Gregor
 
Last edited:

Vertigo Cycles

Well-known member
Joined
Jan 14, 2010
Messages
193
Location
Portland, OR
I know the 3 o'clock crank rule but, you know, it's my day off. I also didn't clock the tire logos to the valve stems and then clock the tires. I don't want to seem like I'm phoning it in but... I'm learning to set limits on my tweaky-ness.
You're killin' me!

Clocking tire logo's and valve stems doesn't matter much anymore with tubeless tires. Now it's reserved for us tweaky types. I'm glad you saved your energy for veneer matching. That IS actually important.
 

Bakafish

Well-known member
Joined
Feb 7, 2017
Messages
477
Location
Tokyo
The other problem is that while I have a fence for 1/2" ply the Domino is really made for metric and my birch isn't. Also the small size can't be centered via the fence. It was a hot mess of trial and error.
Sorry to side track you on details, it's my nature.

I think you are referring to the little stepped presetting adjuster which is graduated in a number of metric values, am I right? If so, it isn't great for metric either as it misses some rather standard values (at least of what I can get over here) so I ended up making my own replacement part with the material thicknesses I use, (yes 3D printer again.) If you have some values you typically need, let me know, I can find the file and model you a part with some imperial ( :sick: gack) step values matching your common stock.

The other option is they left a pair of machined surfaces at the front that accept a gauge block stack, (half the material thickness - 3mm) that's how I used to set it before I decided to 'fix' it with my custom slider. The stepped stop isn't really what holds the moving fence in place, the lock mechanism does that, so once to have the centering offset set, the lock generally suffices.
 
To avoid these ads, REGISTER NOW!
Top Bottom