To avoid these ads, REGISTER NOW!

ZMotorsports Shop Projects 2.0

OP
Z

zmotorsports

ALLIANCE MEMBER
Joined
Oct 20, 2009
Messages
21,477
Location
Northern Utah
Hey Mike, just curious what's the length difference between that driver and the original stubby one? Do you happen to know the part number of the longer one?

And now I need to get those Lisle pliers!

The length difference is 1.5" for the standard stubby vs. 3" shank for the modified stubby, or longer stubby, not sure what to call it. :unsure:
driver1.jpg

This is not something that has a Snap-on part number to be ordered complete. The handle is part number SHDP22IR.
driver2.jpg


I don't know the number of the shank but I have my Snap-on rep. order the shank with the wrench bolster rather than a standard short blade, then I just pressed the shank into the new handle.

@thr3squared , in addition to the SHDP22IR handle that I posted above, the blade is part # SSD2RB.

Hope that helps.
 
To avoid these ads, REGISTER NOW!
OP
Z

zmotorsports

ALLIANCE MEMBER
Joined
Oct 20, 2009
Messages
21,477
Location
Northern Utah
The wife had to finish up a little shopping on Saturday morning so with coffee in hand I headed to the shop to get some work done before we left with the kids for a Christmas concert later in the day. It was a very enjoyable winter morning in the shop. With the heater going, the Christmas music on the radio and fresh cup of coffee I had to just sit back for a moment and take it all in and realize just how blessed I am to have the wife, family, home and all of the things that we've worked so hard for in my life. I truly am blessed.


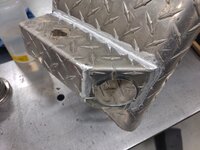
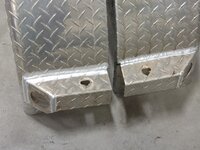
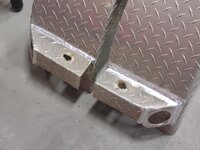
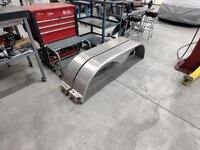
Now moving on to shop work, I had a fellow forum member drop off some trailer fenders last week that had begun cracking and rather than buy new ones, he asked me if I could repair the cracks on one fender and redo the welds on the other one to prevent them from eventually cracking and having the same issues.

I started by loading up the tool cart with those tools that I figured I may need, added a drop of oil to each pneumatic tool in the cart and then moved the cart over to my workstation at the fabrication table.
fenders1.jpg

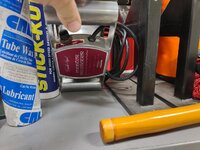
I thought I'd also try the new abrasive lubricant that I bought a few months ago but haven't had the opportunity to try yet. In the past I have used Formax on my abrasive tools and had decent results, however, I follow a guy on YouTube that does a lot of aluminum forming and thought I would try the CRL Tube Wax that he recommends.
fenders2.jpg

With the tools at the ready in the cart, I secured the fender to the table and commenced the work.
fenders3.jpg

An angle plate made for a rather secure method of holding the fender so I didn't have to chase it around the table.
fenders4.jpg

Here the weld bead is mostly removed on the first fender. I used a 36-grit 3" Roloc disc to blend the old weld to the parent material and then a rotary bit to get down into the weld joint and create a "V" in which to ensure I was getting full penetration. I have to admit, the CRL Tube Wax did a great job at preventing heavy buildup and prolonging the life of the abrasive discs as well as keeping the flutes on the rotary bit from clogging up. Not once did I have to stop and run a wire brush over the tools to clear the disc or rotary bit. As the wax slung off along with the aluminum grit, I would touch the disc or bit to the tube wax and proceed, then rinse and repeat. I did notice that with the CRL Tube Wax, it did actually deposit a slight amount more residue onto the component and the table compared to the Formax lube, but not what I would consider excessive. After completion of the prep with the abrasive tools I gave everything a wipe with acetone in preparation for welding.
fenders5.jpg

Before striking an arc, I like to ensure I am getting all of the flow of gas to the torch's cup.
fenders6.jpg

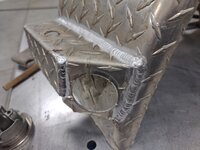
One end of the first fender completed and allowed to cool. The aluminum was quite tarnished and had a fair amount of oxidation which required a bit more cleaning action from the welder, even after mechanically removing much of the oxidation. I turned my A/C balance to allow for a bit more cleaning action than usual and although the welds are not as bright and shiny as I would like, they are solid and I was able to get excellent penetration.
fenders7.jpg

Moving on to the second fender, which was the worst one showing multiple cracks as well as some damage to one of the light openings that needed to be repaired. This crack really opened up once I started to V it out. It appears as though there was quite a bit of gap during the original weld process which resulted in a about half of the width showing lack of fusion. I didn't take a picture of the crack once opened up but it was approx. 1/8" wide from the bracket to the fender's surface.
fenders8.jpg

I grabbed a piece of .125" plate in which to cut a small strip from to fill the gap. I was able to use the straight edge of my new bandsaw guide block. It worked great and allowed me to keep my fingers from the direct path of travel of the blade and was quite easy to control the piece as being fed into the blade.
fenders9.jpg

With the small strip of aluminum tapped into position, I was able to weld the joint and capture all three pieces with the molten puddle thus tying all together as one structure.
fenders10.jpg

Stay tuned for a few more pictures in the next post.
 
OP
Z

zmotorsports

ALLIANCE MEMBER
Joined
Oct 20, 2009
Messages
21,477
Location
Northern Utah
Continuing on with the fender repair.

The other end required a bit of hammer forming of the light opening from an impact. It actually straightened very easily and then the welding could take place.
fenders11.jpg

Both fenders completed.
fenders12.jpg

fenders13.jpg

And set aside so the clean-up could commence.
fenders14.jpg

I made quite a mess around the fabrication table with aluminum grit and debris that needed to be swept up, but everything cleaned up nicely.

Thanks for looking.
 
OP
Z

zmotorsports

ALLIANCE MEMBER
Joined
Oct 20, 2009
Messages
21,477
Location
Northern Utah
I was nearing completion of the fenders a few hours later when the wife arrived home so I thought with a few hours until we were to mee the kids for the concert, I'd take some time and wash and detail her car as I haven't washed it in a couple of weeks.

I ran to the nearby car wash and pressure washed the undercarriage as well as the exterior paint before pulling it back into the shop to wipe it down with a chamois. I also opened all doors, hood and trunk to wipe the jambs down.
acura1.jpg

And the underside of the trunk lid and hood.
acura2.jpg

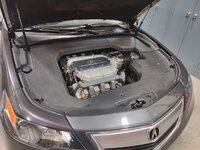
Also gave the engine covers a wipe down.
acura3.jpg

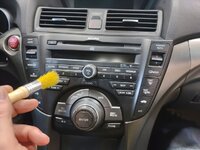
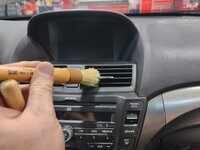
I then moved inside and grabbed my small and large detail brushed in order to thoroughly clean the dash and door panels before running the vacuum through the interior.
acura4.jpg

acura5.jpg

acura6.jpg

acura7.jpg

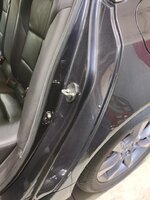
Lastly, I grabbed the down-graded chamois and went at the door jambs.
acura8.jpg

Completed and looking pretty good for an 11-year old car with 175k on the clock.
acura9.jpg

The last detail was to install the 2025 decal to the license plate that came in the mail a couple days prior. I used some chrome polish to detail the license plate frame before reinstalling.
acura10.jpg


Thanks for looking.
 

Jgaz

Well-known member
Joined
Dec 16, 2016
Messages
1,712
Location
AZ
The wife had to finish up a little shopping on Saturday morning so with coffee in hand I headed to the shop to get some work done before we left with the kids for a Christmas concert later in the day. It was a very enjoyable winter morning in the shop. With the heater going, the Christmas music on the radio and fresh cup of coffee I had to just sit back for a moment and take it all in and realize just how blessed I am to have the wife, family, home and all of the things that we've worked so hard for in my life. I truly am blessed.


Now moving on to shop work, I had a fellow forum member drop off some trailer fenders last week that had begun cracking and rather than buy new ones, he asked me if I could repair the cracks on one fender and redo the welds on the other one to prevent them from eventually cracking and having the same issues.

I started by loading up the tool cart with those tools that I figured I may need, added a drop of oil to each pneumatic tool in the cart and then moved the cart over to my workstation at the fabrication table.
fenders1.jpg

I thought I'd also try the new abrasive lubricant that I bought a few months ago but haven't had the opportunity to try yet. In the past I have used Formax on my abrasive tools and had decent results, however, I follow a guy on YouTube that does a lot of aluminum forming and thought I would try the CRL Tube Wax that he recommends.
fenders2.jpg

With the tools at the ready in the cart, I secured the fender to the table and commenced the work.
fenders3.jpg

An angle plate made for a rather secure method of holding the fender so I didn't have to chase it around the table.
fenders4.jpg

Here the weld bead is mostly removed on the first fender. I used a 36-grit 3" Roloc disc to blend the old weld to the parent material and then a rotary bit to get down into the weld joint and create a "V" in which to ensure I was getting full penetration. I have to admit, the CRL Tube Wax did a great job at preventing heavy buildup and prolonging the life of the abrasive discs as well as keeping the flutes on the rotary bit from clogging up. Not once did I have to stop and run a wire brush over the tools to clear the disc or rotary bit. As the wax slung off along with the aluminum grit, I would touch the disc or bit to the tube wax and proceed, then rinse and repeat. I did notice that with the CRL Tube Wax, it did actually deposit a slight amount more residue onto the component and the table compared to the Formax lube, but not what I would consider excessive. After completion of the prep with the abrasive tools I gave everything a wipe with acetone in preparation for welding.
fenders5.jpg

Before striking an arc, I like to ensure I am getting all of the flow of gas to the torch's cup.
fenders6.jpg

One end of the first fender completed and allowed to cool. The aluminum was quite tarnished and had a fair amount of oxidation which required a bit more cleaning action from the welder, even after mechanically removing much of the oxidation. I turned my A/C balance to allow for a bit more cleaning action than usual and although the welds are not as bright and shiny as I would like, they are solid and I was able to get excellent penetration.
fenders7.jpg

Moving on to the second fender, which was the worst one showing multiple cracks as well as some damage to one of the light openings that needed to be repaired. This crack really opened up once I started to V it out. It appears as though there was quite a bit of gap during the original weld process which resulted in a about half of the width showing lack of fusion. I didn't take a picture of the crack once opened up but it was approx. 1/8" wide from the bracket to the fender's surface.
fenders8.jpg

I grabbed a piece of .125" plate in which to cut a small strip from to fill the gap. I was able to use the straight edge of my new bandsaw guide block. It worked great and allowed me to keep my fingers from the direct path of travel of the blade and was quite easy to control the piece as being fed into the blade.
fenders9.jpg

With the small strip of aluminum tapped into position, I was able to weld the joint and capture all three pieces with the molten puddle thus tying all together as one structure.
fenders10.jpg

Stay tuned for a few more pictures in the next post.
Thank you for the tube wax tip.
I always use wax on my burrs, saw blades, and Blair cutters when working with aluminum but have never used it on roloc disks.
One can always learn something.
 

OutlawDrifter

Well-known member
Joined
Jan 20, 2015
Messages
3,899
Location
KS
Mike, I'm jealous of your door jambs1 Mine get about 1 or 2 deep cleans a year(outside of a wipe down after a wash)...but it doesn't take long for the rock road to destroy the labor :LOL:

I think it would take a week of constant water flow to get all of the dust out of the crevices of my vehicles!
 

Swanny1953

ALLIANCE MEMBER
Joined
Jul 28, 2010
Messages
1,082
Location
Lucas, TX
Mike, nice repair on the fenders. I have had to do some work on mine over the years.
I was kinda surprised you didn't clean up the hogged out mounting holes!
 
OP
Z

zmotorsports

ALLIANCE MEMBER
Joined
Oct 20, 2009
Messages
21,477
Location
Northern Utah
Thank you for the tube wax tip.
I always use wax on my burrs, saw blades, and Blair cutters when working with aluminum but have never used it on roloc disks.
One can always learn something.

Thanks. I started using wax on abrasive disc several years ago (Formax) but I already like this CRL Tube Wax better than the Formax for this application. Seemed to have better holding capabilities and doesn't sling as quickly, although it is a bit more "gooey" than the Formax. What little bit that does sling off leaves a bit more residue that the Formax but that is easily removed with acetone. I do think it prolongs the life of the abrasive discs.

I’ll definitely try that CRL Tube Wax, I’m also curious to know a bit more about that YouTube-channel.

As always great content in this thread. 👍🏼👍🏼👍🏼👍🏼

Thanks Anders. The gentleman's name is Morgan Clarke. His channel is MCD-1 for Morgan Clarke Designs. He builds high end desert racers and does amazing aluminum panel work in addition to his tube work. You should check out his channel.
 
OP
Z

zmotorsports

ALLIANCE MEMBER
Joined
Oct 20, 2009
Messages
21,477
Location
Northern Utah
Mike, I'm jealous of your door jambs1 Mine get about 1 or 2 deep cleans a year(outside of a wipe down after a wash)...but it doesn't take long for the rock road to destroy the labor :LOL:

I think it would take a week of constant water flow to get all of the dust out of the crevices of my vehicles!

Thanks Marc. Door jambs are one of my pet peeves and I usually give them a quick wipe down with a chamois after washing to keep them nice and clean.


Mike, nice repair on the fenders. I have had to do some work on mine over the years.
I was kinda surprised you didn't clean up the hogged out mounting holes!

Thanks Gary. The owner and I did discuss the slightly elongated mounting holes in each end of the fenders, however my concern was I had no way of knowing EXACTLY where the hole needed to be without the fender mounted on the trailer so if I were to machine an aluminum weld washer and weld it into place there was a high probability that it would be slightly off and then the retaining thumb screw wouldn't align properly. I suggested just to use a large fender washer along with the thumb screw to cover the oversized hole as well as make alignment of the fender easier when installing onto the trailer.

Also, I was trying to help keep costs down for the owner as it would have been another couple hours labor to machine the weld washers and then weld them onto the fenders, which would have almost doubled the quote.
 

signcrafter

Well-known member
Joined
May 9, 2012
Messages
12,519
I want to give another shout out to Benchmark Abrasives. Let me preface by saying I am not endorsed or have any affiliation with Benchmark, but I've been using their products for a few years now and have been very pleased with the products that I've used.

Last week I placed an order for some supply items that I was getting low on. Nothing major, just some Roloc style 3" grinding disks, some 60-grit PSA sanding discs, some 20k RPM 2.5" wire wheels and some scroll style blades in 32-tpi and 24-tpi for my small pneumatic saw.

Well the order arrived yesterday and after opening I noticed that the label was torn and mostly missing on the plastic bag for the 60-grit PSA discs. I opened the bag to double check the grit and that's when I noticed that they sent my 80-grit by mistake. I took a couple of pictures and sent them the pictures. I got a response within a half an hour stating they apologized and would get the 60-grit discs in the mail immediately. When I asked how to send the incorrect ones back to them, they simply said to enjoy the early Christmas present.

I have not had a single issue with their customer service on anything I have ordered over the past few years and just had to give a shout out for anyone needing grinding or cutting supplies. Not only are their products very good, but their customer service is impeccable.
Mike, I was just checking out the Benchmark site. I need to go on a shopping spree, my roloc drawer is a few of this or that that I have picked up over the years. I've bought a few boxes of 3m sanding discs and scotch brite pads over the years. If you get some free time I would love to see your selection, which ones you keep and what you use each one for mainly. Looking to place an order and while I'd like to just get a box of each I think my kids may want to go to college at some point. Wondering which grits and styles you get for what tasks? Thanks

And, I just added two pliers to my "needs" list. I've been thinking about the knipex hose clamp pliers for a while but the snap on looks pretty nice. I have the lisle fuel disconnect pliers but the electrical one looks like a must have also.
 

signcrafter

Well-known member
Joined
May 9, 2012
Messages
12,519
That's the other forum I saw him on but couldn't remember for the life of me Graham, offroadfabnet.
I remember that forum now, used to be a ton of info over there. Too bad it's shut down now I believe. If I remember right ZT was the guy that made his own tool boxes from some aluminum he had gotten from work or somewhere right? He bent up all his own drawers and then made the frames and painted them blue. I loved those boxes and wished I had the skills and money to do the same. They were a true work of art. Guy has a ton of talent for sure if that is who I'm remembering.
 
OP
Z

zmotorsports

ALLIANCE MEMBER
Joined
Oct 20, 2009
Messages
21,477
Location
Northern Utah
Mike, I was just checking out the Benchmark site. I need to go on a shopping spree, my roloc drawer is a few of this or that that I have picked up over the years. I've bought a few boxes of 3m sanding discs and scotch brite pads over the years. If you get some free time I would love to see your selection, which ones you keep and what you use each one for mainly. Looking to place an order and while I'd like to just get a box of each I think my kids may want to go to college at some point. Wondering which grits and styles you get for what tasks? Thanks

And, I just added two pliers to my "needs" list. I've been thinking about the knipex hose clamp pliers for a while but the snap on looks pretty nice. I have the lisle fuel disconnect pliers but the electrical one looks like a must have also.

Scott, I can get a few pictures tonight when I get home of my abrasive assortments.

To keep costs as well as space required to a minimum, I really don't use a large assortment of grits to be honest, I try to keep my selection at a minimum. As for Roloc style abrasive discs, I mainly use 36-grit and 60-grit as my main two in 3" diameter. Then as the outer edges wear I cut them down to 2" for use on my 2" backing pad. For next steps, I also use 6" DA sanding discs in 60-grit, 80-grit and 120-grit for various metal finishing work and blending, a few others for paint and body prep but that's another story. :bounce:
 

signcrafter

Well-known member
Joined
May 9, 2012
Messages
12,519
Scott, I can get a few pictures tonight when I get home of my abrasive assortments.

To keep costs as well as space required to a minimum, I really don't use a large assortment of grits to be honest, I try to keep my selection at a minimum. As for Roloc style abrasive discs, I mainly use 36-grit and 60-grit as my main two in 3" diameter. Then as the outer edges wear I cut them down to 2" for use on my 2" backing pad. For next steps, I also use 6" DA sanding discs in 60-grit, 80-grit and 120-grit for various metal finishing work and blending, a few others for paint and body prep but that's another story. :bounce:
Thanks Mike. I don't do much metal work or painting, mainly auto repair. I use them for things like cleaning up hubs for bearing replacement, brakes, some gasket surfaces, etc.
 

Scuderia-F1

Well-known member
Joined
Feb 9, 2011
Messages
1,198
Location
Stockholm, Sweden
Thanks. I started using wax on abrasive disc several years ago (Formax) but I already like this CRL Tube Wax better than the Formax for this application. Seemed to have better holding capabilities and doesn't sling as quickly, although it is a bit more "gooey" than the Formax. What little bit that does sling off leaves a bit more residue that the Formax but that is easily removed with acetone. I do think it prolongs the life of the abrasive discs.


Thanks Anders. The gentleman's name is Morgan Clarke. His channel is MCD-1 for Morgan Clarke Designs. He builds high end desert racers and does amazing aluminum panel work in addition to his tube work. You should check out his channel.
Thanks Mike, I'm a big fan of Mr Clarke & I never miss any of his videos.
 

Scuderia-F1

Well-known member
Joined
Feb 9, 2011
Messages
1,198
Location
Stockholm, Sweden
Scott, I can get a few pictures tonight when I get home of my abrasive assortments.

To keep costs as well as space required to a minimum, I really don't use a large assortment of grits to be honest, I try to keep my selection at a minimum. As for Roloc style abrasive discs, I mainly use 36-grit and 60-grit as my main two in 3" diameter. Then as the outer edges wear I cut them down to 2" for use on my 2" backing pad. For next steps, I also use 6" DA sanding discs in 60-grit, 80-grit and 120-grit for various metal finishing work and blending, a few others for paint and body prep but that's another story. :bounce:
These are some pics that I´m REALLY looking forward to see.....
 
To avoid these ads, REGISTER NOW!
OP
Z

zmotorsports

ALLIANCE MEMBER
Joined
Oct 20, 2009
Messages
21,477
Location
Northern Utah
I promised pictures of my abrasive assortment so here they are. They're nothing special but get the job done.


This is my cutoff and thin grinding wheel assortment. I have my 4" and 4-1/2" grinding wheels as well as my 3" die grinder discs in .035", .062" and .125" thicknesses. They are held in the drawer by aluminum dowels that are threaded from the underside of the drawer.
grinding1.jpg

Here is my 3" Roloc discs in 36-grit and 60-grit as well as 2.5" wire wheels, 4-1/2" blending discs and 6" DA sanding paper in 60-grit and 80-grit. At the back of the drawer are a few AVOS style grinding discs as well as some Walter grinding discs. I have a few remaining 2" Roloc discs in the foreground but haven't bought them for several years as I now cut the 3" ones down as the outer edges wear and use them on my 2" Roloc backing pad.
grinding2.jpg


Next, I thought I'd take a few pictures of a couple other components I use in the welding process. I think someone here asked about this a few years ago and I don't know if I ever responded or answered as I think I forgot to take pictures to be honest. Or maybe it was on my shop tour YouTube video, I can't remember.


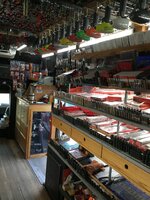
First off, my parents owned and operated a small motel after getting out of the dairy farming industry so I quickly had to shift gears to helping with property management in addition to farming while in High School and when first married. Before my father passed away in early 2000's he had sold his motel and restaurant business and I grabbed a few things before the new owners took over. Some of you may remember the old Magic Fingers vibrating motors that were all the fad back in the 70's and 80's at hotels/motels. They clipped into the springs in the box spring mattresses and were coin operated. Well I grabbed a couple before the new owners took over and I had no idea why at the time. :headscrat Maybe there was some of that hoarding mindset from my dad that wore off on me. :dunno:

In the motel business, I became very familiar with repairing these Magic Finger devices along with washing machines, dryers, HVAC units and all other aspects of the hospitality industry in addition to my vast farmhand knowledge. :bounce: To say I had some rather unique learning opportunities growing up would be an understatement as you can see. :ROFLMAO: While I was greatly appreciative of the sacrifices my parents made for us kids and very well aware of the lessons they tried to teach us, I still couldn't wait to get out on my own and spinning wrenches which is the only thing I truly enjoyed.

Back when I was building ATV drag chassis, snowmobile chassis and suspension components for sandrails, etc. I dug out one of those Magic Fingers and mounted the motor to my fabrication/welding table. My theory at the time was that on certain welding joints when using 4130 chromoly tubing that having the molten puddle vibrate slightly it may do a good job of normalizing or stress relieving during the welding process by evenly mixing the parent material with the tig rod being introduced into the equation. I really had no idea or science behind what I was thinking but I did find that when I had a chassis or component clamped to my fabrication table and upon completing the final welding I seldom, if ever, had any issues with twisting or pulling. I had even had a couple that I cut off the front ends of years later to add length to them and when clamped on the table and the components cut away, the tubes really didn't spring apart or move which reinforced my theory that I was preventing stresses being introduced into the chassis and I to this day contribute that to the small oscillations during the welding process.

When I was building these one-off chassis I would talk to other chassis builders and kept hearing of how much twisting and stresses they were fighting trying to align things after final welding and I simply wasn't experiencing that, at least not to the degree they were so I was convinced there may have been something to my process.

Anyways, at some point someone asked me what was mounted under my fab table so while I was snapping pictures last night I thought I'd show this as well.
vibra1.jpg

Close-up of the motor mounted to the table.
vibra2.jpg

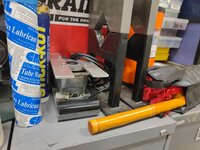
Now this item is more recently added to my tool arsenal. This is very similar being one of those variable speed back messagers, but I removed the padding and added aluminum strips for weight. This is more of a portable version of the one mounted to the fabrication table. I can clamp this to other components while welding and accomplish the same thing but have a little more flexibility.
vibra3.jpg

vibra4.jpg

I don't know if I am completely delusional or not but this has worked for me for many, many years and just thought I'd share to see if someone else may find it useful or not. I may be completely out in left field but I'm sure they will continue to get used.

Thanks for looking.
 

PugetDude

ALLIANCE MEMBER
Joined
Mar 13, 2013
Messages
22,478
Location
Superstition Mountains, AZ
Vibratory stress relief is an accepted AWS process. Not used as often as heat treating, but still an accepted practice.
We used it for press base weldments; these had plates from 1/2" up to 3" thick, with a lot of different size welds. Clamp the weld ******** on the still-hot weldment as it cooled overnight before machining the next day.
Sometimes used on larger iron or steel castings while they are still "green". Couple of the older machinists swore it kept them from getting "squirrelly" during machining.
 

Firstram

Well-known member
Joined
May 16, 2017
Messages
1,393
I used to work with a metal fabricator who had hand tremors so bad he couldn’t hold a cup of coffee without shaking it empty, but when he’d weld the rod would be weaving back and forth over an inch till he struck an arc, then his hands were rock steady! That guy could lay down a beautiful bead!
I worked with someone like that, he suffered with it his whole life. As soon as the whatever tool he was holding touched the work, he was rock solid!
 
OP
Z

zmotorsports

ALLIANCE MEMBER
Joined
Oct 20, 2009
Messages
21,477
Location
Northern Utah
Vibratory stress relief is an accepted AWS process. Not used as often as heat treating, but still an accepted practice.
We used it for press base weldments; these had plates from 1/2" up to 3" thick, with a lot of different size welds. Clamp the weld ******** on the still-hot weldment as it cooled overnight before machining the next day.
Sometimes used on larger iron or steel castings while they are still "green". Couple of the older machinists swore it kept them from getting "squirrelly" during machining.

Thanks for the info Scott. I didn't realize it was an accepted or even sought after process.

Like I've mentioned in the past, I'm just a mechanic who learned how to weld and machine. No schooling or official training and most everything learned from the school of hard knocks, but when I find what works, I stick with it. ;)
 

PugetDude

ALLIANCE MEMBER
Joined
Mar 13, 2013
Messages
22,478
Location
Superstition Mountains, AZ
Like I've mentioned in the past, I'm just a mechanic who learned how to weld and machine. No schooling or official training and most everything learned from the school of hard knocks, but when I find what works, I stick with it. ;)

Experience is what you got when you didn't get what you wanted
 
Last edited:
OP
Z

zmotorsports

ALLIANCE MEMBER
Joined
Oct 20, 2009
Messages
21,477
Location
Northern Utah
Thanks for the warm wishes everyone. I hope everyone had a very Merry Christmas and was able to put the worries of the world away for a few days.

My wife and I had a wonderful Christmas. It was an odd year for us because of if falling on a Monday, which allowed us to be off for a couple of days before. Usually we both work Christmas Eve but she had Friday off and I had a vacation day that I had to use or lose so I also took Friday off to spend with the wife.

We were able to get some visiting done between Friday and Saturday and exchanging gifts with a few friends and family members who we wouldn't see. Sunday the wife and I made dinner and had our kids over as well as FIL and wife's aunt for a nice Christmas Eve dinner. Nothing special, just soup and my "world famous chili" but the wife sure knows how to make everything special.

We watched our grandson open gifts on his first Christmas and were so very blessed to have been able to be a part of his first Christmas and my son's first Christmas with his little family.
 
OP
Z

zmotorsports

ALLIANCE MEMBER
Joined
Oct 20, 2009
Messages
21,477
Location
Northern Utah
There was a not so pleasant gift for me however this Christmas season. :oops:

On Saturday evening the wife and I were running to grab some take-out dinner and then looking forward to relaxing for the evening in front of the fireplace. That went to **** relatively soon.

As we were driving to grab dinner everything was fine, we were just lumbering along the old highway that runs north/south parallel to the interstate as we do a lot of driving between our home and surrounding areas without getting on the interstate. We were just cruising about 50 MPH and hit a couple of stoplights, not hot-rodding the Jeep or even above about 2k RPM for that matter. On about the third or fourth stoplight as we coasted to a stop, the Jeep started running rough and missing. My first thought was fuel as we had just fueled up the previous trek from home.

By the feel it felt quite bad and I thought I'd get a MIL anytime and sure enough it popped on. The wife wanted to know what it was and I mentioned it could be a bad tank of fuel but didn't think it would be that severe as we filled up with still a half a tank. I told her it would probably be a P0300 code as it felt like more than one cylinder.

We limped the Jeep back home and it could barely get out of its own way. Once in the shop I threw the scanner on it and sure enough, code P0300 along with a P1380 and P1381. The last two I was not familiar with so upon a quick lookup I discovered those were related to rough road conditions. I doubted very seriously that the smooth highway would trigger a misfire event after all of the actual rough roads we've had our Jeep on so I discounted those two codes and figured they were set by the poorly running engine, not the other way around.

On Sunday morning I ran out to the shop for a bit to do some basic diagnosis. My first thought was it had to be on the secondary side of the ignition if it was ignition related at all because had it been a failure on the primary side the ECM would have detected either a short or open and indicated the exact cylinder. I then thought that maybe there were some "sympathy" misfires in order to trigger a P0300 rather than a specific cylinder.

With the scanner connected and looking at the freeze frame date nothing was really jumping out at me so I decided to fire it up and watch specifically misfire detection. I noted cylinder #2 was missing consistently and even restarting the misfire counter as it climbed. I also noted cylinder #4 had a few here and there at idle but above idle the misfires ceased. My thinking was that if there was a blown head gasket it could be shared between those two adjacent cylinders so a compression test would be the next step.

Cylinder #2 showed no compression.
spring1.jpg

Cylinder #4 showed 175 PSI. I went again and retested cylinder #2 and again showed zero PSI.
spring2.jpg

I also know that cylinder #2 is not one of the AFM cylinders on a GM LS AFM engine as those are cylinders 1, 4, 6 and 7. But cylinder #4 being in the mix made me want to confirm compression on that cylinder. Also, as a rule of thumb when an AFM camshaft or lifter fail, the engine usually has a definitive clicking or clacking noise of the slop in the valvetrain and other than an odd huffing or puffing sound echoing through the intake and exhaust the engine was quiet.

So that concluded my testing for Christmas Eve as I had to get into the house and make my "world famous chili" for dinner as we had quests coming in a few hours. The wife was awesome and knew how bothered I was by this and told me she could take care of dinner if I wanted to stay out in the shop and find the problem but I was not going to let this ruin my Christmas Even or Christmas day with my kids and grandson.


On Christmas morning while the wife was getting ready and us having a few hours before having to be to her dad's, I ran out to the shop just to pop a rocker cover off and put eyes on the valvetrain. I was suspecting a broken valve spring by the end of the earlier day's testing but wanted to make sure it hadn't dropped into the cylinder and caused catastrophic issues, so I was anxious to open up the right side of the engine.

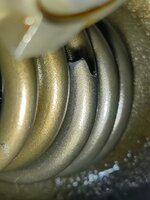
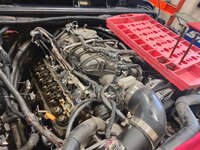
Sure enough, as soon as I removed the coil bracket and rocker cover the problem was staring right at me. Cylinder #2 exhaust valve spring failure.
spring3.jpg

spring4.jpg

I removed the rocker arms on cylinder #2 to get a slightly better look but it didn't look any better with the rocker arms removed. :rolleyes:
spring5.jpg

spring6.jpg


This has been an odd failure and I realize it is a fluke or rare failure at that. Valve spring failures on a stock engine are extremely rare and to be honest, even in all of the race engines and hi-po engines that I've built over the past 3+ decades of my life, I have never experienced a valve spring failure. I used to think it was because how meticulously I set up heads by testing pressures and heights but now I think there may been some luck involved as well.

Valve springs are kind of hit and miss as far as failures and from my past experience with race engines and hi-po street engines, many just don't get the miles on them that a daily driver does so this has been a new experience. Also with hi-po engines many times there are cam changes along with heads being on and off several times and valve springs get changed at a higher rate so many times they never get anywhere near the cycles on them as a daily driver.

That brings me to the repair. Conventional thinking would suggest that this being a fluke failure to just replace the broken valve spring and put it back together and run her. However, I know how my mind works and as much as we are off-road in the back country I feel my confidence would be shaken to the point it would effect my enjoyment wondering when another spring will fail.

I think to calm my anxiety about a future failure I should replace all 16 springs and move on and then down the road to a full AFM delete of the hardware. I have the AFM shut off in the operating system and have never had it activated in the entire time this L94 engine has been in my Jeep but I think even with the system deactivated in the software, they can still have hardware failures once they get well over 100k from what I've seen. In order to do the top end I would need to raise the body back off the chassis to gain access to properly perform the top end of the engine and feel that may be premature at this time. I think I'll replace the valve springs, seals and put it back together for a year or two then get all of the new parts to delete the AFM hardware and perform that modification when I can properly schedule it into my workflow.

Now to decide on which valve springs to go with. In doing some research over the past couple of days, I have actually found that on the Fifth Gen Camaro and Corvette forums that his is not as rare a failure as I thought. There have been several threads related to valve spring failures and several when the owner's cars were still under warranty. I know PAC springs are very popular and highly suggested on those forums and I have heard good things about PAC springs over the years. I also know several had replaced the previous generation of GM springs of the "yellow" or standard beehive springs with the GM performance "blue" springs and have not heard about any failures specifically related to the GM Blue performance springs.


I have also seen where Melling makes and OE replacement valve spring for the LS engines and I have had nothing but success with all of the Melling products I have used over the past 35+ years I've been wrenching. I feel they do extensive testing and do a good job of bringing products to the marketplace only after much R&D and extensive testing based on my experience. They make a spring that is only a few pounds more installed seat pressure than the L94's original spec'd springs.

Now to make up my mind on whether I want to order the GM Blue performance springs or go with the Melling OE replacements. Upon a lot of google searches last night I found no threads where people have used the Melling springs and quite a few that have replaced their OEM LS springs with the GM Blue performance springs. My gutt keeps telling me to order the Melling and be done with it.

What to do, what to do, decisions, decisions.....:unsure:
 

4 FN 27

ALLIANCE MEMBER
Joined
Oct 19, 2015
Messages
4,635
Location
Minnesnowta
Sorry to hear about the Spring and understand the anxiety.

I have read about the failures on 5th mostly related to the LS7, I only watch the Z28 Forum.

We ran PAC Spring for the most part on the 500 inch stuff. They lasted the longest. Keep in mind they were custom PAC springs not the off the shelf springs.

Melling makes nice product and I have no experience with the GM Blue. Not sure if that helps.

Put in what let's you sleep at night.

I always say "God had them bolted together so we can fix 'em, otherwise they would be welded".

Merry Christmas Mike!!!
 

Bob Heine

ALLIANCE MEMBER
Joined
Oct 24, 2009
Messages
10,709
Location
Boca Raton, Florida
Mike, on the bright side, the valve didn't drop into the cylinder. Knowing you won't replace just the broken spring, I vote for the GM Blue springs this go-round. You'll be deep into the engine when you do the AFM delete and that might be the time to install the Melling springs. I replaced the springs in the '87 Corvette when I did the valve seals. At ~80,000 miles and 30 years it was the least I could do. The car didn't burn much oil but when the puff of blue smoke on startup became a cloud I couldn't let it go.
 
To avoid these ads, REGISTER NOW!
Top Bottom