To avoid these ads, REGISTER NOW!

What did you do "IN" your garage today?

PassnThru

Well-known member
Joined
Jan 5, 2010
Messages
6,512
Location
Bowling Green KY
Serviced the riding mower today. That went well.
A few years ago I put new tires on the front and I've been thinking about putting new tires on the rear. They are 21 years old and getting pretty hard and dry rotted. I decided that before I order new tires I should see if I can even get the wheels off the mower before I commit myself to that.
I know what you're thinking but - that went well also. I had to wiggle it a little bit - that's all. Basically slid right off.
I guess I'll be ordering tires now.
Rear mower wheel.jpg
 
To avoid these ads, REGISTER NOW!

rayra

Well-known member
Joined
Dec 1, 2014
Messages
4,724
Location
Escaped from Los Angeles
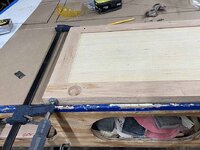
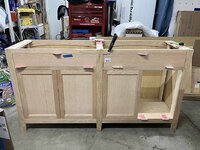
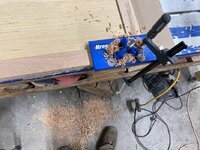
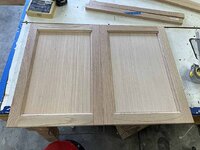
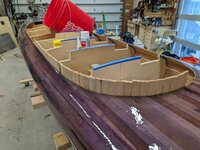
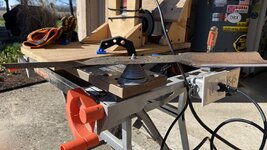
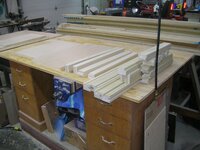
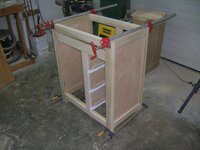
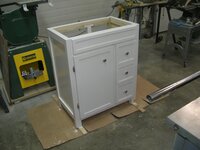
Spent a cold damp day in the garage, for the most part. Nose and fingers are numb. Made great strides on the Buffet build. Completed the assembly of the carcass. Got the false fronts for the drawers fitted to their openings. Made many passes trimming all four edges of the cabinet doors, getting them right-sized for their openings and with the gap spacing I was after. Playing cards as shims again. I REALLY could have used a cross-cutting jig / sliding tray on my table saw during this process, but couldn't be arsed to make one.

Then I managed to overdrive a couple screws and partially split the hinge-side vertical stile on the last door. So I wedged that crack open and worked some glue down in it with a razor blade and it's clamped up overnight.

I also got all the hardware installed in the cabinet carcass and got the final overall width dimensions for the drawers. I have that drawer box wood already cut down to 1/2" thick but need the radiused edeg and tray bottom slot cut on everything.
So Saturday it is finish the last door fitting, then finish shaping the drawer box wood and assemble the drawer boxes (with some rabbet joints this time). And cut the designated oak veneer plywood for the countertop and cut the slots in it and the already-ripped solid oak pieces for the outer edge of the countertop. Then glue that up.

Sunday should be the final finish sanding on everything and using a trim router for all the beveled edges.
(snap) forgot the dang interior shelves again.

Everything should be ready for staining on Monday.

Pretty swift overall, took last weekend 'off' for company from out of town and lost couple days buying and planting this year's garden. Started the Buffet build on the 4th. So 7-8 days of work so far. About half way.
 

Attachments

  • buffet build 036 door split.jpg
    buffet build 036 door split.jpg
    117.7 KB · Views: 26
  • buffet build 035 doors and drawers fitted.jpg
    buffet build 035 doors and drawers fitted.jpg
    120.8 KB · Views: 21
  • buffet build 034 door hinge 35mm drilling.jpg
    buffet build 034 door hinge 35mm drilling.jpg
    114.7 KB · Views: 17
  • buffet build 033 carcass ready.jpg
    buffet build 033 carcass ready.jpg
    84.9 KB · Views: 16
  • buffet build 032 door sorting.jpg
    buffet build 032 door sorting.jpg
    102.6 KB · Views: 14
  • buffet build 031 door sorting.jpg
    buffet build 031 door sorting.jpg
    129.1 KB · Views: 21

02Xterra

Well-known member
Joined
Oct 1, 2015
Messages
525
Location
Lynchburg, Va
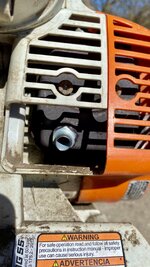
My Husqvarna 125B hasn't been running right, so I ordered up carburetor kit and swapped it in.

full


full


It runs a little bit better, but still not quite right, it'll need some more tweaking.
 

rd65

Well-known member
Joined
Sep 29, 2017
Messages
2,845
Location
Granite Falls, WA
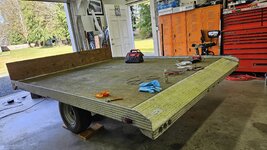
Finished swapping out the lights on the snowmobile trailer. Not the cleanest work but it all works and should be picked up tonight. Son is moving so he wanted to use it. Couldnt let him use with only one working tail light and one working marker light. Nothing worse than taking a day off to get some things done around the house and then getting sick. May have overdone it today.
 

Attachments

  • 20240315_144847.jpg
    20240315_144847.jpg
    932.9 KB · Views: 37

BonzoHansen

Well-known member
Joined
Jun 24, 2005
Messages
1,742
Location
NJ
Almost done with winter maintenance.

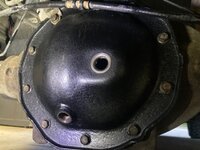
So far: front rotors, pads, bearings; clean and adjust rears, RR e brake cabke; horn relay; pinion seal; trans output seal; cleaned the underside from seal leaks; greased all the grease points; new dust boot on idler arm to CL; checked fluids; new gm serp tensioner;

Glue came in for taillight trim, I'll do that tomorrow maybe. Still want to flush brake fluid.

Take it for some rides this weekend.
 

PhantomEB

Well-known member
Joined
Feb 6, 2006
Messages
6,846
Location
Medicine Hat, AB, Canuckistan
Yesterday it was a quick trip(supposedly) to a town an hour away for some aluminum washers then it turned into visiting several dealers there to look at side by sides. Also got me the green O-ring I needed for the EGR cooler delete that was done on my truck so I am ready to fix that leak today.

0B826179-CBEA-472E-9C2B-409F150D22E7.jpeg

finally got this thing leak free, brakes are firm and she’s power washed. Got some people already inquiring about it now I put her back on the market. Can’t wait to take those funds and really put another huge dent onto the Visa card.

hoping to get the camper tie downs installed on the truck sometime today too. Then it’s back onto the bronco with fuel, coolant and brake lines this weekend.
 

ATC

Well-known member
Joined
May 12, 2012
Messages
8,371
Location
VA
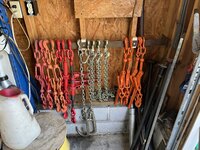
Started building a chain rack. I have 4 milk crates full of chains kicking around, so I want to get them more out of the way. And all my chain binders were just in a pile on the floor.
Now I just need to find more wall space!

I’m going to box in the lower part of the wall with a 2x6 so the excess chain hanging down won’t just pile up on the floor.

32B875EC-03FE-47CB-8A04-A84CADA99BA2.jpeg
 
To avoid these ads, REGISTER NOW!

rayra

Well-known member
Joined
Dec 1, 2014
Messages
4,724
Location
Escaped from Los Angeles
cabinet door split repair is holding and door mounted.

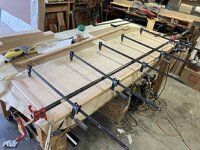
buffet countertop solid oak edges glue-up is done, about to move on to forming the drawer boxes. Still need to router the radiused upper edge on those boards (and all their other shaping). Should have them done and mounted later tonight. Their false fronts are shaped, edged and drilled, ready for mounting to the drawer boxes as soon as those are installed.
 

Attachments

  • buffet build 037 countertop glue-up.jpg
    buffet build 037 countertop glue-up.jpg
    116.1 KB · Views: 18

Jim_No_Garage

Well-known member
Joined
Jan 15, 2011
Messages
3,322
Location
Millington NJ
So today I assisted my son as he replaced the front pads and rotors on his 1999 Suburban K1500. He was getting a lot of vibration on the passenger front brakes so he decided to replace them.

We started with the drivers side front and got everything swapped fairly easily. When we moved on to the passenger side front the source of the vibrations became evident.

The top caliper slide bolt had it's head broken off and the entire pin was just hanging there - it wasn't even screwed into the caliper mount. The bottom mount was SUPER TIGHT - probably because it was carrying the whole caliper. The fact that the top bolt was unthreaded from the caliper mount was a little confusing. . . :dunno: The guess is that the last mechanic snapped the bolt head off as they were reattaching and the bolt eventually vibrated loose from the mount? The outside edge of the rotor was nicely polished by grinding on the caliper bracket. We made a run to AAP for a set of caliper bolts and go it back together quickly after that.
He also charged the refrigerant in the A/C system after replacing the A/C compressor. He had replaced the rear "coil" as it was leaking and found that the compressor was also leaking. He has pretty much replaced everything so hopefully that resolves the NO A/C issues.

My primary role was tool getter and an extra set of hands when fitting things back together. I'm impressed that he has taken on the maintenance of this truck as a hobby. When he first started driving he was unsure how to change a tire (a failure on my part - I know) and he has done a ton of work on this truck.

Cheers

Jim
 

rayra

Well-known member
Joined
Dec 1, 2014
Messages
4,724
Location
Escaped from Los Angeles
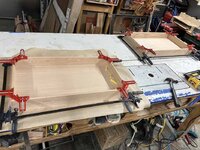
meh. I need better tools. I need some proper blocky 'parallel' F-clamps. The cheaper ones I have allow all sorts of undesired lateral motion. And the crude / cheap corner clamps I'm using are also pretty poor.

Drawer boxes are sized, rounded, rabbeted, glued up and clamped and brad nailed. And I forgot to finish sand the luan bottoms before I trapped them in.

1st thing tomorrow I'll mount the drawer rails and get the drawers situated, then attach the false fronts positioned 'just so'. And then it will be on to finish sanding and edge beveling of everything. Tomorrow will be a dusty day and since my recent CT thorax scan had the Drs asking if I smoked (I don't) and telling me I have emphysema, I better remember to wear a dust mask tomorrow.
 

Attachments

  • buffet build 038 drawer boxes formed.jpg
    buffet build 038 drawer boxes formed.jpg
    107.8 KB · Views: 14
Last edited:

kaymccampbell

Well-known member
Joined
Feb 27, 2015
Messages
29,627
Location
Upstate New York
meh. I need better tools. I need some proper blocky 'parallel' F-clamps. The cheaper ones I have allow all sorts of undesired lateral motion. And the crude / cheap corner clamps I'm using are also pretty poor.

Drawer boxes are sized, rounded, rabbeted, glued up and clamped and brad nailed. And I forgot to finish sand the luan bottoms before I trapped them in.

1st thing tomorrow I'll mount the drawer rails and get the drawers situation, then attach the false fronts positioned 'just so'. And then it will be on to finish sanding and edge beveling of everything. Tomorrow will be a dusty day and since my recent CT thorax scan had the Drs asking if I smoked (I don't) and telling me I have emphysema, I better remember to wear a dust mask tomorrow.
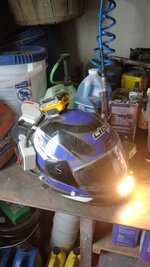
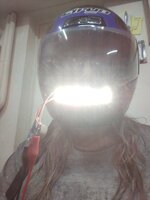
You might want to invest in some more involved headgear. I made one out of an old motorcycle helmet. It's got a pair of 3M P100 60926 filters. It gives me positive air pressure, and keeps my head cool. I use it for anything dust, paint, stinks. It keeps my lungs open and working. It's got headlights, too.
IMG_20230524_174325.jpg
 

GrayFlattop

Well-known member
Joined
Jan 18, 2018
Messages
1,051
Location
Chicago
Washed the garage walls in the corner that is taking forever to put back together. Between the two coats of paint, I made a couple motor mount spacers out of 3/8” aluminum bar stock and put a couple of new v-belts on the compressor project. Wrestled with the bar stock, angle iron and pipe leaning against the stock rack to pull out some unistrut. Tomorrow I’ll put all of it away properly, my haste in the prior week cost me time. I should know better.

Cut the unistrut to the required lengths for another project.
 
Last edited:

rayra

Well-known member
Joined
Dec 1, 2014
Messages
4,724
Location
Escaped from Los Angeles
Heh. Nice helmet. I've got a good 3m mask with organic vapor filters and a PPE cabinet with several types of N95 masks. I've used the 3M for stain and poly work but have been neglecting the dust masks. Been building furniture (and related drywall work) nearly every day ssince New Years, obviously inhaled too much debris lately. And all that masonry work the 2yrs prior. After getting hospitalized with covid 3yrs ago.

Been doing a lot of shooting with suppressors the last couple years, too. They tend to put a lot more gunsmoke back in your face, with gas operated firearms.

I'll be wearing a well fitting N95 tomorrow during sanding, for sure.

I used to do a lot of work with polyester resins and other similar hobby materials, as well as lots of home remodeling / flipping. I've been a lot better about mask and vapor protection in the past. And I've always been concerned about eye injury, wear safety glasses religiously. Saved my right eye last July when I had a masonry blade shatter and fly apart and hit me with shrapnel from diaphragm to forehead. In fact that's why I got the CT scan, looking into why I still have a big bump on my right collarbone. XRay showed no debris, but it seems the chunk that hit me there spalled a chip off the central end of my right collarbone. Still have a big lump there, was making sure there was no bone infection or worse goin on there. Found a lot of other trouble instead.

/Luke, I am you father
/scuba noises
 

Attachments

  • unknownpropper400.jpg
    unknownpropper400.jpg
    28.7 KB · Views: 25

kaymccampbell

Well-known member
Joined
Feb 27, 2015
Messages
29,627
Location
Upstate New York
Heh. Nice helmet. I've got a good 3m mask with organic vapor filters and a PPE cabinet with several types of N95 masks. I've used the 3M for stain and poly work but have been neglecting the dust masks. Been building furniture (and related drywall work) nearly every day ssince New Years, obviously inhaled too much debris lately. And all that masonry work the 2yrs prior. After getting hospitalized with covid 3yrs ago.

Been doing a lot of shooting with suppressors the last couple years, too. They tend to put a lot more gunsmoke back in your face, with gas operated firearms.

I'll be wearing a well fitting N95 tomorrow during sanding, for sure.

I used to do a lot of work with polyester resins and other similar hobby materials, as well as lots of home remodeling / flipping. I've been a lot better about mask and vapor protection in the past. And I've always been concerned about eye injury, wear safety glasses religiously. Saved my right eye last July when I had a masonry blade shatter and fly apart and hit me with shrapnel from diaphragm to forehead. In fact that's why I got the CT scan, looking into why I still have a big bump on my right collarbone. XRay showed no debris, but it seems the chunk that hit me there spalled a chip off the central end of my right collarbone. Still have a big lump there, was making sure there was no bone infection or worse goin on there. Found a lot of other trouble instead.

/Luke, I am you father
/scuba noises
I'll see your darth snorkel and raise you a daft punk.
IMG_20230520_164026.jpg
 

Burt Shaver

Well-known member
Joined
Dec 7, 2023
Messages
1,293
Location
Iroquois, Ontario Canada
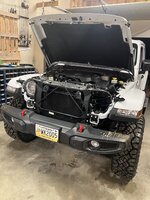
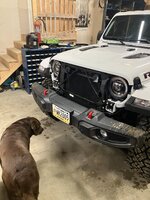
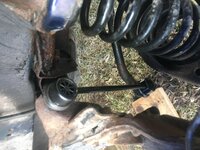
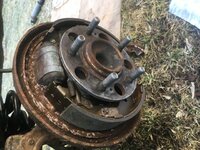
BD19BB5E-391E-437C-A184-E4D17312F659.jpeg68FB1625-88E6-4FB3-8146-E6C5365AD4FE.jpegC1FDCA68-1B64-444C-9A09-690C390C6AC0.jpeg75FC383D-834F-4C85-8CC2-58AA274A82B4.jpeg
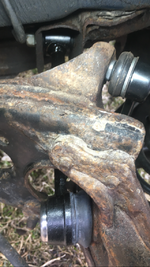
Getting my sons first car ready for him, yesterday I took the front lower control arm off and pressed in a new bushing. Today I got the left rear lateral link off, had to cut through the bolt on the frame as there was no way it was coming out, put a new sway bar link on left rear and brake shoes and drum. New lateral link bolt comes in this Friday. I’m looking forward to that so that left rear will be done
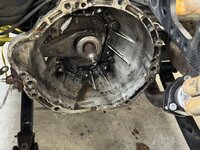
Bolt came in for the lateral link on Friday. I got that in today, put the shock back in, changed the low beam bulb, license plate bulbs, high brake light, left brake light, fixed the rear door that wouldn’t open . Yesterday on the right rear I changed the drum and shoes, new sway bar link, Put new pads and rotors on the front and a new ball joint on front right. All that’s left now is a brake line, change the transmission pan and filter, get an alignment and that’s everything they said it needed for it’s safety.
 

Attachments

  • 9FFEFA71-1E3D-404C-A86F-3B3DD16EAEFE.png
    9FFEFA71-1E3D-404C-A86F-3B3DD16EAEFE.png
    1.7 MB · Views: 19

Mikeske

Well-known member
Joined
Apr 28, 2017
Messages
2,131
Location
Washington State
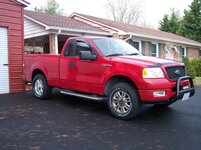
I had the neighbors hobby 1983 Toyota pickup in the shop today. Neighbor had the engine rebuilt with the by golly by gosh method. No one checked the crankshaft main bearings and rod bearing clearances. Yep you got it a spun bearing resulted. I could not not work on it as I am on restrictions from cataract operation this past Thursday so I was the tool getter and taker of tools after the tools need is not needed. Took about a hour and half and the engine is out to a professional rebuild shop. After the engine was out I could tell there were other issues as the bell housing has oil in the bottom. I guess the old mechanic saying applies here. I love my job so much I do it twice. IMG_3152.jpegIMG_0764.jpeg
 
To avoid these ads, REGISTER NOW!
Top Bottom