To avoid these ads, REGISTER NOW!

ZMotorsports Shop Projects 2.0

To avoid these ads, REGISTER NOW!
OP
Z

zmotorsports

ALLIANCE MEMBER
Joined
Oct 20, 2009
Messages
21,629
Location
Northern Utah
Both my son and I arrived at the shop later than normal last night, so we got a late start and only had about an hour and a half to work. However, we did make some good progress.

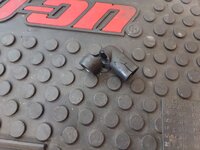
As we cleaned out another fastener tray, we then realized we only had two small trays of fasteners left. We took a few minutes to decipher which fasteners went where as most of it came back to memory. Although the teardown has been several weeks ago, we placed each group of fasteners together based on their locations but had three 6mm x 40mm bolts that we couldn't remember where they went and then 4 silver painted nuts with large swivel washers that stumped us.

We set them aside for the time being and commenced putting things together. We figured the battery tray and battery wiring would be easier without the cooling stack in place so that was the first item assembled last night.
wj94.jpg

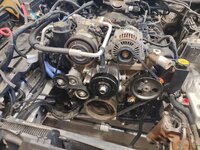
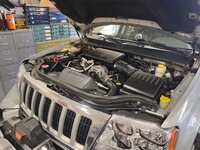
Once the battery tray was fastened in place, we turned to the front of the engine. I had picked up some new HNBR O-rings for the suction and pressure lines coming off the compressor as the OEM's appeared a bit flat. With the O-rings replaced, the A/C lines could be connected, then the power steering pump and then a new serpentine belt.
wj95.jpg

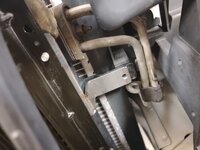
Next up was the cooling stack. Slipped it right into place, connected the A/C condenser to it and then we remembered where the three 6mm x 40mm bolts went, they secured the condenser and aux. transmission cooler to the radiator. We then connected the hydraulic lines to the power steering pump, gearbox and return line from the hydraulic motor on the fan and cleaned up any dripped fluid. That was about the stopping point for the evening, but I really wanted to get the cooling system into a vacuum and confirm there were no issues or leaks so we connected the upper and lower radiator hoses.
wj96.jpg

And pulled it into a vacuum. It looks like it is holding well as we cleaned up tools and got fluids at the ready.wj97.jpg

After a few minutes of cleaning up it was still holding so we closed up the shop for the evening.
wj98.jpg

We have a new alternator pigtail coming and a dipstick but other than that it is getting close to completion.

Thanks for looking.
 
OP
Z

zmotorsports

ALLIANCE MEMBER
Joined
Oct 20, 2009
Messages
21,629
Location
Northern Utah
Rules out the predecessor to this one: https://www.northerntool.com/produc...t-3-ton-lifting-capacity-model-hw93806-155711
:)

I rather like the angled legs because they widen the base when they're extended. I only do that when I need more boom length because I need to lift something higher. I can see where that widening can make things more difficult at times. Its a price that I'm willing to pay for the added stability when something goes way up there.

My son showed me that one last night on Northern's website. Mine looks like the little brother to it.

As for the angled legs, to each their own but I despise them, at least from my experience. I have never really had an issue with needing the angled legs for a more stable and wider leg system as I have never felt like the engine or engine and transmission were unstable. In fact, I found the angled legs more of a nuisance, which is why I got rid of my first engine hoist and bought this one so many years ago. Before the purchase of the 2-post lift, all of our work was done on jackstands in the last shop and I found having to guess or compensate for jackstand placement to be a royal PITA. Seems like I would get them placed and then as the tapered legs from the engine hoist progressed under the car, inevitably it would contact a jackstand and something would have to be adjusted for. I either had to jack up the car and "tweak" the placement of one or both of the jackstands or push the engine hanging from the hoist in one direction or the other slightly to compensate while getting everything to line up. With the parallel legs on this engine hoist, there was no guessing or having to adjust to where you "might" hit the jackstands. If you didn't hit the jackstands going in with parallel legs at the start, you're not going to hit them as I would with the tapered legs taper as the assembly was moving rearward into the engine bay.

It was also a PITA to move up to the engine stand with the tapered legs as the closer I'd get, the narrower the legs got and, in many instances, couldn't pick up an engine off the stand without having the chain at an angle and slightly out of position. Maybe this is why most engine stands are three legged and not four. I prefer the four wheeled engine stand for stability and that wider front end with four wheels throws another wrench in the mix.

Again, to each their own but the legs were the biggest reason I got rid of my last one and bought this one. I may be the oddity because it doesn't look like anyone sells anything but the angled leg style.

Of all things, I never would have guessed on my thread, was that an engine hoist would have drummed up so much attention. :unsure: I've had this one for so long, I guess I really hadn't given it any more thought after the purchase. It just works and has none of the deficiencies that I had to deal with on the last one so it never crossed my mind again.
 

LXCam

ALLIANCE MEMBER
Joined
Apr 23, 2013
Messages
19,400
Location
AZ
I’m with you Mike. I had one very similar to that northern unit. Buddy of mine borrowed it for a while. Then came the weekend I needed to pull a motor and went to go get it. Sumbitch had stolen the base off it to use for something. So I fabbed up a new base and went angled with it.

I despise that fn thing for your exact same reasons (for the last 20yrs) 😂. But the only time I think about making a new base is every time I use it, then when I’m finished a I don’t give it a second thought

But one of these days…😏
 
OP
Z

zmotorsports

ALLIANCE MEMBER
Joined
Oct 20, 2009
Messages
21,629
Location
Northern Utah
Sterling, funny thing was both my son and I were walking around the core support looking closely trying to see where the painted areas were missing nuts and asking ourselves where in the hell those four painted silver nuts went. :headscrat

Then as we were rapping up for the night and checking out the cooling system my sone popped off and made an announcement that "oh, they're for the hood". Oh, for hell's sake, that big shiny thing sitting up on the roof.......:rolleyes:
 

SilverJimmy

Well-known member
Joined
Apr 14, 2012
Messages
1,786
Location
Prescott/Flagstaff, AZ
Hood on a roof, what could go wrong?! Back in my youth a friend of mine convinced his sister to let us take her new X-11 Citation out cruising (remember those turds from Chevy?) on the condition that he check the oil and coolant first and not hot rod it. So all four of us jump in and as we get out of site of Sis, hammer down! We get up to about 50 when I see the hood start to flutter and as I ask the brother if he latched the hood….
Never seen anything before or since as fast as that hood blowing open and then fold straight back over the roof, windshield also exploding! His sister was not happy!!! We still laugh about it, over 40 years later!
 
OP
Z

zmotorsports

ALLIANCE MEMBER
Joined
Oct 20, 2009
Messages
21,629
Location
Northern Utah
Hood on a roof, what could go wrong?! Back in my youth a friend of mine convinced his sister to let us take her new X-11 Citation out cruising (remember those turds from Chevy?) on the condition that he check the oil and coolant first and not hot rod it. So all four of us jump in and as we get out of site of Sis, hammer down! We get up to about 50 when I see the hood start to flutter and as I ask the brother if he latched the hood….
Never seen anything before or since as fast as that hood blowing open and then fold straight back over the roof, windshield also exploding! His sister was not happy!!! We still laugh about it, over 40 years later!

Sterling, I have to say you are a brave soul for openly admitting actually driving and "going out cruising" in a freakin' Chevy Citation. :ROFLMAO:


I fairly certain those bolts would not have ended up in the spares drawer after your son drove away. haha

Yeah, I would have hoped we would catch that before driving off. ;)
 

SilverJimmy

Well-known member
Joined
Apr 14, 2012
Messages
1,786
Location
Prescott/Flagstaff, AZ
I WAS NOT THE DRIVER! Them’s fighting words! Late 70’s, early 80’s junk like that from GM is what was the beginning of my Ford habit. And until we bought our Jeep Rubicon the only thing I ever owned from Mopar was a Dodge truck. Had to take it in trade on a toolbox deal. Sold that pile instantly! I was a Chevy man from birth, my dad bought a Chevy CarryAll brand new a week before I was born, my first ride was in a Chevy truck.
 
OP
Z

zmotorsports

ALLIANCE MEMBER
Joined
Oct 20, 2009
Messages
21,629
Location
Northern Utah
Put fluids in the WJ last night and fired her up.

wj99.jpg

wj100.jpg


A few items to address, such as installing the hood and putting the interior back together then she's on the road.


And replace the brand-new thermostat, which seems to be sticking. Other than that, it sure sounds good. Nice and quiet and smooth so far.

Thanks for watching throughout this project.


I want to wish everyone and their families a safe and happy Independence Day.
 

Bad Mojo

Well-known member
Joined
Sep 2, 2012
Messages
120
Sorry, I honestly don't remember who makes it or where I got it. I've been asked before and don't have any details on it. I've had it for so long, but I remember searching for one that collapses down as small as it does because space was such a concern in my last shop. I want to say I purchased it from NAPA but don't hold me to it as it's been so long ago.
I didn't realize this question was gonna raise such discussion, but not a bad thing. After having a angled legged one that folds I will never go back. This one is so much easier to move around and use. Now, I just need to build an engine stand that fits the hoist well and make setting the engine easy.
 

ntsqd

Well-known member
Joined
Jan 22, 2005
Messages
1,039
Location
Lower left coast
I've had the cherry picker front legs run into stuff under a vehicle. They're going to do that whether they're straight or angled. It is a pain when I've missed on my set-up, but I don't see that straight legs would have made much difference.

The next engine that I get to R&R is in a ~4" lifted OJB. It is tall enough that Ive been debating building a rolling gantry for the Coffing Hoist instead of trying to lower the truck far enough to make the job safe. Given that I don't expect to need it much I'm thinking of wood for the gantry. Something like one of fabricated I-Beam floor joists for the cross beam wouldn't have any trouble with the weight. It will have wheels, but no casters. The geometry to make it stiff and not twist in the vertical supports is currently eluding me, but I'll get there.
 

ScepterToad

Well-known member
Joined
Nov 9, 2023
Messages
357
Mike, I'm watching your video on the Jacks Tracks and Cameo Cliffs. Just wanted to drop a line and say it's so nice to see the way your Jeep moves and sounds on the trail. Having fresh experience with that area and seeing how your Jeep moves compared to mine is eye opening to say the least. Thanks for sharing!
 
OP
Z

zmotorsports

ALLIANCE MEMBER
Joined
Oct 20, 2009
Messages
21,629
Location
Northern Utah
I didn't realize this question was gonna raise such discussion, but not a bad thing. After having a angled legged one that folds I will never go back. This one is so much easier to move around and use. Now, I just need to build an engine stand that fits the hoist well and make setting the engine easy.

That is not a problem. Discussion is good, it just surprises me at times what questions come up from either something I've shown in a picture. Things that I wouldn't have thought would drum up so much discussion, but then I'm glad to have these discussions and glad to see people are paying attention to the pictures. Most more so than I am. :bounce:


Mike, I'm watching your video on the Jacks Tracks and Cameo Cliffs. Just wanted to drop a line and say it's so nice to see the way your Jeep moves and sounds on the trail. Having fresh experience with that area and seeing how your Jeep moves compared to mine is eye opening to say the least. Thanks for sharing!

Thanks Keith.

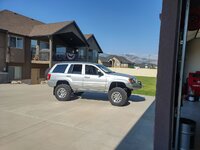
I can tell you that over the years the Jeep has evolved immensely and the way it moves over obstacles and through the trails is completely different than it did 8+ years ago with the bolt on suspension system, oh and the V6. ;) I firmly believe that the bolt on suspension systems/kits commercially available are definitely a compromise and with some extra work and effort there can be much gained by going beyond a bolt on system. I have learned so much in the past 10 or so years of playing with different iterations of my suspension and then when I broke away from the bolt on kit and built my own links, used shocks by size rather than merely application charts and then building bumps and limiting straps for the exact fitment, that all made a huge difference. Adding the V8 five years ago was just the icing on the cake.

The way it lumbers along the trails and crawls over various sized rocks and obstacles now compared to 8+ years ago it like night and day. It's hard to believe that I have had the Jeep for 13 years already. The wife and I went for an off-road drive a few days ago and I still smile to myself when aired down and cruising around the dirt roads. It is such a joy to drive. Can't wait for the next couple of off-road gatherings we're getting ready for in the next couple of months.
 
OP
Z

zmotorsports

ALLIANCE MEMBER
Joined
Oct 20, 2009
Messages
21,629
Location
Northern Utah
I've been away from social media for the past week plus but have been pretty busy in the shop and enjoying time with my wife, kids and grandson. I hope everyone had a good Independence Day.


We had our kids and grandson over for a bar-b-que on the Fourth of July as well as my FIL and wife's aunt. I grilled up some steaks and my wife made a bunch of side dishes.

After eating dinner and before it got dark, we headed outside to let my grandson enjoy some sparklers. As we were walking outside, he headed for the "mo mo" (lawnmower). He is enthralled with anything that has an engine on it and wouldn't go past the mower in the garage, so my son had to stop and let him have a moment on the mower. He instinctly knew exactly what to do with the controls. :unsure:
Maxmower.jpg

My son lit some sparklers but he wasn't as keen on them as I thought he would have been. I think he was more intrigued with the lighter that was being used. It was fun to sit outside on the lawn in the shade and let him run around playing.
MaxFourthJuly.jpg

The next day before it got too warm, I trimmed, edged and mowed the lawn and had to snap a few pictures afterwards.
yardjuly1.jpg

yardjuly2.jpg

yardjuly3.jpg

yardjuly4.jpg

yardjuly5.jpg

yardjuly6.jpg


Thanks for looking.
 
OP
Z

zmotorsports

ALLIANCE MEMBER
Joined
Oct 20, 2009
Messages
21,629
Location
Northern Utah
After the holiday, my son and I got back on his WJ. Although it was running we had some odd & ends to address, one being an abnormally high idle. With the scanner hooked up we saw it was running smooth and quiet but upwards of around 1100 RPM. My initial thought was either a stuck accelerator cable or a vacuum leak after the throttle blades.

With a little digging around my son discovered that the elbow on the back of the intake manifold from the PCV valve was torn. With 20+ years and over 200k miles, I guess it was a little more brittle than we realized and we must have bumped it upon installing the intake manifold. We initially thought we would be pulling the intake to reach it but with the removal of a few items and some finesse, we were able to reach it just above the bell housing. Sure enough that was the issue, afterwards it idled down normally.
wj101.jpg


However, what we also noted was that the temperature continued to climb as we were running it. It surpassed 195 degrees which is the T-stat rating, then 200 degrees and when it hit 210 and didn't drop so we shut it down and suspected a stuck thermostat. That killed the progress for the evening. I picked up another thermostat the next day and we were able to replace it and sure enough, now it hit around 197-199 then would drop a bit and hover in the 199-201 range. A brand-new thermostat had failed to open. Glad we were keeping a close eye on it.
wj102.jpg

After pulling a vacuum on the cooling system and refilling it, it moved under its own power for the first time in several weeks as my son backed it out of the shop and moved it over to the west bay of the shop as I needed the lift.
wj103.jpg

wj104.jpg

Once in the west shop bay we could finish up the Jeep.
wj105.jpg

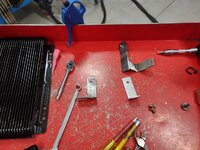
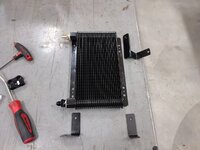
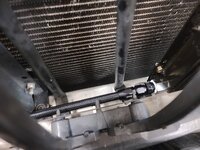
We had planned on adding a second trans cooler after last year's Colorado trip when the transmission temperatures got a little higher than I like. Not having enough room to install a larger cooler this was the next best thing. While waiting for my son to get off work I commenced building some mounting tabs for the second cooler to match the cooler we installed 5 years ago.
wj106.jpg

wj107.jpg

Test fitting the bracket and figuring out where it needed to be placed to keep the cooler symmetrical with the one on the passenger's side.
wj108.jpg

Then the next bracket could be fabricated.
wj109.jpg

That placement should work.
wj110.jpg


Stay tuned for more updates.
 
To avoid these ads, REGISTER NOW!

Dodge

Well-known member
Joined
Feb 8, 2008
Messages
557
Location
Illinois
Your Grandson is growing fast!!! I know by experience how it makes you feel to be around them!

Your property looks great. You are the kind of neighbor I like, which I am sure the majority of your neighbors
are glad you bought the property! I live in a subdivision that still had a majority of the original owners/builders and a new owner
coming in, had to more or less "pass the test". Change!!!!
 
OP
Z

zmotorsports

ALLIANCE MEMBER
Joined
Oct 20, 2009
Messages
21,629
Location
Northern Utah
Continuing on with the transmission cooler.

Bending another tab in the press brake.
wj111.jpg

wj112.jpg

Test fitting to get the length correct so I knew where to cut it and weld it.
wj113.jpg

Tacked together and one last test fit before final welding.
wj114.jpg

After confirming the mounting, it was taken back apart so the pieces could be bead blasted and painted.
wj115.jpg

Mounting tabs painted and ready for final assembly.
wj116.jpg

Cooler mounted in its final resting place.
wj117.jpg

Then the cooler lines could be made up and installed.
wj118.jpg

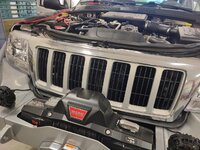
My son was working on finishing up installation of the interior while I finished up the grille area. The coolers are barely visible behind the grille, and everything fits perfectly behind the OEM grill with only minimal trimming.
wj119.jpg

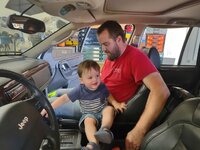
My DIL brought my grandson by to see what we were working on and my grandson just had to help his dad put the interior together.
wj120.jpg


More pictures to follow.
 
OP
Z

zmotorsports

ALLIANCE MEMBER
Joined
Oct 20, 2009
Messages
21,629
Location
Northern Utah
Continuing on.

The last item before a test drive was to install the hood.
wj121.jpg


wj122.jpg

We then connected the scanner and went for the first test drive.
wj123.jpg

Upon returning from the test drive, my son wanted to take it home for the night so he swapped vehicles around in the shop.
wj124.jpg

The WJ looks pretty good for 20+ years old.
wj125.jpg

wj126.jpg

And driving away for the first time in a few weeks.
wj127.jpg


Thanks for looking.
 
OP
Z

zmotorsports

ALLIANCE MEMBER
Joined
Oct 20, 2009
Messages
21,629
Location
Northern Utah
Your Grandson is growing fast!!! I know by experience how it makes you feel to be around them!

Your property looks great. You are the kind of neighbor I like, which I am sure the majority of your neighbors
are glad you bought the property! I live in a subdivision that still had a majority of the original owners/builders and a new owner
coming in, had to more or less "pass the test". Change!!!!

Thank you. The yard or property is a labor of love and I love keeping it looking nice and properly maintained. Although I wish a couple of my neighbors would do a bit better of a job on theirs, it doesn't change the way I maintain mine. I hope the neighbors are pleased with what we've done with the property in the 7+ years that we have owned it now.

Yes, it is amazing how fast he's growing and how quickly he is learning. Almost scary at times as that little mind is like a sponge. He wants to do anything and everything his dad is doing. If my son is helping me with tools leaning over the Jeep, he has to be right in the middle of it and HAS to have a tool in his hand to act like he's helping.

I was installing the core support and had some 6mm bolts I was installing so I started them then held the socket while he moved the ratchet back and forth. He grinned ear to ear because he was helping.

I can't seem to get enough of that little guy and just being around him, all my stressed and **** the world throws at me just melts away. I know I am excited to see him grow and be able to spend time with me in the shop, but there are days I want him to stay this age forever.

It's not that I love my grandson more than my son at all, but it sure makes me go back to when my son was young and I feel like I get to experience that all over again. When he runs into the shop saying "papa" and pointing to me it melts my heart.
 
OP
Z

zmotorsports

ALLIANCE MEMBER
Joined
Oct 20, 2009
Messages
21,629
Location
Northern Utah
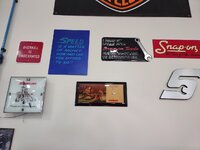
One afternoon while cleaning the house, my wife came into the shop and handed me this clock that I had misplaced during the move. She found it in a box in the basement while putting some holiday decorations away. She knew I had been looking everywhere for it.

I got this from my Snap-on dealer back in the late 80's when Snap-on was running one of their advertising campaigns. This was from the same campaign that I had the posters from and recently had them framed and hung in my shop. Although the clock mechanism no longer works, I still wanted to hang it in the shop.
clock1.jpg

clock2.jpg

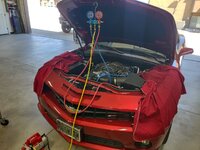
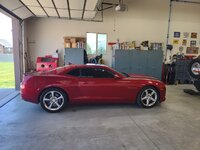
The wife also wanted me to get the car cleaned and ready to start taking on some drives once in a while as it hasn't seen the light of day in nearly six months. Upon a test drive I noticed that the A/C was not working as it should. I had to add a little bit of refrigerant last year so I figured it must have a leak. I started looking around and found an oily spot at the connection between the condenser and the high pressure line, just behind the core support. That was the only sign of a leak I could detect so I hope that was where the leak was. I removed what little refrigerant was in the system.
CamaroAC1.jpg

Then cleaned the suspected area and then went about trying to access it. Accessing the fastener was difficult because it was slightly at an angle and behind or under the core support. I was able to remove the upper cooling stack mounts and lean it slightly rearward in the engine bay just enough to access the nut with a swivel socket.
CamaroAC2.jpg

I ran to my local NAPA and sourced a new seal, then hooked the gauges back up and pulled it into a vacuum. After letting it sit for several hours I felt comfortable that it was a sealed system and then recharged the system.
CamaroAC3.jpg

The area was thoroughly cleaned before reinstalling the cooling stack mounts.
CamaroAC4.jpg

The car is ready to go.
CamaroAC5.jpg


Just as I was wrapping up the Camaro and putting tools away I received a phone call from my local metal supplier informing me that my steel was ready to be picked up. I ran and grabbed it as it will be for my next small project.
stand1.jpg

stand2.jpg


Thanks for looking.
 
OP
Z

zmotorsports

ALLIANCE MEMBER
Joined
Oct 20, 2009
Messages
21,629
Location
Northern Utah
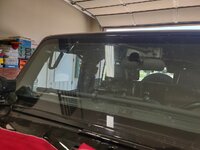
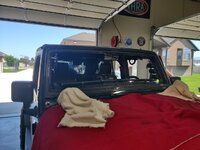
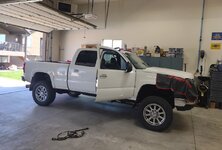
I have had a broken windshield in my truck for quite a while now and a new one in the Jeep that runs almost top to bottom on the passenger side after a rock hit it a few months back while driving through the major construction that is going on here along the Wasatch Front in Weber County.

I contacted my glass guy and he made me a deal on doing both at the same time so rather than arranging different days to bring them by his shop, he sent two guys out to my shop and they knocked them both out in about an hour.

ws1.jpg

ws2.jpg

ws3.jpg

I had both vehicles prepped with all of the lights, wiper arms and lower trim removed so they just had to do the glass work.
ws4.jpg


ws5.jpg

ws6.jpg

ws7.jpg

ws8.jpg

They did a great job and it is the first windshield that I have ever installed in my 2006 Silverado in the 15+ years I have owned it now. The Jeep had the original glass in it for the first 11 years and 115k miles but this one didn't last two years. Although it wasn't the glass's fault, it was the stinkin' construction along I-15 where both took their fatal blows.
 
OP
Z

zmotorsports

ALLIANCE MEMBER
Joined
Oct 20, 2009
Messages
21,629
Location
Northern Utah
I loved that 80’s Snap-on advertising campaign!
Clock looks good up on that wall

Thank you. I also loved that campaign and grabbed anything I could from it. It bothered me that I had this clock hanging in my last shop and hadn't been able to find it after the move. It was a pleasant surprise when the wife walked out to the shop and handed it to me last week as she knew how badly I had been looking for it over the past 7 years.
 

ScepterToad

Well-known member
Joined
Nov 9, 2023
Messages
357
Thanks Keith.

I can tell you that over the years the Jeep has evolved immensely and the way it moves over obstacles and through the trails is completely different than it did 8+ years ago with the bolt on suspension system, oh and the V6. ;) I firmly believe that the bolt on suspension systems/kits commercially available are definitely a compromise and with some extra work and effort there can be much gained by going beyond a bolt on system. I have learned so much in the past 10 or so years of playing with different iterations of my suspension and then when I broke away from the bolt on kit and built my own links, used shocks by size rather than merely application charts and then building bumps and limiting straps for the exact fitment, that all made a huge difference. Adding the V8 five years ago was just the icing on the cake.

The way it lumbers along the trails and crawls over various sized rocks and obstacles now compared to 8+ years ago it like night and day. It's hard to believe that I have had the Jeep for 13 years already. The wife and I went for an off-road drive a few days ago and I still smile to myself when aired down and cruising around the dirt roads. It is such a joy to drive. Can't wait for the next couple of off-road gatherings we're getting ready for in the next couple of months.
Projects look great as always Mike!

I've been through several of your videos on suspension and the Jeep build in general. Thanks for those! I'm not sure what I'll do just yet as far as a plan, but I know that my rear shocks need replacing and I'm leaning towards the dual rate springs all around. Front shocks seem to work pretty well. For now, the only set plan is to get gears in it, rear shocks, and new tires. I don't have the fab skills you have, and certainly not the experience or knowledge to do all that you've done, but I can hopefully get close. In any case, I'm not getting rid of it any time soon, so I'll make it mine as best I can. Thanks again for sharing all this work you do and showing how and why you do it. It really is appreciated.
 
OP
Z

zmotorsports

ALLIANCE MEMBER
Joined
Oct 20, 2009
Messages
21,629
Location
Northern Utah
As soon as the gentleman left the shop from replacing my windshields, I commenced on another project that has been sitting in my shop taking up space for several weeks with no time to complete.

The tractor hub/wheel off of the old family farm tractor that my brother is restoring. This wheel is from a 1938 Farmall F-12 tractor. This project was personal as my dad had repaired it previously probably 50+ years ago the last time it broke. Growing up as a child this tractor was retired about the time I can remember so it just sat and deteriorated over the course of most of my life. Rumor has it that this was the first tractor in Weber Co. back in the late 30's. My dad had pictures of it when it was new and it was purchased with steel wheels. He installed the rubber tires on it several years later.

This tractor was not nearly in as good of condition as the Farmall "H" that my brother restored several years ago and parts are much less abundant or available. I have repaired a couple of parts from this tractor over it's 2-year restoration project now.

I started by beveling the broken piece and the hub enough to able to fill the void up with multiple passes using Ni-55 welding rod using the SMAW (stick) process. Here I installed the through bolts to help hold the piece in alignment.

wheel1.jpg

wheel2.jpg

Tools used and I swapped my electrode holder over on my Miller Dynasty welder as well as the Ni-55 electrodes at the ready.
wheel3.jpg

I also had the rose bud tip on the oxy/acetylene torch ready and a welding blanket to cover everything once welded. I use a needle scaler to peen the weld in cast iron after each pass as well.
wheel4.jpg

Preheating.
wheel5.jpg

I like to get it to at least 400-degrees before welding.
wheel6.jpg

After a couple of passes and ready to cover with a blanket and let cool slowly.
wheel7.jpg

Covered and walked away for a bit.
wheel8.jpg

After a couple of hours, I removed the blanket and V'd out the weld a little bit to allow me to cap them with a nice weld using the GTAW (TIG) process. I knocked the flux off a Ni-55 stick electrode to use as filler to use on the cap weld.
wheel9.jpg

wheel10.jpg


More to come.
 
OP
Z

zmotorsports

ALLIANCE MEMBER
Joined
Oct 20, 2009
Messages
21,629
Location
Northern Utah
Continuing on with the cast iron tractor hub/wheel repair.

I ran a pass using bare Ni-55 rod using the GTAW (TIG) process then came back and ran a weave cover pass. All after some additional preheating of course.
wheel11.jpg

More weave cover pass at the bottom of the broken piece.
wheel12.jpg

Yet more cover passes to flow the repair area out and blend with the parent material.
wheel13.jpg

The areas between the holes had a small amount of filler that protruded into the openings that had to be removed after cooling.
wheel14.jpg

While the welds were slowly cooling I addressed the threads on the fasteners.
wheel15.jpg

That looks much better.
wheel16.jpg

Then after cooled, I tapped the threaded holes as the final step in the repair.
wheel17.jpg

All the way through to the split in the hub.
wheel18.jpg

Fasteners all installed and job completed. The through bolts easily slid into place with no resistance which told me the alignment of the broken piece was perfectly aligned with the opposing section.
wheel19.jpg

Suspended and ready for my brother to pick it up.
wheel20.jpg

Seems like I've been getting my fair share of practice repairing cast iron lately. I haven't done this much cast iron welding in several years then multiple ones within the past 6 months or so. Oh well, it's good to stay in practice and keep the skills sharp.

Unfortunately, I picked the hottest day of the year to do this repair. It's only been sitting in my shop for 3 weeks now but I chose the day it hit 105-degrees to perform the repair. And to make matters worse, I had to turn all my fans off and keep doors closed to avoid drafts that could effect the cast iron and welding process. :rolleyes:


Thanks for looking.
 
OP
Z

zmotorsports

ALLIANCE MEMBER
Joined
Oct 20, 2009
Messages
21,629
Location
Northern Utah
Projects look great as always Mike!

I've been through several of your videos on suspension and the Jeep build in general. Thanks for those! I'm not sure what I'll do just yet as far as a plan, but I know that my rear shocks need replacing and I'm leaning towards the dual rate springs all around. Front shocks seem to work pretty well. For now, the only set plan is to get gears in it, rear shocks, and new tires. I don't have the fab skills you have, and certainly not the experience or knowledge to do all that you've done, but I can hopefully get close. In any case, I'm not getting rid of it any time soon, so I'll make it mine as best I can. Thanks again for sharing all this work you do and showing how and why you do it. It really is appreciated.

I'm glad the videos and information have been helpful Keith.
 

ntsqd

Well-known member
Joined
Jan 22, 2005
Messages
1,039
Location
Lower left coast
I used to use Rockmount Jupiter B TIG filler to fix engine blocks and other cast iron parts. Holy Smokes! It's never been inexpensive, but: https://rockmountwelding.com/products/jupiter-b-tig-alloy/?sku=7303-1 I'm glad my employer was paying for it! In spite of the cost, Recommended. I'll pony up for a pound if a cast iron project comes into my shop.

Jupiter B wants to be peened while cooling. I friend in the power generation industry suggested using a needle scaler for peening operations. I've not used it for that, but I did buy an HF small scaler to test the idea and if I do any more I'll invest a quality needle scaler. Those things are magic! A mutual friend used one to make a turbo intake manifold welded together from aluminum weld elbows look like a casting after he'd blended the welds.
 
OP
Z

zmotorsports

ALLIANCE MEMBER
Joined
Oct 20, 2009
Messages
21,629
Location
Northern Utah
I used to use Rockmount Jupiter B TIG filler to fix engine blocks and other cast iron parts. Holy Smokes! It's never been inexpensive, but: https://rockmountwelding.com/products/jupiter-b-tig-alloy/?sku=7303-1 I'm glad my employer was paying for it! In spite of the cost, Recommended. I'll pony up for a pound if a cast iron project comes into my shop.

Jupiter B wants to be peened while cooling. I friend in the power generation industry suggested using a needle scaler for peening operations. I've not used it for that, but I did buy an HF small scaler to test the idea and if I do any more I'll invest a quality needle scaler. Those things are magic! A mutual friend used one to make a turbo intake manifold welded together from aluminum weld elbows look like a casting after he'd blended the welds.

Yes, a needle scaler work great for peening the hot weld and dissipating the stresses in cast iron repairs. In the pictures above you can see it at the ready along with other tools so I don't have to reach very far in the middle of the welding process.
 
OP
Z

zmotorsports

ALLIANCE MEMBER
Joined
Oct 20, 2009
Messages
21,629
Location
Northern Utah
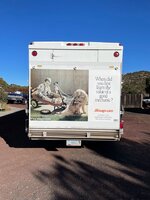
I liked that Snap-On Tribute campaign so much, I bought the truck!
D1CF8E5D-C245-4212-A318-10C9E509C881.jpeg
That poster was put on thousands of trucks, was on 2 of mine! Jebco made that clock for us and I think you can pull a clock mechanism out of any clock like it and retrofit yours to make it right more than twice a day…

Yeah, it is just a standard clock mechanism. I am more than ok with it not actually working as that is just one more thing in the shop that I would have to keep batteries in and I have enough clocks around that it doesn't need to work.
 

customh

Well-known member
Joined
Feb 18, 2013
Messages
566
Location
East Bethel, MN
Yeah, it is just a standard clock mechanism. I am more than ok with it not actually working as that is just one more thing in the shop that I would have to keep batteries in and I have enough clocks around that it doesn't need to work.

Mike, I can't be sure but I am pretty sure you can buy a replacement quartz clock movement that runs on batteries.

Mike. You had to know what you were doing. This is Garage Journal. The notion that something is broken distresses all of us to our core. IT MUST BE FIXED.

Regardless, everyone has missed the elephant in the room:
Just as I was wrapping up the Camaro and putting tools away I received a phone call from my local metal supplier informing me that my steel was ready to be picked up. I ran and grabbed it as it will be for my next small project.
stand1.jpg

Thanks for looking.

Mike has been caught in the act of..... hauling things in his TRUCK BED!! *gasp*
 
To avoid these ads, REGISTER NOW!
Top Bottom