To avoid these ads, REGISTER NOW!

ZMotorsports Shop Projects 2.0

SilverJimmy

Well-known member
Joined
Apr 14, 2012
Messages
1,692
Location
Prescott/Flagstaff, AZ
It has been about 8 years since we've been to the Grand Canyon and I had forgotten just how terrible Highway 89 is between Page and Flagstaff. The road was **** last time I drove it and it has gotten significantly worse since then
Mike, the wife and I had to travel to Page over the weekend for a friend‘s memorial. Flat towed our Jeep behind our truck/camper. I was amazed we still had the Jeep when we got to Page! Man O Man has that stretch of “road” gotten worse than I remembered. Not going back until I hear that ADOT has made an honest attempt to fix that death trap of a highway!
Thanks again for singing the praises of flat towing, so nice to have our Jeep there this weekend.
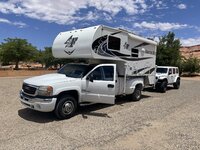
495D3DE7-8752-41AB-84A3-8A74FC1226EE.jpeg
Stayed at the old KOA, pretty nice campground and all we needed was a 30 amp outlet for the A/C to keep us cool. I actually drove by this place daily for over 30 years and never stopped in. Pretty funny!
 
To avoid these ads, REGISTER NOW!
OP
Z

zmotorsports

ALLIANCE MEMBER
Joined
Oct 20, 2009
Messages
21,477
Location
Northern Utah
Mike, the wife and I had to travel to Page over the weekend for a friend‘s memorial. Flat towed our Jeep behind our truck/camper. I was amazed we still had the Jeep when we got to Page! Man O Man has that stretch of “road” gotten worse than I remembered. Not going back until I hear that ADOT has made an honest attempt to fix that death trap of a highway!
Thanks again for singing the praises of flat towing, so nice to have our Jeep there this weekend.
495D3DE7-8752-41AB-84A3-8A74FC1226EE.jpeg
Stayed at the old KOA, pretty nice campground and all we needed was a 30 amp outlet for the A/C to keep us cool. I actually drove by this place daily for over 30 years and never stopped in. Pretty funny!

Sterling, happy to hear that you are still pleased flat towing the Jeep. I don't think we could leave the house without the Jeep in tow as we enjoy sightseeing so much once we get to our destination.

I told the wife the same thing about Highway 89, didn't think we'd be back until they at least make an attempt to fix it. That is one horrible section between Page and Flagstaff. I bottomed out on my air spring's bumpstops several times along that section and I even knocked my speed way down. 🤬
 
OP
Z

zmotorsports

ALLIANCE MEMBER
Joined
Oct 20, 2009
Messages
21,477
Location
Northern Utah
It was my son and DIL's 5th anniversary on Friday so we didn't work in the shop but he came over on Saturday with the goal of getting it sitting in the engine bay bolted in place by afternoon so they could go and enjoy an anniversary dinner.

We fought the engine alignment a bit but ultimately we won out.

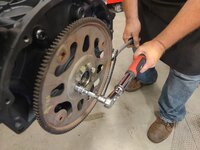
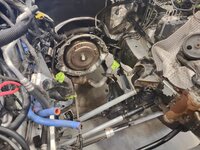
Grabbed the flywheel holding tool that I've had for several decades. I've held a lot of flywheels with this old tool.
wj70.jpg

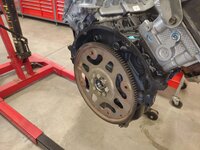
Once we slung the engine and got it off the engine stand I proceeded by torquing the flexplate to spec.
wj71.jpg

Flexplate installed.
wj72.jpg

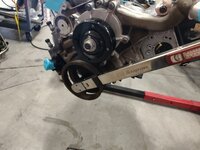
Next it was time to finish the balancer install by torquing the crank bolt to spec and holding the flywheel.
wj73.jpg

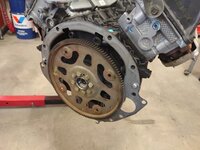
Lastly I slipped the steel separator plate in behind the flexplate and engaged it on the dowel pins as well as added a bit of anti-seize to the dowels. When we pulled the OEM engine, one of the dowels was seized in the transmission so this should prevent that from happening.
wj74.jpg

One last glance over the engine bay to ensure it is ready to receive the engine.
wj69.jpg


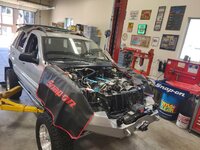
Front tires/wheels removed and front end lowered to clear the radiator support.
wj75.jpg

Slowly going into position while we confirm there are no interferences.
wj76.jpg

And after a break for lunch we had it in place, bolted and ready to start the final connections and assembly.
wj77.jpg

Front tires/wheels reinstalled and this is where we quit for the afternoon.
wj78.jpg


Thanks for looking.
 
OP
Z

zmotorsports

ALLIANCE MEMBER
Joined
Oct 20, 2009
Messages
21,477
Location
Northern Utah
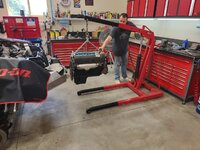
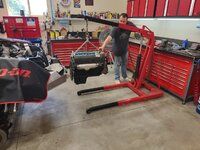
I have had questions over the years about my lift placement and even posted on several specific threads to post placement so I took this picture to show the benefits of not placing the 2-post lift too close to the workbenches.


With my lift placement of approx. 17' from the back wall and my workbenches being 30" deep I still have 7' from the front edge of the workbench to the front of the vehicle on the lift. I have found this to be ideal for tasks such as engine removal/installations as it give plenty of room to work around without tripping over equipment or having to come in at an angle with the engine hoist.
wj75.jpg


Just thought I'd show that for a visual reference for anyone looking for ideas of lift placement in their shops.
 

SilverJimmy

Well-known member
Joined
Apr 14, 2012
Messages
1,692
Location
Prescott/Flagstaff, AZ
Mike, I was just going to comment about that photo of the hoist in front of your son’s Jeep and how much room there is between the bench and a vehicle. I’m thinking in my new shop I’ll shoot for between 18’-20’ for my lift placement since my precision is not at your level! So great you’re getting to spend time working with your son, I sure miss spending time with my dad.
 

Xti04

Well-known member
Joined
Nov 11, 2016
Messages
2,366
My lift sits back about 17 ft from back wall. Gives me 9 ft to my loft and another 8 ft up under there. I went as far off my side wall as I could comfortably but wish I had gone another foot. I can walk around it but I cant walk around while carrying a tire. Just a limitation I have to work around.
 

ScepterToad

Well-known member
Joined
Nov 9, 2023
Messages
340
Great updates on your son's engine install Mike! Looks like it's coming along nicely.

I'll update my thread when I get back, but I must say, Utah is growing quickly on me. We're down in Moab on week 2 and headed home in a few days. This place seems to go on forever and there's another great vista each time we push further into the backcountry or up the road. You have a great state here!!
 
OP
Z

zmotorsports

ALLIANCE MEMBER
Joined
Oct 20, 2009
Messages
21,477
Location
Northern Utah
Great updates on your son's engine install Mike! Looks like it's coming along nicely.

I'll update my thread when I get back, but I must say, Utah is growing quickly on me. We're down in Moab on week 2 and headed home in a few days. This place seems to go on forever and there's another great vista each time we push further into the backcountry or up the road. You have a great state here!!


Keith, were you caught up in that series of storms that rolled through central Eastern Utah the past few days. Saw Moab on the news a couple of days ago with the flooding.
 

ScepterToad

Well-known member
Joined
Nov 9, 2023
Messages
340
Keith, were you caught up in that series of storms that rolled through central Eastern Utah the past few days. Saw Moab on the news a couple of days ago with the flooding.
We were. Got off of Hells Revenge and back to the campground a few minutes before it hit. Managed to get two doors on before the quarter size hail came through. 80 mph winds and something like 2” of rain in 15 minutes. It was nuts. No damage to my property but the campground suffered two broken power poles in the process.
 
OP
Z

zmotorsports

ALLIANCE MEMBER
Joined
Oct 20, 2009
Messages
21,477
Location
Northern Utah
We were. Got off of Hells Revenge and back to the campground a few minutes before it hit. Managed to get two doors on before the quarter size hail came through. 80 mph winds and something like 2” of rain in 15 minutes. It was nuts. No damage to my property but the campground suffered two broken power poles in the process.

Glad to hear you didn't suffer any damage Keith. Saw it on the news and both my wife and I said outloud "glad we weren't there". The wind almost looked worse than the rain.
 
OP
Z

zmotorsports

ALLIANCE MEMBER
Joined
Oct 20, 2009
Messages
21,477
Location
Northern Utah
Last night we were able to get the remainder of the bellhousing bolts installed/tightened as well as the torque converter bolted up to the flexplate, the crank sensor installed, the support bracket between the engine and transmission installed and then moved topside to snake the grounds down through the motor mounts and into position. However, upon looking at the split loom on the grounds neither my son nor I were happy with how they looked. Granted, they are 20-years old and have held up thus far but we wanted to replace them before connecting and put it back as close to OEM as possible, for a 20+ year old Jeep anyways.

On the passenger side, the battery ground cable split loom was crumbling nearly all the way up to the battery. We were able to remove it and break the sticker away from the split loom enough to slide new split loom under the OEM part number sticker. Although not necessary to keep the OEM sticker, it sure felt good to have it put back to OEM level and keep it on the cable. We then tuck the cable down behind the motor mount exactly how it was run from the factory and let it hang underneath along with a couple other grounds.
wj79.jpg

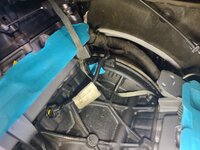
Moving over to the driver's side, we also noted some severe crumbling of the split loom so we addressed it as well. This is a loom containing the oil pressure sensor wiring and connector, the bank 1 upstream O2 sensor wiring and connector as well as another ground which gets bolted to the block. While we were replacing the split loom, we cut the tree barb free from the OEM loom to reuse as well as the strain relief connector that attaches to the stud on one of the rocker cover bolts so everything looks as OEM as possible.
wj80.jpg

Wire routed behind the motor mount and ready to go underneath and connect. While we were right there, we installed the oil pressure switch and connected it as well as connected the strain relief onto the rocker cover stud.
wj81.jpg


The only things we have remaining underneath is to connect these grounds, install the starter motor and then connect the exhaust downpipes to the manifolds and we are finished with the underside and can move topside.

Thanks for looking.
 
OP
Z

zmotorsports

ALLIANCE MEMBER
Joined
Oct 20, 2009
Messages
21,477
Location
Northern Utah
We weren't able to get a lot accomplished last night but we were able to focus on a few items under the Jeep.

We finished tidying up some wiring looms, got the ground points cleaned on the block and the grounds connected as well as the crankshaft position sensor wiring loom replaced and connected and lastly the starter motor installed and connected.

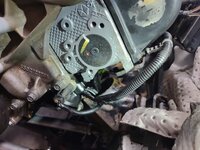
The original split loom on the crankshaft position sensor was crumbling and most had already fallen off. We took it back to the next junction where it looked pretty good and started there.
wj82.jpg

Again, a little care was taken to keep the OEM sticker/label on the pigtail so the loom was removed from under it, the new split loom was started and pushed through it up to the junction, then the label slid back over.
wj83.jpg

Then the wire harness was slipped back behind the bell housing around the transmission dipstick and routed to the crank sensor location and connected.
wj84.jpg

The last few wires which were grounds were prepped and bolted in place to the block once the paint was removed from each boss.
wj85.jpg


My DIL brought our grandson over along with dinner, so we quit for the evening and went in to enjoy an awesome home cooked meal from our kids and played with our grandson for a while.

As I was closing up the shop, I snapped a picture of the backyard showing how well the couple of dry spots have rebounded from earlier in the week when I cleaned the strainers on the heads and the main filter. A big improvement in only a few days.
june2024backyard.jpg


Thanks for looking.
 
OP
Z

zmotorsports

ALLIANCE MEMBER
Joined
Oct 20, 2009
Messages
21,477
Location
Northern Utah
Nothing too exciting for pictures from last night's work as we got several smaller tasks completed and buttoned up to the underside before moving topside.

We were able to get the exhaust downpipes bolted to the manifolds, battery cable and control wire ran to the starter motor, O2 sensors installed, wiring ran back down and connected and the transmission line strain relief bracket resecured to the engine block.
wj86.jpg

We then moved topside to install the engine dipstick and connect the crossover tube for the PCV system at the back of the engine. We then laid the wiring back over the rocker cover on the passenger side, installed the camshaft position sensor and connected as well as the upstream O2 sensor for bank 2. We went through the wiring on the passenger side laying things out and ensuring we had everything roughtly where it should lay in preparation for the install of the intake manifold and completion of the top of the motor.
wj87.jpg

The parts on the parts shelf are decreasing. :bounce:
wj88.jpg


We knocked out two more trays of fasteners last night and down to only two remaining. We're on the home stretch now. Unfortunately, we have a busy weekend with other things so we may only get a few hours to work on it.

Thanks for looking.

Thanks for looking.
 

ntsqd

Well-known member
Joined
Jan 22, 2005
Messages
997
Location
Lower left coast
Been meaning to ask, an earlier pic showed the fan and shroud on the radiator, and it almost looks like the fan is driven off the PS pump or some other hyd. source?
This one:
wj67-jpg.2133530
 

Jgaz

Well-known member
Joined
Dec 16, 2016
Messages
1,714
Location
AZ
Love the parts cart. It reminded me of how much I miss the ones we had at work.
Some of our carts had a wire grid added to the side or the back. Came in real handy for hanging all the plastic panels that are on modern cars
No room for one in my retirement garage.
 
OP
Z

zmotorsports

ALLIANCE MEMBER
Joined
Oct 20, 2009
Messages
21,477
Location
Northern Utah
Been meaning to ask, an earlier pic showed the fan and shroud on the radiator, and it almost looks like the fan is driven off the PS pump or some other hyd. source?
This one:
wj67-jpg.2133530

That is correct, on the WJ platform, the cooling fan is electrically controlled/hydraulically driven.


The fiddly things take time. But the attention to detail is very nice! Thanks for the updates Mike!

Thank you. Yes, the devil is definitely in the details. However, for a 20+ year old daily driven Jeep with over 200k miles I have been pleased with how well things have held up under the hood on this vehicle. I think the previous owner did a fair to good job maintaining it for the first 175k miles, I think my son did his homework and did a good job when looking for a WJ and I think he found a good blank canvas in this one. Although we have modified nearly everything on the chassis of this Jeep, the actual engine and transmission have performed exceptionally well and when performing this engine replacement, there were just a few items such as wiring looms and such that we wanted to address to "freshen" them up. Other than that it's been a pretty basic engine replacement and has gone smoothly.

The goal was to put it back as closely to OE spec's as possible and get many more miles and years out of it.


Love the parts cart. It reminded me of how much I miss the ones we had at work.
Some of our carts had a wire grid added to the side or the back. Came in real handy for hanging all the plastic panels that are on modern cars
No room for one in my retirement garage.

I am loving this rolling parts cart/shelf. I should have purchased it when I first built the new shop and had the room. I can't believe how much nicer it is on larger projects like this to have the parts on a cart and not on the workbenches.
 

ScepterToad

Well-known member
Joined
Nov 9, 2023
Messages
340
Looking good and moving right along Mike!

As I was finishing up the drive last night, my mind turned back towards projects and thinking about my Jeep’s performance on this last trip. One of the items is tires. I seem to remember you’re running a set of Mickey’s these days. Any updated thoughts on the tires you’re running?
 
OP
Z

zmotorsports

ALLIANCE MEMBER
Joined
Oct 20, 2009
Messages
21,477
Location
Northern Utah
Looking good and moving right along Mike!

As I was finishing up the drive last night, my mind turned back towards projects and thinking about my Jeep’s performance on this last trip. One of the items is tires. I seem to remember you’re running a set of Mickey’s these days. Any updated thoughts on the tires you’re running?

Thanks Keith.

I have been running the Mickey Thompson Baja Boss A/T's for the past several years and love them. They handle and perform great on pavement, even snowpacked roads, and off-road even better.

I have thrown a lot of various driving conditions at them over the past several years I've been running them and they've taken everything I've thrown at them with stride. For a large lug all-terrain they are wearing good as well. If you go back within the past few pages you can see the wear rate as I track it and have shown it on this thread when I've rotated them.
 
OP
Z

zmotorsports

ALLIANCE MEMBER
Joined
Oct 20, 2009
Messages
21,477
Location
Northern Utah
My son and I were able to get a little bit more assembled on his WJ on Saturday.

We left on a few nights before ready to install the intake manifold.

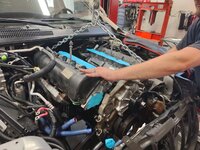
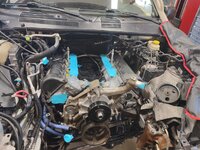
First thing Saturday was to prep the heads for the installation of the intake. Everything cleaned and wiped down.
wj89.jpg

Intake manifold installed and torqued to spec.
wj90.jpg

Next we moved forward with the installation of the injectors, ignition coils and laid the wiring back in place and made all of the necessary connections. We held off on connecting the MAP sensor, coolant sensor and A/C connector until everything was in place so we could put some new split loom on the wires and have them break out at the correct locations.
wj91.jpg

New seal installed in the oil fill and torqued it to spec.
wj92.jpg

A/C compressor and alternator in place along with the new split loom on the wiring.
wj93.jpg

That is where we left off for the day as we both had weddings to get to later in the day Saturday.

Thanks for looking.
 
To avoid these ads, REGISTER NOW!

SilverJimmy

Well-known member
Joined
Apr 14, 2012
Messages
1,692
Location
Prescott/Flagstaff, AZ
Mike, am I being overly critical of Mother Mopar (or who ever they are today) but aesthetically I just can’t get over how unattractive most of the engines in modern Chrysler products are. Not talking about the late model Hemi, that really isn’t a Hemi! The LS platform is very good looking, same for most of Ford’s newer engines. I’m not saying that their performance or utilitarian production of power is flawed, they just don’t have an appealing look to me. And I’ve never seen one used in an out in the open application, with the hood proudly up, as I have for the other modern engines. And I own a new Jeep! But even that motor is fugly!
 

OutlawDrifter

Well-known member
Joined
Jan 20, 2015
Messages
3,903
Location
KS
The LS platform is very good looking...

Sterling, as a guy who has a few LS's and has owned many, without a "beauty" cover over the top, they aren't much to look at in my opinion. The one in my '49 looks like a carb'd late 60s SBC, and that was done to rid it of the ugly ;) :ROFLMAO:

One of the best looking engines from the factory was the Tuned Port Injection engine in the F-bodies and Corvettes.
 

ntsqd

Well-known member
Joined
Jan 22, 2005
Messages
997
Location
Lower left coast
That is correct, on the WJ platform, the cooling fan is electrically controlled/hydraulically driven.
I've been looking into this a little as I find it very intriguing. No idea where I might ever use it, but I'm wanting to know more about it. Is the fan single, 2/3/X speed, or variable speed? I've been looking to see if I could buy the parts-pieces from Rock Auto and they only carry electric fan motors. Same for Napa. That has me wondering if some folks are changing out this system in favor of an all electric system when some expensive part fails.
 
OP
Z

zmotorsports

ALLIANCE MEMBER
Joined
Oct 20, 2009
Messages
21,477
Location
Northern Utah
And I own a new Jeep! But even that motor is fugly!


That's why it has an engine cover on it Sterling. :ROFLMAO:


I've been looking into this a little as I find it very intriguing. No idea where I might ever use it, but I'm wanting to know more about it. Is the fan single, 2/3/X speed, or variable speed? I've been looking to see if I could buy the parts-pieces from Rock Auto and they only carry electric fan motors. Same for Napa. That has me wondering if some folks are changing out this system in favor of an all electric system when some expensive part fails.

While the idea may sound intriguing, however, I find it ok at best. I would much rather have fully electric fans than the hydraulically driven one. There are quite a few people who switch these over to fully electric when they have issues with the hydraulic fan, but my son's is still functioning as designed so we are leaving it intact for the time being. Then the issue becomes trying to tie the electric fan into the operating system for variable speed.
 

Bad Mojo

Well-known member
Joined
Sep 2, 2012
Messages
119
Who made your engine hoist? I bought a used hoist that looks very similar and would like to figure out who makes it, so I can order some service parts.
 
OP
Z

zmotorsports

ALLIANCE MEMBER
Joined
Oct 20, 2009
Messages
21,477
Location
Northern Utah
Who made your engine hoist? I bought a used hoist that looks very similar and would like to figure out who makes it, so I can order some service parts.

Sorry, I honestly don't remember who makes it or where I got it. I've been asked before and don't have any details on it. I've had it for so long, but I remember searching for one that collapses down as small as it does because space was such a concern in my last shop. I want to say I purchased it from NAPA but don't hold me to it as it's been so long ago.
 
OP
Z

zmotorsports

ALLIANCE MEMBER
Joined
Oct 20, 2009
Messages
21,477
Location
Northern Utah
I'm guessing an older model Torin as this one looks similar:

This ^ doesn't look quite like mine. The legs on mine are not angled outward, do not fold up and have the casters tucked up and under the back end. The legs are parallel to one another and telescope outward rather than fold. I have not seen many in the configuration like mine in the past as most resemble the one linked above with the outward angled legs that fold up.
 

Bob Heine

ALLIANCE MEMBER
Joined
Oct 24, 2009
Messages
10,709
Location
Boca Raton, Florida
This ^ doesn't look quite like mine. The legs on mine are not angled outward, do not fold up and have the casters tucked up and under the back end. The legs are parallel to one another and telescope outward rather than fold. I have not seen many in the configuration like mine in the past as most resemble the one linked above with the outward angled legs that fold up.
Mike, I suspect that design was abandoned for cost issues. I see a lot of expense just in the base, with the use of nesting square tubes, rollers, rather than swivel casters at the end, two vertical pillars for the hydraulic cylinder, huge triangle gussets and as you mention, a much wider rear cross-member. It certainly looks more stable than the ones being sold today, all of which appear to be slight variations of the one @ntsqd linked.
Zmotorsports Engine Crane.jpg
 

ntsqd

Well-known member
Joined
Jan 22, 2005
Messages
997
Location
Lower left coast
Bob's critique is why I suspected that it is an older model, as in no longer made. However, something that I'm not (yet) able to isolate, beyond merely both being red, makes me think that they were both designed by the same guy or group.
 
OP
Z

zmotorsports

ALLIANCE MEMBER
Joined
Oct 20, 2009
Messages
21,477
Location
Northern Utah
I know the legs being parallel (not triangulated) and the telescoping rather than tilting up were the primary reasons I was drawn to this particular engine hoist when I was researching. I have not seen another since, so maybe it isn't the great design I thought it was. :unsure: Otherwise I would think it would be more popular.
 

ntsqd

Well-known member
Joined
Jan 22, 2005
Messages
997
Location
Lower left coast
I wouldn't confuse popular with it's users for popular with it's manufacturer.

The angled lower arms do have the advantage of widening the track width when the legs are extended. On an indoor slab that may not matter much at all, but on an outdoor slab likely to have small obstructions on it that could be important.
 

ntsqd

Well-known member
Joined
Jan 22, 2005
Messages
997
Location
Lower left coast
The hoist that I now own was my grandfather's, and he made two modifications to it that I really appreciate. First is that he made a set of steel wheels for the front of the legs from some Ø8"(?) pipe that do not steer. Or get stalled by a twig or a piece of gravel. Since it has been used outside its whole life that second feature is huge.
The other mod that he made was to fit it with a hand-crank cable winch at the pivot end of the boom with a needle bearing cable pulley at the working end of the boom. Boom length changes are locked by a spring loaded pin that fits into incremental holes rather than friction from the end of a bolt. Gone are the days when raising or lowering something causes an undesirable horizontal translation of its position. Now I raise or lower the boom to make small intentional changes in lateral location.
 
OP
Z

zmotorsports

ALLIANCE MEMBER
Joined
Oct 20, 2009
Messages
21,477
Location
Northern Utah
The beauty of your hoist is that it gets “steered” from the rear like a forklift. The cheap ones they make today with swivel casters on all 4 legs **** because it‘s very hard to control them and precisely position stuff where you really want it! Yours works for you, the cheap ones make you work!


BINGO Sterling. The way the front wheels are NOT casters and rigid and the wider rear base which is steered are the two main features I liked about this one when I was looking.
 

Scuderia-F1

Well-known member
Joined
Feb 9, 2011
Messages
1,198
Location
Stockholm, Sweden
I know the legs being parallel (not triangulated) and the telescoping rather than tilting up were the primary reasons I was drawn to this particular engine hoist when I was researching. I have not seen another since, so maybe it isn't the great design I thought it was. :unsure: Otherwise I would think it would be more popular.
In my opinion the design like your hoist is superior, but nowadays only found on really high end hoists. Hoists that comes at an eyewatering price, but well worth the extra coin in my opinion.
 
OP
Z

zmotorsports

ALLIANCE MEMBER
Joined
Oct 20, 2009
Messages
21,477
Location
Northern Utah
In my opinion the design like your hoist is superior, but nowadays only found on really high end hoists. Hoists that comes at an eyewatering price, but well worth the extra coin in my opinion.

Thanks Anders. Like I mentioned, when I was looking to replace my last one, I really liked the wider and more rectangular framework (legs being parallel), the fixed outrigger wheels (not casters), the telescoping legs and the casters tucked up under the base where they don't get tripped over or kicked.

I asked my son last night where we bought it from as I think we've had it at least 15 or maybe even 20 years now that I think about it. Hard to believe we've been in this shop 7 years now and I know we had it for around 10+ years at the last shop. At first he thought NAPA was where we bought it as well but then he reminded me that we purchased quite a few tools from Northern Tools & Equipment there for a while, so maybe that's where we got it. I also don't think we paid an exorbitant amount for it, at least I don't remember paying too much for it. I know I sure like the design and have been pleased with it each time I've used it, although it doesn't get used quite as much as it used to.
 

aka Larry

Well-known member
Joined
May 2, 2012
Messages
8,099
Location
Eastern, NC
The beauty of your hoist is that it gets “steered” from the rear like a forklift. The cheap ones they make today with swivel casters on all 4 legs **** because it‘s very hard to control them and precisely position stuff where you really want it! Yours works for you, the cheap ones make you work!

Mine is rear steer as well. Unlike Mikes, the legs are not parallel, which is pain sometimes. The thing I like about Mike's is it appears to have lower C-of-G than mine, thus more stable.
 

ntsqd

Well-known member
Joined
Jan 22, 2005
Messages
997
Location
Lower left coast
....... I also don't think we paid an exorbitant amount for it, at least I don't remember paying too much for it.
Rules out the predecessor to this one: https://www.northerntool.com/produc...t-3-ton-lifting-capacity-model-hw93806-155711
:)

I rather like the angled legs because they widen the base when they're extended. I only do that when I need more boom length because I need to lift something higher. I can see where that widening can make things more difficult at times. Its a price that I'm willing to pay for the added stability when something goes way up there.
 
To avoid these ads, REGISTER NOW!
Top Bottom