To avoid these ads, REGISTER NOW!

ZMotorsports Shop Projects 2.0

To avoid these ads, REGISTER NOW!
OP
Z

zmotorsports

ALLIANCE MEMBER
Joined
Oct 20, 2009
Messages
21,477
Location
Northern Utah
Mike, couple of awesome projects, love seeing your work! Thanks for sharing.

Mike, if I tried TIG welding a spindle like that, the result woul make your "before" pictures look like an improvement.

Thanks guys.

Scott, welding is about 5% theory and 95% practice. I never would have attempted such a repair 20 years ago. Even this one being cast aluminum, I gave no guarantees but welcomed the challenge.
 
OP
Z

zmotorsports

ALLIANCE MEMBER
Joined
Oct 20, 2009
Messages
21,477
Location
Northern Utah
The wife and I took off last week for a relaxing getaway.

We ended up in Star Valley, Wyoming for about 5 days. I guess we picked the right time to do so as we had our first triple digits of the year much of the week last week and we were up in the higher elevation and only saw mid-80's at the warmest. Evenings were in the high 40's and perfect for sleeping with a window open, although by morning it was being closed. :bounce:

The next few posts will be picture heavy of our trip so please bear with me.

I cannot believe how many animals we saw this trip. One day we took a drive up on the Grey's River between Alpine and what we attempted to make to Cokeville. We saw a wolf (twice) and five moose along with a few elk, a couple of bald eagles and a fox while we were stopped airing back up before hitting the pavement.

On Friday we ventured back into Teton NP and then up into Yellowstone NP as far north as Old Faithful. We saw a lot of bison, two large herds of elk and a grizzly bear and cubs in Teton, but not much in term of wildlife in Yellowstone, although we weren't far enough north to really be in our "sweet spot" for wildlife in Yellowstone. Crowds in Yellowstone were crazy but not too terrible in Teton, at least once we got away from Jackson Lake Lodge and Jenny Lake Lodge, those two areas were madhouses.


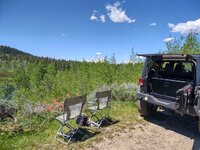
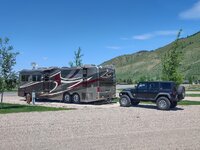
Here is our campsite for the week in Afton, WY. We had excellent 360-degree views of the Star Valley area. We didn't have any immediate neighbors in the campground and had the entire one side to ourselves until Friday when we returned to camp to find it full.
afton1.jpg

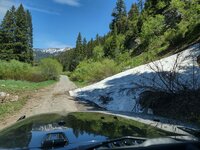
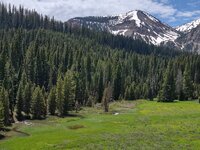
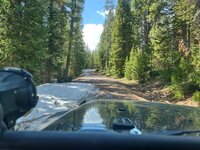
After arriving and getting camp setup we took off and tried a trail we haven't been on before. The trail was called Dry Creek just north of Afton and the creek was anything but dry. We even encountered a few snow drifts that hadn't melted yet.
afton2.jpg

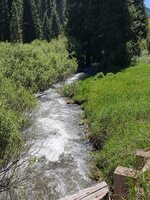
The creek was full bank to bank and even getting into the willows which was evidently not the normal flow.
afton3.jpg

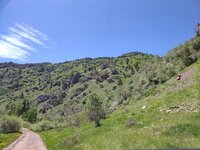
As we climbed in elevation we rose above the tree line then the trail turned to a 62" or narrower trail at about 8500' in elevation, where we turned around. We were about 12 miles from pavement when we turned around but the entire afternoon never saw another vehicle on the trail. In a few areas the creek had breached the banks and was just barely running down the road, other than that it was dry and uneventful.
afton4.jpg

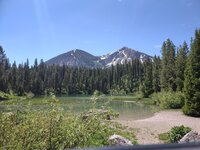
On Wednesday we took off for Teton NP. We had to drive through Jackson Hole, so we did so without stopping and as we passed Moose Junction in Teton we found a trail called Topper Lake that lead up into Bridger National Forest and just skirted along the National Park. About 20 miles up we found the lake and the views were amazing.
afton5.jpg

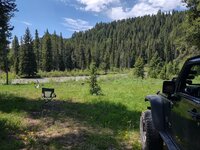
The wife thought this would be the perfect lunch spot so out came the lawn chairs and lunch basket. While eating we heard an owl just below us in the trees but never could see it.
afton6.jpg

We were in no hurry, so we just sat there after eating and enjoyed the views and the sounds of the wildlife around us. Just as we were packing up the chairs and lunch supplies a cow elk and calf walked right past us across the road about 20 yards away. We just stopped and watched them and although the cow kept a close eye on us, they didn't seem to be startled. As soon as I made my way to the driver's door of the Jeep to grab my phone to take a picture they bolted.

The entire area was just breathtaking.
afton7.jpg

As it was getting late in the afternoon and we still had a few hour drive back to camp we took one last side trip to cross the Jackson Lake dam and the short scenic drive around Jenny Lake. This is one of my favorite views in Teton NP.
afton8.jpg

On Thursday we left camp early as we wanted to head to Alpine then take the Grey's River up and over to Cokeville. This is about a 70-mile dirt road with some amazing scenery. The first half of the trail is a dirt highway as it leads up to 3 different outfitters, one even has its own landing strip and lodge. We had a few vehicles blast past us on this section but we were in no hurry and wanted to take in the scenery so we just lumbered along the trail and let the others pass. The Grey's River was full and to capacity and flowing at an alarming rate. Much of the trail that day the river was within inches of the road right up to the bank and in a couple of areas it actually breached the bank and onto the road.
afton9.jpg

afton10.jpg


Stay tuned for more pictures to follow.
 
OP
Z

zmotorsports

ALLIANCE MEMBER
Joined
Oct 20, 2009
Messages
21,477
Location
Northern Utah
Continuing on with the day on the Grey's River.

With each turn the river didn't seem to get any narrower or slower moving.
afton11.jpg

Even the smaller tributaries that fed into the Grey's were flowing at capacity. This was Murphy Creek that fed into the Grey's about 10 miles up the trail.
afton12.jpg

We took the short detour to check out Murphy Lake. It was only about 8 or so miles off the main Grey's River trail/road.
afton13.jpg

Murphy Lake wasn't very big but it sure was beautiful and isolated. We only saw one other couple there in a side by side.
afton14.jpg

We continued up the trail for another couple of miles as it grew near lunchtime so we found a nice spot along the river to set up our chairs. We never saw another person once we went above Murphy Lake.
afton15.jpg

After lunch we headed back to the main Grey's River trail and continued north towards Cokeville. We continued climbing and in many places were at snow level. Here were a couple of beaver dams that were barely slowing the flow of water from the spring runoff.
afton16.jpg

As we approached the summit, the Grey's River began shrinking, but only somewhat.
afton17.jpg

Alongside the road in the willows the wife spotted a bull moose who was doing his best to remain anonymous. How she spotted him I'll never know.
afton18.jpg

Breathtaking views all around as we traveled along.
afton19.jpg

Just as we started climbing again for the last climb before dropping into Cokeville, I heard some splashing alongside the trail but the trees blocked any view of the water. Just as we cleared the row of trees alongside the trail we saw this young guy running alongside the trail following the creekbed and possibly looking for momma, as he was quite young.
afton20.jpg


Stay tuned for more pictures.
 
OP
Z

zmotorsports

ALLIANCE MEMBER
Joined
Oct 20, 2009
Messages
21,477
Location
Northern Utah
Last batch of pictures from the trip.

Just after seeing the juvenile moose we came across an area that the river had breached the banks and flooded the trail. It wasn't bad, only a few inches deep but the water remained right at the trail level for quite a ways.
afton21.jpg

As we made the last climb we came across several drifts that hadn't melted yet. Most of these had tracks where people had punched through with the exception of the last two where we were the first to make tracks through them. There were also multiple tracks that we saw where people had been turning around so I started getting a little anxious. In my mind I kept thinking that once we get through the trees we should start dropping in elevation as we were only about 6-miles from the pavement near Cokeville. I didn't want to make the wife nervous, but I figured once we cleared the trees we were home free.
afton22.jpg


I was wrong. We had driven through two snowdrifts on level ground quite easily but when we came to this one out in the open I figured it would be the same. Unfortunately, I tried to go high on the far left but it was still solid and the Jeep's front end just slid downhill immediately upon climbing up on it.

I then backed up and shifted to the lower section where it appeared to be the shallowest, far right side actually had some of the dirt trail showing through, although it was more mud than dirt. The bad part here was the ground was a slippery gooey mud with about an 18+ inch drop-off on the right into the willows which also was very marshy and didn't appear to be solid ground. There were some downed trees to the left on the drift so I thought if I could keep the right tires on the edge of the trail maybe the left tires would bite into the snow and we could stay straight. NOPE! As soon as the front end hit the snow it immediately shot to the right as the slope wanted to carry the Jeep down into the willows. I backed up a bit and grabbed another bite at it slightly left of the last attempt. Same outcome, only worse. The Jeep's front end shot off the trail and we were now at about a 30-degree angle looking down in the willows and it was slipping slowly downhill. I put it in reverse and applied a small amount of throttle and it lost ground quickly. More quickly than I liked and the wife sucked all the air out of the cabin of the Jeep. Now the rear tires were also starting to slide in the gooey mud.

I did a very quick mental evaluation of my recover gear and looked around as there was absolutely NOTHING to attach the winch to for extraction. I thought I had my folding tracks that I could deploy as worst-case scenario but as soon as I started to lift my foot from the brake it began sliding and that didn't make the wife happy, now the entire Jeep was sliding and not just the front end. I thought I could have her slide over the center console and into the driver's seat to hold the brakes while I got out and deployed my folding mud/sand tracks but then thought I would make one more attempt to back out and lock the axles. Locking the electronic axles does require them to rotate a couple of revolutions to become fully locked and I hate the thought of hitting the throttle until they are fully locked, so I power braked the Jeep just enough to allow me to rotate the drivetrain a few revolutions which allowed both axles to fully lock.

Once locked I hammered the throttle and immediately started sliding downhill again, but didn't dare lift off the throttle, even with the wife protesting loudly. :oops: At this point I thought we were either going into the willows and then really be screwed OR, it would dig down deep enough that I could grab some solid ground, or more solid ground at least. With the amount of mud being thrown forward I was surprised the trenches weren't deeper than they appear in the pictures. The pictures really don't do it justice because it was so gooey that we really didn't sink much but it finally grabbed hold and began backing up back onto the trail. Whew. That was closer than I prefer.

We had a dilemma at this point. Try a third time, which the wife was NOT in favor of, or turn around and head the 63+ miles back to Alpine. Once I got the Jeep back onto solid ground I walked up ahead about a quarter mile, against the wife's protest I might add, to scout out ahead. Unfortunately, just around the bend into the trees there were at least 2 more drifts that we would have to go through and possible more.

If we hadn't been alone and had another vehicle with us, I may have attempted it again but seeing as how we were alone and we hadn't seen another vehicle in over 25 miles we decided it would be best to turn around and although it would be a late night as it was 4:30pm by this time, we at least knew the road behind us was passable all the way back to Alpine.
afton23.jpg

We turned around and settled into the fact that it would probably be dark by the time we arrived back to camp, but we have good lights and we knew the road back down was good road. Just about 5-miles from where we turned around, we saw two moose alongside the road working their way through the willows and didn't seem to be bothered by us stopping to take their picture.
afton24.jpg


Shortly after the couple of moose we saw a bald eagle in its nest with at least two young ones. We watched for a few minutes then continued on and a few miles more, spotted something across the river in a ravine. My wife put the binoculars on it and it was a wolf. That was the second one of the day and possibly the same one as we weren't sure if the area we were in was the same area we saw the first one. Either way, had we not turned around we would have missed several animals that just added to the adventure. My wife said things happen for a reason and maybe that's why we turned around.

Ahhh, making memories.

Thanks for looking.
 

OutlawDrifter

Well-known member
Joined
Jan 20, 2015
Messages
3,903
Location
KS
Drifts can be a game changer, especially when they are solid! I've been in a situation where I HAD to go through and floated on top until the middle...then went through :ROFLMAO: , that was a fair amount of digging to get out!

Beautiful scenery Mike, thanks for sharing as usual!
 
OP
Z

zmotorsports

ALLIANCE MEMBER
Joined
Oct 20, 2009
Messages
21,477
Location
Northern Utah
In addition to the above post, we made it back to camp around 8:15pm where I dropped the wife off at the coach to fix something to eat while I went and washed the mud off the Jeep at the local carwash.

As we were airing up a few miles off the pavement, a fox ran across the road right in front of us. I also noted that there was a thick layer of mud packed in half the right front wheel. I tried to dig as much as I could out without scratching the wheel but it was already hard. I mentioned it to the wife and she asked why I was bothered by that and I said it was going to vastly effect the balance of that tire/wheel once we hit the highway.

I then started reciting the phrase from My Cousin Vinny about having "mud in the tires". She didn't find it as funny as I did. Huh, you'd think after 35+ years of marriage now, she'd be used to my sense of humor. :dunno:

As soon as we got above 45 MPH the steering wheel shook terribly. I pulled over and dug a bit more out of the outer wheel lip which helped but I couldn't wait to get back to Afton and hit the carwash. Besides, Friday was going to be a highway day and I wanted the Jeep clean.
 
OP
Z

zmotorsports

ALLIANCE MEMBER
Joined
Oct 20, 2009
Messages
21,477
Location
Northern Utah
Drifts can be a game changer, especially when they are solid! I've been in a situation where I HAD to go through and floated on top until the middle...then went through :ROFLMAO: , that was a fair amount of digging to get out!

Beautiful scenery Mike, thanks for sharing as usual!

Agreed Marc. Generally snowdrifts less than about 18" or so don't bother me, especially when they are only about 50' or less across. However, this one having to traverse across being off-camber and a drop-off into a marsh on the downhill side made both the wife and I a bit anxious. After the failed third attempt I contemplated grabbing the shovel out of the back of the Jeep and digging a small trench through the snow, just enough to aid in the left tires biting into it and staying level, but figured I'd walk ahead a bit first. Glad I did because the next two drifts looked as bad as this one and I really didn't want to have to come back across it if I didn't have to.

The wife was a trooper though. I apologized for having to turn around, but she just said "no worries, we have plenty of lights if we get caught on the trail after dark and it's all an adventure. Driving back the way we came is better than sitting on the mountainside overnight because we're stuck and no one knows where we are". I had to agree. It wasn't worth the gamble at that point knowing that the drive back the other way was completely unobstructed and clear.
 
OP
Z

zmotorsports

ALLIANCE MEMBER
Joined
Oct 20, 2009
Messages
21,477
Location
Northern Utah
Only had about an hour to work in the shop last night so I thought I would start work on the 1938 Farmall F12 tractor wheel.

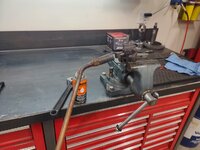
I will have to bevel the break in order to weld back together, but first the bolt that expands the hub to adjust on the axle needed to be removed.
farmall1.jpg

With the broken piece clamped in the vise it wouldn't budge even the slightest amount. It was solid.
farmall2.jpg

Out came the torch to heat up the area around the bolt. Then sprayed the exposes threads with some Kroil.
farmall3.jpg

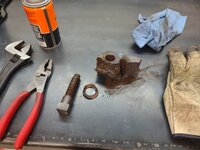
It actually came free with a little force after heating but only turned slightly. I worked it back and forth while spraying some Kroil on the threads working the penetrant all the way around the threads. I was then able to turn it a complete revolution and with a few more squirts of Kroil it started to back out. Not easily by any means, but it was coming out.
farmall4.jpg

With the bolt removed it was set aside to cool.
farmall5.jpg

Next step will be to begin prepping the broken piece and the hub for welding.

Thanks for looking.
 

TimeWarpF100

Well-known member
Joined
Aug 21, 2010
Messages
6,784
Location
not here
Next it was time to swap over to my 3-jaw chuck and flip the jaws to grab the hub in the lathe.

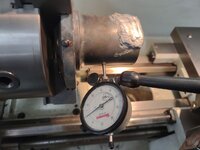
I double checked the runout, and it was within about .003" so good enough to begin machining the bore.
hub10.jpg

The first few passes were rough as it was an interrupted cut but after the initial bore began to take shape, it machined quite well. I snuck up on the bore and not knowing exactly how tight the bearing interference had to be and a phone call to the owner, I settled on shooting for a .001" interference fit. This was a captured bearing as it had the spindle going through with a nut to hold both bearings in as well as a center sleeve so I figured it didn't need to be as tight of an interference fit as some bearing fitments.
hub11.jpg

The ID was finished at .001" interference fit and I snuck up the outer flange of the hub's dimension.
hub12.jpg

Lastly, it was time to focus on the OD. The OD was less important and the owner even told me it could be left rough as it would clear the housing. However, I couldn't leave it rough so I wanted to finish it off so it looked as close to OEM as I could make it. After machining down I ran a file and some 180-grit emery paper over it and called it good. Lastly, added a chamfer to the ID of the bore and OD of the flange.
hub13.jpg

And it is complete ready for the owner to pick up.
hub14.jpg

The owner picked it up yesterday and was very pleased with the results. Especially since it saved his mower being a discontinued part.

Thanks for looking.
Simply Amazing stuff Mike!
 
OP
Z

zmotorsports

ALLIANCE MEMBER
Joined
Oct 20, 2009
Messages
21,477
Location
Northern Utah
Love Kroil, that stuff is great!

Thanks Mike. I had never heard of it until I started in the Industrial Maintenance field back in the late 80's and was immediately hooked on it. Been using it ever since, although I do use PB Blaster on occasion as well. But when something is really testing me, out comes the Kroil. :thumbup:

Damn Mike, I've always known I'm so far out of your league.....and then I see you using an adjustable wrench! And I'm suddenly back in the game! Ha! That is until you start the incredible work on the repair. Them I'm back in the dumpster....

Ha, ha. Not sure what to say, I do have adjustable wrenches and although they are not my favorite wrench by any means, they have a purpose. Such as on a hot bolt where I don't want to damage the chrome on my Snap-on combination wrenches. :ROFLMAO:


Simply Amazing stuff Mike!


Thanks Randy, coming from you I am flattered.
 
To avoid these ads, REGISTER NOW!

Graham08

Well-known member
Joined
Dec 10, 2007
Messages
713
Location
Iron Station, NC
Ha, ha. Not sure what to say, I do have adjustable wrenches and although they are not my favorite wrench by any means, they have a purpose. Such as on a hot bolt where I don't want to damage the chrome on my Snap-on combination wrenches. :ROFLMAO:

Adjustables generally **** as wrenches, but they're one of my favorite ways to straighten out bent metal stuff. A lot more precision with an adjustable wrench than a BFH.
 
OP
Z

zmotorsports

ALLIANCE MEMBER
Joined
Oct 20, 2009
Messages
21,477
Location
Northern Utah
Adjustables generally **** as wrenches, but they're one of my favorite ways to straighten out bent metal stuff. A lot more precision with an adjustable wrench than a BFH.


Agreed. Probably why mine show little to no wear compared to my wrenches. They seem to be the more sacrificial one of the wrench family. I needed some leverage and longer adjustable wrench seemed to fit the ticket without fear of damage to my chrome combo's.
 
OP
Z

zmotorsports

ALLIANCE MEMBER
Joined
Oct 20, 2009
Messages
21,477
Location
Northern Utah
So now with the slipping in the snow/ice, does this mean it’s time to install some deployable chains like emergency vehicles use?

I kid Mike, I love following along on your adventures!

Thanks. The better solution is to just not attempt stupid obstacles like that in the future. :ROFLMAO:


Mike, I watched the recent toolbox tour video, well deserved. Your amount of knowledge and expertise in so many areas has always impressed me, well done Sir!

22170c0a839364416f020dd6ee78c28f.jpg

Thank you Scott. I appreciate the kind words.

What's funny, is I read through some of the very flattering comments people have posted to that video and I wondered who the hell they were talking about. They said things like "old man" and "old timer" which I definitely do NOT relate to :dunno: , then other comments about being a wealth of knowledge or encyclopedia of specifications and I simply don't see myself in that manner. I'm just a mechanic who has been at this a long enough time to have things stick in my head and not every job goes as planned. I was also blessed and fortunate enough to have a wide range of things come into my shop over the years that I was willing to tackle and learn from. I would like to think most of those things also helped provide a living for myself and my family, but I have to admit, there were some I lost my *** on. The only way I looked at those jobs were they were learning opportunities. :unsure:

There were also a few not so positive comments but I can easily discount those to people just being keyboard warriors and probably not knowing one end of a wrench from the other. One guy actually mentioned that my tools looked new and unused, and he was not impressed. As I looked at my tools last night while my son was working on his engine, I had to laugh and actually wondered what video he watched because most of my tools look well used, other than a few that I've purchased more recently. Granted I take care of my tools and use them for the proper job and clean them thoroughly before putting away, but they are definitely well used and not in new condition. :headscrat
 
OP
Z

zmotorsports

ALLIANCE MEMBER
Joined
Oct 20, 2009
Messages
21,477
Location
Northern Utah
When I got home last night I had some sprinkler issues to address in my yard as I have noticed a few dry spots rearing their ugly heads. I found several of the popups that had the small screens partially plugged up and one head was not even popping up through the grass. BINGO. There's my problem in that area. I can't believe I missed that before now. :rolleyes:

While I was finishing up my son came over to continue work on his WJ engine. He and his family have been on vacation for the past week and a half so we've taken a break on his Jeep but now we'll push on ahead.

I had only done a few small items while they were gone until the wife and I also took off for a few days but play time is over and time to get back to work.

Jared had cleaned the timing cover in the solvent tank before he left for vacation but it just needed a little detailing and then a few passes with a Scotchbrite pad by hand to remove the last bit of material left behind. We also had a new crankshaft seal to install so the old one was removed while prepping the timing cover.
wj58.jpg

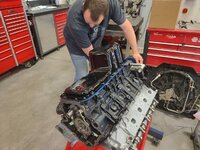
The engine spun over on the stand to assemble the lower end covers. The reman facility was quite generous on the paint so some actually found its way onto the sealing surfaces which we needed to clean off. Here the lower side of the deck bed is cleaned and prepped awaiting the windage tray, new Melling pickup tube and finally the oil pan.

I can't remember if I mentioned this before, but I was actually kind of surprised that this engine was a deck plate design. Sorry, I got talking with my son listening to his trip report and forgot to take a picture of the windage tray and pickup tube installed before the oil pan went on.
wj59.jpg

Oil pan being installed.
wj60.jpg

And torqued to spec.
wj61.jpg

With the bottom finished up it was time to turn it upright and move on with the timing cover installation.
wj62.jpg

Timing cover surface prepped and then gasket and timing cover being installed.
wj63.jpg

And the water pump installed and that is where we left off for the night.
wj64.jpg


Thanks for looking.
 

Maxcustody

Well-known member
Joined
Oct 26, 2021
Messages
1,466
Location
West Virginia
One guy actually mentioned that my tools looked new and unused, and he was not impressed. As I looked at my tools last night while my son was working on his engine, I had to laugh and actually wondered what video he watched because most of my tools look well used, other than a few that I've purchased more recently. Granted I take care of my tools and use them for the proper job and clean them thoroughly before putting away, but they are definitely well used and not in new condition.

All those people need to do is check out this site and all the projects you are involved in and complete.............. (y) (y) (y)

There will always be the keyboard warriors who live in their mother's basements.:ROFLMAO::ROFLMAO:
 

Bob Heine

ALLIANCE MEMBER
Joined
Oct 24, 2009
Messages
10,709
Location
Boca Raton, Florida
One guy actually mentioned that my tools looked new and unused, and he was not impressed.
Mike, I've seen that guy's workshop. Filthy mechanic with filthy shop and filthy tools who is proud to show it off. It's a sign of something but impressive isn't the word that comes to mind. He's the mechanic who leaves footprints on your carpet, funky fingerprints on your steering wheel and a stain on the seat. When you check their work, the fingerprints are everywhere but the item supposedly worked on. Doesn't use or believe in torque wrenches. Don't act surprised when oil stains show up under your car -- no matter how hard you tighten a cross-threaded oil pan plug, it's gonna leak.
 
OP
Z

zmotorsports

ALLIANCE MEMBER
Joined
Oct 20, 2009
Messages
21,477
Location
Northern Utah
Mike, I've seen that guy's workshop. Filthy mechanic with filthy shop and filthy tools who is proud to show it off. It's a sign of something but impressive isn't the word that comes to mind. He's the mechanic who leaves footprints on your carpet, funky fingerprints on your steering wheel and a stain on the seat. When you check their work, the fingerprints are everywhere but the item supposedly worked on. Doesn't use or believe in torque wrenches. Don't act surprised when oil stains show up under your car -- no matter how hard you tighten a cross-threaded oil pan plug, it's gonna leak.

Now that you mention it Bob, I've seen that guy's shop, tools and workmanship as well.
 
OP
Z

zmotorsports

ALLIANCE MEMBER
Joined
Oct 20, 2009
Messages
21,477
Location
Northern Utah
My son came over last night to continue work on his engine.

He cleaned the rocker covers in the solvent tank and then it was ready to install new gaskets and install them. Just prior I like to dump some oil over the moving components of the valvetrain.
wj65.jpg

Then rocker covers can be installed and torqued to spec. Also we installed the harmonic balancer but without the flex plate on we didn't torque it to final spec. yet. That will be done just before reacquainting the engine with the engine bay.
wj66.jpg

Ready to be removed from the engine stand, flex plate installed, torque the harmonic balancer and then stab it back in.
wj67.jpg

We also pushed the Jeep out of the west bay and pushed it back into the east bay so it stands at the ready.
wj68.jpg


Thanks for looking.
 

ntsqd

Well-known member
Joined
Jan 22, 2005
Messages
997
Location
Lower left coast
snip.......


Here is our campsite for the week in Afton, WY. We had excellent 360-degree views of the Star Valley area. We didn't have any immediate neighbors in the campground and had the entire one side to ourselves until Friday when we returned to camp to find it full.
afton1.jpg

After arriving and getting camp setup we took off and tried a trail we haven't been on before. The trail was called Dry Creek just north of Afton and the creek was anything but dry. We even encountered a few snow drifts that hadn't melted yet.
After seeing Afton named I sent this post link to a friend. Apparently you stayed at the campground where his daughter works. Dry Creek is little South of where their home is.
His is a white JK on 37's that is nearly stock ride height (a LOT of work!) that goes by the name on the hood "Yeticon". If you saw the mag article and remember that, it's the same Jeep.
 

Jgaz

Well-known member
Joined
Dec 16, 2016
Messages
1,713
Location
AZ
My son came over last night to continue work on his engine.

He cleaned the rocker covers in the solvent tank and then it was ready to install new gaskets and install them. Just prior I like to dump some oil over the moving components of the valvetrain.
wj65.jpg

Then rocker covers can be installed and torqued to spec. Also we installed the harmonic balancer but without the flex plate on we didn't torque it to final spec. yet. That will be done just before reacquainting the engine with the engine bay.
wj66.jpg

Ready to be removed from the engine stand, flex plate installed, torque the harmonic balancer and then stab it back in.
wj67.jpg

We also pushed the Jeep out of the west bay and pushed it back into the east bay so it stands at the ready.
wj68.jpg


Thanks for looking.
When you said you installed the balancer but didn’t torque it yet I started looking at the pictures for the reminder note or tag I KNEW would be there.
Certain people do certain things a certain way.
 
OP
Z

zmotorsports

ALLIANCE MEMBER
Joined
Oct 20, 2009
Messages
21,477
Location
Northern Utah
After seeing Afton named I sent this post link to a friend. Apparently you stayed at the campground where his daughter works. Dry Creek is little South of where their home is.
His is a white JK on 37's that is nearly stock ride height (a LOT of work!) that goes by the name on the hood "Yeticon". If you saw the mag article and remember that, it's the same Jeep.

I did see that Jeep in town. I think I've also seen it at the small local dealership there as well. I think the dealership's name is Yeti as they also have a body shop next door that bears the same name. Small world.

When you said you installed the balancer but didn’t torque it yet I started looking at the pictures for the reminder note or tag I KNEW would be there.
Certain people do certain things a certain way.

I wish I could say I have "always" done that. However, I had one memory lapse that cost me a rear end many, many years ago. I forgot to put gear oil in a project car and failed to put any indication on it so a couple years after the chassis was completed, I finally finished the car and on the way to the muffler shop the rear end seized up. 🤬 That was a very hard pill to swallow because the wife and I were young, just starting our family and didn't have a pot to piss in nor a window to throw said piss out of. That one expensive lesson has driven the behavior above and I am now **** about adhering to it. Many times I will also double up and write a note on to myself on the workbench next to where I keep my notes going as well.
 

ntsqd

Well-known member
Joined
Jan 22, 2005
Messages
997
Location
Lower left coast
It is that, a small world.

The rule in two of the race repair/prep shops that I worked in was if you put a bolt in, you torque it. If something interrupts putting the bolt in (lunch, other project, etc.) you either be late to that by the time that it takes to torque it (even if it is going to come out later) or you remove it. Those shops had a lot riding on their reputation and could not afford a problem like that so they tended to be very **** about it.
When it's the two of you working on the same project the odds are good that one of you will remember that bolt isn't torqued. Particularly when that's SOP for such a project. Without that now habit I'd forget and learn about having forgotten it from the radical banging and massive oil leak. :(

These sorts of things are covered in Carroll Smith's various books. Young guys just coming up don't have to learn the hard way, like most of us did, when a little reading will cover a lot of this sort of shop practice. I suspect "Prepare to Win" might be the title that best addresses this topic, but it's been a few years since I read it. FWIW Carroll Smith was the 'other Carroll' at Shelby Enterprises and was their race engineer. He was also a first rate character, RIP.
 
OP
Z

zmotorsports

ALLIANCE MEMBER
Joined
Oct 20, 2009
Messages
21,477
Location
Northern Utah
It is that, a small world.

The rule in two of the race repair/prep shops that I worked in was if you put a bolt in, you torque it. If something interrupts putting the bolt in (lunch, other project, etc.) you either be late to that by the time that it takes to torque it (even if it is going to come out later) or you remove it. Those shops had a lot riding on their reputation and could not afford a problem like that so they tended to be very **** about it.
When it's the two of you working on the same project the odds are good that one of you will remember that bolt isn't torqued. Particularly when that's SOP for such a project. Without that now habit I'd forget and learn about having forgotten it from the radical banging and massive oil leak. :(

These sorts of things are covered in Carroll Smith's various books. Young guys just coming up don't have to learn the hard way, like most of us did, when a little reading will cover a lot of this sort of shop practice. I suspect "Prepare to Win" might be the title that best addresses this topic, but it's been a few years since I read it. FWIW Carroll Smith was the 'other Carroll' at Shelby Enterprises and was their race engineer. He was also a first rate character, RIP.

I agree. People coming into the field(s) have a huge advantage over many of us that had to learn the hard way.

The above mentioned is also a practice that I incorporated into my daily job as an Industrial Maintenance Mechanic 35+ years ago after my unfortunate incident on my own dime. Many of the things in our Industrial environment that we work on can kill or severely injure if left incomplete. And with a shop of 17+ mechanics it is something that cannot be over-communicated.

Shift changes, lunches, EOD, all require either finishing the task at hand OR thoroughly passing along to the next shift's mechanic and then documented. This also helps in the event there is ever an OSHA audit due to an accident.
 
To avoid these ads, REGISTER NOW!
Top Bottom