To avoid these ads, REGISTER NOW!

What did you do "IN" your garage today?

rcktpwrd

Well-known member
Joined
Mar 5, 2008
Messages
1,104
Location
Raleigh, NC
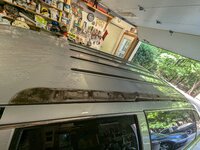
Got most of the roof rack reinstalled, ran short on the well nuts for the middle ribs. Not sure if she didn't order enough or lost a package while they've been sitting in the garage the past couple years... Ordered more that should be here Wednesday.

after she removed the passenger side rail:
wagonroof2.jpg

drivers side:
wagonroof1.jpg

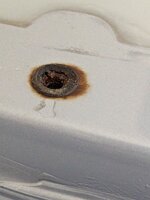
crusty rivnut:
wagonroof3.jpg


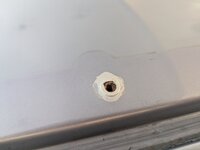
cleaned and painted:
wagonroof4.jpg


rib rails:
IMG_7227.jpg


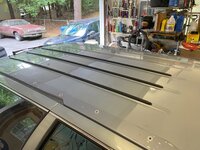
mostly completed:
IMG_7228.jpg


And she found this under the back seat!
wagonkey.jpg
 
To avoid these ads, REGISTER NOW!

ZRX61

Well-known member
Joined
Aug 15, 2006
Messages
28,716
Location
Solar Blight Valley, SoCal
Put a new 6in sanding disc on the belt/disc sander. Used it to shape a piece of aluminum.
Enlarged 4 holes in a shelf from the book case I assembled last week with the Dremel doodad.
Moved the oil & filter closer to the ZRX11 which will get changed either before or after the next time I ride it (next Sunday)

Just remembered I also need to deburr some 4x4in steel plates that will be be backer plates when I install some tie down doodads in the F350 bed. I should probably go deburr the plates before I forget.
 

Outlawmws

Well-known member
Joined
Aug 9, 2011
Messages
39,331
Location
The Badlands
Bunch of little jobs,

T-van - replaced the left top brake light - organized it's parts and tools - out of broke down cardboard boxes and into plastic tuba, one for travel and one to stay home.

Found a key in the collection for the Jacobs 1B (0-1/4) chuck and added a handle. Cleaned up a tack hammer head and small perfect handle screwdriver. Dumped 2 hatchet heads into fresh E-rust and the USC. flipped them 4 hours later, (not quite covered) just now rinsed, wire brushed, and dried them.

Changed oil in the T-van and checked the fluids, cleaned the windows inside.
 

bulletpruf

Well-known member
Joined
Nov 28, 2013
Messages
11,136
Location
San Antonio
Got most of the roof rack reinstalled, ran short on the well nuts for the middle ribs. Not sure if she didn't order enough or lost a package while they've been sitting in the garage the past couple years... Ordered more that should be here Wednesday.

after she removed the passenger side rail:
wagonroof2.jpg

drivers side:
wagonroof1.jpg

crusty rivnut:
wagonroof3.jpg


cleaned and painted:
wagonroof4.jpg


rib rails:
IMG_7227.jpg


mostly completed:
IMG_7228.jpg


And she found this under the back seat!
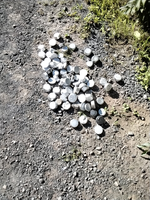
wagonkey.jpg

How about some details on the Cutlass? Don't see too many of these on the road anymore.
 

bulletpruf

Well-known member
Joined
Nov 28, 2013
Messages
11,136
Location
San Antonio
Still reconfiguring the home garage and splitting tools between here and the shop, so I spent a lot of time reorganizing my toolbox here and figuring out what I needed to bring back from the shop.

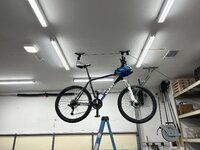
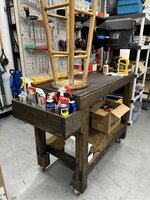
Also got my mountain bike hanging from the ceiling, made a box to hold liquids and attached it to the new workbench, tried to tighten and glue the wooden stool. Probably time for a new one.

IMG_1924.jpg

IMG_1927.jpgIMG_1928.jpg
 

ODIS

Well-known member
Joined
Apr 30, 2012
Messages
2,110
Location
Pacific Northwest
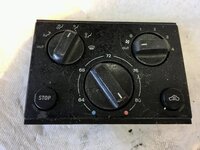
This is the HVAC control from the center console. The plastic used for the face and knobs over time develop a sticky black goo that will instantly stain your hands or cloths upon contact.

IMG_5681.jpeg

In fact, any interior part made from this same plastic has the same issue……… Trust me, this ***** big time.

Have read where others used oven cleaner to remove the goo but it also removed the printing around the control surfaces. Thought that lacquer thinner would work and tried it on the lower portion of the steering wheel column because if this screwed things up, no one would see….. and, the goo from this location always stained my pants or made my hands black. The lacquer thinner worked and then moved on to the control console.

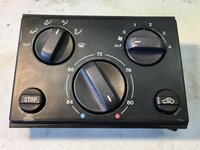
After cleaning:

IMG_5682.jpeg

Yeah, burned through in a couple small spots but No More Goo, so this is good!

Finished the rest of the components and most all of the other plastic parts on the interior.

IMG_5683.jpeg

At least now, the car can be driven without getting some black **** all over my cloths or hands.


IMG_5685.jpeg
 
Last edited:

bulletpruf

Well-known member
Joined
Nov 28, 2013
Messages
11,136
Location
San Antonio
1976 Cutlass S, has a 468 Olds that made 540hp when built back in 2001, th-400 trans and 9" rear with 3:90 gears. Ran 11:90 @ 114mph, Fun street car!

It's not been on the road in 15ish years 🙁

Damn, that's impressive! Lemme guess on the combo - Edelbrock heads, healthy flat tappet, 850 on a dual plane intake, 10" converter, runs on pump gas. How close was I?
 

bulletpruf

Well-known member
Joined
Nov 28, 2013
Messages
11,136
Location
San Antonio
This is the HVAC control from the center console. The plastic used for the face and knobs over time develop a sticky black goo that will instantly stain your hands or cloths upon contact.

IMG_5681.jpeg

In fact, any interior part made from this same plastic has the same issue……… Trust me, this ***** big time.

Have read where others used oven cleaner to remove the goo but it also removed the printing around the control surfaces. Thought that lacquer thinner would work and tried it on the lower portion of the steering wheel column because if this screwed things up, no one would see….. and, the goo from this location always stained my pants or made my hands black. The lacquer thinner worked and then moved on to the control console.

After cleaning:

IMG_5682.jpeg

Yeah, burned through in a couple small spots but No More Goo, so this is good!

Finished the rest of the components and most all of the other plastic parts on the interior.

IMG_5683.jpeg

At least now, the car can be driven without getting some black **** all over my cloths or hands.


IMG_5685.jpeg

We're gonna need to see some pics of the rest of the car...
 

rcktpwrd

Well-known member
Joined
Mar 5, 2008
Messages
1,104
Location
Raleigh, NC
Damn, that's impressive! Lemme guess on the combo - Edelbrock heads, healthy flat tappet, 850 on a dual plane intake, 10" converter, runs on pump gas. How close was I?
Sort of!
Oldsmobile iron heads that have been moderately worked on, Holley 830 on an Edelbrock single plane intake, 'biggest' of the shelf Comp Cams solid lifter, about 10.5:1 compression, runs on 93 octane and I think it's an 11" converter about 2800rpm
 

DGersic

Well-known member
Joined
Mar 12, 2017
Messages
6,383
Location
DeKalb, IL
This is the HVAC control from the center console. The plastic used for the face and knobs over time develop a sticky black goo that will instantly stain your hands or cloths upon contact.

IMG_5681.jpeg

In fact, any interior part made from this same plastic has the same issue……… Trust me, this ***** big time.

Have read where others used oven cleaner to remove the goo but it also removed the printing around the control surfaces. Thought that lacquer thinner would work and tried it on the lower portion of the steering wheel column because if this screwed things up, no one would see….. and, the goo from this location always stained my pants or made my hands black. The lacquer thinner worked and then moved on to the control console.

After cleaning:

IMG_5682.jpeg

Yeah, burned through in a couple small spots but No More Goo, so this is good!

Finished the rest of the components and most all of the other plastic parts on the interior.

IMG_5683.jpeg

At least now, the car can be driven without getting some black **** all over my cloths or hands.


IMG_5685.jpeg

Was the “goo” originally that sort of textured soft touch feeling coating applied over the hard plastic? I’ve had to remove that stuff from several things here after it fails like you’re describing here. Some of it came off with isopropyl alcohol.
 

Zrsnopro97

Well-known member
Joined
Jul 26, 2017
Messages
476
Replaced a broken sliding door cable on wife's 2012 Honda Odyssey. Was expecting a nightmare of a job but turned out to be not too bad. Had a watch a couple YouTube tutorials beforehand. I generally hate doing interior work with all of the brittle plastic clips and fasteners, but this went smoothly.
 
To avoid these ads, REGISTER NOW!

Outlawmws

Well-known member
Joined
Aug 9, 2011
Messages
39,331
Location
The Badlands
At least now, the car can be driven without getting some black **** all over my cloths or hands.


IMG_5685.jpeg

Wait, Wut? is this a Vette or a Ferreri? :willy_nil :ROFLMAO:


Also, I've been having great luck with Mineral oil on aged decrepit plastics, - it Might be worth a try?
 

ODIS

Well-known member
Joined
Apr 30, 2012
Messages
2,110
Location
Pacific Northwest
We're gonna need to see some pics of the rest of the car...
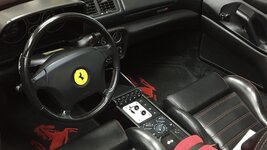
OK, a few shots of the car. BTW, have owned this one for over 20 years:

PXL_20230705_170657345.jpgA2F8E289-1E96-44D0-9754-E8F78741C3EA_1_105_c.jpgB747A832-E224-49B9-9B10-746BBEEF0A73_1_105_c.jpg

Just so there is no confusion, don't own the '67 275 GTB 4 Cam..... but if a star could be wished upon.... focus on the blurry one in the background.
Was the “goo” originally that sort of textured soft touch feeling coating applied over the hard plastic? I’ve had to remove that stuff from several things here after it fails like you’re describing here. Some of it came off with isopropyl alcohol.
Don't think so on the "soft" coating/texture. Whatever the OEM sprayed/dipped on the plastic bits simply failed and did so dramatically.
I knew exactly where this is was going.....That stuff is gross. I started my 360, so time consuming....winter project.

What a difference! Come do mine!
Yes, you are right, so very gross. Spent several hours cleaning and reinstalling the parts that could be removed. Vents were done in place as well as the door openers. Remaining to do is the instrument cluster surround and the central air vents on the dash. Surely, will find other locations that need to be cleaned. Thought this problem ended with the 360, but clearly, it did not. A great winter project and one you can do without sending to Sticky-No-More or others and save a ton of money.
Wait, Wut? is this a Vette or a Ferreri? :willy_nil :ROFLMAO:


Also, I've been having great luck with Mineral oil on aged decrepit plastics, - it Might be worth a try?
Yes, Ferrari, '99 355 F-1 GTS. One of my favorite quotes: "It's a Ferrari, what could possibly go wrong."

355 Ferrari 2.jpg

Will try the mineral oil on one of the plastic parts.... You are using the oil as a preservative?

Thanks to everyone for posting.
 

dwasifar

Well-known member
Joined
May 28, 2017
Messages
2,101
In the garage: changed the oil on my wife's daughter's Dodge Journey.

In the garage and in the backyard: Put up a post for my wife's hummingbird feeders.

IMG_20240812_183616046_HDR.jpg

It's a twin of the one I put in a couple of years ago for the regular feeders:

IMG_20240812_181110239_HDR.jpg
 

Maxcustody

Well-known member
Joined
Oct 26, 2021
Messages
1,466
Location
West Virginia
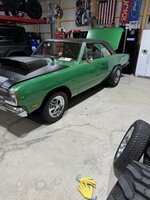
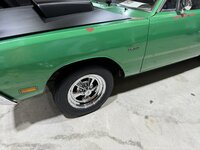
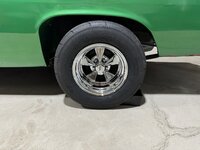
Is that a real Hemi Dart?
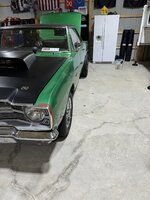
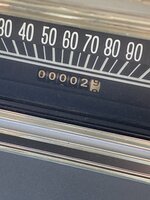
I wish............It was my FIL's, it is a 1969 with a 426 Hemi, kind of a long story, but the Hemi went in with only 2.9 miles on the odometer. This is still where the odometer is today. He passed away last year and it sat in his garage in NJ for the last 50+ years.

IMG_6718.JPG
 

Old Man Roger

Well-known member
Joined
Apr 6, 2017
Messages
17,854
Location
Palm Coast Florida
Not to her....
Know that we get it.lol
I wish............It was my FIL's, it is a 1969 with a 426 Hemi, kind of a long story, but the Hemi went in with only 2.9 miles on the odometer. This is still where the odometer is today. He passed away last year and it sat in his garage in NJ for the last 50+ years.

IMG_6718.JPG
Make it go.:3gears:
 

oldman_pottering

Well-known member
Joined
Jun 3, 2024
Messages
421
Location
Tinonee, NSW Australia
In the garage: changed the oil on my wife's daughter's Dodge Journey.

In the garage and in the backyard: Put up a post for my wife's hummingbird feeders.

IMG_20240812_183616046_HDR.jpg

It's a twin of the one I put in a couple of years ago for the regular feeders:

IMG_20240812_181110239_HDR.jpg
They look awesome ! I'll show my wife and then I'll have to make some, and your place looks beautiful !
 
To avoid these ads, REGISTER NOW!
Top Bottom