freudianfloyd
Well-known member
I have several guns that I need to sight in. Figured it was a good time to build a proper shooting bench. I have wanted one for years.


Looks a little flimsy to me. Maybe you should beef it up with some telephone poles.I have several guns that I need to sight in. Figured it was a good time to build a proper shooting bench. I have wanted one for years.


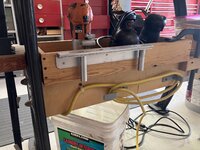
it was a good time to build a proper shooting bench.
do your patch panels go back to existing seams (so can be taken apart by machining out original spot weld) or do you have to cut and fit new seam?I'm cutting the rust out and amd going to use my mig machine to spot weld the replacement panels in. Probably going to be a mix of spot welds and rosette welds.


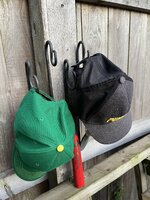
Is that something like swords into plowshares, or vice versa?Yesterday I started hammering a hay fork into a hat rack. Didn't get to finish it unfortunately.
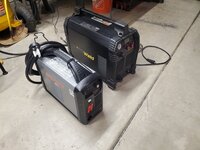
Wait, what? Cheap plasma? maybe I was taking a nap?Second fixture table arrives this Friday, but at least the new torch arrived today
Out with the old, in with the new
Surprised my plasma cutter generated no interest here, had posted it for cheap
Oh well
Wait, what? Cheap plasma? maybe I was taking a nap?
Picked up a Comet (Bridgeport clone) mill and moved it to the shop.
Most of those mills are 3 phase and it looks like you might have 3 phase power to the shop. Likely a 120/240 3Ø 4 wire high-leg ∆ system.


Along the edges, I used a spot weld cutter to seperate the panel from the rest of the body, If I was going to replace the entire panel, I could have done that all the way around. Since I'm just replacing the back half, I cut it with a cut off wheel in my grinder. To replace the entire panel would require removing doors and wiring, too much for a one man operation! I decided just to fix the rust and cut back until I got to good steel. I'll be putting gromets in, so that I am able to apply a liquid rust preventer every year (like Fluid Film).do your patch panels go back to existing seams (so can be taken apart by machining out original spot weld) or do you have to cut and fit new seam?
Is a live one on the rails as amazing as a dead one in the museum?After chasing UP 4014 this morning
Wish I knew as much as I did back then. It's been down hill ever since!Funny thing: I clearly remember being 18 and knowing everything about everything. 57 years later I am starting to realize I don't/didn't!
No, but it IS rocker science.I should disclose that I am an amature! I have never done this before, but it ain't rocket science.

Ooooh, shiny!Getting the clear sprayed before work.
First coat on.


Still some time left before the our villages Car Show on Sept 28th to make another trophy. This one I'm still working on for 'Classic Muscle Cars 1964-1974'. It's basically a stylized shift console like the ones you would see between bucket seats of era.Ok, well let's add another trophy to the mix. This one is called the 'Heritage Award' and will be awarded in the 'Pre-WWII Vehicle' class.
The gas pump and eagle I copped off another trophy I had on the shelf. I stained the bottom wood base with the Black Stain and clear coated it in Polyurethane. Next I cut some thick board stock to length, trimmed the corners to 45o to match the base board corners and routed the top edges on the portable Craftsman table ( this took a few tries to get right ) and lastly I applied the Howard's Feed-N-Wax.
Then it was just a matter of lining eveything up, drilling and countersinking a few holes, a touch of glue and finally stick and trim the black felt to the bottom.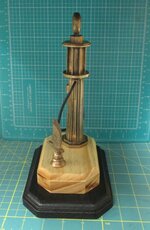


Is a live one on the rails as amazing as a dead one in the museum?
I was hoping for a racing stripe.lolGetting the clear sprayed before work.
First coat on.
There is one!I was hoping for a racing stripe.lol
Considering adding a shift pattern on top of the natural wood board next to the shift rod. Not sure yet on how I should do it.

Depends on what transmission it's for. It could be a Power GlideP
R
N
D
2
1
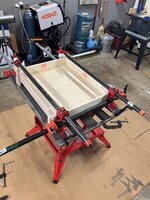
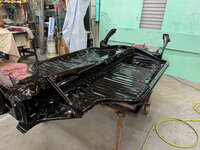

Racing stripe. Hard to see in the reflections.There is one!
There's a mahogany accent strip running straight down the middle of the deck. It's subtle, but you can tell the wood grain is different from the surrounding cedar. I'll go snag a picture of it in a few hours after the paint has cured more. Right now the paint is in that weird 'flash' stage where it has a dullness to it.

So I'm curious, what does a kayak like that weigh all in?Getting the clear sprayed before work.
First coat on.
They got ****** gas out there? The Burg is still full of last fall's non-ethanol hi-test, and it started up fine yesterday afternoon.Made four futile attempts at starting the ZX11...
Carbs probably gummed up as it's been parked since June. Supposed to ride it on Sunday.
Arsebiscuits.
It's supposed to be 50 to 60lbs. I'll weight it on Thursday after I get the hardware installed.So I'm curious, what does a kayak like that weigh all in?