To avoid these ads, REGISTER NOW!

ZMotorsports Shop Projects 2.0

To avoid these ads, REGISTER NOW!
OP
Z

zmotorsports

ALLIANCE MEMBER
Joined
Oct 20, 2009
Messages
21,477
Location
Northern Utah
The parts had arrived for my Grandson's 67' Camaro pedal car last week so I figured I would knock it out over the weekend.

Friday night I sorted out the new parts to ensure everything was at the ready. I was a little disappointed in the seat pad that I ordered. Thought it would be a little higher quality than it was but it will work.
pd21.jpg

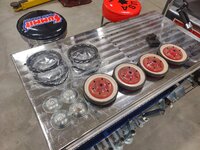
New tires ready to be installed and the center caps were cleaned up with some 0000 steel wool.
pd22.jpg

Started assembling the front end after giving them a soak in the solvent tank to remove some of the gummed-up pivot points.
pd23.jpg

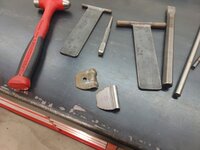
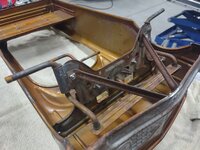
I then remembered that the front steering had a component missing and I was unable to find a replacement, so I had to fabricate one. This wraps around the front knuckle to aid in holding the steering in place.
pd24.jpg

After a little time forming it was starting to look like the original.
pd25.jpg

Mocked in place and started to assemble the front end into the shell.
pd26.jpg

With all of the fasteners started, I could then begin to tighten the fasteners and **** everything together.
pd27.jpg

I mocked up the rear axle and bracket before calling it a night.
pd28.jpg

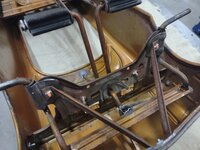
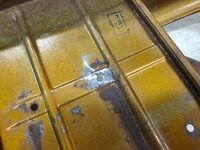
I missed this crack originally, but noticed it as I was mocking up the rear axle. Prepped it for welding, but I don't like performing any welding and then closing up the shop right away, so this repair waited until Saturday morning.
pd29.jpg

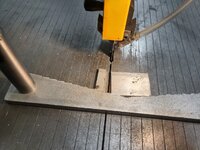
I did cut a small piece of aluminum to act as a heat sink for the welding process.
pd30.jpg


Stay tuned for more.
 
OP
Z

zmotorsports

ALLIANCE MEMBER
Joined
Oct 20, 2009
Messages
21,477
Location
Northern Utah
Continuing on with the pedal car.

Saturday morning with coffee in hand, I headed out to begin welding up the crack in the shell under the seat where the rear axle affixes to.

Heat sink secured in place in one of the ribs.
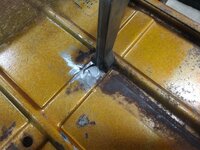
pd31.jpg

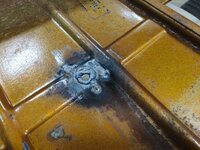
Then low and slow heat was used to prevent warpage and the cracks were welded and hole closed up slightly.
pd32.jpg

Metal finished and the hold drilled out to the correct size.
pd33.jpg

And for good measure, I used a well-worn and dirty wire wheel to try and minimize the freshly ground metal look and add to the patina'd look. Not quite sure why, as it will be completely hidden under the rear axle assembly.
pd34.jpg

Rear axle and pedal linkages installed.
pd35.jpg

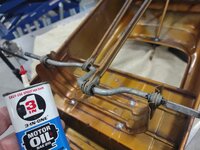
A little lubrication on all of the pivot points to reduce friction and make it both quiet and smooth.
pd36.jpg

Then for that added touch, a little torque seal was applied. You know, for those critical fasteners that could potentially come loose. Now my grandson can do a quick visual to make sure everything is ready for those high speeds without worry. :3gears:
pd37.jpg

Same with the rear axle, Torque seal on the fasteners. ;)
pd38.jpg

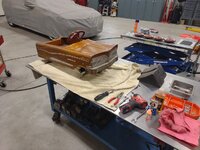
Then the car was uprighted and the steering wheel installed. The steering was terribly sloppy when we purchased the car so with all of the work it is now nice and tight and smoothly operating. No slop in the steering and should be able to hold those high speed turns.
pd39.jpg

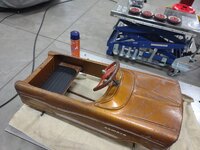
Test fitment of the seat pad so I could mark where to tape for the spray adhesive.
pd40.jpg


Stay tuned for more pictures..
 
OP
Z

zmotorsports

ALLIANCE MEMBER
Joined
Oct 20, 2009
Messages
21,477
Location
Northern Utah
Continuing on.

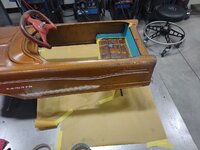
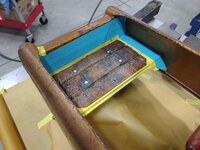
The seat area masked off and prepped for the spray adhesive.
pd41.jpg

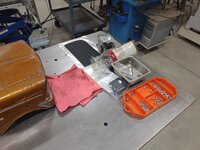
Masking paper to keep the overspray off the pedal linkages as well as my fabrication table.
pd42.jpg

Adhesive applied evenly to the area.
pd43.jpg

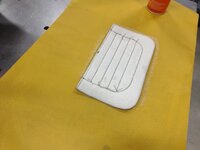
And adhesive applied to the back of the pad.
pd44.jpg

Then installed in place, masking tape removed and some clamps added to hold everything in place while I worked on the tires/wheels.
pd45.jpg

Masking paper thrown away and bench cleaned off.
pd46.jpg

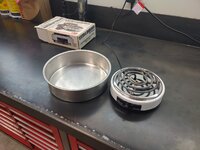
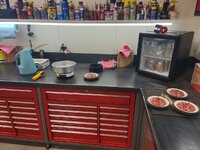
The instruction that came with the tires said to heat in microwave for 1 to 1.5 minutes to soften them, then stretch over the wheel. I really didn't want to use the microwave and potentially smell up the house so I dug out my old heating element and figured I would heat up some water to soften the rubber.
pd47.jpg

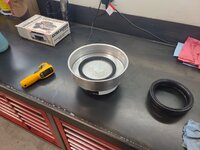
Everything at the ready and bring the water up to temperature.
pd48.jpg

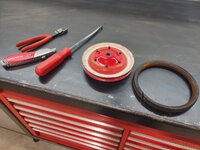
While the water was heating up, I cut one of the tires off and used it as a test to see how long it took to get the rubber soft enough to become pliable and stretchable. Not exactly the same as this rubber was quite old, but it gave me a rough idea and I didn't want to ruin a new tire. I also knew I didn't want to bring the water all the way to boiling so it gave me a target temperature and time in which to work with.
pd49.jpg

I also tried to devise a way to hold the wheel so I wouldn't have to chase it around the bench. I used a piece of cold rolled rod clamped in the vise to hold the wheel, then the tire could be stretched over the wheels outer rim, with gloves of course. :bounce:
pd50.jpg

Stay tuned for the last of the pedal car pictures..
 
OP
Z

zmotorsports

ALLIANCE MEMBER
Joined
Oct 20, 2009
Messages
21,477
Location
Northern Utah
On the home stretch on the pedal car project.

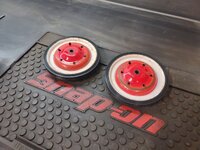
With a little testing, I determined about 175-180 degrees for about 4-5 minutes seemed to work well. Softened the rubber just enough that by hand I could stretch the tire over the wheel and have just enough time to seat the tire fully around the rim of the wheel before it cooled and shrunk enough to make it fixed in place.
pd51.jpg

Two down and two to go.
pd52.jpg

All four completed and wheels cleaned with some cleaner. Ready to install.
pd53.jpg

A little grease was applied to the axle shafts, then the wheels installed and cotter keys followed lastly by the center caps.
pd54.jpg

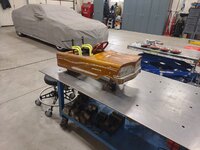
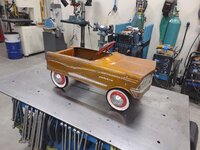
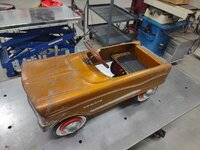
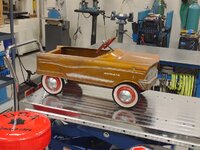
There is the finished car.
pd55.jpg

I kind of think staying with the natural patina may have been the best course to take rather than a full custom paint job. This way he can feel free to have fun on it without me worrying about it getting scratched or dinged. He can flog on this all day long and it will just add to the character.
pd56.jpg

pd57.jpg

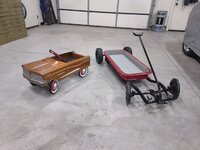
My grandson's fleet of hot rods so far. His '32 Roadster wagon next to his '67 Camaro.
pd58.jpg

pd59.jpg

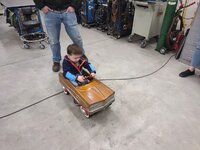
And the kids came by yesterday afternoon so he had to take it for a test spin.
pd60.jpg


He is just a little short yet and doesn't fully grasp the concept of pedaling, but he does get how to scoot around with it. Hope he enjoys it for a while anyways.

Thanks for looking.
 
OP
Z

zmotorsports

ALLIANCE MEMBER
Joined
Oct 20, 2009
Messages
21,477
Location
Northern Utah
I'd bet that Camaro gets the tires ran off of it at your place!


Hope so Marc. IF I have to replace the tires for him again I don't think that would be a bad thing. :3gears:


Funny, when we were out in the shop yesterday I was patting the hood of our Camaro saying "Papa's Camaro" and then going over to his and patting it and saying "this is Max's Camaro". He would just grin. I don't think my wife appreciated it though. She still thinks the Camaro is "Grandma's Camaro". :bounce:
 

bigdave_185

Well-known member
Joined
Feb 14, 2021
Messages
443
Location
Utah
Having my Monday morning coffee waiting for sun to come up I started reading a few pages behind as usual. Just to find the life advise truth bombs over here in the GJ from Mike and some of you other “ol timers”. It’s good to read guys. Not that I’m young compared to many but still have young kids, still make my own poor choices

Keep on keeping on.
 

aka Larry

Well-known member
Joined
May 2, 2012
Messages
8,099
Location
Eastern, NC
BTW, this is not at all a comment on Mike's great work, but I'm just curious, is anyone else wondering why this pedal car would have been called a Camaro? Which generation would this be? I realize it's not intended to be a scale model or anything, but I can't for the life of me see ANY part that resembles ANY Camaro. :headscrat
 
OP
Z

zmotorsports

ALLIANCE MEMBER
Joined
Oct 20, 2009
Messages
21,477
Location
Northern Utah
BTW, this is not at all a comment on Mike's great work, but I'm just curious, is anyone else wondering why this pedal car would have been called a Camaro? Which generation would this be? I realize it's not intended to be a scale model or anything, but I can't for the life of me see ANY part that resembles ANY Camaro. :headscrat


Vincent, Murray Pedal Cars, had several body styles or models of pedal cars. This particular model was called the V-Nose Front and manufactured between 1960 and 1967, then they slapped all different model decal packages on them to appeal to their audience. This particular one just happened to have the "Camaro" sticker package on it.
 
To avoid these ads, REGISTER NOW!

Jeff Ivers

Well-known member
Joined
Apr 9, 2010
Messages
2,567
Location
Oklahoma
Thank you. I purchased all of the parts from C&N Reproductions, they specialize in these vintage pedal cars. I have also seen quite a variety of parts from Speedway Motors.

Thanks for the info. I have an old Kick-n-Go I would like to restore, but I believe the wheel hubs are plastic - going to have to head to the barn and take some measurements
 
OP
Z

zmotorsports

ALLIANCE MEMBER
Joined
Oct 20, 2009
Messages
21,477
Location
Northern Utah
I had to replace the battery in my Jeep last night. Went to run an errand a couple of nights ago and it was dead. I didn't leave anything on, and I generally don't have excessive parasitic draw, so my first thought was a cell must have shorted internally, but just to be sure I had better double check the draw.

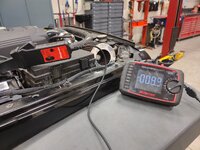
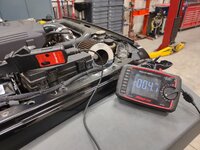
I picked up a new battery under warranty on the way home from work and after replacing it in the house garage, I pulled it into the shop where it was warm just double check the parasitic draw to ensure nothing was out of wack. After the few modules go to sleep it usually drew less than 50 mA so nothing terrible. Seems to be the lower side of average these days.


After closing the door and letting the modules go to sleep the amp draw consistently dropped, one module at a time. Fortunately, I don't have many modules in this Jeep, not like the newer JL/JT platform anyways.
amp1.jpg

amp2.jpg

And after a few minutes it was at its resting state drawing around 47 milliamps. Rather low by today's standards in fact.
amp3.jpg


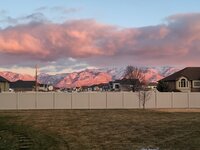
As I was parking the Jeep back in the house garage, I had to snap a picture of the sunset on our Wasatch Mountains. The sunset at times gives our mountains an almost purple hue and it is absolutely beautiful.
sunset.jpg
 

mbryson

Well-known member
Joined
Jan 4, 2014
Messages
133
Location
Bountiful, UT
I hate snow. Our last snowfall here in eastern NC was over three years ago. If it never snowed again I'd be just fine with that.

Did I mention I hate snow?


I honestly can't blame you. NC-SC has some serious appeal to me. My respiratory system would likely appreciate being more coastal and I'd be lying if it doesn't cross my mind to move once or twice per week. I like my kids too much and am looking fwd to being in Mike's shoes where I have grandkids kicking around at times.
 

Jgaz

Well-known member
Joined
Dec 16, 2016
Messages
1,713
Location
AZ
Snow is something you should see on a mountain in the distance and be able to drive to it if you wish.

After 50 years in Michigan, I however have not felt the urge to drive to it.
I deal with it at the Grand Canyon when I volunteer there but that doesn’t mean I like it.

Yes, Cal. people, try New Mexico. Highly recommend it.
 
OP
Z

zmotorsports

ALLIANCE MEMBER
Joined
Oct 20, 2009
Messages
21,477
Location
Northern Utah
Snow is something you should see on a mountain in the distance and be able to drive to it if you wish.

After 50 years in Michigan, I however have not felt the urge to drive to it.
I deal with it at the Grand Canyon when I volunteer there but that doesn’t mean I like it.

Yes, Cal. people, try New Mexico. Highly recommend it.


I actually don't mind driving it myself. I HATE having my wife and kids having to drive in it with the idiot drivers on the road.

I actually think my opinion or feelings on snow itself may change when I retire and can get out first thing in the morning to clear it rather than having to wait until O'dark thirty when I get home to clear it.
 

Jgaz

Well-known member
Joined
Dec 16, 2016
Messages
1,713
Location
AZ
I actually don't mind driving it myself. I HATE having my wife and kids having to drive in it with the idiot drivers on the road.

I actually think my opinion or feelings on snow itself may change when I retire and can get out first thing in the morning to clear it rather than having to wait until O'dark thirty when I get home to clear it.
Agree there also.
I my shift started at 6:00am to overlap the midnight shift.
Didn’t really mind driving in it even if I was ahead of the snowplows. It was the drive home at 3:30 door to door with 5000 of my closest friends that I hated.

I never gave it time to see if it would be better when I retired. Last day at work was Feb. 28 and was in Az by mid March.
 
To avoid these ads, REGISTER NOW!
Top Bottom