To avoid these ads, REGISTER NOW!

What did you do "IN" your garage today?

partsguy5768

Well-known member
Joined
Dec 12, 2024
Messages
347
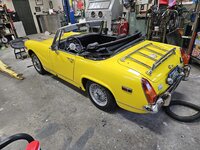
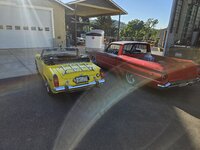
Wifes mg.. ( her and her father built years ago) been sitting about 3 years , installed battery I ordered yesterday, checked everything out and took driving about 2 hours ( never have driven before as I barely fit) weber carb lean... she has been complaining about a bit of a "buck" and a backfire though the carb at part throttle occasionally. Her dad had the idle screw cranked up with the throttle blade exposing the transition holes and the mixture screw cranked out 5 turns.... needs a bigger idle jet. Will order tomorrow. Spent the rest of the day cleaning, Detailing and checking things out. Happy wife! She can drive now and I'll correct the part throttle lean issue when I get the parts. Car cleaned up well. It was very dirty..
 

Attachments

  • 20250529_180812.jpg
    20250529_180812.jpg
    863.7 KB · Views: 62
  • 20250529_180759.jpg
    20250529_180759.jpg
    1.1 MB · Views: 40
  • 20250529_180746.jpg
    20250529_180746.jpg
    1.2 MB · Views: 45
  • 20250529_183905.jpg
    20250529_183905.jpg
    934.9 KB · Views: 56
  • 20250529_183843.jpg
    20250529_183843.jpg
    1 MB · Views: 75
To avoid these ads, REGISTER NOW!

Mikeske

Well-known member
Joined
Apr 28, 2017
Messages
2,131
Location
Washington State
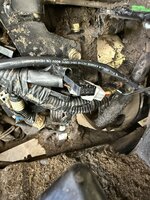
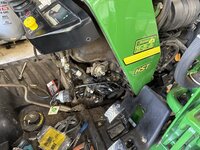
Well finally got around to a start but immediate shut down on my John Deere 2305. I thought the fuel shut off solenoid was possible bad but I decided to do some research on the internet and I found out that the 2305 had an inline diode buried behind the black plastic under the dashboard. I decided to do the cheap first and see if it fixes the no run issue. I go to the dealership with the diode and a I had the part number and the guy walks back to the stock room and gets the new diode. I come home plug the new diode in and viola the tractor starts and runs. $30.00 part is a heck a lot cheaper then a $275.00 solenoid. Tomorrow I start the process of cleaning up and reassemble of the plastic. This is the first time I ever been in this area of the tractor and it needs a deep cleaning and degreasing
 

Attachments

  • IMG_0790.jpeg
    IMG_0790.jpeg
    867.9 KB · Views: 72
  • IMG_0786.jpeg
    IMG_0786.jpeg
    982.8 KB · Views: 56
  • IMG_0788.jpeg
    IMG_0788.jpeg
    944 KB · Views: 52
  • IMG_0785.jpeg
    IMG_0785.jpeg
    611.3 KB · Views: 57

zmotorsports

ALLIANCE MEMBER
Joined
Oct 20, 2009
Messages
21,441
Location
Northern Utah
Finished the radiator project on the Jeep after having some issues with large hands and tight spots to replace bolts. The Rubicon Rides again.

I still marvel at the youtube videos that people have edits in all of the ****** spots that stuff gets weird doing this project, then they act like everything was awesome and easy.

You would need squirrel sized hands to easily do some of the parts of this job.

Oh well, all done. I will clean the garage up tomorrow and reset my tools.


Yeah, I've found it easier on the Jeep JK's to evacuate the A/C system, and pull the cooling stack as an assembly. It's easier than fighting the dang radiator in the engine bay, plus it allows me to ensure all of the side rubber pieces are properly intact and not missing or dislodged.

Glad it rides again. :thumbup:


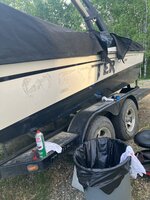
Not in the garage exactly. But right beside. Pulled off the outdated decals off my boat. Gonna go blank for the year and see if I like it. Initial reaction is I don’t think I like it blank as much as I thought I would. I’ll get the newer years boat decals when it’s time.

IMG_5297.jpeg
IMG_5298.jpeg


Nice, but then again I'm a fan of the debadged look on most things. One of the first things I do is debadge my vehicles when I get them home and in the stable. I have left the wife's Acura and our Fifth Gen Camaro alone, but the Duramax and Jeep have been debadged. I only left the Jeep emblem on the grille shell. I also debadged our 2003 Monaco Dynasty coach within the first few years of ownership and after painting it 8 years ago I only installed the oval emblem back onto the front, no other badging or lettering.

That being said, when I rebuilt my brother's boat years ago after painting it, he did install the current model year's lettering and it did look nice. Although it was outdated again when the new models came out. ;)
 

69charged

Well-known member
Joined
Sep 20, 2007
Messages
469
Location
carberry, manitoba
Nice, but then again I'm a fan of the debadged look on most things. One of the first things I do is debadge my vehicles when I get them home and in the stable. I have left the wife's Acura and our Fifth Gen Camaro alone, but the Duramax and Jeep have been debadged. I only left the Jeep emblem on the grille shell. I also debadged our 2003 Monaco Dynasty coach within the first few years of ownership and after painting it 8 years ago I only installed the oval emblem back onto the front, no other badging or lettering.

That being said, when I rebuilt my brother's boat years ago after painting it, he did install the current model year's lettering and it did look nice. Although it was outdated again when the new models came out. ;)
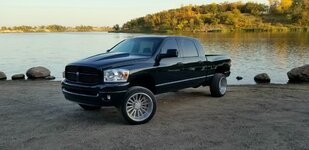
I hear ya. We redid the body on my son’s megacab and took all badging off. Including hiding the antenna into the front fender. Looks real good and smooth and clean.
Resized_20230403_173624.jpeg
Although I’m not a fan of the style of wheel. 🤨
And I’ve debadged my gladiator as well. Just have to weld up the holes in the tailgate where the jeep name was.
We’ll see how it grows on me.
Was going to go with this style
IMG_5304.jpeg
 

Hooked

Well-known member
Joined
Sep 24, 2010
Messages
443
Location
League City, Texas
Finished the radiator project on the Jeep after having some issues with large hands and tight spots to replace bolts. The Rubicon Rides again.

I still marvel at the youtube videos that people have edits in all of the ****** spots that stuff gets weird doing this project, then they act like everything was awesome and easy.

You would need squirrel sized hands to easily do some of the parts of this job.

Oh well, all done. I will clean the garage up tomorrow and reset my tools.
I wondered about your radiator access after I did my truck. Removal and install on mine was easy with 'plenty' of room to access the 8 bolts holding things together. I had envisioned what my hands would look like getting into such a small space. I can barely open the hood without busting a knuckle or two. :)
 

Old Man Roger

Well-known member
Joined
Apr 6, 2017
Messages
17,765
Location
Palm Coast Florida
Yeah, I've found it easier on the Jeep JK's to evacuate the A/C system, and pull the cooling stack as an assembly. It's easier than fighting the dang radiator in the engine bay, plus it allows me to ensure all of the side rubber pieces are properly intact and not missing or dislodged.

Glad it rides again. :thumbup:


Nice, but then again I'm a fan of the debadged look on most things. One of the first things I do is debadge my vehicles when I get them home and in the stable. I have left the wife's Acura and our Fifth Gen Camaro alone, but the Duramax and Jeep have been debadged. I only left the Jeep emblem on the grille shell. I also debadged our 2003 Monaco Dynasty coach within the first few years of ownership and after painting it 8 years ago I only installed the oval emblem back onto the front, no other badging or lettering.

That being said, when I rebuilt my brother's boat years ago after painting it, he did install the current model year's lettering and it did look nice. Although it was outdated again when the new models came out. ;)
Surprised you didn’t make some custom replacement for the blue oval. I mean if you’re gonna debadge, then debadge, right? I can see a Chrome ZMS badge now.lol

Edit, I think billet aluminum would be a better fit.
 

zmotorsports

ALLIANCE MEMBER
Joined
Oct 20, 2009
Messages
21,441
Location
Northern Utah
Surprised you didn’t make some custom replacement for the blue oval. I mean if you’re gonna debadge, then debadge, right? I can see a Chrome ZMS badge now.lol

Edit, I think billet aluminum would be a better fit.

Not sure what "blue oval" you are referring to, but I can guarantee you that I don't own a single vehicle in my stable that has a damn blue oval. Them's fighting words. :ROFLMAO:
 

JEFFREYWisconsin

Well-known member
Joined
Oct 9, 2021
Messages
380
Yeah, I've found it easier on the Jeep JK's to evacuate the A/C system, and pull the cooling stack as an assembly. It's easier than fighting the dang radiator in the engine bay, plus it allows me to ensure all of the side rubber pieces are properly intact and not missing or dislodged.

Glad it rides again. :thumbup:
You are right, that would be easier, Mine is radiator, AC and also for added fun a freaking trans cooler. It is ridiculous to deal with!
 

zmotorsports

ALLIANCE MEMBER
Joined
Oct 20, 2009
Messages
21,441
Location
Northern Utah
You are right, that would be easier, Mine is radiator, AC and also for added fun a freaking trans cooler. It is ridiculous to deal with!

Yeah, they stack them all in there and anything else they can think of.

Fortunately on my personal JKUR, I removed the trans cooler from the equation and when I did my LS swap I put the manual A/C condenser in for a bit more surface area. Previous to the engine swap, I added a large stacked plate style transmission cooler as a standalone cooler so it is not tied to the radiator, at least that can stay in place when I have to pull the cooling stack.
 
To avoid these ads, REGISTER NOW!

JEFFREYWisconsin

Well-known member
Joined
Oct 9, 2021
Messages
380
I wondered about your radiator access after I did my truck. Removal and install on mine was easy with 'plenty' of room to access the 8 bolts holding things together. I had envisioned what my hands would look like getting into such a small space. I can barely open the hood without busting a knuckle or two. :)
I had to do some hand and finger gymnastics, especially when you can just barely get a ratchet on the bolt to remove it, then you have to put the bolts back in when you replace it and there is just almost no way to get the bolt to hold in place while you are trying to once again thread a needle with a ratchet.

Frankly it really sucked.
 

Beerhippie

Well-known member
Joined
Oct 13, 2023
Messages
9,976
Location
Far NE Oregon
Whew. Five hour to change a door hinge is a new record for me!

You know it isn't your normal hinge replacement job when you haul out the welder, grinder and epoxy.

54555890612_41e393a6a1_o.jpg

The door on the right pretty much fell off its two-way hinges yesterday. It was at the end of the day and the door did still close, so I put off fixing it 'til this AM. I started at right about 10 AM and finished up at 3 PM. Of course, fifteen other things needed attention around the pub, kitchen and brewery, so maybe I didn't spend all of those five hours on the door.

Those swinging doors have been in use since the "old brewhouse" was built almost thirty years ago. They've been hit with forklifts and loaded pallet jacks, soaked all day for weeks at a time, sometimes in caustics and sometimes in beer. The door that failed is the most used, so it swings hundreds of times a day.

Which might have something to do with this:
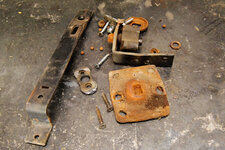
54555792587_0fc6b6cba1_o.jpg

That's what's left of the swinging hinge.

The new one looks much better:

54555792592_cd02650834_o.jpg

Years ago, I had to make and install some braces to hold what was left of the door together. The lower one is partially visible in the first pic above and this is the upper one:

54556776931_79868247f7_o.jpg

The upper pivot socket of the hinge mounts to that--and it's welded on. Using a cut-off wheel and AG, I cut the old welds off, ground the welds down and welded the new one back on.

Where there is still wood on the door, it was completely split, so I had to mix up some epoxy and repair that. Then drill and tap the lower brace for the mounting points of the new hinge, which is similar but not identical to the old one.

Since there is no wood on the threshold of the door, the next step was marking and drilling the concrete for some shell anchors, which was a PITA, as there is no template with the hinge so it has to be mounted to the door and marked in place, then the door needs to be removed again to drill the holes.

Finally done for today and it's beer-thirty. The new hinge is in and the door works again--but not well. I'll screw around with it some more after I finish this fine malt beverage....
 

Mikeske

Well-known member
Joined
Apr 28, 2017
Messages
2,131
Location
Washington State
I got the John Deere 2305 tractor back together today after replacing the defective diode for the fuel shutoff. A simple $30.00 diode and not the fuel shut off which cost around $275.00 is the best possible outcome on this. I cleaned off 15 years of crud, grass clipping and spilled diesel fuel from the area before slapping the plastic back together. I did not take any pictures as all I wanted was getting the tractor back together and then go and see the wife
 

69charged

Well-known member
Joined
Sep 20, 2007
Messages
469
Location
carberry, manitoba
IMG_5306.jpeg
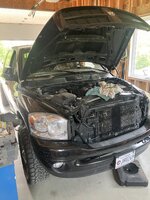
Worked on changing the leaking transmission cooling lines on the son’s truck. I have a sneaking suspicion it’s also leaking from the input shaft seal on the pump. Hope I’m wrong.


IMG_5307.jpeg
I tell him to watch where the oil drains…..and this happens every time!
Would be nicer if the concrete was sealed.
 

JEFFREYWisconsin

Well-known member
Joined
Oct 9, 2021
Messages
380
IMG_5306.jpeg
Worked on changing the leaking transmission cooling lines on the son’s truck. I have a sneaking suspicion it’s also leaking from the input shaft seal on the pump. Hope I’m wrong.


IMG_5307.jpeg
I tell him to watch where the oil drains…..and this happens every time!
Would be nicer if the concrete was sealed.
I put my oil drain pan into a bigger tub that you can buy at a Home Depot type place, its the tub they use for mixing small batch concrete, cheap and durable. 2' by 3' usually works for me!
 

Attachments

  • IMG_2637.jpeg
    IMG_2637.jpeg
    132.9 KB · Views: 34

dcg9381

Well-known member
Joined
Jun 20, 2018
Messages
11,883
Location
Austin, TX
So I have a 10 year old Polaris SxS (900cc), it's been complete **** to start cold for the last 2 years. Been asking about it on various Polaris forums, they simply tell me to run 87 octane ethanol fuel. Fine when warm, but will very hard start when cold. A blast of starter fluid and it's fine.

To me it was a pretty obvious case of poor cold start enrichment.

It finally set a code today saying "fuel trim out of range". That, the polaris guys were helpful with - apparently there is an o-ring on the fuel pump that goes bad and you lose fuel pressure.

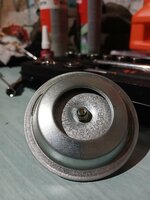
Pulled the pump, fishing for the o-ring. Various plastic bits on this pump that have not aged well as well as some snap rings (not typical type) that hold on the fuel sock. So I gave up about 45 minutes into figuring out how to disassemble the pump not being worth it with all the brittle plastic on this thing. Ordered a new pump (China) that gets here tomorrow. 90% chance this solves my "cold start" problem that I've been chasing for 2-3 years.

1748705831878.png
 
To avoid these ads, REGISTER NOW!
Top Bottom