To avoid these ads, REGISTER NOW!

ZMotorsports Shop Projects 2.0

OP
Z

zmotorsports

ALLIANCE MEMBER
Joined
Oct 20, 2009
Messages
21,469
Location
Northern Utah
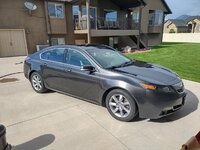
Had a couple of parts to clean in the shop last night then not wanting to start another project until after we get my son's Duramax differentials serviced I figured with the wife home early I would pull her Acura into the shop, give it a vacuum and then a thorough hand washing as it has been a while since I showed it some cosmetic love.

Pulled the car into the shop to vacuum the trunk area and interior, plus give the dash and center console a good wipe down. While it was there all fluids and tire pressures were checked.
tl.jpg

I recently started using Meguiar's APC (All Purpose Cleaner) and I am pretty pleased with it.
tl1.jpg

Although when it arrived one of the gallon jugs had a small leak and after sending them pictures and an email stating about a pint had drained from the damaged gallon jug, rather than send me a small bottle or partial refund, they sent me another full gallon. Great customer service. I just used an old washer fluid jug rinsed out for the time being.
tl2.jpg

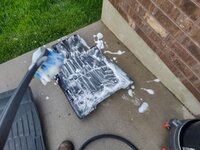
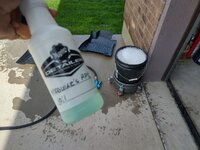
And mixed up the APC at a ratio of 10:1.
tl3.jpg

The floor mats hadn't been thoroughly cleaned since last fall so they were in desperate need of a deep cleaning.
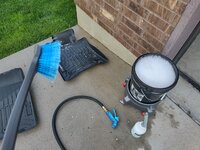
tl4.jpg

tl5.jpg

Then the exterior of the car got a bath.
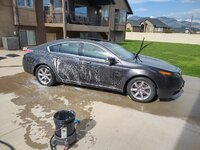
tl6.jpg

And dried.
tl7.jpg

tl8.jpg

Last step was to wipe down the doorjams and reinstall the floor mats now that they had dried in the sun.
tl9.jpg


I really need to focus on doing this more often as it is quite enjoyable to see a nice clean car for the wife to drive. To be honest, I really need to start making the time to keep all my vehicles a little cleaner than I have been lately. I've been so busy over the past few years between making sure our assets are properly maintained and running properly, then doing side work that the cosmetic aspect of our daily drivers sometimes ends up getting neglected. I really need to change that.


Thanks for looking.
 
To avoid these ads, REGISTER NOW!
OP
Z

zmotorsports

ALLIANCE MEMBER
Joined
Oct 20, 2009
Messages
21,469
Location
Northern Utah
It's always nice to have a clean car or truck. I know my truck doesn't get the attention it deserves, but I always try to keep the wife's car in a clean condition. It's one of the requirements for happy wife, happy life.

Agreed. I sometimes think the vehicle takes on a different "feel" when it is nice and clean, at least to me anyways. When I was younger I would wash my truck sometimes a couple times a week as it was always spotless. Then life got busy and nowadays it seems like I should consider myself fortunate if I have time to wash it a couple times a month. I really need to change that, mainly on our daily drivers.
 

HEEP

Well-known member
Joined
Nov 20, 2007
Messages
121
Location
Chattanooga, TN
I'll agree with the "feel " comment. A clean vehicle just seems to drive better. I was the same growing up. My Chevelle never seemed to be dirty. Got in trouble with the family for using too much water. Let's not forget the waxing. I think it might have been every other weekend. HAHA
 
OP
Z

zmotorsports

ALLIANCE MEMBER
Joined
Oct 20, 2009
Messages
21,469
Location
Northern Utah
Jealous of you "city" fellas that can have a clean vehicle longer than 12hrs...I wash mine and then its instantly covered in dust before I hit the paved road :LOL:

Then again...country living does have its perks :unsure:

I know what you mean Marc, growing up on the farm I needed to wash my truck a couple/few times a week because of either the mud in the yard or the dust that settled on the truck from either hauling hay or the farm machinery going in and out of the yard to the fields. I do NOT miss that one bit.

That being said, the wife and I ended up buying our forever home within less than 2-miles from where my parent's family farm was and where I grew up, so I've pretty much come back full circle to where I was born and raised, less the farm and animals of course. We do live in the country, I still have my curb and gutter, concrete on our property and asphalt roads into my subdivision and best thing is; we're NOT in the city, although the city isn't far from us so in my opinion we have the best of both worlds. ;) Country living is the best, a subdivision in the outskirts of the city, yet close enough to all of the parts and supply houses I need and even within about ten to fifteen minutes of being downtown for dinner. :thumbup: Doesn't get much better. :bounce:
 

bigdave_185

Well-known member
Joined
Feb 14, 2021
Messages
443
Location
Utah
I’m thankful my wife will help me wash them all, she even helps me hand wash the Peterbilt when I bring it home every other weekend, but like the country guys, the semi never makes it more then thirty miles before I have to get on a dirt road or gravel pit or muddy job site
 
OP
Z

zmotorsports

ALLIANCE MEMBER
Joined
Oct 20, 2009
Messages
21,469
Location
Northern Utah
I hope everyone had a great weekend.

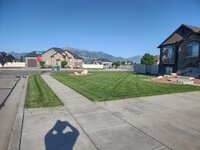
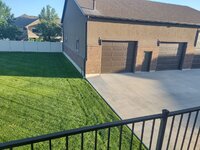
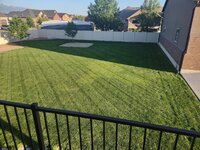
Friday night after work I was able to trim, edge and mow the lawns before dinner. I've entered that time of year now where it requires at least a twice a week mow. Even at 2x a week now it is still so thick and full I have to go around with the leaf blower after mowing and disperse the clumps of grass at the turns edges. But it sure looks good when done. I like addressing the yard on Friday afternoons so the wife and I can enjoy them all weekend long with nice crisp and true edges. Mid-week I don't bother trimming nor edging and just run around them with the mower, otherwise I'd need a swather if I only mowed once a week.
lawn1.jpg

lawn2.jpg
lawn3.jpg

lawn4.jpg

I'm going to give the two spots where I had Bermuda grass another week or two before replacing just to be sure.
lawn5.jpg

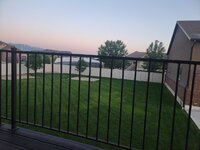
After dinner the wife and I sat out on the deck and enjoyed the fruits of our labor until well past dark. Neither of us wanted to go in and call it a day as we were enjoying the nice quiet neighborhood and overlooking our yard.
lawn6.jpg

Saturday morning I headed to the shop awaiting my son to arrive so we could work on his truck. Late Friday my new power supply arrived so I unboxed it, set it up and tested it out before storing above the workbench within easy reach. I have waffled on getting a power supply for bench testing components rather than using a battery or charger but couldn't justify the cost. Found this one for under $50 so thought I would give it a try as it got pretty good reviews.
power1.jpg

Small and compact which is nice. I don't need anything for production work but just the occasional bench test. This should work fine for my needs.
power2.jpg

Stored above the workbench with the soldering iron.
power3.jpg


Thanks for looking.
 
OP
Z

zmotorsports

ALLIANCE MEMBER
Joined
Oct 20, 2009
Messages
21,469
Location
Northern Utah
My son wanted my assistance replacing a leaking pinion seal on his 2002 Silverady 2500HD Duramax as well as he wanted to service the front and rear differentials.

Sure enough, looks like a leaker. He removed the driveshaft.
truck1.jpg

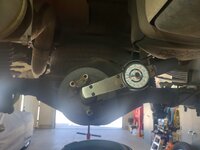
Then we could get a baseline rotating torque reading. There is no specification per se on this once everything is fully assembled, only pinon preload itself. However, I have seen what I consider a lot of erroneous information on a multitude of websites for replacing pinion seals. It's not a difficult task, but it bothers me to see people hammering on these with impact guns and smacking on with large hammers.

I prefer to take a baseline rotating torque reading and then when reassembling to back to that same reading plus a few inch/pounds additional to ensure there is the proper amount of preload and to at least go back and add just a little more compression to that crush sleeve.
truck2.jpg

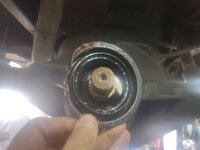
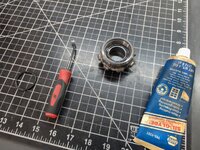
Same with removing the yoke/dampener, I don't like to smack them with hammers to remove. This impact is transferred directly to the bearings and can create stress risers which can lead to the bearing brinelling and then it's all over for the bearing. To remove the yoke I prefer to use a puller to gain access to the seal. Once the yoke is removed, tap the sides of the seal in slightly then I grab it with my shop made vise grips for the slide hammer and a couple smacks with the slide hammer and the seal it out.
truck3.jpg

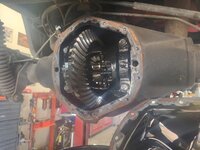
With the fluids drained, my son removed the rear diff. cover and began cleaning the old gasket material from the housing.
truck4.jpg

Housing prepped and ready to accept the new (used) diff. cover.
truck5.jpg

Torquing the differential cover in place.
truck6.jpg

I added fresh gear oil to the front differential while my son was completing the rear differential cover installation.
truck7.jpg

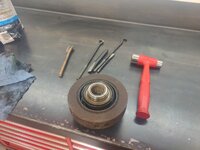
We then moved to the workbench to remove the factory wear sleeve. GM in collaboration with AAM (American Axle Manufacturing) added these wear sleeves to prevent the need to replace an expensive yoke with dampener built in. That was good thinking because on high mileage vehicles it is not uncommon to have to either replace a work yoke due to seal wear or install a Speedi-Sleeve. I've done both over the years so I am glad these have a replaceable wear sleeve from the factory. The new OEM seal kit comes with a new wear sleeve, seal, crush sleeve, nut and washer. Although most of the ones I have seen people replace don't go to the extent of replacing the wear sleeve. Not sure why as they are pretty simple to remove.

Much like removing a Speedi-Sleeve, strike the surface parallel to the shaft across the length of the wear sleeve in a couple locations around the circumference of the sleeve which expands it slightly. Then grab under the edges with a heel bar or two and walk it off the yoke.
truck9.jpg

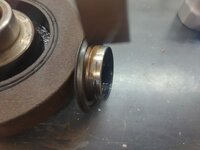
Here you can see one of the strike marks from the chisel. I impacted the wear sleeve in three places around the sleeve prior to prying it off.
truck8.jpg


More continued on the next post.
 
OP
Z

zmotorsports

ALLIANCE MEMBER
Joined
Oct 20, 2009
Messages
21,469
Location
Northern Utah
Continuing on with the pinion seal replacement on my son's truck.

Pressing the new wear sleeve onto the yoke.
truck11.jpg

Ready for installation after installing the new pinion seal.
truck12.jpg

Torque seal applied to the nut after achieving the proper pinion preload and then the driveshaft is reinstalled.
truck13.jpg

Truck set back down on the ground and ready for a road test.
truck14.jpg


Thanks for looking.
 

LXCam

ALLIANCE MEMBER
Joined
Apr 23, 2013
Messages
19,203
Location
AZ
I hope everyone had a great weekend.

Friday night after work I was able to trim, edge and mow the lawns before dinner. I've entered that time of year now where it requires at least a twice a week mow. Even at 2x a week now it is still so thick and full I have to go around with the leaf blower after mowing and disperse the clumps of grass at the turns edges. But it sure looks good when done. I like addressing the yard on Friday afternoons so the wife and I can enjoy them all weekend long with nice crisp and true edges. Mid-week I don't bother trimming nor edging and just run around them with the mower, otherwise I'd need a swather if I only mowed once a week.
lawn1.jpg

lawn2.jpg
lawn3.jpg

lawn4.jpg

I'm going to give the two spots where I had Bermuda grass another week or two before replacing just to be sure.
lawn5.jpg

After dinner the wife and I sat out on the deck and enjoyed the fruits of our labor until well past dark. Neither of us wanted to go in and call it a day as we were enjoying the nice quiet neighborhood and overlooking our yard.
lawn6.jpg

Saturday morning I headed to the shop awaiting my son to arrive so we could work on his truck. Late Friday my new power supply arrived so I unboxed it, set it up and tested it out before storing above the workbench within easy reach. I have waffled on getting a power supply for bench testing components rather than using a battery or charger but couldn't justify the cost. Found this one for under $50 so thought I would give it a try as it got pretty good reviews.
power1.jpg

Small and compact which is nice. I don't need anything for production work but just the occasional bench test. This should work fine for my needs.
power2.jpg

Stored above the workbench with the soldering iron.
power3.jpg


Thanks for looking.
One of the few remaining tools from when I was anodizing in house is a 30amp constant voltage / current power supply. They’re great for troubleshooting on the bench.

And as always, the yard looks awesome Mike 👍
 
To avoid these ads, REGISTER NOW!
OP
Z

zmotorsports

ALLIANCE MEMBER
Joined
Oct 20, 2009
Messages
21,469
Location
Northern Utah
What kind of life do you get out of the driveline U-joints?

It really depends on the environment the trucks are operated in as it's been all over the place as far as age and mileage. Worked on a Super Duty a while back that still had OEM joints in it with just over 200k and a sister truck to it as far as age and mileage was on his third set of U-joints, but is a farm truck.

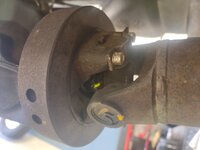
My son's 2002 with 300k still has the OEM joint in both ends of the rear driveshaft. I was contemplating replacing them while the driveshaft was out, but they still seem fine.
 
OP
Z

zmotorsports

ALLIANCE MEMBER
Joined
Oct 20, 2009
Messages
21,469
Location
Northern Utah
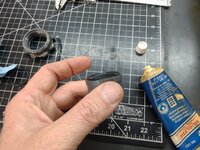
Love the torque seal! My favorite tool in the shop over the last few years.

Agreed. I really like the Cross Check/Torque Seal as I find myself using it on a lot of various fasteners on vehicles. Years ago, I only used it on the hi-po race cars and Jeeps, mainly suspension components and brakes. However, over the past 8 or so years I've been using it more during general repairs on things like brake fasteners and the like.

About a year ago I stumbled across these made by R/L (RevLock) sold through Kartek. I REALLY like the applicator bottle with the stainless-steel needle for a fine and easily controllable disbursement of the product.
 
OP
Z

zmotorsports

ALLIANCE MEMBER
Joined
Oct 20, 2009
Messages
21,469
Location
Northern Utah
Nice work as always!

Do the Mag Hytec covers have a rounded insides these days for fluid movement?

Thanks Keith.

Not sure about the newer Mag-Hytec covers. This is the one I put on my '06 about 15 or so years ago and although the inside is radiused, it isn't what I would call rounded. It doesn't cup the ring gear if that's what you mean.
 

ScepterToad

Well-known member
Joined
Nov 9, 2023
Messages
340
Thanks Keith.

Not sure about the newer Mag-Hytec covers. This is the one I put on my '06 about 15 or so years ago and although the inside is radiused, it isn't what I would call rounded. It doesn't cup the ring gear if that's what you mean.
Interesting.

The reason I ask is that I've seen the Gail Banks videos where he made clear versions of stock, mag-hytec, and banks versions. They are a bit eye opening.

However, given that you've run this on your own truck and your attention to detail, maybe the stock I put into his videos is waning a bit. Any noticeable difference in wear when you pulled this off of your own truck?
 

customh

Well-known member
Joined
Feb 18, 2013
Messages
562
Location
East Bethel, MN
However, given that you've run this on your own truck and your attention to detail, maybe the stock I put into his videos is waning a bit. Any noticeable difference in wear when you pulled this off of your own truck?

You must have missed post 13,100 where he installed the Banks cover on his white D-Max :ROFLMAO:

The red truck is his son's. I wouldn't put any less stock in GB's videos or information.
 
OP
Z

zmotorsports

ALLIANCE MEMBER
Joined
Oct 20, 2009
Messages
21,469
Location
Northern Utah
Interesting.

The reason I ask is that I've seen the Gail Banks videos where he made clear versions of stock, mag-hytec, and banks versions. They are a bit eye opening.

However, given that you've run this on your own truck and your attention to detail, maybe the stock I put into his videos is waning a bit. Any noticeable difference in wear when you pulled this off of your own truck?

Don't get me wrong Keith, I'm not downplaying the Banks research by any means. Gale and his team are much more knowledgeable than I am as I'm not even close to being in the same league.

That being said, I feel the differential cover debate is almost a moot point in a lot of ways because even a stock cover on a hard working truck will keep the fluid within its range. The tests I saw showed a heavily loaded truck working going up mountain showed the stock temps above the others, but not what I would call even close to being outside the fluid's operating range. The Banks was cooler than the others for certain, but not as far below the Mag-Hytec as I was expecting, but then again the Mag-Hytec holds nearly twice the capacity. As for wear, I have seen no abnormal wear in the rear end in my personal truck nor any of the dozens of others that I have worked on with several hundred thousand miles and still running the OEM covers.

To be honest, the biggest reason I installed the Banks on my truck and we put the Mag-Hytec on my son's is because my son was wanting to service his fluid and I was on the fence about trying the Banks cover. I purchased the Banks cover for my truck and we put the Mag-Hytec on my son's to replace the 300k mile OEM cover which was showing some corrosion and cosmetic wear. Other than that we would have reinstalled the OEM cover on my son's.
 

ScepterToad

Well-known member
Joined
Nov 9, 2023
Messages
340
Don't get me wrong Keith, I'm not downplaying the Banks research by any means. Gale and his team are much more knowledgeable than I am as I'm not even close to being in the same league.

That being said, I feel the differential cover debate is almost a moot point in a lot of ways because even a stock cover on a hard working truck will keep the fluid within its range. The tests I saw showed a heavily loaded truck working going up mountain showed the stock temps above the others, but not what I would call even close to being outside the fluid's operating range. The Banks was cooler than the others for certain, but not as far below the Mag-Hytec as I was expecting, but then again the Mag-Hytec holds nearly twice the capacity. As for wear, I have seen no abnormal wear in the rear end in my personal truck nor any of the dozens of others that I have worked on with several hundred thousand miles and still running the OEM covers.

To be honest, the biggest reason I installed the Banks on my truck and we put the Mag-Hytec on my son's is because my son was wanting to service his fluid and I was on the fence about trying the Banks cover. I purchased the Banks cover for my truck and we put the Mag-Hytec on my son's to replace the 300k mile OEM cover which was showing some corrosion and cosmetic wear. Other than that we would have reinstalled the OEM cover on my son's.
Makes sense.

Watching the Banks videos, I was actually more interested in the fluid pathways, specifically getting the fluid up and around the ring gear and into the pinion. Seemed like the mag-hytec (at least in the video I saw) didn't do that nearly as well as the stock or the Banks.

In any case, seems like in your scenario that the fluid path was sufficient. Otherwise, we'd be reading about you changing a worn out pinion bearing in your truck.
 

ScepterToad

Well-known member
Joined
Nov 9, 2023
Messages
340
You must have missed post 13,100 where he installed the Banks cover on his white D-Max :ROFLMAO:

The red truck is his son's. I wouldn't put any less stock in GB's videos or information.
I actually did see that...that's what got my curiosity up when they put it on his sons truck.
 

Carquest

Well-known member
Joined
Nov 29, 2016
Messages
519
Location
South Carolina
Just watched your toolbox tour on You Tube- I've been selling parts since getting out of high school (1988) and I recognized many of the older tools you have. Very impressive, both your knowledge and your tool collection!
 
OP
Z

zmotorsports

ALLIANCE MEMBER
Joined
Oct 20, 2009
Messages
21,469
Location
Northern Utah
Just watched your toolbox tour on You Tube- I've been selling parts since getting out of high school (1988) and I recognized many of the older tools you have. Very impressive, both your knowledge and your tool collection!

Thank you. It's been a journey, that's for certain. :3gears:

I can honestly say that after 4+ decades of wrenching now, I don't think I would be good at anything else. Hell, on the flip side, there are times that I wonder if I'm cut out for the profession I chose. :bounce:. There are some days I question my choice. :unsure:
 
OP
Z

zmotorsports

ALLIANCE MEMBER
Joined
Oct 20, 2009
Messages
21,469
Location
Northern Utah
I recall that original GM car 12 bolt covers had that 'eyebrow' shape in them. I was told that was to direct oil thrown off the ring gear to the diff carrier bearings. No idea if correct or not, but seems reasonable.

Had a friend learn the hard way and it was a learning opportunity for me back in the mid-80's. Buddy installed one of those smooth chrome diff. covers on his truck, and I was about to do the same thing as funds were available. However, within only a few hundred miles he developed a bearing failure out at the axle end. He was telling me about it after he had the rear end rebuilt and the guy doing the rebuild told him he wanted the OEM cover to reinstall as he wouldn't warranty the work otherwise. He explained to him that the OEM cover was designed with the provisions to direct oil flow out to not only the carrier bearings, but the axle bearings at the tube ends. I hadn't thought about that at the time but after a bit of research I discovered that to be the reason for the "eyebrows" in the covers. :unsure:

Needless to say, I didn't end up installing chrome diff. covers on my 1984 shortbed. :bounce: Rather, I pulled mine, sanded and painted them to match the axles and chassis then installed stainless steel fasteners which offset the appearance rather nicely. To be honest, I think I liked the fastener contrast appearance wise better than if I would have had the chrome cover. And it was much cheaper as well, the paint and not having the bearings failures. ;)
 

customh

Well-known member
Joined
Feb 18, 2013
Messages
562
Location
East Bethel, MN
Makes sense.

Watching the Banks videos, I was actually more interested in the fluid pathways, specifically getting the fluid up and around the ring gear and into the pinion. Seemed like the mag-hytec (at least in the video I saw) didn't do that nearly as well as the stock or the Banks.

In any case, seems like in your scenario that the fluid path was sufficient. Otherwise, we'd be reading about you changing a worn out pinion bearing in your truck.

I actually did see that...that's what got my curiosity up when they put it on his sons truck.

Ahhhh I'm tracking now. Interesting long term perspective on the MH.
 
OP
Z

zmotorsports

ALLIANCE MEMBER
Joined
Oct 20, 2009
Messages
21,469
Location
Northern Utah
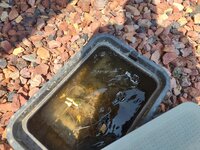
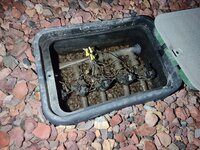
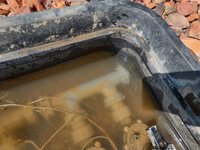
Arrived home after work yesterday and after opening up the shop I was standing on the shop apron admiring my grass when I heard a "gurgling" sound. Fortunately, the school bus hadn't arrived yet so the neighborhood was deathly quiet so I wandered around searching for the sound when I discovered it was coming from my rear sprinkler valve box. :oops:


Well ****. 🤬
leak1.jpg

It has been exactly 8 years TODAY that I completed the sprinkler system at our home and I don't think I have had to touch anything inside this box since. But now I had a leaker. I had to think back to how I ran the supply side and then I remembered this box was branched off the main before it headed around the side of the house to the front valve box and this one had a cap on the end. Looks like the cap was leaking. Upon turning the main feed off at the street and bleeding the pressure off of the system by opening a spigot, I removed the cap and found the O-ring was intact, but a little flat. Before turning the water off, I took a pair of adjustable slip joint pliers and tried tightening the cap a little but I didn't want to break anything as it only turned a small amount barely slowing the leak down.
leak2.jpg

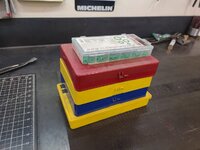
I grabbed my assortments of O-rings to see if I just might happen to have one of the size I need.
leak3.jpg

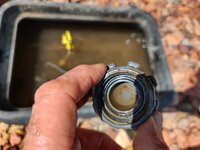
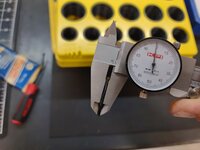
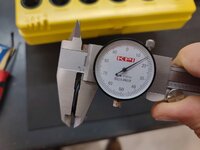
The original one measured right @ .100" cross section.
leak4.jpg

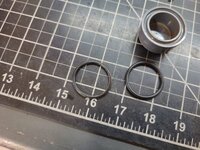
I found one that was slightly fatter @ .115" and still fit in the groove nice and snug.
leak5.jpg

Old (left) and new (right) with the groove in the plug thoroughly cleaned.
leak6.jpg

New O-ring installed and smeared with a little Sil-Glyde to hole it in place while I installed on the submerged valve manifold.
leak7.jpg

Plug snapped back into the threaded cap and ready for installation.
leak8.jpg

With the cap installed, I left the spigot opened at the back corner of the house and slowly turned the supply valve on at the street. Once the full flow of water was running, I slowly turned the back yard spigot off and everything seemed to be holding perfectly.
leak9.jpg

I left the lid off for the next couple of hours while I was working in the shop to keep an eye on it and the water level was dropping as it was dissipating into the sandy soil below the rock bed I placed in the valve box. Before the wife and I went to bed I ran out and took one last look and the water was gone with just the moisture remaining.
leak10.jpg


This morning the system ran normally so a successful repair. Although thinking back a few days ago it now makes sense. Friday morning I looked at the app to see what our water usage was for the season as I like to track it to ensure I have a little wiggle room for those warmer months of July and August. I noticed that it showed we used about 60-gallons on Friday which I immediately thought was odd because I don't run either the front or the rear sprinkler system on Fridays. :headscrat

Upon arriving home from work and beginning my Friday ritual of trimming, edging and mowing the lawns, I paid particular attention to the yard wondering if I had a leak or if it may have been a carryover from one of the nights that it kicked on at 1:00am. I didn't see anything throughout the entire yard mow and even went and pulled the front valve box to check the filter to see if the leak I repaired at the first of the season had returned but it was dry as a bone. :unsure:

I was stumped but chocked it up to an erroneous reading, until yesterday when all of the dots connected.

Another learning opportunity presented itself I guess. :bounce: Oh well, at least it was an easy repair and I didn't have to dig up the box and all of the surrounding landscaping rocks.
 
To avoid these ads, REGISTER NOW!
Top Bottom