To avoid these ads, REGISTER NOW!

Imperial Flaring Tool Query

Mississippi333

Active member
Joined
Nov 2, 2019
Messages
25
Location
Corinth MS
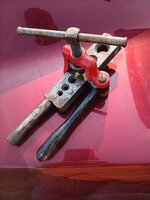
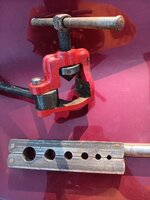
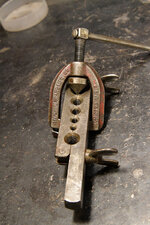
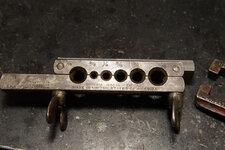
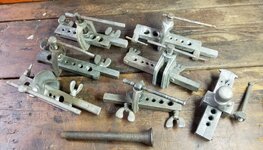
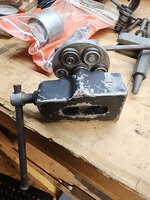
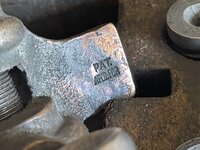
Good evening gentlemen and possibly ladies. I was wondering if anyone had an idea of a part number for this flaring tool. It's marked IMPERIAL BRASS-CHICAGO. I can make out the patent number (NO. 1724697) but I don't see any other numbers. It looks like it's been engraved free-hand on the back side, USAAF, so possibly pre Department of Defense era. Maybe not. The reason I ask is because it is the best type I've ever gotten results with and would like to find my Dad one but haven't been able to find anything pictures or otherwise. I did find patent page but no further. Any information at all I'd great appreciate. Thank you all. Great discussions here.
 

Attachments

  • 17495960093907039707544570053201.jpg
    17495960093907039707544570053201.jpg
    716.3 KB · Views: 72
  • 1749596115145997416926748533872.jpg
    1749596115145997416926748533872.jpg
    686.5 KB · Views: 56
  • 17495962385585682106954550213966.jpg
    17495962385585682106954550213966.jpg
    835.2 KB · Views: 44
To avoid these ads, REGISTER NOW!

LopezBart

Well-known member
Joined
Oct 13, 2023
Messages
2,564
Location
Lopez Island, WA

I'm not sure the clamping mechanism on your example is critical here. Various examples sans clamp are available on EBay, of course; new versions are readily available on Amazon. https://www.amazon.com/Imperial-Tool-195FC-Degree-Flaring/dp/B001HWBYEG?tag=atomicindus08-20
 

Beerhippie

Well-known member
Joined
Oct 13, 2023
Messages
10,016
Location
Far NE Oregon
That's a cool clamping system! Never seen it before.

My Imperial Brass is just your standard, everyday screw clamp:

54581334089_2750900f39_o.jpg

54581477945_1c0f0f64f7_o.jpg

But it's still the best flaring tool I've ever used.

Nice to see that yours is the apparently original red paint. I wasn't sure on mine and now I can repaint it.
 

Private Lugnutz

Well-known member
Joined
Mar 30, 2012
Messages
30,687
Location
The Authentic Jersey Shore
The only flaring tool I have seen with that quick clamp was... yours! When you posted here back in 2021. :)
That is a very odd-looking flaring tool!

I have several, including a wartime Imperial Brass. It has two large wingnuts for clamping the die together, and the screw-type anvil, which slides on or off. It doesn't have that handle affixed to the anvil. What does that handle do when you turn it? I'm curious about the purpose. Is that a cam action tighten and quick release? (EDIT: I'm guessing that's what it does. Instead of threaded bolts and wingnuts, you just move that handle to tighten the die halves together or release them. Pretty nifty.)

On the patents, Imperial Brass stamped the heck out of their dies with their patent numbers. The wartime dies have several patent numbers on them, as late as 2,370,089, which is 1945. You will also see them with in between wartime patents 2,226,852 and 2,242,831, back to 2,072,559 (which dates to 1937). Yours with a 1,724,697 patent (1929!) precedes all those.

Very cool find.
I still can't help you with a model number. 93-F was the number of their standard model kits in the 30's and 40's. While I love the idea of the quick clamp and release on that odd model, I'd have to agree with @LopezBart that the action on the anvil is the same on the other, standard model. I have a few extras I could be talked into letting go, including an Imperial Brass or two. :)
 

Attachments

  • 20191205_171645.jpg
    20191205_171645.jpg
    873.5 KB · Views: 25
  • 20220318_105115.jpg
    20220318_105115.jpg
    195.2 KB · Views: 24

lilredex

Well-known member
Joined
Apr 29, 2006
Messages
5,956
Location
Toronto
Agreed, those Imperial flaring tools are the best ever. Mine came from an estate sale around the corner (HD truck mechanic).
 

Attachments

  • IMPERIAL FLARING TOOL 1B.JPG
    IMPERIAL FLARING TOOL 1B.JPG
    1,018.1 KB · Views: 20
  • Imperial #93-FB Flaring Tool Kit 1A.JPG
    Imperial #93-FB Flaring Tool Kit 1A.JPG
    704.4 KB · Views: 28

larry4406

Well-known member
Joined
Jan 27, 2006
Messages
19,569
Location
Northern Virginia
Wow!

Nice tool! Sorry I can’t help OP.

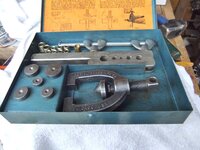
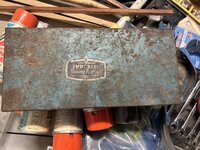
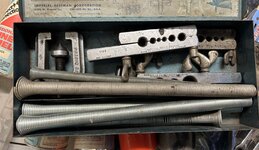
I just looked at the Imperial Eastman set I got from my father in-law’s estate and not helpful.

I’m missing all the anvils except the 1/2” and the cutter. Are replacements available?

One of the clamping tools is marked Blue Point.

Address on the instructions inside the lid predates zip code so not sure of age.

I’ve not used this (yet…).

IMG_9331.jpg
IMG_9332.jpg

IMG_9333.jpgIMG_9334.jpgIMG_9335.jpgIMG_9336.jpg
 
OP
M

Mississippi333

Active member
Joined
Nov 2, 2019
Messages
25
Location
Corinth MS
The only flaring tool I have seen with that quick clamp was... yours! When you posted here back in 2021. :)

I still can't help you with a model number. 93-F was the number of their standard model kits in the 30's and 40's. While I love the idea of the quick clamp and release on that odd model, I'd have to agree with @LopezBart that the action on the anvil is the same on the other, standard model. I have a few extras I could be talked into letting go, including an Imperial Brass or
I believe I can see what you and Mr. Bart are saying about the anvil. My impression of the type is flawed seeing the only one I used at my first machine shop job was heavily used and the tubing tended to slip. I had thought about maybe taking a couple thousands from the parting line edges to tighten it up but went into the service and haven't used that type since. The one I have is the only one I've used since and performs great. I'm not one to ask for advice and not take it. Especially when everyone tells me the same thing. Thanks again guys.
 
OP
M

Mississippi333

Active member
Joined
Nov 2, 2019
Messages
25
Location
Corinth MS
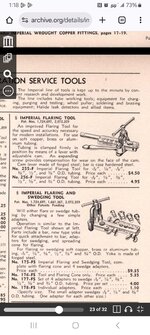
I've learned several things today. The first, the die sets I've used aren't designed to be used on all metals. Second, that would account for the slipping that I believed was a worn tool. Thirdly, I've been using mine incorrectly. Thanks to Mr. four.cycle, I've also learned the part number I was looking for which is No. 255F, is made for soft copper, brass and aluminum in the refrigeration arena. Since I've never purchased any new and not having obtained the associated paperwork that comes with them, I honestly didn't know that certain models were for certain metals. That's on me and my being lazy and not inquisitive enough. Once again gentlemen, thank you all. 1000000089.jpg
 

Private Lugnutz

Well-known member
Joined
Mar 30, 2012
Messages
30,687
Location
The Authentic Jersey Shore
Since I've never purchased any new and not having obtained the associated paperwork that comes with them, I honestly didn't know that certain models were for certain metals.
While Imperial Brass first emerged in the refrigeration/HVAC industry, and all the literature will say brass, copper and aluminum on the early models, automotive mechanics have been making fuel and brake lines with these old flaring kits forever. They will work on soft steel tubing, including brazed and welded steel tubing, but you should use a double flare adapter. Because brake lines should be double flared, the single flare kits are sort of passe (collectibles only) anyway, for me.

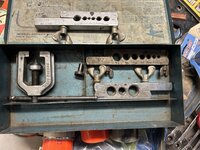
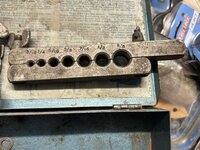
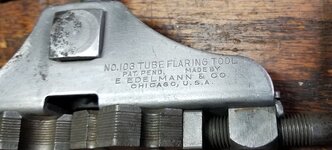
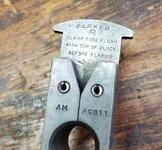
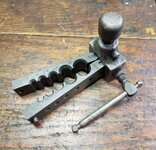
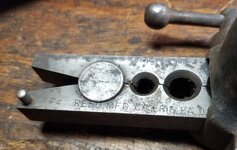
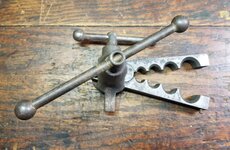
While these old Imperial Brass kits with the removable yoke, the die in two pieces, and the two batwing clamps to keep them together are ubiquitous, they are a little complicated and awkward to use with all the parts. That's what attracted me to your quick clamping model. That would be so much quicker. Imperial Brass (later Eastman) moved to a simpler, more compact hinged design in the 50's. I don't have any, but I do have a couple hinged designs by Reed, Parker (for aircraft lines; note that it's also a hammer type yoke and anvil), and Edelmann. I particularly like the Edelmann with the rotating dies. As you can see, the yoke/anvil just slides, can't come off, and it includes the clamp in the same piece.
 

Attachments

  • 20250612_052049.jpg
    20250612_052049.jpg
    413.6 KB · Views: 27
  • 20250612_052033.jpg
    20250612_052033.jpg
    454.9 KB · Views: 9
  • 20250612_052023.jpg
    20250612_052023.jpg
    572.8 KB · Views: 9
  • 20250612_051814.jpg
    20250612_051814.jpg
    566.5 KB · Views: 8
  • 20250612_051759.jpg
    20250612_051759.jpg
    625.8 KB · Views: 8
  • 20250612_051729.jpg
    20250612_051729.jpg
    1 MB · Views: 8
  • 20250612_051314.jpg
    20250612_051314.jpg
    541.5 KB · Views: 7
  • 20250612_051231.jpg
    20250612_051231.jpg
    610.7 KB · Views: 7
To avoid these ads, REGISTER NOW!

Private Lugnutz

Well-known member
Joined
Mar 30, 2012
Messages
30,687
Location
The Authentic Jersey Shore
Did you catch this?
Yes. I have a few IB flaring kits, including the wartime (2278932 = 1942 patent) edition of that kit you purloined the photo from. See post #5. All of the 30's and 40's dies were marked like that! :)

BTW, the "Slip-On" yoke design in these kits was their first attempt to make using them a little easier. (See the angled slots inside in the photo below with an older model next to it for comparison...)
 

Attachments

  • 20250612_050702.jpg
    20250612_050702.jpg
    449.5 KB · Views: 7
  • 20250612_050535.jpg
    20250612_050535.jpg
    679.4 KB · Views: 15

larry4406

Well-known member
Joined
Jan 27, 2006
Messages
19,569
Location
Northern Virginia
I am guessing he is referring to the full spelling, which is a little unusual and uncommon compared to "U.S.A." The only other major mfgr that I know of as fixated on insisting on the full spelling of the country's name in their stamping was K-D. Kind of cool.
Thank you.

Any idea where I can find the double flare adapter pieces it’s missing? What vintage is my kit if you can tell?
 

Private Lugnutz

Well-known member
Joined
Mar 30, 2012
Messages
30,687
Location
The Authentic Jersey Shore
Any idea where I can find the double flare adapter pieces it’s missing?
The best source is probably other partial kits you find. Salvage and cannibalization is my approach to completing partial kits of anything (also broken or stuck ratchets, etc) and always my answer to these kinds of questions. Whether that's flea markets (my preference) or fleabay and the like. They're not rare. But they're not retail, either, obviously. Unless modern tools are interchangeable. I wouldn't know whether that's the case or not, though.
What vintage is my kit if you can tell?
I can.

Dating vintage IB tools is easy, because they were patent happy. They littered their tools with patent info. As a wartime collector, I look for patent #s 1724697; 2072359; 2226852; 2242831 (1942); and 2370089 (1945).

That 2553813 on yours is a postwar (1951) "tell" for us. Your tandem dies also have dates (1959) on them for the Canadian patent. Those are very likely original to that box. No earlier than 1959. Probably 60s.
 

dscheidt

Well-known member
Joined
Apr 26, 2017
Messages
2,909
Wow!

Nice tool! Sorry I can’t help OP.

I just looked at the Imperial Eastman set I got from my father in-law’s estate and not helpful.

I’m missing all the anvils except the 1/2” and the cutter. Are replacements available?

One of the clamping tools is marked Blue Point.

Address on the instructions inside the lid predates zip code so not sure of age.

Interestingly, 6300 w howard is not in Chicago, that's just outside the city in Niles. I'm not sure when Niles annexed that area, sometime between WWII and 1965ish, probably. There's still a factory there, but much newer building, belonging to some sort of aerospace control concern. (I'm in that area regularly, so that's from memory.)
 

four.cycle

Well-known member
Joined
Oct 19, 2015
Messages
29,304
Location
Tacoma, Washington
Is there something unique about this?

referring to the full spelling, which is a little unusual and uncommon compared to "U.S.A." The only other major mfgr that I know of as fixated on insisting on the full spelling of the country's name in their stamping was K-D.

and that Keystone set I still have, which makes three.
nothing earth-shaking, just different.
 

Attachments

  • Keystone 1.2 hex dr SAE socket set.jpg
    Keystone 1.2 hex dr SAE socket set.jpg
    549.3 KB · Views: 18
OP
M

Mississippi333

Active member
Joined
Nov 2, 2019
Messages
25
Location
Corinth MS
While Imperial Brass first emerged in the refrigeration/HVAC industry, and all the literature will say brass, copper and aluminum on the early models, automotive mechanics have been making fuel and brake lines with these old flaring kits forever. They will work on soft steel tubing, including brazed and welded steel tubing, but you should use a double flare adapter. Because brake lines should be double flared, the single flare kits are sort of passe (collectibles only) anyway, for me.

While these old Imperial Brass kits with the removable yoke, the die in two pieces, and the two batwing clamps to keep them together are ubiquitous, they are a little complicated and awkward to use with all the parts. That's what attracted me to your quick clamping model. That would be so much quicker. Imperial Brass (later Eastman) moved to a simpler, more compact hinged design in the 50's. I don't have any, but I do have a couple hinged designs by Reed, Parker (for aircraft lines; note that it's also a hammer type yoke and anvil), and Edelmann. I particularly like the Edelmann with the rotating dies. As you can see, the yoke/anvil just slides, can't come off, and it includes the clamp in the same piece.
Just when I think I've seen them all lol. So there is also a dowel that registers with the dimple on the dies?
 

alinc100

Well-known member
Joined
May 26, 2013
Messages
3,043
Location
Dearborn,MI
Hijack- can anyone tell me how this 'flaring tool ' works? If it actually is a flaring tool.
 

Attachments

  • 20250330_182031.jpg
    20250330_182031.jpg
    928.7 KB · Views: 15
  • 20250330_182034.jpg
    20250330_182034.jpg
    872.2 KB · Views: 15
  • 20250330_182039.jpg
    20250330_182039.jpg
    656.4 KB · Views: 18
  • 20250330_182048.jpg
    20250330_182048.jpg
    608.9 KB · Views: 30

Private Lugnutz

Well-known member
Joined
Mar 30, 2012
Messages
30,687
Location
The Authentic Jersey Shore
Thanks for the link! I searched thru it and my No. 125-F Kit is not listed.
That was for Andy, Larry. As I recommended, I would look through 60's catalogs. Especially with that "1959" date stamp on the dies. And I just noted that the box on your label is actually Imperial-Eastman, not Imperial-Brass. So definitely after 1961, when they merged.
 

alinc100

Well-known member
Joined
May 26, 2013
Messages
3,043
Location
Dearborn,MI

Andy @alinc100 tagging you in case that link was too subtle. Your double-flare tool (adapters built in to that revolving part so you don't lose them) is on that page, top right.
Yeah , I see it in the catalog. Still unsure how exactly it works. I might have to buy some tubing some day and just practice. I really haven't looked at it much, it's more like a fidgit spinner for me than a needed tool.
.
 

Private Lugnutz

Well-known member
Joined
Mar 30, 2012
Messages
30,687
Location
The Authentic Jersey Shore
Still unsure how exactly it works.
Well, I've never used one like that, but I do love a puzzle.

Applying the basic principles of all double flaring - that is, using an adaptor inside the opening of the tube to make the first flare, removing the adaptor to make the second flare - I could probably bluff my way into helping you figure it out from here and the views you provided.

First of all, it looks like the Colt Revolver of flaring tools to me. That is, instead of a die stock made from two rectangular bars, one half of an opening in each bar, forming several openings down the length of a rectangular die stock, all the openings on yours are located in that revolving half circular die stock. And instead of having to position a tube underneath one of the various size openings and slide a yoke and anvil (some folks call it a cone) up and down a rectangular bar die stock to a position over the top of that opening, it looks like there is only one space for doing all flaring, regardless of the size, and the yoke and anvil are static in that space.

It looks like you just rotate that half circular die stock to a position where the desired size is inside the single work space, underneath the anvil.

If I am right, everything after that is the same as any double flare kit.

You stick a tube through the hole from the bottom. You set the height of the tube to the adaptor (sometimes flush, sometimes there's a mark on it) and clamp it tight with that spindle on the side. You put the adaptor inside the tube and center the point of the anvil/cone inside the adaptor and turn it down until the adaptor stops on the die, making the first flare. You turn the anvil up and remove the adaptor. You center the point of the anvil in the first flare and turn it down until it is flush with the die to make the second flare.
 

MR.X

Well-known member
Joined
Dec 13, 2010
Messages
1,804
Picked this little flaring tool up today at the flea. Brass body and cool old box.
 

Attachments

  • IMG_9945.jpeg
    IMG_9945.jpeg
    803.9 KB · Views: 16
  • IMG_9946.jpeg
    IMG_9946.jpeg
    715.9 KB · Views: 15
  • IMG_9947.jpeg
    IMG_9947.jpeg
    733.6 KB · Views: 17

Private Lugnutz

Well-known member
Joined
Mar 30, 2012
Messages
30,687
Location
The Authentic Jersey Shore
Dang, nice find! That looks VERY early. Late 1920's I'd bet. All their earlier catalogs only include welding and cutting tools and equipment. They don't even show a flaring kit for automotive lines (or fridge work) until the 1930's and by then they're in metal boxes. Is that a hammer type? I can't tell from the orientation of your photo if that spindle is for holding the dies and tube in place and you smack that anvil (flat knob looking thing) to make the flare (vs. screwing an anvil down as in later models)? Or if I am just looking at it cockeyed and that spindle is for making the flare.
 

MR.X

Well-known member
Joined
Dec 13, 2010
Messages
1,804
Dang, nice find! That looks VERY early. Late 1920's I'd bet. All their earlier catalogs only include welding and cutting tools and equipment. They don't even show a flaring kit for automotive lines (or fridge work) until the 1930's and by then they're in metal boxes. Is that a hammer type? I can't tell from the orientation of your photo if that spindle is for holding the dies and tube in place and you smack that anvil (flat knob looking thing) to make the flare (vs. screwing an anvil down as in later models)? Or if I am just looking at it cockeyed and that spindle is for making the flare.
Lock spring and thumb screw hold die in compressor then traditional screw.
 

Attachments

  • IMG_9954.jpeg
    IMG_9954.jpeg
    643.4 KB · Views: 8
  • IMG_9955.jpeg
    IMG_9955.jpeg
    598.5 KB · Views: 9
To avoid these ads, REGISTER NOW!
Top Bottom