Beerhippie
Well-known member
So I need to seal them with a desiccant in the refrigerator?and don't let 'em get too hot.
I've had 'em fly to pieces as soon as I hit the button from storing them out in the garage for years.
BK

So I need to seal them with a desiccant in the refrigerator?and don't let 'em get too hot.
I've had 'em fly to pieces as soon as I hit the button from storing them out in the garage for years.
BK
Not quite an appropriate question for this thread, but where did they come from?package arrived today:
Grits from, bottom row, 40-240, top row, 400-5K. Assorted abrasives.
The Jungle, of course. That's $40 worth. Probably not the highest quality.Not quite an appropriate question for this thread, but where did they come from?
Be sure to keep them somewhere DRY
Maybe a sealed container
I also don't like them laying down
and don't let 'em get too hot

I can't imagine that working well for very long. CA glues don't like change, and are very stiff. I imagine that repair fractures in several minutes. But if he says it works.While researching the glue joints of sanding belts, I came across a tip for repairing failed glue joints:
https://www.woodmagazine.com/sanding-sharpening/easy-fix-for-seam-split-sanding-belts
CA glues are extremely strong in tension and **** under shear.I can't imagine that working well for very long. CA glues don't like change, and are very stiff. I imagine that repair fractures in several minutes. But if he says it works.
You can also buy tape for that, found some of my 1/2x18" belts use it.
Googling
sanding belt splicing tape
Shows many choices.

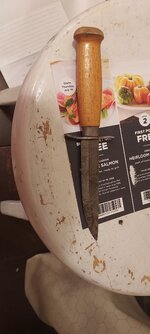
Well for $5, I don't feel like I overpaid too much!Wow! That is a give-my-left-nut find. We've discussed them a little upthread and our host has a late war Army version. Thankfully those notches in the main blade aren't too deep and could be minimized with a skillful sharpening.
Well for $5, I don't feel like I overpaid too much!
I don't know about restoring the blade. It would be very difficult to do without changing the profile.
All in all, the condition seems to be about average for what I see online. I take it the Marines in WWII weren't considering collectors' value of their kit.
After balancing the pH of my Rust Bucket, the knife is in for a bath.
Every reference to this knife I've found refers to it as stainless steel. Don't look it to me. With chrome and nickel critical metals during the war, I'm highly doubtful they'd be used for a pocket knife. The brass liners should have been enough of an extravagance for even the USMC.
Brass was a "critical metal" and not for the most part available for civilian uses. There were exceptions, and the military got what they needed.My understanding is that brass became a controlled metal as soon as we got in the war due to the need of it for cartridge and shell cases. I don't know how quickly the limit was lifted postwar.
For what it's worth I have two of the Army Engineer pocket knives (with the U.S.A. shield) that Camillus made 1942-44. These are all steel except for the jigged bone scales, which I read came from cattle shinbones. These have the common camper or scout configuration: blade, can opener, bottle cap lifter/screwdriver, and the punch/drill. The civilian version of these knives (pre- and postwar) typically had brass liners that the folding blades/tools rubbed against -- smoother action.I've never studied the composition of the wartime MIL-K's, but it all depends on what priorities the USMC had for the knives and when.
Precious metals, including brass, nickel, chromium, molybdenum, and vanadium, were controlled and restricted in stages, by percentages in alloy formulas. I've discussed "New Emergency" (triple alloy) AISI 8000 steel here at great length for hand tools, for example, which was invented in 1942 and contains low doses of chromium, nickel, and molybdenum. On March 27, 1942, in Order M-18-d, the WPB restricted all chromium melting to orders of A-1-K or higher. From January 1 until then it had been A-10. On June 1, 1942, in Amendment 3 to Order M-21-a, the WPB added nickel and moly to the A-1-K or higher category. That same amendment allowed melting those alloys at priority A-3 or higher for “NE” steels, SiMn (AISI 9200) or stainless (AISI 400).
Also, keep in mind these early wartime MIL-K's were basically experimental. They weren't made in high numbers. The Army versions even fewer. They were the basis for the actual MIL-K's that were made in extremely high volume right up through the end of the century.


You could likely keep the overall blade profile by carefully removing enough to get down past the eroded edge sections. Or simply call it done now and have a display item.The USMC knife cleaned up nicely:
Still plenty of pitting from being stored in a can of seawater for decades, but better. I haven't decided what, if anything, I'll do with the edge of the main blade.
The blade appears to have a full-flat-grind--I checked it out under my field 'scope and found no sign of a secondary bevel--so restoring that edge would both thin the blade and make it narrower. I could probably maintain the original shape, but then it would also be a bit shorter.You could likely keep the overall blade profile by carefully removing enough to get down past the eroded edge sections. Or simply call it done now and have a display item.
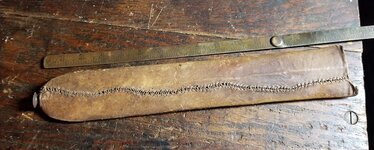
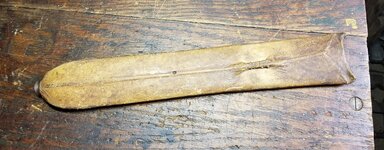


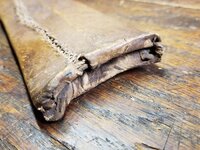
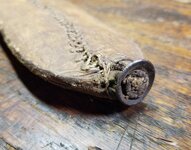 Either way, do you agree with my supposition about the button at the bottom? If it was for a leg-tie, it would be just above the knee. I can see it being worn on something else, too, such as a sling or strap (the loop is very narrow), across the body.
It's much easier to make a secure pouch sheath for an oddly-shaped blade than to make something like kukri sheath with the opening down the back. It's also easier to use a pouch sheath, IMHO.Definitely sinew. I wasn't guessing when I identified it in my first post, but, like you, I don't want to too quickly assume that means frontier.
As for the shape, yeah, almost like a short broadsword, but the sheath may not have conformed to the blade. The sheaths for WWII bolos, for example, belied their odd shape.


Thanks for the rec, RBB.There's a book that you may find useful, at least in part. It's the one on the left in the photo below.
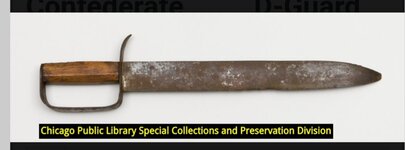
Thanks for the rec, RBB.
I have Baldwin ("Early Knives and Sheaths of the American Frontier") ordered through Inter-Library Loan.
I got nowhere fast online. Lots of Native-American pieces in various museums, and even more (lots and lots more!) reproductions on modern blade makers and forums. Nothing this big or this primitive. Nothing around a wire frame (almost more like a scabbard that way).
Ironically, it's the book on the right that inadvertently gave me an idea. Seeing the title made me think of a spot I always like to go to when I travel to Ft Leavenworth, down by the river, where you can literally see two deep ruts in the earth, a wagon width apart, coming right out of the water and up the sloping hill, long grown over with grass. Which, in turn, made me remember the Army Frontier Museum. I'm going to ask my professional counterpart there to pop over there for a visit, explain my interest in brief, and get a good TPOC and some leads.
There are quite few places in this part of Oregon where traces of the Oregon Trail are still easily visible. One is just barely outside a neighborhood in La Grande--like two minute's walk.Thanks for the rec, RBB.
....
Ironically, it's the book on the right that inadvertently gave me an idea. Seeing the title made me think of a spot I always like to go to when I travel to Ft Leavenworth, down by the river, where you can literally see two deep ruts in the earth, a wagon width apart, coming right out of the water and up the sloping hill, long grown over with grass. Which, in turn, made me remember the Army Frontier Museum. I'm going to ask my professional counterpart there to pop over there for a visit, explain my interest in brief, and get a good TPOC and some leads.
That's the guy I was referring to!"Came from an old San Antonio family that lived near the Alamo and found it on Davy Crockett's body."
I would imagine so. The site I am referring to is on post near Scott Avenue on Riverside Drive. This swale and ruts were primarily the results of a military route, although civilian traders and settlers also used it. Both the Oregon and Santa Fe Trails had a terminus in Ft Leavenworth.There are quite few places in this part of Oregon where traces of the Oregon Trail are still easily visible.