To avoid these ads, REGISTER NOW!

ZMotorsports Shop Projects 2.0

To avoid these ads, REGISTER NOW!

ntsqd

Well-known member
Joined
Jan 22, 2005
Messages
997
Location
Lower left coast
When I had some concrete poured outside I asked our contractor about bolting a lift to it. He told me that it would almost double the cost as it would almost double the thickness and the steel required. If I knew exactly where I wanted the lift to be they could form sub-grade "islands" around where the posts would be without needing to make the whole slab able to support a lift. Since I didn't know what lift I might buy or even when I might be able to afford one I let it go.
 
OP
Z

zmotorsports

ALLIANCE MEMBER
Joined
Oct 20, 2009
Messages
21,477
Location
Northern Utah
Mike,
If you have lifts at work, what's the chance they might replace one of them for age, not necessarily for condition that you might be able to pick up for a lower price?

That's an easy one to answer Mark, zero percent chance.

Many years ago this was an option, that is how I acquired my Nugier 20-ton hydraulic press. The company was purchasing new air over hydraulic 40-ton presses and offered the Nugier 20-ton press to the mechanics via a silent bid process. Those days are long gone since our family-owned company was sold to a large corporation.

For the past 20~ish years now the parent company will not allow ANYTHING to be had by the associates no matter the condition or circumstances. I have to scrap ALL old equipment and assets with very detailed documentation showing the history from cradle to grave. We can't even take the wood skids that our new forklifts come on which we used to be able to offer to our associates. Even the wood skids must be properly disposed of and hauled off with documentation.
 

aka Larry

Well-known member
Joined
May 2, 2012
Messages
8,099
Location
Eastern, NC
For the past 20~ish years now the parent company will not allow ANYTHING to be had by the associates no matter the condition or circumstances. I have to scrap ALL old equipment and assets with very detailed documentation showing the history from cradle to grave. We can't even take the wood skids that our new forklifts come on which we used to be able to offer to our associates. Even the wood skids must be properly disposed of and hauled off with documentation.

Is there a point to this? Seems to me recouping even a few bucks from used equipment would be a win for everyone involved. :headscrat
 
OP
Z

zmotorsports

ALLIANCE MEMBER
Joined
Oct 20, 2009
Messages
21,477
Location
Northern Utah
When I had some concrete poured outside I asked our contractor about bolting a lift to it. He told me that it would almost double the cost as it would almost double the thickness and the steel required. If I knew exactly where I wanted the lift to be they could form sub-grade "islands" around where the posts would be without needing to make the whole slab able to support a lift. Since I didn't know what lift I might buy or even when I might be able to afford one I let it go.

Similar here Thom. When I built my last shop in the early 90's I wasn't planning on a lift nor thinking I'd ever be able to afford one, so placement was not a consideration prior to concrete pouring. I did however, have enough forethought to go a bit thicker than the standard 4" concrete and use 4k PSI concrete in that floor which made adding my Ammco 10k lift pretty easy in 2011 when I was finally able to purchase one. I don't know why the contractor is telling you that it would double the thickness though as most concrete garage and/or shop floors are standard @ 4" thick. I don't think there is a lift manufacturer out there requiring 8" thick concrete. A couple inches thicker in selected areas hardly changes the total concrete usage from my experience.

When building my new shop, I knew exactly where the lift placement would be and therefore planned not only the thickness accordingly, but adding more steel around those areas to accommodate even though most lift manufacturers don't necessarily specify a steel requirement and most only require 4" thick 3k PSI concrete. I figured I was going way overboard just by using 4k PSI concrete, let alone the 7-8 inch thick range and the steel that we added. The transplant of my Ammco lift from the old shop to the new was easy as it was planned in from the beginning of construction. However, I was worried when my son and I started contemplating and measuring for the new wider lift. I knew I had a lot of area where the contractor and I scooped out another couple inches of substrate where the columns would be and he had already added some additional steel, but seeing as how this lift was about 11" wider base and the bases were nearly double the size of the Ammco bases, my main concern was hitting rebar during drilling. I must have guessed right after studying pictures because out of 16-holes I only hit rebar in one of them and was able to eventually get through it.
 
OP
Z

zmotorsports

ALLIANCE MEMBER
Joined
Oct 20, 2009
Messages
21,477
Location
Northern Utah
Is there a point to this? Seems to me recouping even a few bucks from used equipment would be a win for everyone involved. :headscrat

Corporate America, there doesn't need to be a point or valid reasoning Vincent. Much of what I deal with day to day doesn't make logical sense and my bosses are not ones who like to be questioned, about anything.
 

LXCam

ALLIANCE MEMBER
Joined
Apr 23, 2013
Messages
19,207
Location
AZ
Is there a point to this? Seems to me recouping even a few bucks from used equipment would be a win for everyone involved. :headscrat

Corporate America, there doesn't need to be a point or valid reasoning Vincent. Much of what I deal with day to day doesn't make logical sense and my bosses are not ones who like to be questioned, about anything.
You can thank the attorneys on this one. It’s 100% product liability driven.
 

ntsqd

Well-known member
Joined
Jan 22, 2005
Messages
997
Location
Lower left coast
Our concrete & masonry guy over built everything. He had pride in his work and it shows. Too bad he didn't take better care of himself. He was a grumpy old biker, but he's missed by a wide range of people.

I can see why they might have such a policy, but it's not in their best interest. When a ledger makes every decision, those usually don't always make sense. They might be "Good Business" as far as the finance dept. is concerned, but they are not always actually good business. If the company is publicly held, then Wall St. is in your pockets and they only care about 1/4ly profits. If those profits kill that company, oh well, there's other companies.
A very long time ago I worked for this little clothing company that really took off just as I started working in their warehouse. They are called Patagonia. I was something like the 198th employee. A year later they were at something close to 500 employees. Clothing that was returned that couldn't be fixed went into "the doggie bin." We employees were free to pull anything that we could actually use out of the bin if we wanted it. Then it became a problem because word got out to employee's friends and relatives who wanted something out of that bin. Eventually they put a stop to that, the new policy was that all such clothing items are held and sold to the public at an annual event. Eventually even that went away and it is now sold through a local retail operation called Real Cheap Sports.
Employee morale dove as each of these perks were taken away. It costs time and money to put together a program where the employees can fairly benefit from the disposition of a company's excess, but it pays off in improved morale.
 

fouckhest

Well-known member
Joined
Jul 24, 2013
Messages
1,871
Location
Greer, SC
Corporate America, there doesn't need to be a point or valid reasoning Vincent. Much of what I deal with day to day doesn't make logical sense and my bosses are not ones who like to be questioned, about anything.

This is so true, one of my buddies that works at the local Bavarian Motor Company plant tells a story about when everyone on his team (new model team) got new tools and tool boxes, how did they dispose of the old Snap-on units....by throwing them in a dumpster so big that no one could get them out. You might also ask, that must be a big dumpster? You would be right, imagine being able to put an entire X3/X5/X7 in said dumpster, yes, thats correct, they scrap what I understand is ALL of those "test cars' wild!
 

signcrafter

Well-known member
Joined
May 9, 2012
Messages
12,527
You can thank the attorneys on this one. It’s 100% product liability driven.
This. Attorneys and people that want to blame others to benefit. The peanuts that auctioning off used equipment brings to companies isn't worth the risk of one employee getting hurt with said equipment and somehow blaming the company and getting an attorney to go after the company to get some free money.

Something like the press Mike got back in the day, say a guy gets a press from company that is replacing it. He brings it home and decides to do something stupid with it and gets injured. Instead of being a man saying **** that was dumb. He decides to blame the company, obviously they knew it was defective because they replaced it with a new one. Finds attorney to go after company and now both of them are millionaires somehow. It's the world we live in. So companies so screw it and just throw it in dumpster. I'm sure there is a way around liability for the company, like having auction company come in once a year or something. But it isn't worth their time for the little they would make. Sad to be honest because lots of good stuff gets thrown away when it could live a good second life.

I'm kind of surprised I haven't heard of something like this happening from a marketplace sale. But I guess most people don't have the deep pockets companies have so it wouldn't be worth a lawyers time to go after an individual who sold an item on marketplace.
 
OP
Z

zmotorsports

ALLIANCE MEMBER
Joined
Oct 20, 2009
Messages
21,477
Location
Northern Utah
Our concrete & masonry guy over built everything. He had pride in his work and it shows. Too bad he didn't take better care of himself. He was a grumpy old biker, but he's missed by a wide range of people.

I can see why they might have such a policy, but it's not in their best interest. When a ledger makes every decision, those usually don't always make sense. They might be "Good Business" as far as the finance dept. is concerned, but they are not always actually good business. If the company is publicly held, then Wall St. is in your pockets and they only care about 1/4ly profits. If those profits kill that company, oh well, there's other companies.
A very long time ago I worked for this little clothing company that really took off just as I started working in their warehouse. They are called Patagonia. I was something like the 198th employee. A year later they were at something close to 500 employees. Clothing that was returned that couldn't be fixed went into "the doggie bin." We employees were free to pull anything that we could actually use out of the bin if we wanted it. Then it became a problem because word got out to employee's friends and relatives who wanted something out of that bin. Eventually they put a stop to that, the new policy was that all such clothing items are held and sold to the public at an annual event. Eventually even that went away and it is now sold through a local retail operation called Real Cheap Sports.
Employee morale dove as each of these perks were taken away. It costs time and money to put together a program where the employees can fairly benefit from the disposition of a company's excess, but it pays off in improved morale.

Funny how people end up ruining good things Thom.

When I first began working for the company back in the late 80's, when it was family owned, the employees were allowed to purchase damaged product at a deeply discounted price. I was shocked by this policy, but being new to the warehouse business I thought "hell, it's a warehouse and people drive forklifts around so items are bound to get damaged at some point or another" and just figured I'd roll with it. I ended up going through the damage bay items about once a week to see what was available, especially seeing how the wife and I were newlyweds and didn't have a pot to piss in nor window to throw said piss out of. We bought a few items that we normally used at a discounted price, so it was a nice "employee perk".

Fast forward a couple of years and the damage started exploding. Now being in maintenance, I didn't actually have any firsthand contact with the products passing through our warehouse but one day I was talking with a forklift driver from operations after our son was born and I was going off about the hospital bills that were stacking up. He said just wait until he comes home as diapers and formula can really add up quick. Several months later when we brought our son home from the hospital this same forklift operator approached me asking what brand of diapers and formula we used because he was pretty sure some would be damaged later that day. :oops: That's when it hit me, why we were seeing such an uptick in damage in the warehouse. I guess I always have been slow to catch on to things but this didn't seem right.

That was the last time I participated in purchasing any damaged products as I didn't want any part of it any longer. Shortly afterwards the leadership must have figured it out as well because the employee perk of being able to purchase damaged products went away for good and the items were donated to the local Food Bank and other non-profit assistance programs vs. being sold to employees. We were still able to purchase things like used racking, pallet jacks and other assets as the company replaced them, but even all that went away when we were bought out by a large corporation.
 

signcrafter

Well-known member
Joined
May 9, 2012
Messages
12,527
Funny how people end up ruining good things Thom.

When I first began working for the company back in the late 80's, when it was family owned, the employees were allowed to purchase damaged product at a deeply discounted price. I was shocked by this policy, but being new to the warehouse business I thought "hell, it's a warehouse and people drive forklifts around so items are bound to get damaged at some point or another" and just figured I'd roll with it. I ended up going through the damage bay items about once a week to see what was available, especially seeing how the wife and I were newlyweds and didn't have a pot to piss in nor window to throw said piss out of. We bought a few items that we normally used at a discounted price, so it was a nice "employee perk".

Fast forward a couple of years and the damage started exploding. Now being in maintenance, I didn't actually have any firsthand contact with the products passing through our warehouse but one day I was talking with a forklift driver from operations after our son was born and I was going off about the hospital bills that were stacking up. He said just wait until he comes home as diapers and formula can really add up quick. Several months later when we brought our son home from the hospital this same forklift operator approached me asking what brand of diapers and formula we used because he was pretty sure some would be damaged later that day. :oops: That's when it hit me, why we were seeing such an uptick in damage in the warehouse. I guess I always have been slow to catch on to things but this didn't seem right.

That was the last time I participated in purchasing any damaged products as I didn't want any part of it any longer. Shortly afterwards the leadership must have figured it out as well because the employee perk of being able to purchase damaged products went away for good and the items were donated to the local Food Bank and other non-profit assistance programs vs. being sold to employees. We were still able to purchase things like used racking, pallet jacks and other assets as the company replaced them, but even all that went away when we were bought out by a large corporation.
I wouldn't call it slow to catch on Mike, some of us just don't have the mentality of those that take advantage of things like that.

But just think if your company still did those things, just unhook a few wires on a scissor lift and tell them it's unfixable and they need a new one and then buy it for pennies! I'm just joking of coarse but I'm there's lots of people out there that think like that.
 

rd65

Well-known member
Joined
Sep 29, 2017
Messages
2,844
Location
Granite Falls, WA
A few things on these latest posts.
https://www.publicsurplus.com Bookmark this site, lots of good stuff available. A lot of it is in excellent, hardly used condition.
When I had my shop build a lift didn't even cross my mind for some reason. It is 28' deep w/ 10' ceilings and saw cuts in the concrete run right down the middle front to back & side to side. Concrete is just over 4" but not so much that I had to be charged for extra concrete, fiber mesh, six sack mix (?).
The saw cuts are the real killer for adding a two post lift without doing a bunch of additional work.
When I worked at Connelly Skis we had free bins for employees for things like ski rope and gloves that were 2nd's or warranty returns. They did bust a guy who would routinely take lots of stuff and take to his local flea market to sell. He was put on the No For You list.
 
OP
Z

zmotorsports

ALLIANCE MEMBER
Joined
Oct 20, 2009
Messages
21,477
Location
Northern Utah
I wouldn't call it slow to catch on Mike, some of us just don't have the mentality of those that take advantage of things like that.


You nailed it there Scott. I still am amazed during our weekly meetings when Operation's leadership will bring up various scenarios where lift operators are finding loopholes or workarounds in the system to bump their production numbers. I just shake my head and think, wouldn't it just be easier to do the work vs. trying to come up with new and creative ways of avoiding it? :headscrat You're right, it takes a different mentality for sure.


A few things on these latest posts.
https://www.publicsurplus.com Bookmark this site, lots of good stuff available. A lot of it is in excellent, hardly used condition.
When I had my shop build a lift didn't even cross my mind for some reason. It is 28' deep w/ 10' ceilings and saw cuts in the concrete run right down the middle front to back & side to side. Concrete is just over 4" but not so much that I had to be charged for extra concrete, fiber mesh, six sack mix (?).
The saw cuts are the real killer for adding a two post lift without doing a bunch of additional work.
When I worked at Connelly Skis we had free bins for employees for things like ski rope and gloves that were 2nd's or warranty returns. They did bust a guy who would routinely take lots of stuff and take to his local flea market to sell. He was put on the No For You list.

Our local University here has surplus sales quite often when various departments are getting upgrades or remodels and I've been fortunate to take advantage of a few of those deals. I was able to find my cousin a nice parts solvent tank for $25 a couple of years ago and all of my filing cabinets came from one of their remodels and metal drop storage bins came from the Geology department. I don't go online to look at their offerings much these days because I don't have the room nor the need for anything more right now, but when I was looking to outfit my shop I went onto their website weekly looking for items and saved quite a bit of money by doing so.

As for concrete seams, you are correct, those seem to be the biggest thing to avoid when installing a lift and why when I did mine, I dictated where I wanted the saw cuts to be before they poured the concrete so it wouldn't be an issue later. Now eight years later and needing to a bit wider, I am sure glad I had them cut where I did. My last shop where I didn't plan on a lift from the beginning the saw cuts were what I had the hardest time navigating when it came time for a 2-post lift. I was able to place it very close to where I wanted it, but not exactly due to the saw cuts.
 

ntsqd

Well-known member
Joined
Jan 22, 2005
Messages
997
Location
Lower left coast
My college had a Monarch lathe of about 24 x 80 (!) that was nearly brand new because it was purchased for some other Gov't org and then sold off on a intergovernmental listing. One of my Prof's saw it and jumped on it quick. The rumor was that it cost the Dept. $1000!
However, they were so paranoid that they'd come into the lab and find some Freshie wrapped around the spindle that the chuck key was kept locked up with a strict check-out system. It was made in a way that required the chuck key's insertion in a tube for the motor to turn on. We old hands knew how to by-pass that, but we didn't. Because frankly most of us too were scared some Freshie would see how to do it and wind themselves around the chuck. An electric motor appropriate for a lathe of that size combined with the rotational inertia of that chuck and spindle needs to be respected.
 
Last edited:

bugnut

ALLIANCE MEMBER
Joined
Jul 14, 2012
Messages
4,009
Location
Central Ohio
Mike, reading about your concrete pour and understanding. Thinking through the process, around here 4" of concrete floor equals a 2x4 on it's side so you end up with 3.5" Installation of lift requiring 4" doesn't make it. I recently had this conversation with a GC and told him 6" on chairs with the floor mapped out per print, and flat wire not rolled. He could already see the blow-back from the subs doing the pour. I had to remind him it was my $$.

The scrapping of stuff in the workplace makes no sense to worker bee's who see it. It makes sense to the stockholders and dividend earners who never see the liability. The CEO/CFO only get paid by the stockholders.
 
OP
Z

zmotorsports

ALLIANCE MEMBER
Joined
Oct 20, 2009
Messages
21,477
Location
Northern Utah
Last night I tackled and finished up a not so fun job that I have been dreading for the past couple of years. But seeing as how I still have the scissor lift that I rented from my neighbor, I'd try to get it off my "to do" list.

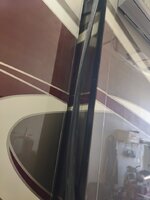
I had a seal tear at the front of my curbside slideout on our coach last year. It wasn't a bad tear but it started getting worse with use so I ordered a new double bulb seal from Uni-Grip a few months ago in preparation for this task. Here I have begun removing the old seal at the back of the slideout. I found a wide flat pry tool worked good for sliding the grip off of the lip and then just pulling it out as I went. The removal went relatively quick. The rear of the slide and top still looked fantastic, it was just up near the top, near the slide lock at the front that the seal was torn but I opted to replace the entire thing. I've seen some people cut a 45-degree at the upper corners and just replace what is damaged or replace in three pieces to ease installation, but I opted to replace it in the manner in which Monaco installed it nearly 23+ years ago.
seal1.jpg

The new double bulb seal from Uni-Grip.
seal2.jpg

I started at the rear lower edge of the slide, working my way up the rear most edge, around the corner and along the top. The vertical section at the rear of the slide wasn't too bad to do by hand. Just tuck the seal inside and pull out as I went just until the U-channel slips halfway over the metal lip and push it on with my fingers. But when it came to the top section it was a bit more problematic. Firstly, because I had to reach up and over the slideout's outermost edge and even with the slide slightly retracted, the lip was still about 16-18 inches away so I didn't have much leverage in that small gap between the opening and the roof of the slide box.

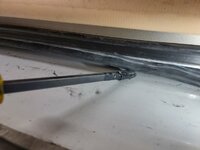
I stood looking at it trying to come up with options that wouldn't scratch or damage the surface of the slide and figured I would throw a piece of heater hose on the end of a flat bladed prybar and then wrap with electrical tape.
seal3.jpg

This worked perfectly. I would tuck the seal inboard about 18 inches ahead of me, then just pull it out until the U channel slips halfway around the lip and chase it with the prybar raising it up and pressing the metal U clip of the seal up onto the lip. This did require a fair bit of pressure as the metal inside the rubber seal is quite tight and needs to be in order to grip firmly onto the .125" lip, but this top section actually moved along at a decent pace.
seal4.jpg

Now with the rear and the top of the seal installed, I had to turn my attention to the front section which was a bit tighter clearance and what I was dreading the most.
seal5.jpg

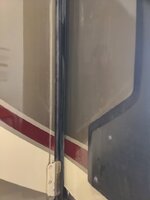
With the seal fully installed, I stood back licking my wounds and admired the finished job. My hands got cut up and were sore as hell afterwards, but glad it's done. Here is the rear of the slide with the new seal installed.
seal6.jpg

Front of the slide with new seal.
seal7.jpg


I had a couple areas near the locks that I added a bit of weatherstrip adhesive to in order to aid in keeping it intact, plus a little clear silicone sealant at the top two corners where the opening is squared off and the bulb seal rounds the corner slightly to seal off any potential leak so I left the slideout extended for the evening and cleaned up tools and called it a night.

I still need to give the area a wipe down with Final Inspection to clean off a bunch of sweaty handprints and then I can have my son help me to reinstall the slide topper and finish this job up.

Thanks for looking.
 
To avoid these ads, REGISTER NOW!
OP
Z

zmotorsports

ALLIANCE MEMBER
Joined
Oct 20, 2009
Messages
21,477
Location
Northern Utah
Mike, great way to capitalize on the scissor lift AND, in my "car guy math" that's either one job done that pushes out the possible purchase OR reinforces how nice having your own would be....hmmmm :unsure:

Mike, I think right now it pushes out the need to purchase one as it is not as high on my priority list as it is the wife's. ;) I swear some days I feel that she thinks I'm an invalid. She got so PISSED last Friday when I disassembled my old Ammco lift without waiting for my son. Then just as pissed again on Sunday when I lifted the top beam up by myself onto the new lift. :rolleyes:
 

signcrafter

Well-known member
Joined
May 9, 2012
Messages
12,527
Mine doesn't get pissed anymore, just shakes her head and walks away. Either she learned it's pointless to get upset because I'm going to do it anyway or she doesn't care about me getting hurt anymore. :unsure:

She did up the life insurance a while back now come to think about it.
 

PugetDude

ALLIANCE MEMBER
Joined
Mar 13, 2013
Messages
22,481
Location
Superstition Mountains, AZ
Last night I tackled and finished up a not so fun job that I have been dreading for the past couple of years. But seeing as how I still have the scissor lift that I rented from my neighbor, I'd try to get it off my "to do" list.

I had a seal tear at the front of my curbside slideout on our coach last year. It wasn't a bad tear but it started getting worse with use so I ordered a new double bulb seal from Uni-Grip a few months ago in preparation for this task. Here I have begun removing the old seal at the back of the slideout. I found a wide flat pry tool worked good for sliding the grip off of the lip and then just pulling it out as I went. The removal went relatively quick. The rear of the slide and top still looked fantastic, it was just up near the top, near the slide lock at the front that the seal was torn but I opted to replace the entire thing. I've seen some people cut a 45-degree at the upper corners and just replace what is damaged or replace in three pieces to ease installation, but I opted to replace it in the manner in which Monaco installed it nearly 23+ years ago.
seal1.jpg

The new double bulb seal from Uni-Grip.
seal2.jpg

I started at the rear lower edge of the slide, working my way up the rear most edge, around the corner and along the top. The vertical section at the rear of the slide wasn't too bad to do by hand. Just tuck the seal inside and pull out as I went just until the U-channel slips halfway over the metal lip and push it on with my fingers. But when it came to the top section it was a bit more problematic. Firstly, because I had to reach up and over the slideout's outermost edge and even with the slide slightly retracted, the lip was still about 16-18 inches away so I didn't have much leverage in that small gap between the opening and the roof of the slide box.

I stood looking at it trying to come up with options that wouldn't scratch or damage the surface of the slide and figured I would throw a piece of heater hose on the end of a flat bladed prybar and then wrap with electrical tape.
seal3.jpg

This worked perfectly. I would tuck the seal inboard about 18 inches ahead of me, then just pull it out until the U channel slips halfway around the lip and chase it with the prybar raising it up and pressing the metal U clip of the seal up onto the lip. This did require a fair bit of pressure as the metal inside the rubber seal is quite tight and needs to be in order to grip firmly onto the .125" lip, but this top section actually moved along at a decent pace.
seal4.jpg

Now with the rear and the top of the seal installed, I had to turn my attention to the front section which was a bit tighter clearance and what I was dreading the most.
seal5.jpg

With the seal fully installed, I stood back licking my wounds and admired the finished job. My hands got cut up and were sore as hell afterwards, but glad it's done. Here is the rear of the slide with the new seal installed.
seal6.jpg

Front of the slide with new seal.
seal7.jpg


I had a couple areas near the locks that I added a bit of weatherstrip adhesive to in order to aid in keeping it intact, plus a little clear silicone sealant at the top two corners where the opening is squared off and the bulb seal rounds the corner slightly to seal off any potential leak so I left the slideout extended for the evening and cleaned up tools and called it a night.

I still need to give the area a wipe down with Final Inspection to clean off a bunch of sweaty handprints and then I can have my son help me to reinstall the slide topper and finish this job up.

Thanks for looking.
Your RV maintenance posts are giving me PTSD flashbacks ...😜
 
OP
Z

zmotorsports

ALLIANCE MEMBER
Joined
Oct 20, 2009
Messages
21,477
Location
Northern Utah
Hope everyone had a great weekend. It was a busy one for me but I feel like I was able to get a lot of odds and ends completed around the shop and yard.

Saturday morning started out by assisting my son to break down his CNC mill as he has decided to sell it. We got the engine hoist out and separated the mill from the base so it was more stable to transport for the buyer. My son posted it on FB Marketplace a couple of nights before and the first guy that contacted him and came and looked at it ended up buying it. They returned on Saturday morning to pick it up.

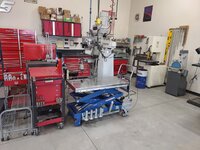
I moved a couple things around in the shop after moving his mill.
shop1.jpg

Opened up a little bit of space between the welding/fabrication table and the lift now. I think when I finally have time to start work on the Wheel Horse yard tractor, I will put the Handy lift in this area for working on the yard tractor.
shop2.jpg

shop3.jpg

The new owner with the mill and base loaded up and ready to leave.
shop4.jpg


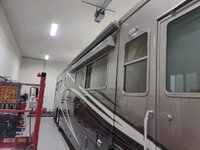
After the mill left, I had my son assist me for a few minutes to reinstall the slide topper on the coach after I replaced the slide seal a few nights prior. The gasket looks much better now not being torn.
seal11.jpg

Slide retracted and topper reinstalled. Now I can also return the scissor lift to my neighbor when he returns from vacation.
seal12.jpg

With that, my son headed home to work in his yard and garage, so I went about the next item on my Saturday "to do" list. I had trimmed edged and mowed my lawn on Friday night and I noticed I had a couple dry spots more in the middle of the back yard. After testing the sprinkler heads I noted that they were sunken in the ground quite a bit and therefore the spray pattern was slightly obstructed and not getting the distance or full pattern of water to all areas. I guess it is a combination of being pushed into the soil and the grass growing up around the heads so after my son headed home I ran to the plumbing store and grabbed some risers to space the heads back up flush with the grass and got my full spray pattern back again.
yard.jpg


I thought I only had to raise a couple of heads but I purchased about 20 risers and once I started digging heads up and raising them, I found I had done six total.

With this now being mid-afternoon the temps were approaching high 90's and I was ready to be done outside and back in the shop working. I was anxious to try out the new lift and I have several items to take care of for preparation for our annual Ouray/Silverton trip coming up in a few weeks.

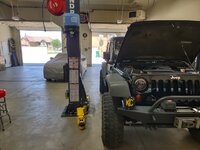
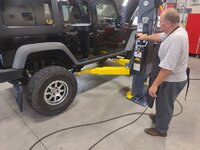
Jeep pulled into the new lift.
jeep11.jpg

Quite a bit more room on either side now.
jeep12.jpg

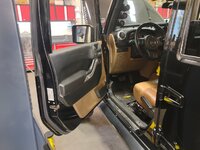
And the doors can be opened to a much wider angle for ingress/egress.
jeep13.jpg

Stay tuned for more.
 
OP
Z

zmotorsports

ALLIANCE MEMBER
Joined
Oct 20, 2009
Messages
21,477
Location
Northern Utah
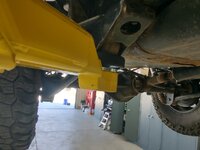
The arms on this thing are pure beef.
jeep14.jpg

jeep15.jpg

Our of curiosity I raised it to the top lock just to see if the literature was accurate.
jeep17.jpg

Yep, pretty damn close to specifications. The literature states 75.5" to underside of arms at full rise on the top lock and I measured right at 76". My Ammco had a height of 67" at the top lock and a full rise of 72", which I never used because I insist it sits on the top lock. I found myself Saturday actually dropping it down 2 notches below the top lock where it was comfortable, but it's nice to know I have the height option now.
jeep18.jpg

The frame measures 81.5" without any additional adapters installed.
jeep19.jpg

jeep20.jpg

The threaded telescoping pads are smooth as glass. Much smoother than the one on my Ammco lift, even after I spent time deburring them.
jeep21.jpg

I don't know if it's the placebo effect or what, but this lift seems much more stable. Not that the Ammco 10k pound lift was not stable, it just seemed to rock a bit more than this one with the Jeep on it. I hope it is not the placebo effect and is actually due to the massive columns and larger bases on this 12k pound lift.
jeep22.jpg

With a little bit of work completed on the Jeep I closed up shop by late afternoon and the wife and I went to one of our favorite restaurants and enjoyed a nice relaxing dinner and evening sitting on the deck enjoying the back yard.


Yesterday the wife had some errands to run then we were able to enjoy a nice dinner of steak, grilled corn on the cob and grilled onions and cauliflower.
dinner1.jpg

What a way to round out the weekend. 🥂
dinner2.jpg


Also, if anyone is interested, I uploaded the arrival and setup video of my new Bendpak 12APX lift yesterday.
 
Last edited:
OP
Z

zmotorsports

ALLIANCE MEMBER
Joined
Oct 20, 2009
Messages
21,477
Location
Northern Utah
Yesterday my son was going to stop by and we were going to replace his low-pressure A/C hose on his WJ seeing as how our dye now revealed the location of his A/C leak that we've been chasing for a year.

But before we started on it I had to fix my 30+ year old Matco telescoping magnet. I broke it the other day when I dropped it and stepped on it before I picked it up. I hated to just throw this away, even though I have another Snap-on that is nearly identical. This one just happens to be my oldest so I use it almost exclusively and was heartbroken when it broke. I figured I would give it a quick try at fixing before tossing in the garbage.

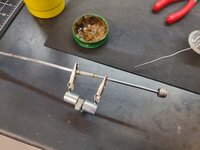
I took a piece of stainless steel tubing and drilled the ID slightly for a tight fit. Then applied some flux to the two pieces and pressed them together.
magnet1.jpg

A little heat from the MAPP gas torch and the solder wicked right in.
magnet2.jpg

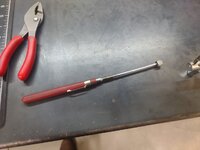
Ran the wire wheel around it and other than that last section not retracting, it's good as new.
magnet3.jpg

And back in its home in the screwdriver drawer.
magnet4.jpg

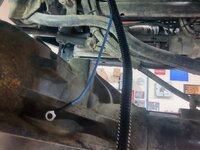
We then turned our attention to my son's WJ and sure enough, the dye lit up under the low pressure crimped connection just like he said.
wj1.jpg

He purchased a new A/C line so we replaced it and prepared to pull a vacuum on the system.
wj2.jpg

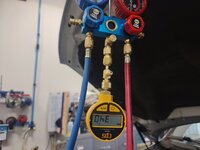
Hooked up the micron gauge to see just how low we could pull it. Generally anything under 500 microns indicates a nice tight system. After pulling the vacuum for about 40 minutes, we valved it off and let it sit for about 20 minutes and the gauge held.
wj3.jpg

While we were waiting my son was curious what 37's would look like on his WJ. I think a little trimming would be in order. :bounce:
wj4.jpg

Next we charged the system.
wj5.jpg

With approx. 90-degrees in the shop I can live with those pressures, pretty much textbook.
wj6.jpg


I hope that is the last of the A/C work on his WJ as we've fought to locate this leak for a while now and had to charge his system each summer for the past couple of years.
 
Last edited:
OP
Z

zmotorsports

ALLIANCE MEMBER
Joined
Oct 20, 2009
Messages
21,477
Location
Northern Utah
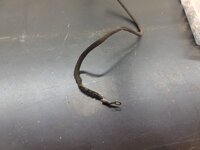
Also, while pulling the vacuum and waiting for the A/C system to hold on his WJ, I turned my attention to replacing the oil pressure sending unit for my Auto Meter A-pillar gauge. The sending unit was beginning to leak and when I went to replace it I didn't like how hard and deteriorating the wire was looking from heat. While messing with it, the insulation on the end just started crumbling. So I figured I should replace that while I was at it.

Old wire cut away from alongside the engine's pan rail.
ls1.jpg

New wire installed and Poly loom being installed.
ls2.jpg

New sending unit installed and wire connected.
ls3.jpg

I also think the power control location on the new Bendpak 12APX is growing on me. I know this was a concern when I was uncrating the columns seeing as how it was 18" lower than my Ammco 10k pound lift in which I had become accustomed to. I even mentioned being concerned about the lower location in my setup video, however, the last few nights of using it I think I may be converted. The location is growing on me and it is less of an issue than I thought it was going to be.
ls4.jpg


Time will tell but the location has been the only thing so far that I have been on the fence about with the new Bendpak lift, but the more I use it the less concerned I am about the location. I almost like it where it is now, almost. ;)


Thanks for looking.
 

madison069

Well-known member
Joined
Nov 5, 2010
Messages
4,240
Location
Monroeville, PA
Yesterday my son was going to stop by and we were going to replace his low-pressure A/C hose on his WJ seeing as how our dye now revealed the location of his A/C leak that we've been chasing for a year.

But before we started on it I had to fix my 30+ year old Matco telescoping magnet. I broke it the other day when I dropped it and stepped on it before I picked it up. I hated to just throw this away, even though I have another Snap-on that is nearly identical. This one just happens to be my oldest so I use it almost exclusively and was heartbroken when it broke. I figured I would give it a quick try at fixing before tossing in the garbage.

I took a piece of stainless steel tubing and drilled the ID slightly for a tight fit. Then applied some flux to the two pieces and pressed them together.
magnet1.jpg

A little heat from the MAPP gas torch and the solder wicked right in.
magnet2.jpg

Ran the wire wheel around it and other than that last section not retracting, it's good as new.
magnet3.jpg

And back in its home in the screwdriver drawer.
magnet4.jpg

We then turned out attention to my son's WJ and sure enough, the dye lit up under the low pressure crimped connection just like he said.
wj1.jpg

He purchased a new A/C line so we replaced it and prepared to pull a vacuum on the system.
wj2.jpg

Hooked up the micron gauge to see just how low we could pull it. Generally anything under 500 microns indicates a nice tight system. After pulling the vacuum for about 40 minutes, we valved it off and let it sit for about 20 minutes and the gauge held.
wj3.jpg

While we were waiting my son was curious what 37's would look like on his WJ. I think a little trimming would be in order. :bounce:
wj4.jpg

Next we charged the system.
wj5.jpg

With approx. 90-degrees in the shop I can live with those pressures, pretty much textbook.
wj6.jpg


I hope that is the last of the A/C work on his WJ as we've fought to locate this leak for a while now and had to charge his system each summer for the past couple of years.
how it holds. Seems like once it starts leaking, the other seals start to go. People wonder why the "Might as well do this while I'm here" scenario is a problem.
 

madison069

Well-known member
Joined
Nov 5, 2010
Messages
4,240
Location
Monroeville, PA
Time will tell but the location has been the only thing so far that I have been on the fence about with the new Bendpak lift, but the more I use it the less concerned I am about the location. I almost like it where it is now, almost. ;)


Thanks for looking.

Easier on the shoulder when you don't have to lift your arm so high all the time. :giggle:
 
OP
Z

zmotorsports

ALLIANCE MEMBER
Joined
Oct 20, 2009
Messages
21,477
Location
Northern Utah
how it holds. Seems like once it starts leaking, the other seals start to go. People wonder why the "Might as well do this while I'm here" scenario is a problem.

We have replaced some seals on some other lines during the engine replacement last summer as well as a new evaporator because that is where I "thought" the leak was coming from after not finding it anywhere else and the only component we really couldn't see due to being under the dash. We were quite confident we had it with the evaporator replacement, but we were wrong. This spring we had to charge it again and that is when we injected nitrogen into the system trying to locate a leak but was less successful using the high pressure and soapy water method, which I generally have good results with. We added a bit of dye and that is how we finally found it and in an area I would not have expected.
Easier on the shoulder when you don't have to lift your arm so high all the time. :giggle:

There may be some reasoning in that Cody. I am a creature of habit and when I saw how low the mount was on the new Bendpak vs. my old Ammco if I'm being honest, was not pleased. I think just because it was different than I was used to but I wanted to be honest with myself and give it a shot before fabricating a relocating bracket in which I was almost ready to do. Now after a few days of using it, I almost like where it is located. That was hard to admit, because I was so adamant about not liking the location a week ago. I did say I would give an honest opinion once I get some time on it and I am getting used to the location rather quickly.
 

CGarage

Well-known member
Joined
Nov 23, 2018
Messages
3,060
Location
United States/Switzerland
Great posts.
1) The OEM manufacturer of that extendable magnet is Ullman I believe. They can be had inexpensively off of Amazon. Ullman is the market leader for magnets, mirrors, and picks that the tool truck brands all buy from.

2) I think TechFlex makes a protective wire sleeve that will give you high temp and abrasion protection both. It may be better than the loom.

3) Have a friend who only does automotive AC work and nothing else. He swears by the electronic leak detectors when looking for refrigerant leaks.

Great posts as always.
 

WoodsTruck

Well-known member
Joined
Jan 12, 2013
Messages
1,028
Mike,
Any reason to put a strip of padding up the lift post to keep the doors from contacting it?
 
OP
Z

zmotorsports

ALLIANCE MEMBER
Joined
Oct 20, 2009
Messages
21,477
Location
Northern Utah
Great posts.
1) The OEM manufacturer of that extendable magnet is Ullman I believe. They can be had inexpensively off of Amazon. Ullman is the market leader for magnets, mirrors, and picks that the tool truck brands all buy from.

2) I think TechFlex makes a protective wire sleeve that will give you high temp and abrasion protection both. It may be better than the loom.

3) Have a friend who only does automotive AC work and nothing else. He swears by the electronic leak detectors when looking for refrigerant leaks.

Great posts as always.

Thank you.

My Snap-on telescoping mirrors and magnets look exactly like my old Matco, I just am sentimental in a way and didn't want to discard the old Matco magnet if I could save it.

I have nylon protective sleeve, but it is too large for a single wire. If you look at the picture of the piece I cut off it is of the high temp nylon cloth style, and although it lasted 7~ish years, it was still pretty hard and brittle. Short of DEI style of heat protective sleeves, I haven't found one that works much better than others, and I've tried (or wasted money on) several different brands over the years.

I don't do enough A/C work to need nor justify the cost of an electronic sniffer at this point. I have an electronic sniffer for R12 from several decades ago, but try not to do much A/C work these days except on personal vehicles and the nitrogen has worked great for me in the past and I already have it. The WJ is really the only vehicle it didn't reveal the leak on.

Mike,
Any reason to put a strip of padding up the lift post to keep the doors from contacting it?

I have a towel that I throw out the window of vehicles I pulled onto my last lift as the drive through width was 11" narrower. It worked great and due to various curvatures and body lines of different vehicles I don't really want to go sticking padding on multiple areas of the columns or the carriage. Never needed it before so won't be putting it on here. There is such a wide range of areas where they doors would make first contact. A heavy towel allowed me to make quick adjustments as I was opening the door to exit the vehicle. With this being the first vehicle I have had on the lift, I had the towel ready but it was not needed as I was able to easily exit the driver's area without the door coming anywhere near making contact. That will be different on my truck I'm sure but I'll have the towel at the ready.
 

CGarage

Well-known member
Joined
Nov 23, 2018
Messages
3,060
Location
United States/Switzerland
I love that you saved the old Matco, I would have done the same.

But if you needed a new one, Ullman I think is the OEM and it can be had for $10-$15 last I checked. I own one. I like a telescoping magnet.

I love your shop and your thoroughness. One of a kind and more mechanics / technicians (industrial, automotive, etc) should aspire to “be like Mike”.

Good show, I say!
 
OP
Z

zmotorsports

ALLIANCE MEMBER
Joined
Oct 20, 2009
Messages
21,477
Location
Northern Utah
I love that you saved the old Matco, I would have done the same.

But if you needed a new one, Ullman I think is the OEM and it can be had for $10-$15 last I checked. I own one. I like a telescoping magnet.

I love your shop and your thoroughness. One of a kind and more mechanics / technicians (industrial, automotive, etc) should aspire to “be like Mike”.

Good show, I say!

Thank you. I love my shop as well, it's a joy to work in and love the feeling it has.

Although if I'm being honest, I really miss the smell of our last shop. There's something about having the smell of race fuel lingering and impregnated into everything....:3gears:
 

SilverJimmy

Well-known member
Joined
Apr 14, 2012
Messages
1,690
Location
Prescott/Flagstaff, AZ
Mike, I would always warranty those pickup magnets for my customers. In fact, just last week I got one warrantied by my new dealer! I understand being attached to some tools as I have both my father’s and my grandfather’s Snap-On tool boxes and I love holding the tools and wishing they could tell me about the things they did with both of them.
 
OP
Z

zmotorsports

ALLIANCE MEMBER
Joined
Oct 20, 2009
Messages
21,477
Location
Northern Utah
Mike, I would always warranty those pickup magnets for my customers. In fact, just last week I got one warrantied by my new dealer! I understand being attached to some tools as I have both my father’s and my grandfather’s Snap-On tool boxes and I love holding the tools and wishing they could tell me about the things they did with both of them.

Sterling, I have no doubt that my current Snap-on dealer would warranty a magnet or mirror without question, but I don't have a current Matco dealer to ask. Besides, a little solder and repair give the tool "character". ;)
 
To avoid these ads, REGISTER NOW!
Top Bottom