To avoid these ads, REGISTER NOW!

ZMotorsports Shop Projects 2.0

To avoid these ads, REGISTER NOW!
OP
Z

zmotorsports

ALLIANCE MEMBER
Joined
Oct 20, 2009
Messages
21,477
Location
Northern Utah
Not much done last night as I got home later than expected.

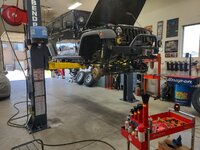
I was able to rotate the tires/wheels on the Jeep and tighten up the tie rod joints before greasing the chassis and setting it back down and torquing the wheels on. My son and his family arrived just as I was torquing the wheels on so my grandson helped me run around the Jeep with the torque wrench until they all clicked. He is just a good little helper.

Going over everything putting hands and eyes on the undercarriage, checking all of my paint marks to make sure nothing has moved and greased the chassis.
jeep31.jpg

Another thing I like about this new Bendpak lift is the arm release system. I wasn't sure how I'd feel about it when installing but I did like the 360-degree forged ring that accepts the cone to lock them in place. Seemed like a nice solid system and now that I've used it a bit I really like how smooth it disengages from the arms and then when released how smooth and positive it reengages with the arms. On my old lift, the teeth sometimes didn't like to release from one another as smoothly as I liked and when pulling up on the pins I would have to shake the arms to get the teeth to disengage with one another. That is why I generally just set the carriages all the way down on the floor to release the arm locks and then swing the arms outward. However, with the new Bendpak lift there are two things I noted last night that I really like, first is when the arms separate from the undercarriage I like to reach under with my foot and slide the arms to the retracted position and I noticed how smooth and how little resistance there is with these massive arms. Secondly, once I slid the retracted the arms I thought I would try the arm release from about 8 inches or so above the floor to see how they worked vs. lowering it all the way to the floor to swing the arms out like on the old lift. The arm release lever moved easily and the cone lifted above the forged gear allowing me to very easily swing the arms outward before having to set them on the floor. Very nice.. I am also getting to where I actually like the location of the control switch and pump release controls compared to my old Ammco lift. This is the one aspect of this lift that for some reason I was more concerned about as I thought it appeared to be too low. But after using it for almost a week now, I kind of like where it is located. I'm actually embarrassed that I made such a fuss about the location. :unsure:
jeep32.jpg

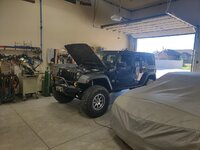
After my grandson helped me torque the wheels on the Jeep he wanted to ride with me to move the Jeep over to the next bay. This Grandpa gig is pretty cool. :cool: But then again, it's easy with such a cute little guy to have as a grandson..
jeep33.jpg

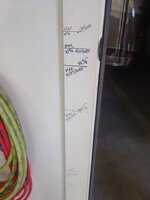
My son mentioned that we hadn't measured him in a few months so my grandson went to the workbench where we keep the carpenter's square for measuring and I opened the drawer and he carried it over to the doorway where he knows we measure him. He stood up against the wall and let me mark his height and then stood there and watched as I measured and noted his height.
max.jpg


Thanks for looking.
 
OP
Z

zmotorsports

ALLIANCE MEMBER
Joined
Oct 20, 2009
Messages
21,477
Location
Northern Utah
Mike, as time allows, would love a video on project planning and doing a vehicle build, start to finish! You have much to contribute in this area and your attention to detail is top class.

Thank you @CGarage . This was brought up a while ago, I think by you, and I started kicking this around last winter jotting down some notes to discuss on a video but to be honest, it kind of died on the notepad as I wondered just how many people really wanted to listen to me ramble on for 30-minutes to an hour on how to plan and move their projects forward. So much of the planning just happens in my head and although I put a lot of thought into my projects, some of the sequence of events just naturally takes shape and materializes and I have a hard time coming up with the words to explain it. But I promise I will give this some more thought and maybe try to come up with something. I do appreciate the vote of confidence though.
 
OP
Z

zmotorsports

ALLIANCE MEMBER
Joined
Oct 20, 2009
Messages
21,477
Location
Northern Utah
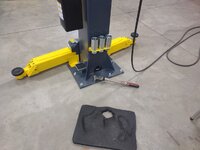
Last night I wanted to double check the floor anchors on my new Bendpak lift so I grabbed the torque wrench and ran around the pattern again seeing as how they have been torqued in the floor for nearly two weeks now. I noted that the two rear outermost anchors I was able to get more than 60-degrees of advancement from the nut so I immediately thought I must have some soft foot taking place. All of the others barely moved before reaching torque spec. so I felt good about them. I backed those two fasteners off and was able to insert another shim under each. I then retorqued them and got that audible firm sounding "snap" from the torque wrench and I knew they were now solidly making contact. It's kind of hard to put into words, but most of you who have experienced this know what I'm talking about when it comes to torquing a fastener, especially in concrete. You have the kind of "lazy" click that almost feels spongy still but reached the desired torque and then you have that firm definitive snap from the torque wrench that indicates it is solid. Hope that makes sense. I'm probably over-thinking this but when I torqued the fasteners the first time they all felt relatively the same but being nearly two weeks have gone by now I just wanted to give them a once over to be certain.

now most manufacturers recommend checking the torque specs monthly but to be honest, I wonder how many people actually do that? :unsure: I know a few commercial shop owners who don't give them another thought once the lifts are installed. With my last lift I was determined to be the exception and at least check them quarterly, which I did, for maybe the first year or two at most. I then went to semi-annually for another couple of years as it usually slipped my mind. I then got in the habit of servicing my air compressor and checking the torque on the lift annually each year on New Year's Eve or Day and have at least stuck to that schedule, although I must admit I check the air compressor oil each time, but I actually only replace it about every 2-3 years because the oil still looks nice and clean most of the time.
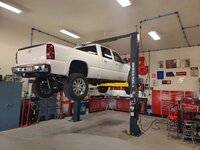
truck1.jpg

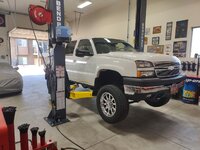
With the floor anchors double and triple checked I figured I would rack the truck and see how the new lift handles it. I kept thinking it felt more stable and moved less with the Jeep but I then didn't want to be naive and just figured it was the placebo effect making me think it was better because it was a new lift. You know how we all like to justify things in our heads. ;)

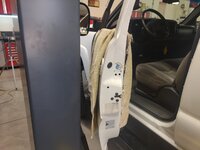
@WoodsTruck had asked about foam padding on the columns earlier and I explained my process but thought I'd show it. Although with the much wider column spacing and drive through width of this one I don't think it will be as much of an issue as it was with my Ammco lift. I just throw a heavy thick towel over the door when I pull the vehicle through the lift, then when I open the door IF I happen to make contact with the column it protects the paint. I also must note that I don't just throw the door open, I cautiously open the door and if the door must make contact I gently make contact because even a slight impact can cause a ding. This is more of placing the door in contact and holding it there while exiting or entering the vehicle.
truck2.jpg

Here you can see that with the wider column spacing getting in/out is much less prone to make contact with the column but I will still use the towel as a precaution.
truck3.jpg

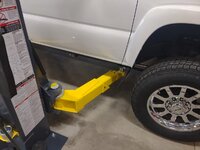
Arms in place. Another thing I like to do is pull the second stage out as far as necessary before extending the third and last stage. This is a practice I have always done and has been a habit. This keeps the smallest part of the arm as deep inside the next larger size as possible. With this lift I found that the third stage (smallest) didn't even need to be extended as the second stage met the frame easily.
truck4.jpg

Rear arm third stage was only extended a few inches to make contact.
truck5.jpg

With the vehicle a few inches off the ground I give it a good jounce to ensure it feels balanced and nothing shifts. This is also a habit and one I am thankful to see my son perform as well.
truck6.jpg

Upon raising the truck I realized that it was not the placebo effect, this is much more stable feeling. There was also no deflection noted on the arms whereas there was some deflection notices on my Ammco 10k pound lift with these longer and heavier trucks, especially when the weight was biased to the rear slightly. I was able to drive the truck onto the lift a little further for better balancing with the longer reach arms as well so I'm sure that plays a role in stability. When I raised a full size truck or SUV up on my Ammco I always had a pole jack handy to stick underneath as soon as it was to height and I will continue that practice, but I didn't feel like it was quite as immediately needed with this lift.
truck7.jpg

truck8.jpg


Overall I am very pleased and impressed with my new Bendpak lift. I know we all justify things in our heads and don't ever want to feel like we made a bad choice in something or want to second guess ourselves, but I can honestly say this was a huge step up from my Ammco in terms of stability. That being said, it isn't a fair comparison because they are in different weight classes, but I am sure glad this opportunity presented itself and I was able to make the upgrade. I don't regret it one bit and after only having it in my shop a couple of weeks now I would do it again.

Thanks for looking.
 

customh

Well-known member
Joined
Feb 18, 2013
Messages
562
Location
East Bethel, MN
My son mentioned that we hadn't measured him in a few months so my grandson went to the workbench where we keep the carpenter's square for measuring and I opened the drawer and he carried it over to the doorway where he knows we measure him. He stood up against the wall and let me mark his height and then stood there and watched as I measured and noted his height.
I'm shocked that the data recording isn't a standardized format!

I like it. Gives it character and proves there's a bit of artist rattling around in your cranium.
 

zanyad

ALLIANCE MEMBER
Joined
Apr 26, 2018
Messages
2,842
Location
NE Ohio
I have both my father’s and my grandfather’s Snap-On tool boxes and I love holding the tools and wishing they could tell me about the things they did with both of them.
This hit home today. I have most of my dad's tools (though he wasn't very handy), and just got the last of my grandfather's yesterday (who was able to fix most anything). I miss both of them.
 
OP
Z

zmotorsports

ALLIANCE MEMBER
Joined
Oct 20, 2009
Messages
21,477
Location
Northern Utah
Hope everyone had a great weekend. I didn't get much shop time, the wife and I volunteered for a local children's hospital's golf tournament fundraiser on Friday evening in a small town about 80-miles from home. The wife has been doing this for about 15 years and I started helping several years ago so we made a day of it on Friday and then get a room and drive home sometime on Saturday. It's a lot of work but seeing the children from the hospital and listening to their stories is heartwrenching. I count our blessings so much every year afterwards and think back to the experience we had when our son was in NICU for 72 days after being born and wondering if that was going to be our life. Really hits home for the wife and I and is an emotional weekend to say the least.

Arrived home early afternoon on Saturday and was planning on doing my yardwork that I normally do on Friday evenings, then I remembered the cable on the Snapper walk-behind mower broke last week and I didn't have time to repair it. Thought I'd knock out a quick temporary setup to be able to use it.

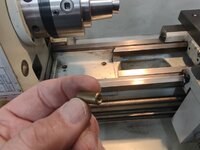
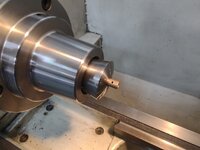
Machined a small threaded cable end and drilled a .065" hole perpendicular to the threaded hole.
mower1.jpg


mower2.jpg

I put the cable through the hole, flared the cable strands a bit and applied some flux, then soldered the end to ensure it didn't pull through. Knocked the cable ends down a bit with a Roloc disc, then inserted a 10-24 screw from either side to pinch the cable in place as well. Trimmed the mounting screw down so that it pivoted slightly on the handle.
mower3.jpg

Completed and ready to mow.
mower4.jpg

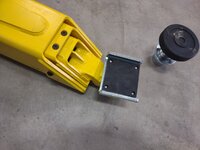
While I had the air hose out from using the die grinder, I thought I would address another small item, this one on the new Bendpak 12APX lift. When I tested it out on my truck the other night, I noticed that the frame cradle wouldn't fit into one of the arms. I used the threaded telescoping pad to lift the truck, but wanted to knock the powder coating down that was preventing the frame cradle from seating in the arm. It didn't take much, just a quick pass with a flap wheel in a die grinder and the excess powder coating was removed.
pad1.jpg

Now all four arms will easily accept the adapters, telescoping threaded pads as well as all of the adapters without issue.
pad2.jpg


After cleaning up my mess, I went into the yard to trim, edge and mow the lawns. Finished up around 6:30pm and ready to call it a day. Spent yesterday relaxing as my wife made an awesome Sunday brunch and had the kids over and was able to spend some time with them and played with our grandson.
 

rd65

Well-known member
Joined
Sep 29, 2017
Messages
2,843
Location
Granite Falls, WA
Hope everyone had a great weekend. I didn't get much shop time, the wife and I volunteered for a local children's hospital's golf tournament fundraiser on Friday evening in a small town about 80-miles from home. The wife has been doing this for about 15 years and I started helping several years ago so we made a day of it on Friday and then get a room and drive home sometime on Saturday. It's a lot of work but seeing the children from the hospital and listening to their stories is heartwrenching. I count our blessings so much every year afterwards and think back to the experience we had when our son was in NICU for 72 days after being born and wondering if that was going to be our life. Really hits home for the wife and I and is an emotional weekend to say the least.

Arrived home early afternoon on Saturday and was planning on doing my yardwork that I normally do on Friday evenings, then I remembered the cable on the Snapper walk-behind mower broke last week and I didn't have time to repair it. Thought I'd knock out a quick temporary setup to be able to use it.

Machined a small threaded cable end and drilled a .065" hole perpendicular to the threaded hole.
mower1.jpg


mower2.jpg

I put the cable through the hole, flared the cable strands a bit and applied some flux, then soldered the end to ensure it didn't pull through. Knocked the cable ends down a bit with a Roloc disc, then inserted a 10-24 screw from either side to pinch the cable in place as well. Trimmed the mounting screw down so that it pivoted slightly on the handle.
mower3.jpg

Completed and ready to mow.
mower4.jpg

While I had the air hose out from using the die grinder, I thought I would address another small item, this one on the new Bendpak 12APX lift. When I tested it out on my truck the other night, I noticed that the frame cradle wouldn't fit into one of the arms. I used the threaded telescoping pad to lift the truck, but wanted to knock the powder coating down that was preventing the frame cradle from seating in the arm. It didn't take much, just a quick pass with a flap wheel in a die grinder and the excess powder coating was removed.
pad1.jpg

Now all four arms will easily accept the adapters, telescoping threaded pads as well as all of the adapters without issue.
pad2.jpg


After cleaning up my mess, I went into the yard to trim, edge and mow the lawns. Finished up around 6:30pm and ready to call it a day. Spent yesterday relaxing as my wife made an awesome Sunday brunch and had the kids over and was able to spend some time with them and played with our grandson.
Our newest grandson was recently released from NICU after 21 days. A trying time for the new parents, the nurses there kept changing the requirements to be able to go home. Dad finally had a somewhat heated discussion with the Dr and a few nurses. They came home the next day. Saw them all last night, they are doing great.
 
OP
Z

zmotorsports

ALLIANCE MEMBER
Joined
Oct 20, 2009
Messages
21,477
Location
Northern Utah
Our newest grandson was recently released from NICU after 21 days. A trying time for the new parents, the nurses there kept changing the requirements to be able to go home. Dad finally had a somewhat heated discussion with the Dr and a few nurses. They came home the next day. Saw them all last night, they are doing great.

Yes, to say it is a "trying", stressful and emotional time for new parents is an understatement. Glad to hear all are doing well.
 

bigdave_185

Well-known member
Joined
Feb 14, 2021
Messages
443
Location
Utah
Twins in the nicu for almost three months here, bless them ladies who work that area of the hospital and take those stories home and have the courage to come back the next day. I vividly remember asking if I could hold a different persons child because not a single soul came to visit this very tiny baby night after night and was told it was not allowed.
 
OP
Z

zmotorsports

ALLIANCE MEMBER
Joined
Oct 20, 2009
Messages
21,477
Location
Northern Utah
Twins in the nicu for almost three months here, bless them ladies who work that area of the hospital and take those stories home and have the courage to come back the next day. I vividly remember asking if I could hold a different persons child because not a single soul came to visit this very tiny baby night after night and was told it was not allowed.

Same Dave. Our son's primary nurse was freakin' awesome, as were the others as well. No matter how stressed, tired, emotional, frustrated or exhausted we were, she was always consistent in demeanor and positive. I often told my wife it takes a special kind of person to do that. For the first several weeks we weren't able to hold him because he couldn't be outside of the incubator, but in those 72 days our son was in the NICU unit, we were there talking to him and finally towards the end we were able to hold him for more than a couple of minutes before his stats dropped and they had to put him back into the incubator. I remember around the 5 or 6 week point, they were telling us he may be permanently on a ventilator and took us to the BPD clinic to become comfortable, and I remember going home and crying my eyes out, again. Seems like that was a common thing though during that time though, that and praying.

It was mandatory that we spoke to counselors during our time there, especially when they informed us that circumstances may be more prolonged and permanent, as they wanted us to "express" ourselves to others in a group setting and I just couldn't do it. I wanted nothing to do with anyone else as I was having enough just processing it myself and didn't think me talking about it would be in anyone's best interest. It did sadden me when I saw babies that had no one to visit them day after day. Broke my heart actually, but they told us the same thing we couldn't hold nor interact with any baby other than our own. I would hope things have changed these days as that was in 1991, but not sure if they have.

I remember that last few weeks of just wanting to get off work and get to the hospital so I could hold him, that's all I wanted to do and all I could think about all day at work. My time at work each day was a blur. I know coworkers didn't know what to say and were being polite when they asked how our son was doing, but I didn't want to talk about it, I didn't want to explain things that I knew they really didn't care about and were not interested in, all I wanted to do was get off work, get to the hospital and hold him. I remember it was about 2 weeks before we actually brought him home, we arrived at the hospital one afternoon after work and when we walked up to the incubator, the top was open and he had no tubes. It shocked both the wife and I so much we thought something was wrong, but they said he had pulled the tube out and they just wanted to see how long he could go without being intubated and he was doing fine several hours later on room air. I remember that being such an emotional day for the wife and I and his primary nurse being so compassionate and sweet. As he grew into his own personality, I think that is something that is imbedded into our son, stubbornness and only willing to do things on his terms when he's ready. Something we saw in him throughout his life and still. He won't do a damn thing until he is ready and it's his idea and you can't tell him any different. Not quite sure where he gets that from? :unsure: Must be his mother. ;)

We actually took a cake back to the NICU unit on our son's first birthday and were able to speak to and share some stories and time with his primary nurse and a couple others that we became close with. I simply don't know how those nurses and do it and having a premature baby and having to deal with that day after day is not something I would want anyone to have to go through.
 
OP
Z

zmotorsports

ALLIANCE MEMBER
Joined
Oct 20, 2009
Messages
21,477
Location
Northern Utah
During last month's trip to Wyoming, the trailside electrical repair caught me off guard. I try to pride myself on being prepared and having my tools and equipment organized, but electrical supplies are hit and miss in my Jeep's toolbox as it's not something I have needed much in the past. I had a few small pieces of wire, some fusible link wire and a small assortment of crimp terminals. The crimp terminals were stored in old 35mm film canisters and unfortunately, the lids had popped off in the soft-sided bags and I had to hunt and dig for what I needed.

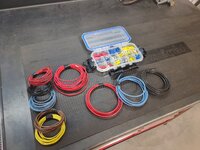
So yesterday I stopped on my way home from work to grab a small divider box that I could throw an assortment of crimp terminals in and then cut some various lengths of wire in 10-gauge, 14-gauge and 16-gauge and placed the wire into a soft-sided bag and the sealed and locking divider box into the Jeeps rear mounted toolbox.
wiring1.jpg

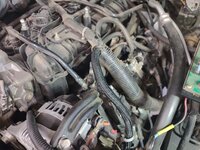
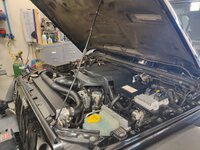
With my assortment of electrical supplies checked off my "to do" list, I moved on to replacing the wire feeding the power distribution module under the hood. As I removed the engine cover, I noticed that some of the poly-loom had become brittle so I wanted to replace that with some split nylon sheathing before moving on to the power distribution wire.
jeep50.jpg

I cut the old brittle poly-loom off and replaced it. To the right you can see the short power distribution wire that I cut temporarily as I dealt with the main harness sheathing.
jeep51.jpg

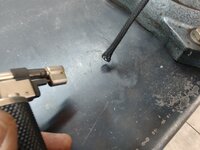
With the main harness covering replaced on that leg of the harness, I turned my attention to the replacement of the 10-gauge wire for that feeds the power distribution module/board. The old one came directly off the alternator and went to the underside of the module and I think there was some fatigue involved as the wire was allowed to bounce unsupported. I wanted to correct that during the replacement. I started by finding a length of 1/4" slip through nylon abrasion covering and melted the end slightly to avoid fraying. A "hot knife" is the preferred method for cutting this style of nylon sheathing, but using a pair of scissors and then quickly melting the ends works almost as well to prevent the unraveling and fraying of the fibers or strands.
jeep52.jpg

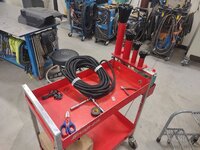
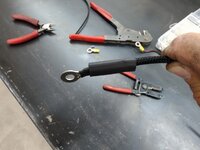
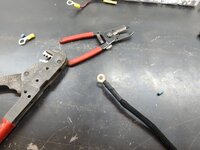
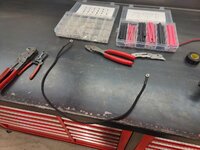
Next I laid out the wire from the power distribution module through the new routing and to the alternator to determine the proper length. Once the proper length was determined, I cut the abrasion sleeving, slipped it over one end, then crimped and heat shrunk the fusible link and eyelet onto the wire.
jeep53.jpg

Then let the abrasion sheathing slide to the end and prepped some more heat shrink to hold everything in place.
jeep54.jpg

One end completed.
jeep55.jpg

Both ends completed and ready to be installed in the engine bay.
jeep56.jpg


Stay tuned for more.
 
OP
Z

zmotorsports

ALLIANCE MEMBER
Joined
Oct 20, 2009
Messages
21,477
Location
Northern Utah
Continuing on.

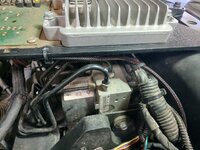
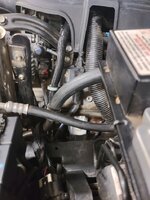
I then routed the wire along its new path from the alternator through a main loom, around the backside of the ABS module and up parallel under the mounting plate for the ECM and power distribution module. A zip-tie holding the wire under the bracket will work well as a strain relief and to prevent the terminal ring from fatigue cracking like the last one.
jeep57.jpg

Wire protruding out from the branch harness directly to the alternator.
jeep58.jpg

Engine cover reinstalled and tested to ensure no interferences were present.
jeep59.jpg

Completed.
jeep60.jpg


Thanks for looking.
 
OP
Z

zmotorsports

ALLIANCE MEMBER
Joined
Oct 20, 2009
Messages
21,477
Location
Northern Utah
With the Jeep completed, tools and equipment checked over and tire pressures checked, the Jeep was moved back to the house garage so the floor of the shop could be swept.

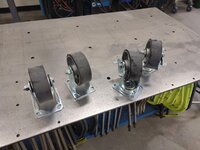
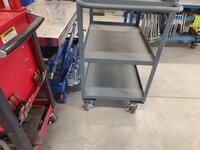
I then turned my attention to the mobile parts shelf. I love having this cart, but one thing that has bugged me from day one was the fact that it didn't come with locking casters. I dug through my assortment of casters and I located four matching one in my stash. Two rigid and two locking swivel casters, perfect.
shop11.jpg

Cart tipped on its end for access.
shop12.jpg

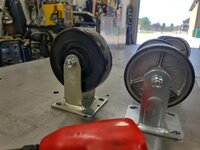
Although the replacements are about an inch shorter overall, they have the exact same bolt pattern so no drilling will be required and will be a simple R&R.
shop13.jpg

One down, three more to go.
shop14.jpg

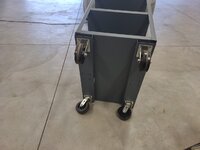
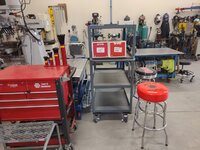
All four replaced, cart up-righted and wheeled back into place with the casters locked.
shop15.jpg

Loaded back up with parts for the next job coming into the shop.
shop16.jpg

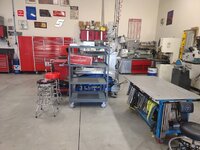
And the shop put back in order. Still not quite used to not seeing my son's CNC mill in this location, but it did open up this area for some rearranging of shop equipment and gained a little space. Now when I finally get time to work on the Wheel Horse tractor project, I think this area adjacent to the fabrication table will work perfectly.
shop17.jpg


Thanks for looking.
 
OP
Z

zmotorsports

ALLIANCE MEMBER
Joined
Oct 20, 2009
Messages
21,477
Location
Northern Utah
The shop is looking tidy, Mike!

Thank you Marc. Feels nice and tidy as well. It's funny how just a few little projects that have been put off make the shop "feel" totally different when completed even though no one really sees them nor knows about them. Those casters on the mobile shelf have been driving me nuts for the past year or so but I just haven't made the time to swap them.
 

Duker

Well-known member
Joined
Sep 25, 2010
Messages
10,868
Location
Livingston, TX
Our of curiosity I raised it to the top lock just to see if the literature w
The threaded telescoping pads are smooth as glass. Much smoother than the one on my Ammco lift, even after I spent time deburring them.
jeep21.jpg

I don't know if it's the placebo effect or what, but this lift seems much more stable. Not that the Ammco 10k pound lift was not stable, it just seemed to rock a bit more than this one with the Jeep on it. I hope it is not the placebo effect and is actually due to the massive columns and larger bases on this 12k pound lift.

Also, if anyone is interested, I uploaded the arrival and setup video of my new Bendpak 12APX lift yesterday.
Mike, just an idea to explore as the only issue I have had with my lift is how the lift pads on both the Round and Square pad wear/dryout fairly quickly and Bendpak is proud of theirs. I bought some sacrificial ones off of amazon that I place on top of the existing pads to protect them and it has extended their life dramatically.
 
To avoid these ads, REGISTER NOW!
OP
Z

zmotorsports

ALLIANCE MEMBER
Joined
Oct 20, 2009
Messages
21,477
Location
Northern Utah
Mike, just an idea to explore as the only issue I have had with my lift is how the lift pads on both the Round and Square pad wear/dryout fairly quickly and Bendpak is proud of theirs. I bought some sacrificial ones off of amazon that I place on top of the existing pads to protect them and it has extended their life dramatically.

Thanks Duke, I have been pretty careful with the ones on my Ammco and in the 14+ years I had that lift, I replaced the pads twice and did the same thing, purchased some aftermarket ones that matched the size from a vendor other than the original manufacturer.
 

signcrafter

Well-known member
Joined
May 9, 2012
Messages
12,525
Shops looking good MIke. I know what you mean about getting some simple things knocked off the to do list, mine is long and time and money aren't always my friend. It's easy to put off those little touches because things still function without doing them. But feels good when you finally get them done.

Looks like next project might have something to do with our test the other day. LOL
 
OP
Z

zmotorsports

ALLIANCE MEMBER
Joined
Oct 20, 2009
Messages
21,477
Location
Northern Utah
Shops looking good MIke. I know what you mean about getting some simple things knocked off the to do list, mine is long and time and money aren't always my friend. It's easy to put off those little touches because things still function without doing them. But feels good when you finally get them done.

Looks like next project might have something to do with our test the other day. LOL

Thanks Scott. Yep, struts sitting on the shelf awaiting installation.
 

ntsqd

Well-known member
Joined
Jan 22, 2005
Messages
997
Location
Lower left coast
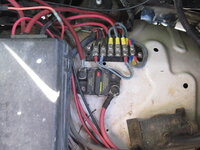
We had a fusible link fail in remote NV on our first trip anywhere with the '96 CTD. It powers the fuel cut solenoid. Looked like it literally was pulled apart, no burn marks. I'd stopped the engine and then it wouldn't restart. I was able to wire around it to get us going, but that failure got me to thinking about future possible failures of fusible links. The truck has 4 of them all feeding off the same stud. If one did fail again I wanted to be able to execute a fix quickly. I came up with this:
i-Bp5bTr9-M.jpg
I've become not a fan of terminal strips on vehicles, but they do have their uses. Those two on the right end are spares.
And just looking at that pic I need to look to see why that wire of the 285 breaker doesn't have some H-S on it.
 
OP
Z

zmotorsports

ALLIANCE MEMBER
Joined
Oct 20, 2009
Messages
21,477
Location
Northern Utah
Perfect timing Mike. Looking forward to gaining some tips and/or advice on using the Branick.

Thanks Scott, don't know about any tips or advice though, swapping out struts is pretty basic. Things to look for are just worn-out bushings on the top hat, which these come with new ones, and maybe a worn or disintegrated bump stop. Bad bump stops are not common, but I have seen them once I get the strut apart and the bellow/boot off.
 

signcrafter

Well-known member
Joined
May 9, 2012
Messages
12,525
Thanks Scott, don't know about any tips or advice though, swapping out struts is pretty basic. Things to look for are just worn-out bushings on the top hat, which these come with new ones, and maybe a worn or disintegrated bump stop. Bad bump stops are not common, but I have seen them once I get the strut apart and the bellow/boot off.
More so on using the branick Mike.
 
OP
Z

zmotorsports

ALLIANCE MEMBER
Joined
Oct 20, 2009
Messages
21,477
Location
Northern Utah
I didn't get much time in the shop last night. Got out of work late and it was in the high 90's when I arrived home and the lawns needed mowing. Of course I picked the hottest day of the week and the hottest time of the day. :rolleyes:


Once I finished running around the lawns, I kicked on the stereo in the shop and the fans and walked over to my workbench where I had a couple of small projects that I haven't been able to get to. I grabbed one to see if I could get something productive done before the wife arrived home from work.

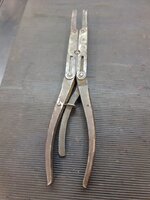
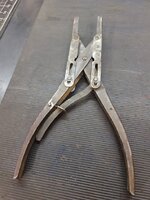
These are some vintage Model A valve spring compression pliers that my cousin had brought me to see if I could fix a couple of months ago when we had them over for Sunday brunch. He couldn't remember how the broken pieces went together and I couldn't figure it out at first. I looked online and that wasn't much help because I could not locate any that looked like these. I had picked them up several times over the past couple of months and set them back down but I really needed to get them done and back to their owner.
plier1.jpg

I looked for wear marks of some sort to figure out the orientation of the broken pieces.
plier2.jpg

After some very close examinating of the pieces, it finally clicked how they fit together.
plier3.jpg

Once the orientation was figured out, I took a small Roloc disc and knocked the corrosion off and cleaned the pieces with some acetone before TIG welding them together.
plier4.jpg

Once both sides were welded, I metal finished the part which was now one again.
plier5.jpg

I then filed the head of the mushroomed pin down enough to remove it from the handle, slid the freshly welded part into position and just as I was about to smack the end of the pin and mushroom the head again, I figured I had better give it a test run. Glad I did because I had the lock in backwards. The ratchet mechanism was locking on the compression stroke and not holding, so I flipped the lock around and now it holds in the compression direction.
plier6.jpg

This might be a better visual of how the serrated teeth bite into the locking mechanism to keep the jaws from opening once set in compression. At that point I laid the pin on the vise anvil and gave it a couple of smacks to mushroom the head a bit so it wouldn't fit back through the hole in the handle.
plier7.jpg


I text a completed picture to my cousin informing him that they were done and that I could drop them off this weekend, but he called me immediately and said he would come and get them. He asked if he could bring a couple guys from his Model A club by my shop and show it off. Evidently he was telling a few of them about my shop and they would like to see it. I'm sure they'll drive their Model A's over as these guys arent' afraid to drive their cars, so I'll have to snap a few pictures.

Thanks for looking.
 

fouckhest

Well-known member
Joined
Jul 24, 2013
Messages
1,871
Location
Greer, SC
My wife and I keep joking that I think I am capable of doing things other than gears. :bounce: I really don't necessarily want to be known as just the "gear guy". :rolleyes:

Nothing wrong with working in your comfort zone! Seems to be working out well at this point, no need to ride the struggle bus for a side hustle.
 
OP
Z

zmotorsports

ALLIANCE MEMBER
Joined
Oct 20, 2009
Messages
21,477
Location
Northern Utah
Nothing wrong with working in your comfort zone! Seems to be working out well at this point, no need to ride the struggle bus for a side hustle.

While I agree with being in the comfort zone Mike, I also don't like the idea of specializing and like a change of pace if I'm being honest. Plus, I really don't want to be known for only doing one thing, such as gears. I like to think of myself as pretty well-rounded and doing one thing a LOT kind of counteracts that image.
 

fouckhest

Well-known member
Joined
Jul 24, 2013
Messages
1,871
Location
Greer, SC
While I agree with being in the comfort zone Mike, I also don't like the idea of specializing and like a change of pace if I'm being honest. Plus, I really don't want to be known for only doing one thing, such as gears. I like to think of myself as pretty well-rounded and doing one thing a LOT kind of counteracts that image.

Totally get that! Reading back, that may have not sounded as intended, was certainly meant to be a light hearted comment :cool:
 
OP
Z

zmotorsports

ALLIANCE MEMBER
Joined
Oct 20, 2009
Messages
21,477
Location
Northern Utah
Owning an aging RV has it's benefits as well as concerns. I feel I can fix/repair quite a few things, but one thing that worries me is parts availability on an aging rig. I follow several RV forums, Monaco in particular, and I try to be mindful of what others are being faced with in hopes of staying ahead of the issues on our own coach.

I had an issue with our Onan 10kw Quiet Diesel about 12-14 years ago and after a lot of diagnosing determined that it was the engine control module that was the culprit. I sourced a new OEM one from my local Rocky Mountain Cummins/Onan dealer and it has run perfect since. I have continued to perform routine preventive maintenance but still worry about the unknowns.

I have been seeing a trend on these older Onan HDCAA 10kw and 12.5kw generators where people are having issues with their ECM's and having difficulty locating new ones because the OEM is discontinuing many parts for these older units. Although I haven't been having any issues with mine, I want to be proactive and have a spares on hand for various components in the event I ever do have a failure. I have a few spare parts for our Aqua-Hot system as well due to parts being harder to come by for these older units. I have dealt with a company called Flight Systems for years who rebuild many circuit boards and controls and do an outstanding job. I reached out to them a while back about a completely unrelated repair and happened to inquire about the availability of these ECM's and was told they have quite a few and they weren't as popular as the modules for the 7500 or 8k Onan's, which makes sense as the 10kw and 12.5kw are much less common than the others.

More recently a gentleman on an RV forum was having a problem with his 12.5 kw Onan as it was intermittently shutting down. The ECM's are one of the known causes to be a source of that problem. Truth is, there are a host of issues that can cause the "intermittent shutdown" symptom, but unfortunately, I think many people don't do the proper diagnosis and just throw the parts cannon at whatever they're working on. I tried to walk this gentleman through several steps to diagnose it but he ended up falling prey to the overwhelming pressure to start replacing parts. Who knows, maybe it is the ECM on his, but without diagnosing he's just guessing.

Anyways, he came back to the forum and mentioned that several of the other parts he replaced didn't cure the problem and that he called his local Cummins/Onan dealer and they could not get the ECM because it was discontinued and he was in full panic mode. It was recommended that he call Flight Systems. The thing I like about Flight Systems is that they generally not only repair the components but also are very good at upgrading if there are any known common failure points or issues.

Reading this I also began to worry about the availability if I ever needed another one down the road, so I called Flight Systems and talked to one of the guys whom I have dealt with in the past. He said they had some but inventory was depleting and then I also discussed what upgrades they had done so I decided to buy one outright without a core, this way I have a spare in the coach as there is nothing wrong with my ECM. Their rebuilt units come with a 2-year warranty and although my 12+ year OEM one was still working fine, I thought I would install it and keep the OEM one as my "known good" unit and carry it in the coach. I ordered it around the first of June and they shipped it immediately after testing, so it has been sitting on my shelf for nearly 2 months now as I just haven't had time to swap it out.

It's not a terrible job, but there are a lot of things that need to be removed to gain access to the ECM which is located inside the air box/silencer as it is cooled by incoming air. Top cover had to be removed first.
ecm1.jpg

Then a couple of hoses moved, some ducting removed and then the air silencer box can be pulled back away from the front of the enclosure which then exposes the ECM.
ecm2.jpg

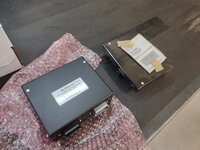
New unit from Flight Systems in the foreground and the 12+ year old OEM one in the background. I did notice a couple of changes in components between the two.
ecm3.jpg


ecm4.jpg


The new one was installed, everything put back together and then I ran the generator powering a couple of my roof A/C units while I put tools away and cleaned up. So far everything seems to be purring like a kitten.

Thanks for looking.
 
OP
Z

zmotorsports

ALLIANCE MEMBER
Joined
Oct 20, 2009
Messages
21,477
Location
Northern Utah
Mount it on a heat sink with thermal paste…

No sense in reinventing the wheel, besides, there's no metal to transfer heat to, everything is plastic/composite where the ECM mounts. To be honest, having it directly inside the air box with fresh incoming air is going to do more for cooling than any thermal transfer paste.

Personally, I think is has more to do with the bouncing around and vibrations than heat though. When I replaced my ECM last time I placed rubber washers on the studs sandwiching them between the air box and the enclosure thinking maybe it would transfer less vibration through to the ECM. Not sure if it helped or not but made me feel like I made an improvement. :bounce:
 
OP
Z

zmotorsports

ALLIANCE MEMBER
Joined
Oct 20, 2009
Messages
21,477
Location
Northern Utah
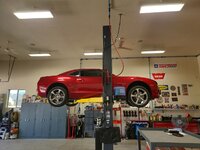
Last night I decided to rack the Camaro for a LOF service as well as throw a few maintenance items at it that have been sitting on the shelf for several months. I have just under 67k miles on it and figured I would replace the belts and spark plugs. Looking at my notes last night, it is coming up on 3 years since I purchased this thing and the wife and I have only put ~5k miles on it in those 3 years. It is a blast to drive, but I really need to get this thing out and drive it more. :unsure:

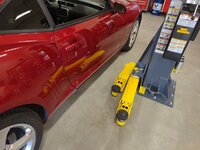
I was a little anxious about driving it through the new lift as the arms are so massive on my new Bendpak 12APX. On my Ammco 10k pound lift, the front arms were not offset so I had to pull the car through the columns past the doors, get out and kick the arms under the car then back up so they'd clear the front tires.
cam1.jpg

On this lift with the offset front arms I can kick the front arms back parallel to the rear arms, then drive through and stage the car properly between the columns.
cam2.jpg

Then I can swing the front arms forward to reach under the car. I was being extra cautious this first time until I could confirm all of the arms and pads cleared the body so I didn't introduce any new scratches or dings to the car. The front arms clear, barely, but they swing forward nice and smooth, then the innermost (smallest) tube could be extended and the pad threaded up to make contact with the body without contacting any of the skirting or body cladding around the car.
cam3.jpg

Rear was a mixed bag, the contact point was a bit further under the car and just out of reach for the threaded telescoping pad mounts, so a short (2.5") adapter was inserted and then the pad could be screwed to almost the lowest point and both front and rear could lift evenly and level. THIS is why I prefer the threaded telescoping pads slightly over the standard frame cradle mounts that the lift comes with. For cars and most SUV's I prefer the adjustable pads and the trucks and Jeeps with full frames I like the frame cradles.
cam4.jpg

I love the height that this thing raises to as well. About 8 inches more than my previous lift.
cam5.jpg

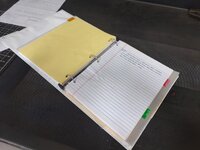
I grabbed my document book for the car so I could update the records. I plan on keeping this current so when I'm gone maybe it will have some meaning to either my son or grandson who will inherit the car.
cam6.jpg

cam7.jpg

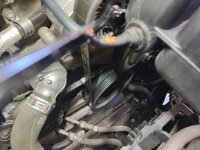
I wanted to get the belts off to ensure that I have purchased the correct ones.
cam8.jpg

Main belt looks correct.
cam9.jpg

It is actually in good condition and probably didn't need to be replaced with only 67k miles, but it is also 13 years old so I figured it would be good to install new and carry these as spares.
cam10.jpg


Stay tuned for more.
 
To avoid these ads, REGISTER NOW!
Top Bottom