To avoid these ads, REGISTER NOW!

Inside Doc's Shop...

To avoid these ads, REGISTER NOW!
OP
D

DocsMachine

Well-known member
Joined
Sep 16, 2006
Messages
1,869
Impressive machining! I am however left totally clueless - what are those used for?

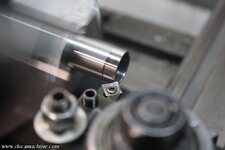
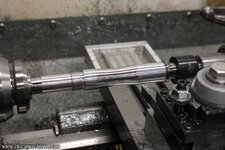
-It's part of a 3-piece barrel system for paintball guns, called a "Freak Barrel".

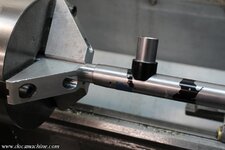
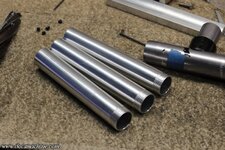
There's a tip (the black thing with holes in the previous photo) which can come in different lengths, styles and colors, an insert (a thinwall tube that comes in different bore sizes) and in this case, a back, the part that actually screws into the gun.

The back holds the insert and accepts the tip, making a complete barrel.

What I've been doing for a while now, is making 'backs' to fit older, out-of-production paintball guns, and in this case, making them out of a material other than aluminum. We, as in most other sports/hobbies, have contingents of those who like customizing their guns, or even building them from scratch, so I end up making one-off goodies like this pretty often. :)

Doc.
 

Jeff Ivers

Well-known member
Joined
Apr 9, 2010
Messages
2,561
Location
Oklahoma
-It's part of a 3-piece barrel system for paintball guns, called a "Freak Barrel".

There's a tip (the black thing with holes in the previous photo) which can come in different lengths, styles and colors, an insert (a thinwall tube that comes in different bore sizes) and in this case, a back, the part that actually screws into the gun.

The back holds the insert and accepts the tip, making a complete barrel.

What I've been doing for a while now, is making 'backs' to fit older, out-of-production paintball guns, and in this case, making them out of a material other than aluminum. We, as in most other sports/hobbies, have contingents of those who like customizing their guns, or even building them from scratch, so I end up making one-off goodies like this pretty often. :)

Doc.
Thank you for clarifying!
 
OP
D

DocsMachine

Well-known member
Joined
Sep 16, 2006
Messages
1,869
By request: Making a super-minimalist paintball barrel. :)

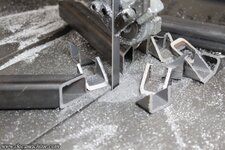
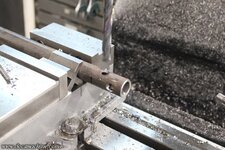
We start by bandsawing off some heavywall aluminum tubing:

phantom01.jpg

This gets faced square at one end, and both IDs deburred:

phantom02.jpg

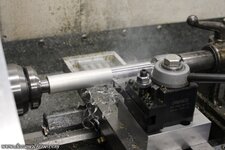
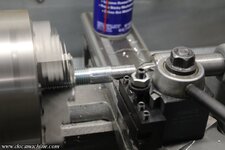
Boot up the homebrew CNC, which was already configured for a straight OD turn between centers, and cut the OD down to 1" even:

phantom03.jpg

This also makes the ID concentric to the OD, which will become important in a moment.

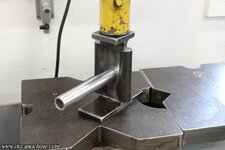
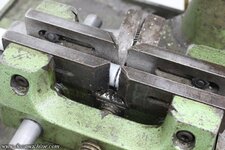
The turned blank then gets squished in my recently-made crimping die:

phantom04.jpg

That squeezes the end down, reducing the ID to about .665" or so.

phantom05.jpg

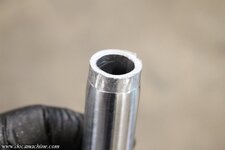
That then goes into the soft jaws on the Sheldon, and the crimped end faced back to square, and bored out to about .700".

phantom06.jpg

With the OD and ID concentric, that new short ID section is still concentric to the rest of the bore.

To finish it off, the ID is reamed back to size, leaving a short "step" at the end to retain the insert.

phantom07.jpg

Then, as I'd miscalculated how long the blank needed to be, I parted off about an inch, and carefully faced it a touch past that to get the insert depth correct.

phantom08.jpg

Switching back to the regular 3-jaw, I chucked up a chunk of 7/8" round stock from the junk bins, and turned a short cone on the end.

phantom09.jpg

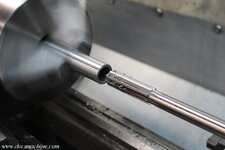
That becomes a new center, so the piece of tubing can be turned between centers again, to reduce the OD even further.

phantom10.jpg

Switching back- again- to the soft jaws (they're bored-in-place, and thus more exactly concentric to the spindle axis than the typical 3-jaw) I turned a short step...

phantom11.jpg

And then threaded it to 14 TPI stub ACME.

phantom12.jpg

A little deburring and a quick test- and it fits!

phantom13.jpg

And there we have it- three of pretty much the absolute most minimalist paintball gun barrels possible. :)

phantom14.jpg

Doc.
 
OP
D

DocsMachine

Well-known member
Joined
Sep 16, 2006
Messages
1,869
Finally got that insert caddy/tray thingie from a month and a half ago done!

Buddy of mine helped me with the woodworking- he has actual woodworking tools- and was kind enough to... er, critique some of my design choices. :) Suffice it to say that I am not conversant in how a wood project like this is supposed be designed and assembled, and so there was some conflict between "how I thought it should go" and "doing it the right way". :D

Doing a few mid-project but thankfully minor design changes didn't help much, either.

Anyway, he attempted to recycle some of my parts and my general concept, and came up with this:

tray1.jpg

And yes, every glitch and weehaw on there is because I didn't know how to do it the 'right' way. :)

But, it's 100% functional, and just a tool-drawer organizer, not a friggin' heirloom armoire, okay? Anyway, that got slathered with stain, without bothering to try and remove or sand off some of the excess glue- see previous statement- and left to dry.

tray2.jpg

And hey, it's just cheap craft ply anyway.

Once dry, I gave it two thick and kinda runny coats of clear poly, and set that aside to cure for several days. And finally, earlier today I slipped it into the drawer and did a kind of preliminary load of the goodies:

tray3.jpg

Seven rows of insert boxes, potentially three deep on each, and then seven pockets for whatever else- allen keys, Torx keys, some drills, some still-packaged taps, a small handful of used inserts (most of which still have at least one good edge- the actual scrap-carbide tin is in the other room) and the baggie of spare insert screws.

It may not look like it, but that's actually a pretty good improvement in the old drawer, and between it and the pegboard, has notably improved storage and ease-of-use here at the Machine.

Doc.
 
OP
D

DocsMachine

Well-known member
Joined
Sep 16, 2006
Messages
1,869
The Thing begins! :)

Alaska's absurdly short summer has started, and I have several projects I've been wanting to get done. Unfortunately, jamming the shop full of machine tools means that some things need to be done outside, whether for reasons of space, or dirtiness (welding, grinding) or whatever (painting, cutting wood, etc.)

This particular one I've been wanting to do for at least three years now, for reasons of storage and organization. Best I'll be able to do is the usual- sneak in a few minutes here and there, but this won't be a very complex build so hopefully it won't take long.

I started by getting out some bits and remnants of some 1" square tubing, 1/8" wall, and bandsawing the bejeebers out of it.

cart01.jpg

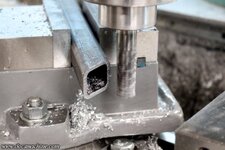
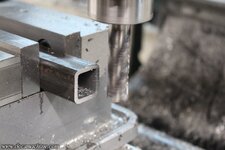
Each one of those, I ran through the mill, to give them a perfect miter and uniform lengths.

cart02.jpg

Like so:

cart03.jpg

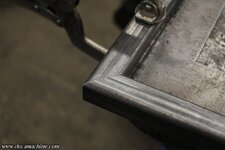
Those get clamped, one pair at a time, to the welding table...

cart04.jpg

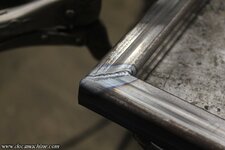
And, this is the tricky part that will stun and amaze you, I welded them together!

cart05.jpg

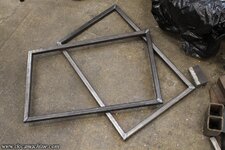
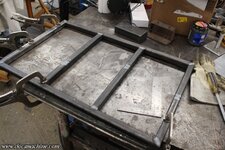
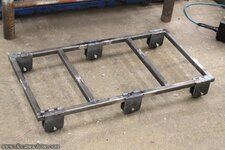
Repeat as necessary, and we all of a sudden, we have two... rectangular frame thingies. :D

cart06.jpg

That was, unfortunately, all the time I had for this project today. Everything else was 'bulk' work, drilling a basketful of parts, deburring a different basket, etc.

More to come!

Doc.
 
OP
D

DocsMachine

Well-known member
Joined
Sep 16, 2006
Messages
1,869
Today's bite at the elephant:

Cut two more pieces of square tubing, and milled the ends flat n' square:

cart07.jpg

And those got TIG'd into what will become the bottom frame:

cart08.jpg

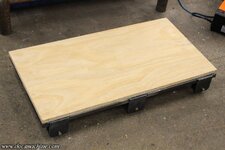
Which was pretty much the sum total of what I could do for the frame, until I can get more material. The only other thing I could do, is get out the chunk of plywood I'd been saving for this exact project, since I'd bought it in '22 or '23, and now that I had the frame dimensions, I was able to cut one of the decks to size:

cart09.jpg

And that, too, became the end of what I could do on this job, today. I need a second chunk of ply for the other deck, and I need to get a job off the drill press first, then use that to drill a bunch more holes.

But, time was limited anyway, and I had other tasks to do. More to come!

Doc.
 
OP
D

DocsMachine

Well-known member
Joined
Sep 16, 2006
Messages
1,869
Okay, the car project is still stalled, waiting for parts. The floor pans should be here sometime this week, and the shifter parts next week. I just got the console mounting kit in today, but unfortunately it's supposed to rain lightly off and on most of the week.

Welcome to Alaska. :)

But, in the meantime, I've been poking along on the 'Thing'- these pics are from various days over the past week. I need this done since the various parts take up entirely too much of my rapidly-dwindling shop space. And, ironically, this is supposed to be a storage solution. :)

Anyway, since we last saw our intrepid heroes, they double-checked their math, and realized they'd made a boo-boo. This thing is a storage cart for tooling for the big turret lathe, mainly the collets- which are currently heaped in an old milk crate, which makes it tough to find a specific size.

The spacing the frame and plywood were cut to, only allowed a spacing of six rows of twelve holes- 72 collets in total. That's not bad, but I already have 56 collets, plus a dozen duplicates, and I know I'll be buying more. I need, for example, a better 1" collet- I have two, but one's been bored out slightly to 1.010" and the other doesn't have internal threads for a collet stop. I think I'm missing 1/2" as well, and my 9/16" is badly worn.

I wanted room to expand, and really, there's room under this machine- particularly for length. So, with a little finagling, I realized I could, with a little rework, fit seven rows of fourteen, for a whopping total of 98.

While I should have just remade the frames from scratch, I decided I'd just 'stretch' them. I first sliced 'em short-ways, and stretched 'em 3/4"...

cart10.jpg

And then about 5-1/2" long ways.

cart11.jpg

The patches aren't perfect- nothing on this cart is- but they'll do the job.

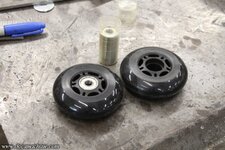
Anyway, with those done, I dusted off the inline skate wheels I bought over three years ago for this very project, and popped in the bearings.

cart12.jpg

There's supposed to be a spacer in between, and a smaller diameter axle, but I left the spacer out and will just be using 5/16" bolts. This is not a high-speed application. :)

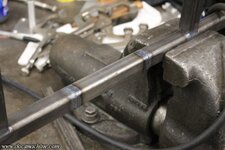
I took a chunk of 1/4" flatbar I had, and sliced it into sections in the bandsaw.

cart13.jpg

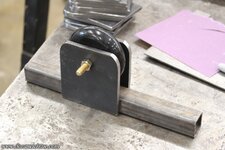
Those will straddle the wheel like so:

cart14.jpg

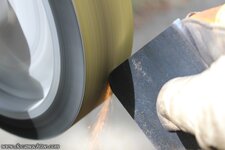
Giving plenty of support and clearance for them to roll. I then ran each one through the belt grinder, to round two corners off and buzz down the sharp edges.

cart15.jpg

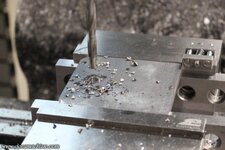
Then drilled in a somewhat uniform manner...

cart16.jpg

And test-fitted.

cart17.jpg

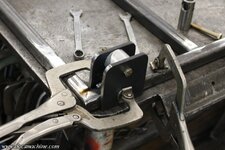
To keep the plates from distorting and 'pinching in' on the wheel, I made up an aluminum spacer with which the plates can be bolted to, maintaining spacing and alignment.

cart18.jpg

Some of it I rolled outside and used the MIG, but most I TIG'ed on the welding table. And once that was mostly done- there's much more welding to do- I cut about 3/8" off each bolt....

cart19.jpg

And test assembled the whole mess:

cart20.jpg

Unsurprisingly, it rolls nicely. It'll probably have about 300 pounds on it when it's done and loaded, but hopefully should still roll easily enough.

And finally, a fresh chunk of plywood for the lower level.

cart21.jpg

As always, more to come!

Doc.
 
OP
D

DocsMachine

Well-known member
Joined
Sep 16, 2006
Messages
1,869
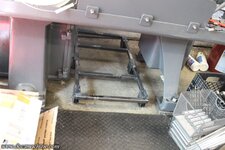
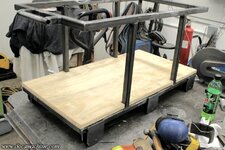
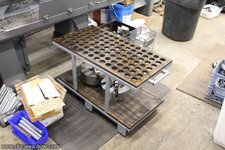
For those that have been wondering just what the heck this thing is, it's a tool cart. One specially sized to fit under the big Warner & Swasey turret lathe.

cart22.jpg

It'll effectively be a "drawer"- rolled out from under the machine to access the collets, rolled back under to keep it out of the way. That milk crate at the far right? That's how I store the collets now. :)

The lower level will be for the chucks- I have three for this machine, an 80-pound almost-10-inch 3-jaw, a 60-pound 8" 3-jaw, and a cheap import 4-jaw. I usually use the collets on this machine, and so the chucks tend to get stacked... wherever.

Again, these pics cover most of the last week- almost two. As noted before, I changed the dimensions of the frame, so I had to cut a fresh pair of plywood slabs. The top one- what will become the top one- I laid out a pattern about as tightly as I could, without making the ply too thin between the holes. After that, I screwed it to an old piece of particleboard I had left over. (It was actually the platen under a treadmill belt, off a machine I dismantled for parts over a decade ago.)

Hey, packrat, alright? :)

cart23.jpg

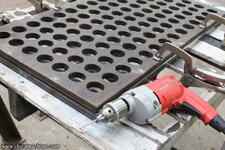
I then used a Forstner bit out a cheap kit I'd bought a few years ago from a secondhand store, and proceeded to drill ninety-three holes. The sacrificial particleboard greatly reduced the chipping and splintering of the bottom of the ply.

cart24.jpg

Turns out it was a really cheap kit, and the bit went dull two-thirds of the way through. I scraped it back to sharpish with a file- the metal wasn't very hard- and got the job done, but if I do this again, I'm gonna buy a real one.

The other five holes? The Forstner wouldn't track, because there was already a pilot hole where I'd put the screw. If I'd been smarter, I'd have offset the screw from the center, but kept it inside the drilled circle, and it'd have worked fine. But since I'm clearly not that smart, I got out a holesaw instead, and cut the last ones that way.

Anyway, after that, as per established procedure, I used a trim router and a corner rounding bit to... well, round the corners, of each hole and the edges, then used a palm sander to smooth things up a little.

cart25.jpg

I found I had a nearly full can of "dark walnut" stain- a little darker than I wanted, but hey, this thing's a shop cart, not a show truck. :)

cart26.jpg

(That was the underside. And the color differences are sunlight shadowed through a tree.)

As evidence of also not thinking ahead (and keeping in mind this was days apart, after the stain dried) I clamped it to the upper frame hoop, and marked off and drilled screw holes from the wood into the steel frame.

cart27.jpg

These then got tapped to 10-32. I don't truck with that "self tapping" stuff. :D

cart28.jpg

The wood got drilled out for screw clearance, and countersunk lightly.

Now, while we're on said top frame, we needed one more mod- a handle to grab and roll the whole mess with. (With which to roll it?) Anyway, two more pieces sawed off, squared up and then milled out:

cart29.jpg

A chunk of some tubing from the junk bins, buffed a little to remove the rust, and then precariously clamped in place.

cart30.jpg

And glued on!

cart31.jpg

I'm... um... a better machinist than I am a weldor. Really! Would I lie to you?

cart32.jpg

With that, I rolled the whole mess outside and used the MIG to tack and then weld the uprights and upper frame on. That was trickier than it looked, and my "welding table" wasn't helping. :)

cart33.jpg

With those fitted, it was back inside and back to TIG mode to finish up the welding, and at some point I cut the notches for the lower ply to fit around the uprights.

cart34.jpg

And yes, that's 'zero sugar' Mountain Dew. Blasphemy, I know.

Anyway, once fitted, that, too got stained and left to dry...

cart35.jpg

And today, when I finally had a chance to paint the frame, it was, of course, rainy and cold- about 44F. The cold wasn't so much of an issue as the rain, so I borrowed a friend's carport, and squirted it in there.

cart36.jpg

One heavy coat of self-etching primer, which dried surprisingly quickly- at least dry enough to topcoat- and one heavy coat of "Dark Machine Grey" Rust-O-Leum. I was going to use the matching-color alkyd enamel the lathe itself was painted with, but the last bit I had was mostly dried up, and I didn't feel like buying a whole 'nother can just for this. The spray is good enough.

I also cleared the wood, and all after curing most of the day outside, are back in the shop and should be ready to assemble by Wednesday afternoon.

Stand by!

Doc.
 
OP
D

DocsMachine

Well-known member
Joined
Sep 16, 2006
Messages
1,869
And now, the thrilling conclusion!

After getting a few other tasks for the day taken care of, I threw the wheels and wood on, and gave it a try under the machine:

cart37.jpg

Naturally, it fit nicely- almost like it was meant to be there. :) I could have had the top deck a couple inches lower, but I wanted lots of room for the chucks- they're heavy and tough to manhandle in and out.

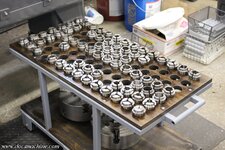
After that, I scraped together all the collets I have for this machine- I'd forgotten I had a box of 'emergency' or "soft" collets, both new and partly machined, but that was, after all, why I wanted the extra room.

cart38.jpg

A lot of work for a fairly simple result, but honestly, worth every minute. That reduced three loose and unsorted boxes into a single rack that at least has a little organization to it. The right-hand row is the hex and square, the rearmost two-plus-some rows are the machined and unmachined soft collets, the left two rows are everything up to about 7/8", and the center row is everything from 1" to 1-1/4".
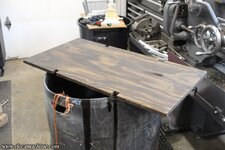
There's a number of duplicates; I have, it turns out, three 1/2", plus a number of somewhat odd sizes- 33/64ths, 45/64ths, etc.- and a couple of marked ones that have been clearly machined out for some job or other. Usually leaving a "step" inside to act as a work stop.

But, the important part is I can now see what I have, and find the size I need a lot faster and easier. The chuck storage is just icing on the cake. :)

And, it stows nicely out of the way, rolling relatively easily despite the whole mess likely weighing around 300 lb.

cart39.jpg

Yet another job checked off the list!

Doc.
 
OP
D

DocsMachine

Well-known member
Joined
Sep 16, 2006
Messages
1,869
Tallied up all the bins, boxes and baskets in which I have my various parts, either in the process of, or about to be fed through the CNCs. The shop is littered with them, and with everything that's been going on, I have to admit I've been kind of losing track of some of them.

But, wrangled 'em into some semblance of order- I need a rack or shelf arrangement I can organize these on, but I have zero room for such a thing. Anyway, turned out to be a nice, even twenty, totaling just over 550 parts. Some were nearly finished, some are just roughed blanks. (And one, I'm... not entirely sure just what I cut those for. :) ) The smallest is six parts, the largest is four bins holding seventy-eight.
Not counting the two 12-foot sticks out on the apron, or the eight six-footers stacked behind the machines, all of which also needs to be cut up and turned as well.

But, I was reminded of two bins of nearly-complete parts, so after getting a couple other tasks done today, I lit up the Logan homebrew CNC and finished 'em off.

Just starting...

progress74.jpg

Roughed....

progress75.jpg

Profiling....

progress76.jpg

And done. Simple cut, just over two minutes cycle time, and just to add a little flair.

progress77.jpg

Finally, buffed to 800 grit, washed in the ultrasonic, dried, and ready to pack up for anno.

progress78.jpg

With luck, I can have that box filled and shipped off by Friday.

Doc.
 
OP
D

DocsMachine

Well-known member
Joined
Sep 16, 2006
Messages
1,869
would never have guessed that paint ball gun parts are that big of a market.

-They're not, at least not anymore. The market was a lot bigger prior to the '08 recession, but that took the proverbial wind out of the market's sails. And since then, the sport has started seeing a lot more competition from things like airsoft, laser-tag, those new "Orbees" guns, and just plain online/multiplayer video games.

The only reason I still have a niche, is I make tiny runs of parts the bigger manufacturers won't bother with.

The marker that barrel above is meant for, the newest version of that model came out 20 years ago, and the company itself has been out of business for over ten. The guns still work, though, and a few parts here and there can keep them running. But no big shop will bother making runs as small as 40-50 parts.

Honestly, I'd be far better off finding a couple clients that want 20+K parts a year (which means not paintball) which would probably make me twice as much, with a quarter the effort. But I'm an enthusiast, and have been in this sport for over 30 years. As long as I can keep the lights on with this biz, I'm satisfied.

Doc.
 

larry4406

Well-known member
Joined
Jan 27, 2006
Messages
19,448
Location
Northern Virginia
@DocsMachine

Definitely a niche market, but hey it pays the bills, keeps the lights on, and you are self employed - all huge wins in my book! Your work looks great and I am jealous!

I know close to zero about paint ball or the guns.

We have "migratory" Canadian geese that are protected that have adopted my yard. From what I have read, I can't "harm" them, but I can harass them to encourage they go elsewhere. I have thought about a paint ball gun or even freezing round ice balls and using a modern sling shot. I like the paint ball idea better, but I would probably get hate from someone if there were a sudden amount of blood red or bright blue birds around the area.

Are the balls literally just a sack of say latex paint or can you get them with interesting interior contents (goose deterrent spray, etc)? I assume you can pick colors?

What is the range of a paint ball gun - say a goose at 100'?

Sorry for derail of your fine thread!
 
OP
D

DocsMachine

Well-known member
Joined
Sep 16, 2006
Messages
1,869
We have "migratory" Canadian geese that are protected that have adopted my yard. From what I have read, I can't "harm" them, but I can harass them to encourage they go elsewhere. I have thought about a paint ball gun or even freezing round ice balls and using a modern sling shot. I like the paint ball idea better, but I would probably get hate from someone if there were a sudden amount of blood red or bright blue birds around the area.

-Heh. You realize that's like asking how to use a drone to video the girl in the second floor bedroom while she's **********.

Yeah, people have done it, but frankly, those people are assholes, and make the legit users look bad.

One, what you're asking is probably illegal. "Harassment" in your case means noise or a scarecrow, not shooting them, even with something nonlethal.

Two, the ball won't break on the birds anyway. Shooting any typical fluffy animal is typically like shooting a hanging curtain. I know people that have shot dogs, moose and supposedly once, a wolf. I had the need once, to shoot a moose, myself. None of them broke- thick fur or presumably feathers are padded armor.

Three, just use an air horn, or maybe a firecracker or two.

Are the balls literally just a sack of say latex paint or can you get them with interesting interior contents (goose deterrent spray, etc)? I assume you can pick colors?

-The ball is a gelatin shell, like a Vitamin E capsule, filled with a nontoxic substance that's basically just thickened food coloring. Propylene glycol, food coloring and an edible wax called Sorbitol, usually. 100% biodegradable, and actually edible, though the fill tastes god-awful.

There are in fact, 'deterrent' balls, filled with a capsicum powder, or a CN/CS ('Mace') type powder. If you look close at some of the recent LA riot photos, you'll see some cops carrying paintball guns- they're shooting "Pepperball" rounds as an irritant, or rubber balls as a pain deterrent.

Players in general aren't overly happy about there, because assholes have brought such things to playing fields. We wish that, while they were developing those things, they'd have bumped the caliber up from nominally .68 to like .75- both a bigger payload, so to speak, and also non-compatibility with existing sport markers. (Except that being able to shoot them through off-the-shelf gear was one of the selling points.)

What is the range of a paint ball gun - say a goose at 100'?

-A good marker with decent paint should be able to hit minute-of-goose at 100 yards, but it might take you a few tries. These are not precision weapons. :)

Doc.
 

larry4406

Well-known member
Joined
Jan 27, 2006
Messages
19,448
Location
Northern Virginia
-Heh. You realize that's like asking how to use a drone to video the girl in the second floor bedroom while she's **********.

Yeah, people have done it, but frankly, those people are assholes, and make the legit users look bad.

One, what you're asking is probably illegal. "Harassment" in your case means noise or a scarecrow, not shooting them, even with something nonlethal.

Two, the ball won't break on the birds anyway. Shooting any typical fluffy animal is typically like shooting a hanging curtain. I know people that have shot dogs, moose and supposedly once, a wolf. I had the need once, to shoot a moose, myself. None of them broke- thick fur or presumably feathers are padded armor.

Three, just use an air horn, or maybe a firecracker or two.


-The ball is a gelatin shell, like a Vitamin E capsule, filled with a nontoxic substance that's basically just thickened food coloring. Propylene glycol, food coloring and an edible wax called Sorbitol, usually. 100% biodegradable, and actually edible, though the fill tastes god-awful.

There are in fact, 'deterrent' balls, filled with a capsicum powder, or a CN/CS ('Mace') type powder. If you look close at some of the recent LA riot photos, you'll see some cops carrying paintball guns- they're shooting "Pepperball" rounds as an irritant, or rubber balls as a pain deterrent.

Players in general aren't overly happy about there, because assholes have brought such things to playing fields. We wish that, while they were developing those things, they'd have bumped the caliber up from nominally .68 to like .75- both a bigger payload, so to speak, and also non-compatibility with existing sport markers. (Except that being able to shoot them through off-the-shelf gear was one of the selling points.)


-A good marker with decent paint should be able to hit minute-of-goose at 100 yards, but it might take you a few tries. These are not precision weapons. :)

Doc.
The search continues…..
 
OP
D

DocsMachine

Well-known member
Joined
Sep 16, 2006
Messages
1,869
Since nobody's paying me to work on my car, every now and then I have to do some actual payin' work. :) Or at least "hope to eventually get paid" work, often as not.

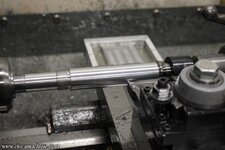
Out of the 20-odd bins of parts I have scattered randomly about the shop, I've recently emptied four... and filled two more. :) Today's project was to finish up, much as I could anyway, yet another batch of barrel blanks. I make several flavors of these, so it's a common project.
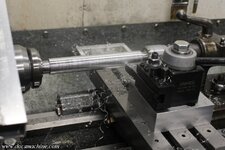
And, as per long-established procedure, the blanks first got fed through the Logan, to be turned between centers, down to diameter.

progress79.jpg

I've been putting a lot of miles on that poor thing- I've been wondering if I don't now have more hours on it as a CNC than I ever did on it as a manual lathe...

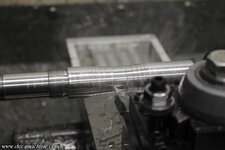
Anyway, once turned to size, they got fed into the Omni for the female tip threads...

progress80.jpg

And then again for the breech end threads.

progress81.jpg

I didn't yet have these threads programmed into the library for this particular tool set, so I had to take the time to write a fresh program, and test & tweak it.

Et voilá! (Which is French for "hey, check this s**t out!" :D )

progress82.jpg

Lotta miles recently on this one, too. :)

progress83.jpg

That's a fifth bin almost done, just need to do the profiling step again. The buff, wash, dry, wrap, pack and ship off to the anodizers!

Doc.
 

Firstram

Well-known member
Joined
May 16, 2017
Messages
1,391
Do you buy tubing with the proper ID for the barrels? I’ve never seen you mention boring or reaming the blanks.
 
To avoid these ads, REGISTER NOW!
OP
D

DocsMachine

Well-known member
Joined
Sep 16, 2006
Messages
1,869
Do you buy tubing with the proper ID for the barrels? I’ve never seen you mention boring or reaming the blanks.

-Yep, it starts with an off-the-shelf heavywall tubing. As I said earlier, this is a product a larger company developed and marketed for the sport many years ago, and I'll bet three months' paycheck they used the exact same inexpensive, readily-available material. They just handled it differently since they had better, faster machines.

Doc.
 

Fixr

Well-known member
Joined
Dec 23, 2012
Messages
9,708
Location
SW VA
-Yep, it starts with an off-the-shelf heavywall tubing. As I said earlier, this is a product a larger company developed and marketed for the sport many years ago, and I'll bet three months' paycheck they used the exact same inexpensive, readily-available material. They just handled it differently since they had better, faster machines.

Doc.
Hmmm. You get paychecks?
 
OP
D

DocsMachine

Well-known member
Joined
Sep 16, 2006
Messages
1,869
Hmmm. You get paychecks?

-It can be said I receive a certain amount of money each month, in wildly varying yet largely unimpressive amounts, yes. :)

I'd imagine what I make is little more than a rounding error to some of you, but at the same time, it's kept the lights on (well, mostly :) ) for a quarter-century so far. :D
Doc.
 
OP
D

DocsMachine

Well-known member
Joined
Sep 16, 2006
Messages
1,869
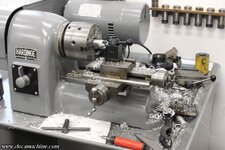
I've been getting quite a bit of use out of the little speed lathe lately, turning that first reference face on several baskets full of round parts destined either for the CNC turning center or one of the turrets.

holder01.jpg

holder02.jpg

In this case, since the parts are generally fresh from the saw, they'll have a burr at both ends. If I'm using a collet in the lathe, that burr either needs to be hand filed off, or buffed off in the belt grinder. To save a little time, I just swapped over to the 3-jaw and used that. The problem there is I have no place to hang the chuck key- I'd thought about making a storage rack for it on the wall, along with the collet rail, but I need something to hold it while I'm using it.

The base casting of the lathe has this hole, tapped 1/2-13, meant for a lifting eye to move the machine around.

holder03.jpg

I pondered some options, and poked around my materials racks, 'til I lucked upon the perfect piece:

holder04.jpg

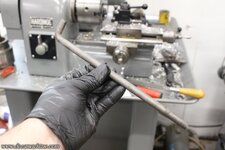
No idea where I got that, but it's an old "J-bolt" or anchor bolt, meant to be cast into concrete with the threads sticking out. That gives you something to bolt the wall or whatever, to. The end is roll-threaded, with kind of poorly formed but functional 1/2-13 threads, and the length, as it turns out, is pretty much perfect.

And you guys make fun of my packrattery. :)

I grabbed a chunk of some 3/16" flatbar out of the bins, cut it to "that looks about right" and beltground the ends into something that emulates "finished" remarkably well.

holder05.jpg

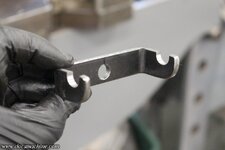
This goes for a ride through the mill, to get two notches and a hole...

holder06.jpg

And then lightly squished in the forty-tonner.

holder07.jpg

Et Voilá as the pretentious sorts might say.

holder08.jpg

That gets TIG-welded to the dogleg of the J-bolt...

holder09.jpg

And the whole thing sprayed black.

holder10.jpg

Once that's had a chance to cure a little, it's screwed into the lathe base and tightened with a nut and washer.

holder11.jpg

It's easy to reach and grab, holds the key securely, and keeps it out of the way no matter what you're working on, whether you're using the chuck or the collet assembly.

Now I just gotta convince that muscle memory to start using it, rather than just dropping the key in the tray like I've been doing for the past three days. :)

Doc.
 

SilverJimmy

Well-known member
Joined
Apr 14, 2012
Messages
1,643
Location
Prescott/Flagstaff, AZ
When I was in 8th grade metal shop the instructor got tired of students turning on the drill press with the chuck key still in the chuck. So he made a cover over the ON button that could only get pushed by inserting the smooth end of the chuck key. Maybe a micro switch in your fancy chuck key rig would get you into better habits? I know I should have a switch on all my stuff to keep me from maiming or killing myself! 😆
 
OP
D

DocsMachine

Well-known member
Joined
Sep 16, 2006
Messages
1,869
Yeah, I've seen that kind of thing- there's even commercial versions of it. :)

But, that's also the sort of thing for shops with untrained or minimally-trained people. I've been doing this for some thirty years (bought my first mill-drill in '94) and had a machine shop instructor that harped hard on chuck keys of all flavors.

Even today, I take my hand off the chuck key to adjust the part, and something in the back of my head shouts "DON'T DO THAT YOU *****!" :D

Doc.
 

Firstram

Well-known member
Joined
May 16, 2017
Messages
1,391
Yeah, I've seen that kind of thing- there's even commercial versions of it. :)

But, that's also the sort of thing for shops with untrained or minimally-trained people. I've been doing this for some thirty years (bought my first mill-drill in '94) and had a machine shop instructor that harped hard on chuck keys of all flavors.

Even today, I take my hand off the chuck key to adjust the part, and something in the back of my head shouts "DON'T DO THAT YOU *****!" :D

Doc.
Same. I’m so bad about not taking my hand off the Chuck key that I often leave it in random places because I carry it with me without realizing it.!
 
OP
D

DocsMachine

Well-known member
Joined
Sep 16, 2006
Messages
1,869
Not the only thing I did today, but this was the big one. :)

Nearly a year ago, I needed to cut some material into short bits to feed into the CNC turning center. A buddy of mine has a Scotchman "cold saw", but as I understand it, it had been disconnected (apparently, I find out, back in 1994!) and requiring 3-phase, hadn't been used since. Last year, I at least showed the thing still worked, using a KB VFD, but ran out of foolin'-around time and had to have the parts cut elsewhere.

The great cycle comes around again, and thanks to my unconscionable wasting of two months to put the new TWB book together, the renewed need is rapidly approaching critical levels.

In the time since last year, my buddy picked up a VFD of his own for it, and two new blades- the one that was on it was badly worn. Earlier this week, I'd picked up some electrical bits, and so it was time to get this ball rollin'. Said saw had been re-relegated to the back corner, so we once again extracted it.

progress115.jpg

One of the first things it needed was the handle- a bar sticking out the top with which the operator, you know, makes the chop saw, well, chop. :)

In this case, the bar is also the filler plug for the gearbox- and said bar has been missing for some time. An inspection inside through the hole shows it doesn't look too bad in there, but I plan in flushing the oil a couple of times.

They think they have the original handle somewhere, but until then, I took a measurement of the hole (the machine was made in Sweden, so it's metric- 20mm coarse) bought a big bolt, and went to work. I porta-banded off the head...

progress116.jpg

Faced the end square...

progress117.jpg

And turned just a smidgen off the OD so it'd fit inside a chunk of tubing.

progress118.jpg

Like so:

progress119.jpg

Said tubing got four 1/2" holes drilled crossways into it...

progress120.jpg

Which I then cleaned up and deburred.

progress121.jpg

With that, the bolt was glued in place with some heavy plug welds, and things generally deburred again.

progress122.jpg

I hauled the whole mess over to my buddy's shop, and hooked up his VFD to a fresh power cord and power switch.

progress123.jpg

The VFD comes with a mounting template, so I drilled the mounting holes in the side of the chassis. Unfortunately the borrowed drills I had were on the dull side, and nobody seemed to have a centerpunch, so things wandered a bit, and it ended up slightly crooked.

progress124.jpg

But, once it was all plugged back in, everything worked like a champ, including both settings of the 2-speed motor. (The old lo-off-hi switch is now just lo and hi, with the VFD of course doing the off and on.) We may still add some stop and start buttons on the front of the chassis, but it'll do for now.

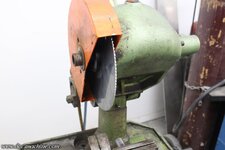
The other thing that annoyed my OCD was the fact that I'm pretty sure this thing hasn't been cleaned since 1994. :)

progress125.jpg

But scarcely an hour and a half later, with some Purple Power, WD-40, Scotchbrite (which seems somehow appropriate :) ) and both wire and plastic toothbrushes, I got it fairly clean:
progress126.jpg

The new blade plunked right into place...

progress127.jpg

And after reinstalling the clamshell blade guard, she was back up to 100% again, and ready to make it's first chips since the Clinton Administration.

progress128.jpg

I'd brought along a chunk of heavywall aluminum tubing- the first chunk of scrap I could grab- and unsurprisingly, it sailed right through it.

progress129.jpg

I'm hoping to try the coolant system tomorrow. The machine has a mechanical pump attached to the gearbox- I'm told it's like an old SAAB fuel pump- but it looks like that's been replaced by an electric submersible pump. I hope it works so I don't have to cobble something- and as I need to cut some stainless steel, coolant is a must.

If I'm lucky, I can get at least one bar sliced up tomorrow, and get them into the Omni over the weekend.

Doc.
 

SilverJimmy

Well-known member
Joined
Apr 14, 2012
Messages
1,643
Location
Prescott/Flagstaff, AZ
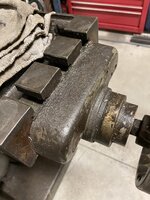
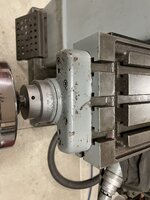
I have a bunch of machines and equipment from my friend’s machine shop. All of them have 40-50 years of dried on cutting fluid and oil mixed with chips baked onto them. I don’t want to refinish them, I just would like to clean them up and get down to the original finish or at least what’s left of the finish. Do you have any good suggestions for cleaning that stuff off? I’ve tried soaking rags in mineral spirits and then letting the soaked rag sit on the caked on crud. That kinda works but is really slow. You have a better way?
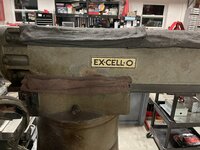
This is the Ex-Cell-O mill my mentor bought brand new in 1974. It doesn’t have any dings or marks on the table and the ways are perfect, he just never cleaned it except to brush chips off!
D93635CC-7B64-4F36-9E26-E46E0162E7AC.jpeg197D8E70-BF52-4D69-8BCE-5ED623D577D2.jpeg
The crud is thick, I could barely read the dials! I soaked it with mineral spirits for a couple days…
ED3B3D1C-848C-4ED2-8792-7B6669F85CBC.jpeg5F81006A-7441-403A-A02A-8B9B64F28561.jpeg56B8DDD3-00D9-463F-8FEB-E600990323DD.jpeg
I only have one side done and haven’t even attempted to clean the Sony DRO and glass scales.
Any TIPS?
Thanks and I also want you to know I definitely enjoy your thread!
 
OP
D

DocsMachine

Well-known member
Joined
Sep 16, 2006
Messages
1,869
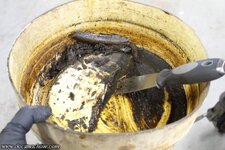
As noted, the old coolant system was a mechanical pump, that had been replaced by an electric submersible. I'm not 100% sure how the reservoir setup was arranged- it kind of looks like the upper chamber was a catch tray, and that went to what was probably a removable tray below that.

Either way, the current setup used the cut-off bottom of a plastic solvent barrel as the catch tub- which of course still had some truly antique oily scum in the bottom. :)

progress130.jpg

I scraped most of that out, then dumped in a few gallons of plain water, just to see if the pump worked. Which, thankfully, it did, and quite well. So I added a dose of some soluble oil I had, and let it circ a bit 'til it was mixed.

progress131.jpg

I know this coolant mix is tough on paint- I had to paint the drip tray of the Logan with POR-15 to keep this stuff from eating the enamel. So after a couple of days of circulating this stuff, the inside of the pump and tub should be pretty clean- I plan to rinse it out with fresh water when I'm done.

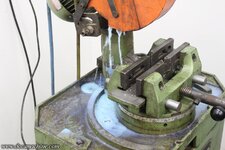
Anyway, nothing left but to try it! I'd marked off the bar of stainless to the proper length, since this machine doesn't have a work stop, and I didn't have time to fab one. With the saw set to the slower speed...

progress132.jpg

... I can't say it "sailed right through", but it had no difficulty chewing through, and the motor didn't even sound like it knew it was cutting.

progress133.jpg

And, in relatively short order, I had the first bar sliced up into a nice even fifty blanks.

progress134.jpg

Blade still seems sharp as when we started, everything seems to be working great. Well worth the time it took to get the thing back up and running- especially since I have three more sticks to do. :)

Admittedly the saw's not mine, and I would like to have it, but at least I have almost-unfettered access to it, so that's almost as good.

On the plus side, I already have this batch into the turret for drilling, let's see how much I can get done this weekend. :)

Doc.
 
OP
D

DocsMachine

Well-known member
Joined
Sep 16, 2006
Messages
1,869
Do you have any good suggestions for cleaning that stuff off?
-Yes, actually. You might be surprised how well Simple Green or Purple Power work.

What you're looking at is generally oil residue- partially dried oil residue, particularly from soluble-oil coolants and brushed-on cutting oils. Solvents will cut this stuff, eventually, but I've been regularly surprised how well SG or PP work.

In the first pic of the saw, see the drip trails down the front? Look at the later pic in the first post- they're gone. That was literally a few squirts of Carquest "Purple Cleaner" (their in-house brand of Purple Power) a few moments wait, and wiping it off with a paper towel.

When I rebuilt my latest lathe last summer, there were old coolant stains that gasoline wouldn't touch, but would start to run as soon as I squirted on some SG.

Doc.
 
OP
D

DocsMachine

Well-known member
Joined
Sep 16, 2006
Messages
1,869
Evening update: I didn't get 'em all drilled, but I got a good chunk of 'em done. Too many other things calling for my attention, it's a 'one bite at a time on the elephant' sort of thing. :)

I've shown this before- an insertable carbide spade drill, run straight in, no center drilling, no pilot hole. Point in fact, this drill wants to chatter if you DO pilot drill. It cuts noticeably smoother if just run in straight. One pass, out to nominally 5/8"- in stainless.

progress135.jpg

That's the major blanking steps done. Once I have the whole batch drilled, then it's over to the turning center!

progress136.jpg

Doc.
 
OP
D

DocsMachine

Well-known member
Joined
Sep 16, 2006
Messages
1,869
Makin' progress!

Re-tooled the CNC- a tale unto itself- and managed to get the program written and proven to face and bore one end of all the drilled blanks, then got the somewhat more complex workin' end program written- faced, bored, chamfered and threaded. :)

progress139.jpg

We're nowhere near done- I still have about half the blanks to drill, and only 'finished' about a dozen of them so far.

progress141.jpg

... To say nothing of the three other sticks of material I need to chop up and run. :)

But we're gettin' there!

Doc.
 
OP
D

DocsMachine

Well-known member
Joined
Sep 16, 2006
Messages
1,869
While I don't generally do "job shop" work- I have, but it's often proven more trouble than it's worth- I had a case where a good friend needed a time-sensitive job done. And, as a rare treat, no issues with how much it's gonna cost- they need the part, the company will pay.

That's not to say I have carte blanche to pad the bill- I don't do such things- but it's case where, when I tell the client an estimate of the cost, they don't say "well, I was hopin' to only spend this much" or something similar.

Which is a good thing, because this is a big job- at least for me.

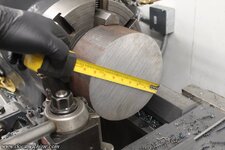
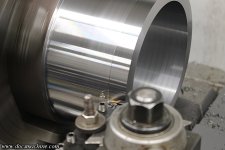
First, we started with an eight-inch, fifty-pound slug of 4140 chrome-moly steel:

bigsteel01.jpg

The OD gets buzzed down to 7-1/2"...

bigsteel02.jpg

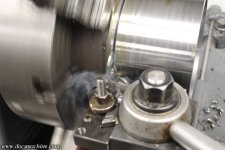
"Buzzed", in this case, means an hour of heavy turning at 120 RPM on a 10HP machine, with blue-hot swarf flying off.

See all those little springs?

bigsteel03.jpg

I can't sweep those off. They've partially melted into the rubber mat. :D

But now for the fun part. Drilling out up to a 1" pilot hole...

bigsteel04.jpg

And then, making roughly three hundred boring passes- in both senses of the word :) ...

bigsteel05.jpg

'Til it's mostly hollow.

bigsteel06.jpg

We're a long way from done, the wall thickness will eventually be around half an inch, but that was already about seven hours' work.

And I have to do two of them.

The white smoke? Vaporized WD-40. I was spraying a little in there basically just to reduce the chance of tip welding, but I'm not sure I was actually doing anything except filling the shop- and my lungs- with oil smoke. I don't have coolant on this machine, and this is one of those cases where I'd need heavy flood, or, well, don't bother.

I don't really have an easy way to set it up at the moment, so basically, 'til we get down to the finish passes, we gotta do it dry. It's hard on the tools, but we don't have a lot of options.

The tools? I started that bore with a 3/4" shank boring bar, but I needed a bit more rigidity. This machine can take a substantial bite, and I had a lot of meat to move. The client loaned me a good- but worn- 1" shank boring bar, that added a good bit of beef. And I pushed those inserts for all they were worth.

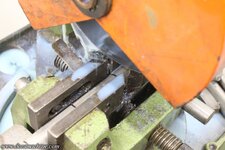
bigsteel07.jpg

For those not familiar with tungsten carbide cutting inserts, the right-facing point of the gold bit is still new and untouched. The left facing point... those craters are worn. Those aren't chips or cracks, they're where the swarf come off the tip as it cuts, and scrubs past the insert.

Why isn't the point itself worn? That is a very good question, and I'm not entirely sure I have a valid answer for that. I looked at the craters under magnification, and they clearly looked worn, not chipped. Why doesn't the cutting edge wear the same way? (Hey, I'm way more familiar with using the 'sharp honed' inserts on small bits of aluminum. :) )

Oh, and the rear corner? That one's spalled- flaked off. That was probably thermal shock, most likely from when I sprayed in some WD-40 onto the 300°- 400°F insert.

These need to be delivered on Monday, so I still have some work to do this weekend. :)

Doc.
 
OP
D

DocsMachine

Well-known member
Joined
Sep 16, 2006
Messages
1,869
And DONE, with a day to spare!

I did all the above on the 26th, and after the food coma wore off on the 27th, I went out and made the last few passes to bring it to size.

bigsteel08.jpg

bigsteel09.jpg

It was better in any case that I gave it time to cool down before trying to cut to spec. After I was done boring, the thing was over 200°F, according to the infrared gun. And it's big enough that had I cut it to spec at that point, it would have cooled off to potentially out of spec.

When I went to start cutting it cold, I was wondering about that, so I took an .005" skim cut, just out of curiosity. Turns out the OD was both out-of-round, but also tapered- it was narrower at the base, where the thickest part of the metal was. Fortunately I'd left .100" for that reason, and a few light, slow passes brought it back into shape.

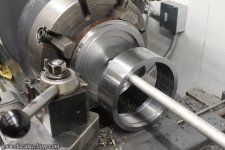
Then, I parted it off, slowly and carefully- with a rod held in the tailstock drill chuck to keep the ring from rolling about and maybe getting dented.

bigsteel10.jpg

We're not quite done with that, but there's still the second one to do, which I started on the morning of Black Friday. (Nobody around here has 'doorbuster' sales on lathe tools or endmills, so why bother shopping? :) )

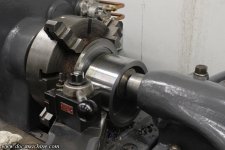
This one was the larger of the two- roughly eighty-six pounds and about as much as that 12" 4-jaw can hold. I have a 15" 4-jaw, but I need the engine crane to mount it. :)

bigsteel11.jpg

But, same operations. I got it faced, roughed to the OD, and drilled, then today (Saturday) I got the rest bored out:

bigsteel12.jpg

The black rings are just pen marks, gives me a better idea of progress since I can make eight or nine passes and the center doesn't seem to get all that much bigger. :)

But, eventually we got down to the finish pass here, too:

bigsteel13.jpg

And once the internal O-ring grooving was done, I parted this one off, too.

bigsteel14.jpg

Captured by the drill chuck directly this time.

bigsteel15.jpg

I used the smaller Sheldon lathe to face the parted end to length, mainly because that thickness was a tight tolerance, and the Sheldon has a better micrometer carriage stop.

bigsteel16.jpg

The big Springfield has a micrometer carriage stop, but the dial is for some reason marked on .0025" increments, and indicated in round numbers. That is, 0 to 1 is .0025", 1 to 2 is .005", 2 to 3 is .0075", 3 to 4 is .010", and so on. I can make it work if I have to, but as a last step on a part I've spent two days on, is due in another day, and cost $150 just in steel? Nope, I know and trust the Sheldon's stop. :)

(I've been meaning to make a new dial, or recut some new marks... along with all the other things on my to-do-list...)

And done! With a full day to spare!

bigsteel17.jpg

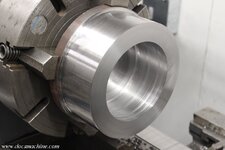
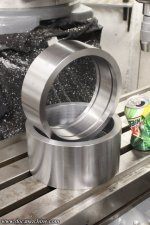
Yeah, finished they don't look like much, but due to the size, they had to be cut from solid, and due to the use, they needed to be tough chrome-moly.

And since it's the oilfield, they had to have 'em, and were willing to pay for it. (Well, at this point I sure hope I get paid... :D )

Doc.
 
OP
D

DocsMachine

Well-known member
Joined
Sep 16, 2006
Messages
1,869
As I understand it, they're part of trash pump or dewatering pump shaft seal. Whatever it pumps, it's dirty, and the junk eventually eats the seals- I'm told these parts need to be remade every couple of years.

Doc.
 
OP
D

DocsMachine

Well-known member
Joined
Sep 16, 2006
Messages
1,869
So, after all this, what have I learned?

Mainly that I need more tools. Duh! :D

This machine really needs a DRO. I've been pondering getting one for it and another for the Sheldon, but I've never liked how they take up room on the side of the cross slide, since at least on the Sheldon, there isn't that much quill travel to start with. And on the big Springfield, it'd need heavy armor to protect it from getting crushed up against the tailstock base.

I also need at least two of my own heavy boring bars. Most of what I have takes HSS, and anything that takes an insert is only 3/4" on the shank. I need a good name-brand 1" and probably a 1-1/4", that take a heavy insert, like a CCMT or a WNMG.

I should make a mount for the bigger bars I already have, too.

I need to fix that micrometer stop. I knew it was going to be an issue a decade ago when I first fitted it to the machine (it's actually, I think, a Mori-Seki stop) and have meant for years to either re-etch or replace the knob. It has a 20TPI thread, so it could easily have 50 .001" graduations. Needs a spring or something to give the barrel a little friction, too, it turns too easily.

I did manage to find an original Springfield carriage stop, but the screw and dial on that were badly damaged and also have to be replaced.

I need a worktable or cart I can roll up to this thing. I had tools piled on the bed, on the floor, on the gearbox, on the headstock and on the bandsaw table. :)

Going along with that, I need to make a tool shelf bolted to the wall for this thing, somewhere. And along with that, I have the "tool stand arm" or whatever they call it, for this thing, that bolts to the back of the bed. I need to make a new top plate for that, to keep the occasionally-used tools on hand. The oil can, drill chuck keys, drills, etc.

And the big one: I really need to put together the overhead trolley system I've been thinking about since I got this machine back together. The 8" and 10" 3-jaws aren't too big a deal, but the 12" 4-jaw, especially leaned out over the bed of a large lathe, is a pain in the sphincter to install or remove.

And the 15" 4-jaw is basically impossible without an engine crane. The 86 pound slug of steel was no picnic either.

I have in mind a trolley made out of Unistrut, with maybe a 1/4 ton chainfall, and a heavy steel rack behind the bed, or maybe at the end of the bed, to hold the chucks. (At least the big ones I can't easily manhandle into place.)

Now, I've known most of these issues for years, but I use this big machine so relatively rarely, that other needs in the shop tend to take understandable precedence. That said, this job would have gone a lot smoother with those things, and hey, if I'm going to have this six thousand pound monster in my shop, taking up as much room as a small car, I might as well have it capable of doing the jobs it's... well, capable of. :D

... Well, that was a nice bit of fortuitousness. Just checked eBay and spotted a 1-1/4" boring bar, looks like an older Kennametal, that takes what appears to be CNMG inserts, with an Aloris CXA tool holder block. It's all a bit worn and rusty, but the price is right, and I know how to deal with rust. :)

Doc.
 
To avoid these ads, REGISTER NOW!
Top Bottom