To avoid these ads, REGISTER NOW!

Above 1200 Sq/FT The Cow Pasture Garage - Australia

Wokspaces above 1200 squarefeet.
OP
K

kitdoctor

Well-known member
Joined
Oct 30, 2010
Messages
531
Location
Sunshine Coast, Australia
Post #0055b - Construction work continues – Lightweight steel framing - More extras to integrate with steel framing continued - Part L

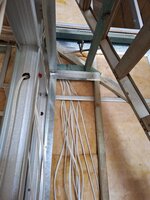
Continuing on from the previous post, here’s another transition problem, this time in the mezzanine storage room between a C-column portal frame member and the stud wall frame on the right-hand-side.

With the C-column and stud wall frame both sitting on the absolute edge of the yellow tongue flooring, the C-Column is a fraction deeper than the frame. It’s the tiniest of differences which is the annoying thing!

Post #0055b - Photo No. 1.jpg

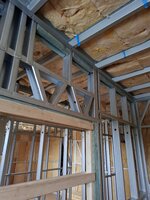
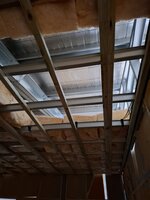
The way this was dealt with was to exaggerate the transition by creating a mini-frame that the plywood could be fixed to. This next photo (by now the insulation had been installed) shows the mini-frame.

Post #0055b - Photo No. 2.jpg

Over at the accommodation module’s staircase, thin timber strips were added, so that when the plasterboard is installed it would clear the heads of the bolts that held the joists together. The four lighter coloured bolt heads were a fraction taller than the heads on the adjacent bolts, so a 2 mm slice was taken off them with a grinder.

Post #0055b - Photo No. 3.jpg

Also, in the stairwell a timber member was inserted into the open side of the floor joist to provide a solid fixing point for the plasterboard. The line of this timber member is also where an expansion joint was planned to be located in the plasterboard lining.

The carpenters also stood a long straight edge up (not shown) in the staircase area so that it spanned across the lower frame, the edge of the yellow tongue flooring and second story frame, just to determine how plumb everything was.

This was done on each side of the staircase, just to make sure that when the plasterboard was added, no waviness was visible in the plasterboard lining. The result was they felt the second story frames on the right-hand side could benefit from some tweaking. So, these were removed, tweaked by moving their position ever so slightly and reinstalled.

Post #0055b - Photo No. 4.jpg

In the laundrette, some further work was done to create a ceiling underneath the staircase. The ceiling height allows for the concealment of the electrical cabling that exits the circuit box which is off to the right-hand-side.

Post #0055b - Photo No. 5.jpg

Here, in the upstairs office, the ceiling system comprises steel battens inserted into a C-channel that acts as a receiver which is then fixed to the wall frames. The problem is the C-channel blocks access to the top plate of the wall frame, so more timber noggins were added. In hindsight, it would have been quicker and less expensive to use steel strip instead of timber. When the carpenters eventually ran out of timber that’s what they did.

Post #0055b - Photo No. 6.jpg

Timber blocks were installed wherever needed for attaching fittings, in this case for a hand towel ring that would be next to the bathroom’s vanity cabinet.

Post #0055b - Photo No. 7.jpg

This next photo is the timber blocking installed to create the storage niche in the wall of the shower cubicle. They even put a slight crossfall on the bottom piece, so that when the niche was tiled it would be self-draining.

Post #0055b - Photo No. 8.jpg

The hinge side door jamb of the frame for the shed to bathroom door was reinforced. The same was done for the shed to living room door frame jamb.

Post #0055b Photo No. 9.jpg

Okay, so that was round two. @Mr onetwo was completely correct, the labour was heading north of 500+ hours and the direct cost of that labour was eyewatering…Then again, in a future post I’ll show you a picture of a very expensive pile of plywood.

Anyway, there’s still more carpentry work to be done, so that’s covered in the next post.
 
To avoid these ads, REGISTER NOW!

Coolabah

Well-known member
Joined
Jun 6, 2010
Messages
1,375
Location
2nd Floor, 3rd on the Right,Narooma, Australia
Post #0055b - Construction work continues – Lightweight steel framing - More extras to integrate with steel framing continued - Part L

Continuing on from the previous post, here’s another transition problem,

<snip>

Okay, so that was round two. @Mr onetwo was completely correct, the labour was heading north of 500+ hours and the direct cost of that labour was eyewatering…Then again, in a future post I’ll show you a picture of a very expensive pile of plywood.

Anyway, there’s still more carpentry work to be done, so that’s covered in the next post.
Wow ! well last time I had carpenters in to help with my shed, (it was around ten years ago with a really talented crew, pretty sure I was paying top dollar back then) , IIRC it was like $80 ph for main bloke and $40 ph for his apprentice ?? So 500 hours at todays prices is , what, $ 50,000 ++++??
Well, my parents always said, ( apart from life is like a box of chocolates..., and Run! Forest , Run !) something I always have flash through my mind when I see a quote that makes my eyes water:

Its only worth it if the alternative is so not worth it !!!
 
OP
K

kitdoctor

Well-known member
Joined
Oct 30, 2010
Messages
531
Location
Sunshine Coast, Australia
Wow ! well last time I had carpenters in to help with my shed, (it was around ten years ago with a really talented crew, pretty sure I was paying top dollar back then) , IIRC it was like $80 ph for main bloke and $40 ph for his apprentice ?? So 500 hours at todays prices is , what, $ 50,000 ++++??
@Coolabah add say 10%, then another 15% to the total plus a $2500/month fee for the builder's profit and overheads margin (which are both more than reasonable) and you're getting close. Keep in mind the cost to install doors, plywood lining, weatherboards etc. is not included in this.

Duayne Pearce a very respected SEQ builder, cites the following examples of two of his projects. Three story homes in Brisbane. One was built in 2010 and the other in late 2024. Very, very similar in scale, design, construction, standard of finish and site conditions. The 2010 build cost was $800 000 and the 2025 build cost was over $2 000 000. So, it was 2.5x more expensive to build in 2024 compared to 2010. Check out his video.

These are some observations he makes:
  • Materials: Exterior claddings/sheeting 2.7x more expensive, interior timber (doors, architraves, skirting boards, door frames etc.) 2.8x more expensive, windows 4.5x more expensive, roofing 2.7x more expensive and building insurance 6x more expensive,
  • Labour: Carpentry 2x more expensive and electrical 2x more expensive.
  • Materials and labour: Painting 2.5x more expensive and joinery 2.5x more expensive.
With the labour component, he bluntly points out that it's a lack of productivity. In simple terms, those on the tools are getting less done than what he considers should be capable of being done in a day.
 
OP
K

kitdoctor

Well-known member
Joined
Oct 30, 2010
Messages
531
Location
Sunshine Coast, Australia
Gee, talk about fiddly! Well worth the trouble and expense, though.
@Mr onetwo and @Geoff289 , we've certainly got to rethink our house design and construction approach.

The builder typically makes his stud wall frames and trusses on site rather than purchasing pre-manufactured frames and trusses which he says are woeful (i.e. rubbish timber, not straight, etc.). I'm thinking surely, as a compromise, I could find a vey high quality manufacturer and work very closely with them and the builder to design the frames and trusses.
 
Last edited:

Bob Heine

ALLIANCE MEMBER
Joined
Oct 24, 2009
Messages
10,708
Location
Boca Raton, Florida
Joel, we were the first occupants of a 3 bedroom, 2 bath, 2 1-car garage unit in Manly in the fall of 1989. The 'For Sale' sign was still out front and our upper unit (1/17 Cliff Street, Manly, NSW 2095) was listed at $595,000. It sold in 2017 for $3,030,000 and is currently not for sale but valued as follows:

"1/17 Cliff Street is a 3 bedroom, 2 bathroom unit in Manly. It offers 2 car spaces and sits on a 674m² lot. The property has a $4,258,000 estimated value. It is located within Northern Beaches council, with no bushfire, flood, or heritage overlays detected. It is within the catchment of Manly Village Public School, Northern Beaches Secondary College Mackellar Girls Campus, and 1 other school. It has reliable NBN Fibre to the Curb and 5G mobile coverage."

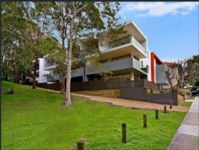
The 674m² lot is misleading because it's the second story of the building with a staircase leading from the front door down to the tiny front courtyard for the three units and a paved front yard in front of the four garage doors. It has received a facelift in the last few years but this was the way it looked the day we moved in:
1-17 Cliff Street 11-1989.jpg
I got to watch the place next door be renovated and it appeared they overdid almost everything.
 

Geoff289

Well-known member
Joined
Nov 10, 2013
Messages
1,235
Location
Melbourne, Australia
Joel, we were the first occupants of a 3 bedroom, 2 bath, 2 1-car garage unit in Manly in the fall of 1989. The 'For Sale' sign was still out front and our upper unit (1/17 Cliff Street, Manly, NSW 2095) was listed at $595,000. It sold in 2017 for $3,030,000 and is currently not for sale but valued as follows:

"1/17 Cliff Street is a 3 bedroom, 2 bathroom unit in Manly. It offers 2 car spaces and sits on a 674m² lot. The property has a $4,258,000 estimated value. It is located within Northern Beaches council, with no bushfire, flood, or heritage overlays detected. It is within the catchment of Manly Village Public School, Northern Beaches Secondary College Mackellar Girls Campus, and 1 other school. It has reliable NBN Fibre to the Curb and 5G mobile coverage."

The 674m² lot is misleading because it's the second story of the building with a staircase leading from the front door down to the tiny front courtyard for the three units and a paved front yard in front of the four garage doors. It has received a facelift in the last few years but this was the way it looked the day we moved in:
1-17 Cliff Street 11-1989.jpg
I got to watch the place next door be renovated and it appeared they overdid almost everything.
That's Australian real estate for you.
 
OP
K

kitdoctor

Well-known member
Joined
Oct 30, 2010
Messages
531
Location
Sunshine Coast, Australia
That's Australian real estate for you.
@Geoff289, so true.

It's a consequence of a system (both financial and taxation) that allows land owners to capture the economic rent or financial benefit of surrounding development (i.e. proximity to schools, cafes, shopping precincts, transport infrastructure, parks, views etc.) without being taxed, unless it's an investment property where there will be a capital gains tax debt triggered upon the sale.

This creates the conditions for speculation, chasing ever higher prices, supported by the banks (and governments) that do all that they can to extend the capacity of people to borrow e.g. 40-year mortgages, government home equity schemes, grants, stamp duty concessions etc. etc.

It's an outcome seen in most countries e.g. UK, Australia, USA, Canada, New Zealand etc. but not all e.g. Singapore. The bigger question is why did this occur or happen??? It is intentional or deliberate...
 
OP
K

kitdoctor

Well-known member
Joined
Oct 30, 2010
Messages
531
Location
Sunshine Coast, Australia
Post #0055c - Construction work continues – Lightweight steel framing - More extras to integrate with steel framing continued - Part L

Using plywood for the lining of walls and ceilings did require some initial planning to address a range of aesthetic and fixing issues. The first decision was that the ceiling sheets would be laid in a brick pattern to stagger the joints between the ends of sheets. This was deliberate to break up where the joints occurred.

Also, the centreline of the room widthways, would be the location of a joint between two full sheets, so that any sheets that were not a full 1200 mm (4’) wide and that needed to be cut would be placed at the sides of the room. The alternative is to have all the ceiling sheets of equal width, but this generates a lot of wastage.

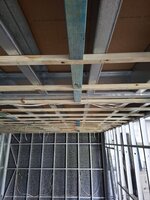
So, the sheets would be laid in an overlapping pattern with their longest dimension (2400 mm or 8’) in the direction of the longest side of the room. This meant that timber blocking was needed at the end joints between sheets. To support the timber blocking at the predetermined locations, this in turn required continuous timber battens to be run across the steel joists or steel ceiling battens. The photo below shows the timber battens and timber blocks at the garage, ready for the fixing of the plywood lining.

Post #0055c - Photo No. 1.jpg

The other thing to appreciate is that with plywood the sheets never have perfectly straight edges. Also, when the sheets are screwed off there can be ever so slight high and low spots at joints between adjacent sheets. This means the joints will exhibit some imperfections. The former also means that on walls, end joints between sheets should be hidden below eye level or well above eye level in rooms with very high ceilings.

For the walls, it was decided to lay the sheets with their longest dimension (2400 mm or 8’) in the vertical direction. Timber blocking was needed between sheets at side joints if there were no studs at these joint locations in the wall frame. The 3600 mm (12’) internal height of the storage room in the garage required the use of two sheets, so the sheets were cut to place the horizontal end joint at existing frame noggins.

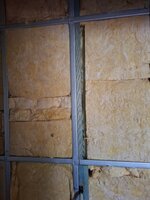
The photo below taken in the garage storage room shows how the insulation has been chased out to accommodate timber blocking. Starting from the centreline of the wall there will be two full sheets and then a partial sheet at each end of the wall.

Post #0055c - Photo No. 2.jpg

In the shed’s workshop the ceiling height (2700 mm or 9’) still required the use of two sheets and it was decided to keep the horizontal end joint between wall sheets closer to floor level. This was because the room would be filled with benches and cabinets positioned against the walls which would hide the joint between sheets. This required some extra timber noggins. Extra studs were also required because the vertical joints between wall sheets did not align with existing studs.

Post #0055c - Photo No. 3.jpg

Some studs were also strengthened with timber.

Post #0055c - Photo No. 4.jpg

In the shed’s workshop the ceiling had to be lowered to clear electrical cables. Battens were installed to do this. These and timber blocks were also needed to fix the plywood ceiling sheets to.

Post #0055c - Photo No. 5.jpg

In some cases (e.g. mezzanine storage room) there was no top plate at ceiling level to fix the wall sheets to, so more timber noggins were added. This also aided the planned fixing of a black powder coated inverted aluminium C-channel (not shown) to create a shadow line at the perimeter of the ceiling. This small detail avoided creating an unsightly joint between wall and ceiling sheets. I’ll show what the end result looked like in a future post.

Post #0055c - Photo No. 6.jpg

In the mezzanine storage room, it wasn’t necessary to lower the ceiling to clear electrical cables, however, battens (and timber blocks – not shown) were still needed to fix the plywood ceiling sheets to.

Post #0055c - Photo No. 7.jpg

The preparation also required provision of access points in the bedroom ceiling (shown below) and the ceiling in the mezzanine storage room. In the bedroom, it’s right at the entrance, so that it’s hardly noticeable, as your focus is really drawn to the rest of the bedroom.

Post #0055c - Photo No. 8.jpg

In hindsight, some of the work was avoidable, or at least could have been done slightly more efficiently, but this would have involved designing the building skeleton in far greater detail. In reality, it's also normal for a certain amount of tweaking to occur on site during the framing process and this is no doubt why builders prefer the flexibility of timber over steel.

Maybe there is a steel joist system out there that does have factory cut service penetration holes and the exercises to drop the height of some of the ceilings could have been avoided.

Realistically, a good designer could have picked up the missing stud that was needed as the side jamb of a door frame and made provision for access points in ceilings. The thing is though, that during the design process you don’t see the steel kit manufacturer’s (Stratco) detailed design plans for the steel stud wall framing. All you see are some very general plans (from the shed designer), showing how typical frames are configured e.g. with door and window openings etc. So, I didn’t have the opportunity to check for errors and omissions or suggest where extra strengthening would be beneficial. None of this is normal anyway with a client checking designs to this extent.

I have thought whether the spacing of studs and position of noggins could have been matched to the plywood sheet length and width. The problem is that this requires planning how many and where full sheets and partial sheets are needed on every wall and ceiling. Not impossible, but would one or more unexpected site factors have brought this plan undone? You saw how many C-columns had to boxed in and that the ceiling was dropped in every room, would this have thrown the calculation out and at least partly ruined such a plan?

I decided not to do a concealed fix and make a feature of the screws used to fix the plywood. To do this required predetermining the position of every screw, so that the screws line up both horizontally and vertically. I'll show how this worked out in a future post.

Anyway, that was about the extent of the work needed to be ready for plasterboard and plywood, enough to cover three posts. Next up it's on to the installation of bulk insulation.
 
Last edited:
OP
K

kitdoctor

Well-known member
Joined
Oct 30, 2010
Messages
531
Location
Sunshine Coast, Australia
Joel, we were the first occupants of a 3 bedroom, 2 bath, 2 1-car garage unit in Manly in the fall of 1989. The 'For Sale' sign was still out front and our upper unit (1/17 Cliff Street, Manly, NSW 2095) was listed at $595,000. It sold in 2017 for $3,030,000 and is currently not for sale but valued as follows:

"1/17 Cliff Street is a 3 bedroom, 2 bathroom unit in Manly. It offers 2 car spaces and sits on a 674m² lot. The property has a $4,258,000 estimated value. It is located within Northern Beaches council, with no bushfire, flood, or heritage overlays detected. It is within the catchment of Manly Village Public School, Northern Beaches Secondary College Mackellar Girls Campus, and 1 other school. It has reliable NBN Fibre to the Curb and 5G mobile coverage."

The 674m² lot is misleading because it's the second story of the building with a staircase leading from the front door down to the tiny front courtyard for the three units and a paved front yard in front of the four garage doors. It has received a facelift in the last few years but this was the way it looked the day we moved in:
@Bob Heine those eastern beach side suburbs are nice and highly sought after. They're always in demand.

In 2011 we bought this one-bedroom unit 14/142-144 Francis Street Bondi Beach NSW 2026 for $625k. Great views to an adjacent park (rare) with the added privacy.

Unit 14 142-144 Francis Street Bondi Beach.png

Unit 14 142-144 Francis Street Bondi Beach Interior.png

At the time I couldn't get past the hurdle that it was twice the value of our own home. We sold in 2024 to provide more funds to put into our shouse build.

Two observations, firstly if only we could hold onto to these golden gooses and, if I knew then what I know now, I would have purchased a two-bedroom unit for $825k.
 

Boostingaz

Well-known member
Joined
May 21, 2018
Messages
3,698
Location
Indiana
What is that molasses, geez, drink a Gatorade lol.

But yes very annoying, some people 😠. They figured they were more important than you, very sad that's how the world works unfortunately.
 
OP
K

kitdoctor

Well-known member
Joined
Oct 30, 2010
Messages
531
Location
Sunshine Coast, Australia
But yes very annoying, some people 😠. They figured they were more important than you, very sad that's how the world works unfortunately.
@Boostingaz and as there's no water connected, it had to be siphoned out. There's a porta-a-loo on site, so they're either blind or just too lazy.

Also, see that greasy mark on the edge of the toilet seat, I'm still trying to get that off :mad:
 

Boostingaz

Well-known member
Joined
May 21, 2018
Messages
3,698
Location
Indiana
@Boostingaz and as there's no water connected, it had to be siphoned out. There's a porta-a-loo on site, so they're either blind or just too lazy.

Also, see that greasy mark on the edge of the toilet seat, I'm still trying to get that off :mad:

My vote would be lazy. I wouldn't even try that hard, I would just have the builder replace the seat. They can investigate and squabble amongst themselves on who's check it comes out of lol. If there are facilities on site, that's just uncalled for.
 
OP
K

kitdoctor

Well-known member
Joined
Oct 30, 2010
Messages
531
Location
Sunshine Coast, Australia
Post #0056a - Construction work continues - Insulation batt installation - Part LI

With the prep work largely done, the installation of the bulk ceiling and wall insulation batts was commenced. By this, I mean to the perimeter walls of the accommodation module in the shed, ditto for the workshop and mezzanine storage room, the separate storage room in the garage, as well as any suspended floors and ceiling areas.

The perimeter walls include walls that are adjacent to the internal floor area of the main shed and the vehicle parking area in the garage, so walls that are inward facing to these areas that are not exterior walls (which were otherwise insulated with foil insulation). I did not insulate interior walls, i.e. walls within an area formed by perimeter walls that further divide areas into smaller spaces or rooms. Confusing, hey?

Understanding Australia’s National Construction Code (NCC 2022) energy efficiency requirements for buildings is not easy, particularly if you’re not a practising energy efficiency specialist. I’ll only talk about them below in very brief detail.

Thankfully there are resources produced by the Australian Building Codes Board (ABCB) that are available to assist. If you’re interested and prefer listening to a tutorial, then check out the relevant energy efficiency tutorial at the NCC Tutor. Another option is to read the ABCB’s Housing Energy Efficiency Handbook.

Okay, now for the boring stuff :sleep: but this might help someone. I’ll do my best to try to keep it short.

In NCC 2022 Volume 2 Part 6 there are two performance requirements for housing energy efficiency. The first of these is H6P1 which is about thermal performance (building fabric) and the second is H6P2 which is about energy usage.

To satisfy a performance requirement there are three fundamental approaches:
  1. a Performance Solution (purple);
  2. a Deemed-to-Satisfy (DTS) Solution (blue); or
  3. a combination of a Performance Solution and a DTS Solution.
These approaches have been further developed and can then be viewed as a series of options to meet one, both or part of the performance requirements. The figure below shows this in a simplified form.

Figure 2.2 Simplified overview of compliance options.png
Notes:
  1. Blue shading denotes a DTS solution and purple shading denotes a Performance Solution.
  2. Option 3 and Option 4 only provide partial compliance with one of the performance requirements, H6P1 Thermal performance.

I’ll focus on Option 1 NatHERS (Nationwide Housing Energy Rating Scheme) because this is the most popular option and the one that most often comes to mind when someone who’s building is exposed to energy efficiency requirements.

Using accredited NatHERS software an assessor will determine two ratings:
  1. A thermal rating which assesses the potential thermal performance of a new home. The results are converted to a score between 0 and 10 stars.
  2. A WOH (Whole of Home) rating which is more holistic and assesses equipment efficiencies and any offsets from on-site renewable energy of a proposed home. A WOH builds on the thermal performance assessment (i.e. star rating) of the proposed house. The results are converted to a score between 1 and 100.
With NCC 2022 housing is required to achieve a minimum thermal rating greater than or equal to 7 stars (NCC 2019 was 6 stars). In warmer climate zones (zones 1 and 2), this can be reduced to 6.5, or as low as 6, where a compliant outdoor living area is present. These reductions reflect that when a (compliant) covered outdoor living area with roof insulation (total R value of at least R 1.5) is present and used, people tend to turn off their air conditioners and use less energy. Adding a ceiling fan allows a further reduction of the star rating from 6.5 to 6. My project was assessed against NCC 2019 and achieved an 8.5 star energy rating.

NCC 2022 requires a WOH rating not less than 60 (out of 100). A WOH rating includes the fuel type and efficiency of heating and heated water systems, the efficiency of cooling systems, an allowance for lighting and the efficiency and energy use of pools and spas. My project was assessed against NCC 2019 and I wasn’t required to provide a WHO rating.

Now bear in mind that the above is only a very brief discussion, but I want to point out one very important detail. A typical free-standing house with an attached, enclosed garage is a Class 1a + Class 10 a building, the garage is the Class 10a part. So, does the Class 10a part have to satisfy NCC H6P1 and H6P2?

My best advice is to check your local requirements because in Queensland it would, even though the NCC would not require it to. For further information refer to the Queensland Development Code Mandatory Part 4.1 – Sustainable Buildings (available from Queensland Development Code).

Now it’s actually one thing to meet the energy efficiency requirements on paper. In reality, how well a home is constructed, more specifically the insulation choice and how well it is installed play a big part in actually meeting the requirements. So, the insulation’s R value (thermal resistance), how carefully it is installed, how well gaps too small for insulation are sealed etc. play a big part in actually meeting the energy efficiency requirements.

For insulation batts I’d decided to utilise Earthwool batts. Despite its name the material only looks like wool and is a type of glasswool insulation, comprising up to 80% recycled glass. The distinctive brown colour of Earthwool® results from ECOSE® Technology. This natural binding process leads to a natural shade of earthy brown – free from dye or colourants.

Post #0056a - Photo No. 1.png

The reason I chose Earthwool batts was because of the manufacturer’s commitment to sustainability (i.e. their binding technology is formaldehyde free), its Air Comfort Gold Standard certificate (i.e. for less harmful volatile organic compound emissions) and from a practical point of view, when it comes into contact with your skin it’s less itchy. See Earthwool FAQs.

With these glasswool batts the key limitation is that they shouldn’t be compressed, as this reduces their effectiveness. With 90 mm deep wall studs, this meant a batt with an R value (thermal resistance) of 2.7 (90 mm thick & ≈ R 15.3 USA) should be used . With 250 mm deep floor joists, I went with the maximum thickness batts that would fit, R 5.0 (240 mm thick & ≈ R 28.4 USA) and to keep the installation straightforward, batts with an R 5.0 value were specified for the ceiling spaces. This combination achieved an 8.5 star rating.

So, about a week out my builder tells me the installation is planned to commence on site, so GOOD NEWS but then what happens? Well, the day before the installation is due to start, I receive a call from my builder advising that his subcontractor can’t obtain the necessary supplies of the two types of Earthwool batts :eek:. The delay is going to be four weeks and the plasterers are going to have to be rescheduled :eek:, or alternatively I switch to Bradford Gold Hi-performance ceiling batts and Hi-performance wall batts. Reluctantly, I switched batts.

So, the day of the installation arrives, we’re on site and the builder is not which is neither unusual nor unacceptable, as a builder can’t be there all the time. So, I did what I usually do in such circumstances and go to introduce myself to the sub-contractor’s representative and ask if he has any questions about the scope of works, site facilities etc. Not only do I think this is the right thing to do, I just think it’s the polite thing to do.

The middle-aged supervisor (cigarette hanging out of his mouth) obviously recognises me as the client and his first words are “What are you doing here?” o_O. Absolutely stunned by his rudeness, I’m unable to articulate I’m an owner builder and therefore I’m entitled to be on site, because ultimately, I’m accountable for everything, including site safety. I utter some words that managing five acres takes a lot of work, so we’re on site quite often. I left it at that and went back to what I was doing but made the decision to keep a close eye on them…

First up, I observe them unloading the insulation batts and it doesn’t come as a surprise that they’re throwing the packs out of the truck like a football. Further visions come to mind of airport baggage handlers throwing passengers bags around and couriers launching packages like missiles onto the porches of homes.

So, the packs bounce around in the dirt and mud (there had been some recent light rain) before they move them into the garage. Okay, it’s not going to damage the batts but the packaging is getting covered in fine dust and mud and the process is transferring that dirt and mud into the garage. Now, someone’s got to clean that up or pay for it to be cleaned up…Not the end of world but my opinion of this subcontractor was fast declining.

This situation raises an interesting dilemma. I’m an owner builder and the client, but ultimately, I didn’t directly hire them. Do I intervene because it’s expediate to do so, or complain to my builder and let him decide what to do? Right or wrong, the approach I’ve taken is to only intervene when there is a risk to property, or the safety of any person, so I grin and bear the behaviour I see.

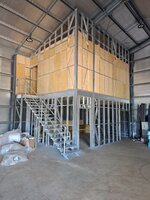
Here’s a couple of general photos of their initial placement of the wall insulation for the mezzanine storage room that’s above the ground floor workshop. It’s not finished, however, on the end wall in the first photo, there‘s a triangular shaped batt that clearly doesn’t fully fill the lower cavity of the stud wall. You can see where the ceiling batts start and finish, that is, in terms of their thickness. In hindsight, I would have preferred the walls batts to extend all the way to the top surface of the ceiling batts. The installer did do a better job on the side wall.

Those are bags of insulation offcuts left on the ground. At this point I was thinking there appears to be a lot of wastage, and secondly, who’s going to dispose of it.

Post #0056a - Photo No. 2.jpg

Now, on the side wall in the second photo there are some batts that needed to be cut to form triangles or part triangles. The ones shown possibly don’t fully fill the part of the cavity that needs filling, maybe they would if they were better positioned. However, keep in mind too that the cavities are larger than what they appear to be because the studs, plates etc. are not solid. So, to be certain, each batt would need individual, close-up inspection to ensure it’s big enough to fully fill its cavity.

Finally, there are batts that are not sitting snugly within their cavity, with corners and edges poking out of a cavity, However, this is to be expected when there’s no interior face wall lining and no exterior face wall cladding. This would be addressed as the build progressed.
Post #0056a - Photo No. 3.jpg

In this next photo of the garage’s storeroom, that’s too much sunlight visible at ceiling level, highlighting there’s a large gap to be filled with insulation batts. I thought to myself, is this the finished result, or are they going to fill that gap?

Using a method to string-in the ceiling batts is often needed in new builds when installing batts in raked ceilings, suspended floors, around complex obstructions etc. Those shown below weren’t sagging, so stringing wasn’t needed. They’re quite fragile and it doesn’t take much for them to separate, resulting in tufts hanging down at some points and small fragments ending up on the floor. Even though you might sweep these fragments up, there will be more reappear, so it’s best to get the ceiling lined as soon as practical.
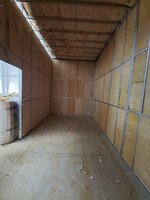
Post #0056a - Photo No. 4.jpg

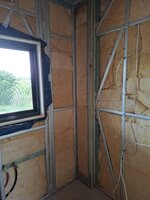
Up next is a photo showing a work-in-progress shot of the insulation being installed in the accommodation module. I took this to highlight the obstacles and obstructions, for example, the electrical cabling, plumbing pipes and taps, as well as the king studs (double, sometimes triple studs) and smaller cavities above the door trimmers. I could immediately tell those smaller cavities weren’t filled enough, however, at this stage, I hadn’t inspected the work closely and I wasn’t aware of the extent of the problems I’d later uncover.

Post #0056a - Photo No. 5.jpg

To put things in context, here’s the back wall of the bathroom before the insulation was installed, showing the plumbing services more clearly.

Post #0056a - Photo No. 6.jpg

Around the time the insulation was being installed my wife was becoming acutely aware of how little kitchen storage space she would have, and in all honestly, I had to agree. So, we decided that the space beneath the staircase should be fitted with some drawer storage. The first step was to remove a portion of the bottom plate, trim down a stud and install some timber blocking.

Post #0056a - Photo No. 7.jpg

Additionally, some aspects of the liveable housing design standard which are required to comply with NCC 2022 were completed, specifically the reinforcing of certain areas of select bathroom walls. The NCC requires that certain areas of some walls in shower cubicles and adjacent to baths and toilets be reinforced to accept handrails. It’s not necessary to reinforce entire wall sections, just specific areas that are shown in the NCC. Also, it’s not necessary to install the handrails, merely make provision for their future installation.

In the shower cubicle, I decided to reinforce the entire area of the two walls on which handrails might be installed. This was done with 12 mm (1/2”) plywood.
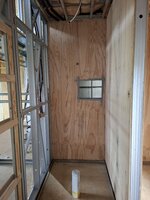
Post #0056a - Photo No. 8.jpg

In the toilet pan area I reinforced the entire side wall adjacent to where the toilet pan would be. Not only would this allow for mounting a handrail, but this would also ensure there was a solid mounting surface for the toilet roll holder. I also chose to reinforce the rear wall to provide a solid mounting surface for the cistern.

Post #0056a - Photo No. 9.jpg

So, if you made it to the end of this post, congratulations!

In the next post, with the work by the insulation installer essentially complete and having had the time to inspect the work closely, I’ll go through the raft of problems I uncovered, including the trick the installer tried to pull off :mad: :sneaky:.
 
Last edited:

Geoff289

Well-known member
Joined
Nov 10, 2013
Messages
1,235
Location
Melbourne, Australia
Thanks for that detailed update.

I spent a whole weekend carefully inspecting the insulation on our place after it went in, personally adjusting some of it and filling in some small gaps here and there. While our builder was completely on board with our objectives and the subbie he used to put the insulation in seems like he might have been better than yours, you can't be too thorough if you want good thermal performance.

I don't think it was mandated at the time, but future proofing for the challenges of getting older was a central design principle so we did the blocking for handrails etc. in our ensuite.
 
OP
K

kitdoctor

Well-known member
Joined
Oct 30, 2010
Messages
531
Location
Sunshine Coast, Australia
I spent a whole weekend carefully inspecting the insulation on our place after it went in,
@Geoff289 I had to do the same (and more) and I'll do another two posts on the insulation batt installation nightmare.

It is possible to undertake an accredited course by the Insulation Council of Australia and New Zealand, however, I couldn't find any accredited installers here on the Sunshine Coast. From what I can see it's not a highly skilled profession and consequently doesn't attract highly skilled installers. Nevertheless, it can be done well or poorly.

If I knew how bad the subcontractor was going to be, we would have done the work ourselves.
 
To avoid these ads, REGISTER NOW!

Bob Heine

ALLIANCE MEMBER
Joined
Oct 24, 2009
Messages
10,708
Location
Boca Raton, Florida
If I knew how bad the subcontractor was going to be, we would have done the work ourselves.
Joel, our 37-year old steel clad front door rusted through in a couple of places (under the many coats of paint). I was going to fix it myself but Liane said buy a new door and pay someone to install it. Building codes have evolved so most contractors would have to replace the frame and sidelight with a whole new assembly (roughly $2,000). If I installed just a replacement slab door it's grandfathered in and it's $167.

I resisted until Liane reminded me that our son and several of his children work in the family business -- a high-end renovation construction company. Last year our son took and passed the licensed contractor exam so I gave in and had our little boy (he's turning 62 in a couple of weeks) and his youngest son (who turns 22 two days later) picked up the slab I ordered from the store closest to them and with a set of three new stainless steel ball bearing hinges from Amazon, had the old door out and the new door installed in about 90 minutes.

While Liane was right (as always), re-installing the latch and deadbolt didn't go as well. Latch took ten minutes but the deadbolt I had no trouble installing one-handed seven years ago fought off every attempt using five hands. Luckily my shed has a locking doorknob and almost identical deadbolt (everything keyed alike). The shed deadbolt has a lever inside rather than a key lock so when I remove the hardware to paint the front door I will try some one-handed magic to get the original one re-installed.

Even when it's family, it's hard to find good help these days.
 
OP
K

kitdoctor

Well-known member
Joined
Oct 30, 2010
Messages
531
Location
Sunshine Coast, Australia
had the old door out and the new door installed in about 90 minutes.
@Bob Heine sounds like the 80/20 rule coming into play.

I can turn my hand at most tasks but I'm as slow as ever, particularly when it's the first time doing something.

On Friday I disconnected the brush hog/slasher from our compact tractor and despite having watched a few YouTube videos and phoning a friend it took me two hours. I was looking in the wrong place for the release mechanism that releases the PTO shaft from the PTO spline. Anyway, lesson learnt.

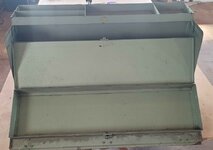
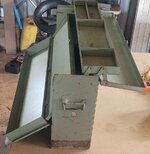
We have been a bit busy over the last few weeks, switching house sits, driving far afield to collect items purchased on Facebook Marketplace for a man cave display etc. Below is an old Rota carpenter's tool box which we collected last week. It was only $50 but it was a seven hour drive to collect it, involving an overnight stay in a motel and a restaurant dinner...

Vintage Rota Carpenter's Tool Box No. 2 Photo No. 1.jpg

Vintage Rota Carpenter's Tool Box No. 2 Photo No. 2.jpg

Vintage Rota Carpenter's Tool Box No. 2 Photo No. 3.jpg

Vintage Rota Carpenter's Tool Box No. 2 Photo No. 4.jpg

Vintage Rota Carpenter's Tool Box No. 2 Photo No. 5.jpg

Vintage Rota Carpenter's Tool Box No. 2 Photo No. 6.jpg

I'm not sure of its age but I'd say it must be 40+ years old. It weighs a tonne and how anyone carried it when loaded with tools I'll never know.
 
OP
K

kitdoctor

Well-known member
Joined
Oct 30, 2010
Messages
531
Location
Sunshine Coast, Australia
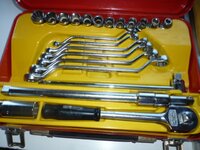
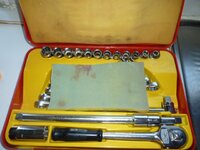
I was also lucky enough to pick up this early '90s era, lightly used, if at all, Sidchrome tool set.

The seller held it for me despite being offered more than what he listed it for. I have seen the "same" but earlier '70s set for less but prices seemed to have strengthened in the last half of the year. At $375, I think it was fair value.

Cat. No. 390-6 Photo No. 5.jpg

Cat. No. 390-6 Photo No. 6.jpg

Cat. No. 390-6 Photo No. 7.jpg

Cat. No. 390-6 Photo No. 1.jpg

Cat. No. 390-6 Photo No. 2.jpg

Cat. No. 390-6 Photo No. 3.jpgCat. No. 390-6 Photo No. 4.jpg
 
OP
K

kitdoctor

Well-known member
Joined
Oct 30, 2010
Messages
531
Location
Sunshine Coast, Australia
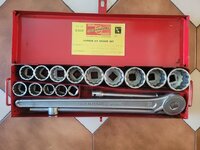
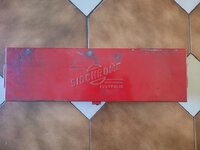
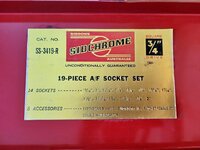
This next item was a good buy at $350, a very lightly used, well-cared for '60s A/F 3/4" drive socket set.

It was advertised as missing the male-male adaptor and not knowing much I assumed this to be correct. When I collected it and got familiar with the set, I realised the adaptor was fitted to the rachet.

Cat. No. SS-3419-R Photo No. 2.jpg

Cat. No. SS-3419-R Photo No. 3.jpg

Cat. No. SS-3419-R Photo No. 4.jpgCat. No. SS-3419-R Photo No. 1.jpg

Snippet Sidchrome Catalogue SS-3419-R.png

Snippet Sidchrome Catalogue ME.34.png
 

Geoff289

Well-known member
Joined
Nov 10, 2013
Messages
1,235
Location
Melbourne, Australia
Those Sidchrome sets were great pick ups. That first set is the same as the metric set I have - see my post 317 on this thread - from the early '90's.

Not that I have any intention of parting with mine but the price you paid is certainly interesting. I wouldn't swear to it but being a gold standard cheapskate, I tend to remember what I paid for things and I reckon my AF set from the '70's set me back about $40 and the metric one from the '90's was about $100, both bought brand new.

Your case is in better nick than mine.
 
OP
K

kitdoctor

Well-known member
Joined
Oct 30, 2010
Messages
531
Location
Sunshine Coast, Australia
Those Sidchrome sets were great pick ups.
@Geoff289, I'm no expert collector but I've been deep diving into Facebook Marketplace, eBay, auction sites etc. etc. researching prices for complete sets in lightly used, unused, to NOS condition.

IMO the prices I paid were fair and reasonable. They would have easily gone for more on eBay which seems to attract the highest prices. Having said that though, there are limits to what buyers will pay on eBay. There's a definite limit around the $500+ mark for tool sets (less than 50 tools/pieces). The seller of the '90s metric set was offered $100+ extra by someone hoping to gazump me. The best buys are often at garage sales and deceased estate sales.
 

wendle

Active member
Joined
Jul 19, 2018
Messages
27
Location
NSW,AU
I'm not sure of its age but I'd say it must be 40+ years old. It weighs a tonne and how anyone carried it when loaded with tools I'll never know.

I'd guess way older than that. 40 years only gets you back to 1985 now!

I started working in joinery shops in 1990 and no-one had anything like that for their tools even back then. Not even the older guys.

Rota was acquired by Stanley in 1990, but other than that it's hard to find good info on the ages or date ranges of their particular models.

Love the Ansett sticker on it!
 

Ralf99

Well-known member
Joined
Apr 14, 2011
Messages
440
Location
S.W.Victoria, Australia
No expert on Rota here, but I have the little brother version of that box and it is built like a tank - as well as a couple of mechanics chests bought by my father in the 60’s..
I’d suggest it might be from the 60’s or early 70’s, maybe even loaded on to the truck by Geoff. From memory the paint color didn’t make it into the 80’s when red and blue became the rage.

Great score on the Sidchrome sets - only 3/8 and 1/4” sets in metric/AF/whitworth to go….👍
 
OP
K

kitdoctor

Well-known member
Joined
Oct 30, 2010
Messages
531
Location
Sunshine Coast, Australia
That Roto tool box is sweet:beer:
@Mr onetwo here's another carpenter's tool box I picked up when getting that house ready for sale. By coincidence it was located in the same suburb.

This one I paid $75 for. It belonged to the seller's deceased husband. She was in her 40s I'd say. Again, I'd be guessing at the age.

Vintage Rota Carpenter's Tool Box No. 1 Photo No. 1.jpg

Vintage Rota Carpenter's Tool Box No. 1 Photo No. 2.jpg

Vintage Rota Carpenter's Tool Box No. 1 Photo No. 3.jpg

Vintage Rota Carpenter's Tool Box No. 1 Photo No. 4.jpg
 
Last edited:
OP
K

kitdoctor

Well-known member
Joined
Oct 30, 2010
Messages
531
Location
Sunshine Coast, Australia
I'd guess way older than that. 40 years only gets you back to 1985 now!
@wendle yes, that is likely correct. I know very little about Rota. There is a Facebook page and when I have the time I'll raise a question on it. What a coincidence @Geoff289 worked there.

There's an excellent book available on Sidchrome tools. The first edition sold out but second editions are available on eBay for $195. At this point it is on the wish list.
 
OP
K

kitdoctor

Well-known member
Joined
Oct 30, 2010
Messages
531
Location
Sunshine Coast, Australia
Great score on the Sidchrome sets - only 3/8 and 1/4” sets in metric/AF/whitworth to go….👍
@Ralf99 it's easy to get into early Sidchrome tools but I'm going to have to enter with caution. I think only looking for lightly used, unused and NOS sets and not going beyond the Proto era should place a limit on things.

It's only been a few weeks and all this research has even distracted me from preparing the next few Garage Journal posts.
 
OP
K

kitdoctor

Well-known member
Joined
Oct 30, 2010
Messages
531
Location
Sunshine Coast, Australia
Post #0056b - Construction work continues - Insulation batt installation continued - Part LI

Welcome back to Part II of the bulk insulation install! With the installation supposedly complete, I took the opportunity to perform an audit in the accommodation module.

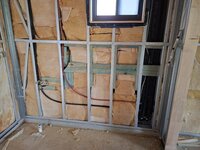
This next photo is of the exterior wall of the bathroom showing the finished insulation install. If you’re wondering about the horizontal timber blocking under the window, that’s there to provide two options for where a towel rail can be fixed to.

On the right-hand-side, the panel is congested with pipes (lagged in a black foam material) that run between the heat pump (located outside) and the hot water storage tank (located inside). Yes, it’s congested but there’s absolutely no insulation installed.

Post #0056b - Photo No. 1.jpg

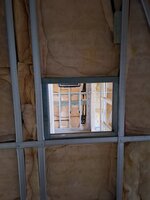
It was a Friday afternoon and the plasterers were coming on the weekend, so yours truly (and my wife) grabbed a bag of scrap insulation pieces and got busy. This next photo, skilfully shot through where the niche in the shower cubicle wall is located, shows what insulation we were able to squeeze in.

Post #0056b - Photo No. 2.jpg

Up in the bedroom, this batt caught my eye. The thing about it was that it wasn’t filling the panel it’s sitting in. The stud was clearly visible, so I pulled the batt out…

Post #0056b - Photo No. 3.jpg

This is what I found. It’s a batt that’s been split down the middle, so it’s only half the thickness it should be. So, I scanned the bedroom walls and could see lots of batts that looked suspicious. Sure enough, they were everywhere and the mad scramble starts to rectify what we’ve found.

Post #0056b - Photo No. 4.jpg

Here’s a photo of one section that we reworked. In this photo, we’ve added a lot of insulation to fill the king stud and under the window frame, as well as ensuring every larger panel has a full thickness batt. At least the sub-contractor did fill the C-column with insulation…

Post #0056b - Photo No. 5.jpg

However, in the kitchenette they didn’t fill what is part of the same C-column and after lifting the fabric flap beneath the window sill, I found that only one of four small areas under the sill trimmer were filled with insulation. There was also no insulation at the king studs either side of the window frame.

Post #0056b - Photo No. 6.jpg

Here’s a close-up photo of the area reworked.

Post #0056b - Photo No. 7.jpg

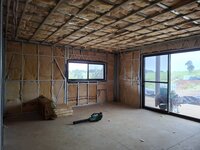
Moving on, here’s a photo of the south wall of the workshop and mezzanine storage room. On the right-hand side and either side of the window there’s no insulation at the king studs.

Post #0056b - Photo No. 8.jpg

Here’s a close-up photo of one of the king studs at the window frame. Also visible is the tip of a triangular piece of insulation that’s too small for the space, hence there’s a large gap. The irony was all the bags of scraps were piling up (shown next to the staircase), yet there’s all these gaps where the scraps could have been utilised.

Post #0056b - Photo No. 9.jpg

The carpenters weren’t due to start lining the workshop and mezzanine storage room until the following week, so my wife and I just focussed on the walls in the accommodation module that would no longer be accessible once the plasterboard was installed.

If there was good news in this, it was that we only needed to tackle some parts of two exterior walls. This was because the walls that faced into the shed would still accessible after the plasterboard was installed, since no weatherboards would be installed until a later stage.

In the next post, things go from bad to worse as I continue the insulation audit looking for half thickness batts.
 
To avoid these ads, REGISTER NOW!
Top Bottom