Post #0056a - Construction work continues - Insulation batt installation - Part LI
With the prep work largely done, the installation of the bulk ceiling and wall insulation batts was commenced. By this, I mean to the perimeter walls of the accommodation module in the shed, ditto for the workshop and mezzanine storage room, the separate storage room in the garage, as well as any suspended floors and ceiling areas.
The perimeter walls include walls that are adjacent to the internal floor area of the main shed and the vehicle parking area in the garage, so walls that are
inward facing to these areas that are not
exterior walls (which were otherwise insulated with foil insulation). I did not insulate
interior walls, i.e. walls within an area formed by perimeter walls that further divide areas into smaller spaces or rooms. Confusing, hey?
Understanding Australia’s National Construction Code (NCC 2022) energy efficiency requirements for buildings is not easy, particularly if you’re not a practising energy efficiency specialist. I’ll only talk about them below in very brief detail.
Thankfully there are resources produced by the
Australian Building Codes Board (ABCB) that are available to assist. If you’re interested and prefer listening to a tutorial, then check out the relevant energy efficiency tutorial at the
NCC Tutor. Another option is to read the ABCB’s
Housing Energy Efficiency Handbook.
Okay, now for the boring stuff

but this might help someone. I’ll do my best to try to keep it short.
In NCC 2022 Volume 2 Part 6 there are two performance requirements for housing energy efficiency. The first of these is H6P1 which is about thermal performance (building fabric) and the second is H6P2 which is about energy usage.
To satisfy a performance requirement there are three fundamental approaches:
- a Performance Solution (purple);
- a Deemed-to-Satisfy (DTS) Solution (blue); or
- a combination of a Performance Solution and a DTS Solution.
These approaches have been further developed and can then be viewed as a series of options to meet one, both or part of the performance requirements. The figure below shows this in a simplified form.
 Notes:
- Blue shading denotes a DTS solution and purple shading denotes a Performance Solution.
- Option 3 and Option 4 only provide partial compliance with one of the performance requirements, H6P1 Thermal performance.
I’ll focus on Option 1 NatHERS (Nationwide Housing Energy Rating Scheme) because this is the most popular option and the one that most often comes to mind when someone who’s building is exposed to energy efficiency requirements.
Using accredited NatHERS software an assessor will determine two ratings:
- A thermal rating which assesses the potential thermal performance of a new home. The results are converted to a score between 0 and 10 stars.
- A WOH (Whole of Home) rating which is more holistic and assesses equipment efficiencies and any offsets from on-site renewable energy of a proposed home. A WOH builds on the thermal performance assessment (i.e. star rating) of the proposed house. The results are converted to a score between 1 and 100.
With NCC 2022 housing is required to achieve a minimum thermal rating greater than or equal to 7 stars (NCC 2019 was 6 stars). In warmer climate zones (zones 1 and 2), this can be reduced to 6.5, or as low as 6, where a compliant outdoor living area is present. These reductions reflect that when a (compliant) covered outdoor living area with roof insulation (total R value of at least R 1.5) is present and used, people tend to turn off their air conditioners and use less energy. Adding a ceiling fan allows a further reduction of the star rating from 6.5 to 6. My project was assessed against NCC 2019 and achieved an 8.5 star energy rating.
NCC 2022 requires a WOH rating not less than 60 (out of 100). A WOH rating includes the fuel type and efficiency of heating and heated water systems, the efficiency of cooling systems, an allowance for lighting and the efficiency and energy use of pools and spas. My project was assessed against NCC 2019 and I wasn’t required to provide a WHO rating.
Now bear in mind that the above is only a very brief discussion, but I want to point out one very important detail. A typical free-standing house with an attached, enclosed garage is a Class 1a + Class 10 a building, the garage is the Class 10a part. So, does the Class 10a part have to satisfy NCC H6P1 and H6P2?
My best advice is to check your local requirements because in Queensland it would, even though the NCC would not require it to. For further information refer to the Queensland Development Code Mandatory Part 4.1 – Sustainable Buildings (available from
Queensland Development Code).
Now it’s actually one thing to meet the energy efficiency requirements on paper. In reality, how well a home is constructed, more specifically the insulation choice and how well it is installed play a big part in actually meeting the requirements. So, the insulation’s R value (thermal resistance), how carefully it is installed, how well gaps too small for insulation are sealed etc. play a big part in actually meeting the energy efficiency requirements.
For insulation batts I’d decided to utilise
Earthwool batts. Despite its name the material only looks like wool and is a type of glasswool insulation, comprising up to 80% recycled glass. The distinctive brown colour of Earthwool® results from ECOSE® Technology. This natural binding process leads to a natural shade of earthy brown – free from dye or colourants.

The reason I chose Earthwool batts was because of the manufacturer’s commitment to sustainability (i.e. their binding technology is formaldehyde free), its Air Comfort Gold Standard certificate (i.e. for less harmful volatile organic compound emissions) and from a practical point of view, when it comes into contact with your skin it’s less itchy. See
Earthwool FAQs.
With these glasswool batts the key limitation is that they shouldn’t be compressed, as this reduces their effectiveness. With 90 mm deep wall studs, this meant a batt with an R value (thermal resistance) of 2.7 (90 mm thick & ≈ R 15.3 USA) should be used . With 250 mm deep floor joists, I went with the maximum thickness batts that would fit, R 5.0 (240 mm thick & ≈ R 28.4 USA) and to keep the installation straightforward, batts with an R 5.0 value were specified for the ceiling spaces. This combination achieved an 8.5 star rating.
So, about a week out my builder tells me the installation is planned to commence on site, so GOOD NEWS but then what happens? Well, the day before the installation is due to start, I receive a call from my builder advising that his subcontractor can’t obtain the necessary supplies of the two types of Earthwool batts
. The delay is going to be four weeks and the plasterers are going to have to be rescheduled
, or alternatively I switch to
Bradford Gold Hi-performance ceiling batts and
Hi-performance wall batts. Reluctantly, I switched batts.
So, the day of the installation arrives, we’re on site and the builder is not which is neither unusual nor unacceptable, as a builder can’t be there all the time. So, I did what I usually do in such circumstances and go to introduce myself to the sub-contractor’s representative and ask if he has any questions about the scope of works, site facilities etc. Not only do I think this is the right thing to do, I just think it’s the polite thing to do.
The middle-aged supervisor (cigarette hanging out of his mouth) obviously recognises me as the client and his first words are “What are you doing here?”
. Absolutely stunned by his rudeness, I’m unable to articulate I’m an owner builder and therefore I’m entitled to be on site, because ultimately, I’m accountable for everything, including site safety. I utter some words that managing five acres takes a lot of work, so we’re on site quite often. I left it at that and went back to what I was doing but made the decision to keep a close eye on them…
First up, I observe them unloading the insulation batts and it doesn’t come as a surprise that they’re throwing the packs out of the truck like a football. Further visions come to mind of airport baggage handlers throwing passengers bags around and couriers launching packages like missiles onto the porches of homes.
So, the packs bounce around in the dirt and mud (there had been some recent light rain) before they move them into the garage. Okay, it’s not going to damage the batts but the packaging is getting covered in fine dust and mud and the process is transferring that dirt and mud into the garage. Now, someone’s got to clean that up or pay for it to be cleaned up…Not the end of world but my opinion of this subcontractor was fast declining.
This situation raises an interesting dilemma. I’m an owner builder and the client, but ultimately, I didn’t directly hire them. Do I intervene because it’s expediate to do so, or complain to my builder and let him decide what to do? Right or wrong, the approach I’ve taken is to only intervene when there is a risk to property, or the safety of any person, so I grin and bear the behaviour I see.
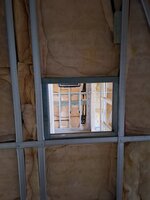
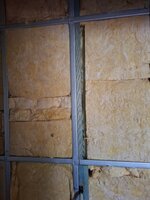
Here’s a couple of general photos of their initial placement of the wall insulation for the mezzanine storage room that’s above the ground floor workshop. It’s not finished, however, on the end wall in the first photo, there‘s a triangular shaped batt that clearly doesn’t fully fill the lower cavity of the stud wall. You can see where the ceiling batts start and finish, that is, in terms of their thickness. In hindsight, I would have preferred the walls batts to extend all the way to the top surface of the ceiling batts. The installer did do a better job on the side wall.
Those are bags of insulation offcuts left on the ground. At this point I was thinking there appears to be a lot of wastage, and secondly, who’s going to dispose of it.

Now, on the side wall in the second photo there are some batts that needed to be cut to form triangles or part triangles. The ones shown possibly don’t fully fill the part of the cavity that needs filling, maybe they would if they were better positioned. However, keep in mind too that the cavities are larger than what they appear to be because the studs, plates etc. are not solid. So, to be certain, each batt would need individual, close-up inspection to ensure it’s big enough to fully fill its cavity.
Finally, there are batts that are not sitting snugly within their cavity, with corners and edges poking out of a cavity, However, this is to be expected when there’s no interior face wall lining and no exterior face wall cladding. This would be addressed as the build progressed.
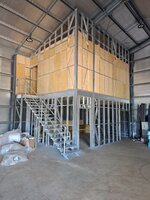
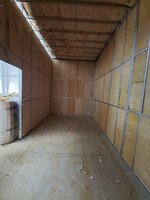
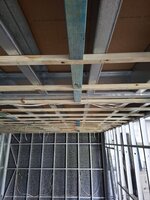
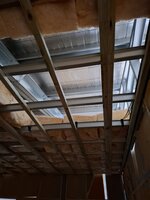
In this next photo of the garage’s storeroom, that’s too much sunlight visible at ceiling level, highlighting there’s a large gap to be filled with insulation batts. I thought to myself, is this the finished result, or are they going to fill that gap?
Using a method to string-in the ceiling batts is often needed in new builds when installing batts in raked ceilings, suspended floors, around complex obstructions etc. Those shown below weren’t sagging, so stringing wasn’t needed. They’re quite fragile and it doesn’t take much for them to separate, resulting in tufts hanging down at some points and small fragments ending up on the floor. Even though you might sweep these fragments up, there will be more reappear, so it’s best to get the ceiling lined as soon as practical.
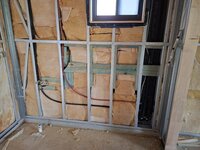
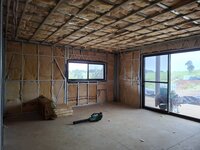
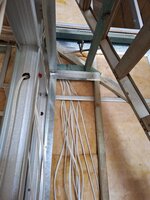
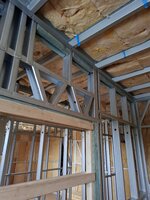
Up next is a photo showing a work-in-progress shot of the insulation being installed in the accommodation module. I took this to highlight the obstacles and obstructions, for example, the electrical cabling, plumbing pipes and taps, as well as the king studs (double, sometimes triple studs) and smaller cavities above the door trimmers. I could immediately tell those smaller cavities weren’t filled enough, however, at this stage, I hadn’t inspected the work closely and I wasn’t aware of the extent of the problems I’d later uncover.

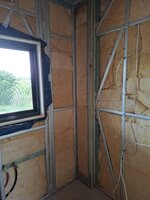
To put things in context, here’s the back wall of the bathroom before the insulation was installed, showing the plumbing services more clearly.

Around the time the insulation was being installed my wife was becoming acutely aware of how little kitchen storage space she would have, and in all honestly, I had to agree. So, we decided that the space beneath the staircase should be fitted with some drawer storage. The first step was to remove a portion of the bottom plate, trim down a stud and install some timber blocking.

Additionally, some aspects of the liveable housing design standard which are required to comply with NCC 2022 were completed, specifically the reinforcing of certain areas of select bathroom walls. The NCC requires that certain areas of some walls in shower cubicles and adjacent to baths and toilets be reinforced to accept handrails. It’s not necessary to reinforce entire wall sections, just specific areas that are shown in the NCC. Also, it’s not necessary to install the handrails, merely make provision for their future installation.
In the shower cubicle, I decided to reinforce the entire area of the two walls on which handrails might be installed. This was done with 12 mm (1/2”) plywood.
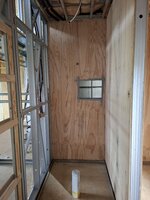
In the toilet pan area I reinforced the entire side wall adjacent to where the toilet pan would be. Not only would this allow for mounting a handrail, but this would also ensure there was a solid mounting surface for the toilet roll holder. I also chose to reinforce the rear wall to provide a solid mounting surface for the cistern.

So, if you made it to the end of this post, congratulations!
In the next post, with the work by the insulation installer essentially complete and having had the time to inspect the work closely, I’ll go through the raft of problems I uncovered, including the trick the installer tried to pull off
.






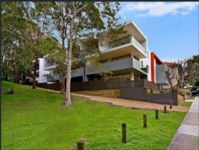


 . They figured they were more important than you, very sad that's how the world works unfortunately.