To avoid these ads, REGISTER NOW!

Above 1200 Sq/FT Overcoming Good-Deal-Itis One Project at a Time

Wokspaces above 1200 squarefeet.
OP
S

SilverJimmy

Well-known member
Joined
Apr 14, 2012
Messages
1,643
Location
Prescott/Flagstaff, AZ
Remember when I said I have a problem with “Good-Deal-Itis”? Well, here I go again! A buddy of mine told me that if I didn’t take this stuff he was going to haul it to U-Pick-It and toss it in their scrap pile (they are paying $90.00 a ton) and finally get it gone! He even sent me a picture of the load so I’d know what I was getting…
21F620C1-D0F8-40C0-9AA9-4A628651EC56.jpeg
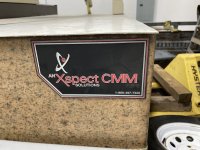
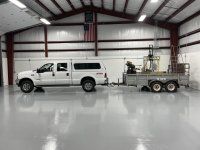
So the wife and I hooked up the trailer and off we went. The thing on the left is a Grizzly G0682 12” cold saw and the other major piece is a Starrett 78x37x12 granite surface plate with a Starrett Coordinate Measuring Machine. Got to my buddy’s shop and loaded it all up. Had to really load the Starrett carefully cuz that thing weighs almost 4000 lbs! Once loaded down the hill we went….
5CE2903B-221D-403E-B833-1CBFEE3071D6.jpeg
When we got to Prescott I backed the truck and trailer into my shop. First thing across my fresh epoxy floor is my F350 and a heavily overloaded trailer, should of recorded the squeal of the trailer tires as I backed into the shop. The epoxy handled it perfectly!
0078B08F-7C47-4996-A7A8-1B9A58BB5A98.jpeg
The cold saw I can use, it’ll be nice once I clean it up and get it running. I even got a box of freshly sharpened blades with it! I’m hoping I can get some parts from Grizzly for it as it has had a rough life. I did download the manual and parts list with all the Do’s & Don’t’s!
7C82C347-DE11-4658-9855-57F7785D110F.jpeg86E96E3E-4380-4F55-AE34-C88A863596DE.jpeg
More to come, like 4000 pounds more!
 
To avoid these ads, REGISTER NOW!
OP
S

SilverJimmy

Well-known member
Joined
Apr 14, 2012
Messages
1,643
Location
Prescott/Flagstaff, AZ
The Starrett stuff I’m not so sure what I’ll do with it. It has a computer system that runs the measuring system. My buddy’s dad used to make wing root pieces for Boeing on his CNC mill, but all that stuff is long gone, this was the last piece of equipment. I can’t even fathom how much it cost new and I don’t need it. 2A1D2CEF-EBD1-4D5E-AC22-3468A1160ACB.jpeg611E809F-F884-4508-91D6-463510AFC053.jpegE083856B-DBD5-40D8-A606-D9250180C4A3.jpeg1381B519-3F38-4A34-BB06-E9C4E1A60334.jpeg
If I keep it I’ll probably remove the measuring system and then make a heavy duty wooden cover for the surface plate. It would then be a substantial work bench that I could still use as a surface plate when I did need to. The surface plate has a bunch of threaded inserts in it for bolting down different fixtures, I did not get any of those. I was given a height gauge and gage blocks by my friend when I helped him shut down his machine shop, so I have what I need for my basic abilities. The guy who gave me all this pointed out that the measuring probe has a ruby tip. He said his dad told him that was so that temperatures couldn’t change the measurements! Amazing tool!
 
OP
S

SilverJimmy

Well-known member
Joined
Apr 14, 2012
Messages
1,643
Location
Prescott/Flagstaff, AZ
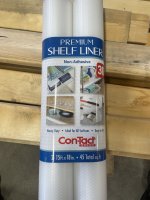
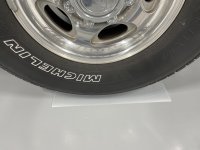
Once I got the truck and trailer backed into the shop I tried out my idea for mitigating ”Hot Tire Lift” that seams to plague epoxy floor coatings. I bought this stuff at Costco a couple weeks ago in preparation for my plan…EF7BEC71-B018-46D4-AB3B-BB0285646C76.jpeg
“Ideal for All Surfaces”! Sure hope so! Even got to use my new surface plate.01DD9C27-47FE-4B98-8297-B5D1CBF2E372.jpeg
Cut 8 pieces 12” long for all the tires. Then laid them in front of the tires.E133DEB2-87C5-413C-9D22-9DED540F3F01.jpeg24D76B82-12E2-4F17-BEF4-E13917424ED8.jpeg
Pull forward a bit and now no more rubber on the road!
E8212C56-0BE1-4B17-A4F7-66C52EEF6CBA.jpeg
I‘m going to try to remember to do this underneath any tires that will be long term in one spot on the epoxy for at least the first year, after that… It’s a shop!
 

DocsMachine

Well-known member
Joined
Sep 16, 2006
Messages
1,869
I'd love to have a functional CMM. :) But even if it was free, the cost of getting it shipped up here would be... shall we say, a tad prohibitive. :)

Doc.
 

Farmall450

Well-known member
Joined
Dec 23, 2011
Messages
13,371
Location
Marengo, Illinois
Met the owner at the shop site and looked it over. After checking it out I decided to pass. The fact that it was next to a building that burned down and had been outside since new in 2008 was just to much of a risk for even me. The hydraulic hoses, an air release cylinder, and the air lines all needed replaced and the steel cables were pretty corroded. It probably is a good deal, but I really don’t need another project!
That looks to be in amazing condition for having sat outside since 2008. I'm envious of how well stuff stores outdoors by you!
 
OP
S

SilverJimmy

Well-known member
Joined
Apr 14, 2012
Messages
1,643
Location
Prescott/Flagstaff, AZ
I'd love to have a functional CMM. :) But even if it was free, the cost of getting it shipped up here would be... shall we say, a tad prohibitive. :)

Doc.
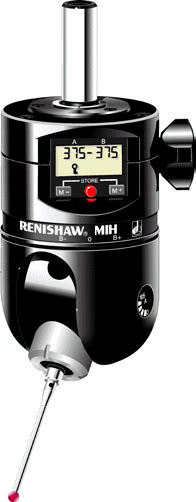
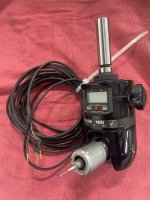
You would probably be the best candidate to resurrect this thing after watching all the lemonade you’ve made from a whole truckload of lemons that you’ve acquired! It needs some love and then it would work I’m thinking. The measuring head is so cool!9BEDE29E-DC6D-46D0-9C5E-5FCB1B69076A.jpeg
I just searched the web for the probe….
Holy ****!
 

Farmall450

Well-known member
Joined
Dec 23, 2011
Messages
13,371
Location
Marengo, Illinois
You're going to really have to hone in on your machine skills to need that CMM! All jokes aside, we use them all day every day at my work. My only word of caution is sometimes the same machine and operator will find different results (in the hundredths of mm) and the supplier's always shows it in tolerance :D

Side note, took me most of the day in several periods of free time, but I caught up with this thread. What an epic build!
 
OP
S

SilverJimmy

Well-known member
Joined
Apr 14, 2012
Messages
1,643
Location
Prescott/Flagstaff, AZ
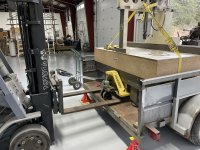
Got everything unloaded today, thank goodness I have a forklift, that thing doesn’t weigh a ton, it weighs 2 tons! After I got it lifted with my pallet jack I had to drag it with the forklift so I could pick it with the forklift!65E260D2-28A5-4A54-8AC7-535294607FE6.jpeg
Once I could get underneath it I got it unloaded from the trailer and down on the floor.
9A64AC45-C8A5-4A1A-9D28-0E773F10AE7F.jpeg
I cut up some of the scrap plywood to go under the pads to try to help the epoxy survive this thing!
4793F156-EE6C-4184-B0AD-377C9FDBADF0.jpeg
Forklift also got some tire condoms! 😆
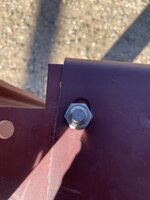
One more tag on the surface plate that I thought was cool, torque specs!
8E07E99D-06CD-4820-B71F-9C7108145418.jpeg
Then I unloaded the cold saw. You know how they say you shouldn’t try stupid **** alone? Well, I got the cold saw off the trailer ok, but then when I was trying to get it onto the moving dolly, all the sudden I realized that I was FUBAR’ed, if I let go of it it was going to possibly flip out from under that moving dolly and become a worthless pile of scrap! I was able to call the wife who was out running errands in town and explain to her how I could possibly need a hand or two….
It was the longest 15 minutes waiting for her to get home and move a 2x4 for me while I held that saw from self destructing! All is good now, just need to get it cleaned up and some parts replaced and the saw will be a good addition to my shop!57D90EB9-DC5F-47BD-AEE9-3B6E08D70228.jpeg1C34FEA6-36B6-4E3A-A59F-AEA1AF02229B.jpeg
Has a static phase converter I’ve never heard of before, anybody seen these before?
8477D707-999F-4329-91C5-C9C4D41F5840.jpeg
I still have all my toes and fingers so I’ll call today a success! Tomorrow is our anniversary, so I probably won’t be wandering around in the shop much! Thanks again for following along in my struggle with “Good-Deal-Itis”!
 
OP
S

SilverJimmy

Well-known member
Joined
Apr 14, 2012
Messages
1,643
Location
Prescott/Flagstaff, AZ
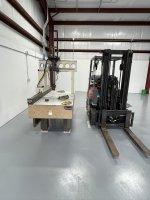
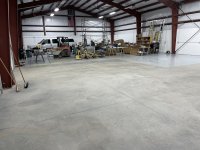
More Shop Tetris, hopefully it’s the last time! Got everything moved out of the last two bays so I can clean out the control joints before I do the backer rod and caulk them. 8B7BF588-7780-4BF7-9C46-D883E648FAA9.jpeg4E34D8E3-F1B8-47BE-BBC0-177AB0C2A048.jpeg1D1851FA-350D-4528-9CC3-76AD64216632.jpegCC5AC15E-27C9-46C3-8F2D-CEE582A148A6.jpeg
After the caulk gets cured I’ll trim it flush and acid etch the concrete. Before I do the epoxy I’m going to follow the instructions and scuff the epoxy around the edges as recommended since it’s been over 72 hours ago that I put it down. I’m also going to scuff the 1/2 of the bay where my tool box and lift are going because I want to put down a second coat of epoxy in that area that will be seeing the highest use. Two coats can’t hurt and now is the time to do it. This stuff is really tough, I ran my forklift and pallet jack all over it yesterday and today and it took it beautifully, still looks great!
 
OP
S

SilverJimmy

Well-known member
Joined
Apr 14, 2012
Messages
1,643
Location
Prescott/Flagstaff, AZ
Cleaned out the control joints today, so glad I won’t have to dig this stuff out anymore.
The shop vac filter plugged up from all the fine dust!
00F39BAC-848C-4314-99E6-5585D9A45563.jpeg
Then I got the backer rod in all the north/south runs. I need to do some JB Weld repairs on a couple spots in the east/west runs.
22A23706-418B-4DCD-9628-41CFB7851EAE.jpeg91CAC4BF-5BE2-481E-AA96-B5D82AED5969.jpeg
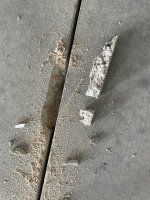
Glued these broken concrete pieces in with the JB Weld so I won’t have large caulk only spots. Probably overkill, but I’ve heard it’s sometimes called for!
 
OP
S

SilverJimmy

Well-known member
Joined
Apr 14, 2012
Messages
1,643
Location
Prescott/Flagstaff, AZ
My attempt at epoxying the busted out concrete seems to be working.
62990B30-FB01-4345-8554-114002C04356.jpeg737BD58B-FC35-47F8-A543-B822A554105F.jpeg
I tried to hit it with my D/A sander but I think the J-B Weld needs another day to cure cuz the epoxy balled up and clogged the sandpaper. So instead I worked on stripping the CMM off the surface plate. Got all the fancy bits unbolted and ready for their new homes, really hope somebody will give them a new life!
DBF753B5-915C-41D8-8172-83313C00C6D9.jpeg1B5C6DB6-ACCD-4F90-8984-45718ECFDB85.jpeg18070BBD-73B6-4889-896E-80B7F8550728.jpeg9483A561-98BB-4394-9B7B-AEEC3F69CA1C.jpeg
This stuff cost a fortune new but now it’s just old obsolete gear, barely worth shipping across the street, but if someone can make it work again, even a Model T beats walking!
 
OP
S

SilverJimmy

Well-known member
Joined
Apr 14, 2012
Messages
1,643
Location
Prescott/Flagstaff, AZ
Yesterday and today I finished caulking all the remaining control joints.
8EB9FCDE-A11F-493E-BDBB-874F615CD9DE.jpeg6293B002-8F76-4B88-AAD1-56B18DABC80C.jpeg
I abraded the epoxy that I had already put down in the area where my lift and my toolbox will be. I also hit all the edges as it was over 72 hours since that epoxy got put down.
9C13FB3B-702B-40E3-8384-39BBF4829618.jpeg
In the shops that I’ve been in that had epoxy coated floors I noticed that these areas always had more wearing of the floor coatings so I’m thinking doubling up the epoxy in this area is a good idea.
I‘m going to let the caulk cure for a couple days, then trim the caulk flush, acid etch the concrete, and finally epoxy this section of floor! A buddy loaned me a propane salamander heater, with the one I also have I should be able to get the slab over 60 degrees so the epoxy will kick! So glad this is almost done.
 

madison069

Well-known member
Joined
Nov 5, 2010
Messages
4,189
Location
Monroeville, PA
Floor is looking great! You didn’t have to rub in the good weather in my face ya know. 🤣😂

I’m waiting to spray the bunker floor when the weather warms up, but currently it looks like it will be several months before the weather will be warm enough!
 
To avoid these ads, REGISTER NOW!
OP
S

SilverJimmy

Well-known member
Joined
Apr 14, 2012
Messages
1,643
Location
Prescott/Flagstaff, AZ
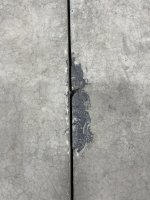
You might remember this broken out concrete from before…
12F1B2D8-A54C-418E-B8C5-F48199D57E62.jpeg
After a bit of J-B Weld and some caulk it now looks like this!
AE1E4BEC-688D-4AC9-8D47-67FB54BFD9B8.jpeg
Got all the caulk trimmed, sanded all the control joint areas, etched the concrete with muriatic acid, and mopped everything 3 or more times! Let it dry overnight and then first thing this morning…… FIRE!
7EB9CB7E-DA3C-41D3-AEFE-338A764D12B0.jpegF8EB1DD0-A264-4365-92BB-F34EA7EE9112.jpegDA47802A-6ACC-448E-B5B7-CFD60E52D3B9.jpeg
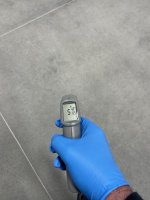
After 1-1/2 hours this was where the slab was at temp wise…8C131392-36CA-4A6C-A787-4692FCF4ED32.jpeg45720FB9-6E11-4F4D-B9E6-20A338865E2D.jpeg
Now we caulk! Edit* Epoxy!
 
Last edited:
OP
S

SilverJimmy

Well-known member
Joined
Apr 14, 2012
Messages
1,643
Location
Prescott/Flagstaff, AZ
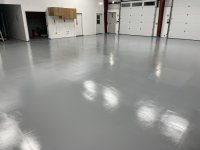
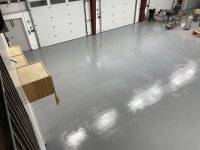
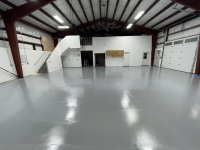
Mixed up the epoxy and then let it induct for about 45 minutes. I did also have a space heater warm up the epoxy to almost 70 degrees just to be extra vigilant. My wife and I then got busy putting the epoxy down. The one two gallon kit almost covered everything but at the end I had to mix up another 24 ounces (2x12) to get it all done.
FBEF22A2-DE16-4D45-8CE0-DDD2E000BD3E.jpegD4B4D060-3211-441D-A0C6-FEDD6B1CE38F.jpegF01353E0-28C1-4CCF-912B-0BEF229E74C4.jpeg
So cool to draw a line thru all of these “To Do” items!
EC75A6B1-2AD6-4BE3-852C-4914E9865CAF.jpeg
Tomorrow I should be able to pull all the masking paper and see how it looks!
 
OP
S

SilverJimmy

Well-known member
Joined
Apr 14, 2012
Messages
1,643
Location
Prescott/Flagstaff, AZ
Very nice shop and progress!

I hope the epoxy works for you and does not delaminate.
I believe that epoxy delamination happens with the thicker coatings that are currently done. This is just a single coating of Polyamide 2 part epoxy paint over fully cured acid etched concrete. Hoping I don’t have any issues and it just works! Thanks for following along and sharing your knowledge.
 

signcrafter

Well-known member
Joined
May 9, 2012
Messages
12,414
Looking great!

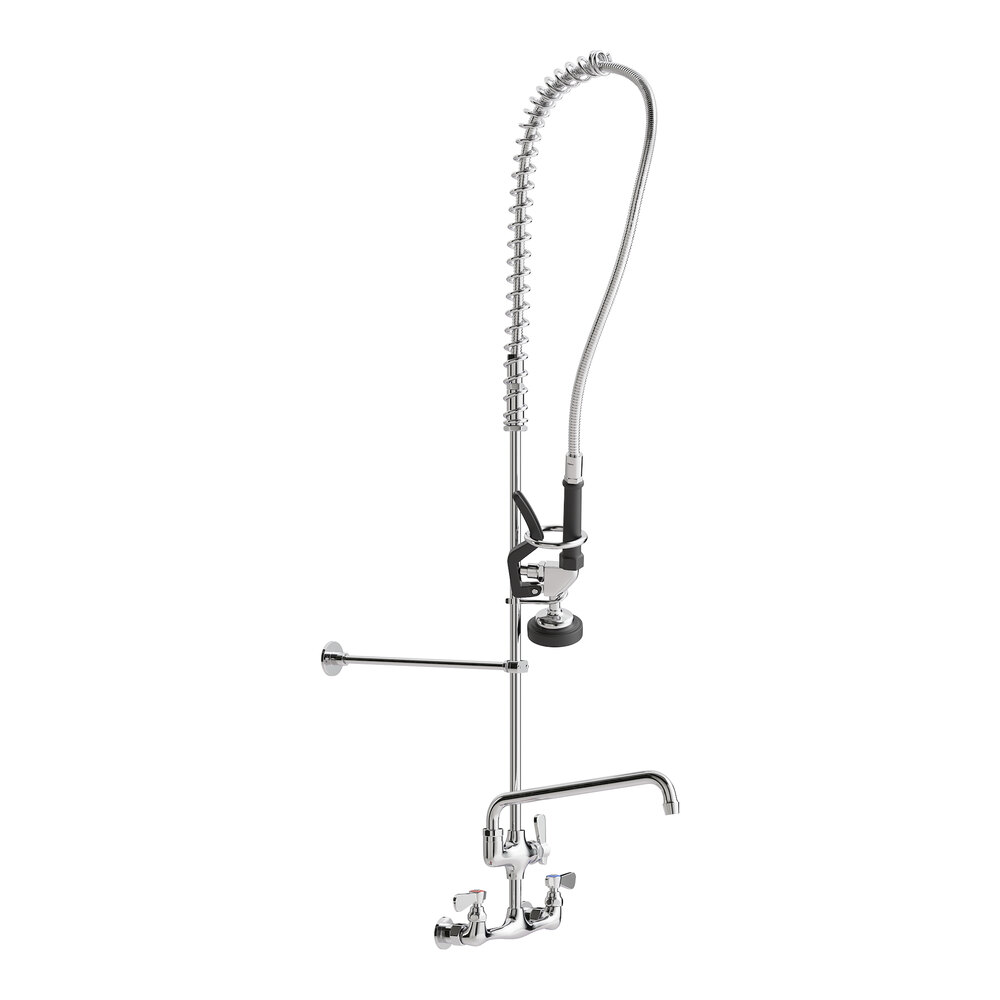
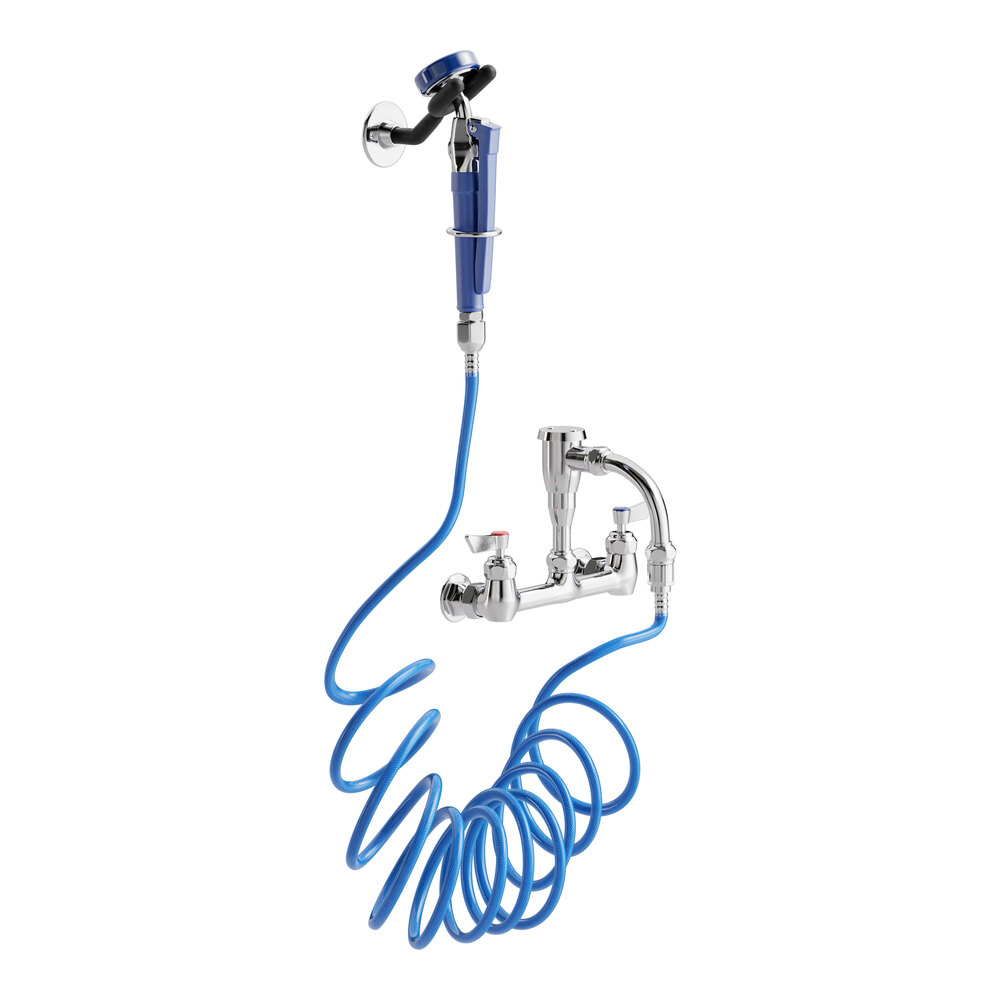
Love the restaurant sink. I do a lot of restaurant remodeling and have been trying to find a single bay prep sink to put in the shop. Have come across a few 2 and 3 bays for good prices but I don't have the room. The drying rack on the sides are nice to have also. The gooseneck type faucets work great on them, have a regular faucet for hand washing and filling buckets but also have the flexible sprayer head that works great for spraying off things, has nice pressure.


They also make a pet grooming one that is similar but has a coil hose for the sprayer head,

I wash a lot of drywall/tile/paint tools and a sprayer with good pressure is really nice to have.
 
OP
S

SilverJimmy

Well-known member
Joined
Apr 14, 2012
Messages
1,643
Location
Prescott/Flagstaff, AZ
Getting stuff moved from Flagstaff down to Prescott, going to be a lot of small bites, but it’s going and moving forward. Got the shop sink fully installed and then moved the small shop drink fridge where I want it to live.
20A6BC22-4225-4E41-9ECC-2C48C24FC981.jpeg
Also moved these old gym lockers down from Flag, have to add the third section back on for the extra room I have in the new shop. I’m going to keep shop supplies like paper towels, TP, shop rags, (clean) car wash towels, and my shop coats in them.

Also moved the first two of my Equipto benches down, I have 4 more to bring down. Two each are going into my clean room and also my other room, the last two will be in the shop back to back for a large work center.
5B9AA1D5-DF2A-4B1F-A9A0-F10D99F863E1.jpeg

Even moved my tool box over where it’ll finally end up, in the area in front of my two post lift bay.
893967C1-30E7-4AD2-95EC-B8E7FE9C0785.jpeg
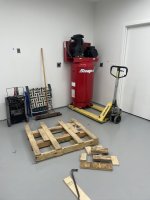
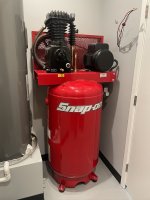
Then of course I did another “stuff I shouldn’t do alone” and pulled the air compressor off the pallet and got it onto the pallet jack so I could install the rubber isolation feet and then move it into the mechanical room.AE556A3F-24F1-4618-A2AF-AD220A3C0061.jpeg
That was pretty sketchy! I have moved lots of these over the years by myself, but, that was years ago! Luckily for me my cabinet guy came by to do some finish work on the bath vanity and he bailed me out. Got it into the mechanical room and into its cubby hole.
D2D9B7F6-1B9F-474F-9632-94F4D3281751.jpeg
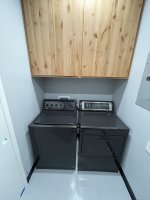
The electricians had installed the disconnect box too low so we had to pull it out of the way. Sparky’s will remount it higher up next week. Finished the base moulding in the room and then installed the washer and dryer.9E943105-1388-4753-BB17-3DF713AD2896.jpeg
All excited to fire everything up, maybe even run a load of shop towels… except the electricians forgot something…
343A57A5-9F34-4F67-B86B-1A7973F7645C.jpeg
No breakers for the dryer circuit, good thing they’ll be here next week! So much more to move, trying to do two loads a week so we don’t get burned out.
 

LXCam

ALLIANCE MEMBER
Joined
Apr 23, 2013
Messages
19,171
Location
AZ
Bud I’m feeling guilty I haven’t been around to help. But the last few months I’ve been in the valley and now thru the end of April I’m split between camp verde and downtown. Hopefully that means I’m around home a few days a week. If something like that comes up again, reach out please. You’re too damn close to the finish line to get hurt or worse, damage something that doesn’t self heal 😉🤣
 

knucklehead 61

Well-known member
Joined
Nov 14, 2024
Messages
223
what product did you use for filling the saw cuts in the slab?
i saw you mentioned using backer rod. i was thinking of using sand to partially fill the cuts.
 
OP
S

SilverJimmy

Well-known member
Joined
Apr 14, 2012
Messages
1,643
Location
Prescott/Flagstaff, AZ
I used a 1/4” backer rod to fill the control joints so I wouldn’t have to use so much caulk.
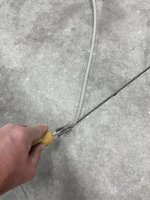
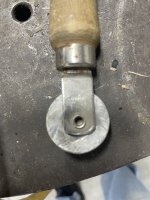
I started the backer rod into the control joint with a tire patch roller tool, then I used a screen door retainer roller to easily roll the rod into the control joints. I trimmed the tool so that it only put the rod down 3/8”
C4AC8337-FABD-4F32-82B4-00A94F2EEDA5.jpeg
7BBC63B5-9B46-4475-BBA9-96EAE6D0D4AE.jpeg
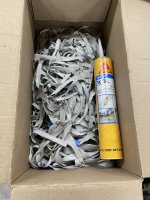
After I got the backer rod all installed I caulked the joints with SikaFlex 1cSL self leveling polyurethane caulk. After the caulk was cured I trimmed it off flush to the concrete with my razor blade scraper.EE016C1A-46AB-4488-BF92-56171A8C417A.jpeg
I ended up using 15 of the 29 oz tubes of the SikaFlex to caulk all the joints in my 50x99 shop. The control joints are cut on a 10’ center, so 4x99 and 9x50 less the wall coverage. There is probably 10-15 pounds of waste but I didn’t know how to get the joints flush without first over caulking them. Only thing I can really tell you for sure is that I really wish Harbor Freight sold a cheap cordless 29 oz caulking gun, when I would finish at the end of a day of caulking I couldn’t squeeze a grape!
 

Xti04

Well-known member
Joined
Nov 11, 2016
Messages
2,339
I used a 1/4” backer rod to fill the control joints so I wouldn’t have to use so much caulk.
I started the backer rod into the control joint with a tire patch roller tool, then I used a screen door retainer roller to easily roll the rod into the control joints. I trimmed the tool so that it only put the rod down 3/8”
C4AC8337-FABD-4F32-82B4-00A94F2EEDA5.jpeg
7BBC63B5-9B46-4475-BBA9-96EAE6D0D4AE.jpeg
After I got the backer rod all installed I caulked the joints with SikaFlex 1cSL self leveling polyurethane caulk. After the caulk was cured I trimmed it off flush to the concrete with my razor blade scraper.EE016C1A-46AB-4488-BF92-56171A8C417A.jpeg
I ended up using 15 of the 29 oz tubes of the SikaFlex to caulk all the joints in my 50x99 shop. The control joints are cut on a 10’ center, so 4x99 and 9x50 less the wall coverage. There is probably 10-15 pounds of waste but I didn’t know how to get the joints flush without first over caulking them. Only thing I can really tell you for sure is that I really wish Harbor Freight sold a cheap cordless 29 oz caulking gun, when I would finish at the end of a day of caulking I couldn’t squeeze a grape!
You guys ****. Seeing all these caulked control joints got under my skin and since I am doing all this shop cleaning I bought some backer rod tonight to do mine. Now I gotta buy some caulking to fill it in once its all done. GJ got me again!
 
To avoid these ads, REGISTER NOW!
Top Bottom