Outlawmws
Well-known member
Its all about cost, and more parts means more cost... Bean counters don't care about better engineering.


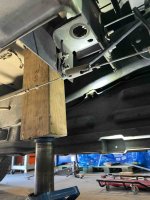
Absolute jack.
Those work pretty good for the priceNo, but I ordered some from the jungle. I've got a couple drawers to try and organize...air tool fittings/pipe fittings, random small parts and pieces, electrical stuff, etc....
I might spend some time over the coming holiday to start on it. I gotta finish my ratchet holders first though.


I recall seeing you had repaired the vert's window once before fairly recently.....Re-glued the window back to the convertible.
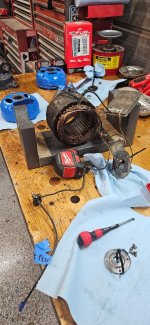
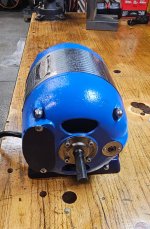
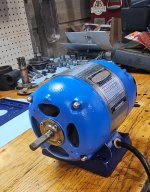
Fixed a heat gun.
How wide and how hard do you think it would be to mount on a G37 coupe?Removed the Braille battery from the new race car to put it on a trickle charger, along with removing any loose, spare parts that traveled with the car. The car came with at least 20 sets of spare brake pads, various springs, a couple used rotors, and a giant carbon fiber wing that was used at Pikes Peak (which will likely be hung up for show in the shop).

How wide and how hard do you think it would be to mount on a G37 coupe?
(don't flame me, it's LS and T56 swapped, no VQ trumpet here)
Hmmm.....It could easily be mounted to any car. I think it's 62" from end-plate to end-plate.
Thank you @bugnut I know a lot of guys absolutely will not touch another's ride but, the single mom thing wins every time@mrb1 Awesome, good on you!
She's a good girl, just in a bind right now. They've worked together five years. And it being 60F in the first week of January in Ohio (as you know) don't hurt. I checked a couple YT clips for a refresher and found a great, new to me, way of getting the one shoe off. Wish I'd seen this years ago. Apply Ebrake and clamp the spring to it's holder on the back plate. Just enough to hold the spring, not the cable. Release the Ebrake and pull on the cable. Will have a half inch now to remove and replace the shoe. No cussin' anymore


 . I can't decide if it would be better to strip and paint, or sand and paint.....
I can't decide if it would be better to strip and paint, or sand and paint...


Thank you! Not a body man or metal worker, just doing the best I can with what I’ve got! This particular section of the trucks are apparently impossible to find, so I’ve gotta do everything I can do save this one! Preferably without slopping it with heavy filler.That is impressive progress!

good thinking !You need to look for a floor tool to put a "temporary" (permanent) flat surface over and put the offending item there (pick one)

 ...
...  Sorting and periodically rifling through some old letters & stumbled upon one of my grandma’s ole’ cocktail
  recipes!

 just pg 4
Pics?More work on my ‘ultimate parts washer’ as little as it is. Making it the same height as my tool boxes.


I recently bought a new tool box. It was shipped on some fairly well made pallets. I used the pallet materials and some scraps leftover from our home build and made two tables to put plants on near the windows of the garage when it gets too cold for them outside. Nothing special. Just something to get them up off the floor and get some sun.


Nice vice!Got my first frame part of my miter station basically built today.
I decided to invest in the Festool DF500 instead of using pocket screws. It's an absolute delight to use. I made a few mistakes (math am hard) but good learning overall and for a first time shop cabinet build, I'm a-okay screwing up there instead of something that needs to be more perfect like kitchen cabinets.