To avoid these ads, REGISTER NOW!

ZMotorsports Shop Projects 2.0

OP
Z

zmotorsports

ALLIANCE MEMBER
Joined
Oct 20, 2009
Messages
21,450
Location
Northern Utah
Wanting some orange peel sounds like a be careful what you wish for scenario.

Agreed Thom. Basically, I wouldn't go into the project trying for orange peel. It will happen all on it's own to a certain degree, no matter what you do, it's almost inevitable. Trying to minimalize the best you can will almost always net you a near OEM appearance. However, that being said, if you go into it trying for orange peel, I have no doubt you'll find it and much more than you bargained for.

For those show jobs, it will always require sanding the orange peel out to flatten the clear and then slowly polish it back. This is why they cost so much as to obtain that level is quite labor intensive, and If I'm being honest, why I learned how to do it myself as it is often the most expensive cost associated with almost any project, especially if one is looking for that show level quality.
 
To avoid these ads, REGISTER NOW!

T444e

Well-known member
Joined
Feb 25, 2016
Messages
454
Mike, your paint work is very impressive and I appreciate you going into detail on the process. I'd be (and am) afraid to to attempt a paint repair on a vehicle I care about, and my Challenger is in need of a some paint repair due to rock chips starting to rust. We will not even bother to address hail damage, but is a 10 year old car with 218k on the odometer. The thing I really noticed is you did not have flies/gnats in the paint. I don't spray much and what I do spray is for corrosion protection, and there are always flys/gnats in the paint (aways, without fail). Is it not issue in your climate? Or are they not attracted to automotive paint like they are to Rustoleum? Just curious based on observations of my experience.
 
OP
Z

zmotorsports

ALLIANCE MEMBER
Joined
Oct 20, 2009
Messages
21,450
Location
Northern Utah
Mike, your paint work is very impressive and I appreciate you going into detail on the process. I'd be (and am) afraid to to attempt a paint repair on a vehicle I care about, and my Challenger is in need of a some paint repair due to rock chips starting to rust. We will not even bother to address hail damage, but is a 10 year old car with 218k on the odometer. The thing I really noticed is you did not have flies/gnats in the paint. I don't spray much and what I do spray is for corrosion protection, and there are always flys/gnats in the paint (aways, without fail). Is it not issue in your climate? Or are they not attracted to automotive paint like they are to Rustoleum? Just curious based on observations of my experience.

Thank you for you comments and for following along on my projects.

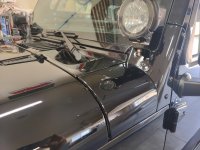
I wouldn't let the age and mileage deter you from fixing your Challenger if you really like the car and want to keep it. My wife's 2013 Acura TL has 210k on the clock and I need to touch up the rear spoiler where the clear is wearing. Everything else looks good and just needs some polishing, but I'll be repairing and re-clearing the rear spoiler on the deck lid here shortly as well as clearing the headlights. I like keeping things in proper repair and aesthetics are part of that care so it's been bugging the ever living **** out of me lately looking at that dent in the Jeep's cowl and a big scratch in the driver's door that we got last year in Kanab, UT when we got into some tight brush on Hog Canyon trail. I just noticed the clear on the wife's car last weekend while washing it and now that is bugging me, so while I have all of the paint supplies out, I may as well address that and get it over with. 🤔

I would suggest if you want to repair your Challenger to do what Scott mentioned above and go to your local wrecking yard and grab a fender or hood off of something and practice all the way up to and including some paint and clear before tackling your Challenger. I learned on my first vehicle, a 1979 GMC Jimmy, in High School and let's just say I would be ashamed if it were in my stable today. :oops: But, was proud of it and knew I did it with my limited skills and tools, despite my peers in school that had their dad's purchase their trucks and deck them out. It just pushed me that much more to refine my skills and I find I am still pursuing that refinement today.

As for the flies and/or gnats, yes, we have them here but the temperatures over the past few weeks have been ideal to keep them at bay, I suspect that will be changing here shortly. There are some tricks to preventing dust nibs and dirt in the job, such as remasking after sanding to prevent dirt from getting in the job as well as on solid colors what I like to do is on the second to the last coat of color is lightly, emphasis on lightly, run a soft 600-grit sponge style of sanding block over the surface. This knocks down any dirt nibs before the clear goes down. Most of the time I have found the base is more susceptible to getting trash in it than people realize. Then I will apply one more coat over that before letting it flash and moving on to the clear. It will not totally prevent dirt or dust in the finished product, but it greatly reduces it.

This can be more problematic on large jobs so care must be taken and the key is not to rush it and give everything plenty of time to flash, don't rush any step in the process as the chemicals need adequate time to evaporate and flash off. One thing I see people doing, and I think I alluded to this in a previous post, it piling on the layers before they've had adequate time to flash off. I have seen people stack on 5, 6 or even 7 layers of clear, pleased with the gloss and finish only to walk away and return in 30-60 minutes to discover solvent pop issues because the trapped solvents had nowhere to go but up through the layers.

Probably more than you were asking, but hope it's helpful.
 
OP
Z

zmotorsports

ALLIANCE MEMBER
Joined
Oct 20, 2009
Messages
21,450
Location
Northern Utah
Hope everyone had a nice weekend. Saturday was a busy day polishing paint on the Jeep. Hope everyone likes pictures, because I have a ****-ton of them coming.

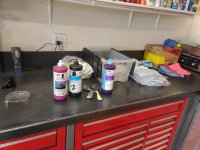
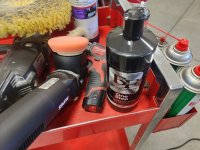
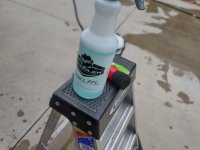
Polishing compounds and pads.
jeep51.jpg

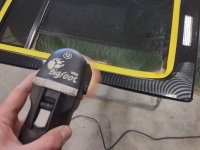
Trusty old BuffMaster corded polisher at the far right called to duty and this time I have a couple of newer tools in the polishing arsenal, a 3" Rupes detail DA and a 6" Rupes DA in which to try some Black Fire One-Step polish as the last step that I have read good reviews on in the RV detail world. I bought these to use on the coach to perform a One-Step detail but figured I'd give them a try on the Jeep.
jeep52.jpg

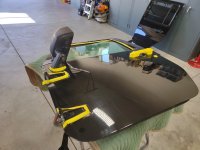
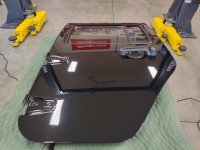
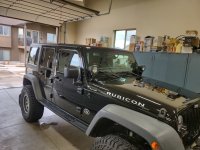
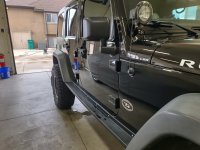
Doors off the Jeep.
jeep53.jpg

jeep54.jpg

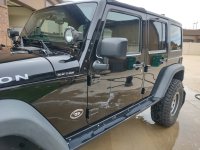
The scratch on the driver's doors is the worst. It starts mid-way through the front door and
jeep55.jpg

continues through the back door. The rest of the scratches are micro scratches and can easily be removed with some coarse compound, then work up through the second and third steps followed lastly by the One-Step using the Rupes polishers.
jeep56.jpg

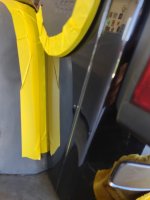
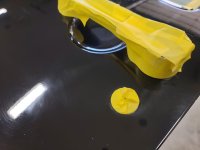
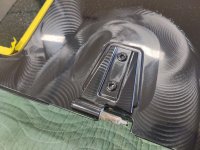
Button head screws taped up to avoid knocking the coating off with the polishers.
jeep57.jpg

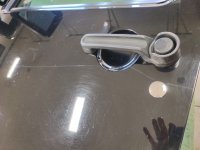
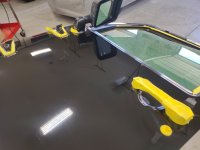
Hinges and door handles masked also to avoid packing with polishing compound.
jeep58.jpg

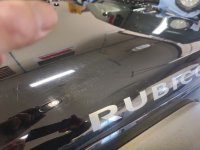
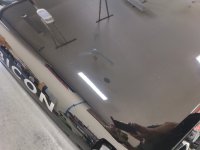
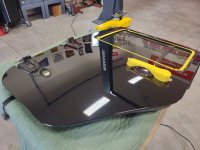
The hood just has a lot of micro scratches from all those car washes.
jeep59.jpg

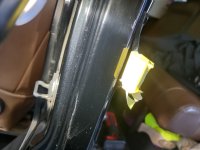
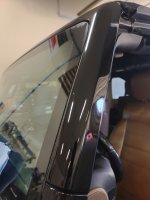
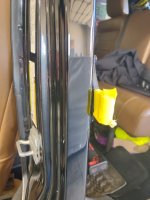
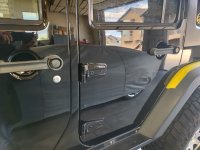
Between the front and back door on the driver's side on the B pillar there is a corresponding deep scratch. Not through the clear, but deep enough in the clear it needs some coarse compound to remove.
jeep60.jpg


Stay tuned for many, many more pictures. Hope that's ok.
 
OP
Z

zmotorsports

ALLIANCE MEMBER
Joined
Oct 20, 2009
Messages
21,450
Location
Northern Utah
Continuing on.

To kick things off I started with a 3" wool compounding pad and coarse 3M compound.
jeep61.jpg

A few passes and the deep scratch is gone. Just fine polishing scratches remain which the next two steps will remove.
jeep62.jpg

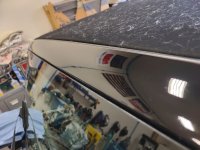
Process repeated along the top of the windshield as there were some scratches from tree branches.
jeep63.jpg

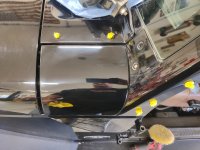
The freshly painted corner cowl turned out great. Just a few passes easily removed the couple of dust nibs in it.
jeep64.jpg

Second step completed and scratches are being replaced with fine swirl marks now.
jeep65.jpg

jeep66.jpg

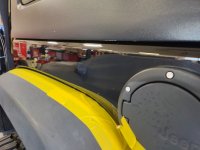
I identified a couple of scratches at the rear driver's quarter near the fuel fill so they were also addressed.
jeep67.jpg

The deep scratch is gone on the driver's front door.
jeep68.jpg

jeep69.jpg

Most all of the finer scratches are also removed.
jeep70.jpg


Stay tuned for many more pictures.
 
OP
Z

zmotorsports

ALLIANCE MEMBER
Joined
Oct 20, 2009
Messages
21,450
Location
Northern Utah
Continuing on.

With all three steps completed on much of the body, it was time to try out the Black Fire One-Step polish and the Rupes 3" detail DA.
jeep71.jpg

It seems to do a nice job.
jeep72.jpg

jeep73.jpg

jeep74.jpg

jeep75.jpg

jeep76.jpg

jeep77.jpg

Once all of the A & B pillars are completed and the rear quarters were done, I turned my attention to getting the hood up to the same level.
jeep78.jpg

Moving on to the passenger's side. The passenger's side was nowhere near as scratched up as the driver's side so it went much faster and I didn't need to hit most if it with the coarse compound.
jeep79.jpg

Driver's rear quarter completed.
jeep80.jpg


Stay tuned for more.
 
Last edited:
OP
Z

zmotorsports

ALLIANCE MEMBER
Joined
Oct 20, 2009
Messages
21,450
Location
Northern Utah
Continuing on.

Driver's rear quarter.
jeep81.jpg

Driver's front quarter.
jeep82.jpg

Last part on the main body was the tailgate. I went straight to the One-Step here as there weren't many scratches, just a bit faded and needed a little attention. I thought I'd try out just using the Rupes 3" detail polisher and the One-Step. I'm impressed. Not a show job by any means, but considering it's an off-road vehicle, I am pleased with the outcome.
jeep83.jpg

Here you can see the definitive area where I stopped just at the edge of the hinge covers.
jeep84.jpg

Tailgate completed. I even hit the powder coated vent cover in the middle of the tailgate using the One-Step and it brought it back to life.
jeep85.jpg

jeep86.jpg

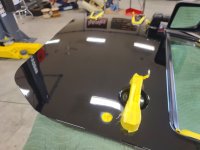
One-Step being done on the hood as the last part.
jeep87.jpg

jeep88.jpg

jeep89.jpg

Again, not a show job as there are still some fine scratches visible, but for a vehicle that will see a lot of off-road miles, I can live with this as I don't want to remove any more clear than necessary.
jeep90.jpg


Stay tuned for more.
 
OP
Z

zmotorsports

ALLIANCE MEMBER
Joined
Oct 20, 2009
Messages
21,450
Location
Northern Utah
Continuing on.

Another shot of the hood after completion.
jeep91.jpg

Next the attention was turned to finish out the doors. The 3" detail polisher was great around the hinges and door handles, but the 6" DA worked great and produced excellent results on the large flat surfaces of the doors.
jeep92.jpg

jeep93.jpg

Driver's front door reinstalled after final step completed.
jeep94.jpg

And that big nasty scratch is gone.
jeep95.jpg

Driver's rear door is nearly completed and the scratch on this door is gone.
jeep96.jpg

A little more detail around the perimeter of the door frame.
jeep97.jpg

Around the hinges with the 3" Rupes and even the hinges themselves were unmasked and hit with the One-Step.
jeep98.jpg

The little 3" Rupes detail polisher really did a nice job even on the hinges themselves without worry of catching and burning through.
jeep99.jpg

Then the Rupes 6" DA hit the large flat areas.
jeep100.jpg


Stay tuned for more.
 
OP
Z

zmotorsports

ALLIANCE MEMBER
Joined
Oct 20, 2009
Messages
21,450
Location
Northern Utah
Continuing on.

Driver's rear door now completed.
jeep101.jpg

Unmasked and wiped with a micro-fiber cloth.
jeep102.jpg

And installed.
jeep103.jpg

jeep104.jpg

jeep105.jpg

Passenger's side front quarter completed.
jeep106.jpg

Passenger's side B-pillar completed.
jeep107.jpg

And passenger's side rear quarter completed.
jeep108.jpg

Passenger's side front door completed and reinstalled.
jeep109.jpg

Rear door and now the entire passenger's side is completed.
jeep110.jpg


Stay tuned for more.
 
OP
Z

zmotorsports

ALLIANCE MEMBER
Joined
Oct 20, 2009
Messages
21,450
Location
Northern Utah
Last of the pictures for today, I promise... :bounce:


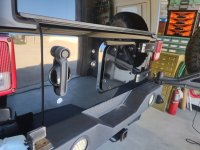
With the polishing completed and getting late in the afternoon, I thought I'd mount the A-pillar off-road lights back on the freshly painted brackets.
jeep111.jpg

Brackets installed.
jeep112.jpg

Passenger's side light mounted and aligned.
jeep113.jpg

Then the driver's side light mounted and aligned to match the passenger's side.
jeep114.jpg

The freshly clear-coated lens covers installed.
jeep115.jpg

jeep116.jpg


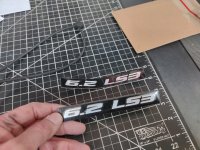
At about this point, the wife had grabbed the mail and she came out to the shop and said I had a package arrive. What timing...... The new LS badge, not to see if it matches the old ones. Sure enough, perfect match.
jeep117.jpg

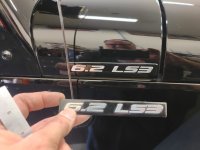
Took measurements off the passenger's side to ensure it goes back on correctly.
jeep118.jpg

Masked off to align the new badge on the driver's side.
jeep119.jpg

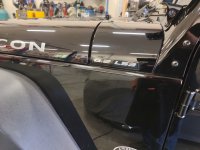
Complete.
jeep120.jpg


As the wife was sitting there as I was finishing up the last detail of the job, adding the LS badge, she had the audacity to say; "well, doesn't look like we'll be doing any off-roading this year then huh?" I replied why? She said "because it looks more like we should go to car shows than Jeep trails this year because now you'll be too afraid to take it off-road and scratch it or get it dirty."

Hmmmm :unsure:


Thanks for looking.
 
OP
Z

zmotorsports

ALLIANCE MEMBER
Joined
Oct 20, 2009
Messages
21,450
Location
Northern Utah
Man, the Jeep is looking GOOD Mike! I'm gonna check out that one step for the coach for sure!

Thanks Keith. I still have to give the Jeep a good thorough wash job to remove some compound splatter and then treat the fenders, but so far I am pleased with the outcome. It's been a few years since I've polished it and it was definitely in need of some TLC.

I need to make time to get a coat of polish on the coach, but now seeing how the Rupes 6" DA and One-Step does, I am excited to get to it.
 
OP
Z

zmotorsports

ALLIANCE MEMBER
Joined
Oct 20, 2009
Messages
21,450
Location
Northern Utah
Jeep looks good.

Is there a need for a smaller diameter buffer for those narrow paint sections?

Thank you.

I have used a small 3" polisher for small areas for quite a few years now, but my old one was pneumatic. Then a couple of years ago I purchased the small Milwaukee 3" cordless polisher at the same time I purchased my Milwaukee 7" larger polisher. I LOVE the small 3" polisher from Milwaukee for detail work as it is so easy to get in around obstacles such as door handles, reveals, etc. whereas the larger one can easily catch and grab and then the next thing you know you've burned through the clear somewhere. I avoid using the large polishers around such area for that reason.

I don't particularly care for the larger Milwaukee polisher as I feel it doesn't work as well as my old tried and true Buffmaster corded polisher. That thing is a tank and just flat works and makes short work of getting after it aggressively whereas the cordless Milwaukee just doesn't have the umph it needs to be aggressive.

When I was looking at the Rupes DA style of polishers, I went with the larger throw to cover larger areas as the coach is what I was really aiming the purchase for. I also bit the bullet and bought the smaller 3" Rupes detail polisher to get around small areas such as the grill work, mirrors, etc. on the coach. However, now seeing how well it works on the Jeep I see myself using it quite a bit more in the future.


I have to thank Dave, aka @bigdave_185 as he volunteered me borrowing his Rupes polisher a couple of years ago but I couldn't bring myself to take him up on his offer. He bragged about how well it worked so when I was looking for a solution to cut a few steps out of the polishing of our coach, I looked in to One-Step polishes and also learned the Rupes 6" DA style was a favorite among RV detailers for this polish. Those reviews and Dave's suggestion were instrumental in my purchase decision.
 
OP
Z

zmotorsports

ALLIANCE MEMBER
Joined
Oct 20, 2009
Messages
21,450
Location
Northern Utah
Nice work as always. I lag on car washing/detailing as it is one of my least favorite things to do. I do like a clean rig, but just hate to do it myself, so I hit the carwash.

I concur. It's not my favorite thing to do either, but I sure do love driving a clean vehicle, so for that peace of mind it's worth it, I guess. :headscrat
 

pancholasvegas

Well-known member
Joined
Nov 6, 2017
Messages
253
I am glad to see that you are satisfied with the SPI Products - I am just now trying out their products (mainly the epoxy primer and W&G remover) and I am thrilled with this stuff! I have hardly an idea of what I'm doing, but these products sure give guys like me a fighting chance!
 
OP
Z

zmotorsports

ALLIANCE MEMBER
Joined
Oct 20, 2009
Messages
21,450
Location
Northern Utah
I am glad to see that you are satisfied with the SPI Products - I am just now trying out their products (mainly the epoxy primer and W&G remover) and I am thrilled with this stuff! I have hardly an idea of what I'm doing, but these products sure give guys like me a fighting chance!

While I have only been using SPI products a few years, I am more than satisfied with their quality. I haven't found anything that I have not been pleased with. The ONLY thing I can suggest is if you use the white epoxy primer, do NOT spray it on a medium wet coat like the grey or black. It will do funny things. Don't ask me how I know.
 
To avoid these ads, REGISTER NOW!

Boosted1

Well-known member
Joined
Nov 25, 2007
Messages
1,680
Location
Georgetown, KY
Nice work on the polish job. I was thinking to myself as I was progressing through your posts that a black vehicle is the most challenging to maintain, so have a black Jeep that is offloaded must be the most difficult.
Then I read your wife's comment. Lol.
 
OP
Z

zmotorsports

ALLIANCE MEMBER
Joined
Oct 20, 2009
Messages
21,450
Location
Northern Utah
There is no way all that black is paint! You somehow substituted black mirrors for body panels. Had to have! (Really nice polish job, outstanding!)
Nice work on the polish job. I was thinking to myself as I was progressing through your posts that a black vehicle is the most challenging to maintain, so have a black Jeep that is offloaded must be the most difficult.
Then I read your wife's comment. Lol.

Thanks guys. I appreciate the comments.

I agree, black is not the best color for an off-road vehicle, but when purchasing used, the choices are somewhat limited. I built my wife a 1989 Thunderbird back in 1990. I think I posted pictures of it in this thread a while back. It was totaled when we bought it, I actually bought two to make one good one out of. The one we kept was light blue, the one we used for parts was kind of a champaign color, but she said she wanted it black. So I stripped it right down and did a full color change. The car turned out beautiful and she loved it, but it was a PITA to keep clean. I could wash it, go in the house to shower to go to dinner and when we came out it would have a layer of dust on it. I swore I would never own another black vehicle.............................then we bought the Jeep 25 years later. :headscrat
 
OP
Z

zmotorsports

ALLIANCE MEMBER
Joined
Oct 20, 2009
Messages
21,450
Location
Northern Utah
Last night I was able to put the finishing touches on the Jeep from the paint work and cosmetic correction.


Backed it outside once it stopped raining to give it a thorough wash job. There was some compound splatter around the windows and window moldings that needed to be cleaned off, plus I needed to really scrub the plastic fenders and door handles. I haven't put any 303 treatment on it last year because I was trying to let it wear off before trying the next product and my fenders were looking quite terrible the last 6+ months.
jeep121.jpg

Used some APC
jeep122.jpg

And a stiff bristled brush to really scrub the fenders and door handles.
jeep123.jpg

jeep124.jpg


jeep125.jpg

Then gave everything a good going over with a chamois.
jeep126.jpg

jeep127.jpg

Pulled back into the shop to hit the nooks and crannies with compressed air to ensure everything was dry and no water would drip onto the plastic while I was treating it.
jeep128.jpg

jeep129.jpg

jeep130.jpg


Stay tuned for more.
 
OP
Z

zmotorsports

ALLIANCE MEMBER
Joined
Oct 20, 2009
Messages
21,450
Location
Northern Utah
Continuing on.

With everything dry, I masked off the paint around the plastic to be treated.
jeep131.jpg


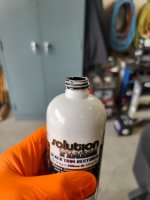
I am taking Dave's, aka @bigdave_185 , who recommended I try Solutions Finish a couple of years ago after he treated the fenders on his wife's Jeep and was impressed with the results. I have had it sitting on the shelf for over a year now and no time to give it a try until now. I wanted to wait to ensure all of the 303 had worn off from last year so I have held off applying any more for the past year and after giving everything a good paint correction and scrubbing the fenders, I figured now was as good a time as any to give it a try.
jeep132.jpg

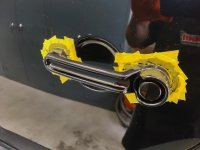
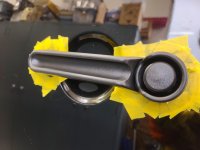
This is more of a die than a surface treatment. It goes on rather thick and soaks in pretty quick. The instructions say to let it sit only for 1-4 minutes, but as faded as my fenders and door handles were I let the die sit on them a little longer than the suggested time, although I don't know how much difference it really made by letting it sit on longer. I started with the door handles by treating them all the way around.
jeep133.jpg

I then went around and wiped off the remaining residue with a micro-fiber towel.
jeep134.jpg

jeep135.jpg


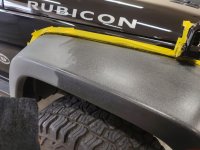
Pleased with the door handles, I moved on to the fenders. Here you can see the difference between the front area I treated and the rear section yet to be treated.
jeep136.jpg

Tailgate handle after another going over with a micro-fiber towel and unmasking the surrounding paint.
jeep137.jpg


Completed.
jeep138.jpg

jeep139.jpg

jeep140.jpg


Time will tell how well this holds up, but Dave said his held up well for quite some time and the product gets excellent reviews.


Thanks for looking.
 
OP
Z

zmotorsports

ALLIANCE MEMBER
Joined
Oct 20, 2009
Messages
21,450
Location
Northern Utah
I'll be curious to see how the plastic treatment works as well.
I had picked up some 303 to use on my fleet and it has mixed results on some quite faded trim on the kids Subaru.

I've been a real fan of 303 for many years, but our Jeep is also the only vehicle in our fleet that has this much exposed textured plastic. The 303 Aerospace has done a "fair" job if I keep it applied regularly, however, if left go more than about 6 months or so, the appearance drops off drastically from UV exposure. Underhood and door gaskets I still feel it is a great product and still use it on those items.


I hope this Solutions Finish meets my long term expectations. I am fine if I need to apply it maybe once a year or even every other year as long as the color holdout is good between those intervals. I was worried it would leave a tacky or gummy feeling when I was applying it, but after buffing off the residue after a while, I was quite pleased that there was no unpleasant or odd "feel" to it. I also don't want it to be a dust magnet, but based on what it feels like after buffing off, I am not expecting that. Again, time will tell and I will report back.
 

Swanny1953

ALLIANCE MEMBER
Joined
Jul 28, 2010
Messages
1,082
Location
Lucas, TX
I swore I would never own another black vehicle.............................then we bought the Jeep 25 years later. :headscrat
Mike, this is exactly where I have been on black vehicles for 30 years! I bought Lori a black Nissan Maxima in 1986 when our oldest daughter was coming into the world, and I liked the car for about 15 minutes! The car was great from a mechanical standpoint (we owned it for 10 years!!), but the black paint and the difficulty of keeping it clean and the constant swirl marks pretty much regardless of what I did, really turned me off! We sold it just before we move to Texas 30 years ago and I just don't see another black car in the cards. In fact, I have turned away from many auctions just because the car is painted black!
When clean and properly prepared, a black car can be absolutely stunning, especially when the bodywork is spot on, and I appreciate all that as long as it's someone else's car to maintain!!!
 
OP
Z

zmotorsports

ALLIANCE MEMBER
Joined
Oct 20, 2009
Messages
21,450
Location
Northern Utah
Mike, this is exactly where I have been on black vehicles for 30 years! I bought Lori a black Nissan Maxima in 1986 when our oldest daughter was coming into the world, and I liked the car for about 15 minutes! The car was great from a mechanical standpoint (we owned it for 10 years!!), but the black paint and the difficulty of keeping it clean and the constant swirl marks pretty much regardless of what I did, really turned me off! We sold it just before we move to Texas 30 years ago and I just don't see another black car in the cards. In fact, I have turned away from many auctions just because the car is painted black!
When clean and properly prepared, a black car can be absolutely stunning, especially when the bodywork is spot on, and I appreciate all that as long as it's someone else's car to maintain!!!


I get t that completely Gary. I don't know if there's a a nicer looking color than black when the body is straight and it's clean, but it is so hard to keep them clean.

When we were looking at used Jeeps back in 2010 I swore I would not own one of those pastel things but when I similar across this nearly new 2011 Keep with only 3208 miles and the wife feel in love with the interior vs. The 2007-2010 models we see looking at I figured I'd make do. I love the Jeep so I'll tolerate the occasion dust settled on it and the occasional polishing.
 

Jgaz

Well-known member
Joined
Dec 16, 2016
Messages
1,705
Location
AZ
Mike, I understand your love of black.
The first vehicle I purchased was black, a 1975 Dodge Tradesman van
IMG_0962.png
I learned to take care of the paint from an older gentleman that was the used car detailer at the dealership where I worked.

Note: This is an iPhone photo of an old film print photo.
I ran the iPhone photo through a AI program and told it to sharpen the focus.
The program did a great job.
The only thing it got wrong was the tire brand and it substituted a CA. license plate instead of the bicentennial Mich. plate that was on the van in the original photo.
Not a difficult way to save photos from the 70’s
 
OP
Z

zmotorsports

ALLIANCE MEMBER
Joined
Oct 20, 2009
Messages
21,450
Location
Northern Utah
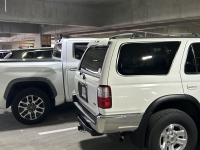
Eastwood plastic resurfacer is another option. I have had good results with it on a few plastic fenders shown here. This is over 3 years after resurfacing the fender flares on my 4Runner.

Thanks for the recommendation. I'll see how this Solutions Finish holds up.


Mike, I understand your love of black.
The first vehicle I purchased was black, a 1975 Dodge Tradesman van
IMG_0962.png
I learned to take care of the paint from an older gentleman that was the used car detailer at the dealership where I worked.

Note: This is an iPhone photo of an old film print photo.
I ran the iPhone photo through a AI program and told it to sharpen the focus.
The program did a great job.
The only thing it got wrong was the tire brand and it substituted a CA. license plate instead of the bicentennial Mich. plate that was on the van in the original photo.
Not a difficult way to save photos from the 70’s


Sharp looking van. A van has massive and flat panels and that one looks pretty straight and nice deep color. Again, black may not be the easiest color to keep clean, but damn, it sure looks good when its straight and clean. :thumbup:


Jeep looks great!

The black truck I now wish I hadn't sold cheap to my neighbor:IMG_4194.png

Pretty straight body. I actually liked the nose on those early to mid 90's Fords. Much better than the front end on my '88 and '89 that I owned.
 
OP
Z

zmotorsports

ALLIANCE MEMBER
Joined
Oct 20, 2009
Messages
21,450
Location
Northern Utah
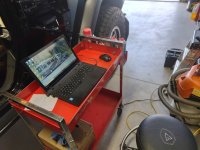
A few weeks ago when I cut a little off the intake duct for my new K&N air filter, I had to "tweak" the air frequency table about 4% in my tune to compensate. The MAF seemed to be under-reporting just a little as MAF placement is critical in the calibration from the air filter and the throttle body. Although my long term fuel trims still were well in the +/- 5% range, I wanted them closer to zero like I had them before. So I "tweaked" it back about 1.5% as it was now ever so slightly over-reporting.

Before messing with tunes and even when performing diagnosis on vehicles these days, I like to hook up my small Clore battery charger as it has a PS (Power Source) feature that maintains a stable voltage. I have read and heard of people bricking their ECM's due to a low power event during tuning, so I have been nervous about that as I don't do a ton of tuning so would have to brick my ECM.
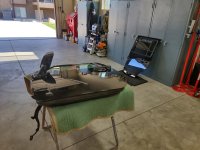
axle1.jpg

Then connected the laptop, downloaded the program, made a small adjustment to my air frequency table and then wrote it back to the ECM.
axle2.jpg

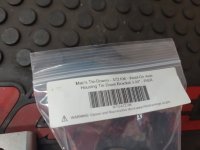
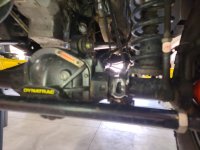
With the cosmetics on the Jeep complete I thought I'd rack it and give it a good once over before our travel season begins as well as knock one more item off my "to-do" list, adding axle tie-down points. Back in the fall when I ordered some parts to modify my new tilt deck car trailer, I ordered some additional 6k pound swivel flat style D-rings from Mac's Tie Downs as well as a couple sets of these axle strap connection points for if/when I decide to haul the Jeep on the trailer. We added some to my son's LJ many years ago and it sure made strapping the axles quick and easy, but I never did add them to my Jeep, I just continued to use wrap around axle straps, but these are so handy for tying a vehicle to a trailer.
axle3.jpg

axle4.jpg

After playing with angles and locations, I knocked the paint off the axle tubes.
axle5.jpg

And welded the brackets in place.
axle6.jpg

axle7.jpg

Ran a wire wheel over the welds, wiped the tubes down and hit with a coat of paint.
axle8.jpg

Then moved on to duplicate on the front axle. With the tie-rod, hydraulic assist cylinder and swaybar links, access was just a little tighter to get a MIG gun in there, but the job came out nice. The only issue with front axles is the brackets are not symmetrical in terms of placement, but they still work great and hold well.
axle9.jpg


Thanks for looking.
 

Grant Gunderson

Well-known member
Joined
May 17, 2013
Messages
2,330
Location
Bellingham, WA
Mike the jeep looks fantastic and I know it’s a hell of a lot of work to keep a black off-road vehicle clean!

I always wanted a black truck for as long as I can remember. So when the Titan XD Diesel first came out I bought it, on paper it was my dream truck. I had one of the very first ones. I quickly learned trying to keep a black truck looking good when it’s mostly mountain driving is a hell of a lot of work and quite frankly impossible when I had a newborn at home to also attend to. But when I did have the odd moment to clean / wax it looked fantastic… which was the only good thing about that vehicle. It would simply fall in its face anytime you tried to accelerate. Then on a work trip the transfer case died. Nissan North America (usa) wouldn’t help as I was in Canada and Nissan Canada said no as I bought it in the us. We ended up doing a post on the NatGeoAdventure instagram (I was working for Nat Geo at the time). Next day I got a call from the president of Nissan North America and told him about our predicament and how my dream truck was a total pos. They ended up buying the truck back from me and paid me interest for the time I owned it…. So in the end made money on the deal. But I learned two things. Never buy a first model year vehicle and never buy a black vehicle!

8 years latter my F250 has been holding up well but was impossible to keep clean with two young kids. Especially with us skiing or mountian biking every day. Now the kids are both 9, I’ve sold my sleds I’m thinking about downsizing but no idea what to get as I really do love a diesel truck in the snow, but something smaller to park at the shop downtown would be good. Once I down size we will pick up a camper van for trips. Hopefully the next one will be easier to keep clean as less kid **** in the backseat. I’m pretty sure trail mix was invented by cleaning out a toddlers car seat.
 
OP
Z

zmotorsports

ALLIANCE MEMBER
Joined
Oct 20, 2009
Messages
21,450
Location
Northern Utah
Mike the jeep looks fantastic and I know it’s a hell of a lot of work to keep a black off-road vehicle clean!

I always wanted a black truck for as long as I can remember. So when the Titan XD Diesel first came out I bought it, on paper it was my dream truck. I had one of the very first ones. I quickly learned trying to keep a black truck looking good when it’s mostly mountain driving is a hell of a lot of work and quite frankly impossible when I had a newborn at home to also attend to. But when I did have the odd moment to clean / wax it looked fantastic… which was the only good thing about that vehicle. It would simply fall in its face anytime you tried to accelerate. Then on a work trip the transfer case died. Nissan North America (usa) wouldn’t help as I was in Canada and Nissan Canada said no as I bought it in the us. We ended up doing a post on the NatGeoAdventure instagram (I was working for Nat Geo at the time). Next day I got a call from the president of Nissan North America and told him about our predicament and how my dream truck was a total pos. They ended up buying the truck back from me and paid me interest for the time I owned it…. So in the end made money on the deal. But I learned two things. Never buy a first model year vehicle and never buy a black vehicle!

8 years latter my F250 has been holding up well but was impossible to keep clean with two young kids. Especially with us skiing or mountian biking every day. Now the kids are both 9, I’ve sold my sleds I’m thinking about downsizing but no idea what to get as I really do love a diesel truck in the snow, but something smaller to park at the shop downtown would be good. Once I down size we will pick up a camper van for trips. Hopefully the next one will be easier to keep clean as less kid **** in the backseat. I’m pretty sure trail mix was invented by cleaning out a toddlers car seat.


Thanks Grant, and I agree, never buy a first model year of anything, let the manufacturer get the bugs worked out. For me that's simple because I never buy new anyways, but even then I don't want to have to deal with the manufacturer.

As for black, I love the color when it's clean. I'm ashamed to say this, but I don't keep the Jeep's paint as polished and scratch free as I would like, at least not like our other vehicles. I use it off-road, a lot, and therefore I accept a few scratches here and there from normal use and washes. I have to pick and choose my polishing events because I know the clear is only so thick and eventually I know I will go through somewhere and at that time I may be faced with the decision to repaint. Even then I will more than likely go back to black for a few reasons, first, I love the color (when it's clean), second I have done enough full color change paint jobs to know they are not fun to do them correctly, meaning engine bay and interior must be disassembled to do so. And third, black is an easy color to match in the event of a dent or ding, much more easily than a grey or silver, or anything metallic for that matter. While I can accept a few fine scratches here and there, dents and dings are something I can't live with, my wife was even shocked I let the dent in the corner cowl go so long.

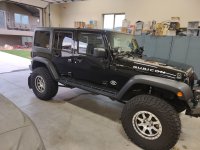
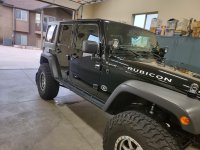
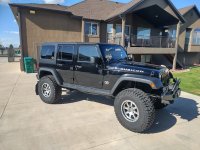
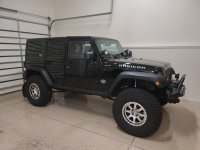
There were a few colors on these Jeep JK's that I liked and was looking for when I was on the hunt for a JKUR, but unfortunately, the ones popping up were the damn pastel colors, smurf blue, neon green or pumpkin orange and none of them appealed to me. This black one jumped out at me for a couple of reasons, first the wife loved the newer interior as it was the same as the 2012-2017 JK's as opposed to the 2007-2010 Wranglers we were looking at which is where our budget was. The owner of this one was not pleased with the performance after owning it for only a few months and when the 2012's came out with the 3.6 Pentastar engine, he ordered one and put this one up for sale. I had in my mind I would be swapping in an LS at some point, so I could tolerate the anemic 3.8 liter for a bit. I was about to start the engine swap back in early 2016 when we decided to move and build a new shop, so that postponed the engine swap a few years, but I was content with the powertrain during that time, so it wasn't that big of a deal.

Looking back, I think this Jeep was the one for us all along, it just needed to find us. ;)
 

aka Larry

Well-known member
Joined
May 2, 2012
Messages
8,087
Location
Eastern, NC
...but unfortunately, the ones popping up were the damn pastel colors, smurf blue, neon green or pumpkin orange

The wild color choices are one the best things about Jeeps IMO. I didn't get to pick the color of ours (Hydro Blue) since my wife just came home with it one day, but had I gotten the choice it would have been "Gecko" (neon green) for sure because I love bright colors.
 

Grant Gunderson

Well-known member
Joined
May 17, 2013
Messages
2,330
Location
Bellingham, WA
Thanks Grant, and I agree, never buy a first model year of anything, let the manufacturer get the bugs worked out. For me that's simple because I never buy new anyways, but even then I don't want to have to deal with the manufacturer.
I agree it’s nice to buy used and save a bunch of $$$ and not deal with the mfg. When I was shooting photos full time I would put a ton of miles a year on a truck….. and also needed as many tax write offs ad I could get. So my accountant pretty much told me buy new and we would fully write it off with depreciation and mileage and as long as I put over 100k on before dumping it, it made the most since financially.

Now that I’m not on the road 5-7 days a week 4 months of the year im looking at used unless I can get a big tax incentive to buy new. The F250 still has a ton of value left in it so thinking I could sell it and it would pretty much cover the cost of a smaller truck.. maybe I’ll go back to a tundra as I loved my 06 but the mileage sucked. A ⅝ ton diesel would be my dream but no one makes one. And then there is the whole camper van thing we both hate sprinters, but need 4wd.. so no idea what to do yet other than I need to sell the truck and get something more appropriate for my current needs.
 
OP
Z

zmotorsports

ALLIANCE MEMBER
Joined
Oct 20, 2009
Messages
21,450
Location
Northern Utah
The wild color choices are one the best things about Jeeps IMO. I didn't get to pick the color of ours (Hydro Blue) since my wife just came home with it one day, but had I gotten the choice it would have been "Gecko" (neon green) for sure because I love bright colors.

As the saying goes Vincent, there's an *** for every seat and those colors are very popular around here, but they're just not in my taste is all I meant.

My black Jeep is more of an anomaly in Utah, and the flashy and vibrant colors are more the norm.
 
To avoid these ads, REGISTER NOW!
Top Bottom