To avoid these ads, REGISTER NOW!

Between 705 & 1200 SQ/FT Double Bee Garage (28x40 stick framed, 12ft ceiling with 10/12 pitch floored attic)

Workspaces between 705 and 1200 squarefeet.
OP
R

robb1887

Well-known member
Joined
Jun 9, 2014
Messages
112
That is the most time that I have ever spent on a thread with 38 posts! Very detailed and well done. I got into this because I am not too far from you if I am guessing right. My beginnings started out like you. Years of drawings and plans that covid wiped out with lumber prices that quadrupled. I am now ready and hope mine does not take as long as yours. Look forward to the final few pics and stories to come.

I am prepping for a 26x40 attached garage. You provided some things that I look forward to, others that I don't, and yet more that I had not considered. Overall, your Double Bee garage is close to what I will be doing. I have the same siding but in white to match my house. Loft space but over only 1/2. Lift, 12/12 roof, 9' walls. I could learn a lot from you on your epic electric journey. I would not be prepared for an $8k quote.

Thank you. I got a lot of insight from this community in my planning and definitely wanted to put some of it back in. Kent Island is about 4 hours north of me.


Not sure if you are 26 wide and 40 deep or 26 deep and 40 wide, but if its the later I would highly suggest trying to squeeze in that 2 ft. It sounds like you're doing car mechanical work as well and a car on a lift and a workbench in front makes for very little working room front to back for say engine hoists, rolling tools and material around, or what not to manuver in. I stood in my Uncles 24' deep garage and immedately agreed that 24' is just not enough as he had warned for my planned work. Material/labor wise its negligable as you're ripping sheets down at 26' vs just slapping them on at 28'
 
To avoid these ads, REGISTER NOW!

Overboost44

Well-known member
Joined
Apr 29, 2020
Messages
105
Location
MD
Thank you. I got a lot of insight from this community in my planning and definitely wanted to put some of it back in. Kent Island is about 4 hours north of me.


Not sure if you are 26 wide and 40 deep or 26 deep and 40 wide, but if its the later I would highly suggest trying to squeeze in that 2 ft. It sounds like you're doing car mechanical work as well and a car on a lift and a workbench in front makes for very little working room front to back for say engine hoists, rolling tools and material around, or what not to manuver in. I stood in my Uncles 24' deep garage and immedately agreed that 24' is just not enough as he had warned for my planned work. Material/labor wise its negligable as you're ripping sheets down at 26' vs just slapping them on at 28'
I guessed wrong about your location. Regardless, I read your post to my wife because I said "listen to this, this is our situation. I appreciate your response also. We can learn a lot from others...

40w x 26d is correct. Where I actual have a problem is OA height. At 28'w I will be a foot higher than I am allowed. Have to keep the 12/12 pitch to match the house. I may be able to get a variance but what I am planning to combat the lack of depth is to have 7' of workshop space along the side where the lift is. I do realize that the 2' would be negligible cost, but I started out at 28'wx24d' and realized quickly that would be a mistake. I am trying to avoid having steel i-beams put in and I believe 28' would put me over the span where I could do it with wood.

I am a car guy and that will be the primary use, wrenching on cars. Love your clown shoe. Looks really well done.
 
OP
R

robb1887

Well-known member
Joined
Jun 9, 2014
Messages
112
Yea, at 28' you'd need to upgrade to either Steel beams or IJT's I looked at both WAY back. I am definitely glad I have no HOA issues and my county is unconderned on height requirements. My desires to match the house as close to what I did was my own desire. I had friends early on trying to get me to build a steel building.

I ended up going with a pair of steel beams, for future gantry crane dreams with a 25'ish cross hung beam and rolling trolleys to get nearly every corner of the shop space for heavy lifting.
 

Swanny1953

ALLIANCE MEMBER
Joined
Jul 28, 2010
Messages
1,082
Location
Lucas, TX
I had a similar issue with the roofline being too high on the last addition. The architect solves that by having 2 roof lines - 3/12 for the first section on either side and 8/12 in the middle to match the existing roof slope. I think it turned out great. Pics are in my build thread in my sig below. .
 
OP
R

robb1887

Well-known member
Joined
Jun 9, 2014
Messages
112
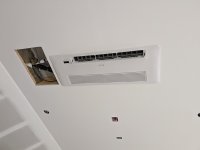
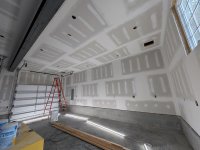
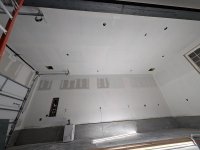
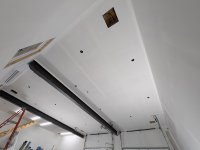
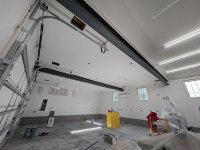
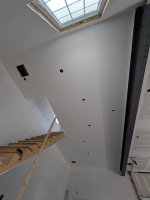
3/11- the upstairs HVAC ceiling cassette was able to be final hooked up with the ceiling finished painting which was amazing news. I lucked out as we did not plan that the louvers pointed AWAY from the staircase to keep the space conditioned better.

55312021041_dc63885f17_c.jpg
55312174518_7a8b31b75e_c.jpg
55312434010_c7abc5b7f2_c.jpg


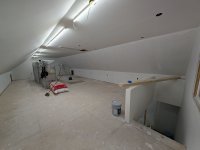
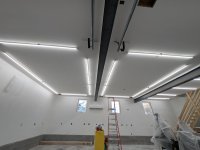
3/13- Not a lot picture worthy tonight other than the first set of lights are hung and the 3 110V ceiling outlets. And moving the temp string downstairs for more light.
The 8ft fixture is slightly out of position as I wait for some extension wiring to arrive to lengthen the lead a foot or two. I'm 3D printing the first wire clip to snap all the wiring to the fixtures for final install.

55312174423_fd3ae42946_c.jpg
55312174288_08ee3edd82_c.jpg
55312433635_cfc7205352_c.jpg

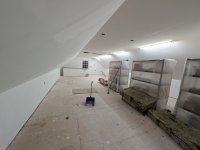
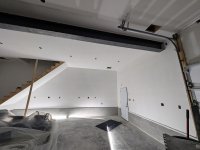
3/14- A lot of priming today thanks to some help from a friend. Upstairs and bay 1 completely ready for top coat. First 5 gallon of primer was tapped. Bay 2 and 3 were started with the remains of the primer already poured before calling it a day.

55312248134_d2bcea441d_c.jpg
55312173958_189d6e2579_c.jpg
55312248269_353d9e4204_c.jpg
55311111427_3727a2dc6d_c.jpg
55312433490_79c19f8c61_c.jpg

3/15- I finally broke down and bought an 18" roller setup, no I didnt want to spray. I had previously been working on a 10" roller as I already had it but a project this size... I needed to do something. Bay 1 got its first of two top coats, cut in Bay 3 primer and got most exposed garage door framing primed.
55311110922_9137ba9117_c.jpg
55312019956_351c63f198_c.jpg
55312432910_953631585b_c.jpg

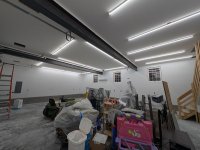
3/21- Almost done with priming. Bay 2 ceiling and maybe 10% of the walls remain. Thanks for the help from a neighbor. Bay 1 ceiling ready for lights tomorrow so I can move all the obstructions into the center of Bay 1 to make life easier. Bay 3 nearly fully primed. Ceiling paint was dead, needed another 5 gallons. The primer was almost dead and would need another gallon. Then lots and LOTS of wall paint (about 12.5 gallons).

55312173288_e513de3444_c.jpg
55311110737_d1bce9fbb8_c.jpg
55312247779_3845c4b13d_c.jpg

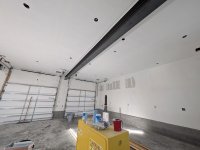
3/22- I ran out of primer for the fresh drywall wans was ~100sqft short. Bummer. Bay 2 & 3 ceiling were primed and cut in for top coat. Bay 1 lights were installed. I need to modify the box covers to accept a wire pass through and will do that after move in for all my tools to be readily available.
55311617886_d2387b1a7e_c.jpg
55311767718_7f1c691556_c.jpg
55311848809_dd19628e34_c.jpg
55310708932_11da039955_c.jpg
55311767758_83b9c8e5e5_c.jpg
55312030585_1e5dd1759e_c.jpg
55312019021_7c5b715461_c.jpg

3/23- Bay 2 & 3 got their first top coat and the upstairs corners were all cut in for top coat

55311617056_652c991554_c.jpg

55311848454_b874d2538b_c.jpg
55312030425_b6ca952eca_c.jpg
55312030440_559c636640_c.jpg


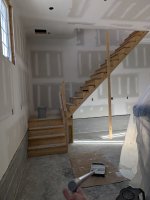
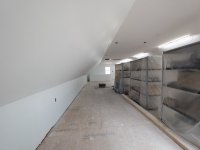
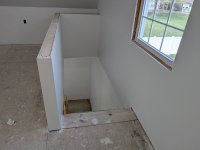
3/24- I finished with ceiling paint finally. The 2nd coats were only a 10% (but much needed) added value to clean up the last bits of variances you could see through the primer and first coat. I also started on the first top coat of walls upstairs, and particularly the stair's wall/knee wall to get that finished to put the railings back up.
55311616441_6628f809f8_c.jpg
55311616476_87c520a777_c.jpg
55311616536_93579d1e16_c.jpg
55312030175_fbd04f9b8f_c.jpg
55311616751_95d0ba76ee_c.jpg

Which one has the 2nd top coat?!
55311616796_099ae96aa2_c.jpg


3/25- downstairs "entry circuit" and bay 1 lights went up to the ceiling again

55311848029_e68ed240db_c.jpg
55311616261_e52b4d2891_c.jpg

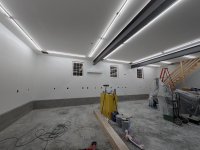
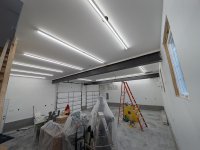
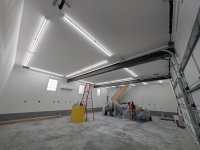
3/29- downstairs lights are all on the ceiling. I have some extra clips to install 20/20 hindsight and the modified box covers to still figure out and install.
55311616061_3303464bf2_c.jpg
55311847819_76624e5501_c.jpg
55311847879_6e161a996e_c.jpg
55311616221_379acbe566_c.jpg


April was Crazy... so I didnt get any shop work done.

5/10- I started cutting in corners and hung the second row of lights upstairs and put in the ceiling outlets

55312029495_b9e6981b29_c.jpg
55311615921_c4ac1359dd_c.jpg
55312029410_d7ab6f321a_c.jpg
55312029385_4102d18b55_c.jpg

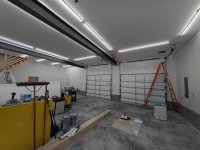
5/17- I finished cutting in all the corners for rolling the walls
55311847619_4ef14de841_c.jpg

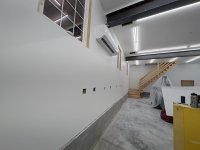
5/18- The downstairs first full coat was done
55312029235_4f20ccceec_c.jpg
55312029210_86fe12aff3_c.jpg
55310707737_0a82331104_c.jpg
55312029330_b792714bee_c.jpg

I think that night I just sat in the space and looked at white walls grinning as I could actually "feel" like I was getting close to being done. The bare drywall to first top coat transformation was a big morale boost.

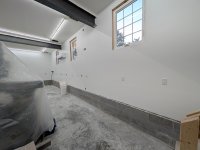
5/19- I applied the 2nd full vertical wall coat upstairs and downstairs so I could start putting in outlet circuits, and a bit upstairs on the rafter "walls" as it was the last bit left of that 5gallon bucket, the paint extention handle on the floor marked where the paint ran out to pick up the next time. A 2nd coat of white paint really doesnt do justice in pictures but it was apparent in person.

55310707467_278e1c8cdb_c.jpg
55311766253_7ff40afff5_c.jpg
55310707577_5e2d4a0c0f_c.jpg
55311847414_b4bc984a3c_c.jpg

It also was the beginning of the outlet/switch/blank saga of electrical. I ended up with 47 120V duplex plugs and 2 welder/plasma plugs for initial install. I have 2 outstanding plugs for the lifts that the plug style is TBD and are waiting that.

55311764378_611c808bce_c.jpg
55311845534_3a6730b1c2_c.jpg

5/24- marked another miles stone for DBG HQ, all the interior wall/ceiling paint was DONE. All the surfaces had 2 coats of top and a coat of primer.

55310705777_8d659b8ff5_c.jpg

5/27- This date marked the "initial" final electrical install which really is just all the plug outlets, missing a few cover plates, and left the known current 220V hardwire boxes open as well as the in wall EMT for A/V cables.

55311613571_13e1918c75_c.jpg
55312027290_8f3c22f976_c.jpg
55311764198_4140b95184_c.jpg

It also meant that the "late added" attic kick wall lights were powered now as they were in hindsight tied into the 20A outlet circuits
55312434230_0feeb8ac98_c.jpg

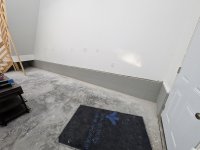
5/31- I am my own worst enemy at this point for getting stuff done before move in, delaying my move in. I decided last minute to add CMU block coating to the inside as well for consistency and ease of future cleaning & "curb appeal". This directly affected ability to paint and apply trim, as I'm only one guy. But it came out great in hindsight and I'm glad I did it


55310705672_6355b85a35_c.jpg
55312027215_a269236c7a_c.jpg
55310705602_a9b4953d1f_c.jpg
55311845134_bfe63199ae_c.jpg
55312027080_244a082995_c.jpg
55312026980_8550722f7b_c.jpg
55312026820_f13ea9e25e_c.jpg
55311844884_ba10a7a7b8_c.jpg
55310705152_f08aaba4ea_c.jpg
55311844714_b78c0efa07_c.jpg

Before and after with trim "thrown on"
55311613666_e7a74b594e_c.jpg
55311613241_7a7eb2751c_c.jpg
 
Last edited:
OP
R

robb1887

Well-known member
Joined
Jun 9, 2014
Messages
112
Updates back to 3/11 are updated in the post prior... the build thread is current. We'll see if I get anything done this weekend as my house upper HVAC went out so we're in emergency work protocols there.
 
To avoid these ads, REGISTER NOW!

runit

Well-known member
Joined
Aug 22, 2022
Messages
195
Location
Raleigh NC
What a space! Truly a labor of love and it shows.

And a 3rd gen 4Runner with a M coupe!

I'm following this for sure!
 
OP
R

robb1887

Well-known member
Joined
Jun 9, 2014
Messages
112
Home HVAC is back to normal operation, with minimal exposure to hot days which was good.

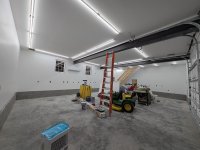
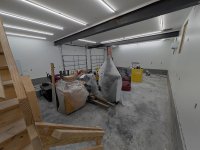
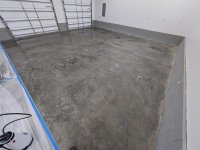
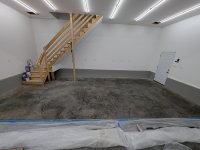
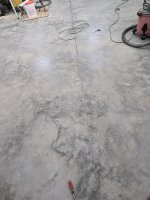
Got back to some shop progress, and did and initial pressure wash of the floor to apply the densifier and sealant (Ghostshield 4500/8510) in the next weeks.

55350497993_718356ff31_c.jpg
55350498378_45a08cf24a_c.jpg
55350757605_08e2e2591a_c.jpg
55350757525_0698739393_c.jpg

20/20 hindsight this should have been done BEFORE drywall and paint to not be as much of a headache... even insulation maybe to reduce the dust thereof but I skipped over that option too.

I would do this in future builds as to having the floor dried in and cured for the 28 days or whatnot

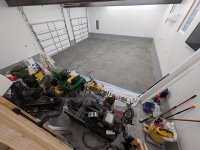
I unforunately have to do a split application as I have too much stuff already accumulated in the space over the last two years, so bays 2 & 3 are getting done first, then moving all my junk to get bay 1 applied.
 

JohnX14

Well-known member
Joined
Jun 2, 2014
Messages
603
Location
Boston 'burbs
I'm not a frequent poster here, but I do want to say congrats after reading this thrugh. I can't imagine the patience it's taken for nearly 3 years. Thay may sound cynical, but it's not. I'm in construction, and have built a few personal houses and detached garages, and they go quick, mostly because of my resources and limited time. The fact that you did what you did yourself, with limited help, is fantastic. (Along with kids, wife, job, etc) I enjoyed reading this thread. Keep going strong.
 
OP
R

robb1887

Well-known member
Joined
Jun 9, 2014
Messages
112
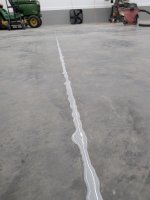
Doing a little more google research I made a personal determination that my floor was power troweled.

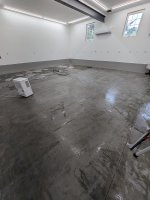
I applied the 4500 (single coat) just before our week vacation which was perfect for a cure time. The 8510 (wet on wet, 2 coats) was applied as soon as we got back to allow it to cure over the week before moving all the equipment over from bay 1 to repeat the process again.

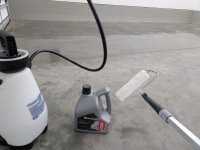
The 4500 (1:1 dilution) was sprayed on and subsequently rolled with the 3/8 microfiber roller to even everything out. (~1.5gal of solution)

55362909631_e4b3b7824c_c.jpg
55363059558_96e23edb31_c.jpg
55363059523_9fc5384a48_c.jpg
55363059468_5e428cd5f0_c.jpg

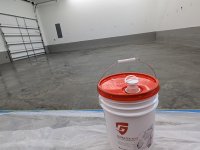
The 8510 was sprayed on, then wet coated shortly after, then rolled over in both directions. The finish had a slight sheen a few hours later but I'm hoping its going to dull back out. (nearly 2 full gallons)

55377410474_333bded35e_c.jpg
55377636795_923fe8da59_c.jpg

I'm not sure if because I am power troweled AND conditioned that the absorption rate is so slow, but the "minute or two" on the label was not seen for my application of either product. It did seem to soak/evaporate better at the edges that are likely significantly warmer due to heat soak than the middle of the slab. I also did zero of the testing suggested as I am up against a deadline for move in. Ambient temps were 74°F-ish during application and a dehum running at 55%.

The sweep prior to the 8510 already showed significantly less dusting which was my biggest dissatisfaction so far with my pad.

Friday night/Saturday will move all the equipment for washing/degreasing bay 1 with a target to apply the 4500 on Sunday the 12th, and 8510 the night of the 18th.
 
Last edited:
OP
R

robb1887

Well-known member
Joined
Jun 9, 2014
Messages
112
I'm not a frequent poster here, but I do want to say congrats after reading this thrugh. I can't imagine the patience it's taken for nearly 3 years. Thay may sound cynical, but it's not. I'm in construction, and have built a few personal houses and detached garages, and they go quick, mostly because of my resources and limited time. The fact that you did what you did yourself, with limited help, is fantastic. (Along with kids, wife, job, etc) I enjoyed reading this thread. Keep going strong.

I missed responding here, but thanks! It's definitely gotten to the point I am tired of working ON the shop and not just working IN the shop. I'm getting really close.

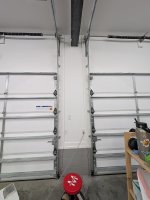
Small update was I finally pulled the trigger on the first of two Chamberlain RJO101 jackshaft openers. I wanted to ensure I didnt need to modify anything else before trimming out around that area. This turned out to be a good plan since I had not accounted for the deadbolt lock wiring when I prewired the lower door sensors and wall switch. I was able to shimmy it into the gaps of the drywall to the door framing and should cover with the trim no issue at least.

It was amazing how much faster these style are to install vs the conventional hanging belt driven track units. I had the first installed in an evening after work, the pre-wiring of course helped a to as well.

55382960081_924afccfa2_c.jpg
55383091678_f951b2f595_c.jpg

I still need to solder the sensor wiring permanent and route that with some wire keepers better, but its operational for the moment which is the important part as when I treat the last bay I would have "painted myself into a corner" if i couldnt access the space through the single man door.
 
To avoid these ads, REGISTER NOW!
Top Bottom