To avoid these ads, REGISTER NOW!

Above 1200 Sq/FT Restored 1930's Auto Shop

Wokspaces above 1200 squarefeet.
To avoid these ads, REGISTER NOW!
OP
B

BB767

Well-known member
Joined
Dec 24, 2009
Messages
3,724
Location
Philo, IL
Oh boy is this going to be part of the test also? Spelling and grammar.
So many comments I have about the mental part of this shop. :bounce:
Mental in a real good way!

I've always said I'm counting on you guys to keep me on my toes. Good eye donnie, sometimes spell check will let you down as it doesn't know context. Maybe we should get into grammar a bit........just to spice the test up? :dunno:

In my defense look at the time that was posted, 0103 AM. This after a days work in the shop. Started out with delivering the Walker floor jack to the powder coaters. Can't get the color to my satisfaction so instead of mixing, shooting samples and then bringing them to the shop we both decided to take it right to them so they can use the original painted parts to get the match.

Then back at the shop I did some maintenance on the Kendall spinner clock....

IMG_3619.jpg


.....seen at the top of the opening to the north room.

SpinnerClockSm2.jpg


It was made in 1954 and everything needs periodic maintenance every so often. The set screw on the spinner wheel that revolves in front of the neon tube loosened up. So I had to take it down and open it up. As long as it was open I cleaned up the clock face, polished the spinner wheel and cleaned the glass. BTW, if you'll note in the above picture there is a piece of cardboard about 3' long on the side of the florescent light fixture. That's to keep the florescent light from glaring on the clock face. It's white on the shop side and flat black on the clock side to reduce any possible glare.

Next it was on to the air meter.....

IMG_3432.jpg


IMG_3433.jpg


...where work continues.

Long and short of it I was typing while tired and that's usually not a good thing as we've seen here....multiple times!! :sad:

Show me no mercy guys and keep me sharp 'cause I know all about Chris and her tests. :scared:

Thomas
 
OP
B

BB767

Well-known member
Joined
Dec 24, 2009
Messages
3,724
Location
Philo, IL
I looked back and found the anvil photos. If this is all old news Im sorry to hop in and rehash, it just smack me.

I cant make anything out in the photo of the anvil. The chipping hammers in post 1907 were used as slitting chisels for hammering designs or splitting steel for mortise and tenons, etc.. Heat the steel, lock it on the anvil, with a plate underneath so as not to damage the anvil, use the slitting tool by placing it on the steel and striking it with a hammer. This would split the steel like using a chisel to split a piece of wood.

Here you go quick60 :bitchslap, is that better? :D Take at look on Page 99, post #1977. Are there other markings I should look for besides the serial number under one of the feet which will have to wait a while. While I know who made it, I still don't know what type of anvil it is.

IMG_3541.jpg


One distinctive feature is the horn curving up above the face....

IMG_3586.jpg


.... another is a curve on one side where the face and heel meet by the pritchel hole.

Thank you also for IDing the tongs and describing the use of the chipping hammers in smithing work. Much appreciated! :thumbup:

Thomas
 
OP
B

BB767

Well-known member
Joined
Dec 24, 2009
Messages
3,724
Location
Philo, IL
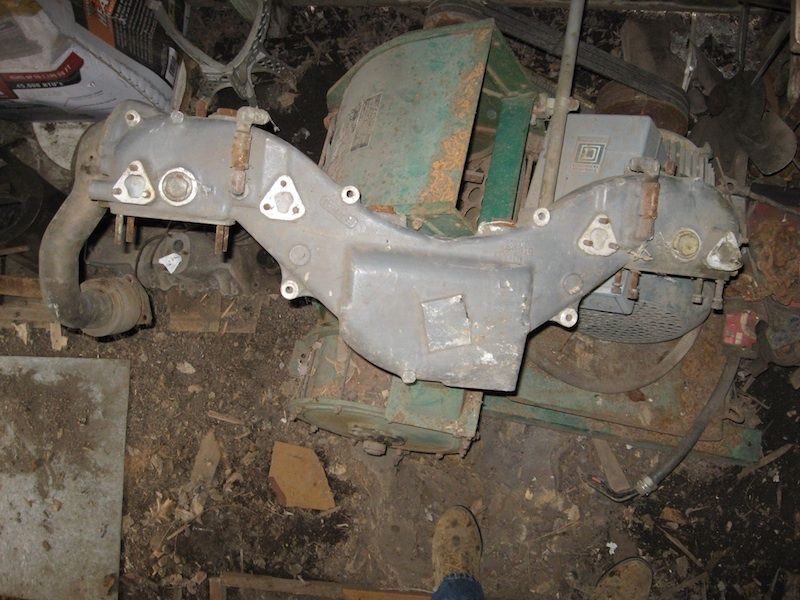
What was under the lift in the image that showed all of the one lung pony motors racked up for assembly on the left ramp??

was that going to be on the test??

This one Joe....

LiftCIRA1965sm.jpg


With Chris creating the test I should think all things are possible. It's gonna be like a gathering storm and you poor folks don't know what's about to be unleashed. I stand by my earlier advice and run for your very lives..........................................

Thomas
 

quick60

Well-known member
Joined
Nov 5, 2010
Messages
214
Location
Virginia
The radius on the heel was probably put there by the smith to turn out a number or pieces with that radius. Could be wear but doubt it. Looks like he stood at the left of the anvil (looking from the heel) and worked over the right side. The radius on the right edge of the face is used to round over material to start scrolls and bends.
An anvil will ring regardless of what it is sitting on. To stop a ring you can wrap a chain around the feet, a large magnet on the body or under the horn may help.

GO to this link and post your photos of the anvil and the identified markings and you will get all the info on the anvil. http://www.abana.org/resources/forums/index.shtml

Also this link may help. .http://habairon.org/Digest/Balcones Forge/Sept07 - A Guide to Anvils.pdf
 

quick60

Well-known member
Joined
Nov 5, 2010
Messages
214
Location
Virginia
The weight may be a little off. I do not recall if American anvil manufacturers used the British system of weighting an anvil. That may be an inspection number or the actual weight of the anvil. Post on abana and you will get the information you seek. Im not much on identifying anvils I just hammer on em once in a while.

Look between the feet for any numbers.

The upturned horn looks unusual. It may have broken off and been reattached at some point.

Nice find though. I would not give it up unless someone makes an outrageously stupid offer. Even then I'd think hard about letting it go. An anvil is a handy item to have not to mention the history behind behind that piece.
 
Last edited:
OP
B

BB767

Well-known member
Joined
Dec 24, 2009
Messages
3,724
Location
Philo, IL
I just finished reading the entire post (it took a few weeks). You must have invented the 48 hour day, because I don't know how else you could have done so much in such a short time. Just clearing out the buildings and organizing the goodies would overwhelm most people. I like restoring and using old tools also and hope you have more pictures and stories like the floor jacks to share. I live in the house my great uncle built in 1923. He was a carpenter and I still have and use many of his old tools as well as his home made work bench. Thanks to BOTH of you for the time you spend updatng the posts and answering all the replies. Now if I can just pry myself away from GJ and get back to my shop, I might get something done...:thumbup:

Thank you for persevering through to the end hlp040db. Working with old tools and equipment from past family members is sure special isn't it. It's like a time bridge. I feel the same working in Mr Johnson's shop and using his tools and equipment. I also have my great grandfathers tool chest...

IMG_3367.jpg


... that's it in the background, filled with hand wood working tools. I treat them with the utmost respect and always think of great grand dad when I use them, always. You clearly have that same reverence. Doing this thread has been quite enjoyable for Chris and myself and when folks like you post in it really makes it all worthwhile. We appreciate it. Welcome and yes, I have several more projects that are going to be posted in here as I work through them so check back.

Thomas
 

hobbitss

Well-known member
Joined
May 31, 2010
Messages
341
Location
Southestern Massachusetts
This one Joe....

LiftCIRA1965sm.jpg


With Chris creating the test I should think all things are possible. It's gonna be like a gathering storm and you poor folks don't know what's about to be unleashed. I stand by my earlier advice and run for your very lives..........................................

Thomas

That's the one... Support Post is on the wrong side of the lift tho'...
I tried...
Thanks for all of the Tool Images.... :bowdown:
 

toranaback

Member
Joined
Dec 20, 2010
Messages
7
tomas and chris, your little thread here is truly inspiring:bowdown:.
I have fully read it from 1 to 103 and am truly inspired by the way you have transformed your little piece of paradice at the center of the universe.:bounce:
I have forwarded the link on to many of my friends here in brisbane , australia so your down under fan base is growing even more.
Thank you for all the detail and keep up the amazing work.:thumbup:
 

hobbitss

Well-known member
Joined
May 31, 2010
Messages
341
Location
Southestern Massachusetts
Yeah, but isn't that the correct side? I thought the brackets welded onto the lift were on the driver's side. Or am I backazzward?

It is difficult to tell from the closeup images but the lift room doors are in the back ground which puts the brackets on the inside edge of the right hand (passenger side) ramp...
 
OP
B

BB767

Well-known member
Joined
Dec 24, 2009
Messages
3,724
Location
Philo, IL
I do wish you'd stop posting pics of that ****** anvil. There's one for sale about 20 miles away that's calling my name & I'm trying very hard to resist... ;)


I'm not exactly clear on which anvil you're refering to.............

Anvilsm.jpg


...'cause if it's....

IMG_3508.jpg


.....this one...

IMG_3517.jpg


....I'd be only....

IMG_3524.jpg


...too happy to oblige your request...

IMG_3525.jpg


... and promise to limit....

IMG_3540.jpg


...how much exposure it gets in the future. BTW, except for the first picture, these are all new and slightly different from what's been posted earlier. I try not to repeat photos if possible.

Also Rick, the Ford wrench returned home today and looks super. I'll get it on here and you can fill us in on how many dips it took. Many thanks my friend. :thumbup:

Thomas
 
Last edited:

cdrewferd

Well-known member
Joined
Apr 5, 2006
Messages
402
Location
Westminster, CO
Ok, I just spent time over about 5 days going through this while thread. Simply amazing what you have done Thomas, and with the support of your wife Chris no less. I only hope that I'm able to do something like this one day as I'm sure it's been quiet the adventure. Your attention to detail is outstanding. I'm looking forward to many more posts and updates on the treasures you find and what you do to bring them back to their working glory.
 

quick60

Well-known member
Joined
Nov 5, 2010
Messages
214
Location
Virginia
BTW If you found any ford wrenches with extension handles welded on them they are used by blacksmiths to add ornamental twists to square stock.
 

MilhouseW

Member
Joined
Mar 10, 2009
Messages
8
Thomas,

I've been following your thread for some time now, but have not posted until now. I commend you for taking on such a project and think it's wonderful that you've kept a garage with so much history alive, and still use it for it's intended purpose. Great work!

I have two thoughts on the brackets welded to the bottom of your lift (as you showed on page 100 of the thread). On the same page you show an original ad for Rotary Lift which shows (and briefly mentions) a "drain bucket holder" that can swing out of the way. Might the brackets be used for something similar? I know the holes and orientation of the bracket might be a bit off for this use, but maybe not?

My second thought was the bracket was used to hang a strap or chain fall for heavy lifting of objects or pulling motors out of vehicles. I'm not sure if there's enough room in the garage to position a vehicle to do that, or if the modification was done before the building was put up around the lift.

Anyways, those are just my thoughts on the brackets. Keep up the great work and thanks for documenting everything for us!

~Neil
 

ZRX61

Well-known member
Joined
Aug 15, 2006
Messages
28,716
Location
Solar Blight Valley, SoCal
Also Rick, the Ford wrench returned home today and looks super. I'll get it on here and you can fill us in on how many dips it took. Many thanks my friend. :thumbup:

Thomas

I upgraded to a new nozzle of my mapp gas doohicky so the number of heat/dip cycles was somewhere between 15 & 30...probably closer to 20-25. You'l see rainbow coloring in the coating while you're doing it, but that goes away once it cools down & gets the lemon pledge polish :thumbup:
 
To avoid these ads, REGISTER NOW!

FordExec

Member
Joined
Nov 21, 2010
Messages
13
I upgraded to a new nozzle of my mapp gas doohicky so the number of heat/dip cycles was somewhere between 15 & 30...probably closer to 20-25. You'l see rainbow coloring in the coating while you're doing it, but that goes away once it cools down & gets the lemon pledge polish :thumbup:

20 to 25 heat/dip cycles? Seems like an awful lot of time and work. Is there a quicker process? I have some micrometers and calipers that need work. Will a small propane torch work? bb
 

ZRX61

Well-known member
Joined
Aug 15, 2006
Messages
28,716
Location
Solar Blight Valley, SoCal
You could use O/A...... but each cycle with the Mapp gas is fairly quick once you get it up the temp the first time. Clouds of smoke & burning oil dripping all over the place :)

& the thinner the metal the faster the process...
 
OP
B

BB767

Well-known member
Joined
Dec 24, 2009
Messages
3,724
Location
Philo, IL
ZRX61 kindly volunteered to oil quench the Ford wrench as a way of demonstrating how to treat tools that have lost their finish. By coating them in this way they won't rust and the finish is very durable. Now that he is done with it and it is back here, in the shop I wanted to post the results. As luck would have it, I happen to have a handy............


IMG_3697.jpg

...anvil to display his fine work.

IMG_3694.jpg

As you can see the anvil is the perfect way to see....

IMG_3701.jpg

...his fine workmanship.

IMG_3695.jpg


But the best part is he's especially fond of anvils and how versatile they are.

IMG_3698.jpg

Note how graceful and yet firmly the anvil cradles the wrench.

IMG_3700.jpg


Here it's as if the wrench seems to point the way to the manufactures name, HAY-BUDDEN stamped on it's flanks....

IMG_3696.jpg

... manufacturers of high quality anvils. Anvils that have been utilized in countless shops across America and the world due to their distinct and useful properties.

IMG_3699.jpg

It's been said no shop is ever really complete with out one. Now I'm encouraging him to take a looooong close look the wrench so he can better describe his conditioning process. It looks really good to me. Nice piece of work. A BIG thank you sir. :thumbup:

Thomas
 

quick60

Well-known member
Joined
Nov 5, 2010
Messages
214
Location
Virginia
Could the holes/brackets be for attaching chain or shackles to pull frames or secure a vehicle down to the platform?
 
OP
B

BB767

Well-known member
Joined
Dec 24, 2009
Messages
3,724
Location
Philo, IL
Hello Thomas,
Just a short hello from your neighbor up here in the burbs.
Being a newbie, I checked out this thread for the first time and I have to say you sure put a lot of work into your proprerty, like everyone is saying, just Awesome!
I get down your way once in a while, have a friend in Decatur and was at the Lakeland College Car show last May.
Maybe we will see you at Buzz the Gutt in Dwight, or Cruisin Roosters at O'Charlies!

Hi neighbor to you as well. Thanks for taking a look here, bet it wasn't what you first expected was it? As I mentioned before there is more material coming forth so stick around. If you do get down this way, (Parkland has a car show every May that Chris and I try to attend), drop me a PM and we'll try to set it up.

Thomas
 
OP
B

BB767

Well-known member
Joined
Dec 24, 2009
Messages
3,724
Location
Philo, IL
I'm going to buy that ****** anvil & then give it the Williams paste treatment so yours looks like a boatanchor. Ha!

I've heard how fabulously well compensated A & P's are so I'm a little surprised it's not sitting in your shop as we speak. :dunno:

Hey ya wanna "practice" that paste treatment on a HAY-BUDDEN that looks a lot like this one....

IMG_3682.jpg


All kidding aside, it was very kind of you to take some of your time to demonstrate that coating. That is very slick.

Thomas
 

hobbitss

Well-known member
Joined
May 31, 2010
Messages
341
Location
Southestern Massachusetts
ZRX61 kindly volunteered to oil quench the Ford wrench as a way of demonstrating how to treat tools that have lost their finish. By coating them in this way they won't rust and the finish is very durable. Now that he is done with it and it is back here, in the shop I wanted to post the results. As luck would have it, I happen to have a handy............


IMG_3697.jpg


...anvil to display his fine work.

IMG_3694.jpg


As you can see the anvil is the perfect way to see....

IMG_3701.jpg


...his fine workmanship.

IMG_3695.jpg


But the best part is he's especially fond of anvils and how versatile they are.

IMG_3698.jpg


Note how graceful and yet firmly the anvil cradles the wrench.

IMG_3700.jpg


Here it's as if the wrench seems to point the way to the manufactures name, HAY-BUDDEN stamped on it's flanks....

IMG_3696.jpg


... manufacturers of high quality anvils. Anvils that have been utilized in countless shops across America and the world due to their distinct and useful properties.

IMG_3699.jpg


It's been said no shop is ever really complete with out one. Now I'm encouraging him to take a looooong close look the wrench so he can better describe his conditioning process. It looks really good to me. Nice piece of work. A BIG thank you sir. :thumbup:

Thomas

That poor Wrench got mixed up in Anvil ****!!!! :eyecrazy:
 

Omphaloskeptic

Well-known member
Joined
Oct 11, 2008
Messages
2,346
Location
Ultima Ratio, Wa.
All 'Tool ****' aside, seeing the two together makes me wonder how long before the owner/pimp of that anvil gives it the hot oil treatment. I mean, first he's taking it for long evening walks on the property, then he's asking about its family and where it was born, next it was the photo shoot. What's next? --- 'Say, would you like to have a ride in my airplane?':headscrat
 

oberst

Well-known member
Joined
Jan 8, 2008
Messages
205
Shirley, that can't be the way the horn of that anvil was oriented from the factory?
 

Nuts

Well-known member
Joined
Jan 31, 2010
Messages
376
Location
Baker City, Or
That is the crookedest horn on an anvil I've ever seen.
Must have been broken out of the mold too soon.
I can't think of a way you could do that yourself
without breaking it off, which does happen.

So when are we going to see a hot oil dipped anvil?


Nuts aka Doug
 
OP
B

BB767

Well-known member
Joined
Dec 24, 2009
Messages
3,724
Location
Philo, IL
I have been meaning to get these on here for some time now, but Rick was so enamored with that anvil that I didn't want to just leave him empty handed. Anyway there were several boxes of new...

IMG_3345.jpg


...planter runner edges...


IMG_3346.jpg


and...

IMG_3344.jpg


... new plow points...

IMG_3347.jpg


IMG_3348.jpg


I am seeking guidance on the disposition of these.

IMG_3349.jpg


IMG_3350.jpg


Are these potential eBay items? Is someone restoring old equipment that these would be useful. I have no idea at all. These are what, over 30 years old or more I would guess? I can't imagine there is anything current being used that would use these, but I really don't know. Any thoughts out there?


Oh. I did have a request to see a better view of the straight peen hammer so.......


IMG_3686.jpg


... here you go. :)

Thomas
 

JC23

Well-known member
Joined
Dec 31, 2009
Messages
11,718
Location
Northcoast
Thomas,

Great thread as usual.

I would think those blades would be valuable to farm equipment and maybe tractor collectors. Seeing how you in a rural area, you should have no problem finding those folks.
 
OP
B

BB767

Well-known member
Joined
Dec 24, 2009
Messages
3,724
Location
Philo, IL
The two 4 bbl carbs with the black platic looking bodies are cartier thermoquads . Off of 70s Chrysler v8s .Lots of folks hated them and junked them for hollys BUT if you had the knack they are 10 times the carbs on a dodge and had a distinctive ROAR (heard for miles). Me I adore them PS I just stumbled on this and am a noob here ...nice work you are a perfectionist like I used to be when I was younger and even more so. OH one thing if the old feller was to ever come back, he would be completely lost and probably very frustrated, but probably appreciative none the less. Keep up the good work.

I must apologize for not getting back to you sooner...

CarburatorSm4.jpg


The carburetors you speak of are here? My only experience with Carters are AFB's and they are not fun to re-jet at the track. The metering rods are not too bad, but the main jets are a bear! I would expect eBay is the best way to get these to a new home if there is anyone who would want them.

You know you might be right about Mr. Johnson being lost were he to return. No doubt frustrated that ALL that good metal is now gone! :eek:

Thanks for visiting here and feel free to come back...often. :)

...of course I haven't forgotten the, well... you know, hammer...

IMG_3685.jpg


Thomas
 

rlwhitetr3b

Well-known member
Joined
Aug 26, 2008
Messages
683
Location
East Central Illinois
Have you checked with the Illinois & Indiana Antique Tractor group? After your donation (post 1626), I would think they might be willing to give you some advice on antique farm equipment parts.
 
OP
B

BB767

Well-known member
Joined
Dec 24, 2009
Messages
3,724
Location
Philo, IL
....

The upturned horn looks unusual. It may have broken off and been reattached at some point.

Nice find though. I would not give it up unless someone makes an outrageously stupid offer. Even then I'd think hard about letting it go. An anvil is a handy item to have not to mention the history behind behind that piece.

Shirley, that can't be the way the horn of that anvil was oriented from the factory?

That is the crookedest horn on an anvil I've ever seen.
Must have been broken out of the mold too soon.
I can't think of a way you could do that yourself
without breaking it off, which does happen....


Nuts aka Doug

I have taken a much closer look at the anvil horn (I'd post a close up picture of it right here but SOMEONE asked me to not post pictures of the anvil anymore :sad:) and I can tell you that the horn is as manufactured. There is no evidence at all of it ever having been broken off and reattached. This might be the time to post this on a black smith forum and see if it can be explained.

As for ever selling it, there are some items that no amount of money can buy (Charles found that out while trying to buy the Al Jerauld manifold) and this is one of those items. It's historical to the shop and as long as I own it, it will remain there. Beside anvils are just so darn useful. You can preform untold different functions with them. Yes sir, mighty handy to have one right at your finger tips, ready for use.


For those interested in seeing a black smith hammer balanced on it's head....

IMG_3683.jpg


...look closely at the top...there you go.

Thomas
 
OP
B

BB767

Well-known member
Joined
Dec 24, 2009
Messages
3,724
Location
Philo, IL
Have you checked with the Illinois & Indiana Antique Tractor group? After your donation (post 1626), I would think they might be willing to give you some advice on antique farm equipment parts.

Good call, I'd forgotten they would be a good resource for information. They're a great group and I'm quite sure they would always be willing to help out with advice... but if anyone here has some additional thoughts I'd like to hear them also.

Thank you.


BTW, you ever want to see the end of a smith's hammer handle?

IMG_3689.jpg


It's on the top left.

Thomas
 
Last edited:
OP
B

BB767

Well-known member
Joined
Dec 24, 2009
Messages
3,724
Location
Philo, IL
Here's an update on some shop items. I spent the afternoon with my buddy and got the low down on the mystery manifold...

UnKnownSm1.jpg


He confirmed it was from an Army tank engine. His brother was an Army tank mechanic during his 2 years of service and some how this came to be out at the shop. The next load to the metal recyclers will see it going to that great recycling pile in the sky but I'll keep the associated Bendix carburetor...

Next the long handled ball peen hammer...

IMG_3526.jpg


He hasn't a clue. Sorry.

As for the brackets under the right hand side (passenger side) lift ramp...

IMG_3570.jpg


...he, like me, had never seen them in use, never asked his Dad or brother about them and doesn't know why they were installed. I believe Nuts and Elroy had it right regarding a home made safety leg, but so far it's just a guess, but a good one I'd say. None of the vintage pictures we looked at showed anything in that area.

We did look at a gagillion billion 8mm home movies though....

IMG_3680.jpg


on an Mansfield Deluxe film editing machine...

IMG_3681.jpg


...in my quest to try to find vintage movies and pictures of the shop and property. I will say this, Mr, Johnson was president of the Illinois Bee Keepers Association and he took that work, VERY seriously. There are reels and reels and reels and more reels of honey bees, hives, bee swarms and more hives. Just reels and reels...........:wtf: If you want to see some vintage honey bee movies contact me, have I got the hot ticket for you!

My work in this area continues so stick around please.

Thomas
 
Last edited:
To avoid these ads, REGISTER NOW!
Top Bottom