ZRX61
Well-known member
I hardly have any. I need to get the album from the other guy who worked on it & get the pics scanned.Vintage aircraft are so cool.Please post more shots!Need to see airplane guts.

I hardly have any. I need to get the album from the other guy who worked on it & get the pics scanned.Vintage aircraft are so cool.Please post more shots!Need to see airplane guts.
Yup, It's a '48 Flxible Starliner.


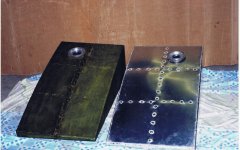
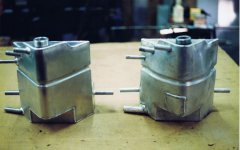
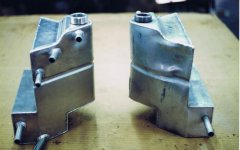
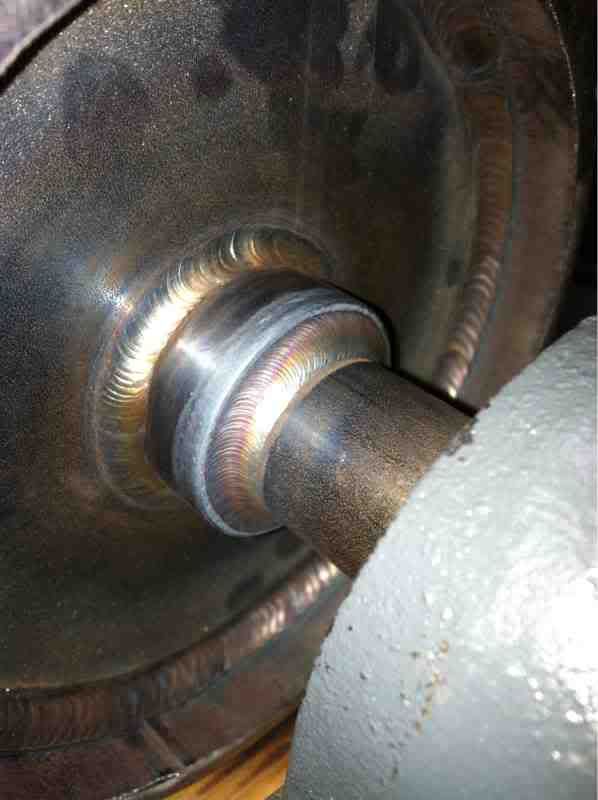
Nice job on the fuel tank.... what is the capacity? I guess every bit helps with the run he's making.
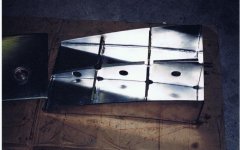
Some more progress on a tailgate....a bit of connect the dots...
The rear side of the weld....
Getting closer...
Nice work.How do you keep it from distorting all to heck so well?Is there access from the backside for dollying?
Re.fuel capacity.I can only assume that auxiliary fuel tank held just enough for him to make it.I've not herd from him since.
DANG! those sure are some pretty welds
Man those are sick welds!To keep the weld that even over a long distance like that is really hard.I've been trying for 29 years now....
You have awesome skills.Keep showing us some of that work.

The outer skin is removed at this point, so the welds are getting planished as I go.
This is an aluminum off-road bumper I made with a guy I work with. I did the design, we both made parts, he welded it, and we both finished it. Finally it was powdercoated. Not the greatest paint surfaces...we're used to round tube that hides a lot more. Turned out pretty good I think. I've got about 5 people that are waiting for me to make them one after I finish tweaking the design.

Williams Classic is very well respected in the Tri Five Group. Looks like you're continuing in some nice fab work still....
Do you use a turntable to get those welds that consistent?


Do you use a fixture to hold the torch or do you hold it by hand?
Thanks Robert. Williams Classic is based in my home town and I had a lot of fun and learned a lot while building some very nice cars in the years that I worked there.
Yes, Jim. I use an Aircrafter brand rotary positioner.
How 'bout layout???
I only saw one pic of a protractor, what else are you guys using to make your job easier?
Lots of sharpies, but no scribes, or inside/outside calipers......


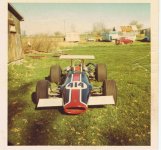
Any more details on the trike? A racing version perhaps?
Well after a couple weekends of spring cleaning distraction (took three loads to the dump) I can walk around in the shop with less trip hazard, and the welding is finished on the tailgate. Now need to dress the welds, sandblast the inside, and mix up some epoxy primer. Inching closer.
That trike is a prototype Olympic racing wheel chair built for a customer.
Not really sheet metal but it is .028 walled Aluminum tubing.Total weight without wheels 4.5lbs.
With the operator using both hands for propulsion (usually), how does the steering function?
Wow, is there a story behind that?


Nice work on the bus!
NASTYZEN-That tailgate is exceptional, how the heck you guys do it, I just don't know.
Oh to be an apprentice.....wax on, wax off.. 


NASTYZEN-That tailgate is exceptional, how the heck you guys do it, I just don't know.