To avoid these ads, REGISTER NOW!

Between 265 & 485 SQ/FT 1950s Craftsman Garage retro remodel

Workspaces sized between 265 and 485 squarefeet.

rickairmedic

Well-known member
Joined
May 31, 2005
Messages
4,165
Location
louisville ,Ky
GTS Dave just won a contest with Epoxy coat for enough epoxy " free " to do his garage . Thus the current rush to figure out colors although your right the grey would work well as well.


Rick
 
To avoid these ads, REGISTER NOW!

fredlangva

Active member
Joined
Sep 10, 2011
Messages
34
Location
Jacksonville, FL
Great garage you have there. When I saw you won the contest, I thought the floor would go great. I am a bit partial to the Taupe base. You can add the flakes that are the closest to the lower wall color to tie it in.

Love the tools also.
 
OP
R

Red Leader

Well-known member
Joined
May 15, 2011
Messages
2,689
Location
Denver, CO
Andy describes his garage as follows:

"The separate garage is a a simple shoebox, about 7 meters deep and 20 meters wide, built to fit the terrain and the constraints of a built house. The rear consists of glass windows that look out into a small pond and a hill."

Frank Lloyd Wright described the garage at Falling Water in similar terms.

Check out Andy's Modern Garage in Far East:
http://www.garagejournal.com/forum/showthread.php?t=71002

Bob,

I know this is from a while back, but I just got around to checking it out. Thanks for the link.

Do you have a garage that you've been working on? Would love to see it:)

-RL
 

chrommagman

Well-known member
Joined
Jul 15, 2011
Messages
346
Location
Mesa, Arizona
Great work!!! I love this project! The 1950's was true Americana! It was all made in the USA and built to last!

Keep up the great work!
 
OP
R

Red Leader

Well-known member
Joined
May 15, 2011
Messages
2,689
Location
Denver, CO
Thanks chrommagman, I appreciate your comments.

I am trying to keep the garage as American as possible. I was going to do my art deco shelving out of $26 plywood until I found out it was made in Chile. Nothing against Chile, but I don't know what kind of glue they use or where it all comes from or the conditions of the plant, so I spent the extra to get the Made in USA stuff. And now, when I go out I can look at my shelves and think 'USA' shelves instead of 'Chile' shelves, haha.

But the extra $$ I have to spend in 'Made in USA' materials I get back when I buy old 'Made in USA' tools for pennies on the dollar compared to either what they originally sold for or the newer junk. :)

But really, its kinda sad, because nobody likes the old 'Made in USA' tools anymore. Too heavy, too ugly, too rusty, and require the most elementary skills like changing a pulley, belt, or bearing such that most folks who can't be bothered with something so easy would actually rather throw it away to go buy something more flimsy and made in China, for more money.

Before I got into old tools, I didn't know how to do any of that either, but you learn. You learn great skills...electrical, mechanical, welding, fabricating, bearing pulling and setting, and all kinds of other stuff. The 'quick and convenient' disposable consumer culture we're surrounded with today won't tolerate it.

Getting such great deals on all these tools would make me so happy if it weren't for the sad reasons why nobody wants them anymore:(

So go make my day - save an old tool, learn some skills on how to keep it running, and enjoy it for the rest of your life. By 'recycling' an old tool you're at least keeping one more 'Made in China' tool from eventually ending up in a landfill:)
 
Last edited:
OP
R

Red Leader

Well-known member
Joined
May 15, 2011
Messages
2,689
Location
Denver, CO
Great garage you have there. When I saw you won the contest, I thought the floor would go great. I am a bit partial to the Taupe base. You can add the flakes that are the closest to the lower wall color to tie it in.

Love the tools also.

Thanks for your thoughts!

Quick update - I have some color samples coming. I still really, really like the idea of the blue border and stripe! A part of me wants to fight the plain jane thing because I want to do something creative with the floor.

Here is a question for all - If the blue just turns out to be too 'off' to work with the walls, is there another color you would suggest as a good border to go with the taupe/beige main floor section?

-RL
 

rickairmedic

Well-known member
Joined
May 31, 2005
Messages
4,165
Location
louisville ,Ky
Dave the only thing I will say on " the stripe border thing " is :D. Fixing an oops on the wall when paint bleeds through or something to that effect is a pain . Now multiply that by many many times if the same stripe is oopsed with epoxy not nearly as easy to redo. I still think a nice taupe or Beige with the right color blue chips would look great and not draw ones eyes away from the fantastic shelves or tools .


Rick
 

Omphaloskeptic

Well-known member
Joined
Oct 11, 2008
Messages
2,346
Location
Ultima Ratio, Wa.
If they can tint the epoxy to match the lower wall color, then I'm sticking with what I posted earlier (#794). I don't believe it would be a "plain-jane" choice; to me, it would be an 'un-busy canvas' to highlight your equipment and give the illusion of a larger space. It would most definitely easier to apply and touch up!
 

Bob Heine

ALLIANCE MEMBER
Joined
Oct 24, 2009
Messages
10,708
Location
Boca Raton, Florida
Do you have a garage that you've been working on? Would love to see it:)
-RL
I do have a garage I've been working on for 15 years. I posted a few pictures with my profile. It's slowly evolving into a candidate for an episode of Hoarders. My wife keeps the house neat by storing her overflow in our garage. Probably revenge for the carburetor and transmission work I used to perform in the kitchen of our first home. I contribute ancient computer parts, slightly rusted used hardware and, nearly empty paint containers. Parts from a 72 Corvette project car fill the remaining space.
 

shopnut

Well-known member
Joined
Feb 22, 2006
Messages
4,237
Location
Florida
Thanks for your thoughts!

Quick update - I have some color samples coming. I still really, really like the idea of the blue border and stripe! A part of me wants to fight the plain jane thing because I want to do something creative with the floor.

-RL
A lot of good advice was given here by all the members - you need to take it all in, weigh the pros/cons, and make a decision. After seeing your built-in shelves, it tells me you have a vision of what you want and are not afraid to put the effort in to get it. We all have a vision of what we want it to look like, but at the end of the day, you need to make this place your very own. I have complete confidence that it will turn out great, no matter what you choose.

If you are determined to do the stripes you really like, you could always paint the light base color now so it looks good in the interim, live with that for a few years to "try it out", and then add the stripes later if you think it needs more. Your vision may become more clear or it may change completely as you make other additions to the place.

Good luck and don't let this drive you crazy! (But if it does, we can always get you admitted in the Asylum :))
 
OP
R

Red Leader

Well-known member
Joined
May 15, 2011
Messages
2,689
Location
Denver, CO
Alright guys, I received some samples from Epoxy-Coat. I got 2 base colors, Taupe and Beige, with 1 custom color, Smoke Blue.

Here are some pictures to show how they look with the existing colors:

p9234327.jpg

p9234330.jpg

p9234334.jpg

p9234335.jpg

p9234339.jpg

p9234341.jpg


So you can see that in some of the pictures, the blue is a little off (not quite as 'green' or 'gray' as the wall, but in other photos, it comes pretty darn close. I'm wondering if since it will be on the floor, any slight differences in color can also balanced by the fact that it will be a different type of finish and on a different surface, with different lighting.

All that being said, I'm going to see what it looks like in the light tomorrow and I will get the final expert - the wife - who is the master of all color combination and coordination, to weigh in on it. If it gets past her, it passes muster. If not, my plan B will be as some of you have said, to do the single color and add in some chips/flakes to tie it all together.

Once I had the tiles on the floor, it was plain to see that the beige works much better in the garage than the Taupe. Although it definitely doesn't match the 'tan/white' on the walls, it didn't seem to bother me. Maybe two 'mismatches' will cancel each other out?:D

I will say that the Beige and Smoke Blue go VERY well together, and definitely carry the theme of the garage beautifully, even if it is slightly off to the walls.
 
Last edited:

rickairmedic

Well-known member
Joined
May 31, 2005
Messages
4,165
Location
louisville ,Ky
Dave the blue is close but it needs a touch more green :D. Did you ask if their stuff can be tinted as that would seem the easiest option to me . Get white and have it tinted where you got your paint to match your paint . Otherwise I think the beige with smoke blue chips would work well.


Rick
 

Omphaloskeptic

Well-known member
Joined
Oct 11, 2008
Messages
2,346
Location
Ultima Ratio, Wa.
Gosh RL, it looks so close to the wall color from your pictures. Are the samples the actual epoxy product, or the color equivalents? It's your wife's call, but I wonder if you ran the epoxy up the curb to the baseboard, would you be able to notice the slight change in hue with the wood separating the two?
 
OP
R

Red Leader

Well-known member
Joined
May 15, 2011
Messages
2,689
Location
Denver, CO
Gosh RL, it looks so close to the wall color from your pictures. Are the samples the actual epoxy product, or the color equivalents? It's your wife's call, but I wonder if you ran the epoxy up the curb to the baseboard, would you be able to notice the slight change in hue with the wood separating the two?

Yep, they are the real epoxy.

I'm sitting here looking at this paint chip (blue), and under a very yellow incandescent light, it looks green.

I'm wondering if I might be able to also order like a small pint of their yellow color and see if than can 'green' it up ever so slightly.

I will say that the color is off, but not by much, and it looks so good with the beige, a part of me doesn't care.
 
OP
R

Red Leader

Well-known member
Joined
May 15, 2011
Messages
2,689
Location
Denver, CO
Dave the blue is close but it needs a touch more green :D. Did you ask if their stuff can be tinted as that would seem the easiest option to me . Get white and have it tinted where you got your paint to match your paint . Otherwise I think the beige with smoke blue chips would work well.


Rick

I haven't asked yet, but I will on Monday. As far as going to get it tinted myself, wouldn't I need a very special epoxy paint to tint it with, not just latex? Do paint places have epoxy paint you can use to tint it? All good points.

I got my wall color at a Habitat ReStore. I doubt they do epoxy tinting:D :lol:

If Epoxy-Coat doesn't 'tint' the colors themselves, I might ask to see if I could get a small container (pint size, maybe) of their yellow, to add to the blue. Under the yellow lighting, this color has that green tone to it, and the green color the Epoxy-Coat offers is more of a british racing green.

EDIT: I just noticed that Epoxy-Coat DOES carry 'touch up' kits and you can get them in any color. So, best case scenario, I am able to purchase JUST the tinting color (in pint size) and instead of needing all the other stuff (hardener, gloves, brush, etc), I would just remove equal parts of epoxy from my main order, then add in the tint color (substitute 1:1 ratio as I go) and just work it in slowly and see the color change.

Worst case scenario, I buy the 'touch up' kit for $50:D
 
Last edited:

Wingnut65

Well-known member
Joined
Apr 21, 2010
Messages
3,170
Location
Tampa Bay, FL
Colors look great and very close to the wall. I'd like to see them in the daylight as well.

I don't think they would warranty the floor if it were tinted locally. Also, self-mixing scares me. It would be so easy to push it to be too green, then you're stuck. Get Mrs. RL to review them as they are.
 

Bob Heine

ALLIANCE MEMBER
Joined
Oct 24, 2009
Messages
10,708
Location
Boca Raton, Florida
When the walls need to be painted in the future, paint stores/departments can mix up a near-perfect match to the Epoxy-Coat samples if the difference bothers you. Like the color, there will be some difference in sheen that may be an issue. I'd settle on the floor colors from Epoxy-Coat's available ones and adjust the wall colors/sheen if necessary.
 
To avoid these ads, REGISTER NOW!

tinbender 66

Well-known member
Joined
Mar 23, 2011
Messages
2,294
Location
Western Washington State
Maybe think about something complimentary to your paint scheme instead of matching it. Colors don't work in my head like they do in real life so I'm just throwing out something that popped into my head (uh-oh).

Super duper get-lost-in-it miles deep glossy black with smoke blue chips (not too many).

I'll go away now:D
 

JasonW

Well-known member
Joined
Aug 25, 2011
Messages
309
Location
Orange County, California
So, I ended up with something peculiar the other day....


p7313178.jpg

By daveamy at 2011-08-01


Then, if I dare, opened the case....


Lo and behold, a monster!!!!

p7313179.jpg

By daveamy at 2011-08-01


A really, really heavy monster haha.


The grinder made it's way from PA to CO via a forum member on the Old Woodworking Machine's forum. I hold a lot of gratitude towards the two gentleman who picked it up and held it for me, then transported it for me. It is now home in the 1950s Garage.


And on top of all that, the picker-upper put together this sweet transport box to give it a comfy ride all the way to Denver. Check this out:

p7313180.jpg

By daveamy at 2011-08-01

Yes, those are handholds routed into the the custom-made box.

Needless to say, with the quality put into the box, it took a while to get the grinder out haha:

p8023222.jpg

By daveamy at 2011-08-02

And here is the final product!

p8023224.jpg

By daveamy at 2011-08-02

p8023225.jpg

By daveamy at 2011-08-02

And the tag:

p8023226.jpg

By daveamy at 2011-08-02

And check that out! Has a 'born on' date of 11-49. Shucks, looks like it missed the '1950' mark by a month. Guess it's time to get rid of it.


:D:D:D
August seems to have been the month for acquiring these apparently rare and rather heavy Craftsman grinders. I picked mine up at a local estate sale where I was fortunate enough to also find the manual (model 115.7397). I scanned and uploaded it to the Vintage Machinery website. If you are interested find it here: http://vintagemachinery.org/pubs/detail.aspx?id=4472 They look about the same despite different numbers.

I am going to have to go check my grinder's 'born date'.

Thanks for the great journal entries. I am enjoying your journey.
 
Last edited:

GirlnAgarage

Well-known member
Joined
Jan 21, 2011
Messages
4,669
Location
Texas
Red Leader, this is a great build you're working on. I'm starting from the beginning and only got to page 9 right now. Been reading it with my morning coffee. I'm not going to skip ahead either, I want to see the progress.

I love the eye you have for details and your way of thinking on things. Also, your method is great - trial and error. Reminds me of someone I know. :spit: I can see the thought bubble "Well lemme do it this way and... D'oh! Ok, I'll just go right here and...Gah! Ok, I'm gonna try putting it like this and...AhhrrrGHHH!..." until eventually its "FINE! I'll just stick that like that and...holy cow, that worked. Of course it did. It was so simple. I'm an idiot. Well now I know...how to do that, not that I'm an idiot. I knew that." :lol_hitti

I learned a couple new tricks so far from this build.

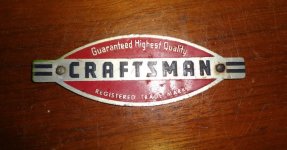
Yesterday evening I was cruising Ebay with a little jingle in my paypal. I ran across a old Craftsman name badge from a tool box and decided to grab it. I knew someone around here had that badge displayed very prominently. Saw it was you.


Anyway, keep up the nice work. I can relate to the ups and downs, successes and failures, trial and errors, wins and losses. The ultimate point is you're doing it how you want to do it and you can see the results. There's no wrong or right or no instruction manual. Your work looks great! :beer:
 

Attachments

  • Cman.jpg
    Cman.jpg
    113 KB · Views: 40

rickairmedic

Well-known member
Joined
May 31, 2005
Messages
4,165
Location
louisville ,Ky
LOL yes its true theres a right way and many many wrong ways to do it . I think its just a matter of how many wrong ways you try before finding the right way :D.


Rick
 

GirlnAgarage

Well-known member
Joined
Jan 21, 2011
Messages
4,669
Location
Texas
LOL yes its true theres a right way and many many wrong ways to do it . I think its just a matter of how many wrong ways you try before finding the right way :D.


Rick

lol true.
There's definitely a right or wrong way as far as technique or sound practices. But as far as ideas and thinking outside the box, it's great to see someone do it with a different style. I think many times people come on forums and essentially seek approval to try something. Then you get all the "that won't work" or "why" or "what for" or "that's useless". I think folks get discouraged from trying stuff. Or we get stuck with cookie cutter ideas....boorrring!

This 50s Craftsman = not boring :thumbup:
 
OP
R

Red Leader

Well-known member
Joined
May 15, 2011
Messages
2,689
Location
Denver, CO
August seems to have been the month for acquiring these apparently rare and rather heavy Craftsman grinders. I picked mine up at a local estate sale where I was fortunate enough to also find the manual (model 115.7397). I scanned and uploaded it to the Vintage Machinery website. If you are interested find it here: http://vintagemachinery.org/pubs/detail.aspx?id=4472 They look about the same despite different numbers.

I am going to have to go check my grinder's 'born date'.

Thanks for the great journal entries. I am enjoying your journey.

Jason,

Thats AMAZING!!! Thank you thank you thank you for posting that up in the publications! How cool to find the grinder AND the manual/paper. Too cool!

If you don't mind, would share pictures of that grinder with us? Feel free to post pictures up on this thread - I'd love to see them!!!
 
OP
R

Red Leader

Well-known member
Joined
May 15, 2011
Messages
2,689
Location
Denver, CO
Red Leader, this is a great build you're working on. I'm starting from the beginning and only got to page 9 right now. Been reading it with my morning coffee. I'm not going to skip ahead either, I want to see the progress.

I love the eye you have for details and your way of thinking on things. Also, your method is great - trial and error. Reminds me of someone I know. :spit: I can see the thought bubble "Well lemme do it this way and... D'oh! Ok, I'll just go right here and...Gah! Ok, I'm gonna try putting it like this and...AhhrrrGHHH!..." until eventually its "FINE! I'll just stick that like that and...holy cow, that worked. Of course it did. It was so simple. I'm an idiot. Well now I know...how to do that, not that I'm an idiot. I knew that." :lol_hitti

I learned a couple new tricks so far from this build.

Yesterday evening I was cruising Ebay with a little jingle in my paypal. I ran across a old Craftsman name badge from a tool box and decided to grab it. I knew someone around here had that badge displayed very prominently. Saw it was you.


Anyway, keep up the nice work. I can relate to the ups and downs, successes and failures, trial and errors, wins and losses. The ultimate point is you're doing it how you want to do it and you can see the results. There's no wrong or right or no instruction manual. Your work looks great! :beer:

GirlnAgarage,

Thank you for your kind words. I really appreciate it. I think in some departments the creativity overwhelms the skill. But the good news is that skills are learned. I remember tidbits from growing up - my dad and his brothers would do a lot of this type of work and I think I picked it up from there, but then didn't do anything like that for the past 4 to 6 years or so, so a lot of this was trial by error. However, I have been learning a lot and it has prepared me to do some of the nexts steps, like the art-deco work bench, or tool holders, or future projects. I'm having so much fun with it that sometimes I don't notice how hard or easy it might be. There were some steps that weren't fun, like the drywall or mudding the walls, but once the paint gets on there, things start looking up:)
 

GirlnAgarage

Well-known member
Joined
Jan 21, 2011
Messages
4,669
Location
Texas
I'm having so much fun with it that sometimes I don't notice how hard or easy it might be. There were some steps that weren't fun, like the drywall or mudding the walls, but once the paint gets on there, things start looking up:)


You don't know how true that was for me too. I got to the point working on the walls that I took a good long break because it dragged me down. Once I got my paint on I felt free to finally move on to the parts I wanted to work on, the stuff in the garage.


One of the highest compliments someone can pay the garage. Thank you:beer:

You're most welcome.
 

shopnut

Well-known member
Joined
Feb 22, 2006
Messages
4,237
Location
Florida
Hey RL, congrats on hitting the 100K mark on the views :thumbup: I better start looking for a good spot to pull over the old Asylum truck and watch the freight train (the 1950s Craftsman Garage) just motor on by!

Its been fun watching and participating, for sure. Keep up the great work!
 
OP
R

Red Leader

Well-known member
Joined
May 15, 2011
Messages
2,689
Location
Denver, CO
Alright guys, I think I've reached a decision!

The blue checks out! (by the wife's eyes!)

Here is a pictures to show what it looks like in natural lighting:

p9254388.jpg


It is a near perfect match.

The best part is that I think I'm going to take my idea of using the blue and mix it with the suggestions many of you have come up with - it will be a win-win combo.

My wife did suggest that instead of continuing the blue from the walls right onto the floor along the border (and thereby making slight color differences more obvious), I could do most (or all) of the entire floor in the tan (which is what many of you suggested), then do some type of blue striping a couple of feet out. This could either be a single 4" stripe, a larger blue stripe (8-10"), or even a double stripe. I'll have to mock up some pictures and you'll all have to let me know what you think.

So! I'm happy because I'll be able to use the blue color (I really wanted to) but also take up your (and the wife's) suggestions to to most of the floor in the tan and break up the blue color of the walls.

Whoohoo!
 

rickairmedic

Well-known member
Joined
May 31, 2005
Messages
4,165
Location
louisville ,Ky
Ok that does look really close in that light . I agree use it as an accent color out away from the walls and it will be hard to tell its not exact. Maybe reverse the earlier patterns blue all over with beige up next to the wall and a second beige stripe outside of that pretty much reverse what you have on the walls.


Rick
 

JasonW

Well-known member
Joined
Aug 25, 2011
Messages
309
Location
Orange County, California
Tan with a blue accent sounds like a good plan to me. I would be afraid that an all blue floor would not only show up any difference in the color but also accent every scuff or spot of dirt on that floor, especially if the colors were identical. The contrast should look nice.

And yes I will be happy to upload some pictures of the grinder. Thanks for the invitation. You just have to be a little patient as I am doing this backwards. I am acquiring the tools before acquiring the garage, so I currently have it tucked away at my parents house. (I knew there was a reason I built them that work bench several years back.)
 
OP
R

Red Leader

Well-known member
Joined
May 15, 2011
Messages
2,689
Location
Denver, CO
Ok that does look really close in that light . I agree use it as an accent color out away from the walls and it will be hard to tell its not exact. Maybe reverse the earlier patterns blue all over with beige up next to the wall and a second beige stripe outside of that pretty much reverse what you have on the walls.


Rick

Tan with a blue accent sounds like a good plan to me. I would be afraid that an all blue floor would not only show up any difference in the color but also accent every scuff or spot of dirt on that floor, especially if the colors were identical. The contrast should look nice.

And yes I will be happy to upload some pictures of the grinder. Thanks for the invitation. You just have to be a little patient as I am doing this backwards. I am acquiring the tools before acquiring the garage, so I currently have it tucked away at my parents house. (I knew there was a reason I built them that work bench several years back.)

Thanks guys for your thoughts. I'll try and mock up some designs tomorrow and throw em up here to see what you all think. If I can use enough blue, I can split the order 50/50, half beige and half blue. If I do just a blue stripe, I may have to get the whole kit in beige and buy a separate kit for the blue stripe. I guess we'll see!
 
OP
R

Red Leader

Well-known member
Joined
May 15, 2011
Messages
2,689
Location
Denver, CO
Hey RL, congrats on hitting the 100K mark on the views :thumbup: I better start looking for a good spot to pull over the old Asylum truck and watch the freight train (the 1950s Craftsman Garage) just motor on by!

Its been fun watching and participating, for sure. Keep up the great work!

Heh,

Not if my child-raising wife has anything to say about it! :D :lol:

I think this thread is going to slow down quite a bit. I had a hard push to get things done before the kid got here and that is probably what a majority of this thread has been.

Although, I do get a nice break for Christmas - I think I will use it to power through making my workbench (FINALLY).

It is a very nice compliment, though. Thank you:beer:
 

Wingnut65

Well-known member
Joined
Apr 21, 2010
Messages
3,170
Location
Tampa Bay, FL
You are on the right track, Dave. Separating the colors will help. I like the idea of double accent stripes.

Like GirlnAgarage said, we keep coming back because this place is not boring. :beer:

With your dedication, the 1950s Craftsman Garage will be finished in due time. Family and work will take a priority as they should. But that will just allow the ideas you have to be worked out in your head and on paper before any wood is cut. But when time is freed up, watch out, Red Leader will do miracles with rough lumber! :thumbup:
 

flybefree

Well-known member
Joined
May 18, 2008
Messages
1,111
Location
Ohio/Kentucky
Tried, and failed, to buy my first vintage tool yesterday...becuase of you and Tinbender! I was trying to line up transport for a nice Delta-Rockwell DP and the thing sold while I was on the phone with my Dad for $80! Oh, it was nice...but there is always next time!

I can't wait to see the pattern you come up with...

Shaun
 
OP
R

Red Leader

Well-known member
Joined
May 15, 2011
Messages
2,689
Location
Denver, CO
I created some basic patterns (about 9 of them) and will post 'em up tomorrow. I was liking the dual stripe. The single stripe was cool but looked a little plain. A thicker and thinner strip together also looked pretty cool.

I'm thinking I'd like to do chips/flakes on the tan part, but keep the blue chip/flake free. That should present an interesting challenge when laying down the floor.

But it will be fun:)

ps - Shaun, no worries on the press - they are one of the more common old tools to show up on CL. You'll find yours soon:)
 

Bobcat719

Member
Joined
Nov 15, 2010
Messages
23
Location
Colorado Springs, CO
Hey hey, just thought I would stop by and show you my newest purchase! (thanks to you!)
1002222o.jpg

By bobcat719 at 2011-09-26
for some reason I could not get them to show up like this on my thread, so check the others out on my page, and maybe some day soon I can upload them like you do! Thanks for all the advice, and encouragement to go out and buy this stuff, it is soooo much better than anything you could buy today new.

BK
 
To avoid these ads, REGISTER NOW!
Top Bottom