To avoid these ads, REGISTER NOW!

Between 265 & 485 SQ/FT 1950s Craftsman Garage retro remodel

Workspaces sized between 265 and 485 squarefeet.

Wingnut65

Well-known member
Joined
Apr 21, 2010
Messages
3,170
Location
Tampa Bay, FL
Dave, I've been thinking of your process to apply the floor that you mentioned. My first thought would be to paint the whole floor in 2-steps and then add the stripes later. First step would be to find out where you want the stripes to be. At the inside edge of one stripe, tape the floor and do the whole outside area. When cured, move toys to wall, put down new tape near edge of finished epoxy and allow for a little overlap. When finished, one of the stripes will be over that blend line. Since it is an accent color, it will cover any irregularities.

This way, you don't have have to tape perfect stripe lines when you paint the floor but don't want to paint where the stripes are. And then have to have even more-perfect tape lines again when you want to fill in that gap on bare concrete to paint just the stripes. If the tape is off a fraction, that would be bare concrete showing.

Just a thought...

Dave, that saw base looks great. I thought the electrolysis was line of sight from the giver to the taker. I am impressed with the results that you got, even in the outside corners. I have a 5 gallon bucket that I use, but I like your set-up for larger pieces. I've heard about using kiddie pools for hoods and stuff. shopnut was asking about this process and with results like that, maybe we need to start a thread about it. Although I may find one already if I would try the search feature...

And, thank Rick for the suggestion on Kroil. I have not heard of it, but am always open to making tear down easier. I'm up to PB from WD right now, but this sound promising. Have you found it available locally, or is it only on-line?
 
To avoid these ads, REGISTER NOW!

rickairmedic

Well-known member
Joined
May 31, 2005
Messages
4,165
Location
louisville ,Ky
Jeff I have found Kroil in a few of my HVAC supply houses so Honestly I am not sure where else its available but I would bet if one called the 800 number they could tell you where to get it .

Rick
 
OP
R

Red Leader

Well-known member
Joined
May 15, 2011
Messages
2,689
Location
Denver, CO
#15
p9264422.jpg

Epoxy-Coat ordered!

I will be getting the chips pictured above. That way, I can do that combination, or just the blue and white, or none at all.

I am going to be doing the whole floor in beige, then will add the blue stripes once everything hardens. After that, I will clear coat the whole floor. In between steps, I will have to scuff up the floor for the blue stripes and the clear coat. That is what Christine said and it sounds like that is the way others have done it.

I was thinking it would have been cool to get 2x of the half-kits and then not have to ratio out anything, but Christine said even with the half-kits, you have to do that. For a 1-car garage 1/2 kit (250 sq ft), you have to divide in half. For a whole kit, (500 sq ft) you have to divide into 4 parts. So even if I was to get the 1/2 kit, I'd still have to divide it out. Reason being that the epoxy cures too quick to do the whole entire thing in 1 setting. I'll have to study up on my fractions:D
 
OP
R

Red Leader

Well-known member
Joined
May 15, 2011
Messages
2,689
Location
Denver, CO
Of table saws...

Kewl but is SWMBO ok with a living room full of classic woodworking tools while the floor is being done :D.


Rick

Heh, Not sure our living room has enough space:lol:

Needless to say, I'll be taking up Jeff's suggestions and buying/building some rolling bases for the tools.

I've been thinking about the table saw setup recently. It is hard because if there is one tool that makes me weak in the knees, it is a good cabinet saw. One day, if I ever have enough space, I'd like to have a cabinet saw collection. These would include:

1. 12" Craftsman/Darra James 95 table saw
2. 9" Craftsman/Atlas 101.02180 cabinet saw
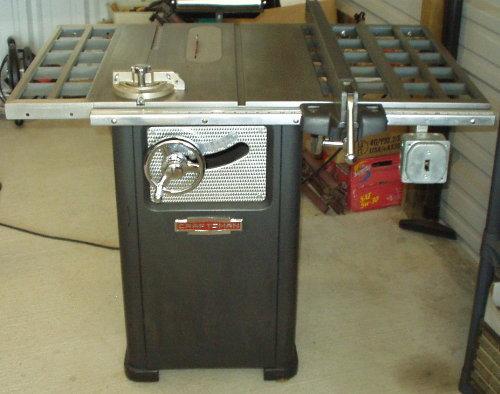
3. 10" Craftsman 103.22450 cabinet saw (quintessential 1950s Craftsman cabinet saw)
4. 10. Atlas/Clausing/DeWalt cabinet saw
5. Oliver/Davis & Wells open bottom cabinet saw
6. Montgomery Ward Powr-Kraft cabinet saw
7. Delta 1160 tilty with cast iron base
8. Some type of modern cabinet saw I could put a bies/incra fence on, have a router base, and all kinds of modern fancy accessories (but no made in China junk)
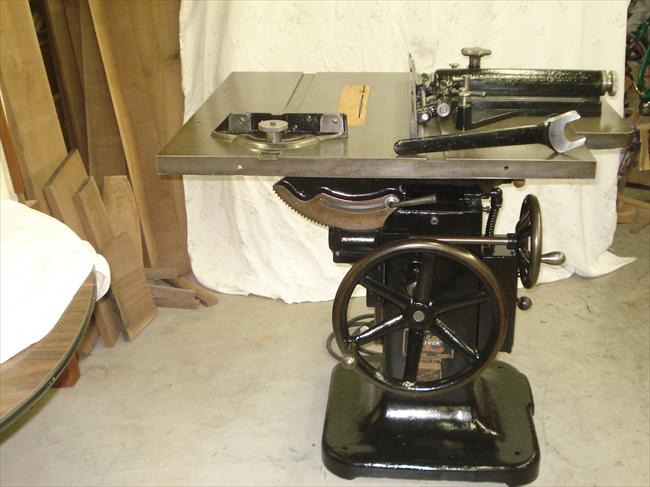
9. A vintage 1920s-1940s industrial pedestal saw.

With the smaller space, I'd like to have 2 table saws, with one being a large, industrial saw mainly for ripping, and a smaller 10" saw for everything else. I would put them back-to-back so that each one could use the others' table area as an outfeed table.

As I've been doing more and more research, I'm developing an affection for the older pedestal type of saws. These might also be known as 'variety saws' which, back when table saws were becoming more commonplace, were known for being able to rip, crosscut, miter, and dado. Some of these old saw are simply beautiful and stunning.

In addition to the insanely large, awesome 14"-16" old school saw, its good to have just a regular table saw. Those much more experienced than me have recommended having at least one regular old 5/8" arbor, 10" table saw around. That way, you can buy off the shelf blades, not have to break the bank for a dado set, etc. I think it is sound wisdom.

My thought is to eventually have a setup where I have one of these:

146-A.jpg


And something like one of these:

6982-D.jpg


There was a timeframe from about 1925 til about 1935ish that the old school pedestal saws started getting more modern refinements, like ball-bearing arbors, ball-bearing sliding tables, even dual arbors...while still retaining the tilt-table design and their graceful lines. I would like to find one of these saws. There are several makers of table saws that had a lot of these features...Oliver, Tannewitz, Crescent, Wadkin, Yates-American, and possibly others. It seems that there is always more to learn, and after reading up on a lot of these saws, I feel the Yates American calling out to me...

I think I'm falling hard for an old sliding-table Yates American No. 1, No. 20, or No. 30....

no1varietysaw.jpg


no20universalsaw.jpg


no30universalsaw.jpg


Simply beautiful saws. I'd take any model I could find...I'm not picky:D The No. 1 to me is the most elegant, with the No. 20 and No. 30 seeming to be the most useful, with the addition of a dual arbor setup. If you know where any one of these saws, slowly fading away into the overgrowth behind an old farmhouse is...let me know:thumbup:

I've never seen a picture of any one of these, there are no records of any on the OWWM site. I'd assume that they are pretty hard to come by. Sounds like the making of a perfect quest saw:)

Now, if you are already succumbing to the way of the 'old tool' addiction and find yourself struggling to remain satisfied with your plastic contractors saw and lunchbox screamer planer, please skip these last set of images, as I guarantee you they will put you over the edge and you will never, ever be able to return.

While I'm sure that one of those Yates table saws would be incredible to find and restore and would be an absolute beauty, that is not reality, at least not yet.

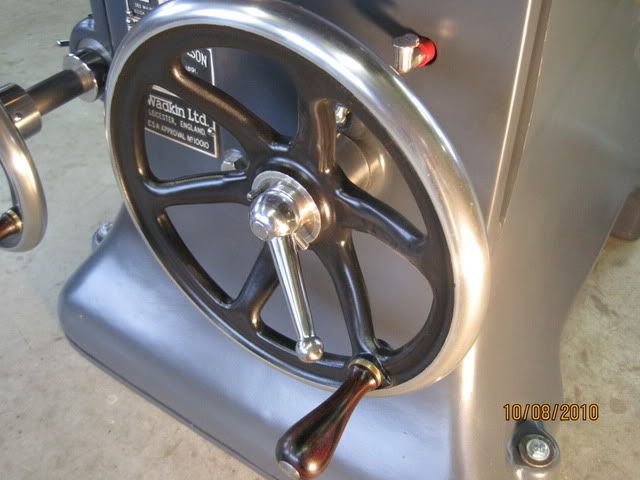
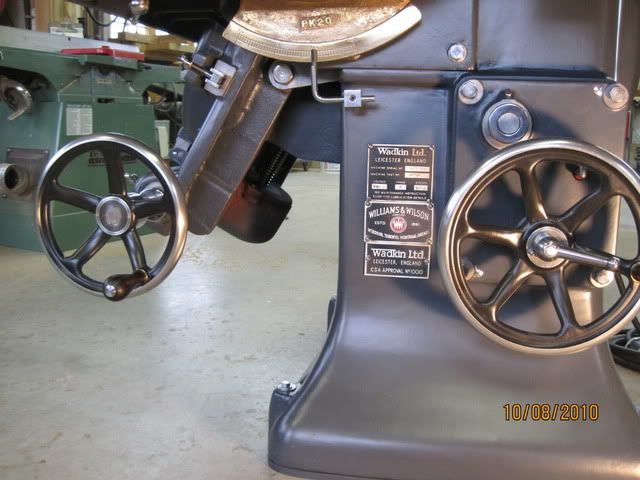
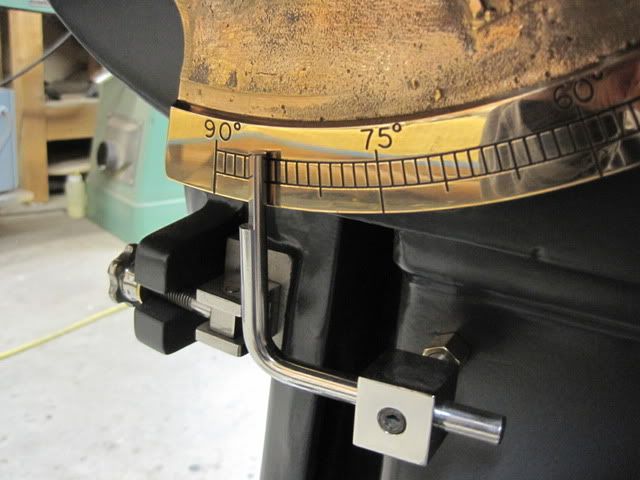
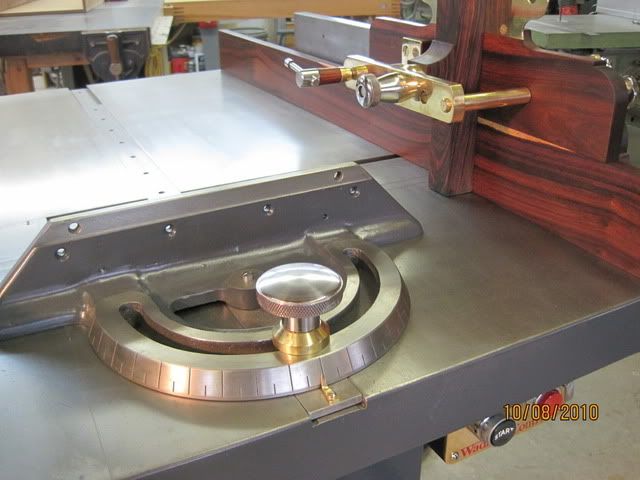
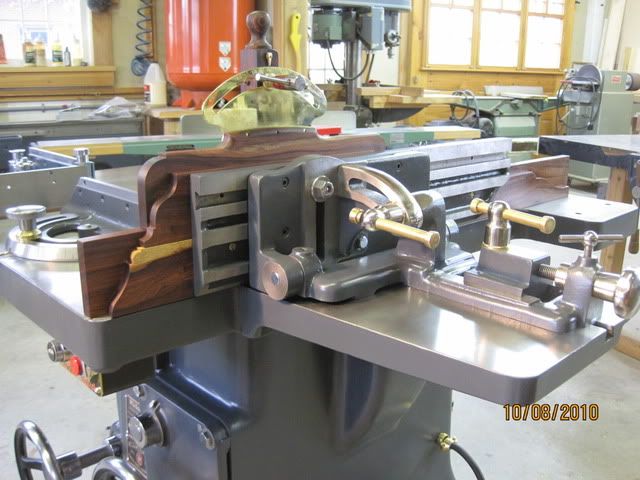
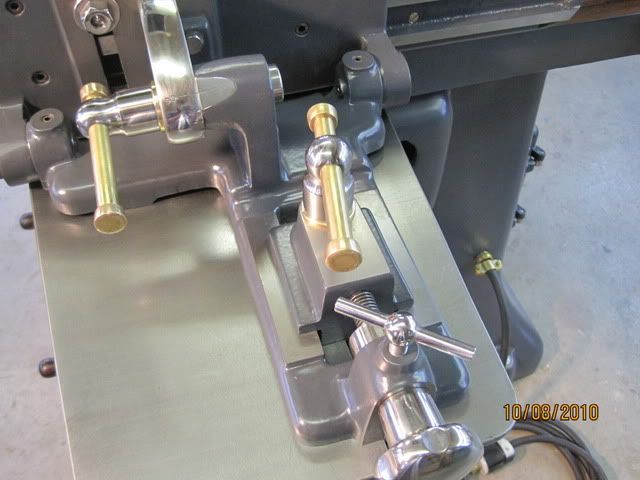
However, this last set of images, is. As of right now, this single saw is what I consider to be the most beautiful table saw in the world. The owner's opinion is that this model is also the finest table saw ever made:


Are you sure you want to see this? No turning back.


IMG_0506.jpg

IMG_0526.jpg

IMG_0530.jpg

IMG_0458.jpg

IMG_0512.jpg

IMG_0513.jpg

IMG_0535.jpg

IMG_0514.jpg

IMG_0516.jpg

IMG_0533.jpg


Simply incredible. Stunning. Magnificent. I cannot imagine a more beautiful tool, ever.

Oh, and here's the kicker - in its unrestored state, he found it for $100.

THIS is why I have a hankerin' for these old, rusted, worn-out, kicked-to-the-curb, pieces of scrap:D
 
Last edited:

Wingnut65

Well-known member
Joined
Apr 21, 2010
Messages
3,170
Location
Tampa Bay, FL
I have now been educated by the master on the finer points of vintage table saws! That is a beautiful saw! :thumbup: And those Yates saws are things of beauty, which is probably why we have plastic saws today. Nobody would pay the price it actually takes to make one of those saws. Beauty doesn't cut wood any better, but it sure makes it more enjoyable.

BTW, the rolling tool base idea was from shopnut, because he got to it before I could suggest it. Wheels do make rearranging the shop much easier.

And congrats on the floor order. Glad the planets were in alignment for you on that piece of the puzzle.
 
Last edited:

GirlnAgarage

Well-known member
Joined
Jan 21, 2011
Messages
4,669
Location
Texas
Holy smokes that saw at the bottom is gorgeous. I'm not a saw girl but the aesthetics, colors and style of that is beautiful.
 

rickairmedic

Well-known member
Joined
May 31, 2005
Messages
4,165
Location
louisville ,Ky
That saw is amazing almost over restored to me though . I would have to put a glass top on it and use it as furniture as I wouldnt want to get it covered in sawdust :D.


Rick
 

santagary

Well-known member
Joined
Mar 23, 2010
Messages
821
Location
Pagosa Springs, Colorado
Dave,

Try taping the lines down with the blue tape and then set your tools against the wall. I think a line 2' off the wall will still be under all your toys, I mean tools. The lines may need to start 3' out or more to be visible and give you the effect you (and we) are looking for.

Also, I think a full order of Beige and accent in Blue. Too much blue on the floor and walls will make the place darker.

x2 :)
 

Skaal-tel 79

Active member
Joined
Sep 8, 2010
Messages
30
Location
Petawawa, Ontario, Canada
I just finished reading through the entire thread. You have some BEAUTIFUL tools. I love the hammered finish. I wish I could find some nice old antiques around here.

I love the 50s style. Great work! And congrats on the young boy :)
 
To avoid these ads, REGISTER NOW!
OP
R

Red Leader

Well-known member
Joined
May 15, 2011
Messages
2,689
Location
Denver, CO
I just finished reading through the entire thread. You have some BEAUTIFUL tools. I love the hammered finish. I wish I could find some nice old antiques around here.

I love the 50s style. Great work! And congrats on the young boy :)

Thank you for your thoughts! I still have a LONG way to go, but little by little it will get done!

Keep an eye out for Poitras and General tools. Of Canadian origin.:canada:
 
Last edited:
OP
R

Red Leader

Well-known member
Joined
May 15, 2011
Messages
2,689
Location
Denver, CO
I have now been educated by the master on the finer points of vintage table saws! That is a beautiful saw! And those Yates saws are things of beauty, which is probably why we have plastic saws today. Nobody would pay the price it actually takes to make one of those saws. Beauty doesn't cut wood any better, but it sure makes it more enjoyable.

BTW, the rolling tool base idea was from shopnut, because he got to it before I could suggest it. Wheels do make rearranging the shop much easier.

And congrats on the floor order. Glad the planets were in alignment for you on that piece of the puzzle.
Thanks Jeff. Although, I stand on the shoulders of giants when it comes to the old woodworking tools. Compared to a lot of guys on the OWWM forum, I am still just a newbie in 'information soak' mode. One day I hope to find one of those old Yates table saws and restore the heck out of it so that it could rival that Wadkin.

Whoops! My bad! Shopnut has so many good ideas already I thought he'd at least leave a few to the rest of us. Guess I was wrong:D

And yes! I'm super excited about the floor! This winter will be 'research time' for it, getting thing ready and reading up on its application. And probably a lot of grinding too:lol:
 
Last edited:
OP
R

Red Leader

Well-known member
Joined
May 15, 2011
Messages
2,689
Location
Denver, CO
More progress on the Atlas saw...

Good news guys! What was stuck, now isn't!

It really paid off to let the stuck stuff sit for a few days soaking in some PB Blaster. It worked well.

First, the arbor bearings:

pa074540.jpg


That little screw-in bushing was rusted in there. After about 3-4 days soaking, I thought I'd try to use my spanner wrench to get it off. No dice. Then the thought hit me (from when I worked on the house faucet). I'll just use a punch and tap it loose. It worked!

Next, I used a piece of wood to knock the bearings loose. Fortunately, there were just a light press fit:

pa074543.jpg


I thought I would try to off the arbor flange with a little puller. No dice:

pa074541.jpg


Time to pull out the big guns:

pa074545.jpg


I went ahead and mounted it in the vise and gave it a few turns:

pa074546.jpg


It still didn't really want to budge, so I wrenched it down some, then used PB Blaster on the arbor where the flange sits. I'll let it sit and each day go out there and give it a 1/16-1/8th of a turn or so and eventually it will pop loose. I'm in no hurry so I don't want to rush things and mess anything up.

Also, the other 'stuck' thing got 'unstuck'!

If you remember, this part:

pa024500.jpg


...which is a sleeve that spaces out the handwheel to the mounting point on the carriage was stuck. After a good soak and a little twisting, here's what I get:

pa074547.jpg


Whoohoo! The sleeve wasn't threaded, but originally slid on. I'm sure that made it easier.

pa074548.jpg

Gotta give credit where credit is due! Thanks PB Blaster!


Also today I gave the cabinet its first good stripping with the angle grinder and a wire cup:

pa074536.jpg


pa074539.jpg


I've still got a few spots on the underneath inside to hit, and then it will be sanding with some 220 grit to get a nice tacky surface for the self-etching primer I picked up.

All in all, a good day! I will start to clean up some of the small bits and start a 'finished' pile. I will also try and get the model #s off the bearings and place an order for some new ones. This is going to be one sweet saw when it is all done!

That's all for now!
 
Last edited:
OP
R

Red Leader

Well-known member
Joined
May 15, 2011
Messages
2,689
Location
Denver, CO
Red Leader, the retractable caster pictured is a Craftsman. I have four I am adapting to a Craftsman table saw that has an original Craftsman stand, the open square type.

Bluebolt,

Good to know. Unfortunately it has been permanently retired:eek:

Is your saw older? I'd love to see some pictures of it!
 

rickairmedic

Well-known member
Joined
May 31, 2005
Messages
4,165
Location
louisville ,Ky
Hey Dave heres a video for you from the flooring section . I know your not doing VCT but theres a part of the video that applies to you in the beginning of the video :D.


Rick
 
OP
R

Red Leader

Well-known member
Joined
May 15, 2011
Messages
2,689
Location
Denver, CO
Hey Dave heres a video for you from the flooring section . I know your not doing VCT but theres a part of the video that applies to you in the beginning of the video :D.


Rick

Rick! That's awesome! I really, really appreciate you finding that since that is most likely EXACTLY what I am going to do (due to budget:D). I have near that same grinder so it was neat seeing what that setup did to the floor, although I will most likely be down there on my knees a LOT longer than he was haha.
 
OP
R

Red Leader

Well-known member
Joined
May 15, 2011
Messages
2,689
Location
Denver, CO
Quick update.

I I finished most of the wet sanding on the saw cabinet today, although I still have to do the bottom inside.

What I learned: I will not do another one of these restorations like this without some type of access to a sandblaster!!!

:lol:
 
OP
R

Red Leader

Well-known member
Joined
May 15, 2011
Messages
2,689
Location
Denver, CO
Dave just to let you know the wheel he was using on the grinder you can get at HF reaqsonably :D.

Rick

Yep, thats what I heard - somewhere around $30-35.

I'll definitely be looking into that route.

I also have a HF grinder (which I got around the same time I started discovering vintage tools) and while I prefer American tools (eventually I'll have a nice vintage Milwaukee or Black & Decker angle grinder) it is nicer to pay $15 for an import tool than to go to a big box store and pay $60 for virtually the same tool.
 

onewaydave

Well-known member
Joined
Sep 28, 2009
Messages
961
Location
Down the road from Dorothy and Toto
I'm late to this party, but...

Nice looking saw.

I have heard rumors that some like the hammered paint becuase they think it is more the durable of the rattle can varieties.

I can vouch for the efficacy of diesel or kerosene for a penetrating oil. Both stink and are not godd cosmetically (on your skin) but are a site cheaper than the compressed can variety.

Dave.
 

tylers88

Active member
Joined
Oct 2, 2011
Messages
36
Location
Clarion, IA
My grandpa had that same table saw, I "helped" him as much as possible when I was little. Also I LOVE the shelving and trim
 

JasonW

Well-known member
Joined
Aug 25, 2011
Messages
309
Location
Orange County, California
Boy, I thought you said things would be slowing down after the baby came. You seem to be as busy as ever. So first things first, I promised pictures of my grinder. Here it is. Needs a good dusting but you see it as it arrived. Spins forever after you power it off. One day I will break it down and clean and repaint it. Born May 1953.

Grinder_115.7397_a.jpg
Grinder_115.7397_b.jpg
Grinder_115.7397_c.jpg

The plans for the floor are looking good. :thumbup:

Now if you don't mind a question. I would like to try electrolytic rust removal on my Craftsman Model 100 drill press. I have read several discussions of the subject but there seems to be some disagreement as to the appropriate amperage. What has your approach been? Also, do you know if it has any negative effect on the charger? Can't imagine it would, but I'd hate to use my new one if there was.
 
OP
R

Red Leader

Well-known member
Joined
May 15, 2011
Messages
2,689
Location
Denver, CO
Boy, I thought you said things would be slowing down after the baby came. You seem to be as busy as ever. So first things first, I promised pictures of my grinder. Here it is. Needs a good dusting but you see it as it arrived. Spins forever after you power it off. One day I will break it down and clean and repaint it. Born May 1953.

Grinder_115.7397_a.jpg
Grinder_115.7397_b.jpg
Grinder_115.7397_c.jpg

The plans for the floor are looking good. :thumbup:

Now if you don't mind a question. I would like to try electrolytic rust removal on my Craftsman Model 100 drill press. I have read several discussions of the subject but there seems to be some disagreement as to the appropriate amperage. What has your approach been? Also, do you know if it has any negative effect on the charger? Can't imagine it would, but I'd hate to use my new one if there was.

Jason,

You know I haven't really even touched the garage in like 3 weeks? Man, it feels like a LIFETIME haha:lol:


Gorgeous grinder. In better shape than mine, for sure. Also, thanks for getting that manual uploaded. Let me know if you need any assistance in getting yours apart. Then again, once I finish up with most of the table saw I'm probably going to tear into the grinder and I'll detail it all in this thread.

:thumbup::thumbup::thumbup:

Regarding the electrolysis, you have to have a 'manual' battery charger. Those 'smart' chargers require a battery to turn on and charge. I used mine at 6amps. It can vary. 2a would probably take a while. 12a would probably work really well. I don't have other experience outside my own charger, so I cannot help you with specifics on the amperage. What I can tell you is to try and get the scrap metal as close to the 'good piece' as you can without them touching. It also works in a straight line, so make sure you use enough of the sacrificial pieces to get good coverage around all the parts you want to de-rust.

I don't think it has any negative effect on the charger other than you are using it a lot. I think the table saw cabinet base was hooked up for a solid 2.5 days:)
 
Last edited:
OP
R

Red Leader

Well-known member
Joined
May 15, 2011
Messages
2,689
Location
Denver, CO
My grandpa had that same table saw, I "helped" him as much as possible when I was little. Also I LOVE the shelving and trim

Tylers,

Thanks for the kind compliment. It was a project that quickly spiraled out of control.

Oh, and there is more to come:D
 
OP
R

Red Leader

Well-known member
Joined
May 15, 2011
Messages
2,689
Location
Denver, CO
I'm late to this party, but...

Nice looking saw.

I have heard rumors that some like the hammered paint becuase they think it is more the durable of the rattle can varieties.

I can vouch for the efficacy of diesel or kerosene for a penetrating oil. Both stink and are not godd cosmetically (on your skin) but are a site cheaper than the compressed can variety.

Dave.

I haven't used a ton of different spray paints, and my first experience with it (Atlas drill press) was slightly disappointing because it easily chips. However, I think a lot of that has to do with the prep, primer, and clear coat. I cleaned the part pretty well, but didn't sand it or sandblast it. I used a plain ol' regular primer (not self etching), I didn't follow the directions on the can very well, and I didn't use a top coat.

The paint color is just so beautiful that I don't mind trying to remedy all the other steps and keep using it. It is the perfect color for the garage. Besides, you can always touch up paint, right?:)
 
OP
R

Red Leader

Well-known member
Joined
May 15, 2011
Messages
2,689
Location
Denver, CO
That looks like fun. Doesn't it feel good to bring a rusted hulk back to its former glory (or beyond)? I'm looking forward to seeing this baby come together!!!

Thanks Paul - its turning out to be a little bit of a labor of love. This thing would be WORLD's different with a sandblaster and a lathe, but since I don't have either one, every part has to be hand prepped, and every single part needs attention.

I do see a sandblaster in my future. I need to research them more. I don't foresee the tool restoration stopping anytime soon. It is SO much fun!! :thumbup:

(ps - I'm going to check out that lathe tomorrow, and some other goodies...I'll report back what I find, hopefully with pictures:D)
 

tinbender 66

Well-known member
Joined
Mar 23, 2011
Messages
2,294
Location
Western Washington State
I hear ya. I've just been disassembling the band saw and it has a zillion parts:eyecrazy:. I don't have a blaster either but it's high on my list, especially as I get closer to getting more serious with the car. Of course then I will need a bigger compressor:D. And so goes the snowball.
 

GirlnAgarage

Well-known member
Joined
Jan 21, 2011
Messages
4,669
Location
Texas
Red Leader, I'm going to dig back in here, but wanted to ask, how do you go about polishing the metal handles? Just increasing grit sand paper?
 

rickairmedic

Well-known member
Joined
May 31, 2005
Messages
4,165
Location
louisville ,Ky
Well I havent started the resto on my drill press ( I'm to busy using it ) :D but when I do my flashlights . I start with 180 grit emery cloth then bump up to 240 grit Then I bump up to 500 then 800 ,1000 , 1500 , 2000 from 500 up is wet or dry sand paper dry . Then depending on the mood I am in I either mount up the buffing wheels and use several grades of buffing compound or I get lazy and grab a microfiber towel and a bottle of metal gloss to do the final polish .


Rick
 
To avoid these ads, REGISTER NOW!
Top Bottom