To avoid these ads, REGISTER NOW!

The "Hole"

To avoid these ads, REGISTER NOW!
OP
A

armstrr

Well-known member
Joined
Apr 24, 2007
Messages
83
dude great job, I first saw these things about 10yrs ago and was like this is how it should be done. My county wouldn't even talk to me about using them on my house and didn't feel like the fight.

The inspector came to inspect the excavation and saw the forms piled up. He was like "you plan on using those?". I say "yup". He says, well ok, call me when you are ready to pour your footer and I said "the footer is poured at the same time as the walls..." and I show him the roll of fabric ... His jaw drops open and before he can speak i say "and then those metal pan thingies will go on top, I'll have some concrete poured and there will be no posts or beams in the basement". He started to shake his head. But then I said the magic words.... "it's all been engineered". Of course I already had the permit, and I would hope the city engineering department did their due diligence.

He looked at the engineered drawings briefly and that's when he gave me his cell # and said to call when we were pouring. (normally all calls are routed through city hall and inspector visits are scheduled 2-3 days out. )
 
OP
A

armstrr

Well-known member
Joined
Apr 24, 2007
Messages
83
just a few more pictures of the walls after being filled. for any of you guys contemplating forming up a slab, you can use that fabric for that also...you just need a little bit of 2x2 and 2x4 framing on the outside edge, and simply unfold the inside edge and tack it down. the weight of the concrete exerts enough force down, that the fabric blow out to the side.

you can better see the rebar placed and ready to be tied into the main level floor system

and i'm not sure what the protective gear required to operate a pencil ******** is...but looking at the last shot, you can see...i didn't have it
 

Attachments

  • 051.jpg
    051.jpg
    146.5 KB · Views: 42
  • 062.jpg
    062.jpg
    150.1 KB · Views: 42
  • 053.jpg
    053.jpg
    148.9 KB · Views: 46
  • 080.jpg
    080.jpg
    46.7 KB · Views: 93
OP
A

armstrr

Well-known member
Joined
Apr 24, 2007
Messages
83
so, the walls are poured...that 160 000lbs of concrete bearing down on the sand squished water out...have i mentioned water?

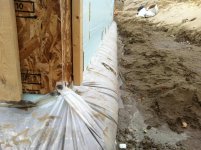
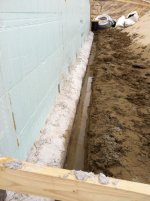
so obviously, i need some footing drainage. i wanted to make sure no sand would enter the footing, so i used landscaping fabric as well as fabric covered big-O to ensure i wouldn't be pumping the sand under my footers away. I have a few redundancies planned for the drainage:
2 electric sump pumps plugged into hi/lo water sensors, a high powered water powered you can see here: http://www.amazon.com/dp/B000GBUU7G/?tag=atomicindus08-20

unfortunately, it was too tight along the fence side to put footing drains on the outside...so i put a secondary drain on the inside along that wall (and overlapped the two endwalls...no point wasting that big-O)
 

Attachments

  • 009.jpg
    009.jpg
    146.7 KB · Views: 30
  • 007.jpg
    007.jpg
    147.3 KB · Views: 26
  • 003.jpg
    003.jpg
    147 KB · Views: 28
OP
A

armstrr

Well-known member
Joined
Apr 24, 2007
Messages
83
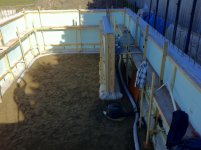
ok, it looks like i got that big-O almost entirely around the inside walls. i dug it down a bit, but it dose sit higher in elevation than the exterior drain. since this is the "backup" I didn't enclose it with additional fabric
 

Attachments

  • 002.jpg
    002.jpg
    140.3 KB · Views: 26
  • 003.jpg
    003.jpg
    145.2 KB · Views: 28
  • 008.jpg
    008.jpg
    143.1 KB · Views: 25
  • 006.jpg
    006.jpg
    142.6 KB · Views: 26
OP
A

armstrr

Well-known member
Joined
Apr 24, 2007
Messages
83
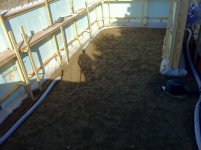
i had a gravel thrower come in and make short work of ...the gravel. approx 6" worth on the inside floor and about 10" around the exterior drain. I've got a great video of it, but no pictures...
 

Attachments

  • 009.jpg
    009.jpg
    146.7 KB · Views: 37
  • 015.jpg
    015.jpg
    151.7 KB · Views: 44
OP
A

armstrr

Well-known member
Joined
Apr 24, 2007
Messages
83
waterproofing did not start out fun. the blueskin product i used required a special primer. you spray or roll it on, then wait for it to tack up before peeling the wax paper off the sticky back side of the product...

well, the primer never seemed to get tacky. what was happening is the dew/humidity was condensing on the walls. at this time of the year, i found the hard way, that there was only about 2 hours per day in which i could apply the primer to a dry wall, allow it to set up and apply the blueskin.

i solved that, by bringing a 20lb propane cylinder with a single element "mr. heater" down with me. i kept it a couple feet ahead of me and was then able to work into the night (which seemed to happen a lot...). mental note: don't place propane heater too close to styrofoam...:wtf:
 

Attachments

  • 001.jpg
    001.jpg
    150.3 KB · Views: 17
Last edited:

Riley

Well-known member
Joined
Feb 18, 2007
Messages
398
This really looks like you're doing a great job!

I've been an interested observer of the whole ICF trend for several years and stated reading about fastfoot a few years ago; except for the testimonials on their sites, I had not seen a installation by a non-trades person.

So if you don't mind I have a couple of questions as to the economics of it from your considered prospective. What did you consider for your break even point? Labor costs vs materials? Insulating value and "do-it-yourself-ability" if I can coin a phrase. :bounce:

Also it looks like you're going stick above ground, was cost the overriding consideration which eliminated using the ICF above ground? Difficulty in construction for follow on trades, electrical access, doors windows etc? Just curious.

From what I've seen, you're doing it the same way I'd like to be able to at some point down the road.

Really enjoying seeing the application of these methods. Thanks!!
 
OP
A

armstrr

Well-known member
Joined
Apr 24, 2007
Messages
83
Riley. I may not be able to answer your questions properly. I had a hard time getting any quotes for either regular foundations or ICF. any of the local "ICF builders" wanted to quote for the whole building ($140/sf). no one wanted the homeowner involved. when i called foundation companies, they were too busy to quote me. that's why i looked into doing it myself. i figured i could hire the excavation, build the forms and then surely someone would be able to come help with the pour...and that is just what happened. I knew i could calculate the cost of the rebar and the blocks. the biggest variable is concrete. i underestimated since ICF mixes often include plasticisers and pea gravel, and water reducers. i paid almost 180$/m3...ouch. i read that concrete is much less expensive in the US than Canada, but that varies by region based on how close gravel pits are etc.

the other reason i went ifc was the conversations i did have with foundation companies told me that 8' was their maximum height...my original plan called for 8'9", but that got cut to 8' due to the water table.

icf is great for a lot of reasons, but if i could do it again, i would price a standard formed basement with 4" of polyiso board on the outside, proper waterproofing and consolidation.

for main level, i am still a fan of stick framing. heck, borrow some of the building techniques from california and use hurricane ties etc...you can build a really strong structure. for insulation, i would use larsen truss techniques (google that) and dense pack with cellulose. they build r-100 walls in european net zero homes this way. very affordable and DIY friendly. because my building is narrow, i cant afford to build in to get the insulation levels i want, so i am hoping to use 2" of polyiso on the outside (r12) and dense pack the 2x6 walls ( r-21). the total r value will be roughly r r-28 (since the framing lowers the total r value)

i also looked into prefabbed insulated core panels...that would be a great way to build...just not if you plan on pouring a concrete slab on top of it. let me know if i didn't cover anything
 
Last edited:
OP
A

armstrr

Well-known member
Joined
Apr 24, 2007
Messages
83
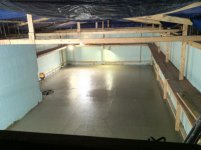
so here is the basement floor pour. this is november 19th...and i live in an area with about the same weather as detroit. my father in law had the great idea, the know how and gumption to build some temporary trusses so we could enclose this and keep things warm with some portable heaters. i also had temporary lines (ok, garden hoses) hooked up to my hot water heater. we covered it with a tarp right after the pour...but almost lost it. we had a weird wind storm pop up at the moment we were trying to secure it...that 40x60 tarp could have lifted 3 of us....across the highway...not fun.

lots of power trowling. the guys did a fantastic job. the finish on the floor is as smooth as home depots...
 

Attachments

  • 015.jpg
    015.jpg
    150.5 KB · Views: 43
  • 013.jpg
    013.jpg
    147.9 KB · Views: 47
  • 011.jpg
    011.jpg
    145.7 KB · Views: 29
  • 009.jpg
    009.jpg
    149.7 KB · Views: 32
OP
A

armstrr

Well-known member
Joined
Apr 24, 2007
Messages
83
you will notice in the previous picture that i used a pump truck again. i was advised by the engineer of record, the block manufacturer and the floor pan supplier NOT to backfill before the bailey floor pan system was in place and poured. my original concrete guy wanted me to backfill before we did that basement...so, i got someone else. he was not happy, and i had not yet paid for the walls...when he handed me the bill for the walls, i knew he was not happy...so he didn't get paid for a while. i wish that drama could have been avoided, but i was the general contractor, and i was taking all the risk if that 44' wall was damaged from the weight of 9' of sand against it. talking to others, it is standard practice to backfill basements, but most basements are not fully in the ground. i think i did the right thing, even though it made the pour challenging: (i had to build a bridge to span that chasm...) in hind site, we could have partially backfilled and brought one of the corners up close to the top to ease the the pour, and the next step...installing the floor pans
 

Attachments

  • 003.jpg
    003.jpg
    148.7 KB · Views: 28
  • 001.jpg
    001.jpg
    20.1 KB · Views: 12
To avoid these ads, REGISTER NOW!
OP
A

armstrr

Well-known member
Joined
Apr 24, 2007
Messages
83
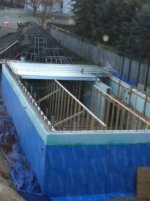
so the pans go in simply enough. end caps are installed and then one pan after another overlaps the next and forms a top hat or i beam pattern. self tapping galvanized tech screws hold it all together and make a solid system. the span of this project only required one intermediate temporary support wall for the pour, but we opted for two...since we had the lumber anyway.

it is the beginning of december now, so rolling that pex meant waiting for a nice sunny day, and getting a hand from a few friends to help zip tie it down. i used scraps or rebar to lift the 6x6 mesh up a bit. rebar is laid on rebar chairs in the bottom of the ibeam...the short lengths of rebar sticking out of the wall are bent to meet these to make a continuous rebar run. the higher wall rebar gets tied into the middle of the top 5" of the slab. sorry, i don't have good pics of most of this as getting the work done seemed more important than documenting it...
 

Attachments

  • 002.jpg
    002.jpg
    12.4 KB · Views: 1
  • 001.jpg
    001.jpg
    11.9 KB · Views: 33
  • 003.jpg
    003.jpg
    14 KB · Views: 2
Last edited:
OP
A

armstrr

Well-known member
Joined
Apr 24, 2007
Messages
83
3rd attempt to upload...grrrr
 

Attachments

  • 002.jpg
    002.jpg
    12.4 KB · Views: 31
  • 003.jpg
    003.jpg
    14 KB · Views: 30
OP
A

armstrr

Well-known member
Joined
Apr 24, 2007
Messages
83
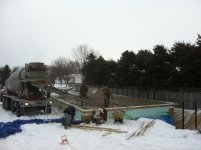
snow?! yup...not the stuff you want when you want to pour concrete! i had to tarp it over and turn on the radiant heat to melt snow and ice.

in the mean time, we compromised on a partial backfill to make our lives easier. at this point it is a wait and see game with the weather... unfortunately the only nice days at the beginning of december either fell on a sunday, so the ready mix company was shut down, or we couldn't assemble a crew.

i had given up on completing this pour until spring...until i got a phone call december 21 telling me that the moon and stars were in alignment and the pour would happen on december 23rd...christmas was coming early!
 

Attachments

  • 001.jpg
    001.jpg
    11.8 KB · Views: 9
  • 002.jpg
    002.jpg
    149.9 KB · Views: 24
OP
A

armstrr

Well-known member
Joined
Apr 24, 2007
Messages
83
so, december 23rd, i hooked my poor water heater up again, and got a 30lb and 20lb propane cylinder in the basement, each with a mr heater...they would provide the heat for the initial kick off, and i would continue to heat the slab with my water heater for about 4.5 weeks....gotta cure it right! i found out the next month that i used $400 in natural gas...ouch
 

Attachments

  • 004.jpg
    004.jpg
    18.1 KB · Views: 7
  • 002.jpg
    002.jpg
    142.5 KB · Views: 21
OP
A

armstrr

Well-known member
Joined
Apr 24, 2007
Messages
83
flash forward. the pour was covered with 6 mil poly, then with concrete curing blankets. as mentioned before, it was heated for 4 or 5 weeks, but it was kept covered so the concrete could continue to "moist cure".

in march we had a quick thaw, so i lifted a bit of the poly and lifted the hatch to find...9" of water in the shop.

i wasn't shocked, or too dismayed. i had enough indications that i was close to the water table in october, and as much as i hoped that the water table would not change through the year, realistically, i knew that spring run off would cause a rise.

the following day i rigged a submersible pump and when i checked the next day, the water was pumped down, but the amount of water entering the sump pit was enough that the sump pump would run for about a minute, then shut off for about 30 seconds...rinse and repeat. at this point i have about 80' of that corregated 1.25" sump pump hose...not ideal stuff, and i know that choked the flow quite a bit.

the sump pit was quite active for about 2.5 months...after that i could set the float high, and the water would not rise...but it did sit about 4" below the surface of the concrete...not ideal, but i am certain i can manage it. luckily, the monopour footing did not allow for the normal cold joint that would exist between footing and concrete wall...an obvious leak point.
 

Attachments

  • 001.jpg
    001.jpg
    145.7 KB · Views: 23
  • 003.jpg
    003.jpg
    147.7 KB · Views: 27
OP
A

armstrr

Well-known member
Joined
Apr 24, 2007
Messages
83
so during the winter i planned and shopped around for material for the shop...and the POOL.

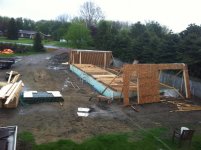
the walls went together quick. shout out to the father in law. he hasn't framed in quite a while, but its just like riding a bike. 2x6 walls, 1/2" osb sheathing. trusses were ordered rated for storage and to hold solar panels should i go that rout.
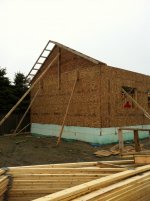
i had 11 guys help lift that wall...a little overkill, but better too easy than too hard (or someone getting hurt)
 

Attachments

  • 004.jpg
    004.jpg
    144.3 KB · Views: 19
  • 003.jpg
    003.jpg
    148.1 KB · Views: 15
OP
A

armstrr

Well-known member
Joined
Apr 24, 2007
Messages
83
trusses were fun. wife wasn't happy about her father walking along the top plate...especially when it was a 19' drop in some locations...
i had the truss designer double up two trusses so i could put an oversize hatch making it easier to store my treasures in the attic
 

Attachments

  • 001.jpg
    001.jpg
    144.4 KB · Views: 27
  • 007.jpg
    007.jpg
    143.5 KB · Views: 26
  • 009.jpg
    009.jpg
    142.5 KB · Views: 29
  • 011.jpg
    011.jpg
    142.8 KB · Views: 25
  • 017.jpg
    017.jpg
    145.9 KB · Views: 28

omr

Banned
Joined
Jun 1, 2011
Messages
723
***** to hear about the water but on the bright side now you know how high it will get if the pump breaks..
 
OP
A

armstrr

Well-known member
Joined
Apr 24, 2007
Messages
83
***** to hear about the water but on the bright side now you know how high it will get if the pump breaks..

yah, and this year, i have the sump pump plumbed and run with 2" all the way to the back ditch, and with the redundancies i have, i am confident...but this coming spring will be the: "lets see how dry this basement can be" test.

there is a subdivision going in about a 1/4 mile from me. i think some of the construction has upset some underground aquifers as there are new homes that have pumps going continuously in spring. i am several feet lower in the ground, but am at the high point in absolute elevation. i believe the city will eventually have to instal a drain that will make this all go away....at least i hope, but i'll plan for the worst and hope for the best.
 
OP
A

armstrr

Well-known member
Joined
Apr 24, 2007
Messages
83
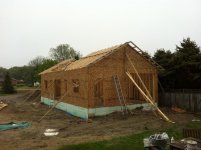
i preferred ply for the roof...the lumber yard didn't carry 1/2", so i went the next size up...it was almost 5/8" and it was obvious lifting that stuff onto the roof. we built a stilt slide which helped a lot.
 

Attachments

  • 001.jpg
    001.jpg
    147.5 KB · Views: 39
  • 003.jpg
    003.jpg
    145.4 KB · Views: 42
  • 008.jpg
    008.jpg
    64.3 KB · Views: 45
To avoid these ads, REGISTER NOW!
Top Bottom