To avoid these ads, REGISTER NOW!

Joe Homeowner’s Garage Build

OP
Z

Zeppe807

Well-known member
Joined
Dec 25, 2009
Messages
372
Location
Sonoma County, Ca.
So a new revelation and change to many of our upcoming plans: we are now expecting our third child in September!
I am not sure if I had announced it, but I have a second son as of 8/29/12!:D I now have my Daughter 12/13/09, Son #1 8/8/11, & and Son #2 8/29/12! :willy_nil
We are very happy, and are now getting prepared for our Third. I am going to say it now, I think it will be another beautiful girl. If I am wrong, so be it, but I have a feeling.

I am still working on the garage, but am trying to keep it to a tighter budget. We will see how fast this goes, but one step at a time.


We will soon be out numbered! :beer:


Talk to you all later,
Joe


As a reminder of what I started with as a concept
I like the idea of the chop saw.:thumbup:


Thanks For the Input and Thoughts.

entireplan.jpg


Here is a more complete, but not final drawing of the cabinets in the garage. On the top left there is a side view of the cabinets and also on the bottom right. I am 6'2" and the drawing depicts me and my line of site. My work bench is 36" high X 26" deep, the cabinets are 24" higher and 14" deep, the next step out is 52" above the bench and 24" deep. You can also see where I plan on putting my new welding table. I did not plan on making the table quite as deep 3.5', so I may make the cabinets a bit deeper to use more of the area.

The welding table and cabinets will be directly in front of the door as you walk out. On the wall as one would walk out of the door, there is a shoe/cubby hole location built in.

I have decided to build the bench on the upper left differently.

More input please.

Thanks,


I have been making a little progress over the last week. I only work on it after the kids are in bed, so I have a limited amount of time each night. Although I did get a whole Sunday to myself too, So that Helped A Lot.:rocker:

photobucket-62556-1353601790795.jpg


photobucket-56999-1353601751101.jpg


photobucket-55538-1353601735821.jpg


photobucket-25009-1353569402448.jpg


photobucket-13568-1353569423608.jpg


photobucket-42591-1353569445090.jpg


photobucket-9618-1353569471950.jpg


photobucket-36935-1353601967677.jpg


photobucket-57129-1353601708233.jpg


I am still in the process of remodeling the garage, so please ignore the temporary conduit that the Previous Owner installed. :thumbup:

Happy Thanksgiving All. I am very Thankful!

Joe Zeppe:beer:
 
Last edited:
To avoid these ads, REGISTER NOW!
OP
Z

Zeppe807

Well-known member
Joined
Dec 25, 2009
Messages
372
Location
Sonoma County, Ca.
Came up with a unique way of opening and holding my top shelf door (At least I think so).

I used a spare strut off my wife's Lexus hood :evil: and made some brackets, so it holds it open AND closed.

The door seals really nice, and holds it up, and only takes a little help up, and down. LOVE IT! Although since I only have one strut, the far side hangs a little lower, but not bad.


The door is 8ft x 2ft, 1/2" plywood, with 1" x 4" trim, and tin, so it is a little heavy.

photobucket-45365-1353899175484.jpg


photobucket-58357-1353899188098.jpg


photobucket-46232-1353899201090.jpg


The last picture, you can see how the extended arm, makes the strut go over center, and the strut holds the door closed when down.


Joe Zeppe :beer:
 

MartinFan6

Member
Joined
Oct 20, 2010
Messages
8
And they both fit in the garage! Funny because my wife has been trying to get her car in the garage since we moved in.
photobucket-61120-1340517000639.jpg

photobucket-54621-1340517049846.jpg

Joe Zeppe[/QUOTE]
Please tell me that the cj will stay in the family, don't let that go:rocker:Nice looking bumper you made what did you use for the tire rack swing?
 
OP
Z

Zeppe807

Well-known member
Joined
Dec 25, 2009
Messages
372
Location
Sonoma County, Ca.
Zeppe807 said:
And they both fit in the garage! Funny because my wife has been trying to get her car in the garage since we moved in.
photobucket-61120-1340517000639.jpg

photobucket-54621-1340517049846.jpg

Joe Zeppe
Please tell me that the cj will stay in the family, don't let that go:rocker:Nice looking bumper you made what did you use for the tire rack swing?

The CJ is not going anywhere, except for outside. That was my Grandfathers, and I treasure it. Since we now have 3 little kids, it is hard for the wife to get them all in when it is raining, therefore the Jeep goes out and the Car comes in. My Grandpa always kept the Jeep in a barn when it stared raining, since it never had a top on. It was out for the first good rain storm recently, and the gasket around the windshield glass leaked, and the gasket between the folding windshield and body leaked. :sad: The water was running over the dash, filled the main gauge, and the floor was filled, but draining. I felt like ****.

Once I have the room in the garage for the car to open the doors, I am going to see if I can shoehorn the Jeep along the house, and then will put a cover over it. :eek:


The bumper I make is out of 4x2, 3x2, rectangular tube by 3/16" wall, I weld the shackle mounts through both sides, and the pivot is tapered bearings, that I insert into a custom hub. The Hub is a 3" solid round, that I turn down to fit the bearings.

With a safety factor of 3; and a 35" tire, there can be an additional 800lb load on the bumper. I don't recommend that much on the back of a Jeep, but the bumper can handle it.

This bumper had Many change orders while in production, and therefore took the longest for me to build. It had: two 5 gallon fuel tanks for the Jeep, a 2 gallon Mixed Fuel tank for a Chainsaw, a rack, A CHAINSAW MOUNT, an ammo can adapted to mount to the fuel rack (it holds shovel, axe, pick, sledge hammer, chain, and misc tools), sealed lights, taller center post (for future .50 cal mount), automatic swing lock, trailer hitch, D ring, and shackle mounts.

I haven't gotten a chance to go out with him since he mounted it on to take proper pictures, but hopefully soon! The guy lives on a couple thousand acres, and wants to be prepared!:scared:


Joe Zeppe :beer:
 
Last edited:

wrigh003

Well-known member
Joined
Mar 27, 2006
Messages
783
Location
Birmingham, AL
:thumbup:

Kudos to you on getting up and moving with the three little ones around. I have three boys, ages 7 and under, and I love them to bits- but getting anything done around our place has gotten so hard that progress on just about any project stalls out at least a couple times mid-work. I’m trying to do better, and the biggest of them is getting to where he can start to be a helper instead of a “helper,” if you know what I mean – but it’s tough getting things accomplished with the little guys running around. Just wanted to say congrats on overcoming that.

Garage looks great.
 
OP
Z

Zeppe807

Well-known member
Joined
Dec 25, 2009
Messages
372
Location
Sonoma County, Ca.
:thumbup:

Kudos to you on getting up and moving with the three little ones around. I have three boys, ages 7 and under, and I love them to bits- but getting anything done around our place has gotten so hard that progress on just about any project stalls out at least a couple times mid-work. I’m trying to do better, and the biggest of them is getting to where he can start to be a helper instead of a “helper,” if you know what I mean – but it’s tough getting things accomplished with the little guys running around. Just wanted to say congrats on overcoming that.

Garage looks great.

Thanks. I have to thank my wife the most, since she keeps everything together. I try to come home do the family thing, early dinner, clean up, put the kids to bed, and then go to work in the garage for a few hours. That seems to be the best and sometimes only way I can get out there. On the weekends, I am lucky when my wife can keep the kiddos busy in the house, so I can work on all the projects.


So moving forward on the garage and getting the car in the garage for easy kid loading.

I am working on getting wheels on the table to move it into the cabinet. I am being kind of particular, and I want to make the table rest on the legs when I am working on the table, and I want the wheels to easily come down when I need to move it. I came up with a bunch of neat ideas, but too complicated for the time I have. So I came up with this.

Please critique. Please realize, it is a mock-up, and the only thing to date that I have purchased so far for my table are these four used casters for a total of $20.
photobucket-60184-1354600156559.jpg

Up in the moving position.

photobucket-80396-1354602332046.jpg

Down in the working position.


Seems to work so far, and I cut and drilled all the parts out tonight. Tomorrow night I hope to have it all welded up. I want to build a rack under the table for all the pieces of metal I have.


Later!

Joe Zeppe
 

MartinFan6

Member
Joined
Oct 20, 2010
Messages
8
I am working on getting wheels on the table to move it into the cabinet. I am being kind of particular, and I want to make the table rest on the legs when I am working on the table, and I want the wheels to easily come down when I need to move it. I came up with a bunch of neat ideas, but too complicated for the time I have. So I came up with this.

Please critique. Please realize, it is a mock-up, and the only thing to date that I have purchased so far for my table are these four used casters for a total of $20.
photobucket-60184-1354600156559.jpg

Up in the moving position.

photobucket-80396-1354602332046.jpg

Down in the working position.


Seems to work so far, and I cut and drilled all the parts out tonight. Tomorrow night I hope to have it all welded up. I want to build a rack under the table for all the pieces of metal I have.


Later!

Joe Zeppe[/QUOTE]

So you have this on all 4 legs? what gets them in the roll position? Looking to do the same and have had a bunch of different ideas but keep coming back to something similar. Wanted all 4 to work at once though. Could you give a little more detail? Thanks Roger
 
OP
Z

Zeppe807

Well-known member
Joined
Dec 25, 2009
Messages
372
Location
Sonoma County, Ca.
I am working on getting wheels on the table to move it into the cabinet. I am being kind of particular, and I want to make the table rest on the legs when I am working on the table, and I want the wheels to easily come down when I need to move it. I came up with a bunch of neat ideas, but too complicated for the time I have. So I came up with this.

Please critique. Please realize, it is a mock-up, and the only thing to date that I have purchased so far for my table are these four used casters for a total of $20.
photobucket-60184-1354600156559.jpg

Up in the moving position.

photobucket-80396-1354602332046.jpg

Down in the working position.


Seems to work so far, and I cut and drilled all the parts out tonight. Tomorrow night I hope to have it all welded up. I want to build a rack under the table for all the pieces of metal I have.


Later!

Joe Zeppe

So you have this on all 4 legs? what gets them in the roll position? Looking to do the same and have had a bunch of different ideas but keep coming back to something similar. Wanted all 4 to work at once though. Could you give a little more detail? Thanks Roger[/QUOTE]

It is not automatic in anyway, and I had a few ways it would work to lift the HEAVY Table, but they all took too much space on the legs, or lifted the down position too far up. I like the location of the shelf, and the top height of the table, so I was kind of stuck, along with broke. I will use the floor jack to lift and lower the table, and when parked it will be up.


I think it will work, and I haven't totally finished it yet. I started to build a new knife and a new propane forge:lol_hitti


Priorities, and Christmas Presents!

Joe Zeppe:beer:
 

ShumanSS6.0

Well-known member
Joined
Nov 11, 2012
Messages
55
Location
Minnesota
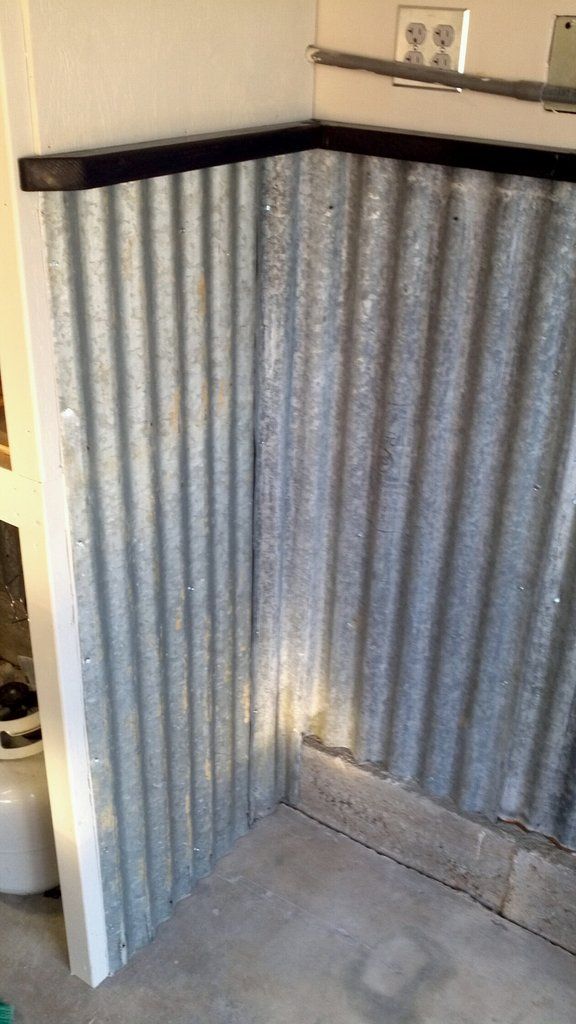
Dude, the corrugated steel is exactly the same idea I have. It looks awesome!!! Thanks for the pics....can you advise the blade you used on the circular saw? I'm going to try and reuse some steel off an old barn roof that burned down at my grandma's farm. Can't believe how much you are getting done with 3 little ones in the house....I have a 3yr old son who already consumes the majority of my spare time. I feel for you on PO "handy man" upgrades, you will sleep better at night when it is done your way....the right way!
 
To avoid these ads, REGISTER NOW!
OP
Z

Zeppe807

Well-known member
Joined
Dec 25, 2009
Messages
372
Location
Sonoma County, Ca.
Dude, the corrugated steel is exactly the same idea I have. It looks awesome!!! Thanks for the pics....can you advise the blade you used on the circular saw? I'm going to try and reuse some steel off an old barn roof that burned down at my grandma's farm. Can't believe how much you are getting done with 3 little ones in the house....I have a 3yr old son who already consumes the majority of my spare time. I feel for you on PO "handy man" upgrades, you will sleep better at night when it is done your way....the right way!

Thanks, The more PO fixes I find the better I sleep knowing they are fixed, but the unknown is bad too!

The saw blade I used was and OLD probably 20 to 30 years old non carbide edge cross cut/general construction blade from my grandfather. So any old saw blade turned around backwards would probably be fine, but the thinner the better. I also used his old saw too, which spins faster than my worm drive, and I think that could have helped too. But it was easy, and I recommend the clamp/guide, It was a finger and ear saver :dunno::dunno:


I was recently at HD and saw (get it?) they had a saw blade for cutting ferrous sheet metal for less than $10. Just and FYI.


Good luck with your project, and let me know if you have any questions.


Joe Zeppe :beer:
 

DigitalK

Member
Joined
Sep 24, 2006
Messages
16
I enjoyed your thread. So much stuff on here looks like it's built by billionaires. Its good to see a regular guys successes and struggles with a normal person size garage. Keep up the good work!
 
OP
Z

Zeppe807

Well-known member
Joined
Dec 25, 2009
Messages
372
Location
Sonoma County, Ca.
I enjoyed your thread. So much stuff on here looks like it's built by billionaires. Its good to see a regular guys successes and struggles with a normal person size garage. Keep up the good work!

Thanks!

My hardest thing is to concentrate on one project at a time:lol_hitti


Joe Zeppe:beer:
 
OP
Z

Zeppe807

Well-known member
Joined
Dec 25, 2009
Messages
372
Location
Sonoma County, Ca.
Thanks!

My hardest thing is to concentrate on one project at a time:lol_hitti


Joe Zeppe:beer:

Dammit, I did it again.

New fence, little projects here and there, and now I have decided to paint my cabinets, a little at a time.

Before:
DSCF2756.jpg

photobucket-39870-1358833885637.jpg

They come apart easily to paint up nice.
photobucket-1554-1358833824492.jpg

photobucket-46438-1358833859012.jpg


I was going to go with the craftsman color scheme, but I couldn't get the colors right, and I like the idea of the frame black, and the drawers gray to tie everything in the garage together.


Joe Zeppe :beer:
 
OP
Z

Zeppe807

Well-known member
Joined
Dec 25, 2009
Messages
372
Location
Sonoma County, Ca.
Looks great painted. You should do that on the lathe cabinet too.

:headscrat I did so it would match the walls. Maybe I should look into some other color combo for the lathe stand.
Before:
IMG_1853.jpg

After:
photobucket-9618-1353569471950.jpg


WELL EVERYTHING TURNED TO **** ON THE CABINETS!

I was REALLY happy with the OSH "Tool Grey" spray paint and the color.

Apparently OSH discontinued that color, and Rustolium the maker for OSH (Oh, Most of the time I really dislike rustolium) does not have any colors that match the "Tool Grey". I tried another rustolium grey, but it was too light. I tried a "Magic" brand "Machinery Grey" but it magically turned to the most crappy paint I have every used. I did everything like normal, and it ran all over.


So, now I am on the hunt for the perfect color again.


Joe Zeppe :beer:
 
OP
Z

Zeppe807

Well-known member
Joined
Dec 25, 2009
Messages
372
Location
Sonoma County, Ca.
Well it was a productive weekend, and a few evenings.

1) I was able to cut out the cabinet doors, route them out, paint, mount, paint again, and put the handles on them.

2) I was also able to finish (kinda) the welding table by putting on the wheels, and I painted the legs, ... I got a little crazy and painted the top too. The 1200+ lb table moves very easily on the wheels.

2013-02-04_21-54-54_625_zpsc73acdae.jpg


2013-02-04_21-54-33_649_zps6d8dcfb3.jpg


2013-02-04_21-55-23_406_zps4415876f.jpg


I had to move the lathe and mill over to get the two welders against the wall. I like how it all turned out.

My worry is that when the car is parked in the garage, the doors will be opened into the MIG welders stingers, so I placed the stools and vacuum in those protective places.
2013-02-04_21-57-52_968_zps6525b770.jpg


As far as the paint on the top of a Welding table,... I was trying to do some detailed building, and the dark metal was a pain to work on. It seems to look cleaner, and easier to clean. I don't care how long it will last, it was just a can of **** paint I had, and I was bored. Really, my main concern is that I use a propane heater to heat the table top, to heat the garage. It is the easiest way to heat the garage, otherwise the heat goes straight up to the attic. The paint on the table may be a problem due to the heat. That may be the breaking point for me.


I'm pretty happy with the way it turned out. :D


Joe Zeppe :beer:
 
OP
Z

Zeppe807

Well-known member
Joined
Dec 25, 2009
Messages
372
Location
Sonoma County, Ca.
It's been busy here; kids, work, yard, garage planning, and now my wife started to work a couple days a week (makes her sane, and gives her a break from the kiddos).

I have been pretty lucky with Craigslist lately, and even a roadside find that netted me $140.
http://www.garagejournal.com/forum/showthread.php?t=200002
http://www.garagejournal.com/forum/showthread.php?t=202923

I had originally planned a combo workbench; half wood, and half metal, but since I found these new metal cabinets I think I will add tops to them. I plan on taking and reinforcing one and adding a 1/4" metal top to one. This will leave a void under it, so I think I will cut the face out and make it a shelf or a Big HD drawer. The other one I will fill the top with a wood laminated top. I plan on making the top like a butcher top with either 4x6s or 4x12s, both of which I have already (Free). I would then be able to cut the steel and install my old wood vise to that one.

If it all works out like planned, or half of what I have planned, I will be happy!


I also recently found an old barn style lamp reflector/collector, but that was it. I really dig that look of a light and have to big ones, so last night I took the reflector/collector of a light, drilled and tapped some holes and adapted the barn light to a new light. Hard to explain, see pictures.


I think it is a neat mod to my light!:shocking:


I was able to save another 1" plate (500 lbs) from the trash and brought it home today. Although on the ride home I had to figure out a plan of getting it out of the truck since I have my camper shell on it. So I made a small cherry picker and used my table *** the base. So with misc materials around the garage, I built my bolt on "Shop Crane". And since my table is mobile, so is the crane.


I would like to add a radius to this end.


I had an existing 2.5" hole in the table so that is where the 5/8" Grade 8 bolts attached the upright to the table.

I have been busy working on my vehicles and I seem to not be able to get my 'projects' done, but I am trying!


Hope to share more changes soon!


Later!

Joe Zeppe :beer:
 
OP
Z

Zeppe807

Well-known member
Joined
Dec 25, 2009
Messages
372
Location
Sonoma County, Ca.
Well it's been a great summer, the family has been busy enjoying camping. We have been borrowing my parents, and we finally got our own, so we've been very busy. My garage was used as a drop zone between weekends and I finally got a free two days and worked on the drop zone.

Our New (to us) trailer:

I finally took and put things in order in the garage; mainly the new benches.


Closer to the finished idea.


On this one, I will eventually have a solid metal plate that will be my light duty welding/fabrication table.


And to get rid of the old bench a CL add went out and it was gone on the second day. :rocker:


and how it started:


It's getting there. I need to rewire, sheetrock, and install the tin along this side. I will then do the back wall.

I enjoy the work I get to do in the garage, and I see these high dollar garages and drool. I have been lucky and patient, and that has gotten me this far without having to dish out a bunch of money, and I like where I've gotten.


Joe Zeppe :beer:
 
To avoid these ads, REGISTER NOW!
Top Bottom